Latch JEEP CHEROKEE 2015 KL / 5.G Owner's Manual
[x] Cancel search | Manufacturer: JEEP, Model Year: 2015, Model line: CHEROKEE, Model: JEEP CHEROKEE 2015 KL / 5.GPages: 772, PDF Size: 18.21 MB
Page 112 of 772
WARNING!
•Improper installation of a child restraint to the
LATCH anchorages can lead to failure of the re-
straint. The child could be badly injured or killed.
Follow the child restraint manufacturer ’s directions
exactly when installing an infant or child restraint.
•Child restraint anchorages are designed to with-
stand only those loads imposed by correctly-fitted
child restraints. Under no circumstances are they to
be used for adult seat belts, harnesses, or for
attaching other items or equipment to the vehicle.
Installing Child Restraints Using The Vehicle Seat
Belt
The seat belts in the passenger seating positions are
equipped with a Switchable Automatic Locking Retractor
(ALR) that is designed to keep the lap portion of the seat
belt tight around the child restraint so that it is not
necessary to use a locking clip. The ALR retractor can be
“switched” into a locked mode by pulling all of the
webbing out of the retractor and then letting the webbing
retract back into the retractor. If it is locked, the ALR will
make a clicking noise while the webbing is pulled back
into the retractor. For additional information on ALR,
refer to the “Automatic Locking Mode” description un-
der “Occupant Restraints.”
11 0 T H I N G S TO K N O W B E F O R E S TA R T I N G Y O U R V E H I C L E
Page 115 of 772
Installing A Child Restraint With A Switchable
Automatic Locking Retractor (ALR)
1. Place the child seat in the center of the seating
position. For some second row seats, you may need to
recline the seat and/or raise the head restraint to get a
better fit. If the rear seat can be moved forward and
rearward in the vehicle, you may wish to move it to its
rear-most position to make room for the child seat.
You may also move the front seat forward to allow
more room for the child seat.
2. Pull enough of the seat belt webbing from the retractor
to pass it through the seat belt path of the child
restraint. Do not twist the belt webbing in the seat belt
path.
3. Slide the latch plate into the buckle until you hear a
“click”.
4. Pull on the webbing to make the lap portion tight
against the child seat.
5. To lock the seat belt, pull down on the shoulder part of
the seat belt until you have pulled all the seat belt
webbing out of the retractor. Then, allow the webbing
to retract back into the retractor. As the webbing
retracts, you will hear a clicking sound. This means the
seat belt is now in the Automatic Locking mode.
6. Try to pull the webbing out of the retractor. If it is
locked, you should not be able to pull out any web-
bing. If the retractor is not locked, repeat step 5.
7. Finally, pull up on any excess webbing to tighten the
lap portion around the child restraint while you push
the child restraint rearward and downward into the
vehicle seat.
2
THINGS TO KNOW BEFORE STARTING YOUR VEHICLE 113
Page 123 of 772
Door Latches
Check for positive closing, latching, and locking.
Fluid Leaks
Check area under vehicle after overnight parking for fuel,
engine coolant, oil, or other fluid leaks. Also, if gasoline
fumes are detected or if fuel, or brake fluid leaks are
suspected, the cause should be located and corrected
immediately.
2
THINGS TO KNOW BEFORE STARTING YOUR VEHICLE 121
Page 154 of 772
Manual Seats — If Equipped
Manual Front Seat Forward/Rearward Adjustment
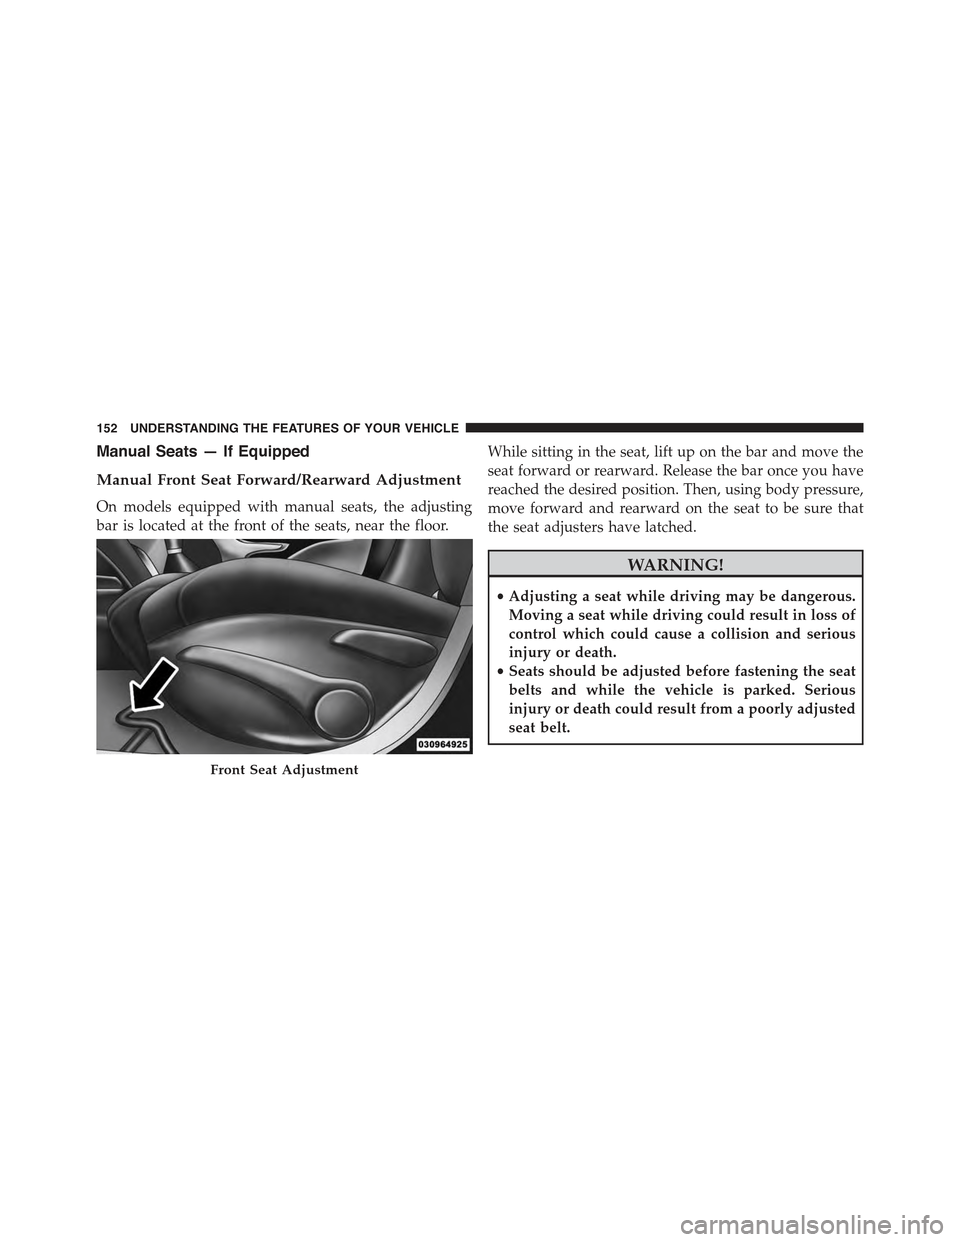
On models equipped with manual seats, the adjusting
bar is located at the front of the seats, near the floor.
While sitting in the seat, lift up on the bar and move the
seat forward or rearward. Release the bar once you have
reached the desired position. Then, using body pressure,
move forward and rearward on the seat to be sure that
the seat adjusters have latched.
WARNING!
•Adjusting a seat while driving may be dangerous.
Moving a seat while driving could result in loss of
control which could cause a collision and serious
injury or death.
•Seats should be adjusted before fastening the seat
belts and while the vehicle is parked. Serious
injury or death could result from a poorly adjusted
seat belt.
Front Seat Adjustment
152 UNDERSTANDING THE FEATURES OF YOUR VEHICLE
Page 162 of 772
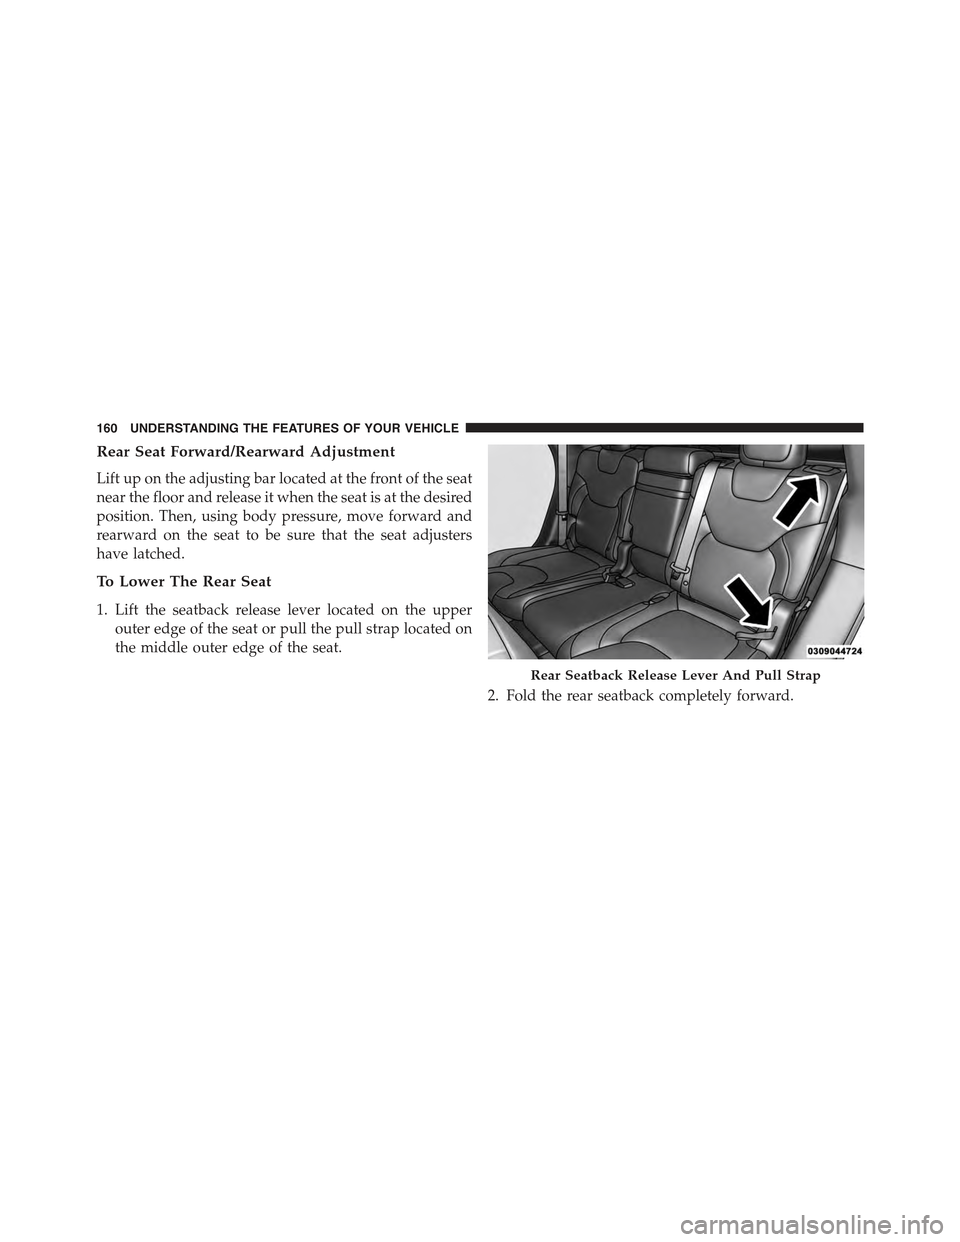
Rear Seat Forward/Rearward Adjustment
Lift up on the adjusting bar located at the front of the seat
near the floor and release it when the seat is at the desired
position. Then, using body pressure, move forward and
rearward on the seat to be sure that the seat adjusters
have latched.
To Lower The Rear Seat
1. Lift the seatback release lever located on the upper
outer edge of the seat or pull the pull strap located on
the middle outer edge of the seat.
2. Fold the rear seatback completely forward.
Rear Seatback Release Lever And Pull Strap
160 UNDERSTANDING THE FEATURES OF YOUR VEHICLE
Page 163 of 772
To Raise The Rear Seat
NOTE:If interference from the cargo area prevents the
seatback from fully locking, you will have difficulty
returning the seat to its proper position.
Raise the seatback and lock it into place.
WARNING!
Be certain that the seatback is securely locked into
position. If the seatback is not securely locked into
position the seat will not provide the proper stability
for child seats and/or passengers. An improperly
latched seat could cause serious injury.
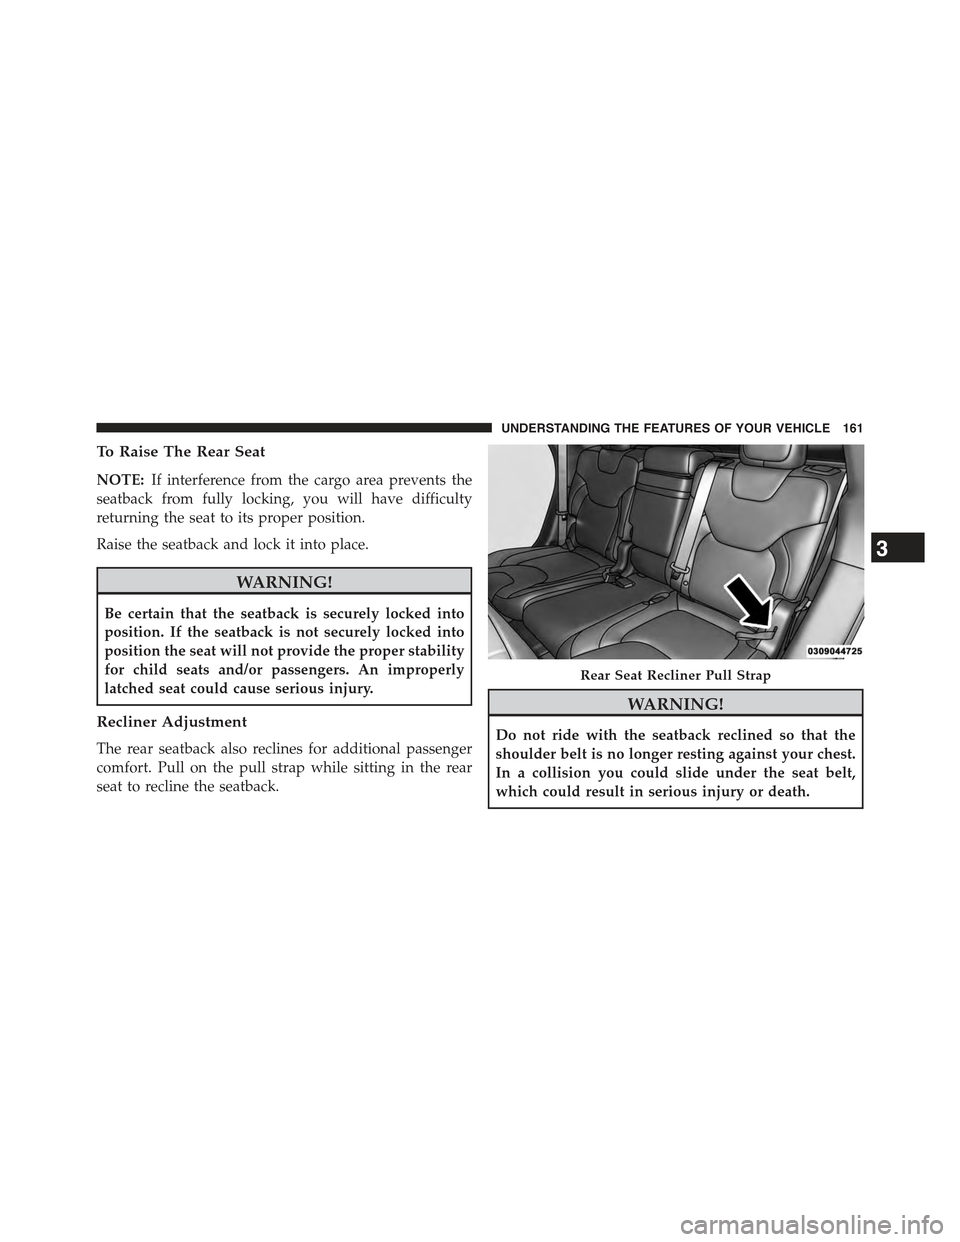
Recliner Adjustment
The rear seatback also reclines for additional passenger
comfort. Pull on the pull strap while sitting in the rear
seat to recline the seatback.
WARNING!
Do not ride with the seatback reclined so that the
shoulder belt is no longer resting against your chest.
In a collision you could slide under the seat belt,
which could result in serious injury or death.
Rear Seat Recliner Pull Strap
3
UNDERSTANDING THE FEATURES OF YOUR VEHICLE 161
Page 168 of 772
The seat will return to its previously set position when
you cycle the vehicles ignition to the ACC or RUN
position.
•The Easy Entry/Easy Exit feature is disabled when the
driver seat position is less than 0.9 in (22.7 mm)
forward of the rear stop. At this position, there is no
benefit to the driver by moving the seat for Easy Exit
or Easy Entry.
Each stored memory setting will have an associated Easy
Entry and Easy Exit position.
NOTE:The Easy Entry/Exit feature is not enabled when
the vehicle is delivered from the factory. The Easy
Entry/Exit feature is enabled (or later disabled) through
the programmable features in the Uconnect® system.
Refer to “Uconnect® Settings/Customer Programmable
Features” in “Understanding Your Instrument Panel” for
further information.
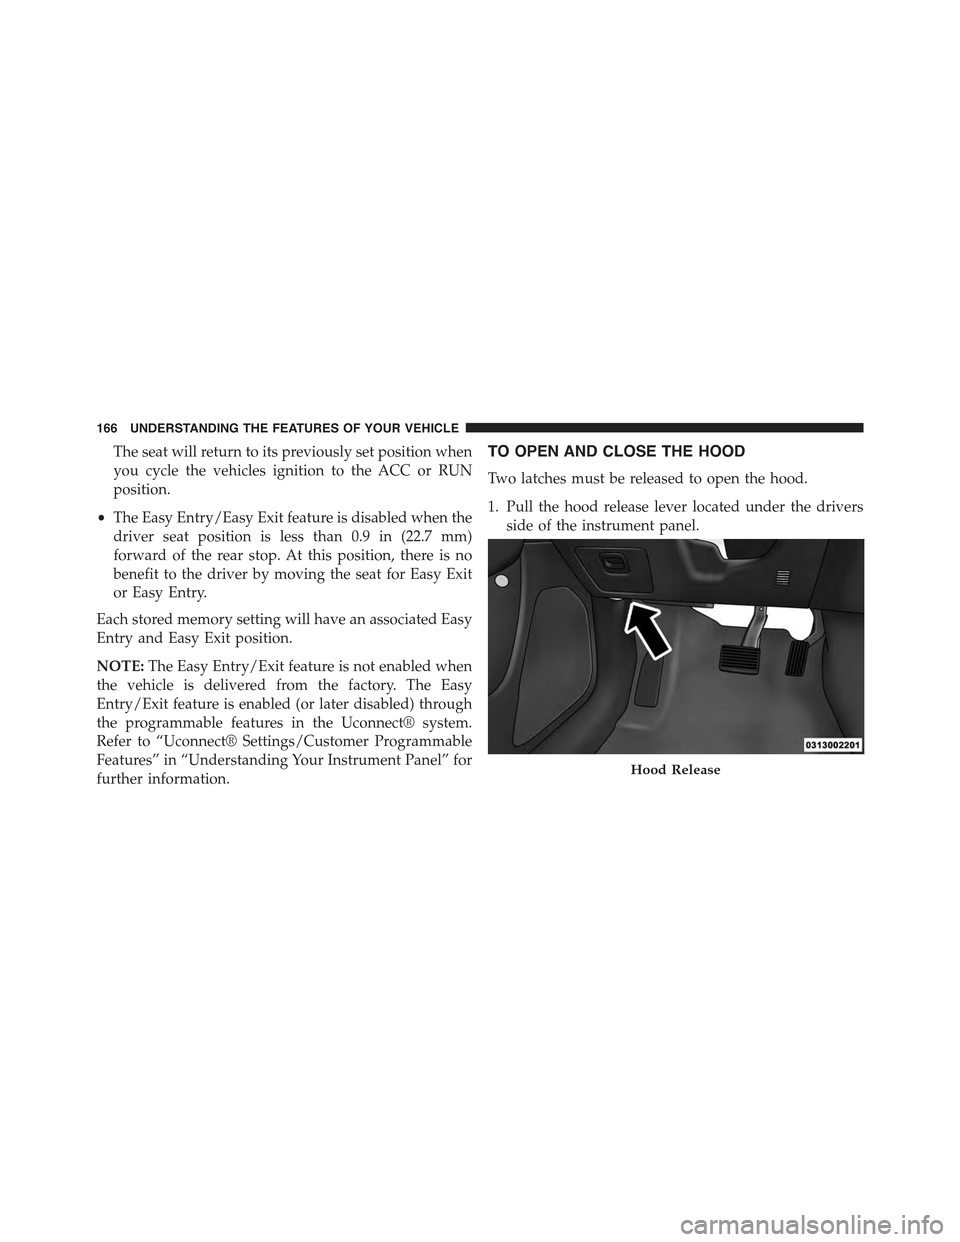
TO OPEN AND CLOSE THE HOOD
Two latches must be released to open the hood.
1. Pull the hood release lever located under the drivers
side of the instrument panel.
Hood Release
166 UNDERSTANDING THE FEATURES OF YOUR VEHICLE
Page 169 of 772
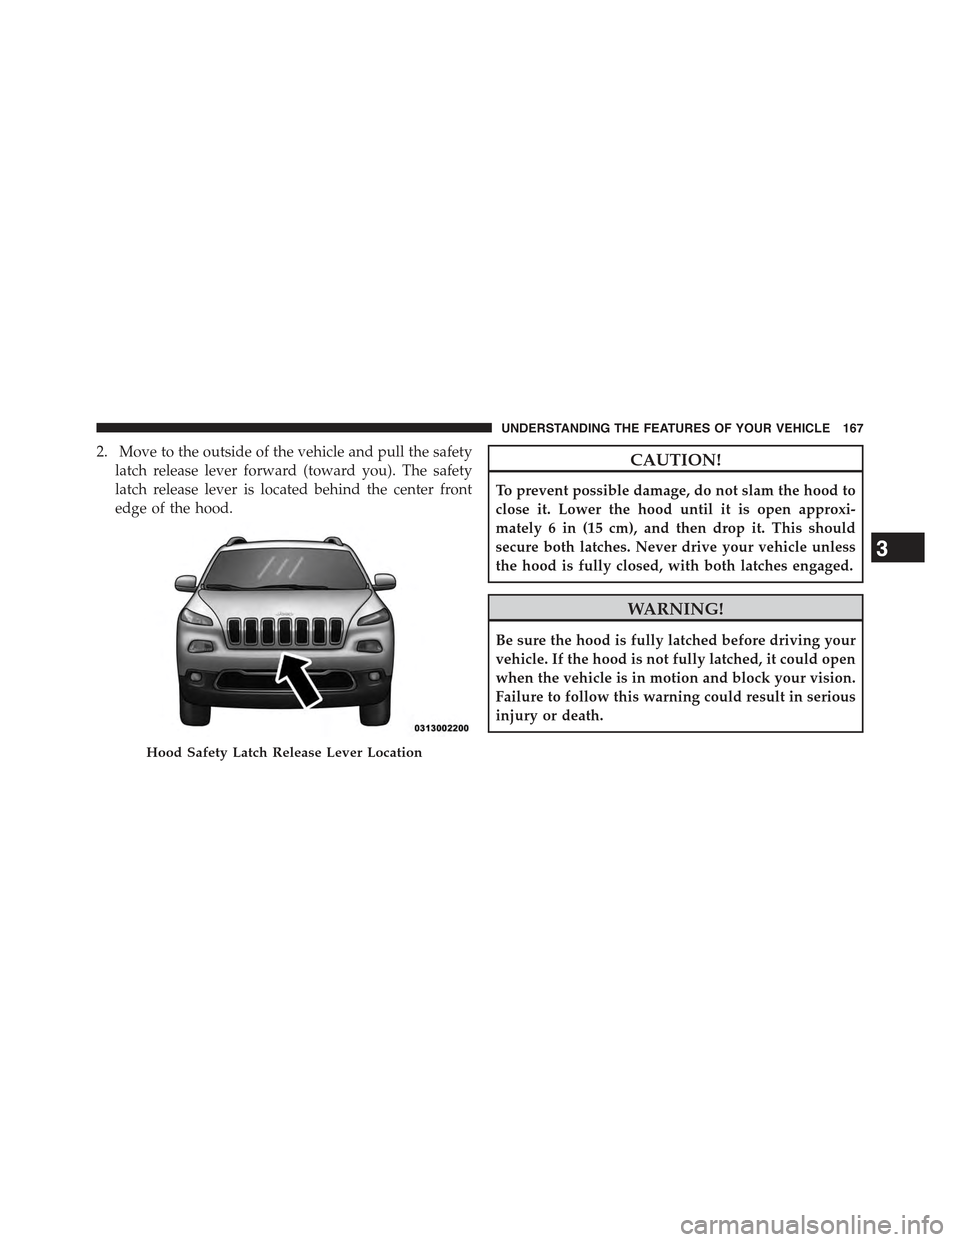
2. Move to the outside of the vehicle and pull the safety
latch release lever forward (toward you). The safety
latch release lever is located behind the center front
edge of the hood.
CAUTION!
To prevent possible damage, do not slam the hood to
close it. Lower the hood until it is open approxi-
mately 6 in (15 cm), and then drop it. This should
secure both latches. Never drive your vehicle unless
the hood is fully closed, with both latches engaged.
WARNING!
Be sure the hood is fully latched before driving your
vehicle. If the hood is not fully latched, it could open
when the vehicle is in motion and block your vision.
Failure to follow this warning could result in serious
injury or death.
Hood Safety Latch Release Lever Location
3
UNDERSTANDING THE FEATURES OF YOUR VEHICLE 167
Page 314 of 772
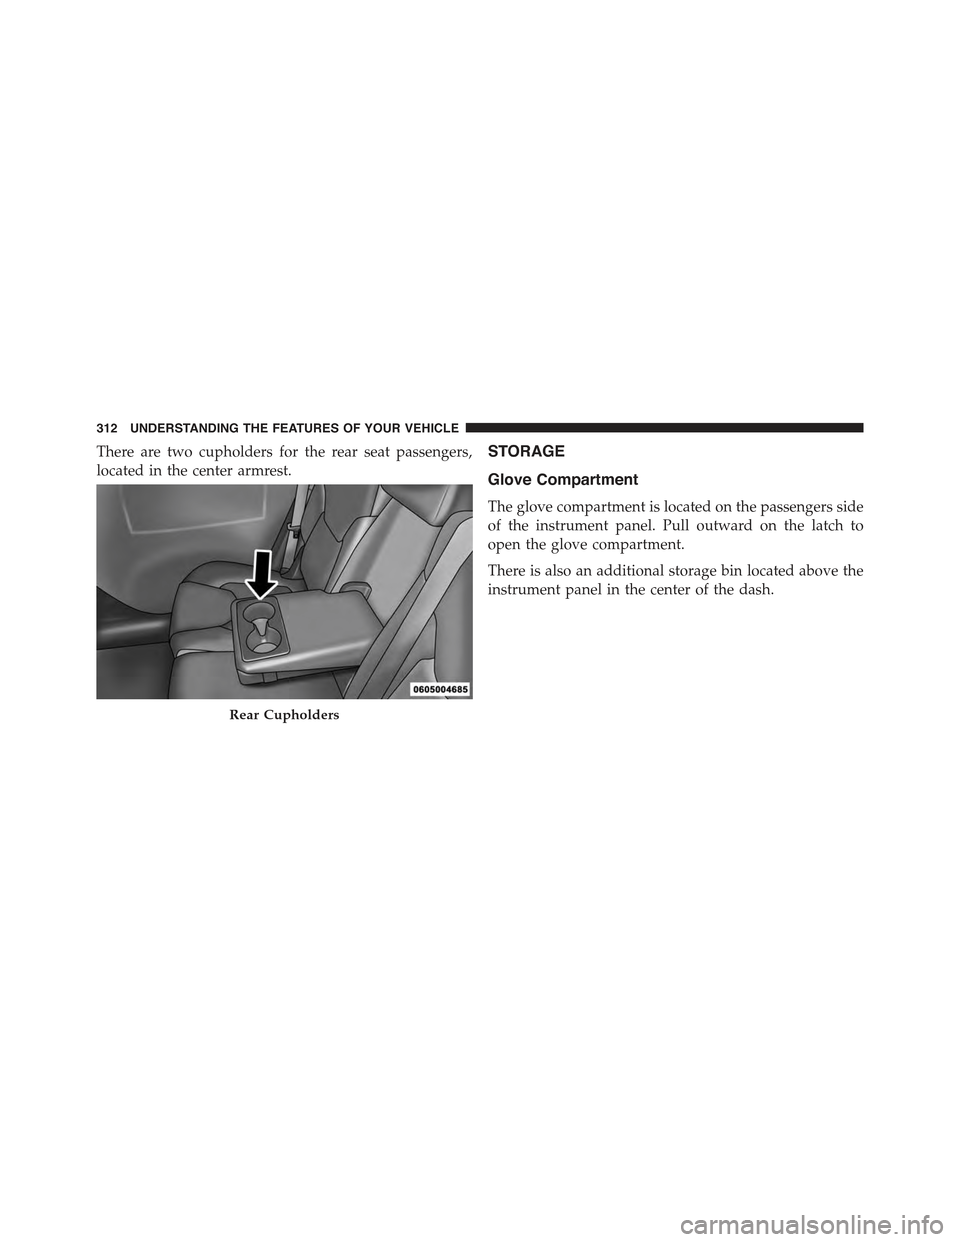
There are two cupholders for the rear seat passengers,
located in the center armrest.
STORAGE
Glove Compartment
The glove compartment is located on the passengers side
of the instrument panel. Pull outward on the latch to
open the glove compartment.
There is also an additional storage bin located above the
instrument panel in the center of the dash.
Rear Cupholders
312 UNDERSTANDING THE FEATURES OF YOUR VEHICLE
Page 315 of 772
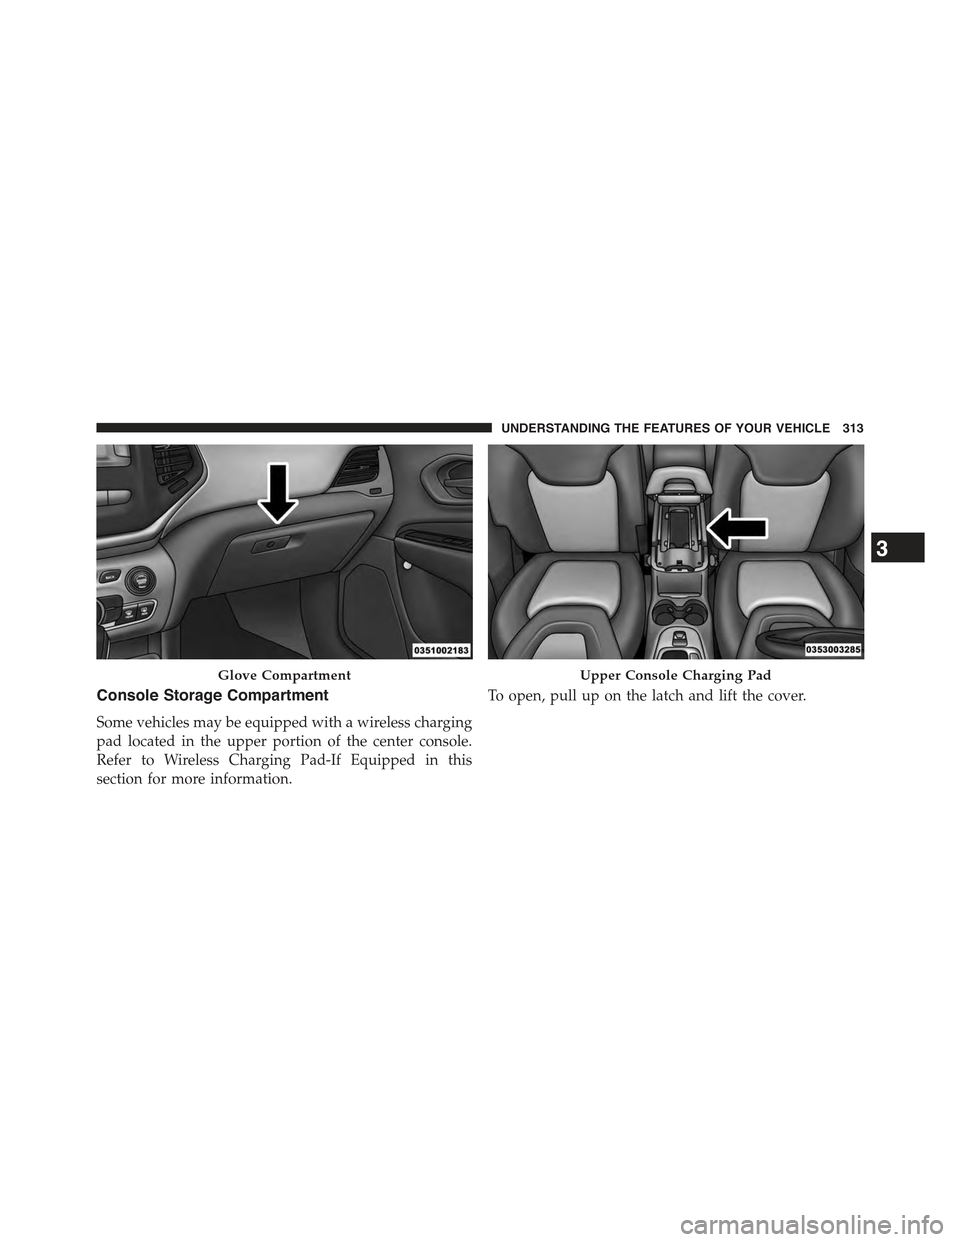
Console Storage Compartment
Some vehicles may be equipped with a wireless charging
pad located in the upper portion of the center console.
Refer to Wireless Charging Pad-If Equipped in this
section for more information.
To open, pull up on the latch and lift the cover.
Glove CompartmentUpper Console Charging Pad
3
UNDERSTANDING THE FEATURES OF YOUR VEHICLE 313