brake fluid JEEP CHEROKEE 2015 KL / 5.G Owners Manual
[x] Cancel search | Manufacturer: JEEP, Model Year: 2015, Model line: CHEROKEE, Model: JEEP CHEROKEE 2015 KL / 5.GPages: 772, PDF Size: 18.21 MB
Page 123 of 772
Door Latches
Check for positive closing, latching, and locking.
Fluid Leaks
Check area under vehicle after overnight parking for fuel,
engine coolant, oil, or other fluid leaks. Also, if gasoline
fumes are detected or if fuel, or brake fluid leaks are
suspected, the cause should be located and corrected
immediately.
2
THINGS TO KNOW BEFORE STARTING YOUR VEHICLE 121
Page 333 of 772
INSTRUMENT CLUSTER DESCRIPTIONS
1. Tachometer
Indicates the engine speed in revolutions per minute
(RPM x 1000).
2. High Beam Indicator
Indicates that headlights are on high beam.
3. Front Fog Light Indicator — If Equipped
This indicator will illuminate when the front fog
lights are on.
4. Park/Headlight ON Indicator — If Equipped
This indicator will illuminate when the park
lights or headlights are turned on.
5. Brake Warning Light
This light monitors various brake functions,
including brake fluid level and parking brake
application. If the brake light turns on it may
indicate that the parking brake is applied, that
the brake fluid level is low, or that there is a problem with
the anti-lock brake system reservoir.
If the light remains on when the parking brake has been
disengaged, and the fluid level is at the full mark on the
master cylinder reservoir, it indicates a possible brake
hydraulic system malfunction or that a problem with the
Brake Booster has been detected by the Anti-Lock Brake
System (ABS)/Electronic Stability Control (ESC) system.
In this case, the light will remain on until the condition
has been corrected. If the problem is related to the brake
booster, the ABS pump will run when applying the brake
and a brake pedal pulsation may be felt during each stop.
4
UNDERSTANDING YOUR INSTRUMENT PANEL 331
Page 334 of 772
The dual brake system provides a reserve braking capac-
ity in the event of a failure to a portion of the hydraulic
system. A leak in either half of the dual brake system is
indicated by the Brake Warning Light, which will turn on
when the brake fluid level in the master cylinder has
dropped below a specified level.
The light will remain on until the cause is corrected.
NOTE:The light may flash momentarily during sharp
cornering maneuvers, which change fluid level condi-
tions. The vehicle should have service performed, and
the brake fluid level checked.
If brake failure is indicated, immediate repair is neces-
sary.
WARNING!
Driving a vehicle with the red brake light on is
dangerous. Part of the brake system may have failed.
It will take longer to stop the vehicle. You could have
a collision. Have the vehicle checked immediately.
Vehicles equipped with the Anti-Lock Brake System
(ABS), are also equipped with Electronic Brake Force
Distribution (EBD). In the event of an EBD failure, the
Brake Warning Light will turn on along with the ABS
Light. Immediate repair to the ABS system is required.
Operation of the Brake Warning Light can be checked by
turning the ignition switch from the OFF position to the
ON/RUN position. The light should illuminate for ap-
proximately two seconds. The light should then turn off
unless the parking brake is applied or a brake fault is
detected. If the light does not illuminate, have the light
inspected by an authorized dealer.
332 UNDERSTANDING YOUR INSTRUMENT PANEL
Page 343 of 772
2. Brake Warning Light
This light monitors various brake functions,
including brake fluid level and parking brake
application. If the brake light turns on it may
indicate that the parking brake is applied, that
the brake fluid level is low, or that there is a problem with
the anti-lock brake system reservoir.
If the light remains on when the parking brake has been
disengaged, and the fluid level is at the full mark on the
master cylinder reservoir, it indicates a possible brake
hydraulic system malfunction or that a problem with the
Brake Booster has been detected by the Anti-Lock Brake
System (ABS)/Electronic Stability Control (ESC) system.
In this case, the light will remain on until the condition
has been corrected. If the problem is related to the brake
booster, the ABS pump will run when applying the brake
and a brake pedal pulsation may be felt during each stop.
The dual brake system provides a reserve braking capac-
ity in the event of a failure to a portion of the hydraulic
system. A leak in either half of the dual brake system is
indicated by the Brake Warning Light, which will turn on
when the brake fluid level in the master cylinder has
dropped below a specified level.
The light will remain on until the cause is corrected.
NOTE:The light may flash momentarily during sharp
cornering maneuvers, which change fluid level condi-
tions. The vehicle should have service performed, and
the brake fluid level checked.
If brake failure is indicated, immediate repair is neces-
sary.
4
UNDERSTANDING YOUR INSTRUMENT PANEL 341
Page 365 of 772
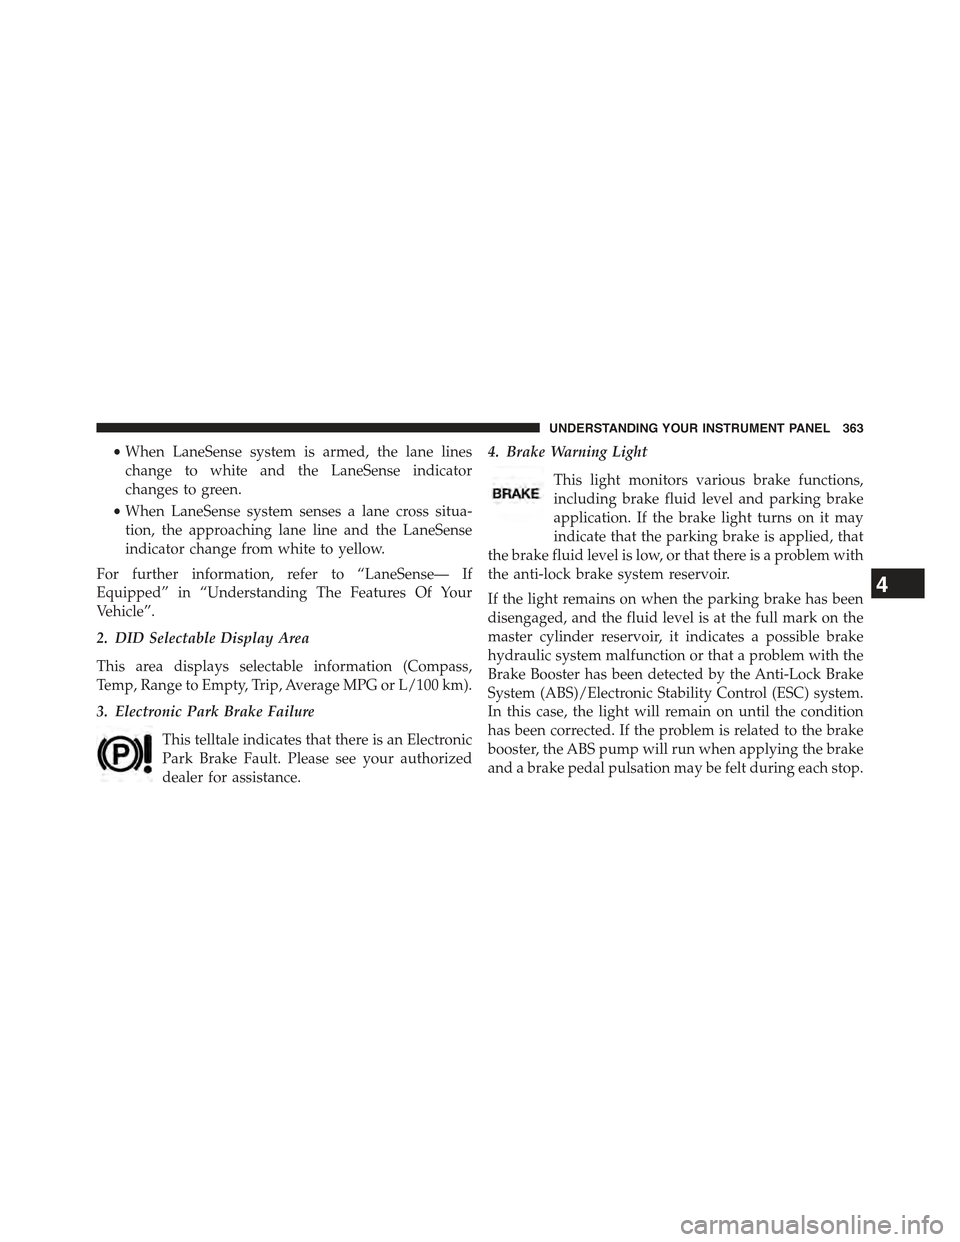
•When LaneSense system is armed, the lane lines
change to white and the LaneSense indicator
changes to green.
•When LaneSense system senses a lane cross situa-
tion, the approaching lane line and the LaneSense
indicator change from white to yellow.
For further information, refer to “LaneSense— If
Equipped” in “Understanding The Features Of Your
Vehicle”.
2. DID Selectable Display Area
This area displays selectable information (Compass,
Temp, Range to Empty, Trip, Average MPG or L/100 km).
3. Electronic Park Brake Failure
This telltale indicates that there is an Electronic
Park Brake Fault. Please see your authorized
dealer for assistance.
4. Brake Warning Light
This light monitors various brake functions,
including brake fluid level and parking brake
application. If the brake light turns on it may
indicate that the parking brake is applied, that
the brake fluid level is low, or that there is a problem with
the anti-lock brake system reservoir.
If the light remains on when the parking brake has been
disengaged, and the fluid level is at the full mark on the
master cylinder reservoir, it indicates a possible brake
hydraulic system malfunction or that a problem with the
Brake Booster has been detected by the Anti-Lock Brake
System (ABS)/Electronic Stability Control (ESC) system.
In this case, the light will remain on until the condition
has been corrected. If the problem is related to the brake
booster, the ABS pump will run when applying the brake
and a brake pedal pulsation may be felt during each stop.
4
UNDERSTANDING YOUR INSTRUMENT PANEL 363
Page 366 of 772
The dual brake system provides a reserve braking capac-
ity in the event of a failure to a portion of the hydraulic
system. A leak in either half of the dual brake system is
indicated by the Brake Warning Light, which will turn on
when the brake fluid level in the master cylinder has
dropped below a specified level.
The light will remain on until the cause is corrected.
NOTE:The light may flash momentarily during sharp
cornering maneuvers, which change fluid level condi-
tions. The vehicle should have service performed, and
the brake fluid level checked.
If brake failure is indicated, immediate repair is necessary.
WARNING!
Driving a vehicle with the red brake light on is
dangerous. Part of the brake system may have failed.
(Continued)
WARNING!(Continued)
It will take longer to stop the vehicle. You could have
a collision. Have the vehicle checked immediately.
Vehicles equipped with the Anti-Lock Brake System
(ABS), are also equipped with Electronic Brake Force
Distribution (EBD). In the event of an EBD failure, the
Brake Warning Light will turn on along with the ABS
Light. Immediate repair to the ABS system is required.
Operation of the Brake Warning Light can be checked by
turning the ignition switch from the OFF position to the
ON/RUN position. The light should illuminate for ap-
proximately two seconds. The light should then turn off
unless the parking brake is applied or a brake fault is
detected. If the light does not illuminate, have the light
inspected by an authorized dealer.
364 UNDERSTANDING YOUR INSTRUMENT PANEL
Page 509 of 772
Maintenance
After driving through deep water, inspect your vehicle
fluids and lubricants (engine, transmission, Power Trans-
fer Unit and Rear Drive Module) to assure they have not
been contaminated. Contaminated fluids and lubricants
(milky, foamy in appearance) should be flushed/changed
as soon as possible to prevent component damage.
Driving In Snow, Mud And Sand
In heavy snow, when pulling a load, or for additional
control at slower speeds, shift the transmission to a low
gear and shift the 4WD system to the appropriate terrain
mode, using 4WD LOW if necessary. Refer to “Four-
Wheel Drive Operation” in “Starting and Operating” for
further information. Do not shift to a lower gear than
necessary to maintain headway. Over-revving the engine
can spin the wheels and traction will be lost.
Avoid abrupt downshifts on icy or slippery roads be-
cause engine braking may cause skidding and loss of
control.
Hill Climbing
NOTE:Before attempting to climb a hill, determine the
conditions at the crest and/or on the other side.
Before climbing a steep hill,shift the transmission to a
lower gear and shift the 4WD System to 4WD LOW. Use
first gear and 4WD LOW for very steep hills.
If you stall or begin to lose headwaywhile climbing a
steep hill, allow your vehicle to come to a stop and
immediately apply the brakes. Restart the engine and
shift to REVERSE. Back slowly down the hill allowing the
compression braking of the engine to help regulate your
speed. If the brakes are required to control vehicle speed,
apply them lightly and avoid locking or skidding the
tires.
5
STARTING AND OPERATING 507
Page 520 of 772
BRAKE SYSTEM
Your vehicle is equipped with dual hydraulic
brake systems. If either of the two hydraulic
systems loses normal capability, the remaining
system will still function. However, there will
be some loss of overall braking effectiveness. This will be
evident by increased pedal travel during application and
greater pedal force required to slow or stop the vehicle. In
addition, if the malfunction is caused by a leak in the
hydraulic system, the “Brake Warning Light” will turn on
as the brake fluid level drops in the master cylinder.
In the event power assist is lost for any reason (i.e.,
repeated brake applications with the engine OFF) the
brakes will still function. However, the effort required to
brake the vehicle will be much greater than that required
with the power system operating.
WARNING!
•Riding the brakes can lead to brake failure and
possibly a collision. Driving with your foot resting
or riding on the brake pedal can result in abnor-
mally high brake temperatures, excessive lining
wear, and possible brake damage. You would not
have your full braking capacity in an emergency.
•Driving a vehicle with the “Brake Warning Light”
on is dangerous. A significant decrease in braking
performance or vehicle stability during braking
may occur. It will take you longer to stop the
vehicle or will make your vehicle harder to control.
You could have a collision. Have the vehicle
checked immediately.
518 STARTING AND OPERATING
Page 625 of 772
on the ground. This will provide the best positioning
of the kit when injecting the sealant into the deflated
tire and running the air pump. Move the vehicle as
necessary to place the valve stem in this position
before proceeding.
3. Place the transmission in PARK (auto transmission) or
in Gear (manual transmission) and turn Off the igni-
tion.
4. Set the parking brake.
(B) Setting Up To Use Tire Service Kit:
1. Push in the Mode Select Knob (5) and turn to the
Sealant Mode position.
2. Uncoil the Sealant Hose (6) and then remove the cap
from the fitting at the end of the hose.
3. Place the Tire Service Kit flat on the ground next to the
deflated tire.
4. Remove the cap from the valve stem and then screw
the fitting at the end of the Sealant Hose (6) onto the
valve stem.
5. Uncoil the Power Plug (8) and insert the plug into the
vehicle’s 12 Volt power outlet.
NOTE:Do not remove foreign objects (e.g., screws or
nails) from the tire.
(C) Injecting Tire Service Kit Sealant Into The
Deflated Tire:
•Always start the engine before turning ON the Tire
Service Kit.
NOTE:Manual transmission vehicles must have the
parking brake engaged and the shift lever in NEUTRAL.
•After pressing the Power Button (4), the sealant (white
fluid) will flow from the Sealant Bottle (1) through the
Sealant Hose (6) and into the tire.
6
WHAT TO DO IN EMERGENCIES 623
Page 656 of 772
▫Brake System........................692
▫Automatic Transmission................694
▫Sky Slider™ Top Care..................696
▫Appearance Care And Protection From
Corrosion...........................698
!FUSES..............................705
▫Power Distribution Center...............706
▫Interior Fuses........................719
!VEHICLE STORAGE....................720
!REPLACEMENT BULBS.................721
!BULB REPLACEMENT..................722
▫Low Beam And High Beam Headlamps.....722
▫Front Turn Signals And Front Side
Marker Lamps.......................724
▫Front Fog Lamp......................724
▫Front Fog Lamp (Trailhawk).............725
▫Bodyside Mounted Back-up Lamp.........725
▫Liftgate Mounted Back-up Lamp..........726
▫License Plate Lamp....................726
!FLUID CAPACITIES....................727
!FLUIDS, LUBRICANTS AND GENUINE PARTS . .728
▫Engine.............................728
▫Chassis............................730
654 MAINTAINING YOUR VEHICLE