buttons JEEP CHEROKEE 2015 KL / 5.G Service Manual
[x] Cancel search | Manufacturer: JEEP, Model Year: 2015, Model line: CHEROKEE, Model: JEEP CHEROKEE 2015 KL / 5.GPages: 772, PDF Size: 18.21 MB
Page 439 of 772
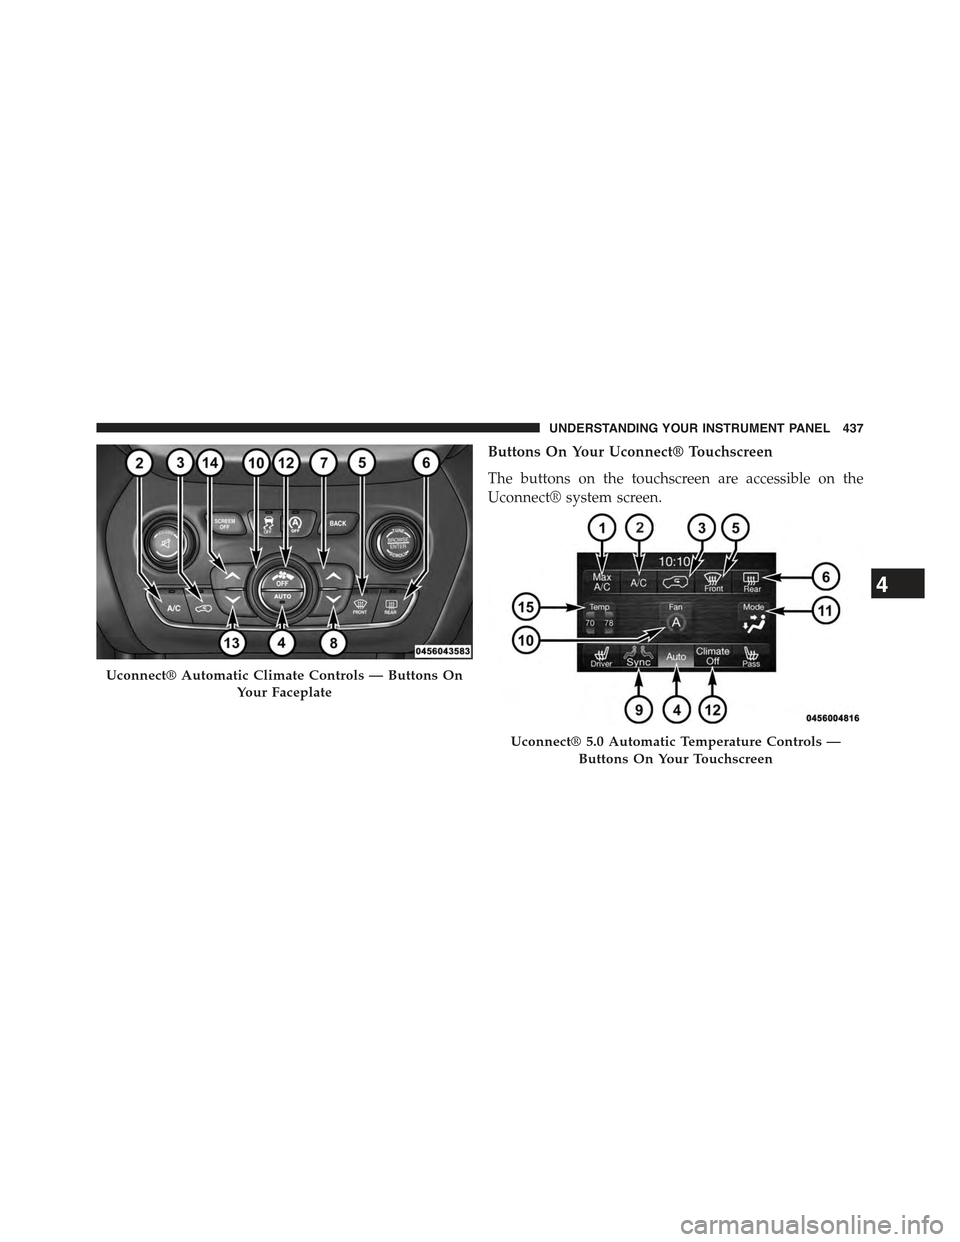
Buttons On Your Uconnect® Touchscreen
The buttons on the touchscreen are accessible on the
Uconnect® system screen.
Uconnect® Automatic Climate Controls — Buttons On
Your Faceplate
Uconnect® 5.0 Automatic Temperature Controls —
Buttons On Your Touchscreen
4
UNDERSTANDING YOUR INSTRUMENT PANEL 437
Page 440 of 772
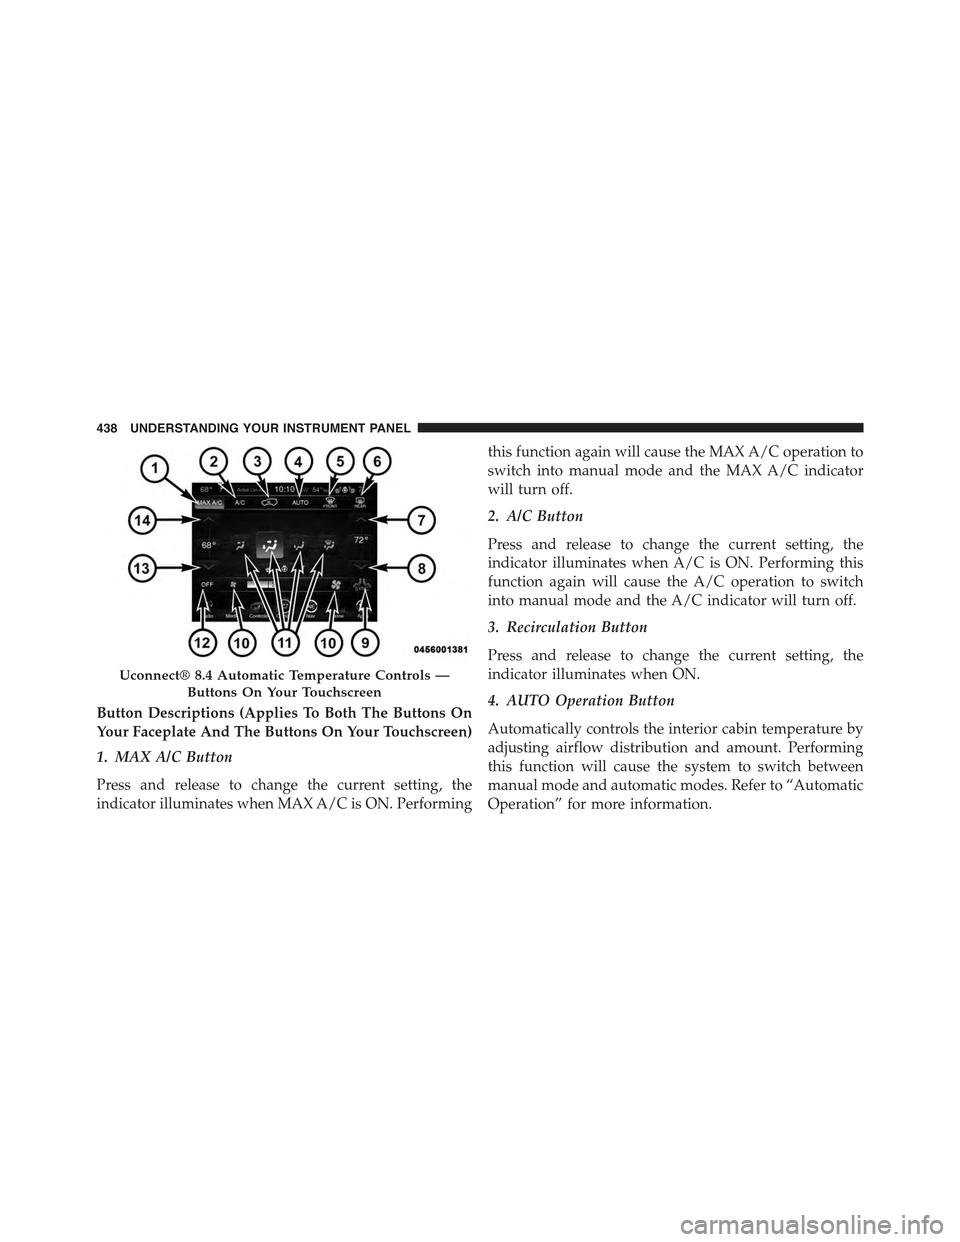
Button Descriptions (Applies To Both The Buttons On
Your Faceplate And The Buttons On Your Touchscreen)
1. MAX A/C Button
Press and release to change the current setting, the
indicator illuminates when MAX A/C is ON. Performing
this function again will cause the MAX A/C operation to
switch into manual mode and the MAX A/C indicator
will turn off.
2. A/C Button
Press and release to change the current setting, the
indicator illuminates when A/C is ON. Performing this
function again will cause the A/C operation to switch
into manual mode and the A/C indicator will turn off.
3. Recirculation Button
Press and release to change the current setting, the
indicator illuminates when ON.
4. AUTO Operation Button
Automatically controls the interior cabin temperature by
adjusting airflow distribution and amount. Performing
this function will cause the system to switch between
manual mode and automatic modes. Refer to “Automatic
Operation” for more information.
Uconnect® 8.4 Automatic Temperature Controls —
Buttons On Your Touchscreen
438 UNDERSTANDING YOUR INSTRUMENT PANEL
Page 443 of 772
speeds can be selected using either the blower control
knob on the faceplate or buttons on the touchscreen as
follows:
Blower Control Knob On The Faceplate
The blower speed increases as you turn the blower
control knob clockwise from the lowest blower setting.
The blower speed decreases as you turn the blower
control knob counterclockwise.
Button On The Touchscreen
Use the small blower icon to reduce the blower setting
and the large blower icon to increase the blower setting.
Blower can also be selected by pressing the blower bar
area between the icons.
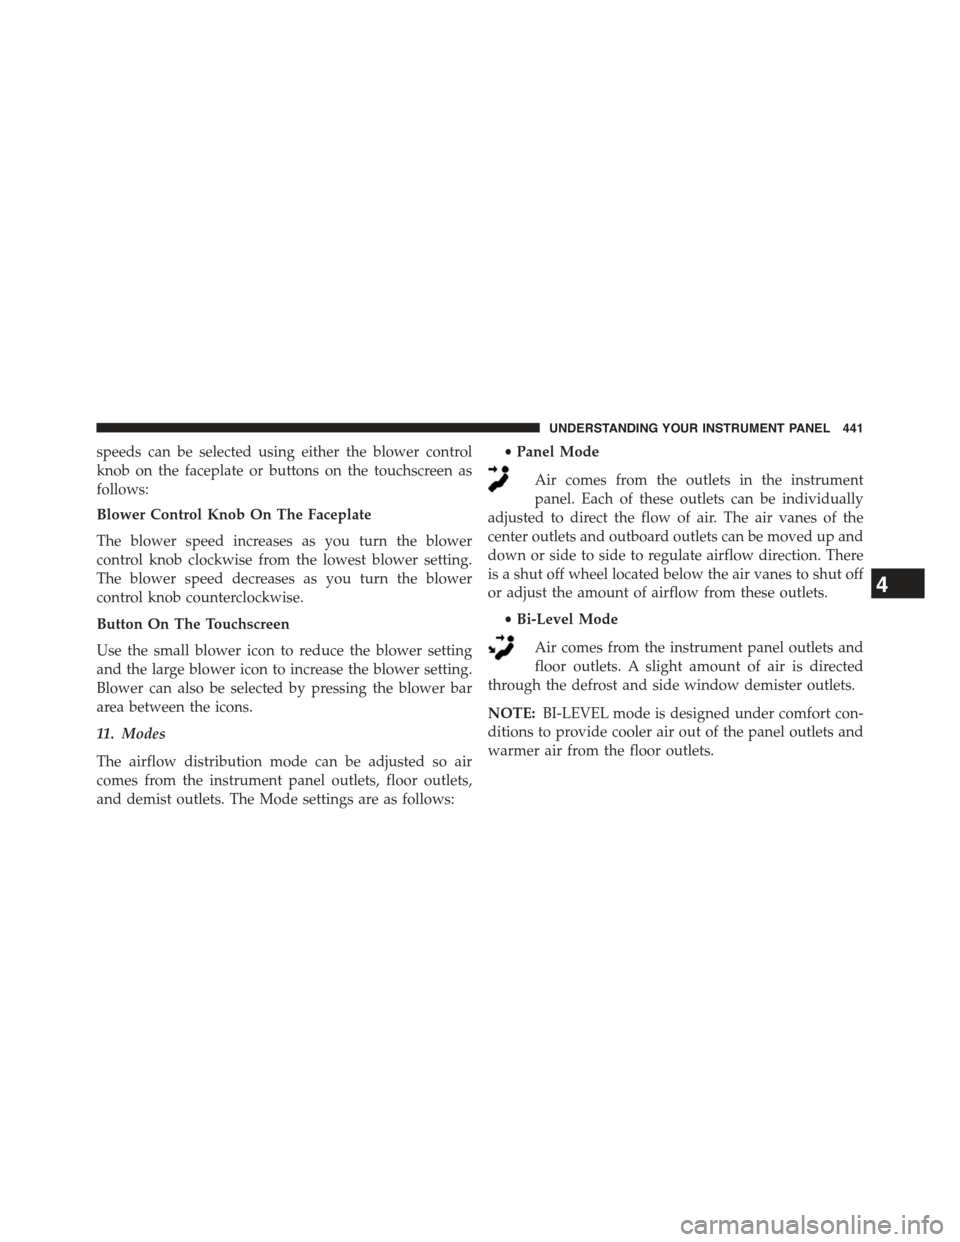
11. Modes
The airflow distribution mode can be adjusted so air
comes from the instrument panel outlets, floor outlets,
and demist outlets. The Mode settings are as follows:
•Panel Mode
Air comes from the outlets in the instrument
panel. Each of these outlets can be individually
adjusted to direct the flow of air. The air vanes of the
center outlets and outboard outlets can be moved up and
down or side to side to regulate airflow direction. There
is a shut off wheel located below the air vanes to shut off
or adjust the amount of airflow from these outlets.
•Bi-Level Mode
Air comes from the instrument panel outlets and
floor outlets. A slight amount of air is directed
through the defrost and side window demister outlets.
NOTE:BI-LEVEL mode is designed under comfort con-
ditions to provide cooler air out of the panel outlets and
warmer air from the floor outlets.
4
UNDERSTANDING YOUR INSTRUMENT PANEL 441
Page 447 of 772
The windshield wiper de-icer operates automatically
once the following conditions are met:
•Activation By Front Defrost
The wiper de-icer activates automatically during a cold
weather manual start withfull defrost,theblower speed
is greater than five,and when theambient temperature
is below 40° F (4.4° C).
•Activation By Rear Defrost
The wiper de-icer activates automatically when the Rear
Defrost is operating and theambient temperature is
below 40° F (4.4° C).
•Activation By Remote Start Operation
When the Remote Start is activated and theoutside
ambient temperature is less than 40° F (4.4° C)the
windshield wiper de-icer is activated. Upon exiting Re-
mote Start, the climate control functions will resume their
previous operation except, if the de-icer is active, the
de-icer timer and operation will continue.
Automatic Temperature Control (ATC)
Automatic Operation
1. Push the AUTO button on the faceplate or press the
“AUTO” button on the touchscreen.
2. Next, adjust the temperature you would like the
system to maintain by adjusting the driver and pas-
senger temperature buttons on the faceplate or but-
tons on the touchscreen. Once the desired temperature
is displayed, the system will achieve and automati-
cally maintain that comfort level.
4
UNDERSTANDING YOUR INSTRUMENT PANEL 445
Page 452 of 772
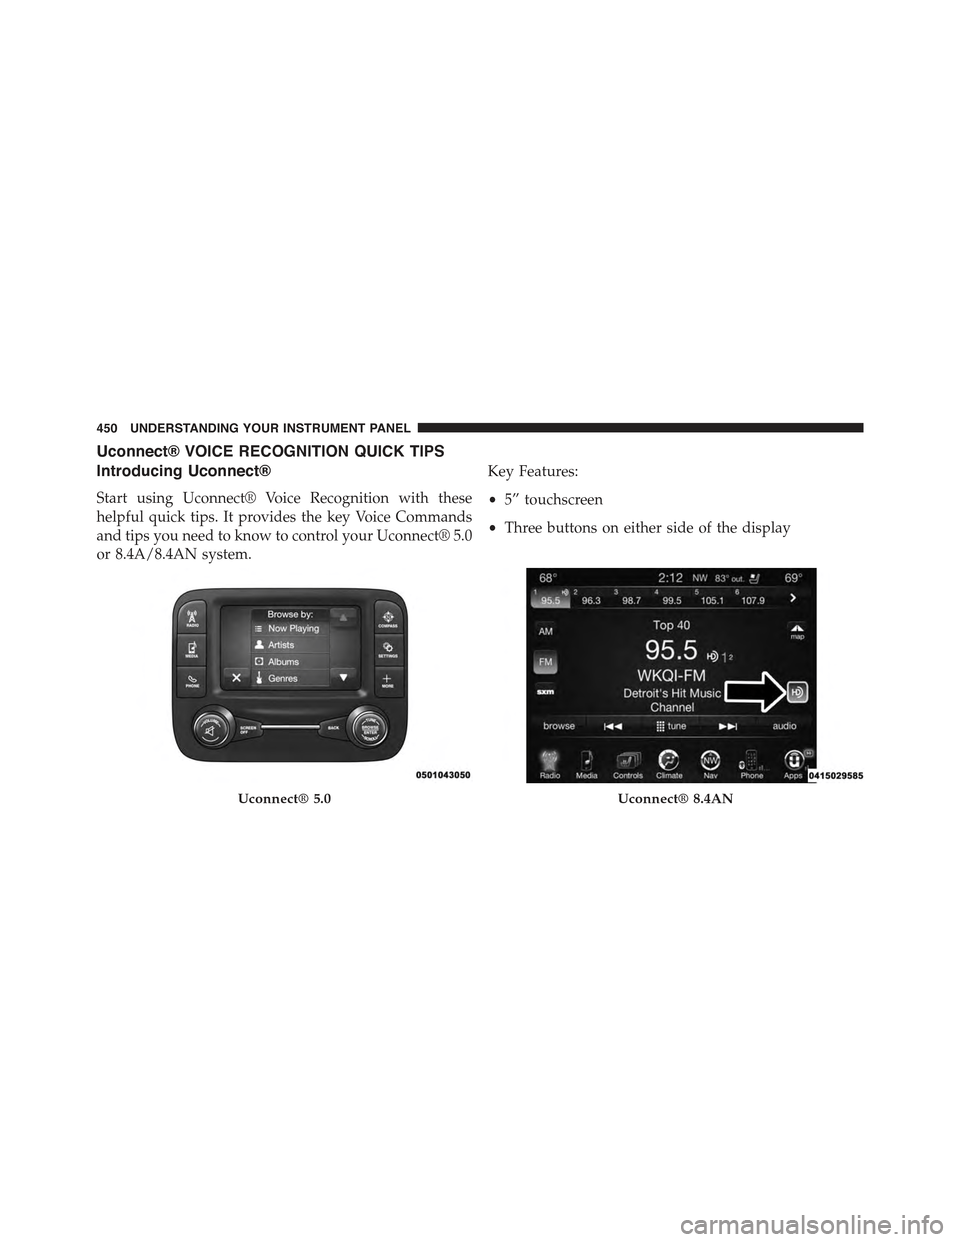
Uconnect® VOICE RECOGNITION QUICK TIPS
Introducing Uconnect®
Start using Uconnect® Voice Recognition with these
helpful quick tips. It provides the key Voice Commands
and tips you need to know to control your Uconnect® 5.0
or 8.4A/8.4AN system.
Key Features:
•5” touchscreen
•Three buttons on either side of the display
Uconnect® 5.0Uconnect® 8.4AN
450 UNDERSTANDING YOUR INSTRUMENT PANEL
Page 453 of 772
If you see theicon on your touchscreen, you have
the Uconnect® 8.4AN system. If not, you have a
Uconnect® 8.4A system.
Get Started
All you need to control your Uconnect® system with
your voice are the buttons on your steering wheel.
1. VisitUconnectPhone.com to check mobile device
and feature compatibility and to find phone pair-
ing instructions.
2. Reduce background noise. Wind and passenger con-
versations are examples of noise that may impact
recognition.
3. Speak clearly at a normal pace and volume while
facing straight ahead. The microphone is positioned
on the rearview mirror and aimed at the driver.
4. Each time you give a Voice Command, you must first
push either the VR or Phone button, wait untilafter
the beep, then say your Voice Command.
5. You can interrupt the help message or system prompts
by pushing the VR or Phone button and saying a Voice
Command from current category.
4
UNDERSTANDING YOUR INSTRUMENT PANEL 451
Page 498 of 772
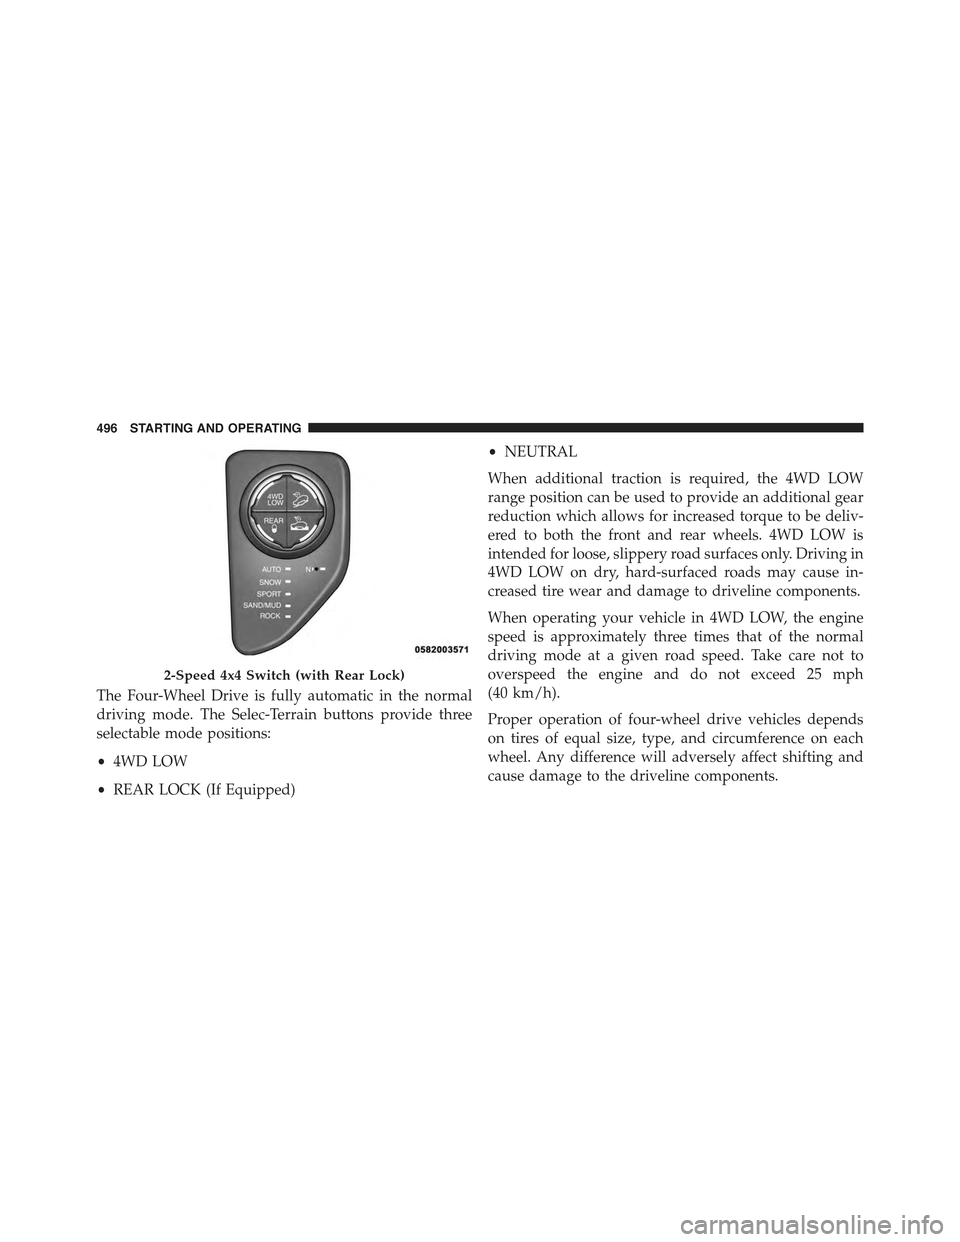
The Four-Wheel Drive is fully automatic in the normal
driving mode. The Selec-Terrain buttons provide three
selectable mode positions:
•4WD LOW
•REAR LOCK (If Equipped)
•NEUTRAL
When additional traction is required, the 4WD LOW
range position can be used to provide an additional gear
reduction which allows for increased torque to be deliv-
ered to both the front and rear wheels. 4WD LOW is
intended for loose, slippery road surfaces only. Driving in
4WD LOW on dry, hard-surfaced roads may cause in-
creased tire wear and damage to driveline components.
When operating your vehicle in 4WD LOW, the engine
speed is approximately three times that of the normal
driving mode at a given road speed. Take care not to
overspeed the engine and do not exceed 25 mph
(40 km/h).
Proper operation of four-wheel drive vehicles depends
on tires of equal size, type, and circumference on each
wheel. Any difference will adversely affect shifting and
cause damage to the driveline components.
2-Speed 4x4 Switch (with Rear Lock)
496 STARTING AND OPERATING