change time JEEP CHEROKEE 2015 KL / 5.G Owners Manual
[x] Cancel search | Manufacturer: JEEP, Model Year: 2015, Model line: CHEROKEE, Model: JEEP CHEROKEE 2015 KL / 5.GPages: 772, PDF Size: 18.21 MB
Page 26 of 772
To Unlock The Doors And Liftgate
Push and release the UNLOCK button on the RKE
transmitter once to unlock the driver’s door or twice
within five seconds to unlock all doors and liftgate. The
turn signal lights will flash to acknowledge the unlock
signal. The illuminated entry system will also turn on.
If the vehicle is equipped with Passive Entry, refer to
“Keyless Enter-N-Go™” in “Things To Know Before
Starting Your Vehicle” for further information.
1st Push Of Key Fob Unlocks
This feature lets you program the system to unlock either
the driver’s door or all doors on the first push of the
UNLOCK button on the RKE transmitter. To change the
current setting, refer to “Uconnect® Settings” in “Under-
standing Your Instrument Panel” for further information.
Flash Lamps With Lock
This feature will cause the turn signal lights to flash when
the doors are locked or unlocked with the RKE transmit-
ter. This feature can be turned on or turned off. To change
the current setting, refer to “Uconnect® Settings” in
“Understanding Your Instrument Panel” for further in-
formation.
Headlight Illumination On Approach
This feature activates the headlights for up to 90 seconds
when the doors are unlocked with the RKE transmitter.
The time for this feature is programmable on vehicles
equipped through Uconnect®. To change the current
setting, refer to “Uconnect® Settings” in “Understanding
Your Instrument Panel” for further information.
24 THINGS TO KNOW BEFORE STARTING YOUR VEHICLE
Page 27 of 772
To Lock The Doors And Liftgate
Push and release the LOCK button on the RKE transmit-
ter to lock all doors and liftgate. The turn signal lights
will flash and the horn will chirp to acknowledge the
signal.
If the vehicle is equipped with Passive Entry, refer to
“Keyless Enter-N-Go™” in “Things To Know Before
Starting Your Vehicle” for further information.
Sound Horn With Lock
This feature will cause the horn to chirp when the doors
are locked with the RKE transmitter. This feature can be
turned on or turned off. To change the current setting,
refer to “Uconnect® Settings” in “Understanding Your
Instrument Panel” for further information.
Using The Panic Alarm
To turn the Panic Alarm feature on or off, push and hold
the PANIC button on the RKE transmitter for at least one
second and release. When the Panic Alarm is activated,
the turn signals will flash, the horn will pulse on and off,
and the interior lights will turn on.
The Panic Alarm will stay on for three minutes unless
you turn it off by either pushing the PANIC button a
second time or drive the vehicle at a speed of 15 MPH
(24 km/h) or greater.
NOTE:
•The interior lights will turn off if you cycle the ignition
switch to the ACC or ON/RUN position while the
Panic Alarm is activated. However, the exterior lights
and horn will remain on.
•You may need to be less than 35 ft (11 m) from the
vehicle when using the RKE transmitter to turn off the
Panic Alarm due to the radio frequency noises emitted
by the system.
2
THINGS TO KNOW BEFORE STARTING YOUR VEHICLE 25
Page 81 of 772
•Do not add a secondary seat cover or mat.
•At no time should any Supplemental Restraint System
(SRS) component or SRS related component or fastener
be modified or replaced with any part except those
which are approved by Chrysler Group LLC .
WARNING!
Unapproved modifications or service procedures to
the passenger seat assembly, its related components,
seat cover or cushion may inadvertently change the
air bag deployment in case of a frontal collision. This
could result in death or serious injury to the front
passenger if the vehicle is involved in a collision. A
modified vehicle may not comply with required
Federal Motor Vehicle Safety Standards (FMVSS)
and/or Canadian Motor Vehicle Safety Standards
(CMVSS).
Knee Impact Bolsters
The Knee Impact Bolsters help protect the knees of the
driver and front passenger, and position the front occu-
pants for improved interaction with the Advanced Front
Air Bags.
WARNING!
•Do not drill, cut, or tamper with the knee impact
bolsters in any way.
•Do not mount any accessories to the knee impact
bolsters such as alarm lights, stereos, citizen band
radios, etc.
Supplemental Driver And Front Passenger Knee
Air Bags
This vehicle is equipped with a Supplemental Driver
Knee Air Bag mounted in the instrument panel below the
steering column and a Supplemental Passenger Knee Air
2
THINGS TO KNOW BEFORE STARTING YOUR VEHICLE 79
Page 120 of 772
WARNING!(Continued)
•If it is necessary to sit in a parked vehicle with the
engine running, adjust your heating or cooling
controls to force outside air into the vehicle. Set the
blower at high speed.
The best protection against carbon monoxide entry into
the vehicle body is a properly maintained engine exhaust
system.
Whenever a change is noticed in the sound of the exhaust
system, when exhaust fumes can be detected inside the
vehicle, or when the underside or rear of the vehicle is
damaged, have a competent mechanic inspect the com-
plete exhaust system and adjacent body areas for broken,
damaged, deteriorated, or mispositioned parts. Open
seams or loose connections could permit exhaust fumes
to seep into the passenger compartment. In addition,
inspect the exhaust system each time the vehicle is raised
for lubrication or oil change. Replace as required.
Safety Checks You Should Make Inside The
Vehicle
Seat Belts
Inspect the seat belt system periodically, checking for
cuts, frays, and loose parts. Damaged parts must be
replaced immediately. Do not disassemble or modify the
system.
Front seat belt assemblies must be replaced after a
collision. Rear seat belt assemblies must be replaced after
a collision if they have been damaged (i.e., bent retractor,
torn webbing, etc.). If there is any question regarding seat
belt or retractor condition, replace the seat belt.
Air Bag Warning Light
The light should come on and remain on for
four to eight seconds as a bulb check when the
ignition switch is first turned ON. If the light is
11 8 T H I N G S TO K N O W B E F O R E S TA R T I N G Y O U R V E H I C L E
Page 126 of 772
▫Front Heated Seats — If Equipped.........154
▫Front Ventilated Seats — If Equipped.......156
▫Head Restraints......................157
▫60/40 Split Folding Rear Seat With Fold-Flat
Feature............................159
!DRIVER MEMORY SEAT — IF EQUIPPED . . . .162
▫Programming The Memory Feature.........163
▫Linking And Unlinking The Remote Keyless Entry
Transmitter To Memory.................164
▫Memory Position Recall.................165
▫Easy Entry/Exit Seat...................165
!TO OPEN AND CLOSE THE HOOD.........166
!LIGHTS.............................168
▫Headlight Switch.....................168
▫Automatic Headlights — If Equipped.......169
▫Headlights On With Wipers (Available With
Automatic Headlights Only).............169
▫Headlight Time Delay..................169
▫Automatic High Beam Headlamp Control — If
Equipped...........................170
▫Daytime Running Lights (DRL) — If
Equipped...........................172
▫Lights-On Reminder...................172
▫Fog Lights — If Equipped...............172
▫Multifunction Lever...................173
▫Turn Signals.........................174
▫Lane Change Assist...................174
▫High/Low Beam Switch................174
124 UNDERSTANDING THE FEATURES OF YOUR VEHICLE
Page 144 of 772
The BSM detection zone covers approximately one lane
width on both sides of the vehicle (12 ft or 3.8 m). The
zone length starts at the outside mirror and extends
approximately 10 ft (3 m) beyond the rear bumper of the
vehicle. The BSM system monitors the detection zones on
both sides of the vehicle when the vehicle speed reaches
approximately 6 mph (10 km/h) or higher and will alert
the driver of vehicles in these areas.
NOTE:
•The BSM system does NOT alert the driver about
rapidly approaching vehicles that are outside the de-
tection zones.
•The BSM system detection zone DOES NOT change if
your vehicle is towing a trailer. Therefore, visually
verify the adjacent lane is clear for both your vehicle
and trailer before making a lane change. If the trailer or
other object (i.e., bicycle, sports equipment) extends
beyond the side of your vehicle, this may result in the
BSM warning light remaining illuminated the entire
time the vehicle is in a forward gear.
The area on the rear fascia where the radar sensors are
located must remain free of snow, ice, and dirt/road
contamination so that the BSM system can function
properly. Do not block the area of the rear fascia where
the radar sensors are located with foreign objects (bum-
per stickers, bicycle racks, etc.)
The BSM system will provide a visual alert in the
appropriate side view mirror based on a detected object.
If the turn signal is then activated, and it corresponds to
an alert present on that side of the vehicle, an audible
chime will also be sounded. Whenever a turn signal and
detected object are present on the same side at the same
time, both the visual and audio alerts will be issued. In
addition to the audible alert the radio (if on) will also be
muted.
142 UNDERSTANDING THE FEATURES OF YOUR VEHICLE
Page 151 of 772
NOTE:The BSM system will store the current operating
mode when the vehicle is shut off. Each time the vehicle
is started the previously stored mode will be recalled and
used.
General Information
This vehicle has systems that operate on radio frequency
that comply with Part 15 of the Federal Communications
Commission (FCC) rules and with Industry Canada
Standards RSS- GEN/210/220/310.
Operation is subject to the following two conditions:
1. The device may not cause harmful interference.
2. The device must accept any interference received,
including interference that may cause undesired op-
eration of the device.
Changes or modifications to any of these systems by
other than an authorized service facility could void
authorization to use this equipment.
SEATS
Seats are a part of the Occupant Restraint System of the
vehicle.
WARNING!
•It is dangerous to ride in a cargo area, inside or
outside of a vehicle. In a collision, people riding in
these areas are more likely to be seriously injured
or killed.
•Do not allow people to ride in any area of your
vehicle that is not equipped with seats and seat
belts. In a collision, people riding in these areas are
more likely to be seriously injured or killed.
•Be sure everyone in your vehicle is in a seat and
using a seat belt properly.
3
UNDERSTANDING THE FEATURES OF YOUR VEHICLE 149
Page 156 of 772
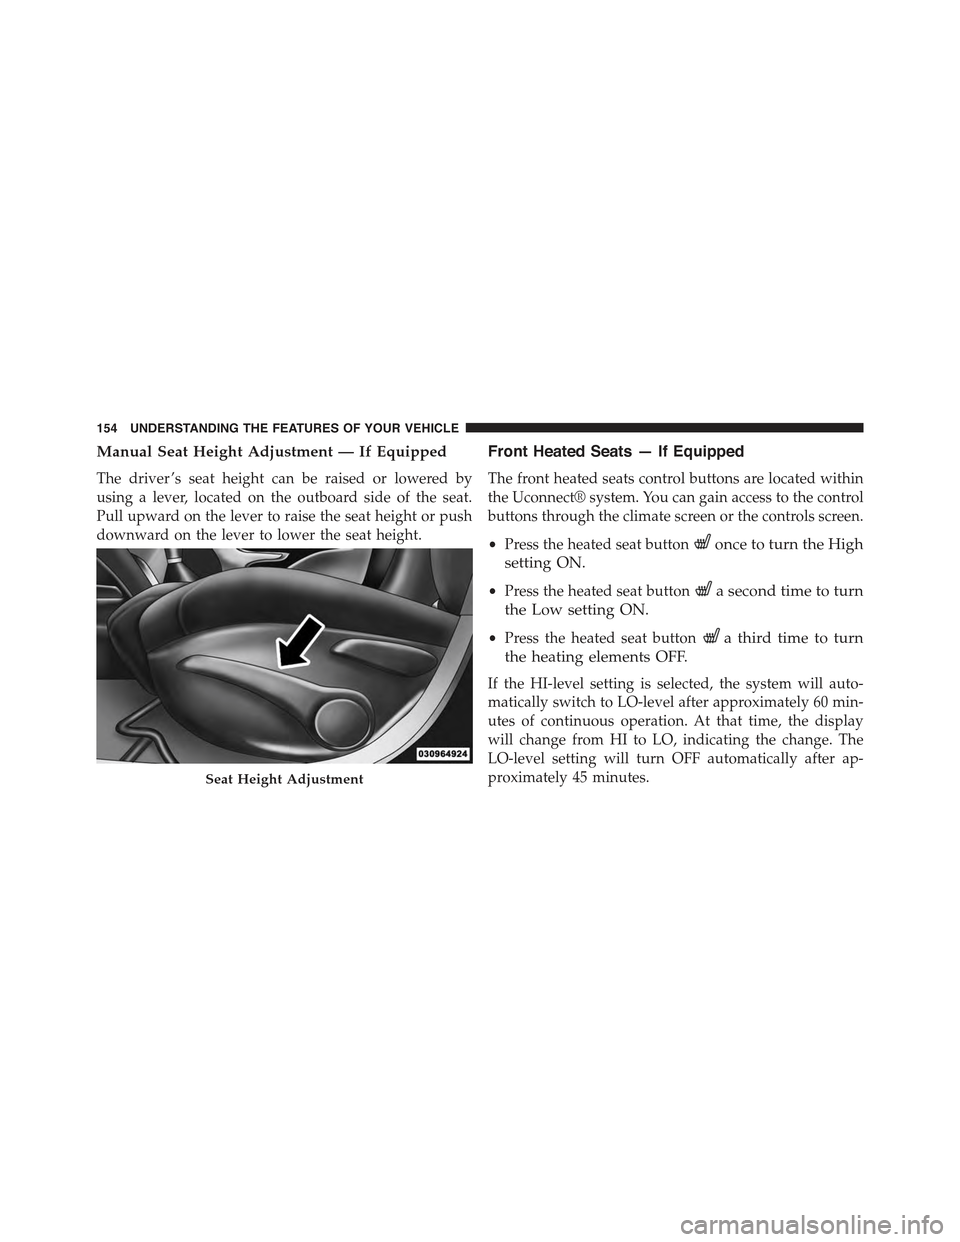
Manual Seat Height Adjustment — If Equipped
The driver ’s seat height can be raised or lowered by
using a lever, located on the outboard side of the seat.
Pull upward on the lever to raise the seat height or push
downward on the lever to lower the seat height.
Front Heated Seats — If Equipped
The front heated seats control buttons are located within
the Uconnect® system. You can gain access to the control
buttons through the climate screen or the controls screen.
•Press the heated seat buttononce to turn the High
setting ON.
•Press the heated seat buttona second time to turn
the Low setting ON.
•Press the heated seat buttona third time to turn
the heating elements OFF.
If the HI-level setting is selected, the system will auto-
matically switch to LO-level after approximately 60 min-
utes of continuous operation. At that time, the display
will change from HI to LO, indicating the change. The
LO-level setting will turn OFF automatically after ap-
proximately 45 minutes.Seat Height Adjustment
154 UNDERSTANDING THE FEATURES OF YOUR VEHICLE
Page 176 of 772
Turn Signals
Move the multifunction lever up or down and the arrows
on each side of the instrument cluster flash to show
proper operation of the front and rear turn signal lights.
NOTE:
•If either light remains on and does not flash, or there is
a very fast flash rate, check for a defective outside light
bulb. If an indicator fails to light when the lever is
moved, it would suggest that the indicator bulb is
defective.
•A “Turn Signal On” message will appear in the EVIC/
DID and a continuous chime will sound if the vehicle
is driven more than 1 mile (1.6 km) with either turn
signal on.
•When the Daytime Running Lights are on and a turn
signal is activated, the Daytime Running Lamp will
turn off on the side of the vehicle in which the turn
signal is flashing. The Daytime Running Lamp will
turn back on when the turn signal is turned off.
Lane Change Assist
Tap the lever up or down once, without moving beyond
the detent, and the turn signal (right or left) will flash
three times then automatically turn off.
High/Low Beam Switch
Push the multifunction lever away from you to switch
the headlights to high beam. Pull the multifunction lever
toward you to switch the headlights back to low beam.
Flash-To-Pass
You can signal another vehicle with your headlights by
lightly pulling the multifunction lever toward you. This
will turn on the high beams headlights until the lever is
released.
174 UNDERSTANDING THE FEATURES OF YOUR VEHICLE
Page 209 of 772
•Distance Setting Change
•System Cancel
•Driver Override
•System Off
•ACC Proximity Warning
•ACC Unavailable Warning
•The EVIC/DID will return to the last display selected
after five seconds of no ACC display activity
Display Warnings And Maintenance
“Wipe Front Radar Sensor In Front Of Vehicle”
Warning
The “ACC/FCW Unavailable Wipe Front Radar Sensor”
warning will display and also a chime will indicate when
conditions temporarily limit system performance.
This most often occurs at times of poor visibility, such as
in snow or heavy rain. The ACC system may also become
temporarily blinded due to obstructions, such as mud,
dirt or ice. In these cases, the EVIC/DID will display
“ACC/FCW Unavailable Wipe Front Radar Sensor” and
the system will deactivate.
The “ACC/FCW Unavailable Wipe Front Radar Sensor”
message can sometimes be displayed while driving in
highly reflective areas (i.e. tunnels with reflective tiles, or
ice and snow). The ACC system will recover after the
vehicle has left these areas. Under rare conditions, when
the radar is not tracking any vehicles or objects in its path
this warning may temporarily occur.
NOTE:If the “ACC/FCW Unavailable Wipe Front Radar
Sensor” warning is active Normal (Fixed Speed) Cruise
Control is still available. For additional information refer
to “Normal (Fixed Speed) Cruise Control Mode” in this
section.
3
UNDERSTANDING THE FEATURES OF YOUR VEHICLE 207