trim JEEP CHEROKEE 2015 KL / 5.G Owners Manual
[x] Cancel search | Manufacturer: JEEP, Model Year: 2015, Model line: CHEROKEE, Model: JEEP CHEROKEE 2015 KL / 5.GPages: 772, PDF Size: 18.21 MB
Page 36 of 772
will be enabled. On exiting remote start resume previous
operation except, if the De-Icer is active, the De-Icer timer
and operation will continue.
DOOR LOCKS
Manual Door Locks
To lock each door, rotate the door lock knob on each door
trim panel forward. To unlock the front doors, pull the
inside door handle to the first detent or rotate the door
lock button until the red indicator is visible. To unlock the
rear doors, rotate the door lock button until the red
indicator is visible.
If the door lock button is locked (no red indicator visible)
when you shut the door, the door will lock. Therefore,
make sure the Key Fob is not inside the vehicle before
closing the door.
NOTE:The manual door locks will not lock or unlock
the liftgate.
WARNING!
•For personal security and safety in the event of a
collision, lock the vehicle doors before you drive as
well as when you park and leave the vehicle.
•When leaving the vehicle, always remove the Key
Fob from the ignition and lock your vehicle.
•Never leave children alone in a vehicle, or with
access to an unlocked vehicle. Allowing children to
be in a vehicle unattended is dangerous for a
number of reasons. A child or others could be
seriously or fatally injured. Children should be
warned not to touch the parking brake, brake pedal
or the transmission gear selector.
(Continued)
34 THINGS TO KNOW BEFORE STARTING YOUR VEHICLE
Page 37 of 772
WARNING!(Continued)
•Do not leave the Key Fob in or near the vehicle, or
in a location accessible to children, and do not
leave the ignition of a vehicle equipped with
Keyless Enter-N-Go™ in the ACC or ON/RUN
mode. A child could operate power windows, other
controls, or move the vehicle.
Power Door Locks
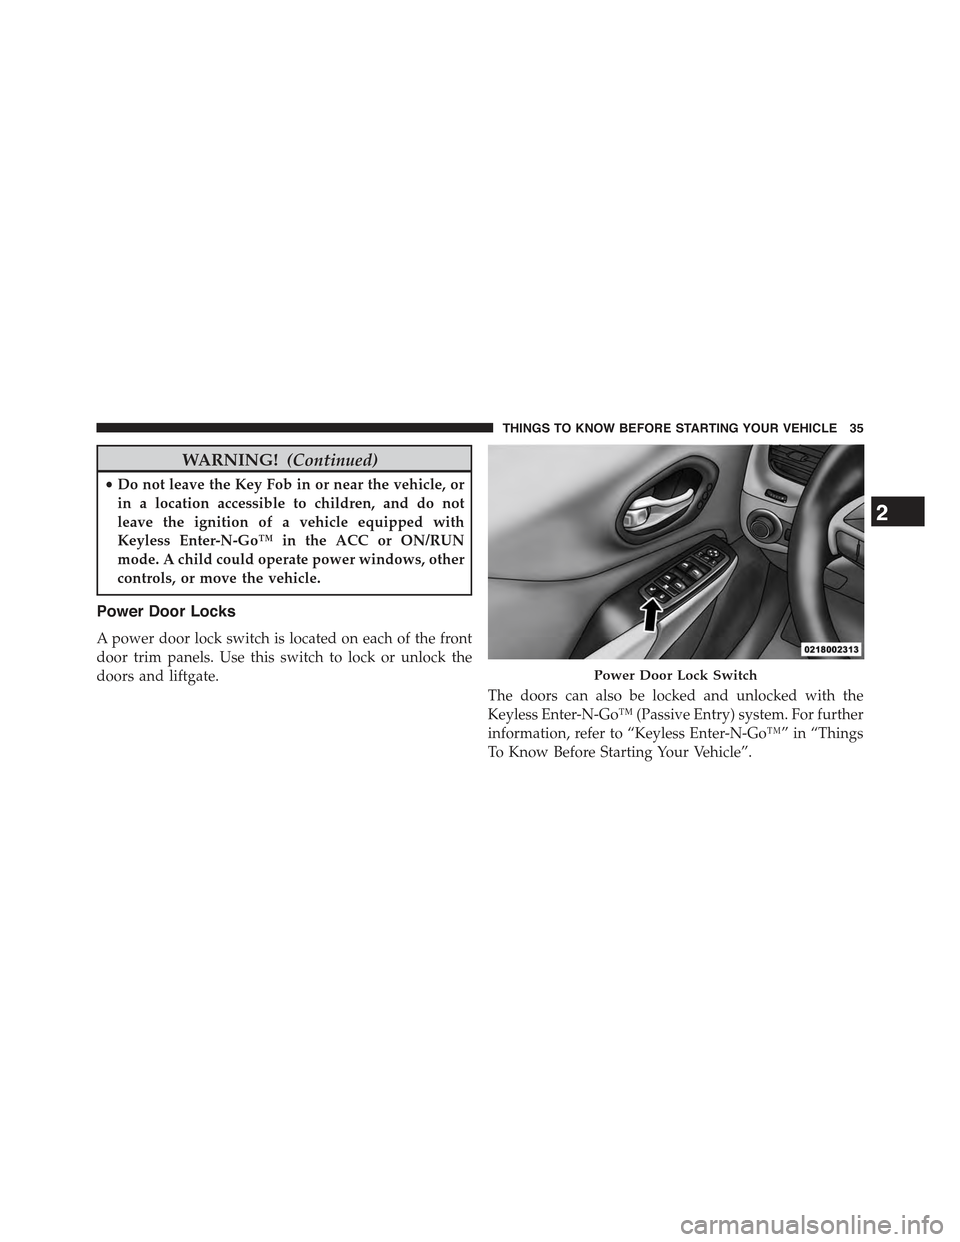
A power door lock switch is located on each of the front
door trim panels. Use this switch to lock or unlock the
doors and liftgate.
The doors can also be locked and unlocked with the
Keyless Enter-N-Go™ (Passive Entry) system. For further
information, refer to “Keyless Enter-N-Go™” in “Things
To Know Before Starting Your Vehicle”.
Power Door Lock Switch
2
THINGS TO KNOW BEFORE STARTING YOUR VEHICLE 35
Page 46 of 772
WINDOWS
Power Windows
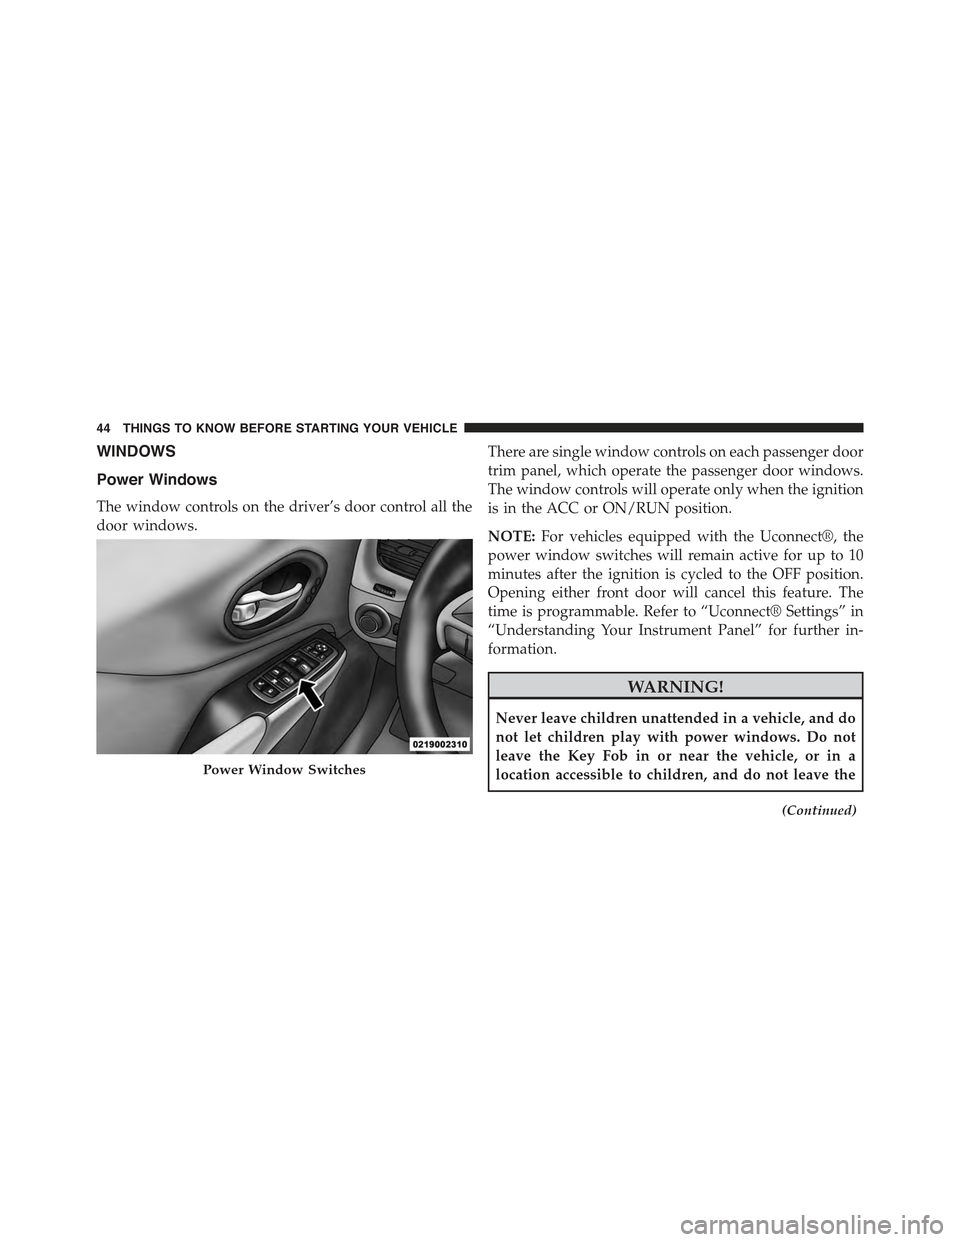
The window controls on the driver’s door control all the
door windows.
There are single window controls on each passenger door
trim panel, which operate the passenger door windows.
The window controls will operate only when the ignition
is in the ACC or ON/RUN position.
NOTE:For vehicles equipped with the Uconnect®, the
power window switches will remain active for up to 10
minutes after the ignition is cycled to the OFF position.
Opening either front door will cancel this feature. The
time is programmable. Refer to “Uconnect® Settings” in
“Understanding Your Instrument Panel” for further in-
formation.
WARNING!
Never leave children unattended in a vehicle, and do
not let children play with power windows. Do not
leave the Key Fob in or near the vehicle, or in a
location accessible to children, and do not leave the
(Continued)
Power Window Switches
44 THINGS TO KNOW BEFORE STARTING YOUR VEHICLE
Page 48 of 772
•Any impact due to rough road conditions may trigger
the auto-reverse function unexpectedly during auto-
closure. If this happens, pull the switch lightly to the
first detent and hold to close the window manually.
WARNING!
There is no anti-pinch protection when the window
is almost closed. Be sure to clear all objects from the
window before closing.
Reset Auto-Up
Should the Auto Up feature stop working, the window
probably needs to be reset. To reset Auto Up:
1. Pull the window switch up to close the window
completely and continue to hold the switch up for an
additional two seconds after the window is closed.
2. Push the window switch down firmly to the second
detent to open the window completely and continue
to hold the switch down for an additional two seconds
after the window is fully open.
Window Lockout Switch
The window lockout switch on the driver’s door trim
panel allows you to disable the window controls on the
rear passenger doors. To disable the window controls,
push and release the window lockout button (setting it in
the DOWN position). To enable the window controls,
push and release the window lockout button again
(setting it in the UP position).
46 THINGS TO KNOW BEFORE STARTING YOUR VEHICLE
Page 50 of 772
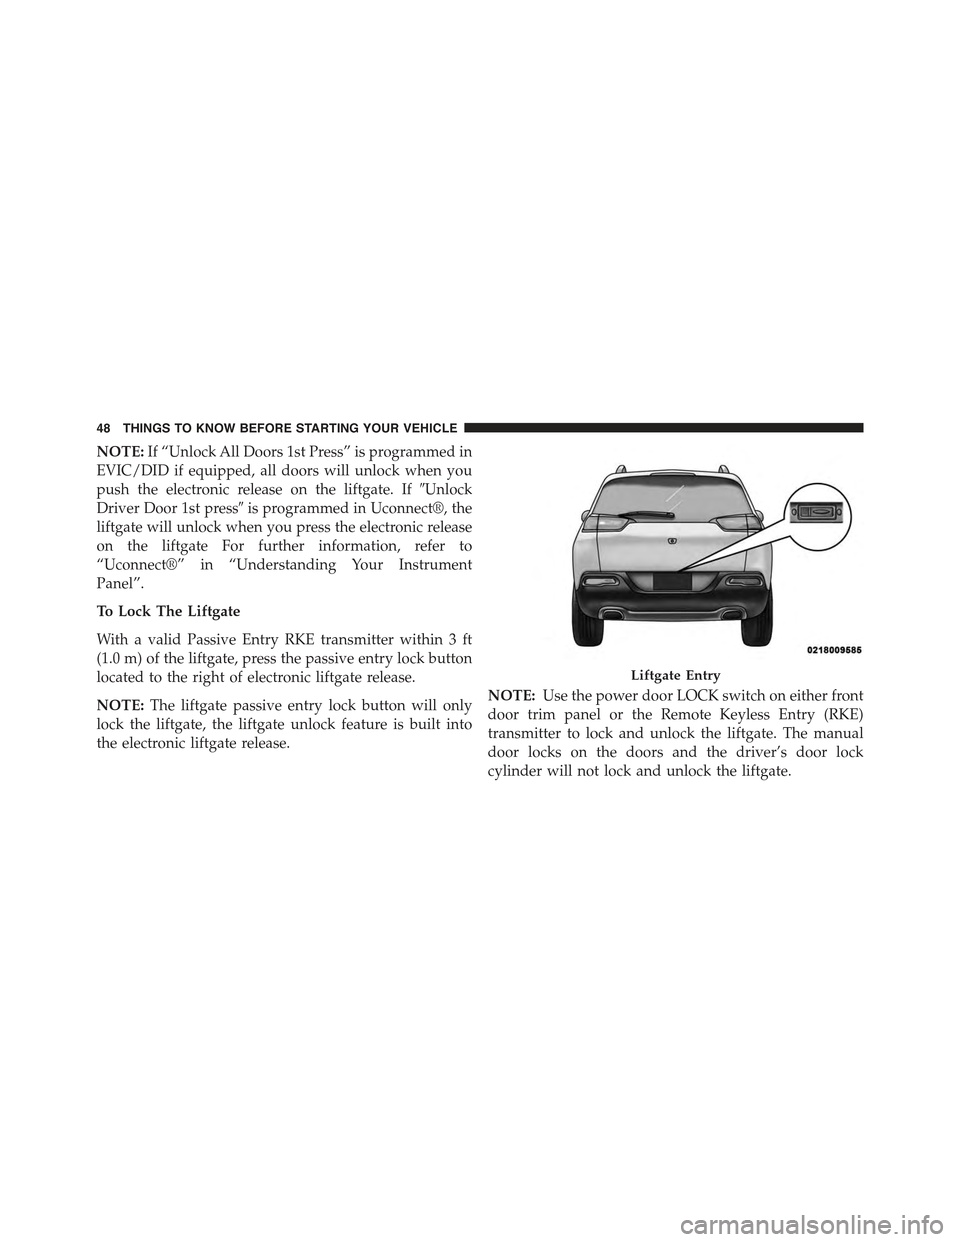
NOTE:If “Unlock All Doors 1st Press” is programmed in
EVIC/DID if equipped, all doors will unlock when you
push the electronic release on the liftgate. If#Unlock
Driver Door 1st press#is programmed in Uconnect®, the
liftgate will unlock when you press the electronic release
on the liftgate For further information, refer to
“Uconnect®” in “Understanding Your Instrument
Panel”.
To Lock The Liftgate
With a valid Passive Entry RKE transmitter within 3 ft
(1.0 m) of the liftgate, press the passive entry lock button
located to the right of electronic liftgate release.
NOTE:The liftgate passive entry lock button will only
lock the liftgate, the liftgate unlock feature is built into
the electronic liftgate release.
NOTE:Use the power door LOCK switch on either front
door trim panel or the Remote Keyless Entry (RKE)
transmitter to lock and unlock the liftgate. The manual
door locks on the doors and the driver’s door lock
cylinder will not lock and unlock the liftgate.
Liftgate Entry
48 THINGS TO KNOW BEFORE STARTING YOUR VEHICLE
Page 51 of 772
WARNING!
Driving with the liftgate open can allow poisonous
exhaust gases into your vehicle. You and your pas-
sengers could be injured by these fumes. Keep the
liftgate closed when you are operating the vehicle.
Power Liftgate — If Equipped
The power liftgate may be opened by pushing
the electronic liftgate release (refer to Keyless
Enter-N-Go™ located in Things To Know Be-
fore Starting) or by pushing the LIFTGATE
button on the Remote Keyless Entry (RKE) transmitter.
Push the LIFTGATE button on the RKE transmitter twice
within five seconds, to open the power liftgate. Once the
liftgate is open, pushing the button twice within five
seconds a second time will close the liftgate.
The power liftgate may also be opened or closed by
pushing the LIFTGATE button located on the left side of
the steering wheel on the instrument panel, or closed by
pushing the LIFTGATE button located on left rear trim
panel, near the liftgate opening. Push the LIFTGATE
button located on left rear trim panel once will close the
liftgate only, this button cannot be used to open the
liftgate.
When the LIFTGATE button on the RKE transmitter is
pushed two times, the turn signals will flash twice to
signal that the liftgate is opening or closing (if Flash
Lamps with Lock is enabled in the Uconnect® settings)
and the liftgate chime will be audible. For further infor-
mation, refer to#Uconnect®#in#Understanding Your
Instrument Panel#.
2
THINGS TO KNOW BEFORE STARTING YOUR VEHICLE 49
Page 52 of 772
NOTE:
•In the event of a power malfunction to the liftgate, an
emergency liftgate latch release can be used to open
the liftgate. The emergency liftgate latch release can be
accessed through a snap-in cover located on the lift-
gate trim panel.
•If liftgate is left open for an extended period of time,
the liftgate may need to be closed manually to reset
power liftgate functionality.
WARNING!
During power operation, personal injury or cargo
damage may occur. Ensure the liftgate travel path is
clear. Make sure the liftgate is closed and latched
before driving away.
NOTE:
•The power liftgate buttons will not operate if the
vehicle is in gear or the vehicle speed is above 0 mph
(0 km/h).
•The power liftgate will not operate in temperatures
below−22°F (−30°C) or temperatures above 150°F
(65°C). Be sure to remove any buildup of snow or ice
from the liftgate before pushing any of the power
liftgate switches.
•If anything obstructs the power liftgate while it is
closing or opening, the liftgate will automatically
reverse to the closed or open position, provided it
meets sufficient resistance.
•There are also pinch sensors attached to the side of the
liftgate. Light pressure anywhere along these strips
will cause the liftgate to return to the open position.
50 THINGS TO KNOW BEFORE STARTING YOUR VEHICLE
Page 53 of 772
•The power liftgate must be in the full open position for
rear liftgate close button on the left rear trim, near the
liftgate opening to operate. If the liftgate is not fully
open, push the Liftgate button on the Key Fob to fully
open the liftgate, and then push it again to close.
•If the electronic liftgate release is pushed while the
power liftgate is closing, the liftgate will reverse to the
full open position.
•If the electronic liftgate release is pushed while the
power liftgate is opening, the liftgate motor will dis-
engage to allow manual operation.
•If the power liftgate encounters multiple obstructions
within the same cycle, the system will automatically
stop and the liftgate must be opened or closed manu-
ally.
•If your liftgate is power closing and you put the
vehicle in gear, the liftgate will continue to power
close. However, vehicle movement may result in a
detection of an obstruction.
WARNING!
•Driving with the liftgate open can allow poisonous
exhaust gases into your vehicle. You and your
passengers could be injured by these fumes. Keep
the liftgate closed when you are operating the
vehicle.
•If you are required to drive with the liftgate open,
make sure that all windows are closed, and the
climate control blower switch is set at high speed.
Do not use the recirculation mode.
2
THINGS TO KNOW BEFORE STARTING YOUR VEHICLE 51
Page 72 of 772
Seat belts are necessary for your protection in all colli-
sions, and also are needed to help keep you in position,
away from an inflating air bag.
When the ORC detects a collision requiring the Ad-
vanced Front Air Bags, it signals the inflator units. A large
quantity of non-toxic gas is generated to inflate the
Advanced Front Air Bags.
The steering wheel hub trim cover and the upper right
side of the instrument panel separate and fold out of the
way as the air bags inflate to their full size. The Advanced
Front Air Bags fully inflate in less time than it takes to
blink your eyes. The air bags then quickly deflate while
helping to restrain the driver and front passenger.
Occupant Classification System (OCS) — Front
Passenger Seat
The OCS is part of a Federally regulated safety system for
this vehicle. It is designed to provide Passenger Ad-
vanced Front Air Bag output appropriate to the occu-
pant’s seated weight, as determined by the OCS.
The Occupant Classification System (OCS) consists of the
following:
•Occupant Restraint Controller (ORC)
•Occupant Classification Module (OCM) and Sensor
located in the front passenger seat
•Air Bag Warning Light
70 THINGS TO KNOW BEFORE STARTING YOUR VEHICLE
Page 80 of 772
WARNING!(Continued)
•Placing an object on the floor under the front
passenger seat may prevent the OCS from working
properly, which may result in serious injury or
death in a collision. Do not place any objects on the
floor under the front passenger seat.
The Air Bag Warning Lightwill turn on whenever
the OCS is unable to classify the front passenger seat
status. A malfunction in the OCS may affect the
operation of the air bag system.
If the Air Bag Warning Lightdoes not come on, or
stays on after you start the vehicle, or it comes on as
you drive, take the vehicle to an authorized dealer for
service immediately.
The passenger seat assembly contains critical OCS com-
ponents that may affect the Passenger Advanced Front
Air Bag inflation. In order for the OCS to properly
classify the seated weight of a front seat passenger, the
OCS components must function as designed.
Do not make any modifications to the front passenger
seat components, assembly, or to the seat cover. If the
seat, trim cover, or cushion needs service for any reason,
take the vehicle to your authorized dealer. Only Chrysler
Group LLC approved seat accessories may be used.
The following requirements must be strictly followed:
•Do not modify the front passenger seat assembly or
components in any way.
•Do not use prior or future model year seat covers or
cushions not designated by Chrysler Group LLC for
the specific model being repaired. Always use the
correct seat cover and cushion specified for the vehicle.
•Do not replace the seat cover or cushion with an
aftermarket seat cover or cushion.
78 THINGS TO KNOW BEFORE STARTING YOUR VEHICLE