JEEP CHEROKEE 2015 KL / 5.G User Guide
Manufacturer: JEEP, Model Year: 2015, Model line: CHEROKEE, Model: JEEP CHEROKEE 2015 KL / 5.GPages: 244, PDF Size: 30.6 MB
Page 131 of 244
Voice Texting (8.4A/8.4AN)
You must be registered with Uconnect®Access and have a compatible MAP –
enabled smartphone to use your voice to send a personalized text message. (Not
compatible with iPhone®.)
1. To send a message, push the Phone button. After the beep, say:“Send
messageto John Smith.”
2. Listen to the prompt. After the beep, dictate the message you would like to send.
Wait for Uconnect®to process your message.
3. The Uconnect®system will repeat your message and provide a variety of options
to add to, delete, send or hear the message again. After the beep, tell Uconnect®
what you’d like to do. For instance, if you’re happy with your message, after the
beep, say“Send.”
TIP:
• Messages are limited to 140 characters.
• The Messaging button on the touchscreen must be illuminated to use the feature.
ELECTRONICS
129
Page 132 of 244
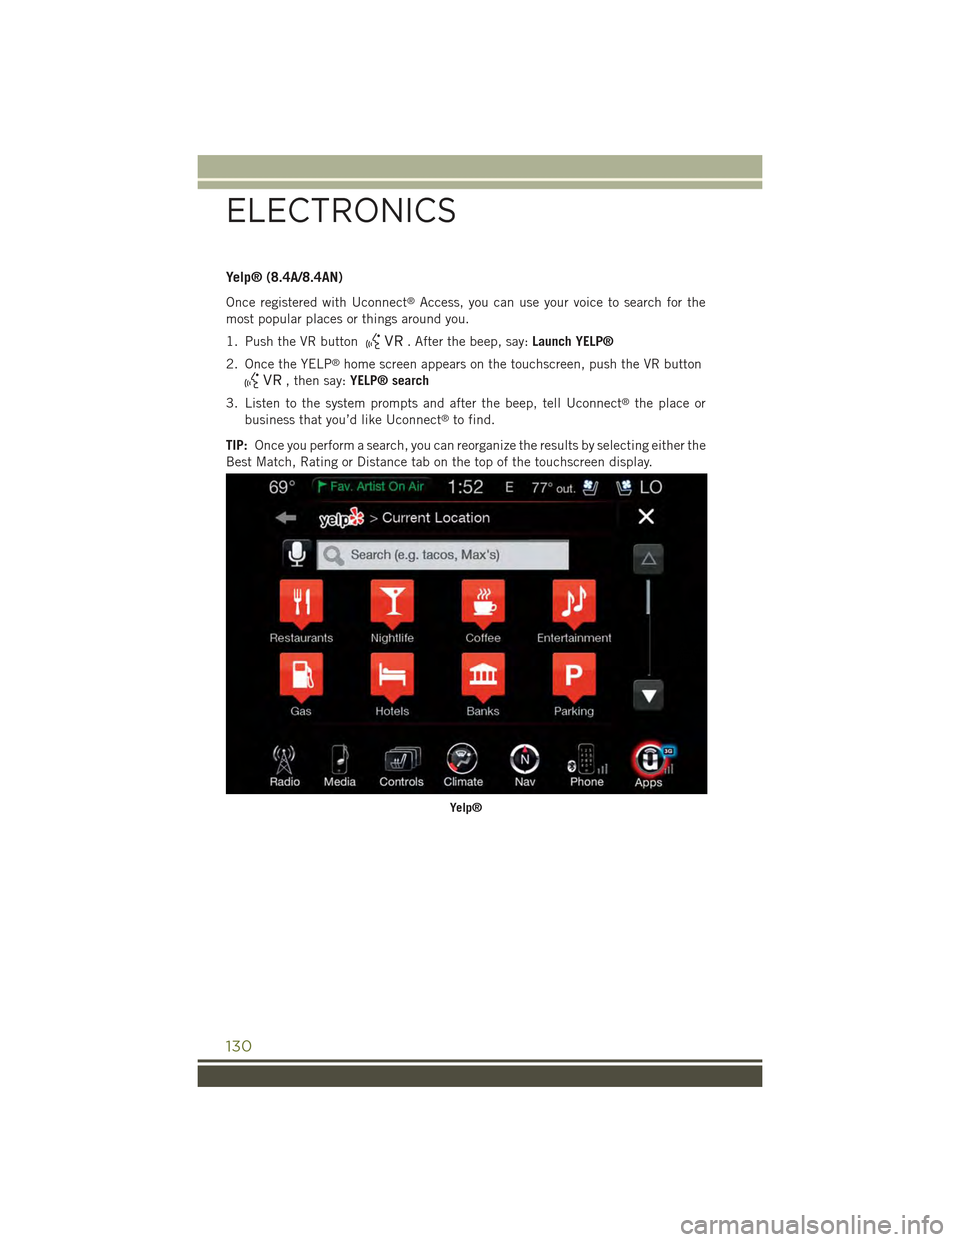
Yelp® (8.4A/8.4AN)
Once registered with Uconnect®Access, you can use your voice to search for the
most popular places or things around you.
1. Push the VR button. After the beep, say:Launch YELP®
2. Once the YELP®home screen appears on the touchscreen, push the VR button
, then say:YELP® search
3. Listen to the system prompts and after the beep, tell Uconnect®the place or
business that you’d like Uconnect®to find.
TIP:Once you perform a search, you can reorganize the results by selecting either the
Best Match, Rating or Distance tab on the top of the touchscreen display.
Yelp®
ELECTRONICS
130
Page 133 of 244
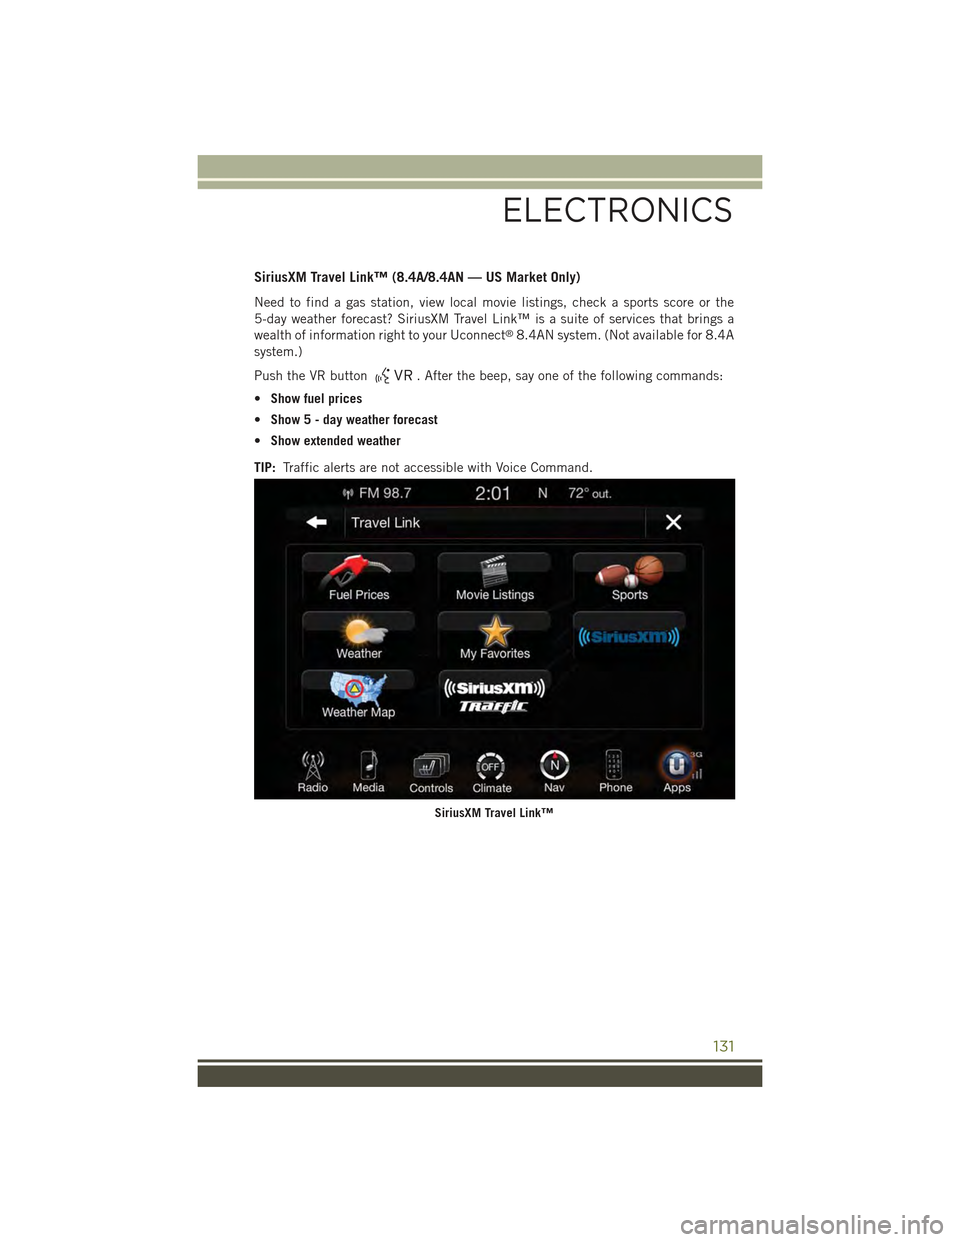
SiriusXM Travel Link™ (8.4A/8.4AN — US Market Only)
Need to find a gas station, view local movie listings, check a sports score or the
5-day weather forecast? SiriusXM Travel Link™ is a suite of services that brings a
wealth of information right to your Uconnect®8.4AN system. (Not available for 8.4A
system.)
Push the VR button. After the beep, say one of the following commands:
•Show fuel prices
•Show 5 - day weather forecast
•Show extended weather
TIP:Traffic alerts are not accessible with Voice Command.
SiriusXM Travel Link™
ELECTRONICS
131
Page 134 of 244
Additional Information
© 2014 Chrysler Group LLC. All rights reserved. Mopar, Mopar Owner Connect and
Uconnect are registered trademarks of Chrysler Group LLC. Android is a trademark of
Google Inc. SiriusXM and all related marks and logos are trademarks of SiriusXM
Radio Inc. Yelp, Yelp logo, Yelp burst and related marks are registered trademarks of
Yelp.
DriveUconnect.com
DriveUconnect.ca
Uconnect®System Support:
• U.S residents call: 1-877-855-8400
•Canadian residents call: 1-800-465-2001 (English) or 1-800-387-9983 (French)
Mon. – Fri., 7:00 am – 12:00 am, ET
Sat., 8:00 am – 10:00 pm, ET
Sun., 9:00 am – 5:00 pm, ET
Uconnect®Access Services Support 1-855-792-4241. Please have your Uconnect®
Security PIN ready when you call.
ELECTRONICS
132
Page 135 of 244
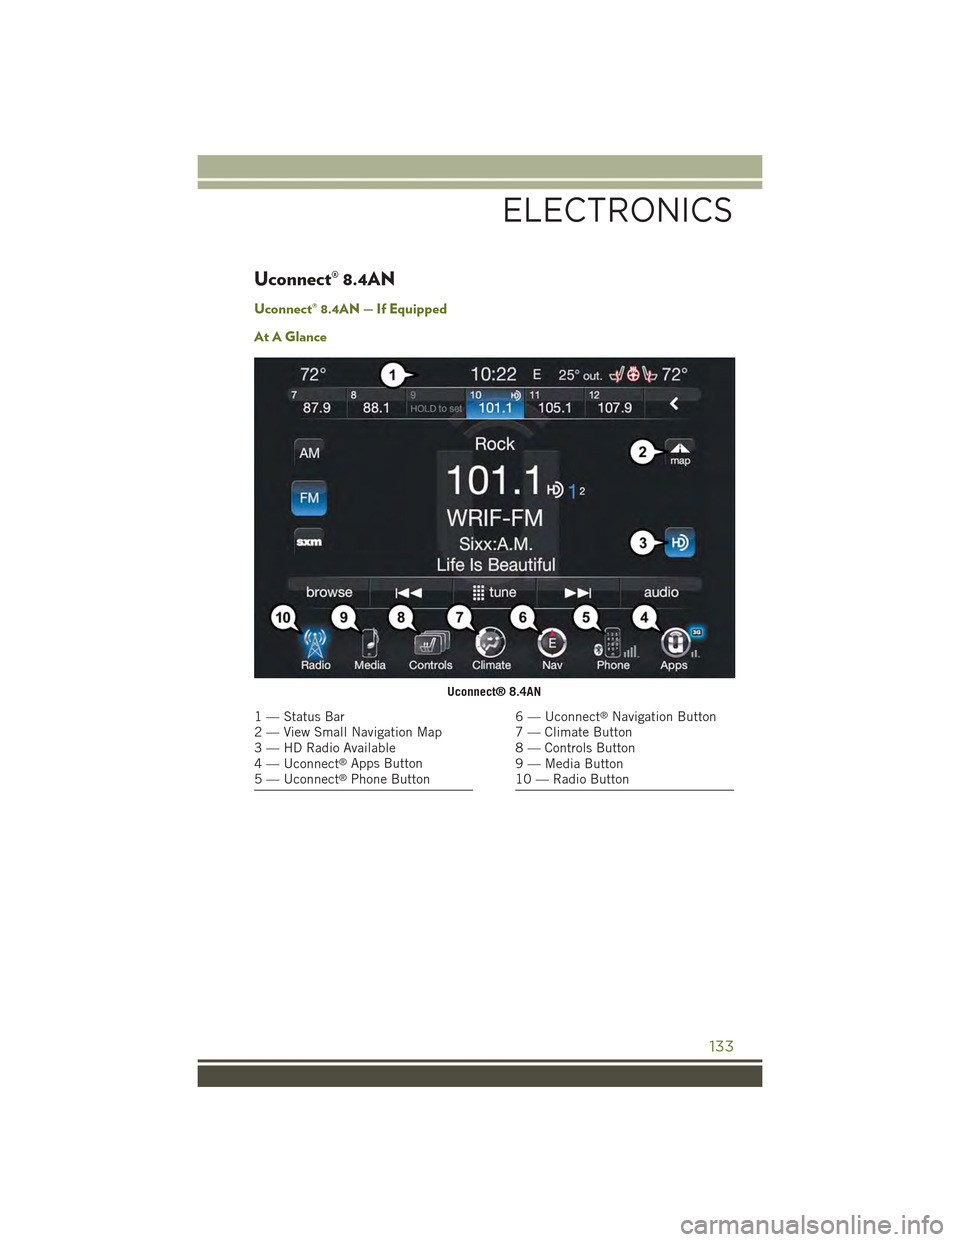
Uconnect® 8.4AN
Uconnect® 8.4AN — If Equipped
At A Glance
Uconnect® 8.4AN
1 — Status Bar2 — View Small Navigation Map3 — HD Radio Available4 — Uconnect®Apps Button5 — Uconnect®Phone Button
6 — Uconnect®Navigation Button7 — Climate Button8 — Controls Button9 — Media Button10 — Radio Button
ELECTRONICS
133
Page 136 of 244
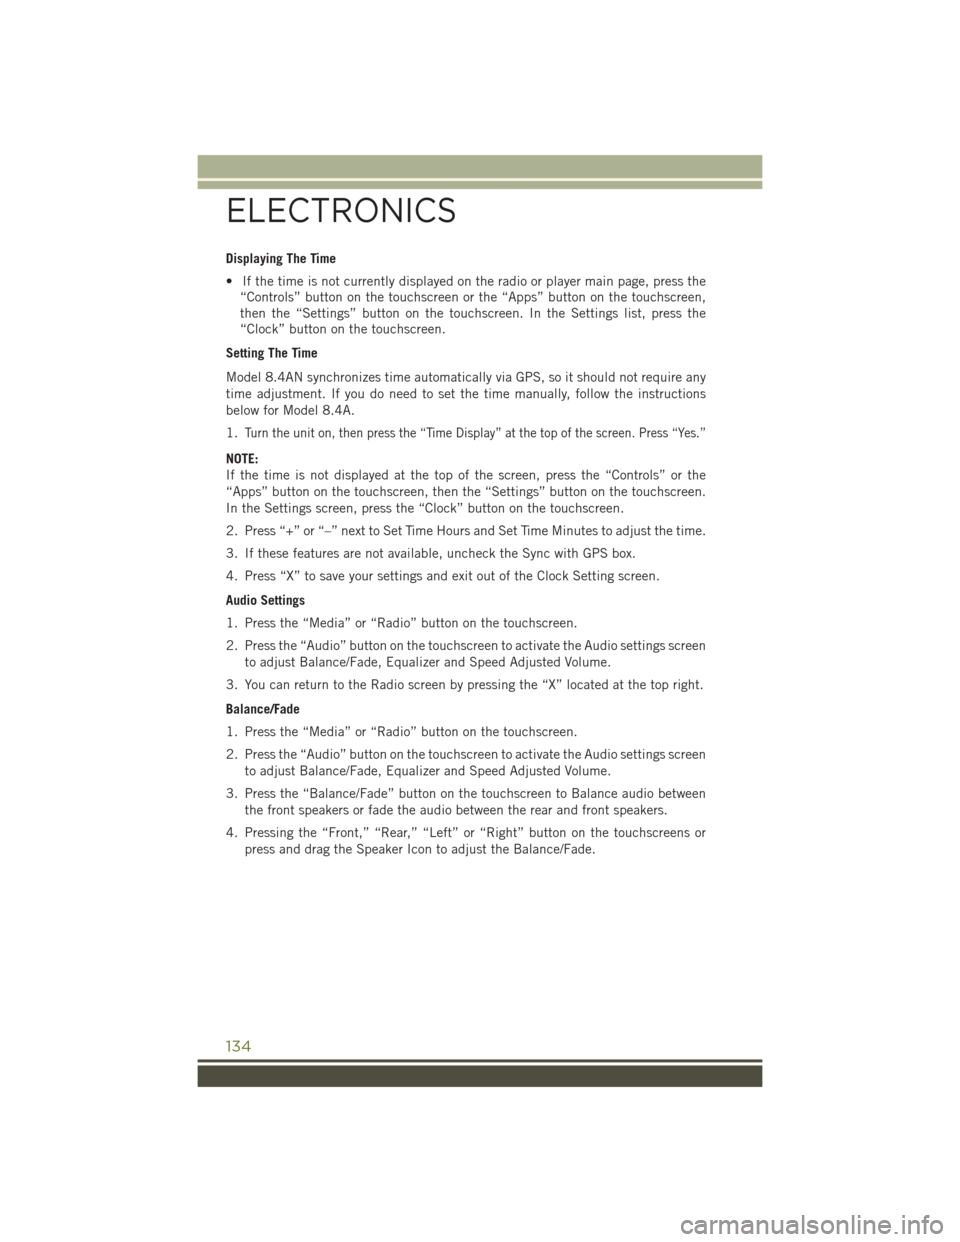
Displaying The Time
• If the time is not currently displayed on the radio or player main page, press the
“Controls” button on the touchscreen or the “Apps” button on the touchscreen,
then the “Settings” button on the touchscreen. In the Settings list, press the
“Clock” button on the touchscreen.
Setting The Time
Model 8.4AN synchronizes time automatically via GPS, so it should not require any
time adjustment. If you do need to set the time manually, follow the instructions
below for Model 8.4A.
1.Turn the unit on, then press the “Time Display” at the top of the screen. Press “Yes.”
NOTE:
If the time is not displayed at the top of the screen, press the “Controls” or the
“Apps” button on the touchscreen, then the “Settings” button on the touchscreen.
In the Settings screen, press the “Clock” button on the touchscreen.
2. Press “+” or “–” next to Set Time Hours and Set Time Minutes to adjust the time.
3. If these features are not available, uncheck the Sync with GPS box.
4. Press “X” to save your settings and exit out of the Clock Setting screen.
Audio Settings
1. Press the “Media” or “Radio” button on the touchscreen.
2. Press the “Audio” button on the touchscreen to activate the Audio settings screen
to adjust Balance/Fade, Equalizer and Speed Adjusted Volume.
3. You can return to the Radio screen by pressing the “X” located at the top right.
Balance/Fade
1. Press the “Media” or “Radio” button on the touchscreen.
2. Press the “Audio” button on the touchscreen to activate the Audio settings screen
to adjust Balance/Fade, Equalizer and Speed Adjusted Volume.
3. Press the “Balance/Fade” button on the touchscreen to Balance audio between
the front speakers or fade the audio between the rear and front speakers.
4. Pressing the “Front,” “Rear,” “Left” or “Right” button on the touchscreens or
press and drag the Speaker Icon to adjust the Balance/Fade.
ELECTRONICS
134
Page 137 of 244
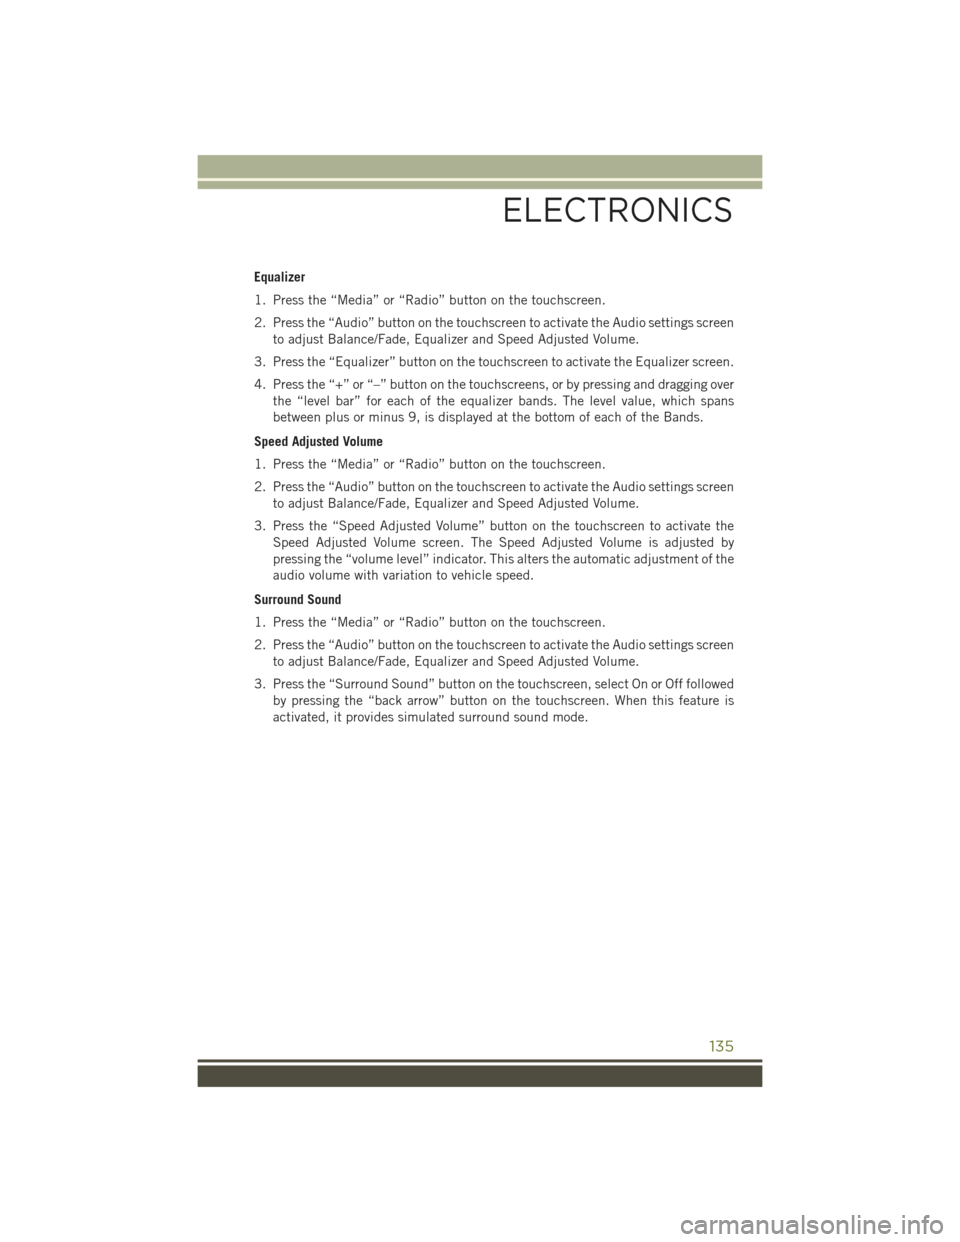
Equalizer
1. Press the “Media” or “Radio” button on the touchscreen.
2. Press the “Audio” button on the touchscreen to activate the Audio settings screen
to adjust Balance/Fade, Equalizer and Speed Adjusted Volume.
3. Press the “Equalizer” button on the touchscreen to activate the Equalizer screen.
4. Press the “+” or “–” button on the touchscreens, or by pressing and dragging over
the “level bar” for each of the equalizer bands. The level value, which spans
between plus or minus 9, is displayed at the bottom of each of the Bands.
Speed Adjusted Volume
1. Press the “Media” or “Radio” button on the touchscreen.
2. Press the “Audio” button on the touchscreen to activate the Audio settings screen
to adjust Balance/Fade, Equalizer and Speed Adjusted Volume.
3. Press the “Speed Adjusted Volume” button on the touchscreen to activate the
Speed Adjusted Volume screen. The Speed Adjusted Volume is adjusted by
pressing the “volume level” indicator. This alters the automatic adjustment of the
audio volume with variation to vehicle speed.
Surround Sound
1. Press the “Media” or “Radio” button on the touchscreen.
2. Press the “Audio” button on the touchscreen to activate the Audio settings screen
to adjust Balance/Fade, Equalizer and Speed Adjusted Volume.
3. Press the “Surround Sound” button on the touchscreen, select On or Off followed
by pressing the “back arrow” button on the touchscreen. When this feature is
activated, it provides simulated surround sound mode.
ELECTRONICS
135
Page 138 of 244
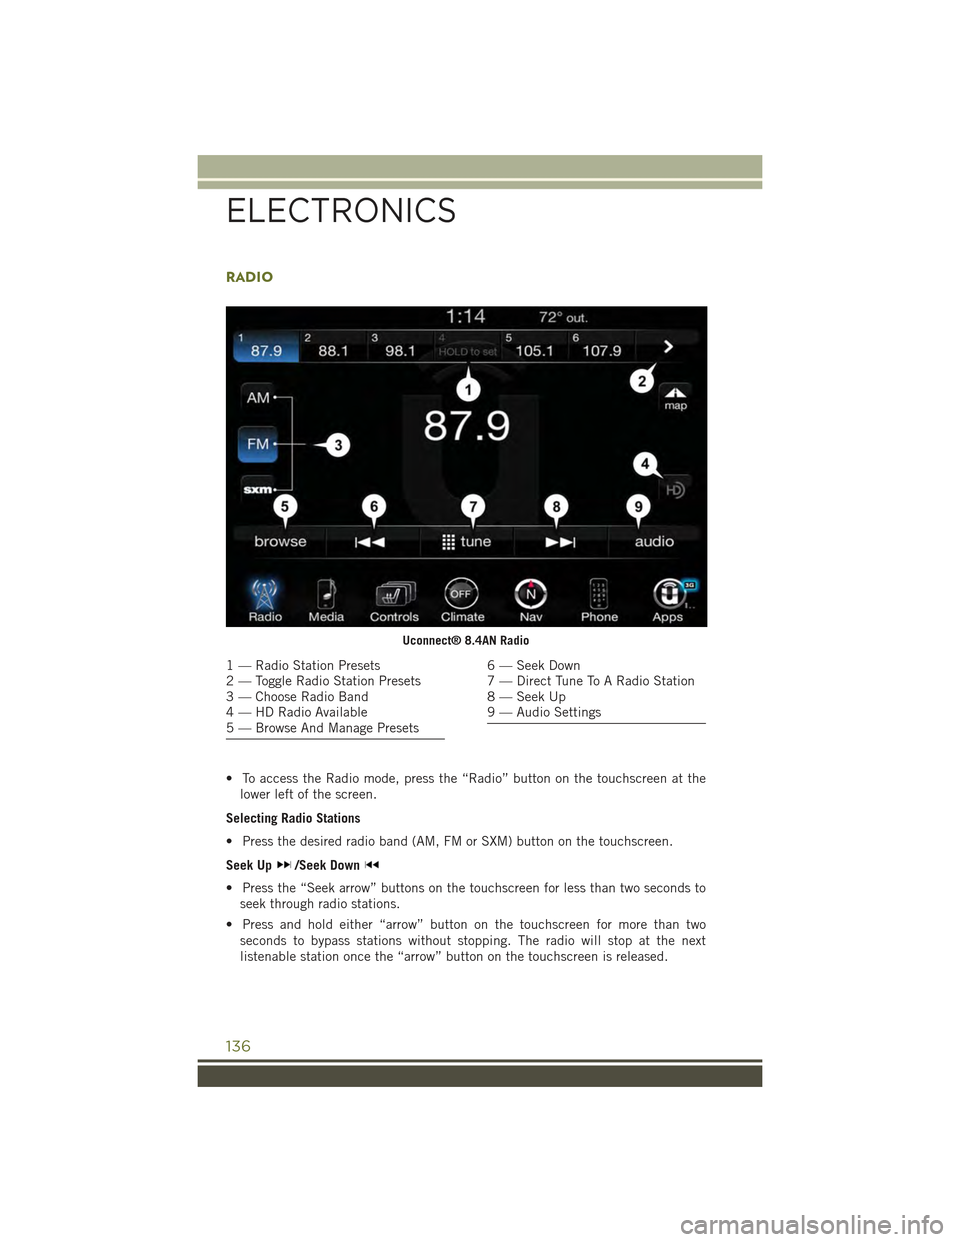
RADIO
• To access the Radio mode, press the “Radio” button on the touchscreen at the
lower left of the screen.
Selecting Radio Stations
• Press the desired radio band (AM, FM or SXM) button on the touchscreen.
Seek Up/Seek Down
• Press the “Seek arrow” buttons on the touchscreen for less than two seconds to
seek through radio stations.
• Press and hold either “arrow” button on the touchscreen for more than two
seconds to bypass stations without stopping. The radio will stop at the next
listenable station once the “arrow” button on the touchscreen is released.
Uconnect® 8.4AN Radio
1 — Radio Station Presets2 — Toggle Radio Station Presets3 — Choose Radio Band4 — HD Radio Available5 — Browse And Manage Presets
6 — Seek Down7 — Direct Tune To A Radio Station8 — Seek Up9 — Audio Settings
ELECTRONICS
136
Page 139 of 244
Direct Tune
• Tune directly to a radio station by pressing the “Tune” button on the screen, and
entering the desired station number.
Store Radio Presets
Your radio can store 36 total preset stations, 12 presets per band (AM, FM and SXM).
They are shown at the top of your radio screen.
• To see the 12 preset stations per band, press the “arrow” button on the
touchscreen at the top right of the screen to toggle between the two sets of six
presets.
• To set a station into memory press and hold the desired numbered button on the
touchscreen for more than two seconds or until you hear a confirmation beep.
HD Radio
HD Radio technology (available on Uconnect®8.4AN) allows broadcasters to
transmit a high-quality digital signal.
With an HD radio receiver, the listener is provided with a clear sound that enhances
the listening experience. HD radio can also transmit data such as song title or artist.
SiriusXM Premier Over 160 Channels
Get every channel available on your satellite radio, and enjoy all you want, all in one
place. Hear commercial-free music plus sports, news, talk and entertainment. Get all
the premium programming, including Howard Stern, every NFL game, Oprah Radio®,
every MLB®and NHL®game, every NASCAR®race and more. And get 20+ Xtra
channels, including SiriusXM Latino, a selection of channels dedicated to Spanish
language programming.
• To access SiriusXM Satellite Radio, press the “SXM” button on the touchscreen on
the main Radio screen.
The following describes features that are available when in SiriusXM Satellite Radio
mode.
Seek Up/Seek Down
• Press the “Seek arrow” button on the touchscreen for less than two seconds to
seek through channels in SXM mode.
• Press and hold either “arrow” button on the touchscreen for more than two
seconds to bypass channels without stopping. The radio will stop at the next
listenable channel once the arrow button on the touchscreen is released.
ELECTRONICS
137
Page 140 of 244
Direct Tune
• Tune directly to a SXM channel by pressing the “Tune” button on the touchscreen
on the screen, and entering the desired station number.
Jump
Automatically tells you when Traffic & Weather for a favorite city is available, and
gives you the option to switch to that channel.
• Press “Jump” to activate the feature. After listening to Traffic and Weather, press
“Jump” again to return to the previous channel.
Fav
Activates the favorites menu. You can add up to 50 favorite artists or songs.
• Just press Add Fav Artist or Add Fav Song while the song is playing. You will then
be alerted any time one of these songs, or works by these artists, is playing on other
SiriusXM channels.
SiriusXM Parental Controls
You can skip or hide certain channels from view if you do not want access to them.
• Press the “More” button on the touchscreen, then the “Settings” button on the
touchscreen, next press the “Sirius Setup” button on the touchscreen, then select
“Channel Skip”. Press the box, check-mark, next to the channel you want skipped.
They will not show up in normal usage.
SiriusXM also offers the option to permanently block selected channels. Call
(1-888-601-6297 for U.S. customers, 1-877-438-9677 for Canadian customers)
and request the Family-Friendly Package.
Browse
Lets you browse the SiriusXM channel listing or Genre listing. Favorites, Game Zone,
Weather and Jump settings also provide a way to browse the SiriusXM channel list.
BrowseSub-MenuSub-Menu Description
AllShows the channel listing.
Genre Provides a list of all genres, and lets you jump to a channel within theselected genre.
Presets Lets you scroll the list of Preset satellite channels. Press the channel, orpress Enter on the Tune knob, to go to that channel. Press the trash canicon to delete a preset. Your presets are also shown at the top of the mainSatellite Radio screen.
Favorites Lets you manage artists and songs in the Favorites list and configure AlertSettings to let you know when favorite songs or artists are playing on otherchannels. Also, view a list of channels airing any of your Favorites.
ELECTRONICS
138