ECU JEEP CHEROKEE 2015 KL / 5.G Owner's Manual
[x] Cancel search | Manufacturer: JEEP, Model Year: 2015, Model line: CHEROKEE, Model: JEEP CHEROKEE 2015 KL / 5.GPages: 244, PDF Size: 30.6 MB
Page 168 of 244
CARGO AREA FEATURES
• The cargo load floor system has a load capacity of 400 lbs (181 kg). The load floor
has a built-in storage bin that can hold a variety of items. The underside of the
storage bin cover also contains a plastic-lined tray. The cover can be installed with
either side facing up for added utility.
Cargo Tie-Down Hooks and Loops
• The tie-downs located on the cargo area floor should be used to secure loads safely
when the vehicle is moving.
WARNING!
• Cargo tie-downs are not safe anchors for a child seat tether strap. In a sudden
stop or a collision, a tie-down could pull loose and allow the child seat to come
loose. A child could be badly injured. Use only the anchors provided for child
seat tethers.
• To help protect against personal injury, passengers should not be seated in the
rear cargo area. The rear cargo space is intended for load carrying purposes
only, not for passengers, who should sit in seats and use seat belts.
UTILITY
166
Page 170 of 244
RECREATIONAL TOWING (BEHIND MOTORHOME,
ETC.)
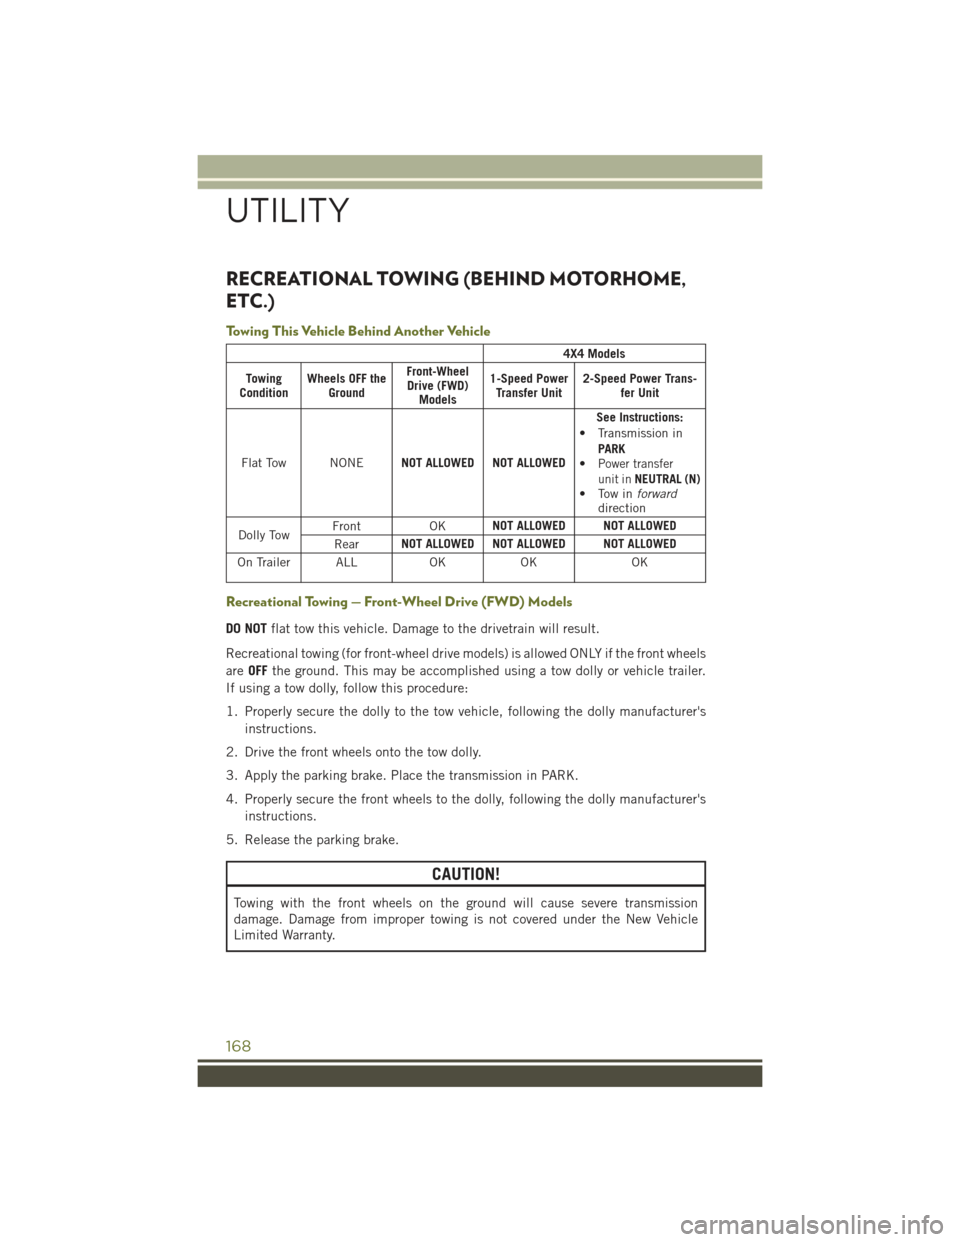
Towing This Vehicle Behind Another Vehicle
4X4 Models
TowingConditionWheels OFF theGround
Front-WheelDrive (FWD)Models
1-Speed PowerTransfer Unit2-Speed Power Trans-fer Unit
Flat Tow NONENOT ALLOWED NOT ALLOWED
See Instructions:• Transmission in
PARK•Power transferunit inNEUTRAL (N)• Tow inforwarddirection
Dolly TowFrontOKNOT ALLOWED NOT ALLOWED
RearNOT ALLOWED NOT ALLOWED NOT ALLOWED
On Trailer ALLOKOKOK
Recreational Towing — Front-Wheel Drive (FWD) Models
DO NOTflat tow this vehicle. Damage to the drivetrain will result.
Recreational towing (for front-wheel drive models) is allowed ONLY if the front wheels
areOFFthe ground. This may be accomplished using a tow dolly or vehicle trailer.
If using a tow dolly, follow this procedure:
1. Properly secure the dolly to the tow vehicle, following the dolly manufacturer's
instructions.
2. Drive the front wheels onto the tow dolly.
3. Apply the parking brake. Place the transmission in PARK.
4. Properly secure the front wheels to the dolly, following the dolly manufacturer's
instructions.
5. Release the parking brake.
CAUTION!
Towing with the front wheels on the ground will cause severe transmission
damage. Damage from improper towing is not covered under the New Vehicle
Limited Warranty.
UTILITY
168
Page 182 of 244
- Vehicle Security Light
This light will flash rapidly for approximately 15 seconds when the vehicle security
alarm is arming. The light will flash at a slower speed continuously after the alarm is
set. The security light will also come on for about three seconds when the ignition is
first turned on.
-FuelCap/LooseGasCapEVICMessage
• If a “gas cap” message (shown as gASCAP) appears, tighten the gas cap until a
“clicking” sound is heard.
• If the message continues to appear for more than three days after tightening the
gas cap, see your authorized service center.
- Electronic Speed Control ON Indicator
This indicator will illuminate when the electronic speed control has been activated to
the “ON” position.
- Electronic Speed Control SET Indicator
This indicator will illuminate when the cruising speed has been set.
-AdaptiveCruseControl(ACC)ONIndicator
• If your vehicle is equipped with adaptive cruise control the controls operate
exactly the same as the normal (fixed speed) cruise control with one difference.
You can set a specified distance you would like to maintain between you and the
vehicle in front of you.
• If the ACC sensor detects a vehicle ahead, ACC will apply limited braking or
acceleration automatically to maintain a preset following distance, while matching
the speed of the vehicle ahead.
• If the sensor does not detect a vehicle ahead of you, ACC will maintain a fixed set
speed.
• For further information on Adaptive Cruse Control (ACC) ON operation and proper
use, refer to “Speed Control ” in “Operating Your Vehicle”.
NOTE:
Adaptive Cruise Control (ACC) increases the driving convenience provided by cruise
control while traveling on highways and major roadways. However, it is not a safety
system and not designed to prevent collisions.
WHAT TO DO IN EMERGENCIES
180
Page 194 of 244
9. Position the spare wheel/tire on the vehicle and install lug bolts with the
cone-shaped end toward the wheel. Lightly tighten the bolts.
10. Lower the vehicle by turning the jack screw to the left, and remove the jack.
11. Finish tightening the lug bolts. Push down on the wrench while at the end of the
handle for increased leverage. Tighten the lug bolts in a star pattern until each
nut has been tightened twice. The correct wheel bolt tightness is 100 ft lb
(135 N·m). If in doubt about the correct tightness, have them checked with a
torque wrench by your authorized dealer or at a service station.
12. Lower the jack to it's fully closed position.
13. Secure the tire, jack, and tools in their proper locations.
14. Remove chocks from wheels.
Road Tire Installation
1. Mount the road tire on the axle.
2. Install the remaining lug bolts with the threaded end of the bolt toward the wheel.
Lightly tighten the lug bolts.
3. Lower the vehicle to the ground by turning the jack handle counterclockwise.
4. Finish tightening the lug bolts. Push down on the wrench while at the end of the
handle for increased leverage. Tighten the lug bolts in a star pattern until each
bolt has been tightened twice. The correct tightness of each lug bolt is 100 ft/lbs
(135 N·m). If in doubt about the correct tightness, have them checked with a
torque wrench by your authorized dealer or service station.
5. After 25 miles (40 km) check the lug bolt torque with a torque wrench to ensure
that all lug bolts are properly seated against the wheel.
CAUTION!
Do not attempt to raise the vehicle by jacking on locations other than those
indicated in the Jacking Instructions for this vehicle.
WHAT TO DO IN EMERGENCIES
192
Page 195 of 244
WARNING!
• Being under a jacked-up vehicle is dangerous. The vehicle could slip off the
jack and fall on you. You could be crushed. Never put any part of your body
under a vehicle that is on a jack. If you need to get under a raised vehicle, take
it to a service center where it can be raised on a lift.
• Never start or run the engine while the vehicle is on a jack.
• The jack is designed to be used as a tool for changing tires only. The jack
should not be used to lift the vehicle for service purposes. The vehicle should
be jacked on a firm level surface only. Avoid ice or slippery areas.
• Do not attempt to change a tire on the side of the vehicle close to moving
traffic, pull far enough off the road to avoid the danger of being hit when
operating the jack or changing the wheel.
• Carefully follow these tire changing warnings to help prevent personal injury or
damage to your vehicle:
• Always park on a firm, level surface as far from the edge of the roadway
as possible before raising the vehicle.
• Turn on the Hazard Warning flasher.
• Chock the wheel diagonally opposite the wheel to be raised.
• Set the parking brake firmly and set an automatic transmission in PARK.
• Do not let anyone sit in the vehicle when it is on a jack.
• Do not get under the vehicle when it is on a jack.
• Only use the jack in the positions indicated and for lifting this vehicle during
a tire change.
• If working on or near a roadway, be extremely careful of motor traffic.
• Assure that spare tires, flat or inflated, are securely stowed, spares must be
stowed in the rear cargo area with the wing nut attached.
• Raising the vehicle higher than necessary can make the vehicle less stable. It
could slip off the jack and hurt someone near it. Raise the vehicle only enough
to remove the tire.
• A loose tire or jack thrown forward in a collision or hard stop could injure the
occupants in the vehicle. Have the deflated (flat) tire repaired or replaced
immediately.
• To avoid the risk of forcing the vehicle off the jack, do not tighten the lug bolts
fully until the vehicle is lowered to the ground. Failure to follow this warning
may result in personal injury.
WHAT TO DO IN EMERGENCIES
193
Page 200 of 244
RECOVERY STRAP
• Your vehicle may be included with a recovery strap. Recovery straps do not act like
traditional tow straps, chains, or winch cables.
Using Recovery Strap
1. Review all warnings and instructions first.
2. Position the recovery vehicle.
3. Connect the recovery strap.
4. Add a recovery damper or blanket.
5. Clear the danger zone.
6. Safely and slowly start pulling.
7. Disconnect the recovery strap after both vehicles are secure and parked.
WARNING!
Recovery straps should only be used in emergencies to rescue stranded vehicles. Only
use Recovery straps on vehicles that fit within the recommended GVW of your
recovery strap. Only attach recovery straps to OE recommended anchor points or
emergency towing anchor points. Never attach to tow ball or vehicle tie down point,
these are not designed for this purpose. Never attach to vehicle steering, drive train,
or any other suspension components. NEVER pull a strap over sharp edges or abrasive
surfaces that can damage the recovery strap. NEVER use a damaged strap, it has
reduced strength. DO NOT attempt to repair straps. ONLY persons involved in the
recovery should be in either vehicle. No passengers. Anyone inside the vehicles can
be struck by strap recoil, causing serious injury. MOVE bystanders at least 40 feet
from the recovery area when using the recovery strap.
SHIFT LEVER OVERRIDE
• If a malfunction occurs and the shift lever cannot be moved out of the PARK
position, you can use the following procedure to temporarily move the shift lever:
• Turn the engine OFF.
• Apply the parking brake.
• Using a screwdriver or similar tool, carefully separate the shifter bezel and boot
assembly from the center console bezel.
• Press and maintain firm pressure on the brake pedal.
• Insert a small screwdriver or similar tool down into the shift lever override
access hole (at the right front corner of the shift lever assembly), and push and
hold the override release lever down.
• Move the shift lever to the NEUTRAL position.
• The vehicle may then be started in NEUTRAL.
• Reinstall the shift lever boot.
WHAT TO DO IN EMERGENCIES
198
Page 227 of 244
REPORTING SAFETY DEFECTS IN THE
UNITED STATES
If you believe that your vehicle has a defect that could cause a collision or cause
injury or death, you should immediately inform the National Highway Traffic Safety
Administration (NHTSA) in addition to notifying the manufacturer.
If NHTSA receives similar complaints, it may open an investigation, and if it finds
that a safety defect exists in a group of vehicles, it may order a recall and remedy
campaign. However, NHTSA cannot become involved in individual problems be-
tween you, your authorized dealer and the manufacturer.
To contact NHTSA, you may either call the Auto Safety Hotline toll free at
1–888–327–4236 (TTY: 1–800–424–9153), or go to http://www.safercar.gov; or
write to: Administrator, NHTSA, 1200 New Jersey Avenue, SE., West Building,
Washington, D.C. 20590. You can also obtain other information about motor vehicle
safety from http://www.safercar.gov.
In Canada
If you believe that your vehicle has a safety defect, you should contact the Customer
Service Department immediately. Canadian customers who wish to report a safety
defect to the Canadian government should contact Transport Canada, Motor Vehicle
Defect Investigations and Recalls at 1-800-333-0510 or go to http://www.tc.gc.ca/
roadsafety/.
French Canadian customers who wish to report a safety defect to the Canadian
government should contact Transport Canada, Motor Vehicle Defect Investigations
and Recalls at 1-800-333-0510 or go to http://www.tc.gc.ca/securiteroutiere/ .
CUSTOMER ASSISTANCE
225
Page 228 of 244
AUTHENTIC ACCESSORIES BY MOPAR®
•The following highlights just some of the many Authentic Jeep Accessories by
MOPAR®featuring a fit, finish, and functionality specifically for your Jeep Cherokee.
•In choosing Authentic Accessories you gain far more than expressive style, premium
protection, or extreme entertainment, you also benefit from enhancing your vehicle
with accessories that have been thoroughly tested and factory-approved.
•For the full line of Authentic Jeep Accessories by Mopar®, visit your local dealership
or online atmopar.com for U.S. residents and mopar.ca for Canadian residents.
NOTE:
All parts are subject to availability.
JEEP CARGO MANAGEMENT SYSTEM:
• Off Road Kit• Roadside Safety Kit • Cooler
• First Aid Kit• Collapsible Tote
EXTERIOR:
• Rock Rails• Front End Cover • Hood Decal
• Wheels• Splash Guards• Skid Plates
• Wheel Locks• Locking Gas Cap
INTERIOR:
• Premium Floor Mats • Emergency Roadside Kit • Molded Cargo Tray
• Security Cover• Bright Pedal Kit • Ambient Light Kit
• Slush Mats• Door Sill Guards • Katzkin Leather Interiors
ELECTRONICS:
•MOPAR®Web (WiFi) • Park Distance Sensors
• Remote Start• Speaker Upgrades
• Rear View Camera • Electronic Vehicle Track-ing System
CARRIERS:
• Hitch-mount Bike Carrier • Sport Utility Bars • Roof-mount Bike Carrier
• Roof Top Cargo Basket •Roof-mount Ski andSnowboard Carrier• Roof Cargo Box Carrier
MOPAR® ACCESSORIES
226
Page 231 of 244
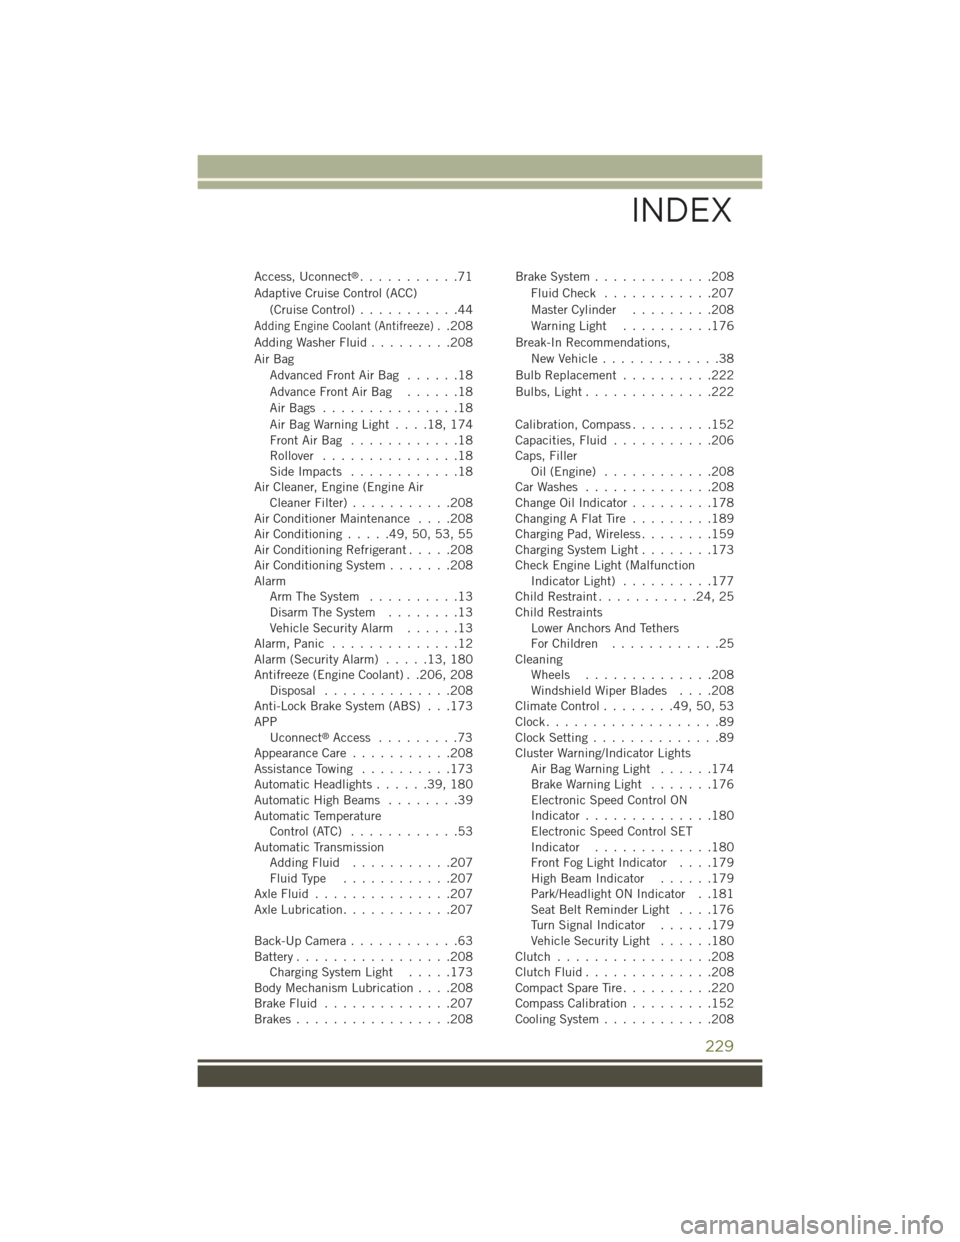
Access, Uconnect®...........71
Adaptive Cruise Control (ACC)
(Cruise Control)...........44
Adding Engine Coolant (Antifreeze)..208
Adding Washer Fluid.........208
Air Bag
Advanced Front Air Bag . . . . . .18
Advance Front Air Bag . . . . . .18
Air Bags . . . . . . . . . . . . . . .18
Air Bag Warning Light . . . .18, 174Front Air Bag . . . . . . . . . . . .18Rollover...............18Side Impacts . . . . . . . . . . . .18Air Cleaner, Engine (Engine AirCleaner Filter)...........208Air Conditioner Maintenance....208Air Conditioning.....49,50,53,55Air Conditioning Refrigerant.....208Air Conditioning System.......208AlarmArm The System..........13Disarm The System........13Vehicle Security Alarm......13Alarm, Panic . . . . . . . . . . . . . .12Alarm (Security Alarm).....13,180Antifreeze (Engine Coolant) . .206, 208Disposal..............208Anti-Lock Brake System (ABS) . . .173APPUconnect®Access.........73Appearance Care...........208Assistance Towing..........173Automatic Headlights......39,180Automatic High Beams........39Automatic TemperatureControl (ATC)............53Automatic TransmissionAdding Fluid...........207Fluid Type . . . . . . . . . . . .207Axle Fluid . . . . . . . . . . . . . . .207Axle Lubrication............207
Back-Up Camera............63Battery.................208Charging System Light.....173Body Mechanism Lubrication....208Brake Fluid..............207Brakes.................208
Brake System.............208
Fluid Check . . . . . . . . . . . .207
Master Cylinder.........208
Warning Light . . . . . . . . . .176
Break-In Recommendations,
New Vehicle.............38
Bulb Replacement..........222
Bulbs, Light..............222
Calibration, Compass.........152Capacities, Fluid...........206Caps, FillerOil (Engine) . . . . . . . . . . . .208Car Washes . . . . . . . . . . . . . .208Change Oil Indicator.........178Changing A Flat Tire . . . . . . . . .189Charging Pad, Wireless........159Charging System Light........173Check Engine Light (MalfunctionIndicator Light)..........177Child Restraint...........24,25Child RestraintsLower Anchors And TethersFor Children............25CleaningWheels..............208Windshield Wiper Blades....208Climate Control........49,50,53Clock...................89Clock Setting..............89Cluster Warning/Indicator LightsAir Bag Warning Light . . . . . .174Brake Warning Light.......176Electronic Speed Control ONIndicator..............180Electronic Speed Control SETIndicator.............180Front Fog Light Indicator....179High Beam Indicator......179Park/Headlight ON Indicator . .181Seat Belt Reminder Light....176Turn Signal Indicator......179Vehicle Security Light......180Clutch . . . . . . . . . . . . . . . . .208Clutch Fluid . . . . . . . . . . . . . .208Compact Spare Tire . . . . . . . . . .220Compass Calibration.........152Cooling System............208
INDEX
229
Page 232 of 244
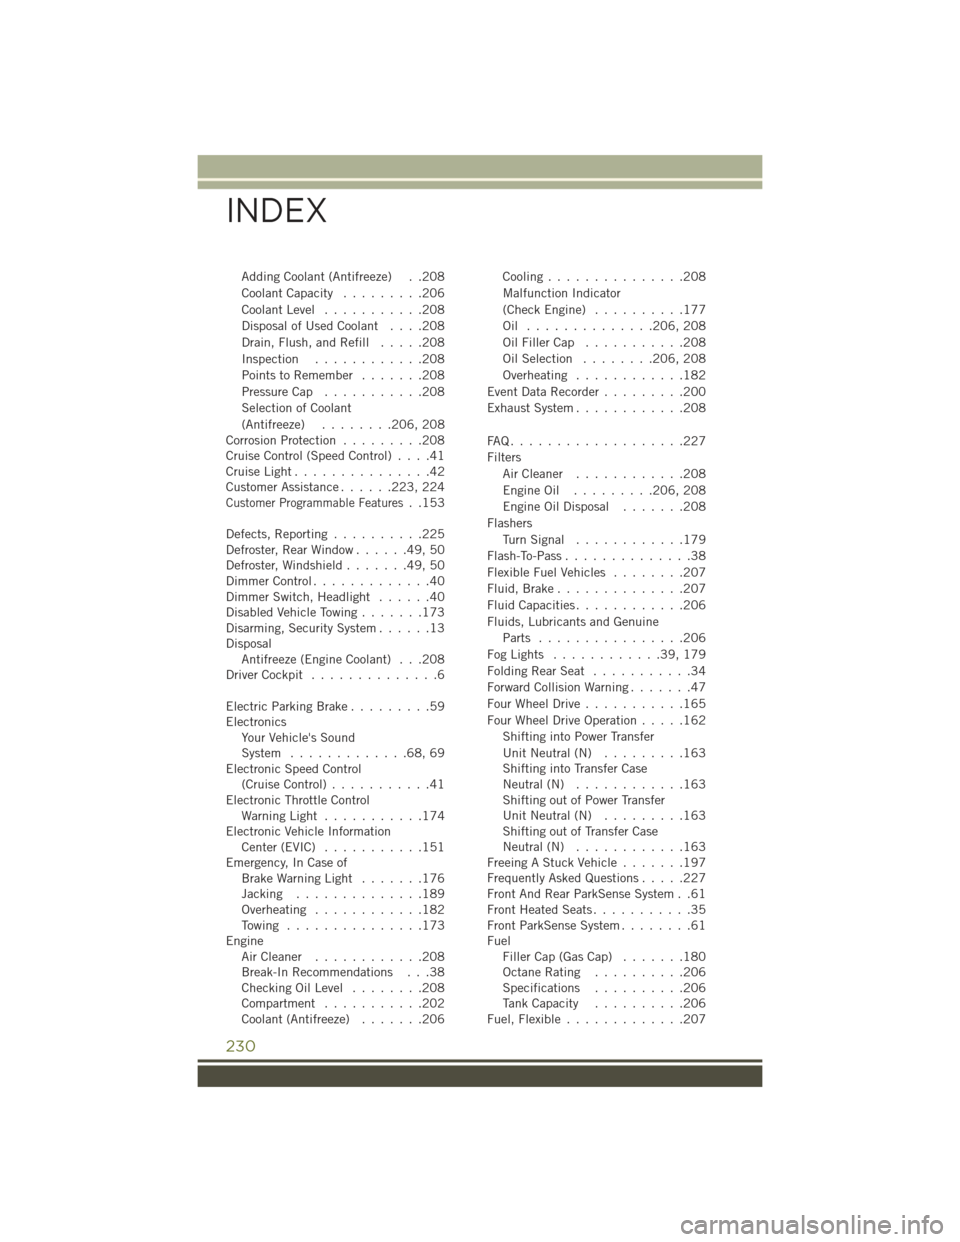
Adding Coolant (Antifreeze) . .208
Coolant Capacity.........206
Coolant Level...........208
Disposal of Used Coolant....208
Drain, Flush, and Refill.....208
Inspection............208
Points to Remember.......208
Pressure Cap...........208
Selection of Coolant
(Antifreeze)........206, 208Corrosion Protection.........208Cruise Control (Speed Control)....41Cruise Light . . . . . . . . . . . . . . .42Customer Assistance......223, 224
Customer Programmable Features..153
Defects, Reporting..........225Defroster, Rear Window......49,50Defroster, Windshield.......49,50Dimmer Control.............40Dimmer Switch, Headlight......40Disabled Vehicle Towing.......173Disarming, Security System......13DisposalAntifreeze (Engine Coolant) . . .208Driver Cockpit..............6
Electric Parking Brake.........59ElectronicsYo u r Ve h i c l e ' s S o u n dSystem.............68,69Electronic Speed Control(Cruise Control)...........41Electronic Throttle ControlWarning Light . . . . . . . . . . .174Electronic Vehicle InformationCenter (EVIC) . . . . . . . . . . .151Emergency, In Case ofBrake Warning Light.......176Jacking..............189Overheating............182To w i n g . . . . . . . . . . . . . . . 1 7 3EngineAir Cleaner . . . . . . . . . . . .208Break-In Recommendations . . .38Checking Oil Level........208Compartment...........202Coolant (Antifreeze).......206
Cooling...............208
Malfunction Indicator
(Check Engine) . . . . . . . . . .177
Oil . . . . . . . . . . . . . .206, 208
Oil Filler Cap...........208
Oil Selection........206, 208
Overheating............182
Event Data Recorder.........200
Exhaust System............208
FA Q . . . . . . . . . . . . . . . . . . . 2 2 7
Filters
Air Cleaner............208
Engine Oil . . . . . . . . .206, 208
Engine Oil Disposal.......208
Flashers
Tu r n S i g n a l . . . . . . . . . . . . 1 7 9
Flash-To-Pass..............38
Flexible Fuel Vehicles........207
Fluid, Brake..............207
Fluid Capacities............206
Fluids, Lubricants and Genuine
Parts................206
Fog Lights . . . . . . . . . . . .39, 179
Folding Rear Seat . . . . . . . . . . .34
Forward Collision Warning.......47
Four Wheel Drive...........165
Four Wheel Drive Operation.....162
Shifting into Power Transfer
Unit Neutral (N).........163Shifting into Transfer CaseNeutral (N)............163Shifting out of Power TransferUnit Neutral (N).........163Shifting out of Transfer CaseNeutral (N)............163Freeing A Stuck Vehicle.......197Frequently Asked Questions.....227Front And Rear ParkSense System . .61Front Heated Seats...........35Front ParkSense System........61FuelFiller Cap (Gas Cap).......180Octane Rating..........206Specifications..........206Tank Capacity..........206Fuel, Flexible.............207
INDEX
230