automatic transmission JEEP CHEROKEE 2015 KL / 5.G User Guide
[x] Cancel search | Manufacturer: JEEP, Model Year: 2015, Model line: CHEROKEE, Model: JEEP CHEROKEE 2015 KL / 5.GPages: 244, PDF Size: 30.6 MB
Page 18 of 244
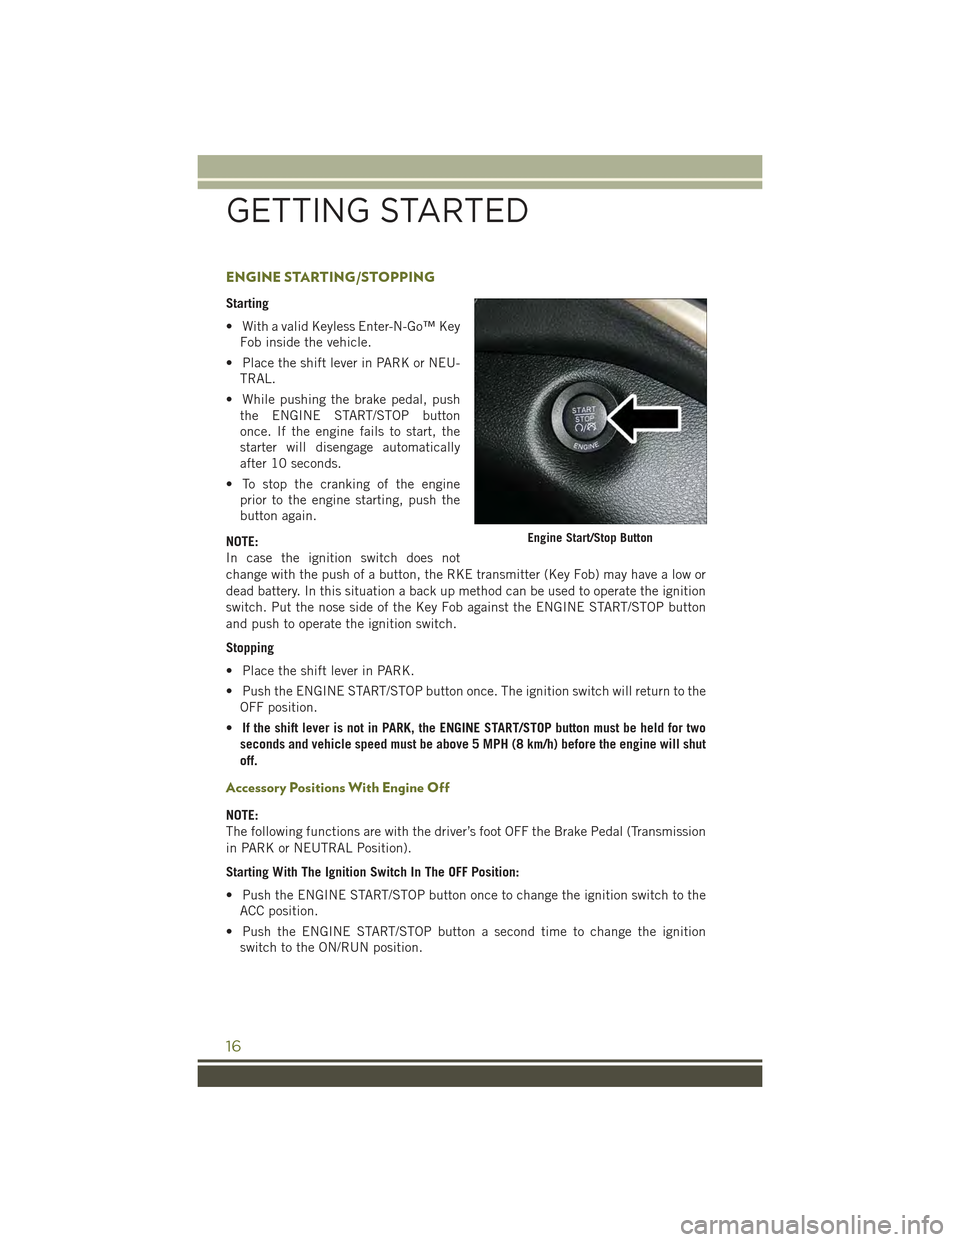
ENGINE STARTING/STOPPING
Starting
• With a valid Keyless Enter-N-Go™ Key
Fob inside the vehicle.
• Place the shift lever in PARK or NEU-
TRAL.
• While pushing the brake pedal, push
the ENGINE START/STOP button
once. If the engine fails to start, the
starter will disengage automatically
after 10 seconds.
• To stop the cranking of the engine
prior to the engine starting, push the
button again.
NOTE:
In case the ignition switch does not
change with the push of a button, the RKE transmitter (Key Fob) may have a low or
dead battery. In this situation a back up method can be used to operate the ignition
switch. Put the nose side of the Key Fob against the ENGINE START/STOP button
and push to operate the ignition switch.
Stopping
• Place the shift lever in PARK.
• Push the ENGINE START/STOP button once. The ignition switch will return to the
OFF position.
•If the shift lever is not in PARK, the ENGINE START/STOP button must be held for two
seconds and vehicle speed must be above 5 MPH (8 km/h) before the engine will shut
off.
Accessory Positions With Engine Off
NOTE:
The following functions are with the driver’s foot OFF the Brake Pedal (Transmission
in PARK or NEUTRAL Position).
Starting With The Ignition Switch In The OFF Position:
• Push the ENGINE START/STOP button once to change the ignition switch to the
ACC position.
• Push the ENGINE START/STOP button a second time to change the ignition
switch to the ON/RUN position.
Engine Start/Stop Button
GETTING STARTED
16
Page 19 of 244
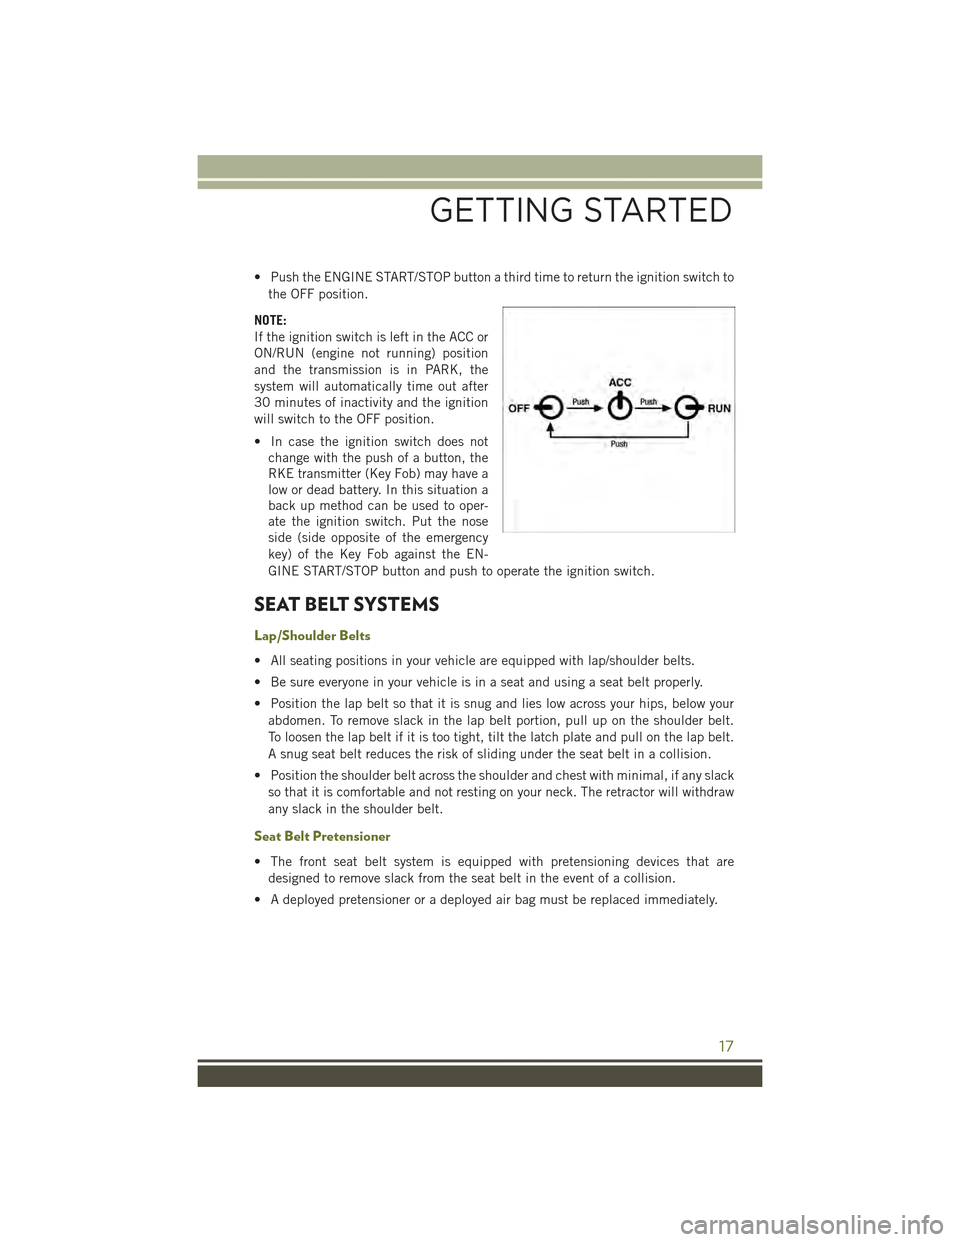
• Push the ENGINE START/STOP button a third time to return the ignition switch to
the OFF position.
NOTE:
If the ignition switch is left in the ACC or
ON/RUN (engine not running) position
and the transmission is in PARK, the
system will automatically time out after
30 minutes of inactivity and the ignition
will switch to the OFF position.
• In case the ignition switch does not
change with the push of a button, the
RKE transmitter (Key Fob) may have a
low or dead battery. In this situation a
back up method can be used to oper-
ate the ignition switch. Put the nose
side (side opposite of the emergency
key) of the Key Fob against the EN-
GINE START/STOP button and push to operate the ignition switch.
SEAT BELT SYSTEMS
Lap/Shoulder Belts
• All seating positions in your vehicle are equipped with lap/shoulder belts.
• Be sure everyone in your vehicle is in a seat and using a seat belt properly.
• Position the lap belt so that it is snug and lies low across your hips, below your
abdomen. To remove slack in the lap belt portion, pull up on the shoulder belt.
To loosen the lap belt if it is too tight, tilt the latch plate and pull on the lap belt.
A snug seat belt reduces the risk of sliding under the seat belt in a collision.
• Position the shoulder belt across the shoulder and chest with minimal, if any slack
so that it is comfortable and not resting on your neck. The retractor will withdraw
any slack in the shoulder belt.
Seat Belt Pretensioner
• The front seat belt system is equipped with pretensioning devices that are
designed to remove slack from the seat belt in the event of a collision.
• A deployed pretensioner or a deployed air bag must be replaced immediately.
GETTING STARTED
17
Page 40 of 244
ENGINE BREAK-IN RECOMMENDATIONS
A long break-in period is not required for the engine and drivetrain (transmission and
axle) in your vehicle.
Drive moderately during the first 300 miles (500 km). After the initial 60 miles
(100 km), speeds up to 50 or 55 mph (80 or 90 km/h) are desirable.
While cruising, brief full-throttle acceleration within the limits of local traffic laws
contributes to a good break-in. Wide-open throttle acceleration in low gear can be
detrimental and should be avoided.
The engine oil installed in the engine at the factory is a high-quality energy
conserving type lubricant. Oil changes should be consistent with anticipated climate
conditions under which vehicle operations will occur. For the recommended viscosity
and quality grades, refer to “Maintaining Your Vehicle.”
NOTE:
A new engine may consume some oil during its first few thousand miles (kilometers)
of operation. This should be considered a normal part of the break-in and not
interpreted as an indication of an engine problem or malfunction.
CAUTION!
Never use Non-Detergent Oil or Straight Mineral Oil in the engine or damage may
result.
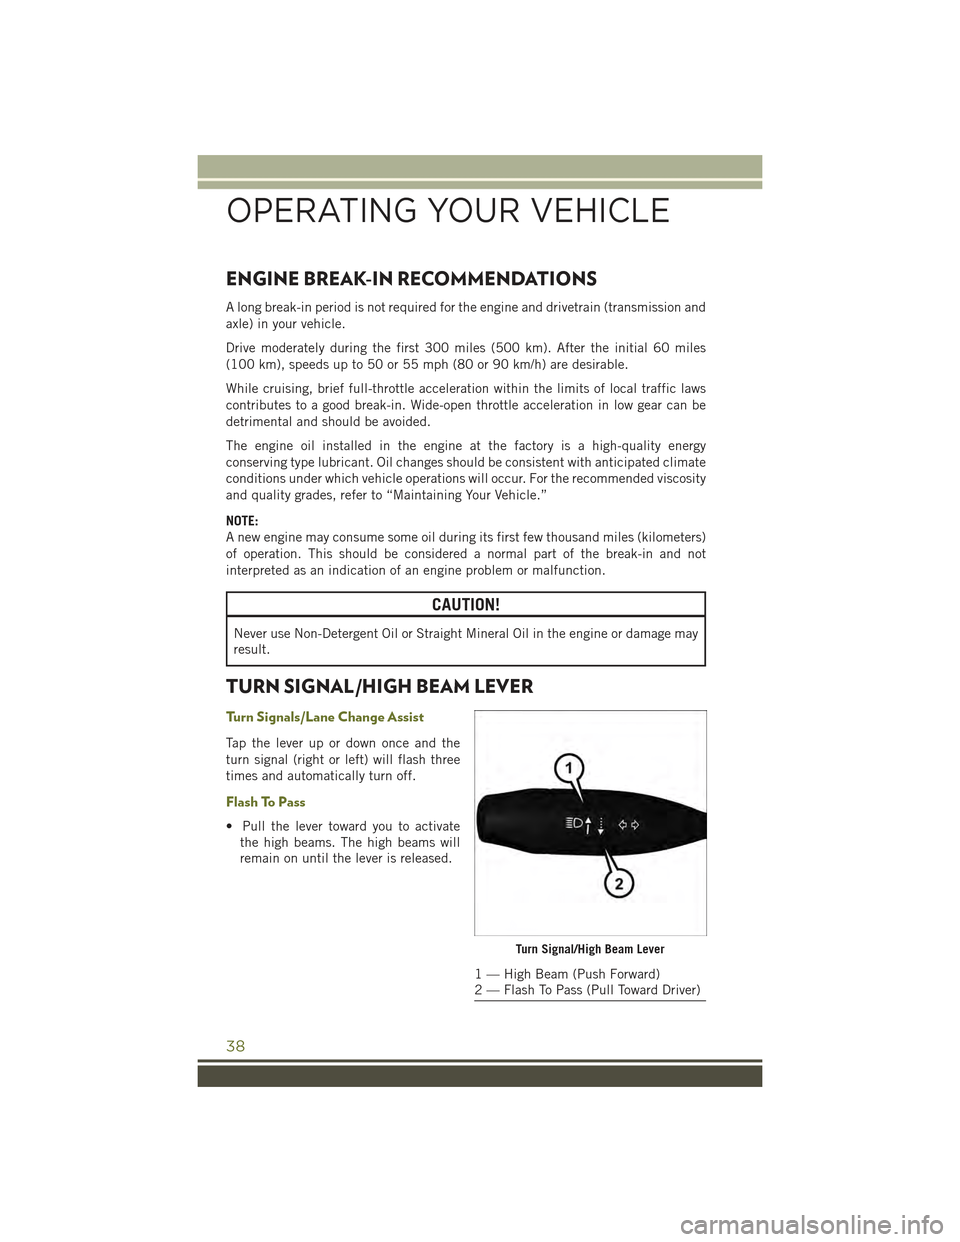
TURN SIGNAL/HIGH BEAM LEVER
Turn Signals/Lane Change Assist
Tap the lever up or down once and the
turn signal (right or left) will flash three
times and automatically turn off.
Flash To Pass
• Pull the lever toward you to activate
the high beams. The high beams will
remain on until the lever is released.
Turn Signal/High Beam Lever
1 — High Beam (Push Forward)2 — Flash To Pass (Pull Toward Driver)
OPERATING YOUR VEHICLE
38
Page 61 of 244
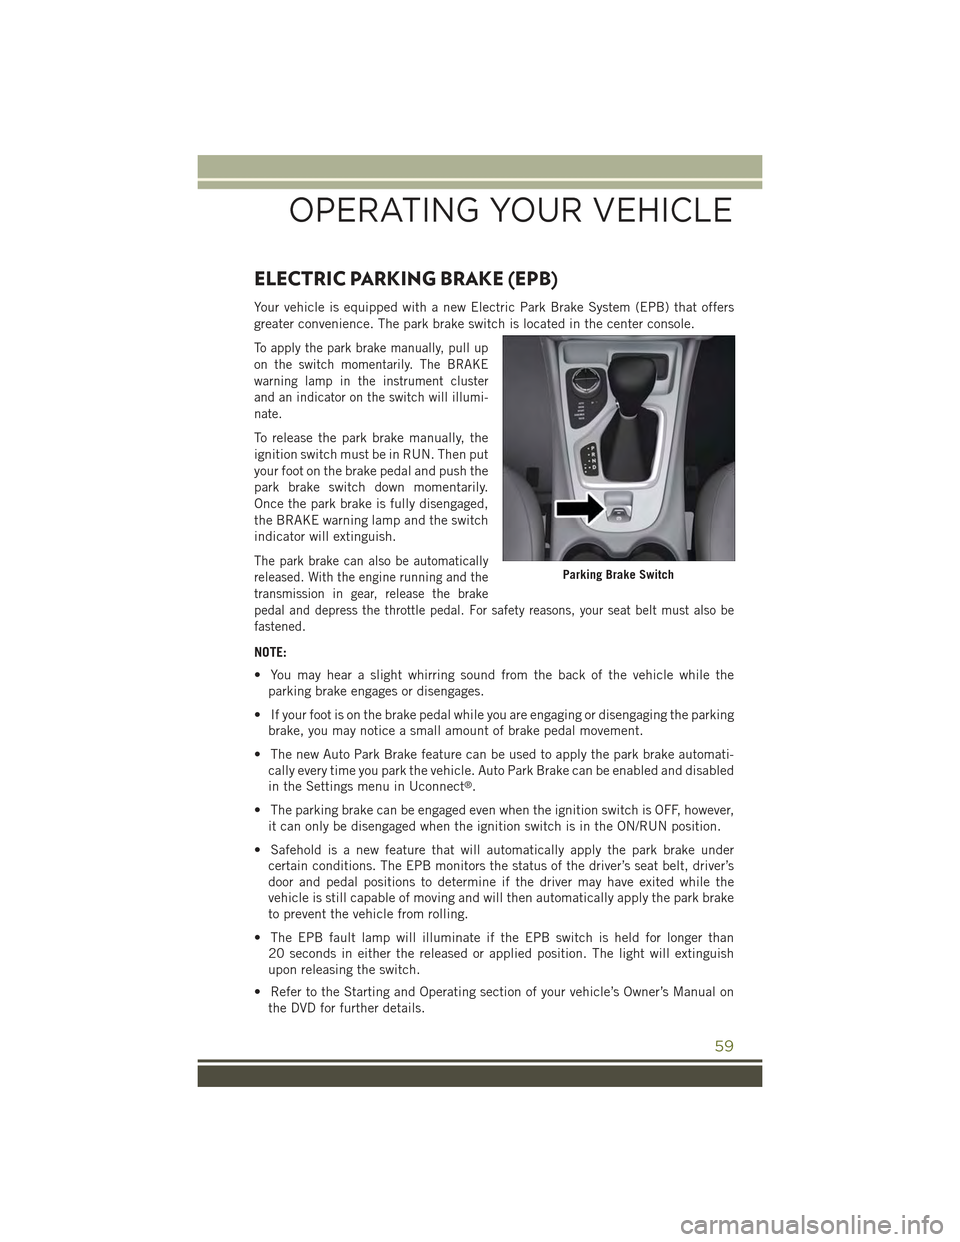
ELECTRIC PARKING BRAKE (EPB)
Your vehicle is equipped with a new Electric Park Brake System (EPB) that offers
greater convenience. The park brake switch is located in the center console.
To apply the park brake manually, pull up
on the switch momentarily. The BRAKE
warning lamp in the instrument cluster
and an indicator on the switch will illumi-
nate.
To release the park brake manually, the
ignition switch must be in RUN. Then put
your foot on the brake pedal and push the
park brake switch down momentarily.
Once the park brake is fully disengaged,
the BRAKE warning lamp and the switch
indicator will extinguish.
The park brake can also be automatically
released. With the engine running and the
transmission in gear, release the brake
pedal and depress the throttle pedal. For safety reasons, your seat belt must also be
fastened.
NOTE:
• You may hear a slight whirring sound from the back of the vehicle while the
parking brake engages or disengages.
• If your foot is on the brake pedal while you are engaging or disengaging the parking
brake, you may notice a small amount of brake pedal movement.
• The new Auto Park Brake feature can be used to apply the park brake automati-
cally every time you park the vehicle. Auto Park Brake can be enabled and disabled
in the Settings menu in Uconnect®.
• The parking brake can be engaged even when the ignition switch is OFF, however,
it can only be disengaged when the ignition switch is in the ON/RUN position.
• Safehold is a new feature that will automatically apply the park brake under
certain conditions. The EPB monitors the status of the driver’s seat belt, driver’s
door and pedal positions to determine if the driver may have exited while the
vehicle is still capable of moving and will then automatically apply the park brake
to prevent the vehicle from rolling.
• The EPB fault lamp will illuminate if the EPB switch is held for longer than
20 seconds in either the released or applied position. The light will extinguish
upon releasing the switch.
• Refer to the Starting and Operating section of your vehicle’s Owner’s Manual on
the DVD for further details.
Parking Brake Switch
OPERATING YOUR VEHICLE
59
Page 167 of 244
• Shifting into or out of Rear E-Locker is possible with the vehicle completely
stopped; however, difficulty may occur due to the mating clutch teeth not being
properly aligned. Several attempts may be required for clutch teeth alignment and
shift completion to occur. The preferred method is for the vehicle to be rolling,
below 15 MPH (24 km/h), while including right and left steering maneuvers to
allow for the clutch teeth to align.
• The Rear E-Locker System must be disengaged prior to taking the vehicle out of
4X4 LOW range. If 4X4 LOW shift conditions/interlocks are not met, a message will
flash from the Electronic Vehicle Information Center (EVIC)/Driver Information
Display with instructions on how to complete the requested shift.
SELEC-TERRAIN™
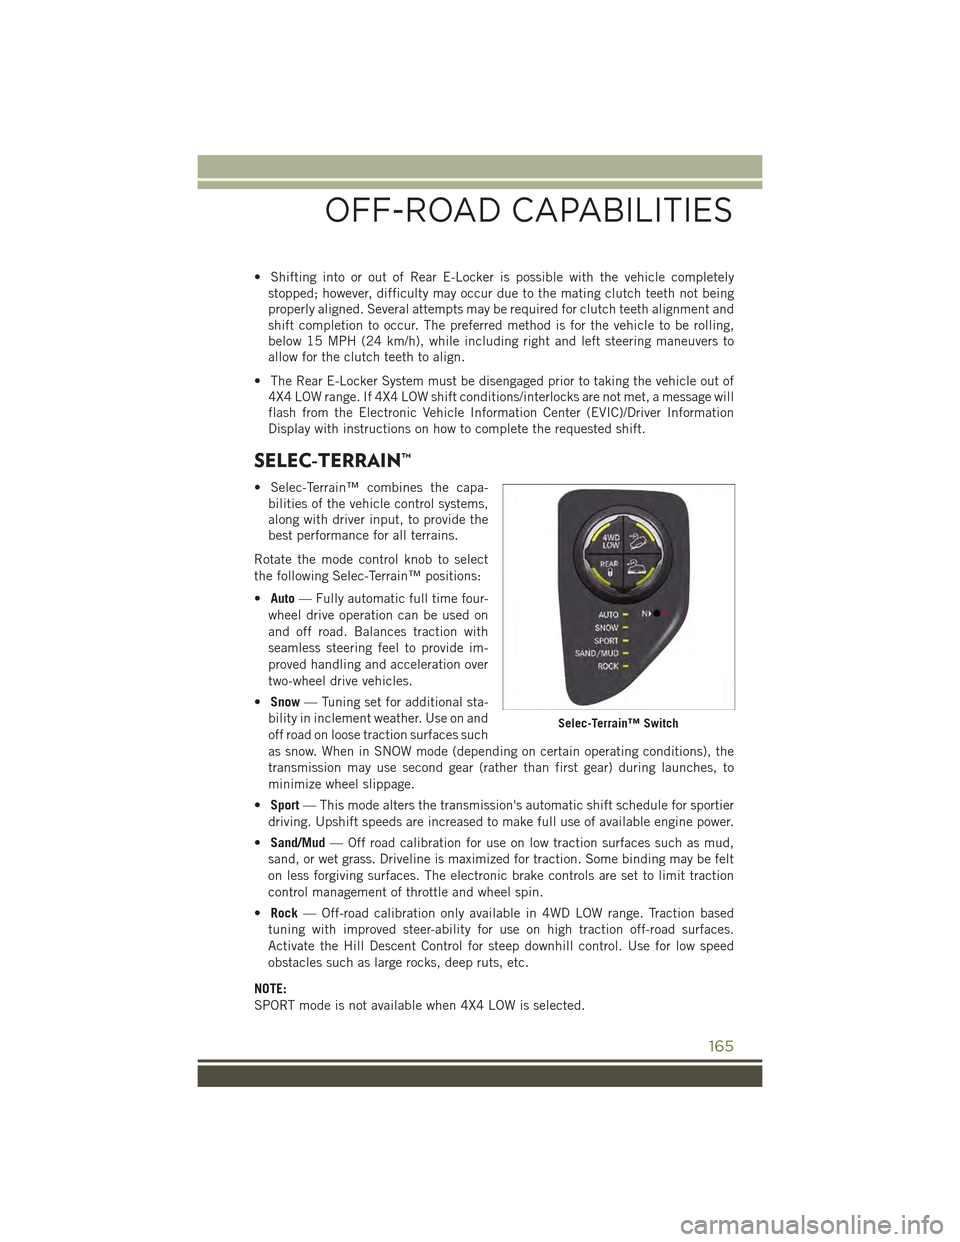
• Selec-Terrain™ combines the capa-
bilities of the vehicle control systems,
along with driver input, to provide the
best performance for all terrains.
Rotate the mode control knob to select
the following Selec-Terrain™ positions:
•Auto— Fully automatic full time four-
wheel drive operation can be used on
and off road. Balances traction with
seamless steering feel to provide im-
proved handling and acceleration over
two-wheel drive vehicles.
•Snow— Tuning set for additional sta-
bility in inclement weather. Use on and
off road on loose traction surfaces such
as snow. When in SNOW mode (depending on certain operating conditions), the
transmission may use second gear (rather than first gear) during launches, to
minimize wheel slippage.
•Sport— This mode alters the transmission's automatic shift schedule for sportier
driving. Upshift speeds are increased to make full use of available engine power.
•Sand/Mud— Off road calibration for use on low traction surfaces such as mud,
sand, or wet grass. Driveline is maximized for traction. Some binding may be felt
on less forgiving surfaces. The electronic brake controls are set to limit traction
control management of throttle and wheel spin.
•Rock— Off-road calibration only available in 4WD LOW range. Traction based
tuning with improved steer-ability for use on high traction off-road surfaces.
Activate the Hill Descent Control for steep downhill control. Use for low speed
obstacles such as large rocks, deep ruts, etc.
NOTE:
SPORT mode is not available when 4X4 LOW is selected.
Selec-Terrain™ Switch
OFF-ROAD CAPABILITIES
165
Page 169 of 244
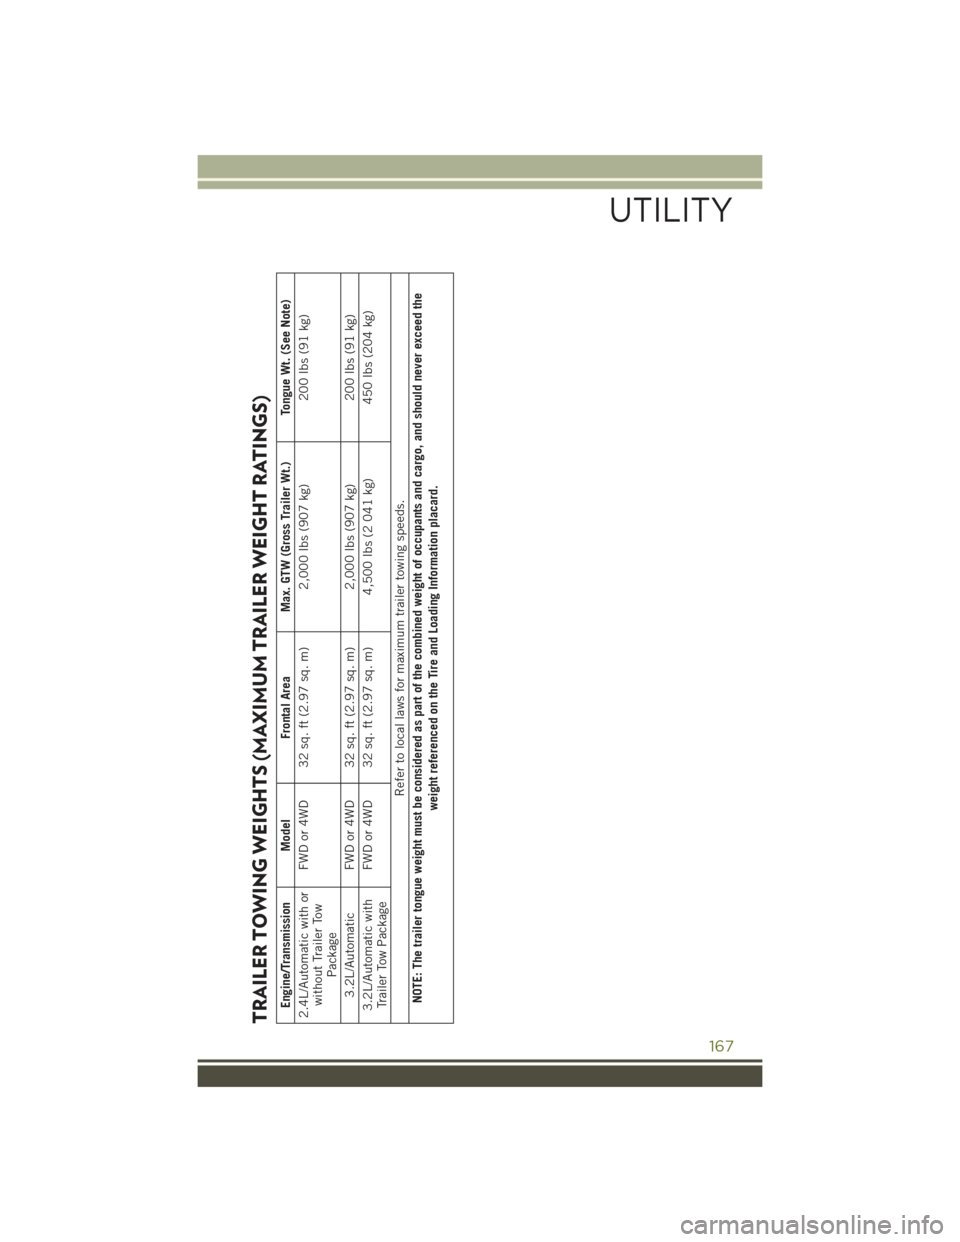
TRAILER TOWING WEIGHTS (MAXIMUM TRAILER WEIGHT RATINGS)
Engine/Transmission Model
Frontal Area
Max. GTW (Gross Trailer Wt.) Tongue Wt. (See Note)
2.4L/Automatic with orwithout Trailer Tow
Package
FWD or 4WD 32 sq. ft (2.97 sq. m) 2,000 lbs (907 kg)
200 lbs (91 kg)
3.2L/Automatic FWD or 4WD 32 sq. ft (2.97 sq. m) 2,000 lbs (907 kg)
200 lbs (91 kg)
3.2L/Automatic withTrailer Tow Package
FWD or 4WD 32 sq. ft (2.97 sq. m) 4,500 lbs (2 041 kg)
450 lbs (204 kg)
Refer to local laws for maximum trailer towing speeds.
NOTE: The trailer tongue weight must be considered as part of the combined weight of occupants and cargo, and should never exceed the
weight referenced on the Tire and Loading Information placard.
UTILITY
167
Page 179 of 244
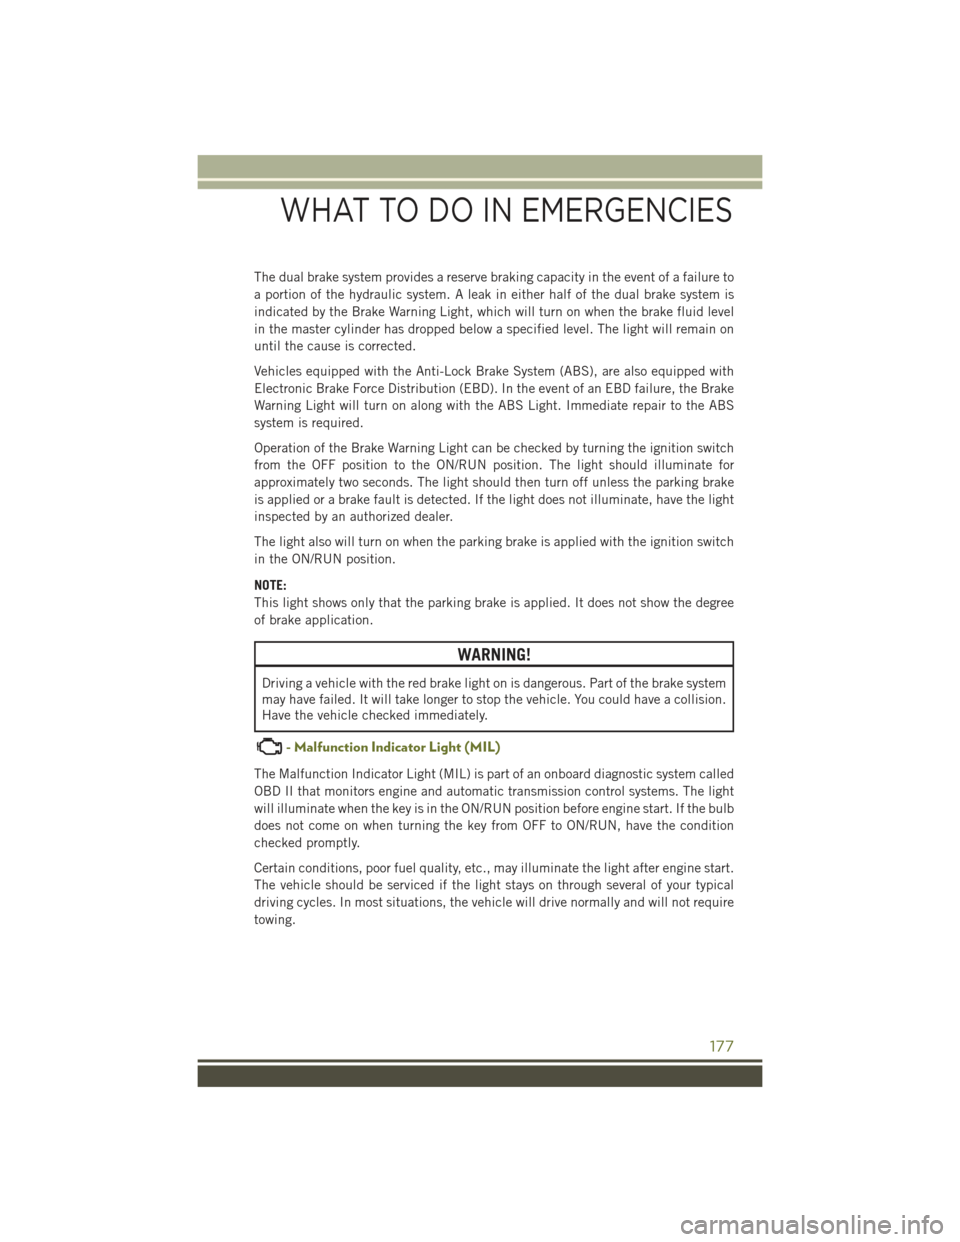
The dual brake system provides a reserve braking capacity in the event of a failure to
a portion of the hydraulic system. A leak in either half of the dual brake system is
indicated by the Brake Warning Light, which will turn on when the brake fluid level
in the master cylinder has dropped below a specified level. The light will remain on
until the cause is corrected.
Vehicles equipped with the Anti-Lock Brake System (ABS), are also equipped with
Electronic Brake Force Distribution (EBD). In the event of an EBD failure, the Brake
Warning Light will turn on along with the ABS Light. Immediate repair to the ABS
system is required.
Operation of the Brake Warning Light can be checked by turning the ignition switch
from the OFF position to the ON/RUN position. The light should illuminate for
approximately two seconds. The light should then turn off unless the parking brake
is applied or a brake fault is detected. If the light does not illuminate, have the light
inspected by an authorized dealer.
The light also will turn on when the parking brake is applied with the ignition switch
in the ON/RUN position.
NOTE:
This light shows only that the parking brake is applied. It does not show the degree
of brake application.
WARNING!
Driving a vehicle with the red brake light on is dangerous. Part of the brake system
may have failed. It will take longer to stop the vehicle. You could have a collision.
Have the vehicle checked immediately.
- Malfunction Indicator Light (MIL)
The Malfunction Indicator Light (MIL) is part of an onboard diagnostic system called
OBD II that monitors engine and automatic transmission control systems. The light
will illuminate when the key is in the ON/RUN position before engine start. If the bulb
does not come on when turning the key from OFF to ON/RUN, have the condition
checked promptly.
Certain conditions, poor fuel quality, etc., may illuminate the light after engine start.
The vehicle should be serviced if the light stays on through several of your typical
driving cycles. In most situations, the vehicle will drive normally and will not require
towing.
WHAT TO DO IN EMERGENCIES
177
Page 195 of 244
WARNING!
• Being under a jacked-up vehicle is dangerous. The vehicle could slip off the
jack and fall on you. You could be crushed. Never put any part of your body
under a vehicle that is on a jack. If you need to get under a raised vehicle, take
it to a service center where it can be raised on a lift.
• Never start or run the engine while the vehicle is on a jack.
• The jack is designed to be used as a tool for changing tires only. The jack
should not be used to lift the vehicle for service purposes. The vehicle should
be jacked on a firm level surface only. Avoid ice or slippery areas.
• Do not attempt to change a tire on the side of the vehicle close to moving
traffic, pull far enough off the road to avoid the danger of being hit when
operating the jack or changing the wheel.
• Carefully follow these tire changing warnings to help prevent personal injury or
damage to your vehicle:
• Always park on a firm, level surface as far from the edge of the roadway
as possible before raising the vehicle.
• Turn on the Hazard Warning flasher.
• Chock the wheel diagonally opposite the wheel to be raised.
• Set the parking brake firmly and set an automatic transmission in PARK.
• Do not let anyone sit in the vehicle when it is on a jack.
• Do not get under the vehicle when it is on a jack.
• Only use the jack in the positions indicated and for lifting this vehicle during
a tire change.
• If working on or near a roadway, be extremely careful of motor traffic.
• Assure that spare tires, flat or inflated, are securely stowed, spares must be
stowed in the rear cargo area with the wing nut attached.
• Raising the vehicle higher than necessary can make the vehicle less stable. It
could slip off the jack and hurt someone near it. Raise the vehicle only enough
to remove the tire.
• A loose tire or jack thrown forward in a collision or hard stop could injure the
occupants in the vehicle. Have the deflated (flat) tire repaired or replaced
immediately.
• To avoid the risk of forcing the vehicle off the jack, do not tighten the lug bolts
fully until the vehicle is lowered to the ground. Failure to follow this warning
may result in personal injury.
WHAT TO DO IN EMERGENCIES
193
Page 196 of 244
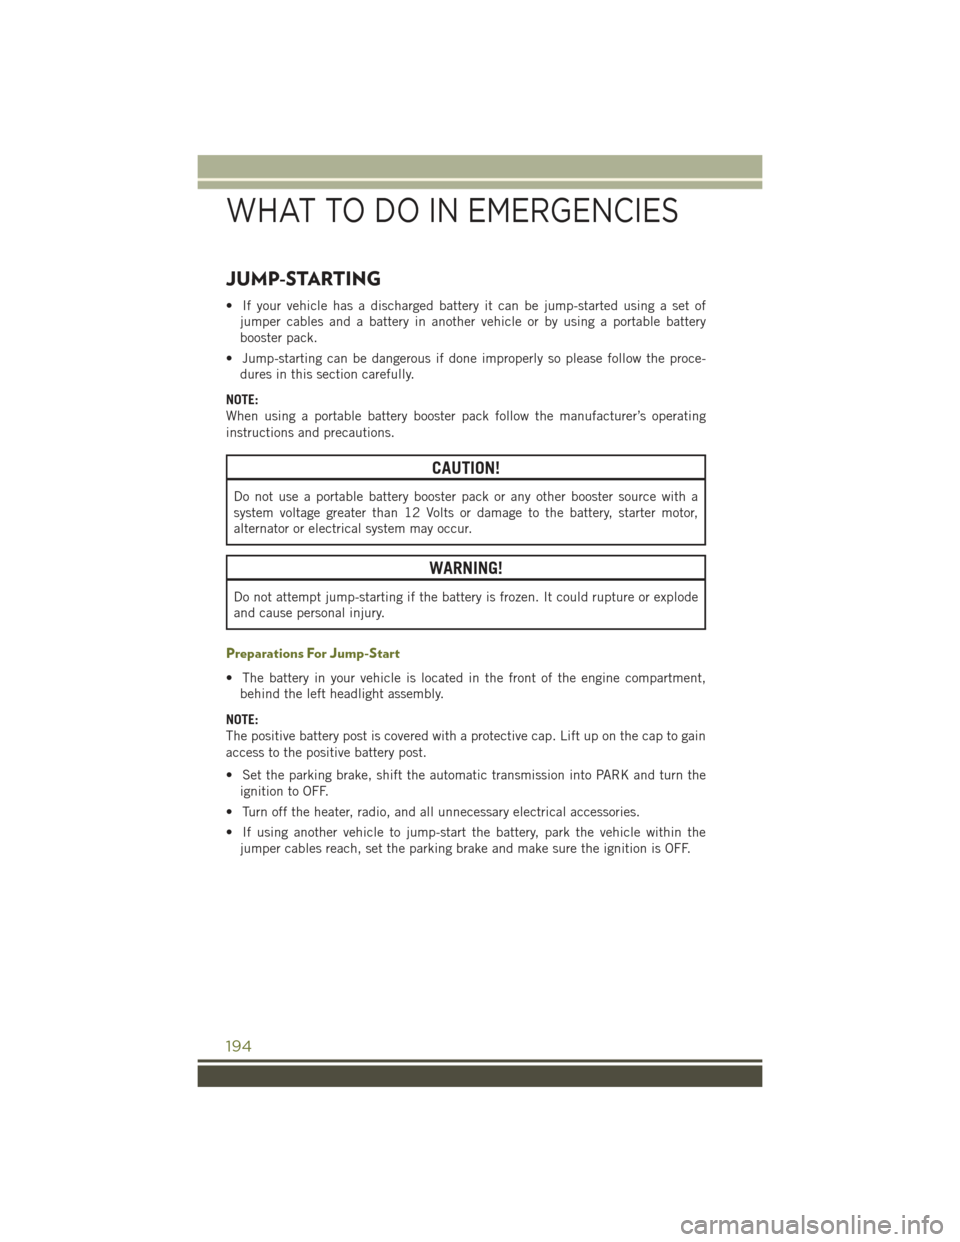
JUMP-STARTING
• If your vehicle has a discharged battery it can be jump-started using a set of
jumper cables and a battery in another vehicle or by using a portable battery
booster pack.
• Jump-starting can be dangerous if done improperly so please follow the proce-
dures in this section carefully.
NOTE:
When using a portable battery booster pack follow the manufacturer’s operating
instructions and precautions.
CAUTION!
Do not use a portable battery booster pack or any other booster source with a
system voltage greater than 12 Volts or damage to the battery, starter motor,
alternator or electrical system may occur.
WARNING!
Do not attempt jump-starting if the battery is frozen. It could rupture or explode
and cause personal injury.
Preparations For Jump-Start
• The battery in your vehicle is located in the front of the engine compartment,
behind the left headlight assembly.
NOTE:
The positive battery post is covered with a protective cap. Lift up on the cap to gain
access to the positive battery post.
• Set the parking brake, shift the automatic transmission into PARK and turn the
ignition to OFF.
• Turn off the heater, radio, and all unnecessary electrical accessories.
• If using another vehicle to jump-start the battery, park the vehicle within the
jumper cables reach, set the parking brake and make sure the ignition is OFF.
WHAT TO DO IN EMERGENCIES
194
Page 209 of 244
CAUTION!
• Mixing of engine coolant (antifreeze) other than specified Organic Additive
Technology (OAT) engine coolant (antifreeze), may result in engine damage and
may decrease corrosion protection. Organic Additive Technology (OAT) engine
coolant is different and should not be mixed with Hybrid Organic Additive
Technology (HOAT) engine coolant (antifreeze) or any “globally compatible”
coolant (antifreeze). If a non-OAT engine coolant (antifreeze) is introduced into
the cooling system in an emergency, the cooling system will need to be drained,
flushed, and refilled with fresh OAT coolant (conforming to MS-12106), by an
authorized dealer as soon as possible.
• Do not use water alone or alcohol-based engine coolant (antifreeze) products.
Do not use additional rust inhibitors or antirust products, as they may not be
compatible with the radiator engine coolant and may plug the radiator.
• This vehicle has not been designed for use with propylene glycol-based engine
coolant (antifreeze). Use of propylene glycol-based engine coolant (antifreeze)
is not recommended.
E85 FLEXIBLE FUEL — 2.4L ENGINE ONLY
Refer to your Owner's Manual on the DVD for further details.
CAUTION!
Only vehicles with the E-85 fuel filler door label or a yellow gas cap can operate on
E-85.
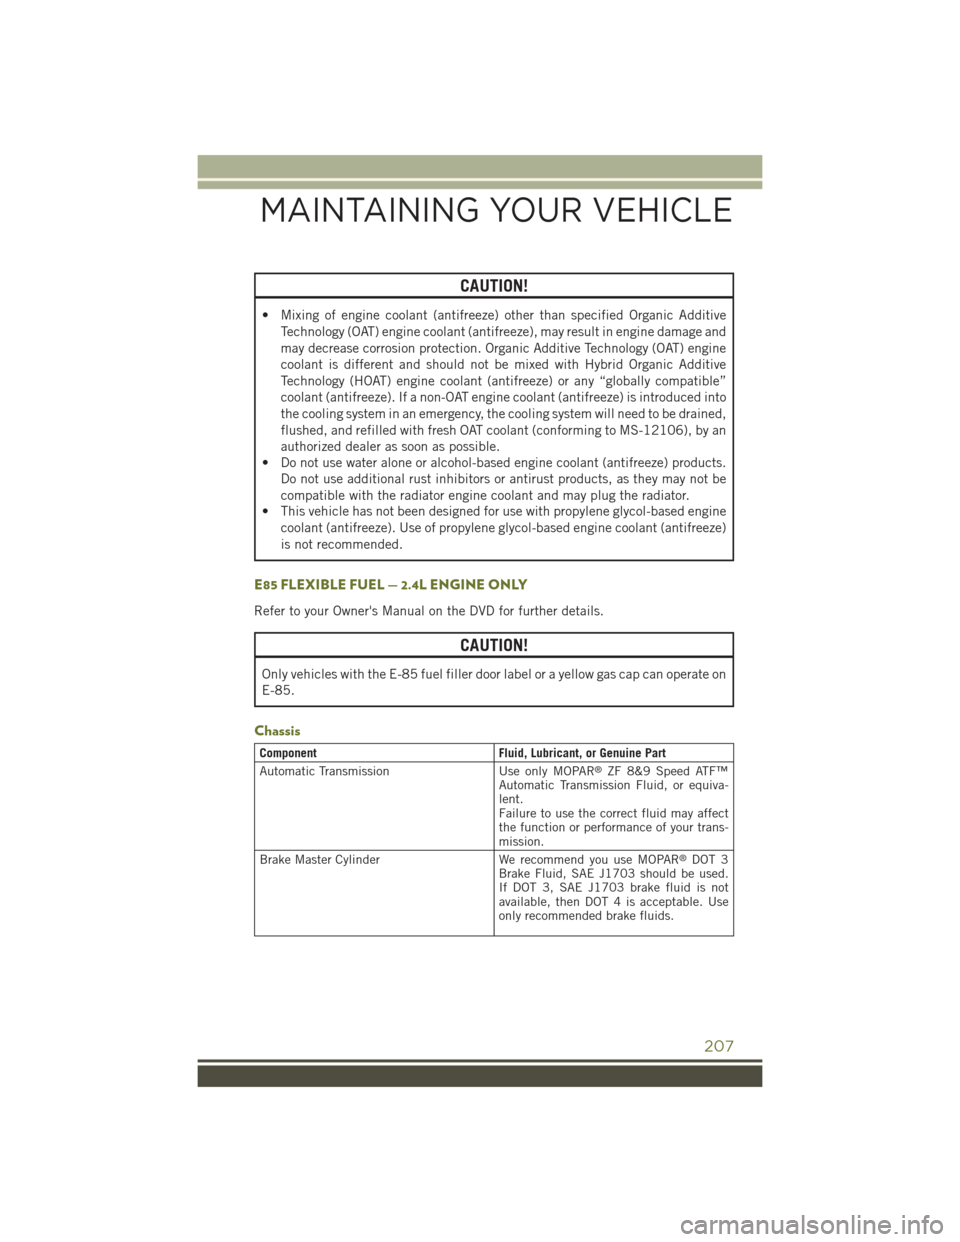
Chassis
ComponentFluid, Lubricant, or Genuine Part
Automatic TransmissionUse only MOPAR®ZF 8&9 Speed ATF™Automatic Transmission Fluid, or equiva-lent.Failure to use the correct fluid may affectthe function or performance of your trans-mission.
Brake Master CylinderWe recommend you use MOPAR®DOT 3Brake Fluid, SAE J1703 should be used.If DOT 3, SAE J1703 brake fluid is notavailable, then DOT 4 is acceptable. Useonly recommended brake fluids.
MAINTAINING YOUR VEHICLE
207