center console JEEP CHEROKEE 2016 KL / 5.G User Guide
[x] Cancel search | Manufacturer: JEEP, Model Year: 2016, Model line: CHEROKEE, Model: JEEP CHEROKEE 2016 KL / 5.GPages: 236, PDF Size: 11.24 MB
Page 22 of 236
Lighter Weight Passengers (Including Small Adults)
When a lighter weight passenger, including a small adult, occupies the front passenger
seat, the OCS may reduce the inflation rate of the Passenger Advanced Front Air Bag.
This does not mean that the OCS is working improperly.
Do not decrease OR increase the front passenger’s seated weight on the front
passenger seat
The front passenger’s seated weight must be properly positioned on the front
passenger seat. Failure to do so may result in serious injury or death. The OCS
determines the most probable classification of the occupant that it detects. The OCS
will detect the front passenger’s decreased or increased seated weight, which may
result in an adjusted inflation rate of the Passenger Advanced Front Air Bag in a
collision. This does not mean that the OCS is working improperly. Decreasing the
front passenger’s seated weight on the front passenger seat may result in a
reduced-power deployment of the Passenger Advanced Front Air Bag. Increasing the
front passenger’s seated weight on the front passenger seat may result in a full-power
deployment of the Passenger Advanced Front Air Bag. Examples of improper front
passenger seating include:
• The front passenger’s weight is transferred to another part of the vehicle (like thedoor, arm rest or instrument panel).
• The front passenger leans forward, sideways, or turns to face the rear of the vehicle.
• The front passenger’s seatback is not in the full upright position.
• The front passenger carries or holds an object while seated (e.g., backpack, box, etc.).
• Objects are lodged under the front passenger seat.
• Objects are lodged between the front passenger seat and center console.
• Accessories that may change the seated weight on the front passenger seat are attached to the front passenger seat.
• Anything that may decrease or increase the front passenger’s seated weight.
GETTING STARTED
20
Page 44 of 236
Ambient Light Dimmer
• Rotate the left dimmer control upward or downward to increase or decrease thebrightness of the ambient light located in the overhead console, door handle lights,
under I/P lights, door map pocket lights, and cubby bin lights.
• Rotate the left dimmer control to the extreme bottom position to turn off the ambient lights.
WIPER/WASHER LEVER
Front Wipers
Intermittent, Low And High Operation
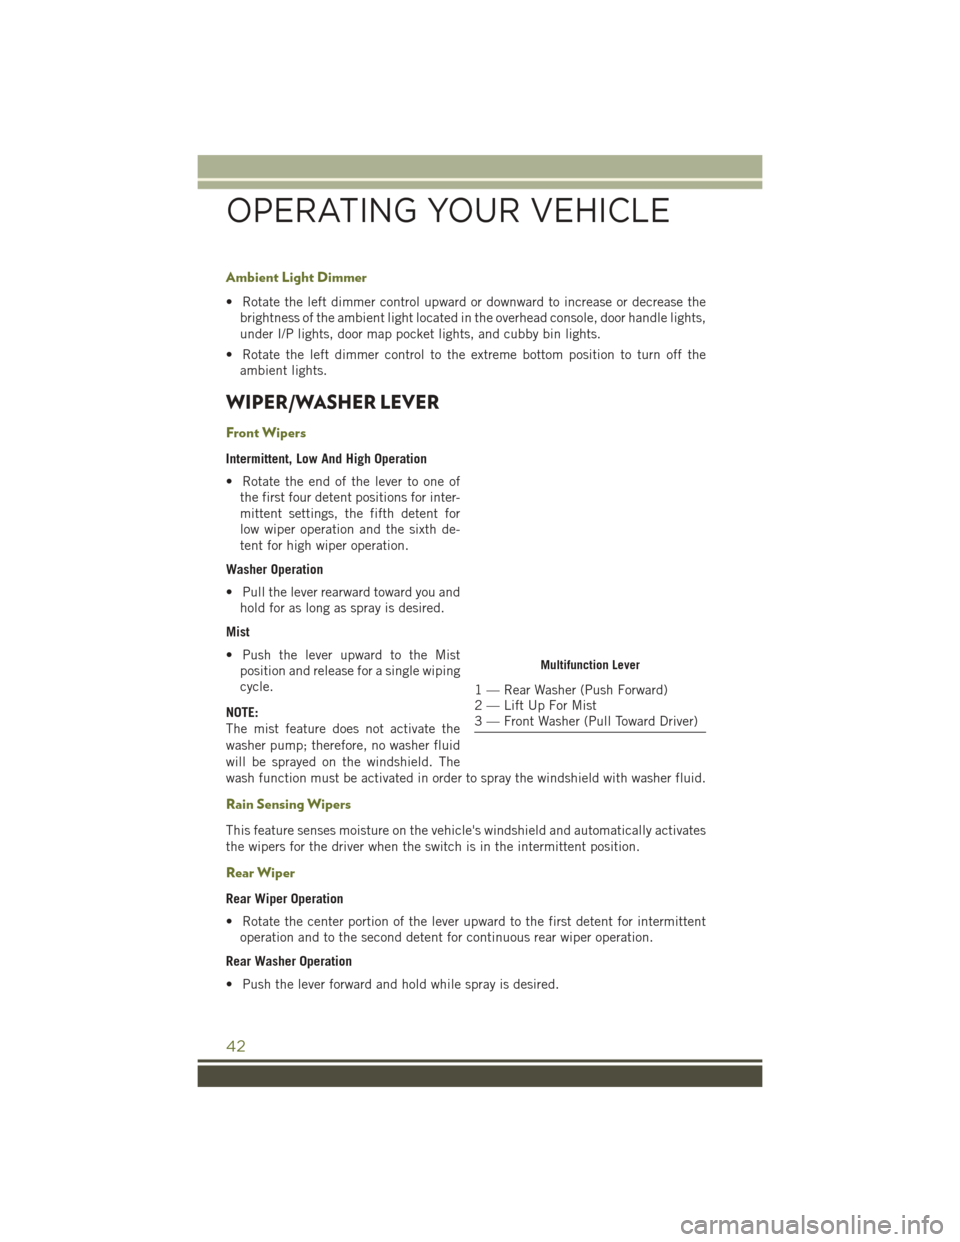
• Rotate the end of the lever to one ofthe first four detent positions for inter-
mittent settings, the fifth detent for
low wiper operation and the sixth de-
tent for high wiper operation.
Washer Operation
• Pull the lever rearward toward you and hold for as long as spray is desired.
Mist
• Push the lever upward to the Mist position and release for a single wiping
cycle.
NOTE:
The mist feature does not activate the
washer pump; therefore, no washer fluid
will be sprayed on the windshield. The
wash function must be activated in order to spray the windshield with washer fluid.
Rain Sensing Wipers
This feature senses moisture on the vehicle's windshield and automatically activates
the wipers for the driver when the switch is in the intermittent position.
Rear Wiper
Rear Wiper Operation
• Rotate the center portion of the lever upward to the first detent for intermittent operation and to the second detent for continuous rear wiper operation.
Rear Washer Operation
• Push the lever forward and hold while spray is desired.
Multifunction Lever
1 — Rear Washer (Push Forward)
2 — Lift Up For Mist
3 — Front Washer (Pull Toward Driver)
OPERATING YOUR VEHICLE
42
Page 62 of 236
To Manually Turn On The Stop/Start System
Push the STOP/START Off switch (located on the switch bank). The light on the
switch will turn off.
For complete details on the Stop/Start System refer to the “Stop/Start System” in the
“Starting And Operating” section located in your owners manual on the DVD for
further information.
ELECTRIC PARK BRAKE (EPB)
Your vehicle is equipped with a new Electric Park Brake System (EPB) that offers
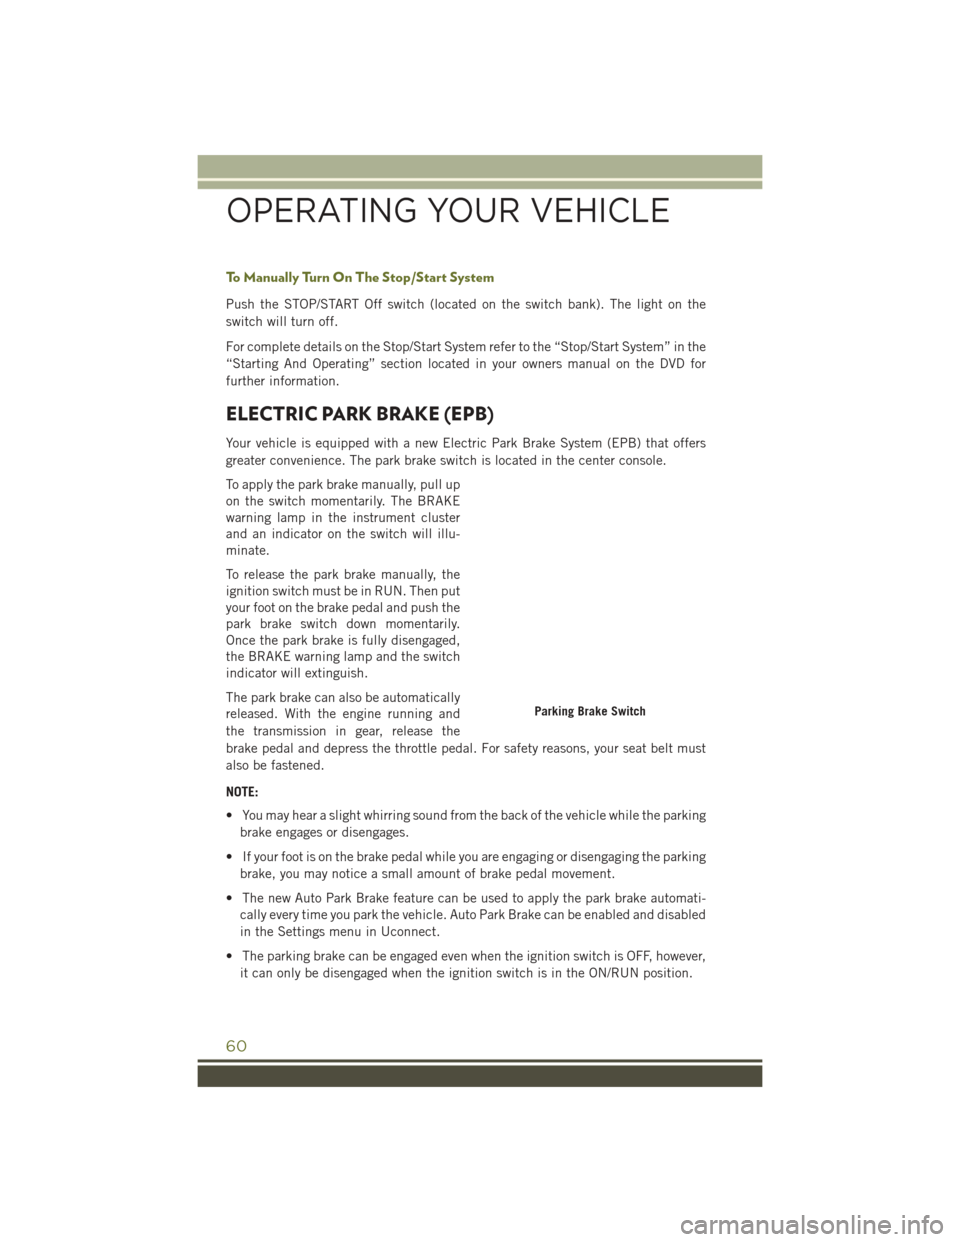
greater convenience. The park brake switch is located in the center console.
To apply the park brake manually, pull up
on the switch momentarily. The BRAKE
warning lamp in the instrument cluster
and an indicator on the switch will illu-
minate.
To release the park brake manually, the
ignition switch must be in RUN. Then put
your foot on the brake pedal and push the
park brake switch down momentarily.
Once the park brake is fully disengaged,
the BRAKE warning lamp and the switch
indicator will extinguish.
The park brake can also be automatically
released. With the engine running and
the transmission in gear, release the
brake pedal and depress the throttle pedal. For safety reasons, your seat belt must
also be fastened.
NOTE:
• You may hear a slight whirring sound from the back of the vehicle while the parkingbrake engages or disengages.
• If your foot is on the brake pedal while you are engaging or disengaging the parking brake, you may notice a small amount of brake pedal movement.
• The new Auto Park Brake feature can be used to apply the park brake automati- cally every time you park the vehicle. Auto Park Brake can be enabled and disabled
in the Settings menu in Uconnect.
• The parking brake can be engaged even when the ignition switch is OFF, however, it can only be disengaged when the ignition switch is in the ON/RUN position.
Parking Brake Switch
OPERATING YOUR VEHICLE
60
Page 90 of 236
SiriusXM Premier Over 160 channels
Get every channel available on your satellite radio, and enjoy all you want, all in one
place. Hear commercial-free music plus sports, news, talk and entertainment. Get all
the premium programming, including Howard Stern, every NFL game, Oprah Radio,
every MLB and NHL game, every NASCAR race, Martha Stewart and more. And get
20+ extra channels, including SiriusXM Latino, offering 20 channels of commercial
free music, news, talk, comedy, sports and more dedicated to Spanish language
programming.
To access SiriusXM Satellite Radio, push the RADIO button on the faceplate and then
the SXM button on the touchscreen.
SiriusXM services require subscriptions, sold separately after the 12-month trial
included with the new vehicle purchase.If you decide to continue your service at the
end of your trial subscription, the plan you choose will automatically renew and bill at
then-current rates until you call SiriusXM at 1-866-635-2349 for U.S. residents and
1-888-539-7474 for Canadian residents to cancel. See SiriusXM Customer Agreement
for complete terms at www.siriusxm.com for U.S. residents and www.siriusxm.ca for
Canadian residents. All fees and programming subject to change. Our satellite service
is available only to those at least 18 and older in the 48 contiguous USA and D.C.
Our Sirius satellite service is also available in PR (with coverage limitations).
Our Internet radio service is available throughout our satellite service area and in AK
and HI. © 2015 Sirius XM Radio Inc. Sirius, XM and all related marks and logos are
trademarks of Sirius XM Radio Inc.
Disc Operation (If Equipped)
Your vehicle may have a remote CD player located in the lower center console storage
bin, or in the lower center bench seat bin.
• CD/Disc Mode is entered by either inserting a CD/Disc or by pushing the MEDIA button located on the side of the display. Once in Media Mode, select “Disc.”
• Gently insert one CD into the CD player with the CD label facing as indicated on the illustration located on the Disc player.
Seek Up/Down Buttons
• Press to seek through Disc tracks.
• Hold either button to bypass tracks without stopping.
Browse
• Press the “Browse” button on the touchscreen to scroll through and select a desired track on the Disc. Press the “Exit” button on the touchscreen if you want
to cancel the browse function.
ELECTRONICS
88
Page 106 of 236
Disc Operation (If Equipped)
• Your vehicle may have a remote CD player located in the lower center consolestorage bin, or in the lower center bench seat bin.
• CD/Disc Mode is entered by either inserting a CD/Disc or by pressing the MEDIA button. Once in Media Mode, select “Disc.”
• Gently insert one CD into the CD player with the CD label facing as indicated on the illustration located on the Disc player.
Seek Up/Down Buttons
• Press to seek through Disc tracks.
• Hold either button to bypass tracks without stopping.
Browse
• Press the “Browse” button on the touchscreen to scroll through and select a desired track on the Disc. Press the “Exit” button on the touchscreen if you wish
to cancel the browse function.
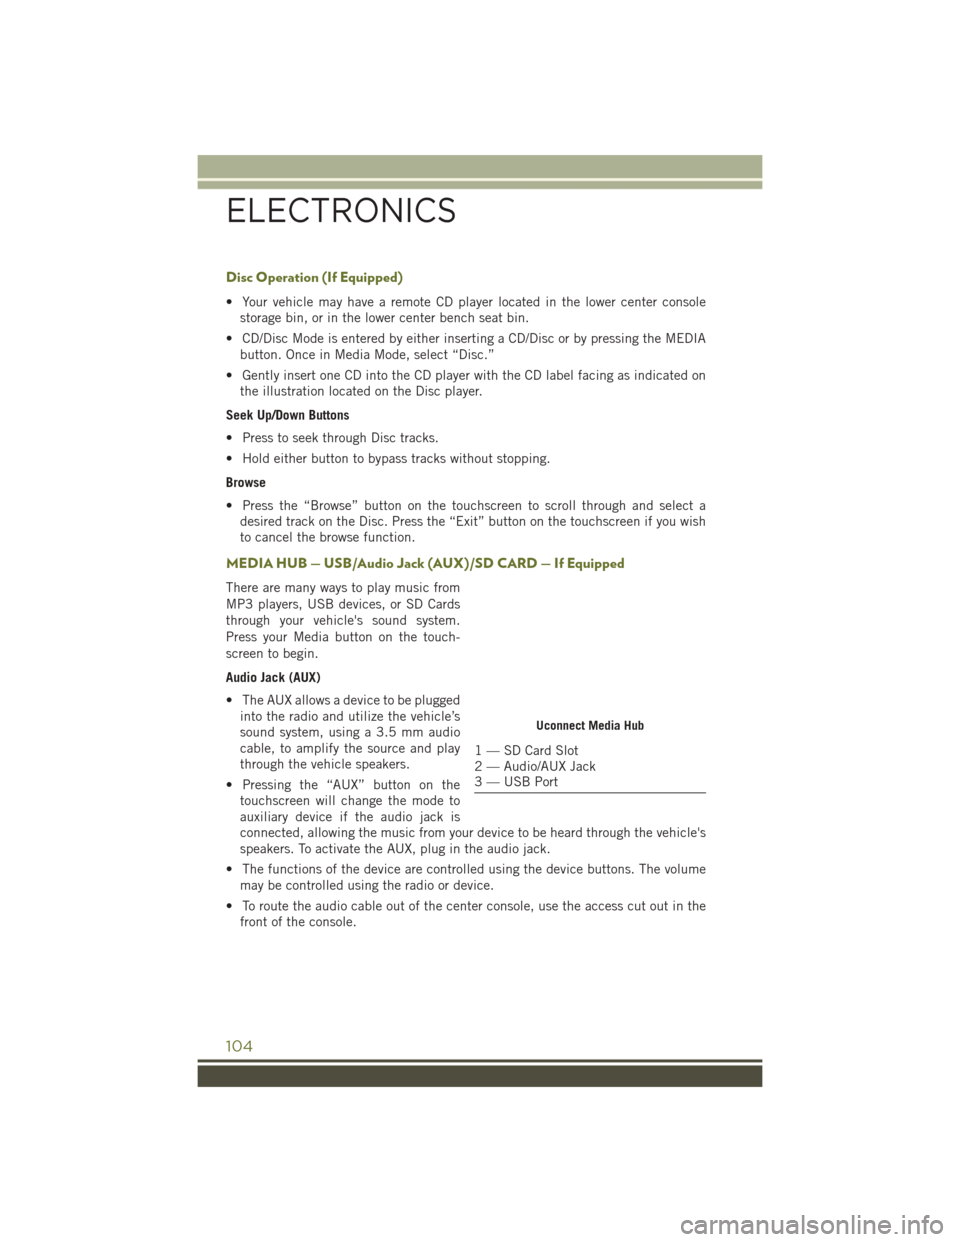
MEDIA HUB — USB/Audio Jack (AUX)/SD CARD — If Equipped
There are many ways to play music from
MP3 players, USB devices, or SD Cards
through your vehicle's sound system.
Press your Media button on the touch-
screen to begin.
Audio Jack (AUX)
• The AUX allows a device to be pluggedinto the radio and utilize the vehicle’s
sound system, using a 3.5 mm audio
cable, to amplify the source and play
through the vehicle speakers.
• Pressing the “AUX” button on the touchscreen will change the mode to
auxiliary device if the audio jack is
connected, allowing the music from your device to be heard through the vehicle's
speakers. To activate the AUX, plug in the audio jack.
• The functions of the device are controlled using the device buttons. The volume may be controlled using the radio or device.
• To route the audio cable out of the center console, use the access cut out in the front of the console.
Uconnect Media Hub
1 — SD Card Slot
2 — Audio/AUX Jack
3 — USB Port
ELECTRONICS
104
Page 107 of 236
USB Port
• Connect your compatible device using a USB cable into the USB Port. USBMemory sticks with audio files can also be used. Audio from the device can be
played on the vehicles sound system while providing metadata (artist, track title,
album, etc.) information on the radio display.
• When connected, the compatible USB device can be controlled using the radio or Steering Wheel Audio Controls to play, skip to the next or previous track, browse,
and list the contents.
• The battery charges when plugged into the USB port (if supported by the specific device).
• To route the USB cable out of the center console, use the access cut out.
NOTE:
When connecting your device for the first time, the system may take several minutes
to read your music, depending on the number of files. For example, the system will
take approximately five minutes for every 1,000 songs loaded on the device. Also
during the reading process, the Shuffle and Browse functions will be disabled. This
process is needed to ensure the full use of your features and only happens the first
time it is connected. After the first time, the reading process of your device will take
considerably less time unless changes are made or new songs are added to the
playlist.
SD Card
• Play songs stored on an SD card inserted into the SD card slot.
• Song playback can be controlled using the radio or Steering Wheel Audio Controls to play, skip to the next or previous track, browse, and list the contents.
Bluetooth Streaming Audio
• If equipped with Uconnect Voice Command, your Bluetooth-equipped device may also be able to stream music to your vehicle's sound system. Your connected
device must be Bluetooth-compatible and paired with your system (see Uconnect
Phone for pairing instructions). You can access the music from your connected
Bluetooth device by pressing the Bluetooth
button on the touchscreen while in
Media mode.
ELECTRONICS
105
Page 146 of 236
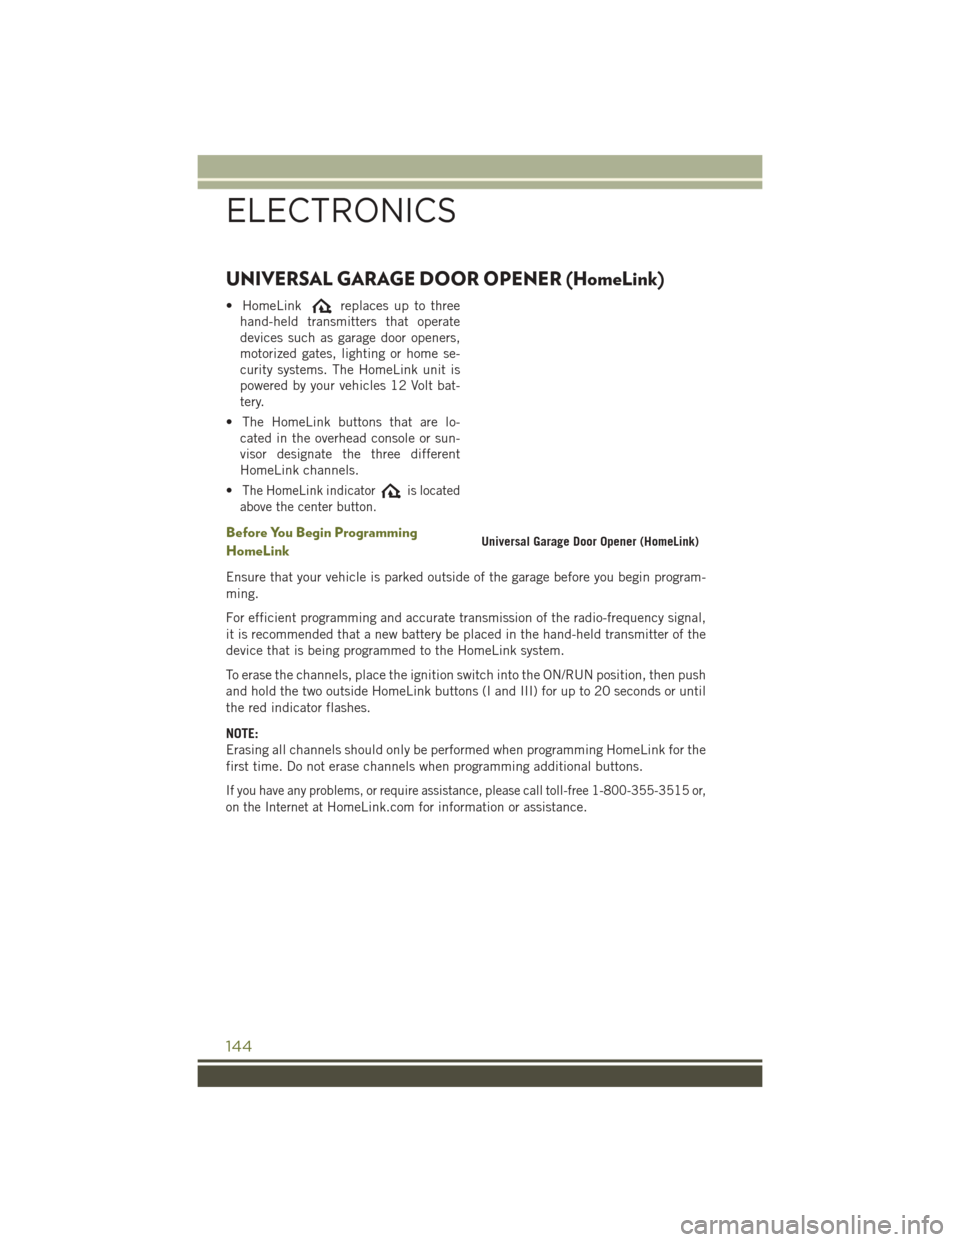
UNIVERSAL GARAGE DOOR OPENER (HomeLink)
• HomeLinkreplaces up to three
hand-held transmitters that operate
devices such as garage door openers,
motorized gates, lighting or home se-
curity systems. The HomeLink unit is
powered by your vehicles 12 Volt bat-
tery.
• The HomeLink buttons that are lo- cated in the overhead console or sun-
visor designate the three different
HomeLink channels.
•
The HomeLink indicatoris located
above the center button.
Before You Begin Programming
HomeLink
Ensure that your vehicle is parked outside of the garage before you begin program-
ming.
For efficient programming and accurate transmission of the radio-frequency signal,
it is recommended that a new battery be placed in the hand-held transmitter of the
device that is being programmed to the HomeLink system.
To erase the channels, place the ignition switch into the ON/RUN position, then push
and hold the two outside HomeLink buttons (I and III) for up to 20 seconds or until
the red indicator flashes.
NOTE:
Erasing all channels should only be performed when programming HomeLink for the
first time. Do not erase channels when programming additional buttons.
If you have any problems, or require assistance, please call toll-free 1-800-355-3515 or,
on the Internet at
HomeLink.com for information or assistance.
Universal Garage Door Opener (HomeLink)
ELECTRONICS
144
Page 149 of 236
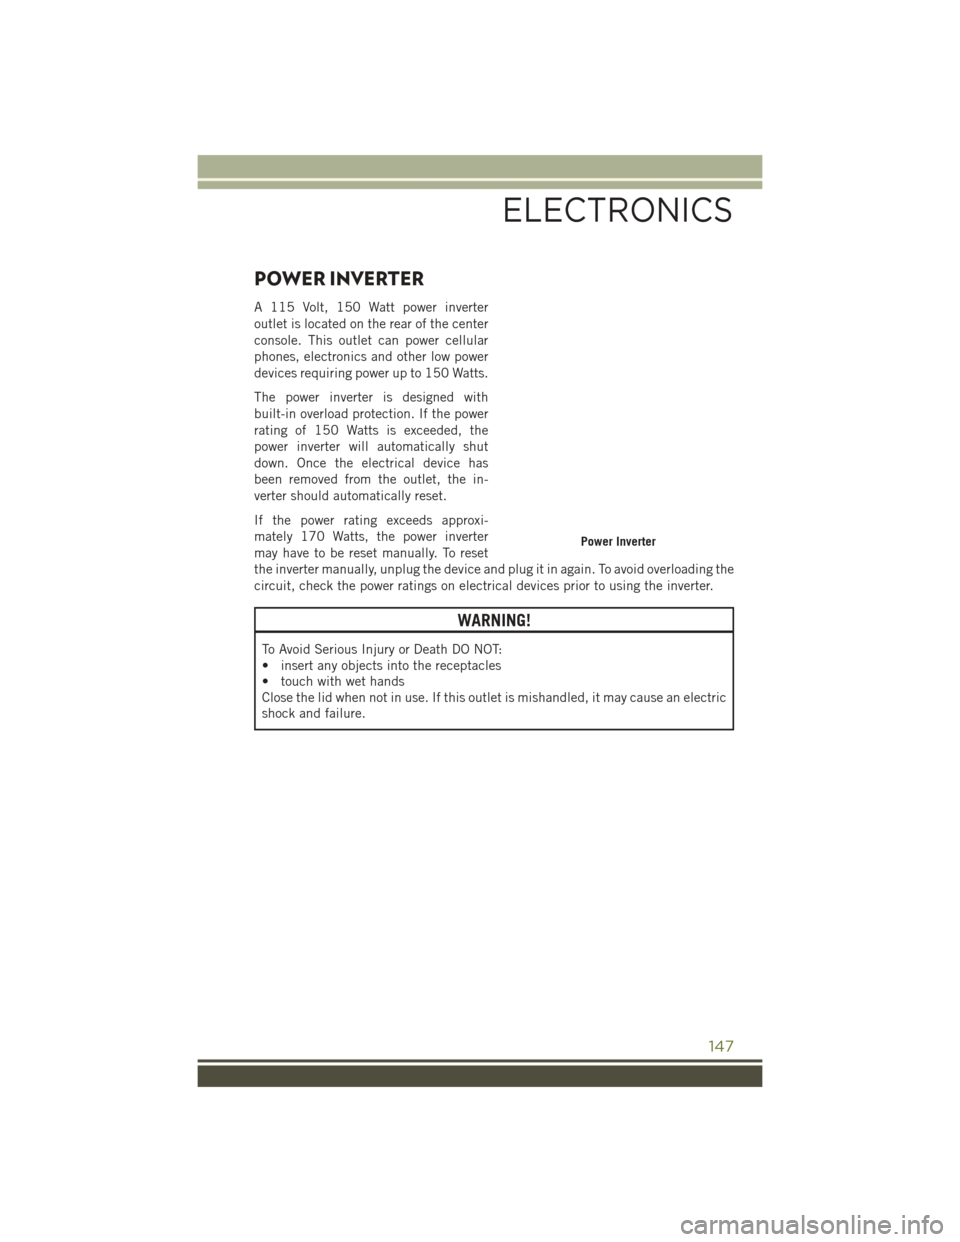
POWER INVERTER
A 115 Volt, 150 Watt power inverter
outlet is located on the rear of the center
console. This outlet can power cellular
phones, electronics and other low power
devices requiring power up to 150 Watts.
The power inverter is designed with
built-in overload protection. If the power
rating of 150 Watts is exceeded, the
power inverter will automatically shut
down. Once the electrical device has
been removed from the outlet, the in-
verter should automatically reset.
If the power rating exceeds approxi-
mately 170 Watts, the power inverter
may have to be reset manually. To reset
the inverter manually, unplug the device and plug it in again. To avoid overloading the
circuit, check the power ratings on electrical devices prior to using the inverter.
WARNING!
To Avoid Serious Injury or Death DO NOT:
• insert any objects into the receptacles
• touch with wet hands
Close the lid when not in use. If this outlet is mishandled, it may cause an electric
shock and failure.
Power Inverter
ELECTRONICS
147
Page 150 of 236
POWER OUTLET
There are three 12 Volt electrical power outlets on this vehicle.
The front 12 Volt power outlet is located below the climate controls in the Center
Console Media Center, and is powered when the ignition switch is in the ON/RUN
position. The outlet can operate a conventional cigar lighter unit or power accessories
designed for use with a standard power outlet adapter.
The center console 12 Volt power outlet is powered directly from the battery (power
available at all times). Items plugged into this outlet may discharge the battery and/or
prevent the engine from starting.
Front Power Outlet
Center Console Power Outlet
ELECTRONICS
148
Page 151 of 236
There is also a 12 Volt power outlet located in the rear cargo area of the vehicle. This
power outlet has power available directly from the battery (power available at all
times). Items plugged into this outlet also may discharge the battery and/or prevent
the engine from starting.
NOTE:
• Do not exceed the maximum power of160 Watts (13 Amps) at 12 Volts. If
the 160 Watt (13 Amp) power rating is
exceeded, the fuse protecting the sys-
tem will need to be replaced.
• Power outlets are designed for acces- sory plugs only. Do not insert any other
object in the power outlet as this will
damage the outlet and blow the fuse.
Improper use of the power outlet can
cause damage not covered by your new
vehicle Limited warranty.
• The rear cargo power outlet can be switched to “battery” powered all the time by switching the power outlet right rear quarter panel fuse in the fuse panel.
Rear Cargo Power Outlet
Power Outlets Fuse Locations
1 — F75 Fuse 20A Yellow Front Power Outlet/Cigar Lighter Console Bin
2 — F81 Fuse 20A Yellow Rear Power Outlet (battery powered at all times)
3 — F91 Fuse 20A Yellow Rear Power Outlet (powered when the ignition switch is
in the ON or ACC position)
4 — F60 Fuse 20A Yellow Power Outlet Center Console
ELECTRONICS
149