window JEEP CHEROKEE 2018 Owner handbook (in English)
[x] Cancel search | Manufacturer: JEEP, Model Year: 2018, Model line: CHEROKEE, Model: JEEP CHEROKEE 2018Pages: 312, PDF Size: 4.91 MB
Page 123 of 312
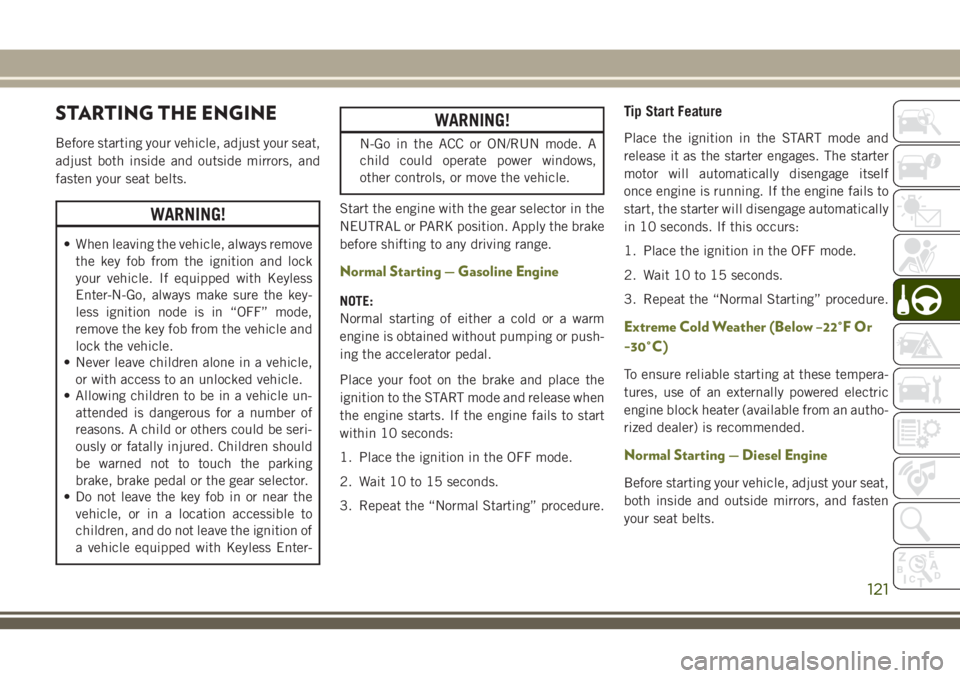
STARTING THE ENGINE
Before starting your vehicle, adjust your seat,
adjust both inside and outside mirrors, and
fasten your seat belts.
WARNING!
• When leaving the vehicle, always removethe key fob from the ignition and lock
your vehicle. If equipped with Keyless
Enter-N-Go, always make sure the key-
less ignition node is in “OFF” mode,
remove the key fob from the vehicle and
lock the vehicle.
• Never leave children alone in a vehicle,
or with access to an unlocked vehicle.
• Allowing children to be in a vehicle un-
attended is dangerous for a number of
reasons. A child or others could be seri-
ously or fatally injured. Children should
be warned not to touch the parking
brake, brake pedal or the gear selector.
• Do not leave the key fob in or near the
vehicle, or in a location accessible to
children, and do not leave the ignition of
a vehicle equipped with Keyless Enter-
WARNING!
N-Go in the ACC or ON/RUN mode. A
child could operate power windows,
other controls, or move the vehicle.
Start the engine with the gear selector in the
NEUTRAL or PARK position. Apply the brake
before shifting to any driving range.
Normal Starting — Gasoline Engine
NOTE:
Normal starting of either a cold or a warm
engine is obtained without pumping or push-
ing the accelerator pedal.
Place your foot on the brake and place the
ignition to the START mode and release when
the engine starts. If the engine fails to start
within 10 seconds:
1. Place the ignition in the OFF mode.
2. Wait 10 to 15 seconds.
3. Repeat the “Normal Starting” procedure.
Tip Start Feature
Place the ignition in the START mode and
release it as the starter engages. The starter
motor will automatically disengage itself
once engine is running. If the engine fails to
start, the starter will disengage automatically
in 10 seconds. If this occurs:
1. Place the ignition in the OFF mode.
2. Wait 10 to 15 seconds.
3. Repeat the “Normal Starting” procedure.
Extreme Cold Weather (Below –22°F Or
−30°C)
To ensure reliable starting at these tempera-
tures, use of an externally powered electric
engine block heater (available from an autho-
rized dealer) is recommended.
Normal Starting — Diesel Engine
Before starting your vehicle, adjust your seat,
both inside and outside mirrors, and fasten
your seat belts.
121
Page 124 of 312
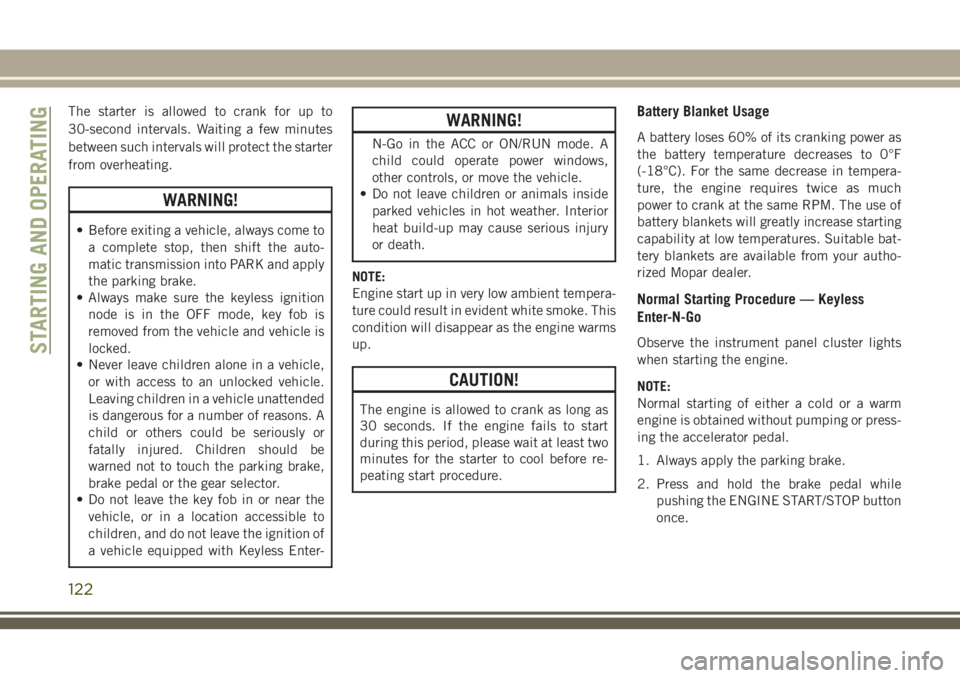
The starter is allowed to crank for up to
30-second intervals. Waiting a few minutes
between such intervals will protect the starter
from overheating.
WARNING!
• Before exiting a vehicle, always come toa complete stop, then shift the auto-
matic transmission into PARK and apply
the parking brake.
• Always make sure the keyless ignition
node is in the OFF mode, key fob is
removed from the vehicle and vehicle is
locked.
• Never leave children alone in a vehicle,
or with access to an unlocked vehicle.
Leaving children in a vehicle unattended
is dangerous for a number of reasons. A
child or others could be seriously or
fatally injured. Children should be
warned not to touch the parking brake,
brake pedal or the gear selector.
• Do not leave the key fob in or near the
vehicle, or in a location accessible to
children, and do not leave the ignition of
a vehicle equipped with Keyless Enter-
WARNING!
N-Go in the ACC or ON/RUN mode. A
child could operate power windows,
other controls, or move the vehicle.
• Do not leave children or animals inside
parked vehicles in hot weather. Interior
heat build-up may cause serious injury
or death.
NOTE:
Engine start up in very low ambient tempera-
ture could result in evident white smoke. This
condition will disappear as the engine warms
up.
CAUTION!
The engine is allowed to crank as long as
30 seconds. If the engine fails to start
during this period, please wait at least two
minutes for the starter to cool before re-
peating start procedure.
Battery Blanket Usage
A battery loses 60% of its cranking power as
the battery temperature decreases to 0°F
(-18°C). For the same decrease in tempera-
ture, the engine requires twice as much
power to crank at the same RPM. The use of
battery blankets will greatly increase starting
capability at low temperatures. Suitable bat-
tery blankets are available from your autho-
rized Mopar dealer.
Normal Starting Procedure — Keyless
Enter-N-Go
Observe the instrument panel cluster lights
when starting the engine.
NOTE:
Normal starting of either a cold or a warm
engine is obtained without pumping or press-
ing the accelerator pedal.
1. Always apply the parking brake.
2. Press and hold the brake pedal while pushing the ENGINE START/STOP button
once.STARTING AND OPERATING
122
Page 127 of 312
WARNING!
• Never use the PARK position as a sub-stitute for the parking brake. Always ap-
ply the parking brake fully when exiting
the vehicle to guard against vehicle
movement and possible injury or dam-
age.
• When exiting the vehicle, always make
sure the ignition is in the OFF mode,
remove the key fob from the vehicle, and
lock your vehicle.
• Never leave children alone in a vehicle,
or with access to an unlocked vehicle.
Allowing children to be in a vehicle un-
attended is dangerous for a number of
reasons. A child or others could be seri-
ously or fatally injured. Children should
be warned not to touch the parking
brake, brake pedal or the transmission
gear selector.
• Do not leave the key fob in or near the
vehicle, (or in a location accessible to
children), and do not leave the ignition
in the ACC or ON/RUN mode. A child
WARNING!
could operate power windows, other con-
trols, or move the vehicle.
• Be sure the parking brake is fully disen-
gaged before driving; failure to do so can
lead to brake failure and a collision.
• Always fully apply the parking brake
when leaving your vehicle, or it may roll
and cause damage or injury. Also be
certain to leave the transmission in
PARK. Failure to do so may allow the
vehicle to roll and cause damage or in-
jury.
• Driving the vehicle with the parking
brake engaged, or repeated use of the
parking brake to slow the vehicle may
cause serious damage to the brake sys-
tem.
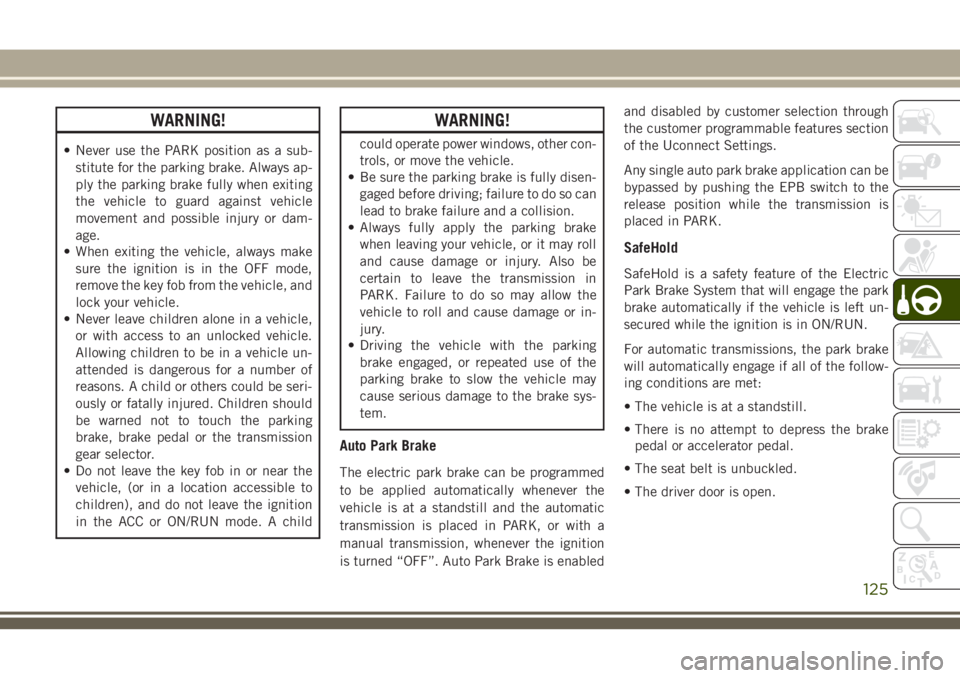
Auto Park Brake
The electric park brake can be programmed
to be applied automatically whenever the
vehicle is at a standstill and the automatic
transmission is placed in PARK, or with a
manual transmission, whenever the ignition
is turned “OFF”. Auto Park Brake is enabled and disabled by customer selection through
the customer programmable features section
of the Uconnect Settings.
Any single auto park brake application can be
bypassed by pushing the EPB switch to the
release position while the transmission is
placed in PARK.
SafeHold
SafeHold is a safety feature of the Electric
Park Brake System that will engage the park
brake automatically if the vehicle is left un-
secured while the ignition is in ON/RUN.
For automatic transmissions, the park brake
will automatically engage if all of the follow-
ing conditions are met:
• The vehicle is at a standstill.
• There is no attempt to depress the brake
pedal or accelerator pedal.
• The seat belt is unbuckled.
• The driver door is open.
125
Page 173 of 312
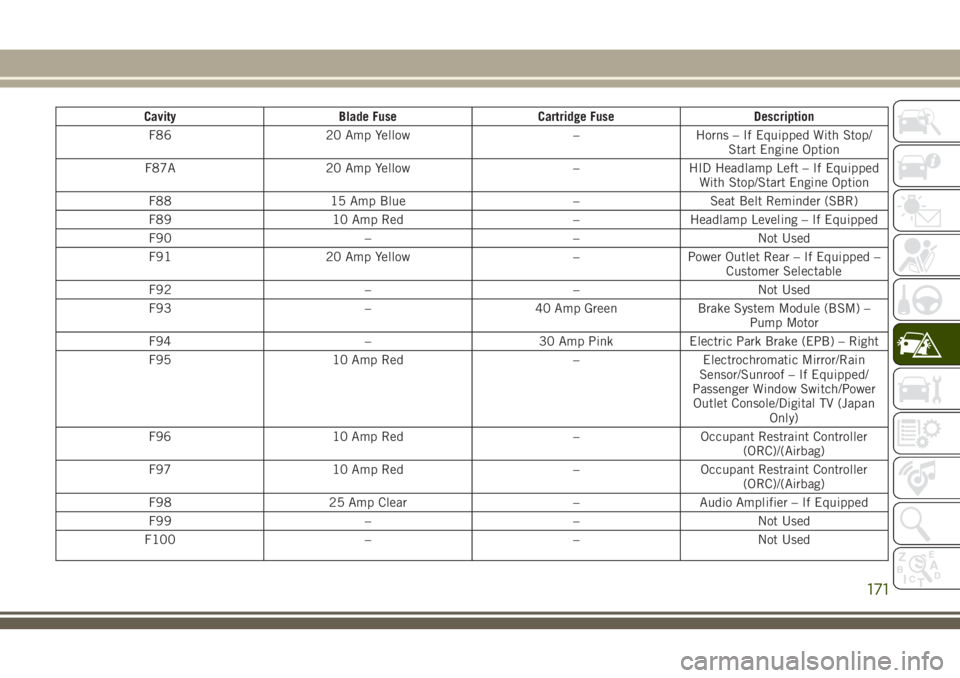
CavityBlade Fuse Cartridge Fuse Description
F86 20 Amp Yellow –Horns – If Equipped With Stop/
Start Engine Option
F87A 20 Amp Yellow –HID Headlamp Left – If Equipped
With Stop/Start Engine Option
F88 15 Amp Blue –Seat Belt Reminder (SBR)
F89 10 Amp Red –Headlamp Leveling – If Equipped
F90 ––Not Used
F91 20 Amp Yellow –Power Outlet Rear – If Equipped –
Customer Selectable
F92 ––Not Used
F93 –40 Amp GreenBrake System Module (BSM) –
Pump Motor
F94 –30 Amp PinkElectric Park Brake (EPB) – Right
F95 10 Amp Red –Electrochromatic Mirror/Rain
Sensor/Sunroof – If Equipped/
Passenger Window Switch/Power Outlet Console/Digital TV (Japan Only)
F96 10 Amp Red –Occupant Restraint Controller
(ORC)/(Airbag)
F97 10 Amp Red –Occupant Restraint Controller
(ORC)/(Airbag)
F98 25 Amp Clear –Audio Amplifier – If Equipped
F99 ––Not Used
F100 ––Not Used
171
Page 174 of 312
Interior Fuses
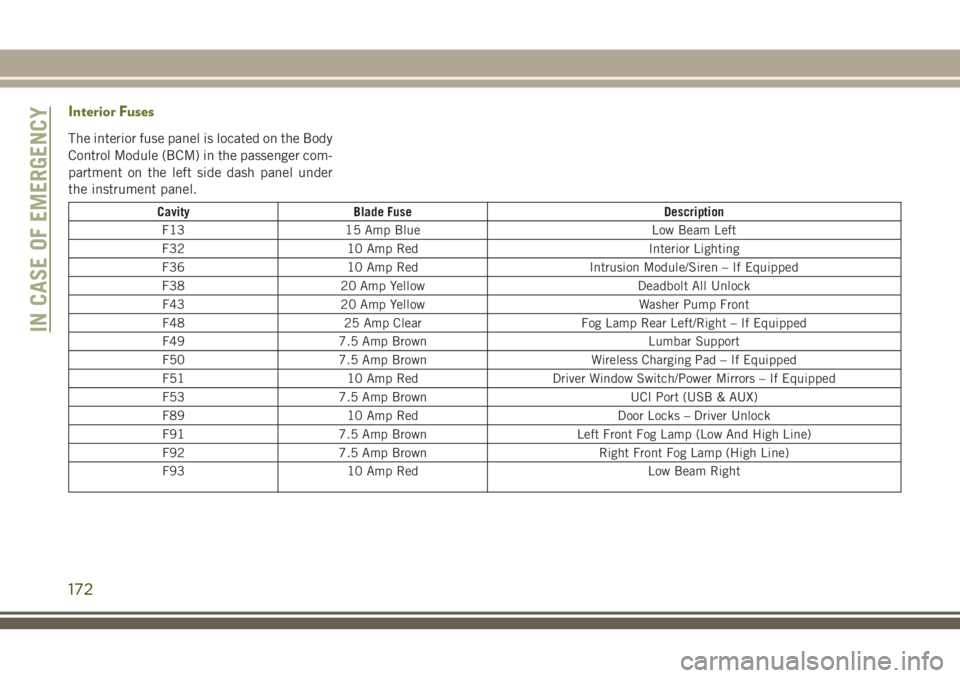
The interior fuse panel is located on the Body
Control Module (BCM) in the passenger com-
partment on the left side dash panel under
the instrument panel.
CavityBlade Fuse Description
F13 15 Amp Blue Low Beam Left
F32 10 Amp Red Interior Lighting
F36 10 Amp Red Intrusion Module/Siren – If Equipped
F38 20 Amp Yellow Deadbolt All Unlock
F43 20 Amp Yellow Washer Pump Front
F48 25 Amp Clear Fog Lamp Rear Left/Right – If Equipped
F49 7.5 Amp Brown Lumbar Support
F50 7.5 Amp Brown Wireless Charging Pad – If Equipped
F51 10 Amp Red Driver Window Switch/Power Mirrors – If Equipped
F53 7.5 Amp Brown UCI Port (USB & AUX)
F89 10 Amp Red Door Locks – Driver Unlock
F91 7.5 Amp Brown Left Front Fog Lamp (Low And High Line)
F92 7.5 Amp Brown Right Front Fog Lamp (High Line)
F93 10 Amp Red Low Beam Right
IN CASE OF EMERGENCY
172
Page 211 of 312
tire system for leaks. DO NOT REMOVE THE
COOLANT PRESSURE CAP WHEN THE
COOLING SYSTEM IS HOT.
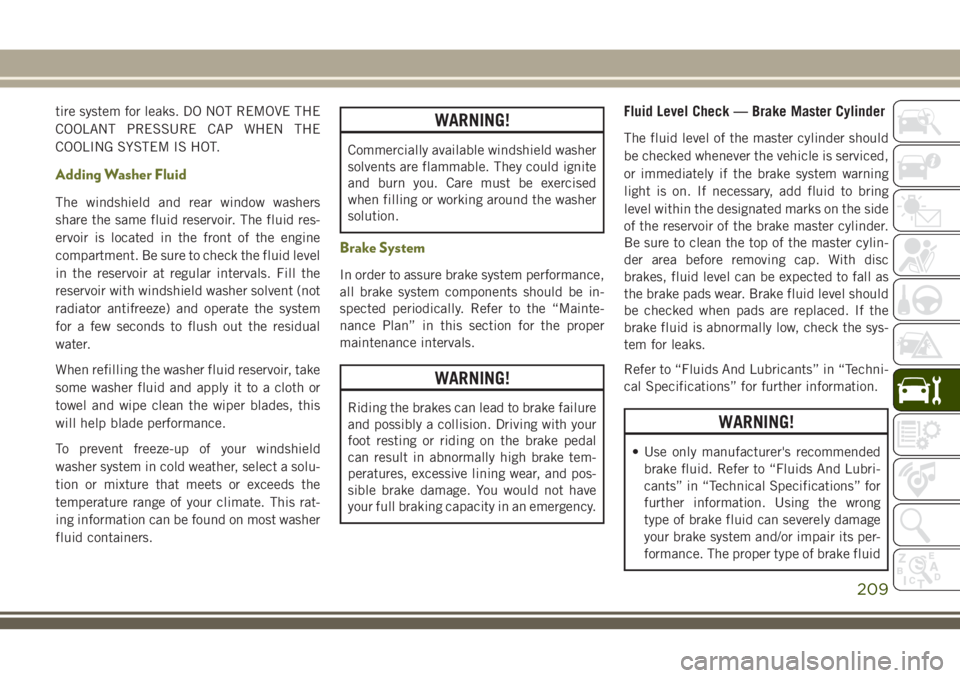
Adding Washer Fluid
The windshield and rear window washers
share the same fluid reservoir. The fluid res-
ervoir is located in the front of the engine
compartment. Be sure to check the fluid level
in the reservoir at regular intervals. Fill the
reservoir with windshield washer solvent (not
radiator antifreeze) and operate the system
for a few seconds to flush out the residual
water.
When refilling the washer fluid reservoir, take
some washer fluid and apply it to a cloth or
towel and wipe clean the wiper blades, this
will help blade performance.
To prevent freeze-up of your windshield
washer system in cold weather, select a solu-
tion or mixture that meets or exceeds the
temperature range of your climate. This rat-
ing information can be found on most washer
fluid containers.
WARNING!
Commercially available windshield washer
solvents are flammable. They could ignite
and burn you. Care must be exercised
when filling or working around the washer
solution.
Brake System
In order to assure brake system performance,
all brake system components should be in-
spected periodically. Refer to the “Mainte-
nance Plan” in this section for the proper
maintenance intervals.
WARNING!
Riding the brakes can lead to brake failure
and possibly a collision. Driving with your
foot resting or riding on the brake pedal
can result in abnormally high brake tem-
peratures, excessive lining wear, and pos-
sible brake damage. You would not have
your full braking capacity in an emergency.
Fluid Level Check — Brake Master Cylinder
The fluid level of the master cylinder should
be checked whenever the vehicle is serviced,
or immediately if the brake system warning
light is on. If necessary, add fluid to bring
level within the designated marks on the side
of the reservoir of the brake master cylinder.
Be sure to clean the top of the master cylin-
der area before removing cap. With disc
brakes, fluid level can be expected to fall as
the brake pads wear. Brake fluid level should
be checked when pads are replaced. If the
brake fluid is abnormally low, check the sys-
tem for leaks.
Refer to “Fluids And Lubricants” in “Techni-
cal Specifications” for further information.
WARNING!
• Use only manufacturer's recommendedbrake fluid. Refer to “Fluids And Lubri-
cants” in “Technical Specifications” for
further information. Using the wrong
type of brake fluid can severely damage
your brake system and/or impair its per-
formance. The proper type of brake fluid
209
Page 227 of 312
tires. Rotation will increase tread life, help to
maintain mud, snow, and wet traction levels,
and contribute to a smooth, quiet ride.
Refer to the “Maintenance Plan” for the
proper maintenance intervals. The reasons
for any rapid or unusual wear should be
corrected prior to rotation being performed.
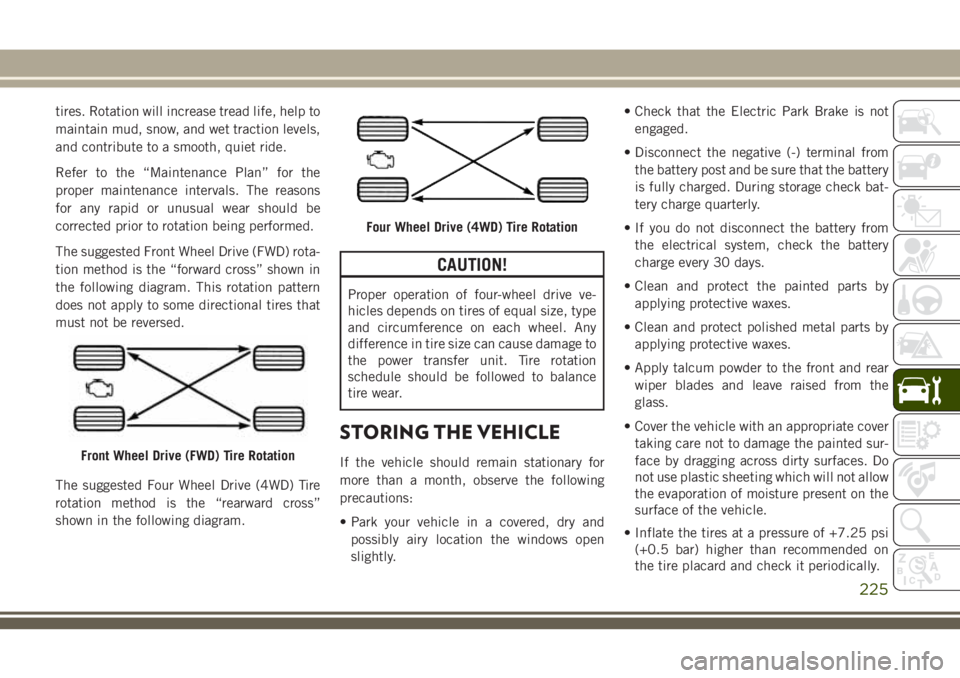
The suggested Front Wheel Drive (FWD) rota-
tion method is the “forward cross” shown in
the following diagram. This rotation pattern
does not apply to some directional tires that
must not be reversed.
The suggested Four Wheel Drive (4WD) Tire
rotation method is the “rearward cross”
shown in the following diagram.
CAUTION!
Proper operation of four-wheel drive ve-
hicles depends on tires of equal size, type
and circumference on each wheel. Any
difference in tire size can cause damage to
the power transfer unit. Tire rotation
schedule should be followed to balance
tire wear.
STORING THE VEHICLE
If the vehicle should remain stationary for
more than a month, observe the following
precautions:
• Park your vehicle in a covered, dry andpossibly airy location the windows open
slightly. • Check that the Electric Park Brake is not
engaged.
• Disconnect the negative (-) terminal from the battery post and be sure that the battery
is fully charged. During storage check bat-
tery charge quarterly.
• If you do not disconnect the battery from the electrical system, check the battery
charge every 30 days.
• Clean and protect the painted parts by applying protective waxes.
• Clean and protect polished metal parts by applying protective waxes.
• Apply talcum powder to the front and rear wiper blades and leave raised from the
glass.
• Cover the vehicle with an appropriate cover taking care not to damage the painted sur-
face by dragging across dirty surfaces. Do
not use plastic sheeting which will not allow
the evaporation of moisture present on the
surface of the vehicle.
• Inflate the tires at a pressure of +7.25 psi (+0.5 bar) higher than recommended on
the tire placard and check it periodically.Front Wheel Drive (FWD) Tire Rotation
Four Wheel Drive (4WD) Tire Rotation
225
Page 230 of 312
Leather Parts
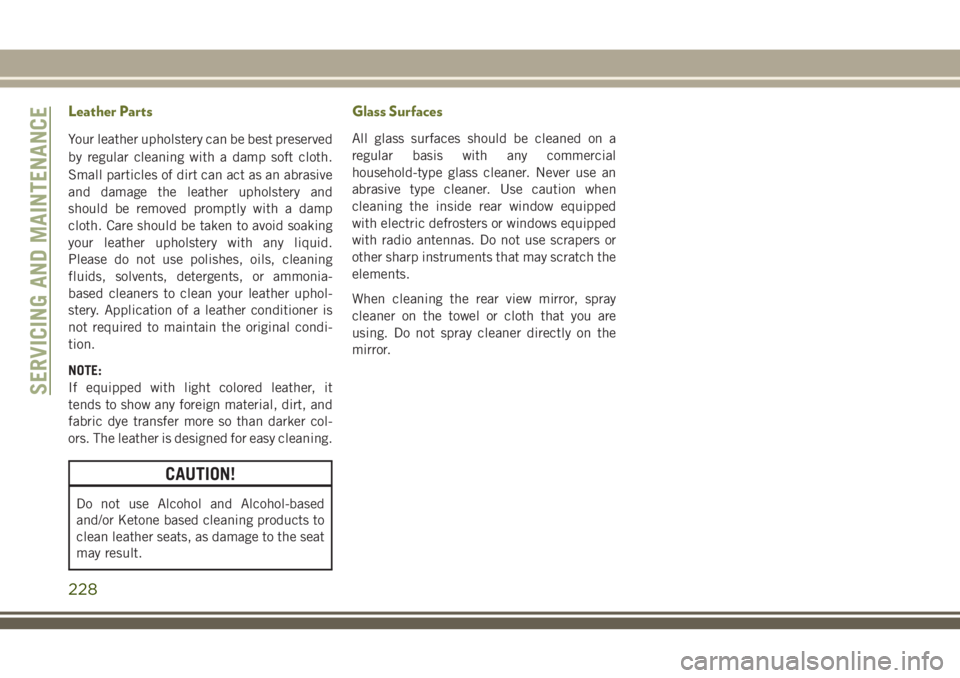
Your leather upholstery can be best preserved
by regular cleaning with a damp soft cloth.
Small particles of dirt can act as an abrasive
and damage the leather upholstery and
should be removed promptly with a damp
cloth. Care should be taken to avoid soaking
your leather upholstery with any liquid.
Please do not use polishes, oils, cleaning
fluids, solvents, detergents, or ammonia-
based cleaners to clean your leather uphol-
stery. Application of a leather conditioner is
not required to maintain the original condi-
tion.
NOTE:
If equipped with light colored leather, it
tends to show any foreign material, dirt, and
fabric dye transfer more so than darker col-
ors. The leather is designed for easy cleaning.
CAUTION!
Do not use Alcohol and Alcohol-based
and/or Ketone based cleaning products to
clean leather seats, as damage to the seat
may result.
Glass Surfaces
All glass surfaces should be cleaned on a
regular basis with any commercial
household-type glass cleaner. Never use an
abrasive type cleaner. Use caution when
cleaning the inside rear window equipped
with electric defrosters or windows equipped
with radio antennas. Do not use scrapers or
other sharp instruments that may scratch the
elements.
When cleaning the rear view mirror, spray
cleaner on the towel or cloth that you are
using. Do not spray cleaner directly on the
mirror.
SERVICING AND MAINTENANCE
228
Page 232 of 312
VEHICLE IDENTIFICATION
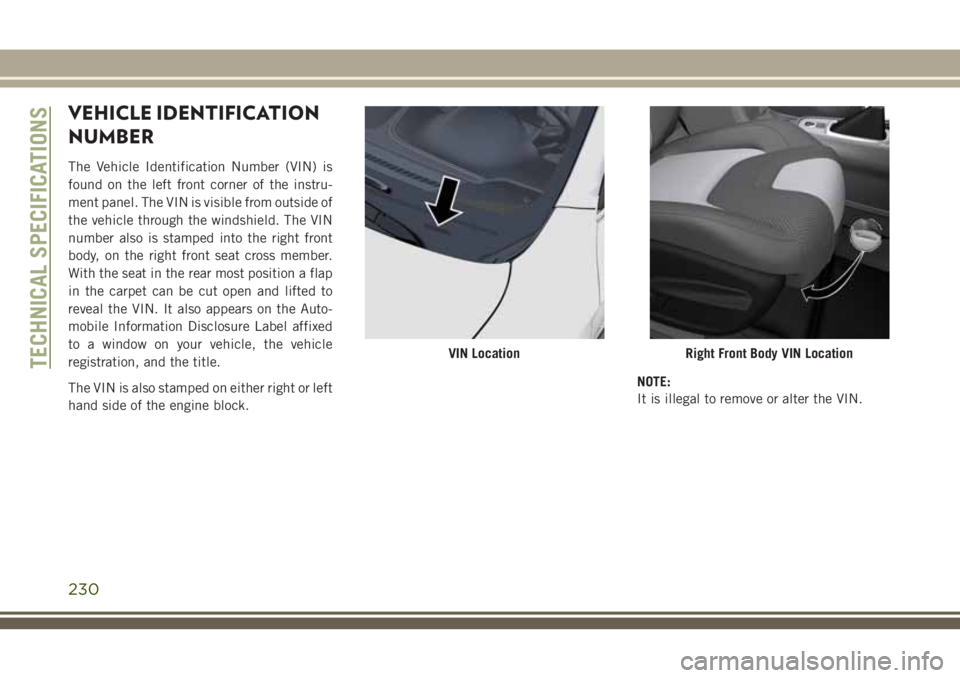
NUMBER
The Vehicle Identification Number (VIN) is
found on the left front corner of the instru-
ment panel. The VIN is visible from outside of
the vehicle through the windshield. The VIN
number also is stamped into the right front
body, on the right front seat cross member.
With the seat in the rear most position a flap
in the carpet can be cut open and lifted to
reveal the VIN. It also appears on the Auto-
mobile Information Disclosure Label affixed
to a window on your vehicle, the vehicle
registration, and the title.
The VIN is also stamped on either right or left
hand side of the engine block.NOTE:
It is illegal to remove or alter the VIN.
VIN LocationRight Front Body VIN LocationTECHNICAL SPECIFICATIONS
230
Page 243 of 312
MOPAR ACCESSORIES
Authentic Accessories By Mopar
• The following highlights just some of themany Authentic Jeep Accessories by Mopar
featuring a fit, finish, and functionality spe-
cifically for your Jeep Cherokee. • In choosing Authentic Accessories you gain
far more than expressive style, premium
protection, or extreme entertainment, you
also benefit from enhancing your vehicle
with accessories that have been thoroughly
tested and factory-approved. • For the full line of Authentic Jeep Accesso-
ries by Mopar, visit your local dealership or
online at mopar.com for U.S. residents and
mopar.ca for Canadian residents.
NOTE:
All parts are subject to availability.
JEEP CARGO MANAGEMENT SYSTEM:
• Off Road Kit • Roadside Safety Kit • Cooler
• First Aid Kit • Collapsible Tote • Cargo Area Cover
EXTERIOR:
• Rock Rails • Front End Cover • Hood Decal
• Wheels • Splash Guards • Skid Plates
• Wheel Locks • Locking Gas Cap • Spare Tire Kit
• License Plate Frames • Side Window Air Deflectors • Camping Tent
• Valve Stem Caps • Vehicle Cover
INTERIOR:
• Premium Floor Mats • Emergency Roadside Kit • Molded Cargo Tray
• Security Cover • Bright Pedal Kit • Katzkin Leather Interiors
• All-Weather Mats • Door Sill Guards • Carpet Cargo Mat
241