clock JEEP CHEROKEE 2019 Owner handbook (in English)
[x] Cancel search | Manufacturer: JEEP, Model Year: 2019, Model line: CHEROKEE, Model: JEEP CHEROKEE 2019Pages: 344, PDF Size: 6.35 MB
Page 274 of 344

UCONNECT 4 WITH 7-INCH
DISPLAY
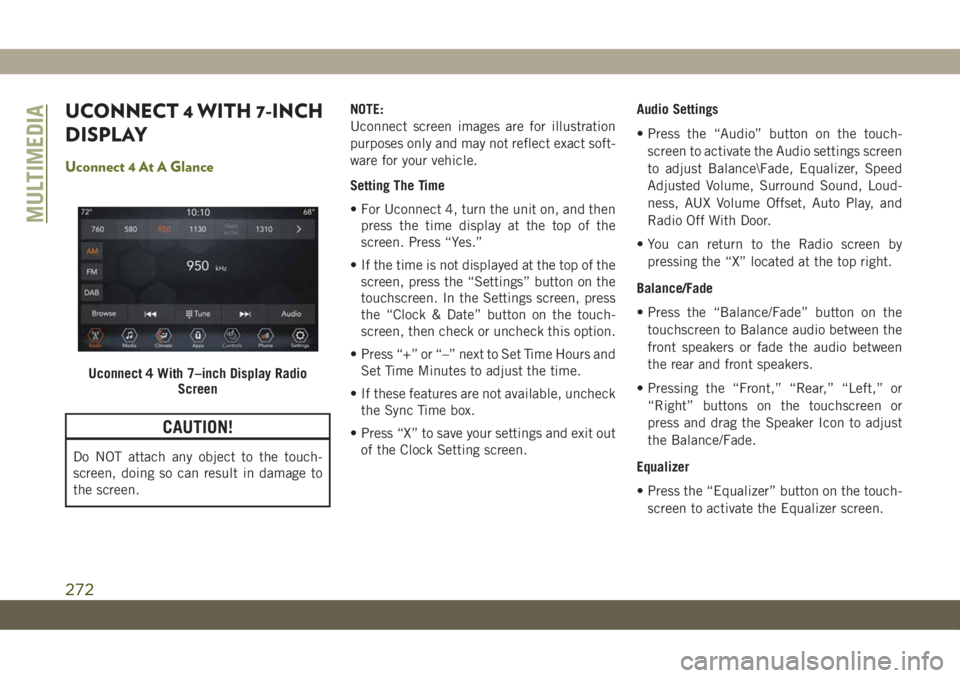
Uconnect 4 At A Glance
CAUTION!
Do NOT attach any object to the touch-
screen, doing so can result in damage to
the screen.NOTE:
Uconnect screen images are for illustration
purposes only and may not reflect exact soft-
ware for your vehicle.
Setting The Time
• For Uconnect 4, turn the unit on, and then
press the time display at the top of the
screen. Press “Yes.”
• If the time is not displayed at the top of the
screen, press the “Settings” button on the
touchscreen. In the Settings screen, press
the “Clock & Date” button on the touch-
screen, then check or uncheck this option.
• Press “+” or “–” next to Set Time Hours and
Set Time Minutes to adjust the time.
• If these features are not available, uncheck
the Sync Time box.
• Press “X” to save your settings and exit out
of the Clock Setting screen.Audio Settings
• Press the “Audio” button on the touch-
screen to activate the Audio settings screen
to adjust Balance\Fade, Equalizer, Speed
Adjusted Volume, Surround Sound, Loud-
ness, AUX Volume Offset, Auto Play, and
Radio Off With Door.
• You can return to the Radio screen by
pressing the “X” located at the top right.
Balance/Fade
• Press the “Balance/Fade” button on the
touchscreen to Balance audio between the
front speakers or fade the audio between
the rear and front speakers.
• Pressing the “Front,” “Rear,” “Left,” or
“Right” buttons on the touchscreen or
press and drag the Speaker Icon to adjust
the Balance/Fade.
Equalizer
• Press the “Equalizer” button on the touch-
screen to activate the Equalizer screen.
Uconnect 4 With 7–inch Display Radio
Screen
MULTIMEDIA
272
Page 280 of 344

• TuneIn
• Deezer
• Reuters
• Twitter
• Facebook Check-In
• Apple CarPlay
• Android Auto, and many more.
UCONNECT 4C/4C NAV
WITH 8.4-INCH DISPLAY
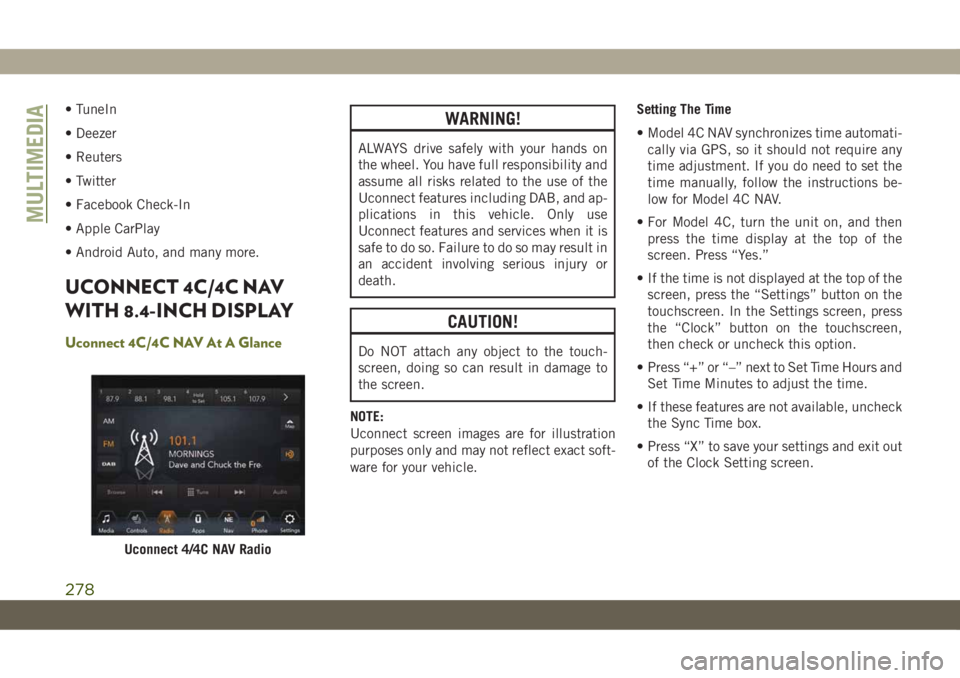
Uconnect 4C/4C NAV At A Glance
WARNING!
ALWAYS drive safely with your hands on
the wheel. You have full responsibility and
assume all risks related to the use of the
Uconnect features including DAB, and ap-
plications in this vehicle. Only use
Uconnect features and services when it is
safe to do so. Failure to do so may result in
an accident involving serious injury or
death.
CAUTION!
Do NOT attach any object to the touch-
screen, doing so can result in damage to
the screen.
NOTE:
Uconnect screen images are for illustration
purposes only and may not reflect exact soft-
ware for your vehicle.Setting The Time
• Model 4C NAV synchronizes time automati-
cally via GPS, so it should not require any
time adjustment. If you do need to set the
time manually, follow the instructions be-
low for Model 4C NAV.
• For Model 4C, turn the unit on, and then
press the time display at the top of the
screen. Press “Yes.”
• If the time is not displayed at the top of the
screen, press the “Settings” button on the
touchscreen. In the Settings screen, press
the “Clock” button on the touchscreen,
then check or uncheck this option.
• Press “+” or “–” next to Set Time Hours and
Set Time Minutes to adjust the time.
• If these features are not available, uncheck
the Sync Time box.
• Press “X” to save your settings and exit out
of the Clock Setting screen.
Uconnect 4/4C NAV Radio
MULTIMEDIA
278
Page 290 of 344

UCONNECT SETTINGS
The Uconnect system allows you to access
Customer Programmable feature settings
such as Display, Voice, Clock, Safety & Driv-
ing Assistance, Lights, Doors & Locks,
Auto-On Comfort, Engine Off Options, Sus-
pension, Compass Settings, Audio, Phone/
Bluetooth, Radio Setup, Restore Settings,
Clear Personal Data, and System Information
through buttons on the touchscreen.
Push the SETTINGS button (Uconnect 3), or
press the “Apps” button (Uconnect 4 or
4C/4C NAV) located near the bottom of the
touchscreen, then press the “Settings” but-
ton on the touchscreen to access the Settings
screen. When making a selection, scroll up or
down until the preferred setting is high-
lighted, then press the preferred setting until
a check-mark appears next to the setting,
showing that setting has been selected. The
following feature settings are available:
• Language • Engine Off Options
• Display • Compass — If
Equipped
• Units • Audio• Voice • Phone/Bluetooth
• Clock • Suspension — If
Equipped
• Camera — If
Equipped• AUX Switches
• Safety & Driving
Assistance• Restore Settings
• Brakes • Clear Personal Data
• Mirrors & Wipers —
If Equipped• System Information
• Lights • Radio Setup
• Doors & Locks
• Auto-On Comfort
NOTE:
Depending on the vehicles options, feature
settings may vary.
Refer to “Uconnect Settings” in “Multime-
dia” in your Owner’s Manual for further infor-
mation.
TIPS CONTROLS AND
GENERAL INFORMATION
Steering Wheel Audio Controls
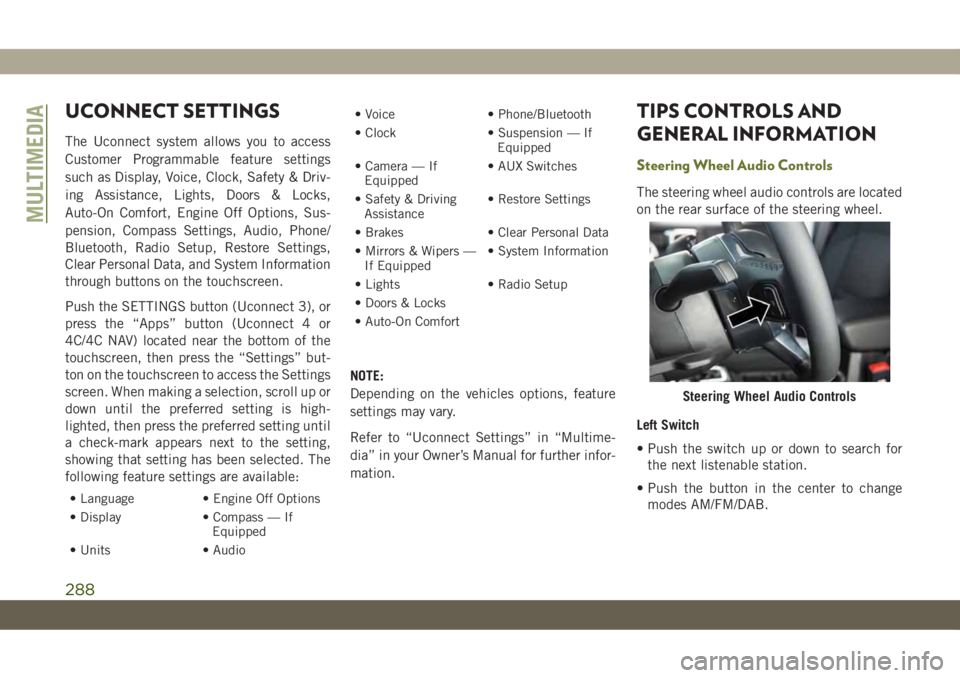
The steering wheel audio controls are located
on the rear surface of the steering wheel.
Left Switch
• Push the switch up or down to search for
the next listenable station.
• Push the button in the center to change
modes AM/FM/DAB.
Steering Wheel Audio Controls
MULTIMEDIA
288
Page 336 of 344

Bulb Replacement.............184
Bulbs, Light.................138
Camera, Rear................173
Capacities, Fluid..............260
Caps, Filler
Fuel....................212
Oil (Engine).....227, 228, 229, 230
Carbon Monoxide Warning.........136
Car Washes..................250
Changing A Flat Tire.........196, 239
Checking Your Vehicle For Safety. . . .136
Checks, Safety................136
Child Restraint................119
Child Restraints
Child Seat Installation.........130
How To Stow An unused ALR Seat
Belt....................130
Clean Air Gasoline.............255
Cleaning
Wheels..................246
Climate Control................40
Automatic.................40
Clock Settings................269
Cold Weather Operation..........140
Compact Spare Tire.............245
Cooling System...............231Cooling Capacity............260
Inspection................232
Selection Of Coolant
(Antifreeze)............260, 262
Cruise Control (Speed Control) . . .161, 162
Cruise Light.............73, 74, 75
Customer Assistance............315
Cybersecurity.................267
Daytime Running Lights...........33
Dealer Service................235
Defroster, Windshield............137
Diagnostic System, Onboard........75
Diesel
Display Messages.............63
Dipsticks
Oil (Engine)
...............231
Disable Vehicle Towing...........214
Disturb.................302, 312
Door Ajar.................66, 67
Door Ajar Light..............66, 67
Doors......................20
Drag And Drop Menu........273, 279
Driver’s Seat Back Tilt............23
Easy Entry Seats...............26
Electrical Power Outlets...........58Electric Brake Control System.......78
Anti-Lock Brake System.........77
Electronic Roll Mitigation.....80, 83
Electric Parking Brake...........142
Electronic Speed Control (Cruise
Control)...............161, 162
Electronic Stability Control (ESC).....80
Electronic Throttle Control Warning
Light.....................66
Emergency Braking..............93
Emergency, In Case Of
Gear Selector Override.........213
Hazard Warning Flasher........184
Jacking...............196, 239
Jump Starting..............209
Emissions...................265
Engine..........227, 228, 229, 230
Break-In Recommendations......141
Checking Oil Level...........231
Coolant (Antifreeze)..........262
Cooling..................231
Exhaust Gas Caution..........136
Fuel Requirements...........260
Jump Starting..............209
Oil..................260, 262
Oil Filler Cap. . . .227, 228, 229, 230
Oil Selection...............260
INDEX
334