android auto JEEP CHEROKEE 2019 Owner handbook (in English)
[x] Cancel search | Manufacturer: JEEP, Model Year: 2019, Model line: CHEROKEE, Model: JEEP CHEROKEE 2019Pages: 344, PDF Size: 6.35 MB
Page 11 of 344
RAISING THE VEHICLE................. 239
TIRES.......................... 239
Tires — General Information......... 239
Tire Types..................... 244
Spare Tires — If Equipped........... 244
Wheel And Wheel Trim Care.......... 246
Tire Chains (Traction Devices)......... 247
Tire Rotation Recommendations........ 248
STORING THE VEHICLE................ 249
BODYWORK....................... 250
Preserving The Bodywork............ 250
INTERIORS....................... 251Seats And Fabric Parts............. 251
Plastic And Coated Parts............ 251
Leather Parts................... 252
Glass Surfaces.................. 252
TECHNICAL SPECIFICATIONS
VEHICLE IDENTIFICATION NUMBER.......... 253
WHEEL AND TIRE TORQUE SPECIFICATIONS.... 253
Torque Specifications.............. 254
FUEL REQUIREMENTS — GASOLINE ENGINE.... 254Methanol..................... 255
Ethanol....................... 255
Clean Air Gasoline................ 255
CNG And LP Fuel System Modifications . . . 255
MMT In Gasoline................. 256
Materials Added To Fuel............ 256
Fuel Icon Identification Compliant To
EN16942..................... 256
FUEL REQUIREMENTS — DIESEL ENGINE...... 258Fuel Icon Identification Compliant To
EN16942..................... 259
FLUID CAPACITIES................... 260
FLUIDS AND LUBRICANTS............... 262
Engine....................... 262
Chassis....................... 265
FUEL CONSUMPTION AND CO2EMISSIONS..... 265
MOPAR ACCESSORIES................. 265
Authentic Accessories By Mopar........ 265
MULTIMEDIA
CYBERSECURITY................... 267
UCONNECT 3 WITH 5–INCH DISPLAY — IF
EQUIPPED....................... 268
Uconnect 3 With 5–inch Display At A
Glance....................... 268
Clock Setting................... 269
Audio Setting................... 269
Radio Operation................. 270
Voice Text Reply
(Not Compatible With iPhone)........ 270
Apps — If Equipped............... 271
UCONNECT 4 WITH 7-INCH DISPLAY......... 272Uconnect 4 At A Glance............ 272
Drag & Drop Menu Bar............. 273
Radio....................... 274
Android Auto — If Equipped.......... 275
Apple CarPlay Integration — If Equipped . . 276
Apps — If Equipped............... 277
UCONNECT 4C/4C NAV WITH 8.4-INCH DISPLAY . . 278Uconnect 4C/4C NAV At A Glance...... 278
Drag & Drop Menu Bar............. 279
Radio....................... 280
Android Auto — If Equipped.......... 281
Apple CarPlay Integration — If Equipped . . 285
Apps — If Equipped............... 287
UCONNECT SETTINGS................ 288
TIPS CONTROLS AND GENERAL INFORMATION . . . 288
Steering Wheel Audio Controls........ 288
AUX/USB/MP3 CONTROL — IF EQUIPPED...... 289
NAVIGATION — IF EQUIPPED............. 290
Changing The Navigation Voice Prompt
Volume....................... 290
Finding Points Of Interest........... 292
Finding A Place By Spelling The Name . . . 292
One-Step Voice Destination Entry....... 292
Setting Your Home Location.......... 292
Home........................ 292
Adding A Stop.................. 294
Taking A Detour.................. 294
Map Update.................... 294
UCONNECT PHONE.................. 295Uconnect Phone (Bluetooth Hands Free
Calling)...................... 295
Pairing (Wirelessly Connecting) Your Mobile
Phone To The Uconnect System....... 298
Common Phone Commands (Examples) . . . 301
Mute (Or Unmute) Microphone During Call . 302
Transfer Ongoing Call Between Handset And
Vehicle...................... 302
Phonebook.................... 302
Voice Command Tips.............. 302
Changing The Volume.............. 302
Using Do Not Disturb.............. 302
Incoming Text Messages............ 303
Helpful Tips And Common Questions To Improve
Bluetooth Performance With Your Uconnect
System...................... 304
9
Page 12 of 344
UCONNECT VOICE RECOGNITION QUICK TIPS.... 305Introducing Uconnect.............. 305
Get Started.................... 306
Basic Voice Commands............. 307
Radio........................ 307
Media....................... 307
Phone....................... 308
Voice Text Reply................. 309
Climate...................... 310
Navigation (4C NAV)............... 311
Siri Eyes Free — If Equipped......... 311
Using Do Not Disturb.............. 312
Android Auto — If Equipped.......... 312
Apple CarPlay — If Equipped......... 313
Additional Information............. 314
CUSTOMER ASSISTANCE
IF YOU NEED ASSISTANCE.............. 315ARGENTINA................... 316
AUSTRALIA.................... 316
AUSTRIA..................... 316
BALANCE OF THE CARIBBEAN........ 316
BELGIUM..................... 317
BOLIVIA...................... 317
BRAZIL...................... 317
BULGARIA.................... 317CHILE....................... 317
CHINA....................... 318
COLOMBIA.................... 318
COSTA RICA................... 318
CROATIA...................... 318
CZECH REPUBLIC................ 318
DENMARK.................... 319
DOMINICAN REPUBLIC............ 319
ECUADOR..................... 319
EL SALVADOR.................. 319
ESTONIA..................... 319
FINLAND..................... 320
FRANCE...................... 320
GERMANY..................... 320
GREECE...................... 321
GUATEMALA................... 321
HONDURAS.................... 321
HUNGARY..................... 321
INDIA....................... 321
IRELAND..................... 322
ITALY ........................ 322
LATVIA....................... 322
LITHUANIA.................... 323
LUXEMBURG................... 323
NETHERLANDS................. 323
NEW ZEALAND.................. 324NORWAY ...................... 324
PANAMA...................... 324
PARAGUAY.................... 324
PERU....................... 324
POLAND...................... 325
PORTUGAL.................... 325
PUERTO RICO AND U.S. VIRGIN ISLANDS . 325
REUNION..................... 326
ROMANIA..................... 326
RUSSIA...................... 326
SERBIA...................... 327
SLOVAKIA..................... 327
SLOVENIA..................... 327
SOUTH AFRICA................. 327
SPAIN ....................... 328
SWEDEN..................... 328
SWITZERLAND.................. 328
TAIWAN ...................... 329
TURKEY...................... 329
UKRAINE..................... 329
UNITED KINGDOM............... 330
URUGUAY..................... 330
VENEZUELA................... 330
INDEX....................... 333
TABLE OF CONTENTS
10
Page 277 of 344
WARNING!
ALWAYS drive safely with your hands on
the wheel. You have full responsibility and
assume all risks related to the use of the
Uconnect features and applications in this
vehicle. Only use Uconnect when it is safe
to do so. Failure to do so may result in an
accident involving serious injury or death.
• To access the Radio mode, press the “Ra-
dio” button on the touchscreen.
Selecting Radio Stations
• Press the desired radio band (AM, FM or
DAB) button on the touchscreen.
Seek Up/Seek Down
• Press the Seek up or down arrow buttons on
the touchscreen for less than two seconds
to seek through radio stations.
• Press and hold either arrow button on the
touchscreen for more than two seconds to
bypass stations without stopping. The radio
will stop at the next listenable station once
the arrow button on the touchscreen is
released.Direct Tune
• Tune directly to a radio station by pressing
the “Tune” button on the screen, and en-
tering the desired station number.
Store Radio Presets Manually
Your radio can store 36 total preset stations,
12 presets per band (AM, FM and DAB). They
are shown at the top of your radio screen. To
see the 12 preset stations per band, press the
arrow button on the touchscreen at the top
right of the screen to toggle between the two
sets of six presets.
To store a radio preset manually, follow the
steps below:
1. Tune to the desired station.
2. Press and hold the desired numbered but-
ton on the touchscreen for more than two
seconds or until you hear a confirmation
beep.
Android Auto — If Equipped
NOTE:
Feature availability depends on your carrier
and mobile phone manufacturer. Some
Android Auto features may or may not be
available in every region and/or language.
Android Auto is a feature of your Uconnect
system, and your Android 5.0 Lollipop, or
higher, powered smartphone with a data plan,
that allows you to project your smartphone
and a number of its apps onto the touch-
screen radio display. Android Auto automati-
cally brings you useful information, and orga-
nizes it into simple cards that appear just
when they are needed. Android Auto can be
used with Google's best-in-class speech tech-
nology, the steering wheel controls, the knobs
and buttons on your radio faceplate, and the
radio display’s touchscreen to control many
of your apps. To use Android Auto follow the
following steps:
1. Download the Android Auto app from the
Google Play store on your Android-
powered smartphone.
275
Page 278 of 344
2. Connect your Android powered smart-
phone to one of the media USB ports in
your vehicle. If you have not downloaded
the Android Auto app to your smartphone
before plugging in the device for the first
time, the app begins to download.
NOTE:
Be sure to use the factory-provided USB
cable that came with your phone, as af-
termarket cables may not work.
Your phone may ask you to approve the
use of the Android Auto app before use.3. Once the device is connected and recog-
nized, Android Auto should automatically
launch, but you can also launch it by
touching the Android Auto icon on the
touchscreen, located under Apps.
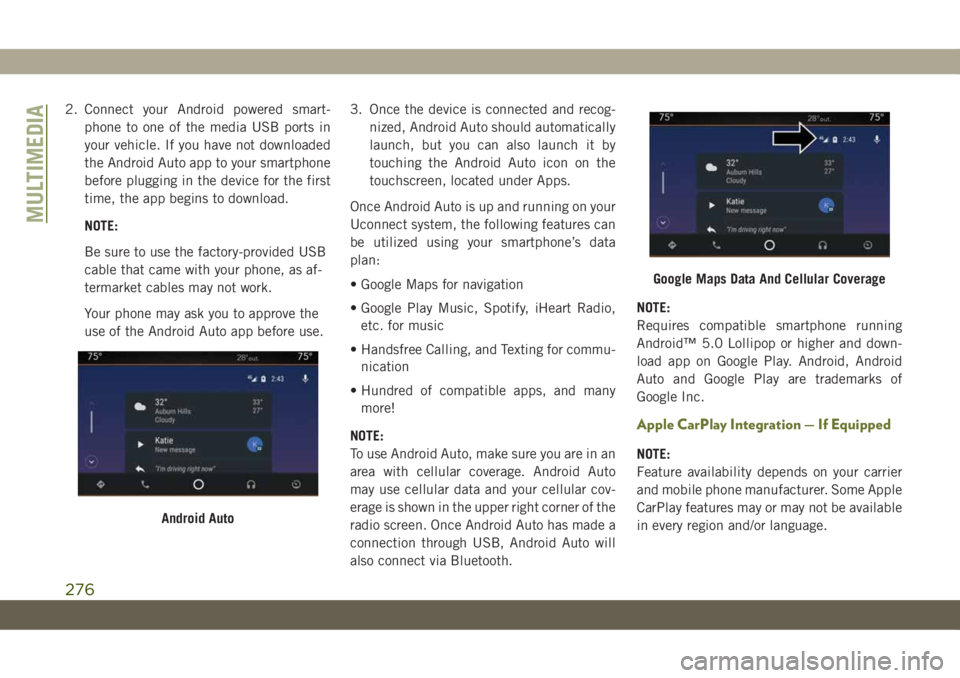
Once Android Auto is up and running on your
Uconnect system, the following features can
be utilized using your smartphone’s data
plan:
• Google Maps for navigation
• Google Play Music, Spotify, iHeart Radio,
etc. for music
• Handsfree Calling, and Texting for commu-
nication
• Hundred of compatible apps, and many
more!
NOTE:
To use Android Auto, make sure you are in an
area with cellular coverage. Android Auto
may use cellular data and your cellular cov-
erage is shown in the upper right corner of the
radio screen. Once Android Auto has made a
connection through USB, Android Auto will
also connect via Bluetooth.NOTE:
Requires compatible smartphone running
Android™ 5.0 Lollipop or higher and down-
load app on Google Play. Android, Android
Auto and Google Play are trademarks of
Google Inc.
Apple CarPlay Integration — If Equipped
NOTE:
Feature availability depends on your carrier
and mobile phone manufacturer. Some Apple
CarPlay features may or may not be available
in every region and/or language.
Android Auto
Google Maps Data And Cellular Coverage
MULTIMEDIA
276
Page 280 of 344
• TuneIn
• Deezer
• Reuters
• Twitter
• Facebook Check-In
• Apple CarPlay
• Android Auto, and many more.
UCONNECT 4C/4C NAV
WITH 8.4-INCH DISPLAY
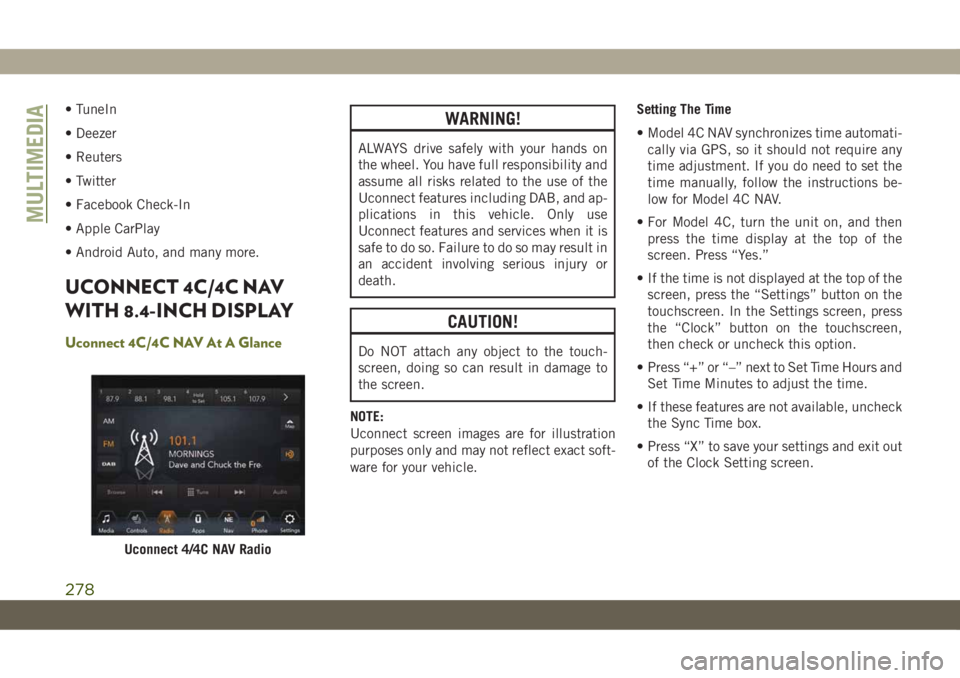
Uconnect 4C/4C NAV At A Glance
WARNING!
ALWAYS drive safely with your hands on
the wheel. You have full responsibility and
assume all risks related to the use of the
Uconnect features including DAB, and ap-
plications in this vehicle. Only use
Uconnect features and services when it is
safe to do so. Failure to do so may result in
an accident involving serious injury or
death.
CAUTION!
Do NOT attach any object to the touch-
screen, doing so can result in damage to
the screen.
NOTE:
Uconnect screen images are for illustration
purposes only and may not reflect exact soft-
ware for your vehicle.Setting The Time
• Model 4C NAV synchronizes time automati-
cally via GPS, so it should not require any
time adjustment. If you do need to set the
time manually, follow the instructions be-
low for Model 4C NAV.
• For Model 4C, turn the unit on, and then
press the time display at the top of the
screen. Press “Yes.”
• If the time is not displayed at the top of the
screen, press the “Settings” button on the
touchscreen. In the Settings screen, press
the “Clock” button on the touchscreen,
then check or uncheck this option.
• Press “+” or “–” next to Set Time Hours and
Set Time Minutes to adjust the time.
• If these features are not available, uncheck
the Sync Time box.
• Press “X” to save your settings and exit out
of the Clock Setting screen.
Uconnect 4/4C NAV Radio
MULTIMEDIA
278
Page 283 of 344
WARNING!
ALWAYS drive safely with your hands on
the wheel. You have full responsibility and
assume all risks related to the use of the
Uconnect features and applications in this
vehicle. Only use Uconnect when it is safe
to do so. Failure to do so may result in an
accident involving serious injury or death.
• To access the Radio mode, press the “Ra-
dio” button on the touchscreen.
Selecting Radio Stations
• Press the desired radio band (AM, FM or
DAB) button on the touchscreen.
Seek Up/Seek Down
• Press the Seek up or down arrow buttons on
the touchscreen for less than two seconds
to seek through radio stations.
• Press and hold either arrow button on the
touchscreen for more than two seconds to
bypass stations without stopping. The radio
will stop at the next listenable station once
the arrow button on the touchscreen is
released.Direct Tune
• Tune directly to a radio station by pressing
the “Tune” button on the screen, and en-
tering the desired station number.
Store Radio Presets Manually
Your radio can store 36 total preset stations,
12 presets per band (AM, FM and DAB). They
are shown at the top of your radio screen. To
see the 12 preset stations per band, press the
arrow button on the touchscreen at the top
right of the screen to toggle between the two
sets of six presets.
To store a radio preset manually, follow the
steps below:
1. Tune to the desired station.
2. Press and hold the desired numbered but-
ton on the touchscreen for more than two
seconds or until you hear a confirmation
beep.
Android Auto — If Equipped
NOTE:
Feature availability depends on your carrier
and mobile phone manufacturer. Some
Android Auto features may or may not be
available in every region and/or language.
Android Auto is a feature of your Uconnect
system, and your Android 5.0 Lollipop, or
higher, powered smartphone with a data plan,
that allows you to project your smartphone
and a number of its apps onto the touch-
screen radio display. Android Auto automati-
cally brings you useful information, and orga-
nizes it into simple cards that appear just
when they are needed. Android Auto can be
used with Google's best-in-class speech tech-
nology, the steering wheel controls, the knobs
and buttons on your radio faceplate, and the
radio display’s touchscreen to control many
of your apps. To use Android Auto follow
these steps:
1. Download the Android Auto app from the
Google Play store on your Android-
powered smartphone.
281
Page 284 of 344
2. Connect your Android powered smart-
phone to one of the media USB ports in
your vehicle. If you have not downloaded
the Android Auto app to your smartphone
before plugging in the device for the first
time, the app begins to download.
NOTE:
Be sure to use the factory-provided USB
cable that came with your phone, as af-
termarket cables may not work.
Your phone may ask you to approve the
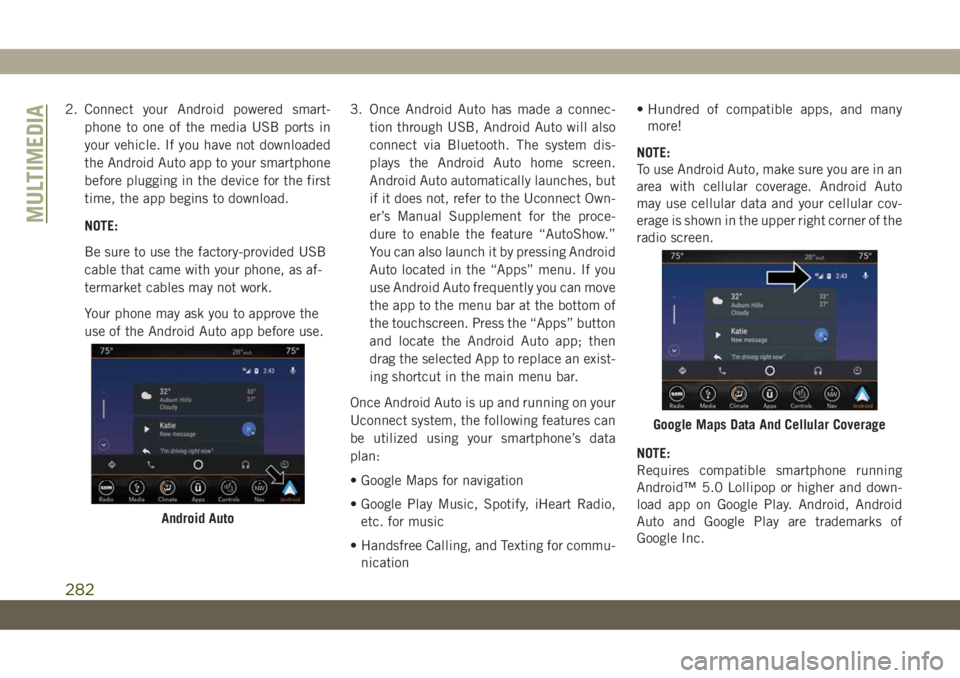
use of the Android Auto app before use.3. Once Android Auto has made a connec-
tion through USB, Android Auto will also
connect via Bluetooth. The system dis-
plays the Android Auto home screen.
Android Auto automatically launches, but
if it does not, refer to the Uconnect Own-
er’s Manual Supplement for the proce-
dure to enable the feature “AutoShow.”
You can also launch it by pressing Android
Auto located in the “Apps” menu. If you
use Android Auto frequently you can move
the app to the menu bar at the bottom of
the touchscreen. Press the “Apps” button
and locate the Android Auto app; then
drag the selected App to replace an exist-
ing shortcut in the main menu bar.
Once Android Auto is up and running on your
Uconnect system, the following features can
be utilized using your smartphone’s data
plan:
• Google Maps for navigation
• Google Play Music, Spotify, iHeart Radio,
etc. for music
• Handsfree Calling, and Texting for commu-
nication• Hundred of compatible apps, and many
more!
NOTE:
To use Android Auto, make sure you are in an
area with cellular coverage. Android Auto
may use cellular data and your cellular cov-
erage is shown in the upper right corner of the
radio screen.
NOTE:
Requires compatible smartphone running
Android™ 5.0 Lollipop or higher and down-
load app on Google Play. Android, Android
Auto and Google Play are trademarks of
Google Inc.
Android Auto
Google Maps Data And Cellular Coverage
MULTIMEDIA
282
Page 285 of 344
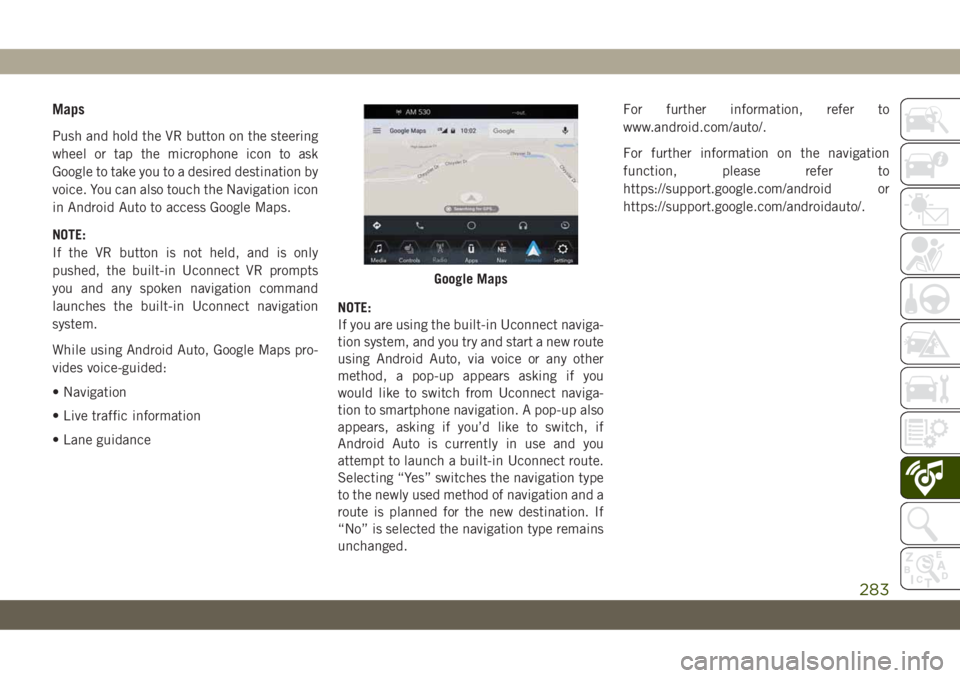
Maps
Push and hold the VR button on the steering
wheel or tap the microphone icon to ask
Google to take you to a desired destination by
voice. You can also touch the Navigation icon
in Android Auto to access Google Maps.
NOTE:
If the VR button is not held, and is only
pushed, the built-in Uconnect VR prompts
you and any spoken navigation command
launches the built-in Uconnect navigation
system.
While using Android Auto, Google Maps pro-
vides voice-guided:
• Navigation
• Live traffic information
• Lane guidanceNOTE:
If you are using the built-in Uconnect naviga-
tion system, and you try and start a new route
using Android Auto, via voice or any other
method, a pop-up appears asking if you
would like to switch from Uconnect naviga-
tion to smartphone navigation. A pop-up also
appears, asking if you’d like to switch, if
Android Auto is currently in use and you
attempt to launch a built-in Uconnect route.
Selecting “Yes” switches the navigation type
to the newly used method of navigation and a
route is planned for the new destination. If
“No” is selected the navigation type remains
unchanged.For further information, refer to
www.android.com/auto/.
For further information on the navigation
function, please refer to
https://support.google.com/android or
https://support.google.com/androidauto/.
Google Maps
283
Page 286 of 344
Music
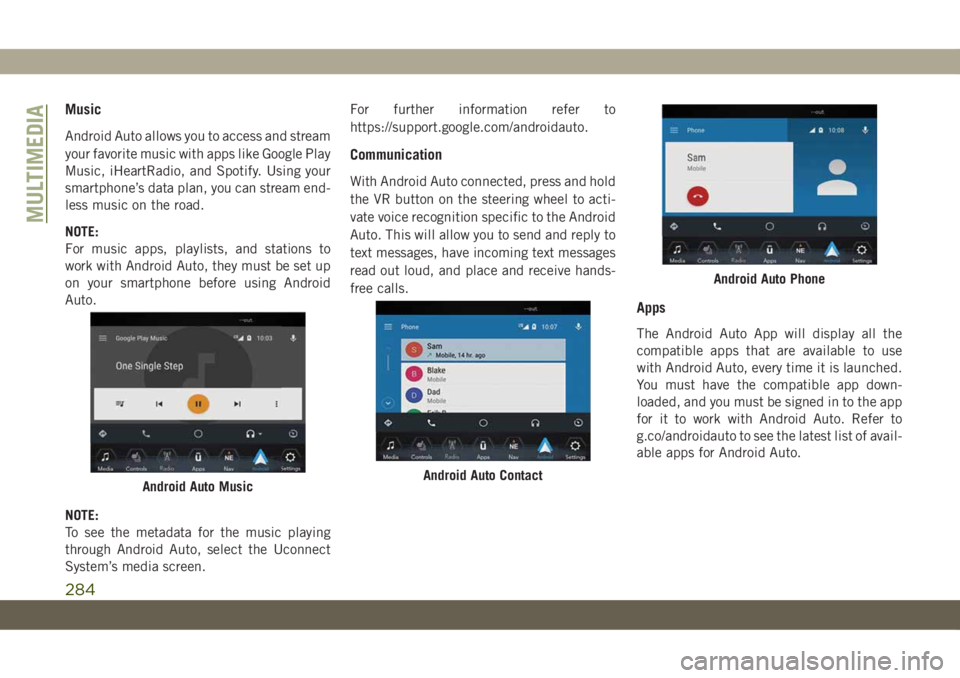
Android Auto allows you to access and stream
your favorite music with apps like Google Play
Music, iHeartRadio, and Spotify. Using your
smartphone’s data plan, you can stream end-
less music on the road.
NOTE:
For music apps, playlists, and stations to
work with Android Auto, they must be set up
on your smartphone before using Android
Auto.
NOTE:
To see the metadata for the music playing
through Android Auto, select the Uconnect
System’s media screen.For further information refer to
https://support.google.com/androidauto.
Communication
With Android Auto connected, press and hold
the VR button on the steering wheel to acti-
vate voice recognition specific to the Android
Auto. This will allow you to send and reply to
text messages, have incoming text messages
read out loud, and place and receive hands-
free calls.
Apps
The Android Auto App will display all the
compatible apps that are available to use
with Android Auto, every time it is launched.
You must have the compatible app down-
loaded, and you must be signed in to the app
for it to work with Android Auto. Refer to
g.co/androidauto to see the latest list of avail-
able apps for Android Auto.
Android Auto MusicAndroid Auto Contact
Android Auto Phone
MULTIMEDIA
284
Page 289 of 344
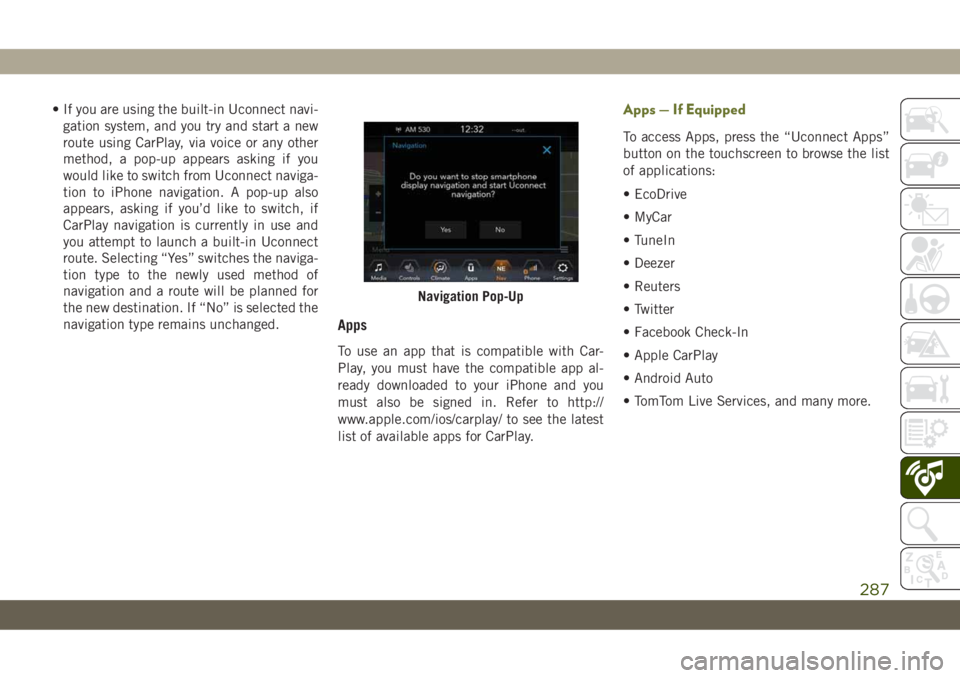
• If you are using the built-in Uconnect navi-
gation system, and you try and start a new
route using CarPlay, via voice or any other
method, a pop-up appears asking if you
would like to switch from Uconnect naviga-
tion to iPhone navigation. A pop-up also
appears, asking if you’d like to switch, if
CarPlay navigation is currently in use and
you attempt to launch a built-in Uconnect
route. Selecting “Yes” switches the naviga-
tion type to the newly used method of
navigation and a route will be planned for
the new destination. If “No” is selected the
navigation type remains unchanged.
Apps
To use an app that is compatible with Car-
Play, you must have the compatible app al-
ready downloaded to your iPhone and you
must also be signed in. Refer to http://
www.apple.com/ios/carplay/ to see the latest
list of available apps for CarPlay.
Apps — If Equipped
To access Apps, press the “Uconnect Apps”
button on the touchscreen to browse the list
of applications:
• EcoDrive
• MyCar
• TuneIn
• Deezer
• Reuters
• Twitter
• Facebook Check-In
• Apple CarPlay
• Android Auto
• TomTom Live Services, and many more.
Navigation Pop-Up
287