lock JEEP CHEROKEE 2020 Owner handbook (in English)
[x] Cancel search | Manufacturer: JEEP, Model Year: 2020, Model line: CHEROKEE, Model: JEEP CHEROKEE 2020Pages: 332, PDF Size: 8.87 MB
Page 21 of 332
19
The Vehicle Security Alarm is designed to
protect your vehicle. However, you can create
conditions where the system will give you a
false alarm. If one of the previously
described arming sequences has occurred,
the Vehicle Security Alarm will arm, regard-
less of whether you are in the vehicle or not.
If you remain in the vehicle and open a door,
the alarm will sound. If this occurs, disarm
the Vehicle Security Alarm.
If the Vehicle Security Alarm is armed and
the battery becomes disconnected, the
Vehicle Security Alarm will remain armed
when the battery is reconnected; the exterior
lights will flash, and the horn will sound. If
this occurs, disarm the Vehicle Security
Alarm.
DOORS
Keyless Enter-N-Go — Passive Entry
The Passive Entry system is an enhancement
to the vehicle’s Remote Keyless Entry system
and a feature of Keyless Enter-N-Go —
Passive Entry. This feature allows you to lock
and unlock the vehicle’s door(s) and fuel
door without having to push the key fob lock
or unlock buttons. NOTE:
Passive Entry may be programmed on/off;
refer to “Uconnect Settings” in “Multi
-
media” in the Owner’s Manual for further
information.
If wearing gloves on your hands, or if it has
been raining/snowing on the Passive Entry
door handle, the unlock sensitivity can be
affected, resulting in a slower response
time.
If the vehicle is unlocked by Passive Entry
and no door is opened within 60 seconds,
the vehicle will re-lock and if equipped
will arm the security alarm.
The key fob may not be able to be detected
by the vehicle Passive Entry system if it is
located next to a mobile phone, laptop, or
other electronic device; these devices may
block the key fob's wireless signal and
prevent the Passive Entry handle from
locking/unlocking the vehicle.
Passive Entry activates illuminated
approach for the time set by the customer
(0, 30, 60, or 90 seconds), and flashes
the turn signal lights. Refer to “Uconnect
Settings” in “Multimedia in the Owner’s
Manual for further information. To Unlock From The Driver's Side
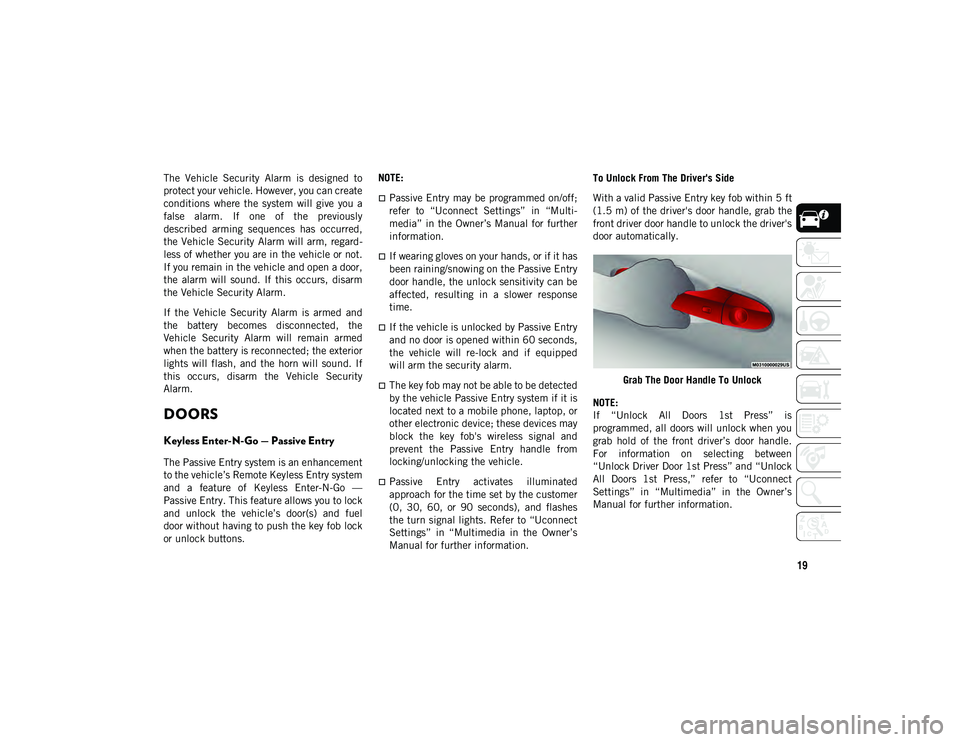
With a valid Passive Entry key fob within 5 ft
(1.5 m) of the driver's door handle, grab the
front driver door handle to unlock the driver's
door automatically.
Grab The Door Handle To Unlock
NOTE:
If “Unlock All Doors 1st Press” is
programmed, all doors will unlock when you
grab hold of the front driver’s door handle.
For information on selecting between
“Unlock Driver Door 1st Press” and “Unlock
All Doors 1st Press,” refer to “Uconnect
Settings” in “Multimedia” in the Owner’s
Manual for further information.
2020_JEEP_CHEROKEE_UG_RHD_UK.book Page 19
Page 22 of 332
GETTING TO KNOW YOUR VEHICLE
20
To Unlock From The Passenger Side
With a valid Passive Entry key fob within 5 ft
(1.5 m) of the passenger door handle, grab
the front passenger door handle to unlock all
four doors and the liftgate automatically.
NOTE:
All doors will unlock when the front
passenger door handle is grabbed regardless
of the driver’s door unlock preference setting
(“Unlock Driver Door 1st Press” or “Unlock
All Doors 1st Press”).
Preventing Inadvertent Locking Of Passive
Entry Key Fob In Vehicle (FOBIK-Safe)
To minimize the possibility of unintentionally
locking a Passive Entry key fob inside your
vehicle, the Passive Entry system is equipped
with an automatic door unlock feature which
will function if the ignition is OFF.
FOBIK-Safe only executes in vehicles with
Passive Entry. There are three situations that
trigger a FOBIK-Safe search in any Passive
Entry vehicle:
A lock request is made by a valid Passive
Entry key fob while a door is open.
A lock request is made by the Passive
Entry door handle while a door is open.
A lock request is made by the door panel
switch while the door is open.
When any of these situations occur, after all
open doors are shut, the FOBIK-Safe search
will be executed. If it finds a Passive Entry
key fob inside the car, the car will unlock and
alert the customer.
NOTE:
The vehicle will only unlock the doors when
a valid Passive Entry key fob is detected
inside the vehicle. The vehicle will not
unlock the doors when any of the following
conditions are true:
The doors are manually locked using the
door lock knobs.
If a paired key fob is found outside of the
vehicle, FOBIK-Safe will not activate.
Three attempts are made to lock the doors
using the door panel switch and then close
the doors.
If the liftgate is opened and then all four
doors are locked, the key fob will become
locked in the vehicle if the liftgate is
closed and will not alert the customer. To Unlock/Enter The Liftgate
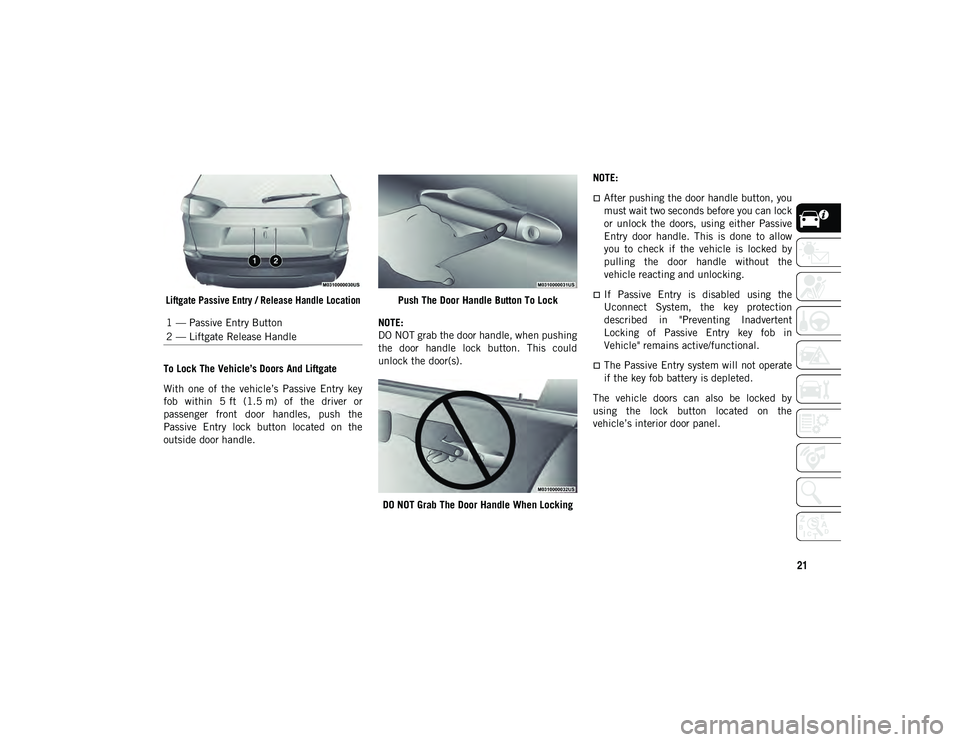
With a valid Passive Entry key fob within 5 ft
(1.5 m) of the liftgate, push the Passive
Entry button located to the left of the liftgate
release handle to open the liftgate with one
fluid motion.
To Lock The Liftgate
NOTE:
Always take the key with you once a door or
the liftgate is locked to prevent locking the
key fob inside of the vehicle. If the key has
been locked inside of the vehicle, it can be
recovered using the second provided key fob.
With a valid Passive Entry key fob within 5 ft
(1.5 m) of the liftgate, push the Passive
Entry button located to the left of the liftgate
release handle.
NOTE:
The liftgate passive entry lock button will
lock all doors and the liftgate.
2020_JEEP_CHEROKEE_UG_RHD_UK.book Page 20
Page 23 of 332
21
Liftgate Passive Entry / Release Handle Location
To Lock The Vehicle’s Doors And Liftgate
With one of the vehicle’s Passive Entry key
fob within 5 ft (1.5 m) of the driver or
passenger front door handles, push the
Passive Entry lock button located on the
outside door handle. Push The Door Handle Button To Lock
NOTE:
DO NOT grab the door handle, when pushing
the door handle lock button. This could
unlock the door(s).
DO NOT Grab The Door Handle When Locking NOTE:
After pushing the door handle button, you
must wait two seconds before you can lock
or unlock the doors, using either Passive
Entry door handle. This is done to allow
you to check if the vehicle is locked by
pulling the door handle without the
vehicle reacting and unlocking.
If Passive Entry is disabled using the
Uconnect System, the key protection
described in "Preventing Inadvertent
Locking of Passive Entry key fob in
Vehicle" remains active/functional.
The Passive Entry system will not operate
if the key fob battery is depleted.
The vehicle doors can also be locked by
using the lock button located on the
vehicle’s interior door panel.
1 — Passive Entry Button
2 — Liftgate Release Handle
2020_JEEP_CHEROKEE_UG_RHD_UK.book Page 21
Page 24 of 332
GETTING TO KNOW YOUR VEHICLE
22
Child-Protection Door Lock System —
Rear Doors
To provide a safer environment for small chil-
dren riding in the rear seats, the rear doors
are equipped with a Child-Protection Door
Lock system.
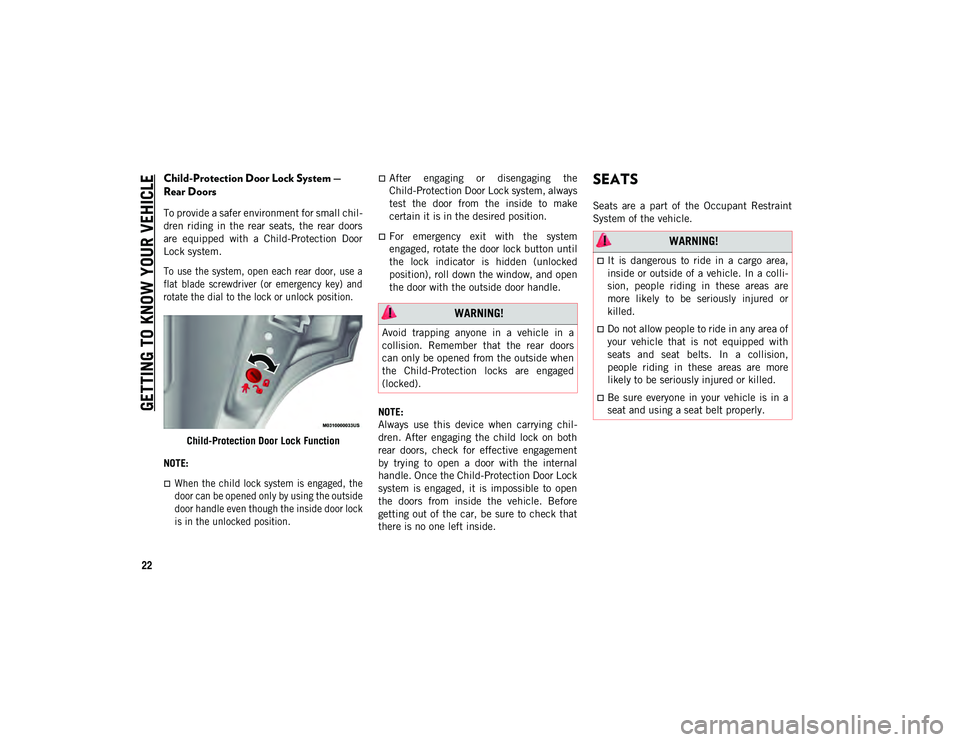
To use the system, open each rear door, use a
flat blade screwdriver (or emergency key) and
rotate the dial to the lock or unlock position.
Child-Protection Door Lock Function
NOTE:
When the child lock system is engaged, the
door can be opened only by using the outside
door handle even though the inside door lock
is in the unlocked position.
After engaging or disengaging the
Child-Protection Door Lock system, always
test the door from the inside to make
certain it is in the desired position.
For emergency exit with the system
engaged, rotate the door lock button until
the lock indicator is hidden (unlocked
position), roll down the window, and open
the door with the outside door handle.
NOTE:
Always use this device when carrying chil -
dren. After engaging the child lock on both
rear doors, check for effective engagement
by trying to open a door with the internal
handle. Once the Child-Protection Door Lock
system is engaged, it is impossible to open
the doors from inside the vehicle. Before
getting out of the car, be sure to check that
there is no one left inside.
SEATS
Seats are a part of the Occupant Restraint
System of the vehicle.
WARNING!
Avoid trapping anyone in a vehicle in a
collision. Remember that the rear doors
can only be opened from the outside when
the Child-Protection locks are engaged
(locked).
WARNING!
It is dangerous to ride in a cargo area,
inside or outside of a vehicle. In a colli -
sion, people riding in these areas are
more likely to be seriously injured or
killed.
Do not allow people to ride in any area of
your vehicle that is not equipped with
seats and seat belts. In a collision,
people riding in these areas are more
likely to be seriously injured or killed.
Be sure everyone in your vehicle is in a
seat and using a seat belt properly.
2020_JEEP_CHEROKEE_UG_RHD_UK.book Page 22
Page 25 of 332
23
Driver Memory Seat — If Equipped
The memory seat feature allows you to save
two different driver seating positions, driver's
outside mirror, and radio station preset
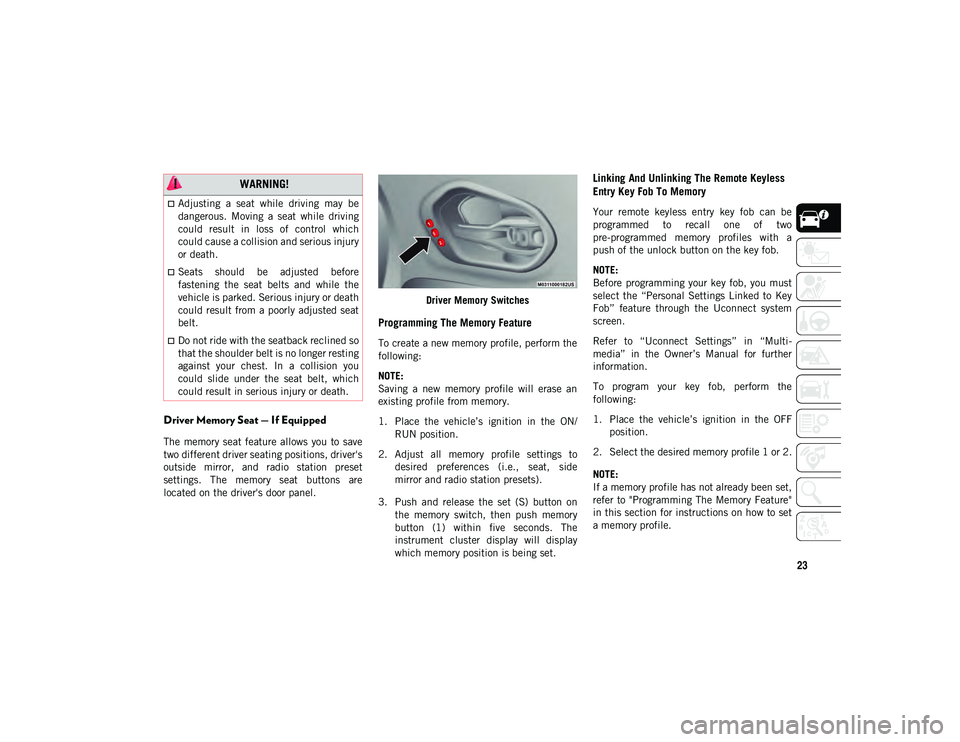
settings. The memory seat buttons are
located on the driver's door panel.Driver Memory Switches
Programming The Memory Feature
To create a new memory profile, perform the
following:
NOTE:
Saving a new memory profile will erase an
existing profile from memory.
1. Place the vehicle’s ignition in the ON/
RUN position.
2. Adjust all memory profile settings to desired preferences (i.e., seat, side
mirror and radio station presets).
3. Push and release the set (S) button on the memory switch, then push memory
button (1) within five seconds. The
instrument cluster display will display
which memory position is being set.
Linking And Unlinking The Remote Keyless
Entry Key Fob To Memory
Your remote keyless entry key fob can be
programmed to recall one of two
pre-programmed memory profiles with a
push of the unlock button on the key fob.
NOTE:
Before programming your key fob, you must
select the “Personal Settings Linked to Key
Fob” feature through the Uconnect system
screen.
Refer to “Uconnect Settings” in “Multi -
media” in the Owner’s Manual for further
information.
To program your key fob, perform the
following:
1. Place the vehicle’s ignition in the OFF position.
2. Select the desired memory profile 1 or 2.
NOTE:
If a memory profile has not already been set,
refer to "Programming The Memory Feature"
in this section for instructions on how to set
a memory profile.
WARNING!
Adjusting a seat while driving may be
dangerous. Moving a seat while driving
could result in loss of control which
could cause a collision and serious injury
or death.
Seats should be adjusted before
fastening the seat belts and while the
vehicle is parked. Serious injury or death
could result from a poorly adjusted seat
belt.
Do not ride with the seatback reclined so
that the shoulder belt is no longer resting
against your chest. In a collision you
could slide under the seat belt, which
could result in serious injury or death.
2020_JEEP_CHEROKEE_UG_RHD_UK.book Page 23
Page 26 of 332
GETTING TO KNOW YOUR VEHICLE
24
3. Push and release the set (S) button onthe memory switch, then within five
seconds push and release the button
labeled (1) or (2) accordingly. “Memory
Profile Set” (1 or 2) will display in the
instrument cluster display.
4. Push and release the lock button on the key fob within 10 seconds.
NOTE:
Your key fob can be unlinked to your memory
settings by pushing the set (S) button,
followed by pushing the unlock button on the
key fob within 10 seconds.
Memory Position Recall
To recall the memory settings for driver one,
push memory button (1) or the unlock button
on the key fob linked to memory position 1.
To recall the memory settings for driver two,
push memory button (2) or the unlock button
on the key fob linked to memory position 2.
A recall can be cancelled by pushing any of the
memory buttons (S, 1, or 2) during a recall.
When a recall is cancelled, the driver seat will
stop moving. A delay of one second will occur
before another recall can be selected.
Easy Entry/Exit Seat — If Equipped
This feature provides automatic driver seat
positioning to enhance driver mobility when
entering and exiting the vehicle.
The distance the driver seat moves depends
on where you have the driver seat positioned
when you place the vehicle’s ignition in the
OFF position.
Each stored memory setting will have an
associated Easy Entry and Easy Exit position.
NOTE:
The Easy Entry/Exit feature is not enabled
when the vehicle is delivered from the
factory. The Easy Entry/Exit feature is
enabled (or later disabled) through the
programmable features in the Uconnect
system.
Refer to “Uconnect Settings” in “Multi -
media” in the Owner’s Manual for further
information.
Heated Seats
On some models, the front and rear seats
may be equipped with heaters located in the
seat cushions and seat backs.
WARNING!
Persons who are unable to feel pain to
the skin because of advanced age,
chronic illness, diabetes, spinal cord
injury, medication, alcohol use, exhaus-
tion or other physical condition must
exercise care when using the seat heater.
It may cause burns even at low tempera-
tures, especially if used for long periods
of time.
Do not place anything on the seat or
seatback that insulates against heat,
such as a blanket or cushion. This may
cause the seat heater to overheat. Sitting
in a seat that has been overheated could
cause serious burns due to the increased
surface temperature of the seat.
2020_JEEP_CHEROKEE_UG_RHD_UK.book Page 24
Page 30 of 332
GETTING TO KNOW YOUR VEHICLE
28
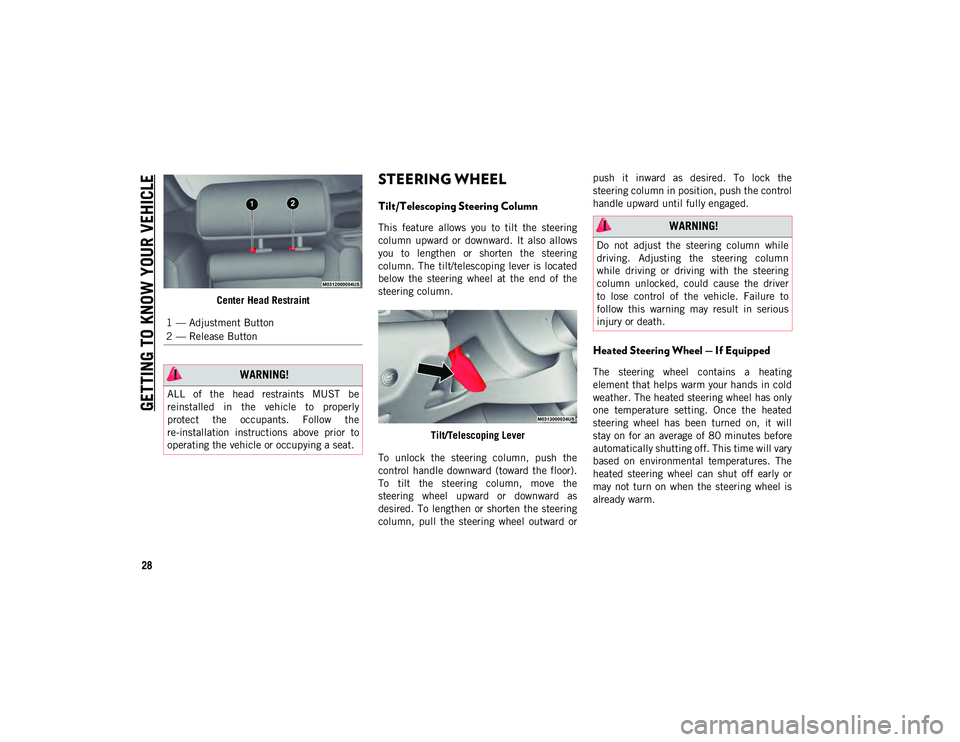
Center Head Restraint
STEERING WHEEL
Tilt/Telescoping Steering Column
This feature allows you to tilt the steering
column upward or downward. It also allows
you to lengthen or shorten the steering
column. The tilt/telescoping lever is located
below the steering wheel at the end of the
steering column.Tilt/Telescoping Lever
To unlock the steering column, push the
control handle downward (toward the floor).
To tilt the steering column, move the
steering wheel upward or downward as
desired. To lengthen or shorten the steering
column, pull the steering wheel outward or push it inward as desired. To lock the
steering column in position, push the control
handle upward until fully engaged.
Heated Steering Wheel — If Equipped
The steering wheel contains a heating
element that helps warm your hands in cold
weather. The heated steering wheel has only
one temperature setting. Once the heated
steering wheel has been turned on, it will
stay on for an average of 80 minutes before
automatically shutting off. This time will vary
based on environmental temperatures. The
heated steering wheel can shut off early or
may not turn on when the steering wheel is
already warm.
1 — Adjustment Button
2 — Release Button WARNING!
ALL of the head restraints MUST be
reinstalled in the vehicle to properly
protect the occupants. Follow the
re-installation instructions above prior to
operating the vehicle or occupying a seat.
WARNING!
Do not adjust the steering column while
driving. Adjusting the steering column
while driving or driving with the steering
column unlocked, could cause the driver
to lose control of the vehicle. Failure to
follow this warning may result in serious
injury or death.
2020_JEEP_CHEROKEE_UG_RHD_UK.book Page 28
Page 32 of 332
GETTING TO KNOW YOUR VEHICLE
30
EXTERIOR LIGHTS
Multifunction Lever
The multifunction lever controls the opera-
tion of the turn signals, headlight beam
selection and passing lights. The multifunc -
tion lever is located on the left side of the
steering column.
Multifunction Lever
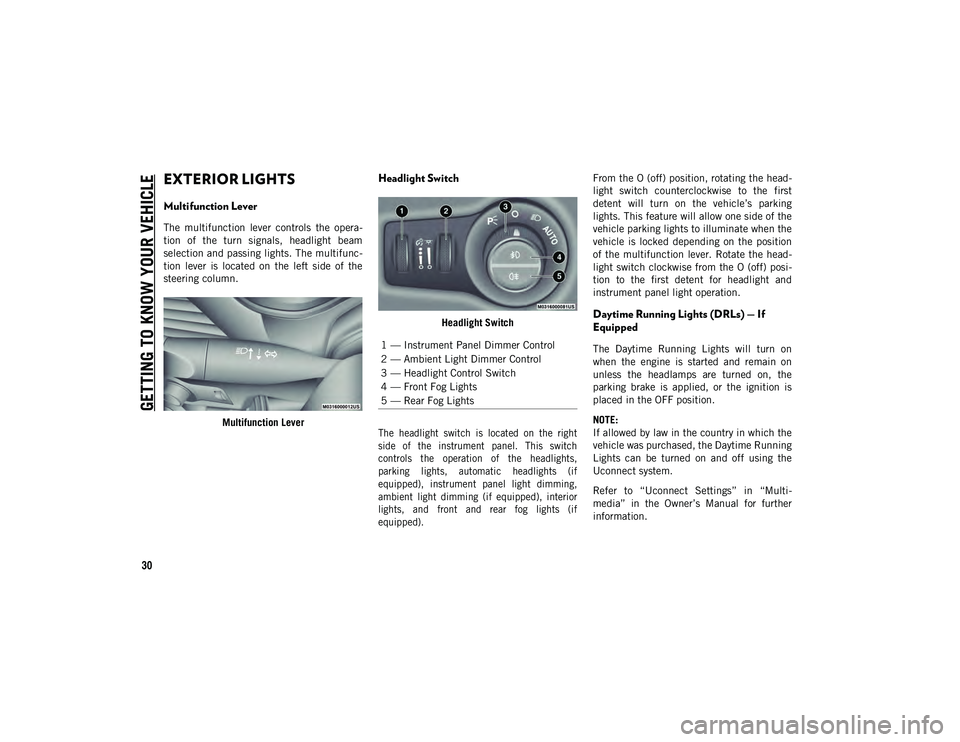
Headlight Switch
Headlight Switch
The headlight switch is located on the right
side of the instrument panel. This switch
controls the operation of the headlights,
parking lights, automatic headlights (if
equipped), instrument panel light dimming,
ambient light dimming (if equipped), interior
lights, and front and rear fog lights (if
equipped).
From the O (off) position, rotating the head
-
light switch counterclockwise to the first
detent will turn on the vehicle’s parking
lights. This feature will allow one side of the
vehicle parking lights to illuminate when the
vehicle is locked depending on the position
of the multifunction lever. Rotate the head -
light switch clockwise from the O (off) posi -
tion to the first detent for headlight and
instrument panel light operation.Daytime Running Lights (DRLs) — If
Equipped
The Daytime Running Lights will turn on
when the engine is started and remain on
unless the headlamps are turned on, the
parking brake is applied, or the ignition is
placed in the OFF position.
NOTE:
If allowed by law in the country in which the
vehicle was purchased, the Daytime Running
Lights can be turned on and off using the
Uconnect system.
Refer to “Uconnect Settings” in “Multi -
media” in the Owner’s Manual for further
information.1 — Instrument Panel Dimmer Control
2 — Ambient Light Dimmer Control
3 — Headlight Control Switch
4 — Front Fog Lights
5 — Rear Fog Lights
2020_JEEP_CHEROKEE_UG_RHD_UK.book Page 30
Page 33 of 332
31
High/Low Beam Switch
Push the multifunction lever, located on the
left side of the steering wheel, away from you
to switch the headlights to high beam. Pull
the multifunction lever toward you to switch
the headlights back to low beam.
Automatic High Beam Headlamp Control —
If Equipped
The Automatic High Beam Headlamp Control
system provides increased forward lighting at
night by automating high beam control
through the use of a digital camera mounted
on the windshield. This camera detects
vehicle specific light and automatically
switches from high beams to low beams until
the approaching vehicle is out of view.
NOTE:
The multifunction lever must be in the
high beam position in order to activate the
Automatic High Beams.
The Automatic High Beam Headlamp
Control can be turned on or off using the
Uconnect System. Refer to “Uconnect
Settings” in “Multimedia” in your Owner’s
Manual for further information.When set to AUTO, the system automatically
turns the headlights on or off based on
ambient light levels.
Flash-To-Pass
You can signal another vehicle with your
headlights by lightly pulling the multifunc
-
tion lever toward you. This will cause the
high beam headlights to turn on, and remain
on, until the lever is released.
Automatic Headlights — If Equipped
This system automatically turns the head -
lights on or off according to ambient light
levels. To turn the system on, rotate the
headlight switch clockwise to the last detent
(AUTO position) for automatic headlight
operation. When the system is on, the head -
light time delay feature is also on. This
means the headlights will stay on for up to
90 seconds after the ignition is placed in the
OFF position. To turn the automatic system
off, move the headlight switch out of the
AUTO position.
NOTE:
The engine must be running before the head -
lights will come on in the automatic mode.
Parking Lights
To operate the parking lights, the ignition
must be in the OFF position. Turn the head -
light switch to the “P” position. Then move
the multifunction lever up or down to turn on
the left or right side parking lights.
Headlights On With Wipers (Available
With Automatic Headlights Only)
When this feature is active, the headlights
will turn on after the wipers are turned on if
the headlight switch is placed in the AUTO
position and programmable feature is set to
ON. In addition, the headlights will turn off
when the wipers are turned off if they were
turned on by this feature.
NOTE:
The Headlights On with Wipers feature can
be turned on or off using the Uconnect
System.
Refer to “Uconnect Settings” in “Multi -
media” in the Owner’s Manual for further
information.
2020_JEEP_CHEROKEE_UG_RHD_UK.book Page 31
Page 45 of 332
43
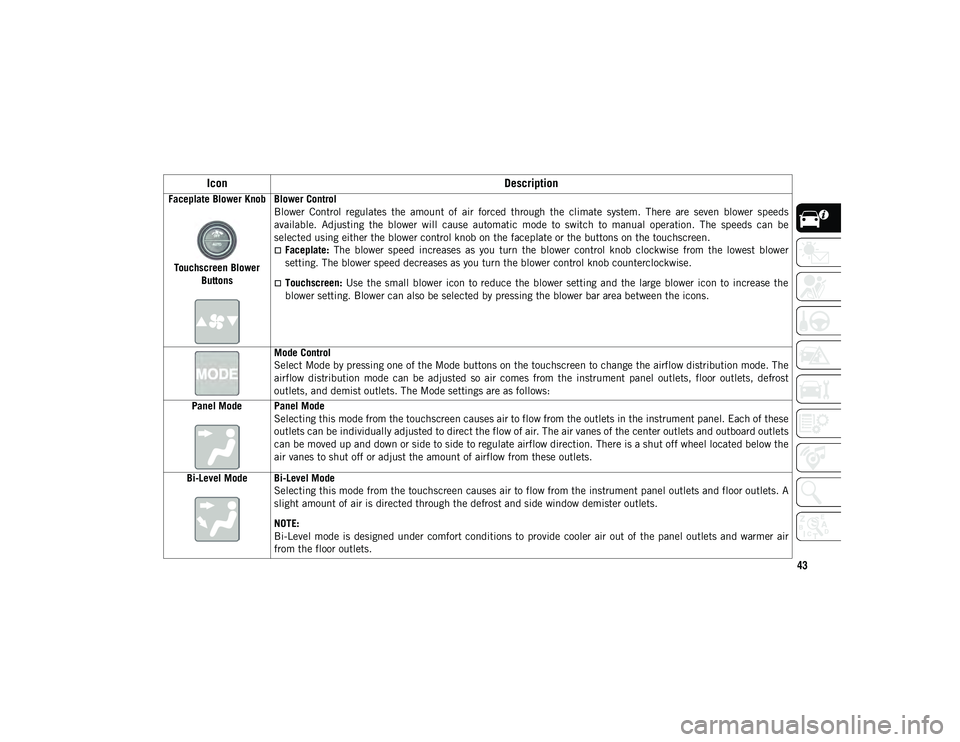
Faceplate Blower KnobTouchscreen Blower Buttons Blower Control
Blower Control regulates the amount of air forced through the climate system. There are seven blower speeds
available. Adjusting the blower will cause automatic mode to switch to manual operation. The speeds can be
selected using either the blower control knob on the faceplate or the buttons on the touchscreen.
Faceplate:
The blower speed increases as you turn the blower control knob clockwise from the lowest blower
setting. The blower speed decreases as you turn the blower control knob counterclockwise.
Touchscreen: Use the small blower icon to reduce the blower setting and the large blower icon to increase the
blower setting. Blower can also be selected by pressing the blower bar area between the icons.
Mode Control
Select Mode by pressing one of the Mode buttons on the touchscreen to change the airflow distribution mode. The
airflow distribution mode can be adjusted so air comes from the instrument panel outlets, floor outlets, defrost
outlets, and demist outlets. The Mode settings are as follows:
Panel Mode Panel Mode Selecting this mode from the touchscreen causes air to flow from the outlets in the instrument panel. Each of these
outlets can be individually adjusted to direct the flow of air. The air vanes of the center outlets and outboard outlets
can be moved up and down or side to side to regulate airflow direction. There is a shut off wheel located below the
air vanes to shut off or adjust the amount of airflow from these outlets.
Bi-Level Mode Bi-Level Mode Selecting this mode from the touchscreen causes air to flow from the instrument panel outlets and floor outlets. A
slight amount of air is directed through the defrost and side window demister outlets.
NOTE:
Bi-Level mode is designed under comfort conditions to provide cooler air out of the panel outlets and warmer air
from the floor outlets.
Icon Description
2020_JEEP_CHEROKEE_UG_RHD_UK.book Page 43