lock JEEP CHEROKEE 2020 Owner handbook (in English)
[x] Cancel search | Manufacturer: JEEP, Model Year: 2020, Model line: CHEROKEE, Model: JEEP CHEROKEE 2020Pages: 332, PDF Size: 8.87 MB
Page 148 of 332
STARTING AND OPERATING
146
(Continued)
(Continued)
AUTOMATIC
TRANSMISSION — IF
EQUIPPED
WARNING!
It is dangerous to shift out of PARK (P)
or NEUTRAL (N) if the engine speed is
higher than idle speed. If your foot is not
firmly pressing the brake pedal, the
vehicle could accelerate quickly forward
or in reverse. You could lose control of
the vehicle and hit someone or some-
thing. Only shift into gear when the
engine is idling normally and your foot is
firmly pressing the brake pedal.
Unintended movement of a vehicle could
injure those in or near the vehicle. As
with all vehicles, you should never exit a
vehicle while the engine is running.
Before exiting a vehicle, always come to
a complete stop, then apply the parking
brake, shift the transmission into PARK,
turn the engine OFF, and remove the key
fob. When the ignition is in the LOCK/
OFF (key removal) position, (or, with
Keyless Enter-N-Go, when the ignition is
in the OFF mode) the transmission is
locked in PARK, securing the vehicle
against unwanted movement.
When leaving the vehicle, always make
sure the ignition is in the OFF mode,
remove the key fob from the vehicle, and
lock the vehicle.
Never use the PARK position as a substi
-
tute for the parking brake. Always apply
the parking brake fully when exiting the
vehicle to guard against vehicle move-
ment and possible injury or damage.
WARNING! (Continued)
Your vehicle could move and injure you
and others if it is not in PARK. Check by
trying to move the gear selector out of
PARK with the brake pedal released.
Make sure the transmission is in PARK
before exiting the vehicle.
Never leave children alone in a vehicle,
or with access to an unlocked vehicle.
Allowing children to be in a vehicle unat -
tended is dangerous for a number of
reasons. A child or others could be seri -
ously or fatally injured. Children should
be warned not to touch the parking
brake, brake pedal or the transmission
gear selector.
Do not leave the key fob in or near the
vehicle (or in a location accessible to
children), and do not leave the ignition
(in a vehicle equipped with Keyless
Enter-N-Go) in the ACC or ON/RUN
mode. A child could operate power
windows, other controls, or move the
vehicle.
WARNING! (Continued)
2020_JEEP_CHEROKEE_UG_RHD_UK.book Page 146
Page 149 of 332
147
NOTE:
You must press and hold the brake pedal
while shifting out of PARK.
Key Ignition Park Interlock
This vehicle is equipped with a Key Ignition
Park Interlock which requires the transmis-
sion to be in PARK before the ignition can be
turned to the LOCK/OFF (key removal) posi -
tion. The key fob can only be removed from
the ignition when the ignition is in the LOCK/
OFF position, and the transmission is locked
in PARK whenever the ignition is in the
LOCK/OFF position.
Brake/Transmission Shift Interlock
System
This vehicle is equipped with a Brake Trans -
mission Shift Interlock system (BTSI) that
holds the transmission gear selector in PARK
unless the brakes are applied. To shift the
transmission out of PARK, the ignition must
be in the ON/RUN mode (engine running or
not) and the brake pedal must be pressed.
The brake pedal must also be pressed to shift
from NEUTRAL into DRIVE or REVERSE
when the vehicle is stopped or moving at low
speeds.
Nine-Speed Automatic Transmission
The transmission gear range (PRND) is
displayed both beside the gear selector and
in the instrument cluster. To select a gear
range, press the lock button on the gear
selector and move the selector rearward or
forward. You must also press the brake pedal
to shift the transmission out of PARK (or
NEUTRAL, when the vehicle is stopped or
moving at low speeds). Select the DRIVE
range for normal driving. NOTE:
In the event of a mismatch between the gear
selector position and the actual transmission
gear (for example, driver selects REVERSE
while driving forward), the position indicator
will blink continuously until the selector is
returned to the proper position, or the
requested shift can be completed.
The electronically-controlled transmission
adapts its shift schedule based on driver
inputs, along with environmental and road
conditions. The transmission electronics are
self-calibrating; therefore, the first few shifts
on a new vehicle may be somewhat abrupt.
This is a normal condition, and precision
shifts will develop within a few hundred
miles (kilometers).
The nine-speed transmission has been devel
-
oped to meet the needs of current and future
FWD/AWD vehicles. Software and calibration
is refined to optimize the customer’s driving
experience and fuel economy. By design,
some vehicle and driveline combinations
utilize 9th gear only in very specific driving
situations and conditions.
CAUTION!
Shift into or out of PARK or REVERSE
only after the vehicle has come to a
complete stop.
Do not shift between PARK, REVERSE,
NEUTRAL, or DRIVE when the engine is
above idle speed.
Before shifting into any gear, make sure
your foot is firmly pressing the brake
pedal.
2020_JEEP_CHEROKEE_UG_RHD_UK.book Page 147
Page 152 of 332
STARTING AND OPERATING
150
FOUR-WHEEL DRIVE
OPERATION
1-Speed Four-Wheel Drive (4X4) — If
Equipped
This feature provides on-demand four-wheel
drive (4X4). The system is automatic with no
driver inputs or additional driving skills
required. Under normal driving conditions,
the front wheels provide most of the traction.
If the front wheels begin to lose traction,
power is shifted automatically to the rear
wheels. The greater the front wheel traction
loss, the greater the power transfer to the
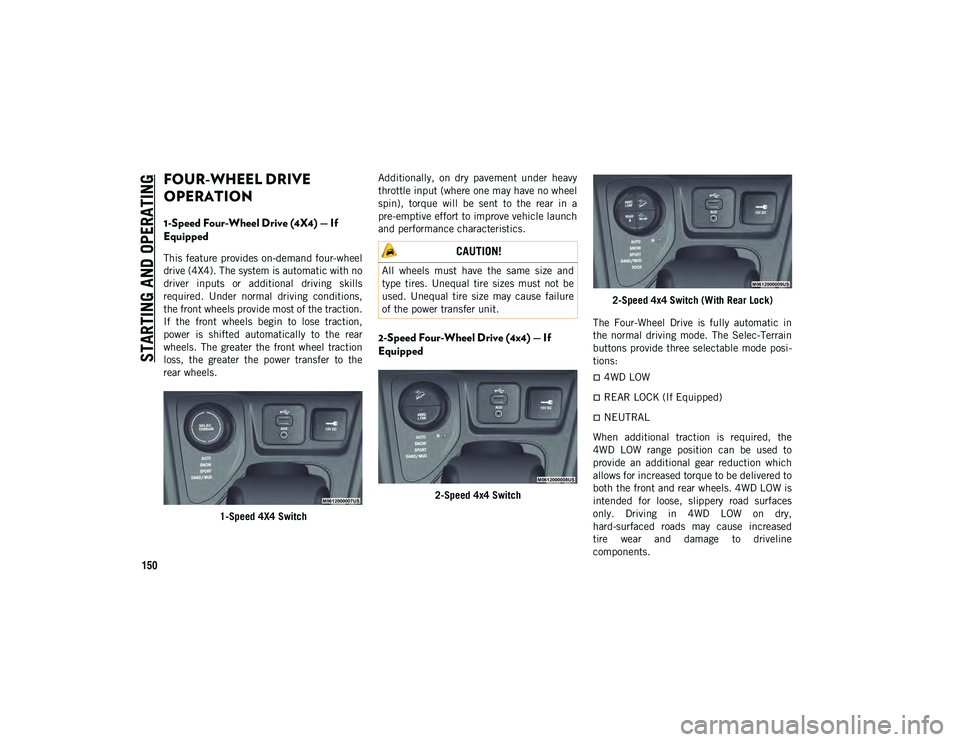
rear wheels.1-Speed 4X4 Switch Additionally, on dry pavement under heavy
throttle input (where one may have no wheel
spin), torque will be sent to the rear in a
pre-emptive effort to improve vehicle launch
and performance characteristics.
2-Speed Four-Wheel Drive (4x4) — If
Equipped
2-Speed 4x4 Switch
2-Speed 4x4 Switch (With Rear Lock)
The Four-Wheel Drive is fully automatic in
the normal driving mode. The Selec-Terrain
buttons provide three selectable mode posi -
tions:
4WD LOW
REAR LOCK (If Equipped)
NEUTRAL
When additional traction is required, the
4WD LOW range position can be used to
provide an additional gear reduction which
allows for increased torque to be delivered to
both the front and rear wheels. 4WD LOW is
intended for loose, slippery road surfaces
only. Driving in 4WD LOW on dry,
hard-surfaced roads may cause increased
tire wear and damage to driveline
components.
CAUTION!
All wheels must have the same size and
type tires. Unequal tire sizes must not be
used. Unequal tire size may cause failure
of the power transfer unit.
2020_JEEP_CHEROKEE_UG_RHD_UK.book Page 150
Page 153 of 332
151
When operating your vehicle in 4WD LOW,
the engine speed is approximately three
times that of the normal driving mode at a
given road speed. Take care not to overspeed
the engine and do not exceed 50 mph
(80 km/h).
Proper operation of four-wheel drive vehicles
depends on tires of equal size, type, and
circumference on each wheel. Any difference
will adversely affect shifting and cause
damage to the driveline components.
Because four-wheel drive provides improved
traction, there is a tendency to exceed safe
turning and stopping speeds. Do not go
faster than road conditions permit.
Shift Positions
For additional information on the appropriate
use of each 4WD system mode position, see
the information below:
NEUTRAL (N)
This range disengages the driveline from the
powertrain.
4WD LOW
This range is for low speed four-wheel drive.
It provides an additional gear reduction
which allows for increased torque to be deliv-
ered to both the front and rear wheels while
providing maximum pulling power for loose,
slippery road surfaces only. Do not exceed
25 mph (40 km/h).
NOTE:
Refer to “Selec-Terrain — If Equipped” for
further information on the various positions
and their intended usages.
Shifting Procedures
Shifting Into 4X4 LOW
With the vehicle at speeds of 0 to 3 mph (0
to 5 km/h), the ignition in the ON mode and
the engine running, shift the transmission
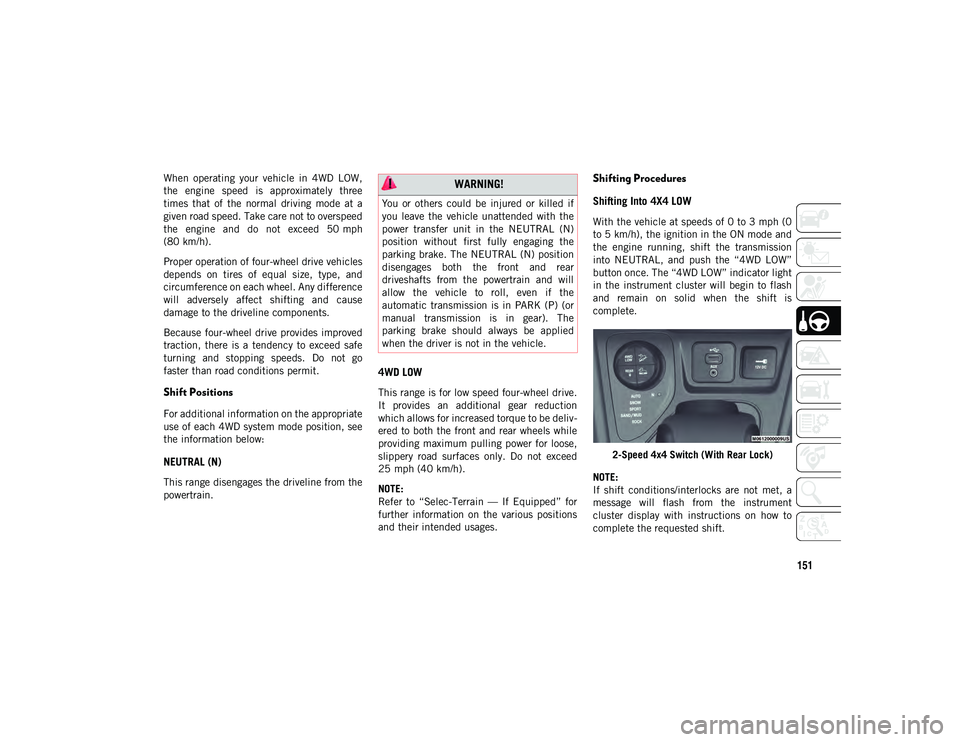
into NEUTRAL, and push the “4WD LOW”
button once. The “4WD LOW” indicator light
in the instrument cluster will begin to flash
and remain on solid when the shift is
complete.
2-Speed 4x4 Switch (With Rear Lock)
NOTE:
If shift conditions/interlocks are not met, a
message will flash from the instrument
cluster display with instructions on how to
complete the requested shift.
WARNING!
You or others could be injured or killed if
you leave the vehicle unattended with the
power transfer unit in the NEUTRAL (N)
position without first fully engaging the
parking brake. The NEUTRAL (N) position
disengages both the front and rear
driveshafts from the powertrain and will
allow the vehicle to roll, even if the
automatic transmission is in PARK (P) (or
manual transmission is in gear). The
parking brake should always be applied
when the driver is not in the vehicle.
2020_JEEP_CHEROKEE_UG_RHD_UK.book Page 151
Page 154 of 332
STARTING AND OPERATING
152
Refer to “Instrument Cluster Display” in
“Getting To know Your Instrument Panel” for
further information.
Shifting Out Of 4X4 LOW
With the vehicle at speeds of 0 to 3 mph (0
to 5 km/h), the ignition in the ON mode and
the engine running, shift the transmission
into NEUTRAL, and push the “4WD LOW”
button once. The “4WD LOW” indicator light
in the instrument cluster will flash and go
out when the shift is complete.
NOTE:
If shift conditions/interlocks are not met, a
message will flash from the instrument
cluster display with instructions on how to
complete the requested shift. Refer to
“Instrument Cluster Display” in “Getting
To Know Your Instrument Panel” for
further information.
Shifting into or out of 4WD LOW is
possible with the vehicle completely
stopped; however, difficulty may occur
due to the mating clutch teeth not being
properly aligned. Several attempts may be
required for clutch teeth alignment and
shift completion to occur. The preferred
method is with the vehicle rolling 0 to3 mph (0 to 5 km/h). If the vehicle is
moving faster than 3 mph (5 km/h), the
4WD system will not allow the shift.
NEUTRAL Shift Procedure
For the neutral shift procedure refer to
“Recreational Towing” in chapter for further
information.
Rear Electronic Locker (E-Locker) System
— If Equipped
The Rear E-Locker System features a
mechanical locking rear differential to
provide better traction in the 4WD LOW posi
-
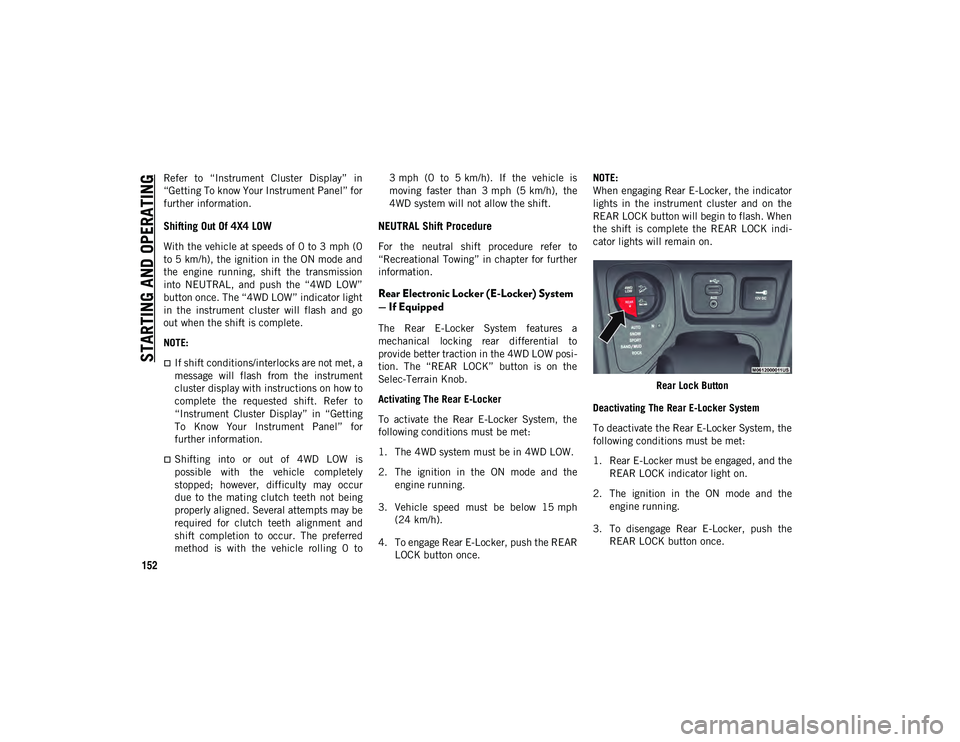
tion. The “REAR LOCK” button is on the
Selec-Terrain Knob.
Activating The Rear E-Locker
To activate the Rear E-Locker System, the
following conditions must be met:
1. The 4WD system must be in 4WD LOW.
2. The ignition in the ON mode and the engine running.
3. Vehicle speed must be below 15 mph (24 km/h).
4. To engage Rear E-Locker, push the REAR LOCK button once. NOTE:
When engaging Rear E-Locker, the indicator
lights in the instrument cluster and on the
REAR LOCK button will begin to flash. When
the shift is complete the REAR LOCK indi
-
cator lights will remain on.
Rear Lock Button
Deactivating The Rear E-Locker System
To deactivate the Rear E-Locker System, the
following conditions must be met:
1. Rear E-Locker must be engaged, and the REAR LOCK indicator light on.
2. The ignition in the ON mode and the engine running.
3. To disengage Rear E-Locker, push the REAR LOCK button once.
2020_JEEP_CHEROKEE_UG_RHD_UK.book Page 152
Page 155 of 332
153
NOTE:
It may also be necessary to drive slowly
steering back and forth to complete
engagement and disengagement of the
E-Locker.
When disengaging Rear E-Locker, the indi-
cator lights in the instrument cluster and on
the REAR LOCK button will begin to flash.
When the shift is complete the REAR LOCK
indicator lights will remain off.
Shifting into or out of Rear E-Locker is
possible with the vehicle completely
stopped; however, difficulty may occur
due to the mating clutch teeth not being
properly aligned. Several attempts may be
required for clutch teeth alignment and
shift completion to occur. The preferred
method is for the vehicle to be rolling,
below 15 mph (24 km/h), while including
right and left steering maneuvers to allow
for the clutch teeth to align.
The Rear E-Locker System must be disen -
gaged prior to taking the vehicle out of
4WD LOW range. If 4WD LOW shift condi -
tions/interlocks are not met, a message
will flash from the instrument cluster
display with instructions on how to
complete the requested shift.
SELEC-TERRAIN
Description
Selec-Terrain allows the driver to specify the
driving surface to allow the vehicle systems
to provide the best performance possible
across a wide range of conditions
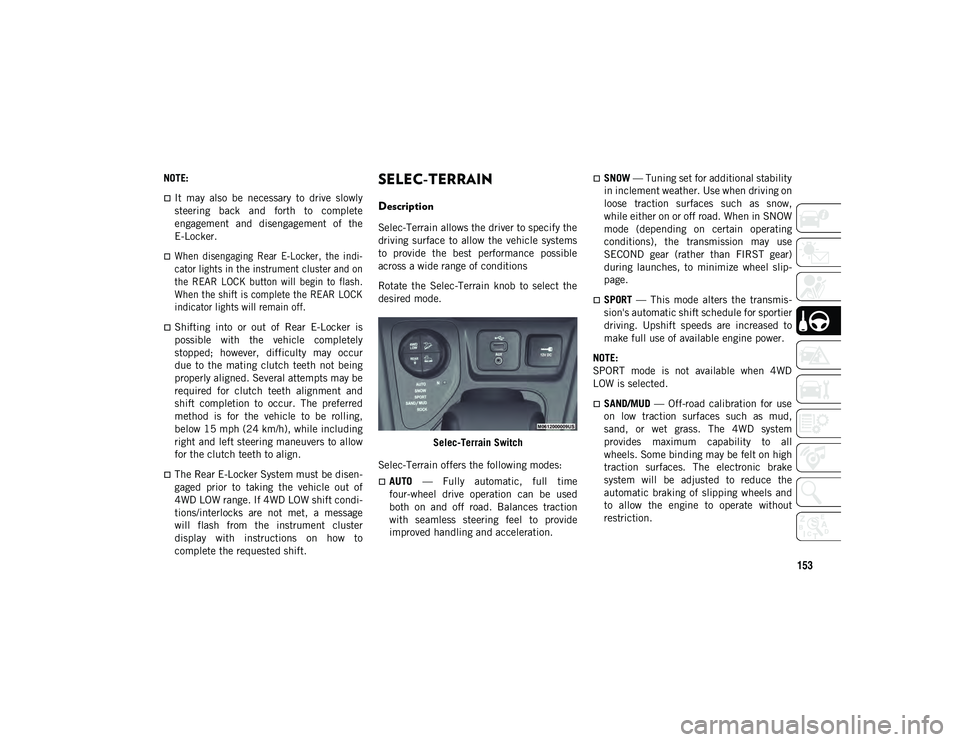
Rotate the Selec-Terrain knob to select the
desired mode.
Selec-Terrain Switch
Selec-Terrain offers the following modes:
AUTO — Fully automatic, full time
four-wheel drive operation can be used
both on and off road. Balances traction
with seamless steering feel to provide
improved handling and acceleration.
SNOW — Tuning set for additional stability
in inclement weather. Use when driving on
loose traction surfaces such as snow,
while either on or off road. When in SNOW
mode (depending on certain operating
conditions), the transmission may use
SECOND gear (rather than FIRST gear)
during launches, to minimize wheel slip -
page.
SPORT — This mode alters the transmis -
sion's automatic shift schedule for sportier
driving. Upshift speeds are increased to
make full use of available engine power.
NOTE:
SPORT mode is not available when 4WD
LOW is selected.
SAND/MUD — Off-road calibration for use
on low traction surfaces such as mud,
sand, or wet grass. The 4WD system
provides maximum capability to all
wheels. Some binding may be felt on high
traction surfaces. The electronic brake
system will be adjusted to reduce the
automatic braking of slipping wheels and
to allow the engine to operate without
restriction.
2020_JEEP_CHEROKEE_UG_RHD_UK.book Page 153
Page 173 of 332
171
(Continued)
For example: If approaching the left side
of the lane the steering wheel will turn to
the right.
When the LaneSense system senses the
lane has been approached and is in a lane
departure situation, the left thick lane line
flashes yellow (on/off) and the left thin
line remains solid yellow. The LaneSense
telltale changes from solid yellow to
flashing yellow. At this time torque is
applied to the steering wheel in the oppo-
site direction of the lane boundary.For example: If approaching the left side
of the lane the steering wheel will turn to
the right.
NOTE:
The LaneSense system operates with the
similar behavior for a right lane departure.
Changing LaneSense Status
The LaneSense system has settings to adjust
the intensity of the torque warning and the
warning zone sensitivity (early/late) that you
can configure through the Uconnect system
screen.
Refer to “Uconnect Settings” in “Multi -
media” in the Owner’s Manual for further
information. NOTE:
When enabled, the system operates above
37 mph (60 km/h) and below 112 mph
(180 km/h).
Use of the turn signal suppresses the
warnings.
The system will not apply torque to the
steering wheel whenever a safety system
engages (Anti-Lock Brakes, Traction
Control System, Electronic Stability
Control, Forward Collision Warning, etc.).
PARKVIEW REAR BACK UP
CAMERA — IF EQUIPPED
Your vehicle may be equipped with the
ParkView Rear Back Up Camera that allows
you to see an on-screen image of the rear
surroundings of your vehicle whenever the
gear selector is put into REVERSE. The
image will be displayed in the touchscreen
display along with a caution note to “check
entire surroundings” across the top of the
screen. After five seconds this note will
disappear. The ParkView camera is located
on the rear of the vehicle above the rear
license plate. NOTE:
The ParkView Rear Back Up Camera has
programmable modes of operation that may
be selected through the Uconnect System.
Refer to “Uconnect Settings” in “Multi
-
media” in the Owner’s Manual for further
information.
WARNING!
Drivers must be careful when backing up
even when using the ParkView Rear Back
Up Camera. Always check carefully behind
your vehicle, and be sure to check for
pedestrians, animals, other vehicles,
obstructions, or blind spots before backing
up. You are responsible for the safety of
your surroundings and must continue to
pay attention while backing up. Failure to
do so can result in serious injury or death.
CAUTION!
To avoid vehicle damage, ParkView
should only be used as a parking aid. The
ParkView camera is unable to view every
obstacle or object in your drive path.
2020_JEEP_CHEROKEE_UG_RHD_UK.book Page 171
Page 174 of 332
STARTING AND OPERATING
172
NOTE:
If snow, ice, mud, or any foreign substance
builds up on the camera lens, clean the lens,
rinse with water, and dry with a soft cloth. Do
not cover the lens.
REFUELING THE VEHICLE
The Capless Fuel System uses a flapper
placed at the filler pipe of the fuel tank; it
opens and closes automatically upon inser-
tion/extraction of the fuel nozzle. The
Capless Fuel System is designed so that it
prevents the filling of an incorrect type of
fuel.
1. Unlock the fuel filler door by pushing the unlock button on the key fob or the
unlock button on the driver-side door
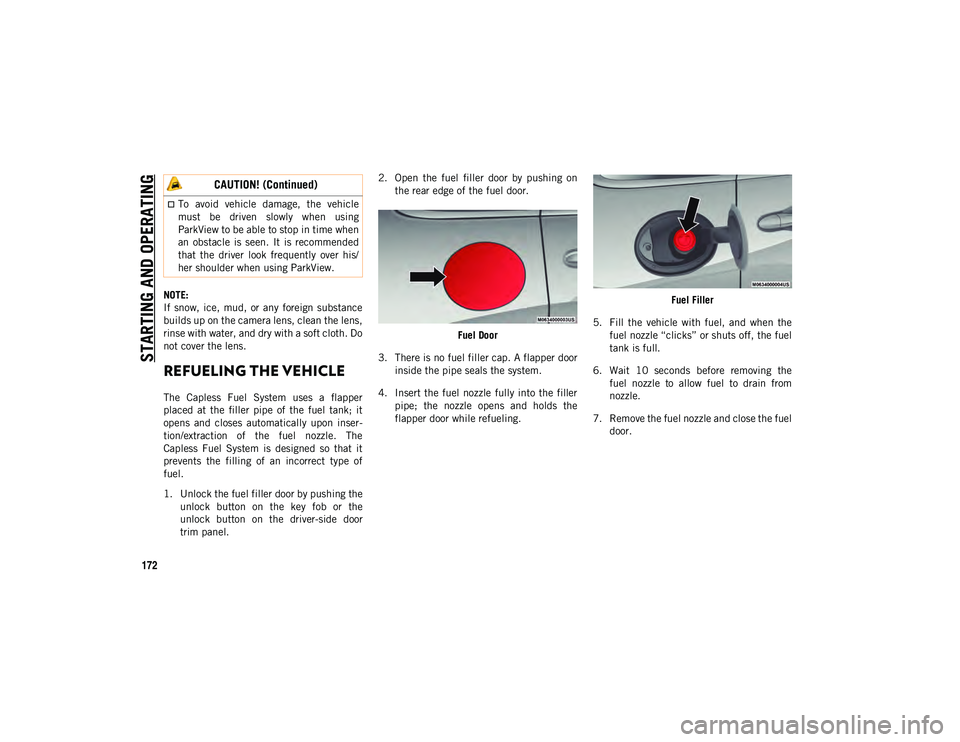
trim panel. 2. Open the fuel filler door by pushing on
the rear edge of the fuel door.
Fuel Door
3. There is no fuel filler cap. A flapper door inside the pipe seals the system.
4. Insert the fuel nozzle fully into the filler pipe; the nozzle opens and holds the
flapper door while refueling. Fuel Filler
5. Fill the vehicle with fuel, and when the fuel nozzle “clicks” or shuts off, the fuel
tank is full.
6. Wait 10 seconds before removing the fuel nozzle to allow fuel to drain from
nozzle.
7. Remove the fuel nozzle and close the fuel door.
To avoid vehicle damage, the vehicle
must be driven slowly when using
ParkView to be able to stop in time when
an obstacle is seen. It is recommended
that the driver look frequently over his/
her shoulder when using ParkView.
CAUTION! (Continued)
2020_JEEP_CHEROKEE_UG_RHD_UK.book Page 172
Page 175 of 332
173
Emergency Gas Can Refueling
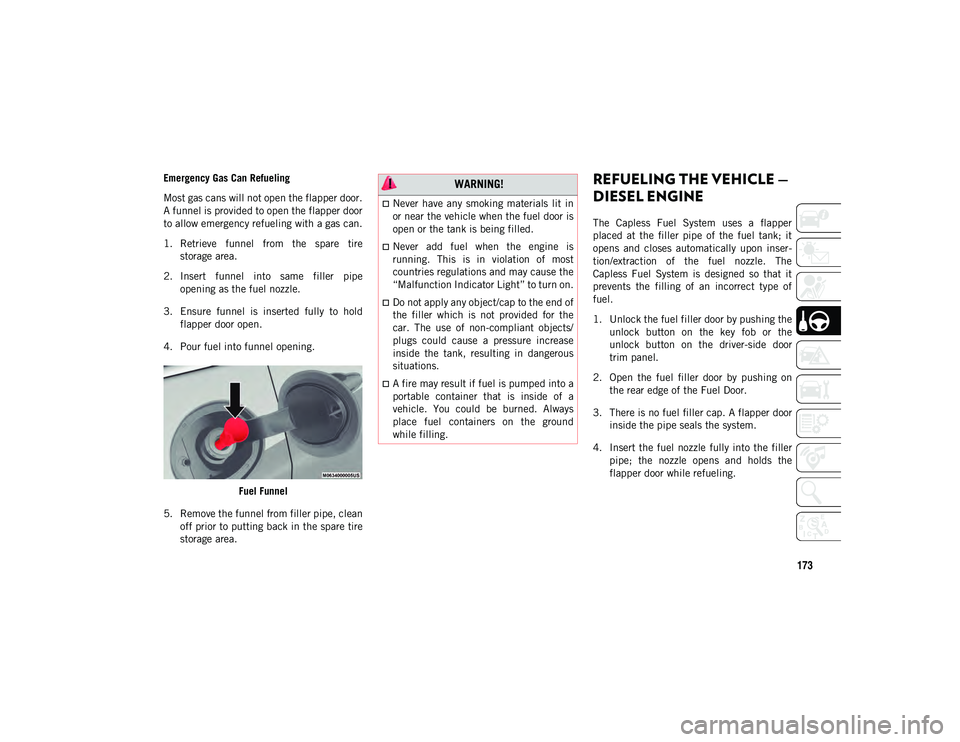
Most gas cans will not open the flapper door.
A funnel is provided to open the flapper door
to allow emergency refueling with a gas can.
1. Retrieve funnel from the spare tirestorage area.
2. Insert funnel into same filler pipe opening as the fuel nozzle.
3. Ensure funnel is inserted fully to hold flapper door open.
4. Pour fuel into funnel opening.
Fuel Funnel
5. Remove the funnel from filler pipe, clean off prior to putting back in the spare tire
storage area.REFUELING THE VEHICLE —
DIESEL ENGINE
The Capless Fuel System uses a flapper
placed at the filler pipe of the fuel tank; it
opens and closes automatically upon inser -
tion/extraction of the fuel nozzle. The
Capless Fuel System is designed so that it
prevents the filling of an incorrect type of
fuel.
1. Unlock the fuel filler door by pushing the unlock button on the key fob or the
unlock button on the driver-side door
trim panel.
2. Open the fuel filler door by pushing on the rear edge of the Fuel Door.
3. There is no fuel filler cap. A flapper door inside the pipe seals the system.
4. Insert the fuel nozzle fully into the filler pipe; the nozzle opens and holds the
flapper door while refueling.
WARNING!
Never have any smoking materials lit in
or near the vehicle when the fuel door is
open or the tank is being filled.
Never add fuel when the engine is
running. This is in violation of most
countries regulations and may cause the
“Malfunction Indicator Light” to turn on.
Do not apply any object/cap to the end of
the filler which is not provided for the
car. The use of non-compliant objects/
plugs could cause a pressure increase
inside the tank, resulting in dangerous
situations.
A fire may result if fuel is pumped into a
portable container that is inside of a
vehicle. You could be burned. Always
place fuel containers on the ground
while filling.
2020_JEEP_CHEROKEE_UG_RHD_UK.book Page 173
Page 178 of 332
STARTING AND OPERATING
176
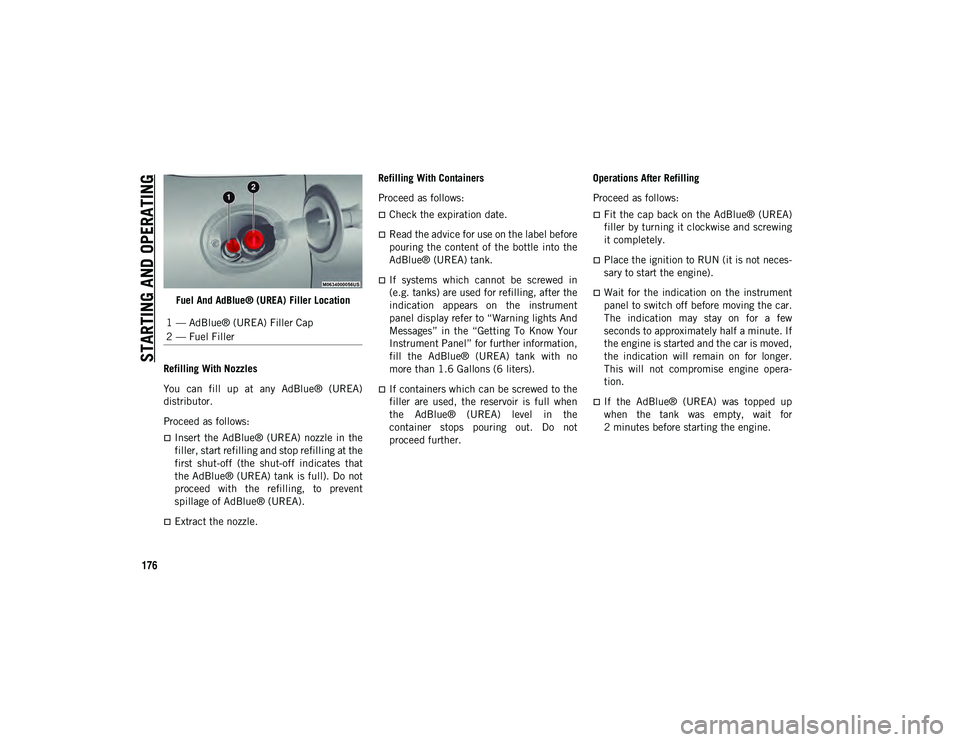
Fuel And AdBlue® (UREA) Filler Location
Refilling With Nozzles
You can fill up at any AdBlue® (UREA)
distributor.
Proceed as follows:
Insert the AdBlue® (UREA) nozzle in the
filler, start refilling and stop refilling at the
first shut-off (the shut-off indicates that
the AdBlue® (UREA) tank is full). Do not
proceed with the refilling, to prevent
spillage of AdBlue® (UREA).
Extract the nozzle. Refilling With Containers
Proceed as follows:
Check the expiration date.
Read the advice for use on the label before
pouring the content of the bottle into the
AdBlue® (UREA) tank.
If systems which cannot be screwed in
(e.g. tanks) are used for refilling, after the
indication appears on the instrument
panel display refer to “Warning lights And
Messages” in the “Getting To Know Your
Instrument Panel” for further information,
fill the AdBlue® (UREA) tank with no
more than 1.6 Gallons (6 liters).
If containers which can be screwed to the
filler are used, the reservoir is full when
the AdBlue® (UREA) level in the
container stops pouring out. Do not
proceed further.
Operations After Refilling
Proceed as follows:
Fit the cap back on the AdBlue® (UREA)
filler by turning it clockwise and screwing
it completely.
Place the ignition to RUN (it is not neces-
sary to start the engine).
Wait for the indication on the instrument
panel to switch off before moving the car.
The indication may stay on for a few
seconds to approximately half a minute. If
the engine is started and the car is moved,
the indication will remain on for longer.
This will not compromise engine opera-
tion.
If the AdBlue® (UREA) was topped up
when the tank was empty, wait for
2 minutes before starting the engine.
1 — AdBlue® (UREA) Filler Cap
2 — Fuel Filler
2020_JEEP_CHEROKEE_UG_RHD_UK.book Page 176