wheel torque JEEP CHEROKEE 2021 Owner handbook (in English)
[x] Cancel search | Manufacturer: JEEP, Model Year: 2021, Model line: CHEROKEE, Model: JEEP CHEROKEE 2021Pages: 332, PDF Size: 8.87 MB
Page 173 of 332
171
(Continued)
For example: If approaching the left side
of the lane the steering wheel will turn to
the right.
When the LaneSense system senses the
lane has been approached and is in a lane
departure situation, the left thick lane line
flashes yellow (on/off) and the left thin
line remains solid yellow. The LaneSense
telltale changes from solid yellow to
flashing yellow. At this time torque is
applied to the steering wheel in the oppo-
site direction of the lane boundary.For example: If approaching the left side
of the lane the steering wheel will turn to
the right.
NOTE:
The LaneSense system operates with the
similar behavior for a right lane departure.
Changing LaneSense Status
The LaneSense system has settings to adjust
the intensity of the torque warning and the
warning zone sensitivity (early/late) that you
can configure through the Uconnect system
screen.
Refer to “Uconnect Settings” in “Multi -
media” in the Owner’s Manual for further
information. NOTE:
When enabled, the system operates above
37 mph (60 km/h) and below 112 mph
(180 km/h).
Use of the turn signal suppresses the
warnings.
The system will not apply torque to the
steering wheel whenever a safety system
engages (Anti-Lock Brakes, Traction
Control System, Electronic Stability
Control, Forward Collision Warning, etc.).
PARKVIEW REAR BACK UP
CAMERA — IF EQUIPPED
Your vehicle may be equipped with the
ParkView Rear Back Up Camera that allows
you to see an on-screen image of the rear
surroundings of your vehicle whenever the
gear selector is put into REVERSE. The
image will be displayed in the touchscreen
display along with a caution note to “check
entire surroundings” across the top of the
screen. After five seconds this note will
disappear. The ParkView camera is located
on the rear of the vehicle above the rear
license plate. NOTE:
The ParkView Rear Back Up Camera has
programmable modes of operation that may
be selected through the Uconnect System.
Refer to “Uconnect Settings” in “Multi
-
media” in the Owner’s Manual for further
information.
WARNING!
Drivers must be careful when backing up
even when using the ParkView Rear Back
Up Camera. Always check carefully behind
your vehicle, and be sure to check for
pedestrians, animals, other vehicles,
obstructions, or blind spots before backing
up. You are responsible for the safety of
your surroundings and must continue to
pay attention while backing up. Failure to
do so can result in serious injury or death.
CAUTION!
To avoid vehicle damage, ParkView
should only be used as a parking aid. The
ParkView camera is unable to view every
obstacle or object in your drive path.
2020_JEEP_CHEROKEE_UG_RHD_UK.book Page 171
Page 200 of 332
IN CASE OF EMERGENCY
198
10. Lower the vehicle to the ground byturning the jack handle counterclock -
wise.
11. Finish tightening the wheel bolts. Push down on the wrench while at the end of
the handle for increased leverage.
Tighten the wheel bolts in a star pattern
until each wheel bolt has been tightened
twice. If in doubt about the correct tight -
ness, have them checked with a torque
wrench by an authorized dealer or at a
service station.
NOTE:
Refer to “Torque Specifications” in “Tech -
nical Specifications” for the proper lug bolt
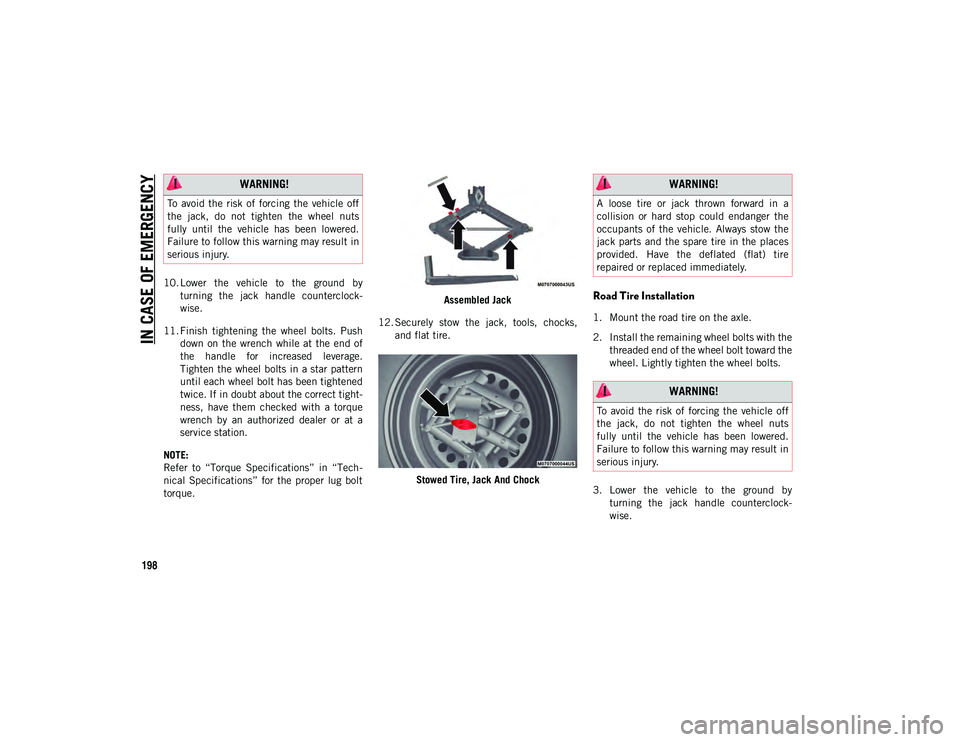
torque. Assembled Jack
12. Securely stow the jack, tools, chocks, and flat tire.
Stowed Tire, Jack And Chock
Road Tire Installation
1. Mount the road tire on the axle.
2. Install the remaining wheel bolts with thethreaded end of the wheel bolt toward the
wheel. Lightly tighten the wheel bolts.
3. Lower the vehicle to the ground by turning the jack handle counterclock -
wise.
WARNING!
To avoid the risk of forcing the vehicle off
the jack, do not tighten the wheel nuts
fully until the vehicle has been lowered.
Failure to follow this warning may result in
serious injury.
WARNING!
A loose tire or jack thrown forward in a
collision or hard stop could endanger the
occupants of the vehicle. Always stow the
jack parts and the spare tire in the places
provided. Have the deflated (flat) tire
repaired or replaced immediately.
WARNING!
To avoid the risk of forcing the vehicle off
the jack, do not tighten the wheel nuts
fully until the vehicle has been lowered.
Failure to follow this warning may result in
serious injury.
2020_JEEP_CHEROKEE_UG_RHD_UK.book Page 198
Page 201 of 332
199
4. Finish tightening the wheel bolts. Pushdown on the wrench while at the end of
the handle for increased leverage.
Tighten the wheel bolts in a star pattern
until each wheel bolt has been tightened
twice. If in doubt about the correct tight -
ness, have them checked with a torque
wrench by an authorized dealer or service
station.
Refer to “Torque Specifications” in
“Technical Specifications” for the proper
lug bolt torque.
5. Lower the jack until it is free. Remove the wheel chocks. Reassemble the lug
wrench to the jack assembly and stow it
in the spare tire area. Secure the
assembly using the means provided.
Release the parking brake before driving
the vehicle.
6. After 25 miles (40 km), check the wheel bolt torque with a torque wrench to
ensure that all wheel bolts are properly
seated against the wheel.Declaration Of Conformance
1. The undersigned, Tony Fabiano, repre -
senting the manufacturer, herewith
declares that the machinery described
below fulfills all relevant provisions of:
The EC-directive 2006/42/EC on
Machinery
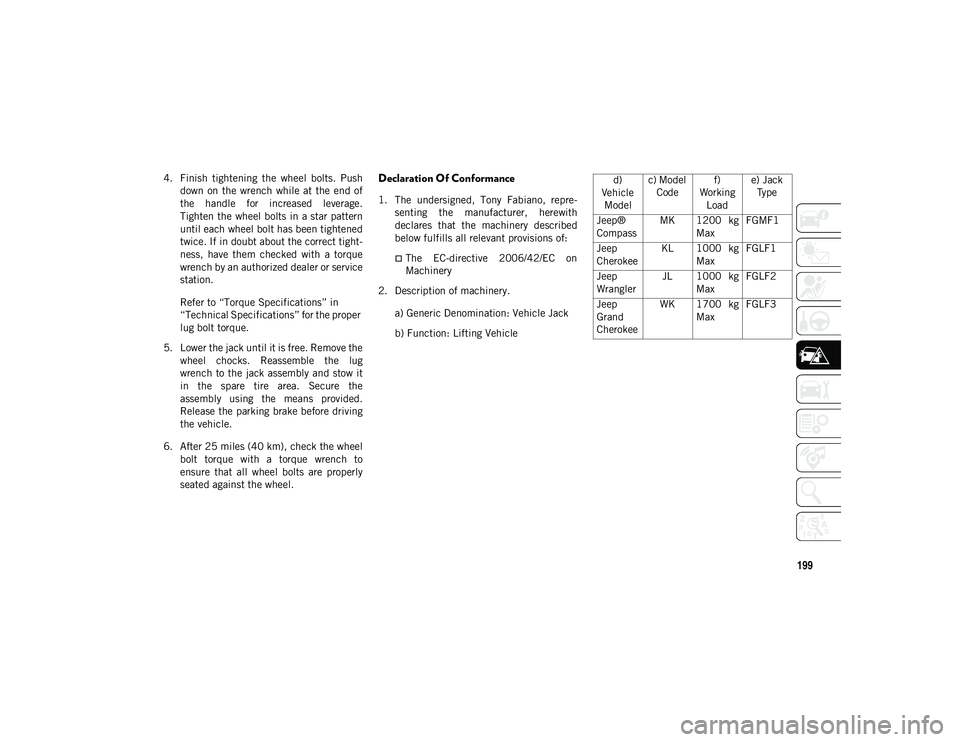
2. Description of machinery.
a) Generic Denomination: Vehicle Jack
b) Function: Lifting Vehicle d)
Vehicle Model c) Model
Code f)
Working Load e) Jack
Type
Jeep®
Compass MK 1200 kg
Max FGMF1
Jeep
Cherokee KL 1000 kg
Max FGLF1
Jeep
Wrangler JL 1000 kg
Max FGLF2
Jeep
Grand
Cherokee WK 1700 kg
Max FGLF3
2020_JEEP_CHEROKEE_UG_RHD_UK.book Page 199
Page 258 of 332
TECHNICAL SPECIFICATIONS
256
WHEEL AND TIRE TORQUE
SPECIFICATIONS
Proper lug nut/bolt torque is very important
to ensure that the wheel is properly mounted
to the vehicle. Any time a wheel has been
removed and reinstalled on the vehicle, the
lug nuts/bolts should be torqued using a
properly calibrated torque wrench using a
high quality six sided (hex) deep wall socket.
Torque Specifications
**Use only authorized dealer recommended
lug nuts/bolts and clean or remove any dirt or
oil before tightening.
Inspect the wheel mounting surface prior to
mounting the tire and remove any corrosion
or loose particles.
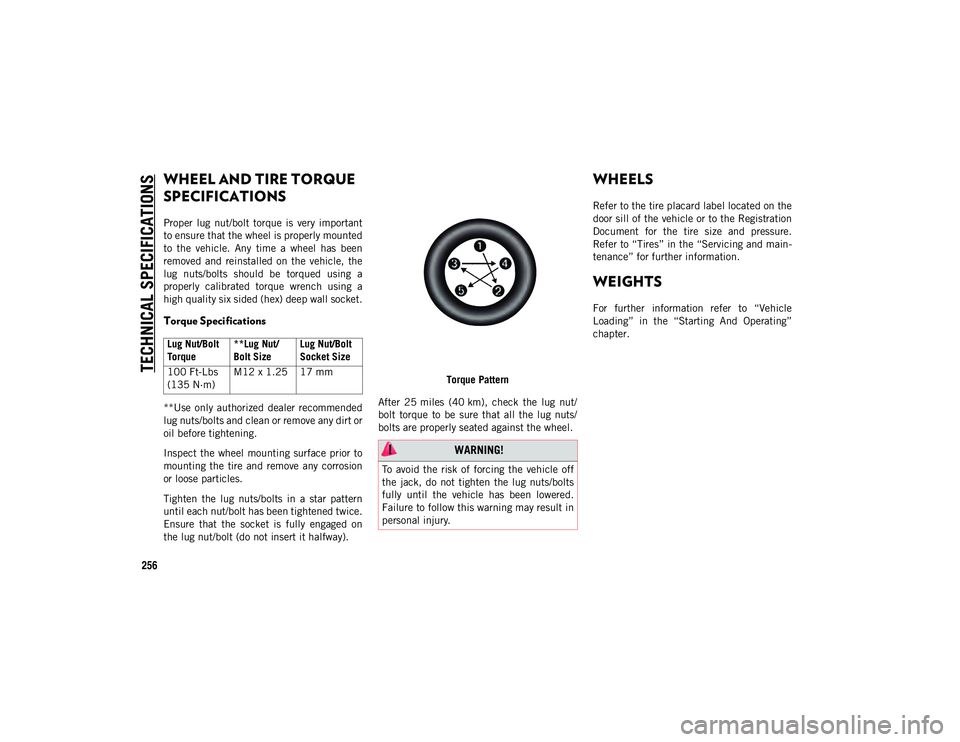
Tighten the lug nuts/bolts in a star pattern
until each nut/bolt has been tightened twice.
Ensure that the socket is fully engaged on
the lug nut/bolt (do not insert it halfway).Torque Pattern
After 25 miles (40 km), check the lug nut/
bolt torque to be sure that all the lug nuts/
bolts are properly seated against the wheel.
WHEELS
Refer to the tire placard label located on the
door sill of the vehicle or to the Registration
Document for the tire size and pressure.
Refer to “Tires” in the “Servicing and main -
tenance” for further information.
WEIGHTS
For further information refer to “Vehicle
Loading” in the “Starting And Operating”
chapter.
Lug Nut/Bolt
Torque **Lug Nut/
Bolt SizeLug Nut/Bolt
Socket Size
100 Ft-Lbs
(135 N·m) M12 x 1.25 17 mm
WARNING!
To avoid the risk of forcing the vehicle off
the jack, do not tighten the lug nuts/bolts
fully until the vehicle has been lowered.
Failure to follow this warning may result in
personal injury.
2020_JEEP_CHEROKEE_UG_RHD_UK.book Page 256
Page 330 of 332
328
INDEX
Pressure Monitoring System (TPMS)....................... 70 , 93
Radial ........................................... 243
Replacement ................................. 245
Rotation ........................................ 250
Safety ........................................... 241
Snow Tires..................................... 246
Spare Tires ............................ 246 , 247
Spinning ....................................... 244
Tread Wear Indicators ..................... 244
Wheel Nut Torque .......................... 256
To Open Hood ..................................... 52
Towing...................................... 179 , 215
Disabled Vehicle ............................ 215 Guide ............................................ 179
Recreational .................................. 180
Weight .......................................... 179
Towing Behind A Motorhome .............. 180
Traction Control ................................... 87
Traction Control Switch ........................ 87
Trailer Sway Control (TSC) .................... 87
Trailer Towing ................................... 179
Trailer Towing Guide .......................... 179
Trailer Weight .................................... 179
Transaxle Automatic...................................... 146
Operation ...................................... 146 Transmission..................................... 147
Automatic ..............................147 , 236
Fluid............................................. 265
Maintenance ................................. 236
Manual ......................................... 143
Transporting Pets .............................. 134
Tread Wear Indicators ........................ 244
Turn Signals ............................ 30 , 33 , 73
U
Uconnect Uconnect Settings ......................... 285
Uconnect 3 With 5-Inch Display ......... 269
Uconnect 4 With 7-Inch Display ......... 272
Uconnect 4 With 8.4-Inch Display ...... 277
Uconnect Phone ................................ 290 Making A Call ................................ 296
Pairing .......................................... 292
Uconnect Settings Customer Programmable Features ...............................19 , 285
Passive Entry Programming ............... 19
Untwisting Procedure, Seat Belt ......... 103
USB ................................................. 286 V
Vehicle Loading .................................177
Vehicle Modifications/Alterations .............4
Vehicle Storage ....................................46
Ventilated Seats ...................................25
Voice Command ......................... 296
, 299
Voice Recognition System (VR) .... 296 , 299
W
Warning Lights (Instrument Cluster
Descriptions) .......................................68
Warnings And Cautions ...........................4
Warnings, Roll Over ................................2
Washers, Windshield ..........................234
Washing Vehicle.................................252
Wheel And Wheel Tire Care .................248
Wheel And Wheel Tire Trim .................248
Wind Buffeting ....................................50
Window Fogging ...................................46
Windows .............................................47 Power ..............................................47
Windshield Defroster ..........................136
Windshield Washers .............................34 Fluid .............................................234
Windshield Wiper Blades ....................237
Windshield Wipers ....................... 34 , 234
Wipers Blade Replacement .................237
Wipers, Intermittent .............................34
Wipers, Rain Sensitive ..........................35
2020_JEEP_CHEROKEE_UG_RHD_UK.book Page 328