clock JEEP CHEROKEE 2021 Owner handbook (in English)
[x] Cancel search | Manufacturer: JEEP, Model Year: 2021, Model line: CHEROKEE, Model: JEEP CHEROKEE 2021Pages: 332, PDF Size: 8.87 MB
Page 13 of 332
11
MULTIMEDIA
UCONNECT SYSTEMS .......................... 268CYBERSECURITY ................................ 268
UCONNECT 3 WITH 5-INCH DISPLAY —
IF EQUIPPED ........................................ 269
Uconnect 3 With 5-inch Display At A
Glance......................................... 269 Clock Setting .............................. 269
Audio Setting ............................... 269
Radio Operation .......................... 270
Voice Text Reply (Not Compatible With
iPhone®) .................................... 271
UCONNECT 4 WITH 7-INCH DISPLAY ..... 272
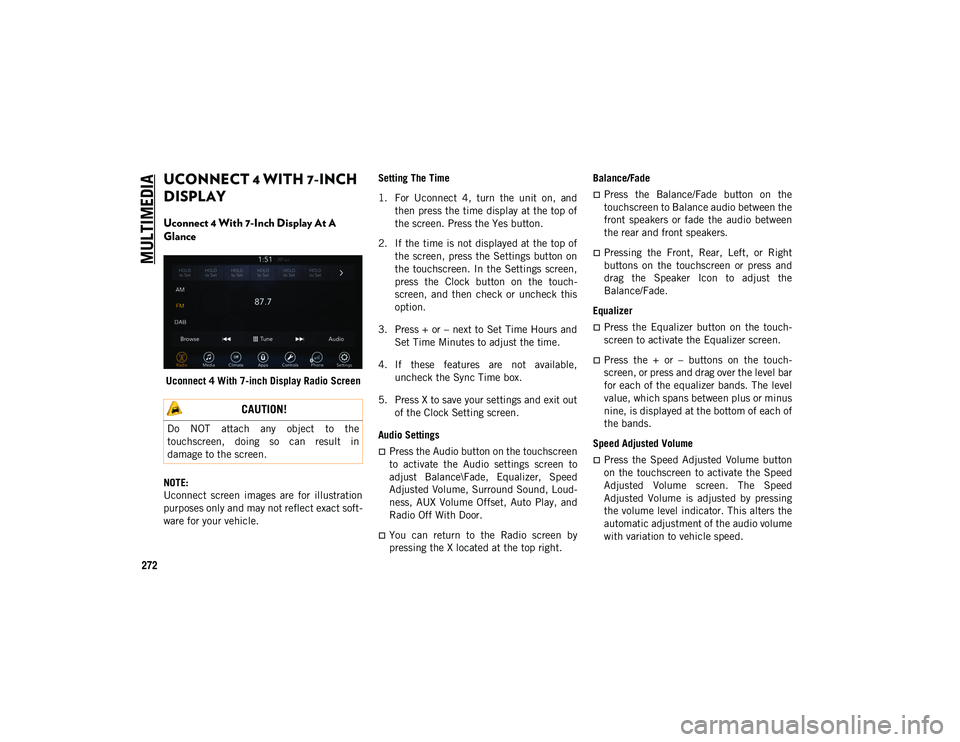
Uconnect 4 With 7-Inch Display
At A Glance ................................ 272 Drag & Drop Menu Bar ................. 273
Radio ......................................... 274
Android Auto™ — If Equipped ...... 275
Apple CarPlay® Integration —
If Equipped.................................. 276 Apps — If Equipped ..................... 277
UCONNECT 4C/4C NAV WITH 8.4-INCH
DISPLAY..............................................277
Uconnect 4C/4C NAV At A Glance 277
Drag & Drop Menu Bar ................. 278
Radio ......................................... 279
Android Auto™ — If Equipped ...... 280
Apple CarPlay® Integration —
If Equipped ................................. 283 Apps — If Equipped ..................... 285
UCONNECT SETTINGS ..........................285
STEERING WHEEL AUDIO CONTROLS —
IF EQUIPPED .......................................286
Radio Operation ........................... 286
Media Mode................................. 286
AUX/USB/MP3 CONTROL —
IF EQUIPPED ........................................286 NAVIGATION — IF EQUIPPED ...............287
Changing The Navigation Voice
Prompt Volume ............................ 287 Finding Points Of Interest ............. 288
Finding A Place By Spelling The
Name .......................................... 288 One-Step Voice Destination Entry .. 288
Setting Your Home Location .......... 288
Home .......................................... 289
Adding A Stop ............................. 289
Taking A Detour ........................... 289
Map Update................................. 289
UCONNECT PHONE ...............................290
Uconnect Phone (Bluetooth®
Hands-Free Calling) ......................290 Pairing (Wirelessly Connecting) Your
Mobile Phone To The Uconnect
System ........................................292 Common Phone Commands
(Examples) ..................................296 Mute (Or Unmute) Microphone
During Call ...................................296 Transfer Ongoing Call Between
Handset And Vehicle .....................296 Phonebook ..................................296
Voice Command Tips .....................296
Changing The Volume....................296
Using Do Not Disturb ...................297
Incoming Text Messages ...............297
Helpful Tips And Common
Questions To Improve Bluetooth®
Performance With Your
Uconnect System ..........................298
2020_JEEP_CHEROKEE_UG_RHD_UK.book Page 11
Page 32 of 332
GETTING TO KNOW YOUR VEHICLE
30
EXTERIOR LIGHTS
Multifunction Lever
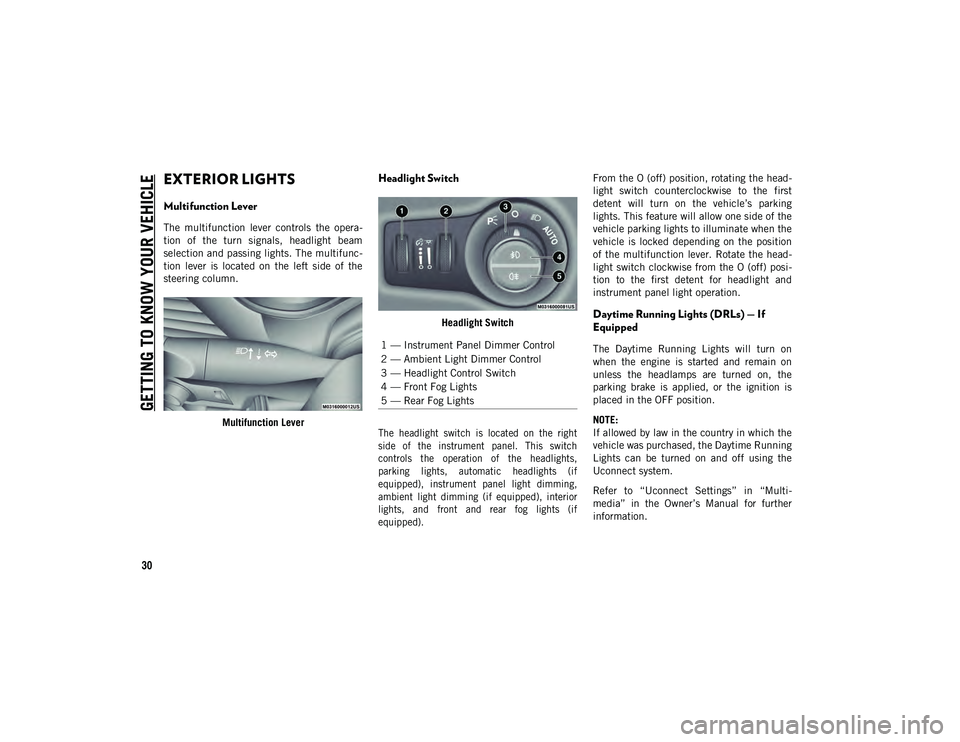
The multifunction lever controls the opera-
tion of the turn signals, headlight beam
selection and passing lights. The multifunc -
tion lever is located on the left side of the
steering column.
Multifunction Lever
Headlight Switch
Headlight Switch
The headlight switch is located on the right
side of the instrument panel. This switch
controls the operation of the headlights,
parking lights, automatic headlights (if
equipped), instrument panel light dimming,
ambient light dimming (if equipped), interior
lights, and front and rear fog lights (if
equipped).
From the O (off) position, rotating the head
-
light switch counterclockwise to the first
detent will turn on the vehicle’s parking
lights. This feature will allow one side of the
vehicle parking lights to illuminate when the
vehicle is locked depending on the position
of the multifunction lever. Rotate the head -
light switch clockwise from the O (off) posi -
tion to the first detent for headlight and
instrument panel light operation.Daytime Running Lights (DRLs) — If
Equipped
The Daytime Running Lights will turn on
when the engine is started and remain on
unless the headlamps are turned on, the
parking brake is applied, or the ignition is
placed in the OFF position.
NOTE:
If allowed by law in the country in which the
vehicle was purchased, the Daytime Running
Lights can be turned on and off using the
Uconnect system.
Refer to “Uconnect Settings” in “Multi -
media” in the Owner’s Manual for further
information.1 — Instrument Panel Dimmer Control
2 — Ambient Light Dimmer Control
3 — Headlight Control Switch
4 — Front Fog Lights
5 — Rear Fog Lights
2020_JEEP_CHEROKEE_UG_RHD_UK.book Page 30
Page 33 of 332
31
High/Low Beam Switch
Push the multifunction lever, located on the
left side of the steering wheel, away from you
to switch the headlights to high beam. Pull
the multifunction lever toward you to switch
the headlights back to low beam.
Automatic High Beam Headlamp Control —
If Equipped
The Automatic High Beam Headlamp Control
system provides increased forward lighting at
night by automating high beam control
through the use of a digital camera mounted
on the windshield. This camera detects
vehicle specific light and automatically
switches from high beams to low beams until
the approaching vehicle is out of view.
NOTE:
The multifunction lever must be in the
high beam position in order to activate the
Automatic High Beams.
The Automatic High Beam Headlamp
Control can be turned on or off using the
Uconnect System. Refer to “Uconnect
Settings” in “Multimedia” in your Owner’s
Manual for further information.When set to AUTO, the system automatically
turns the headlights on or off based on
ambient light levels.
Flash-To-Pass
You can signal another vehicle with your
headlights by lightly pulling the multifunc
-
tion lever toward you. This will cause the
high beam headlights to turn on, and remain
on, until the lever is released.
Automatic Headlights — If Equipped
This system automatically turns the head -
lights on or off according to ambient light
levels. To turn the system on, rotate the
headlight switch clockwise to the last detent
(AUTO position) for automatic headlight
operation. When the system is on, the head -
light time delay feature is also on. This
means the headlights will stay on for up to
90 seconds after the ignition is placed in the
OFF position. To turn the automatic system
off, move the headlight switch out of the
AUTO position.
NOTE:
The engine must be running before the head -
lights will come on in the automatic mode.
Parking Lights
To operate the parking lights, the ignition
must be in the OFF position. Turn the head -
light switch to the “P” position. Then move
the multifunction lever up or down to turn on
the left or right side parking lights.
Headlights On With Wipers (Available
With Automatic Headlights Only)
When this feature is active, the headlights
will turn on after the wipers are turned on if
the headlight switch is placed in the AUTO
position and programmable feature is set to
ON. In addition, the headlights will turn off
when the wipers are turned off if they were
turned on by this feature.
NOTE:
The Headlights On with Wipers feature can
be turned on or off using the Uconnect
System.
Refer to “Uconnect Settings” in “Multi -
media” in the Owner’s Manual for further
information.
2020_JEEP_CHEROKEE_UG_RHD_UK.book Page 31
Page 45 of 332
43
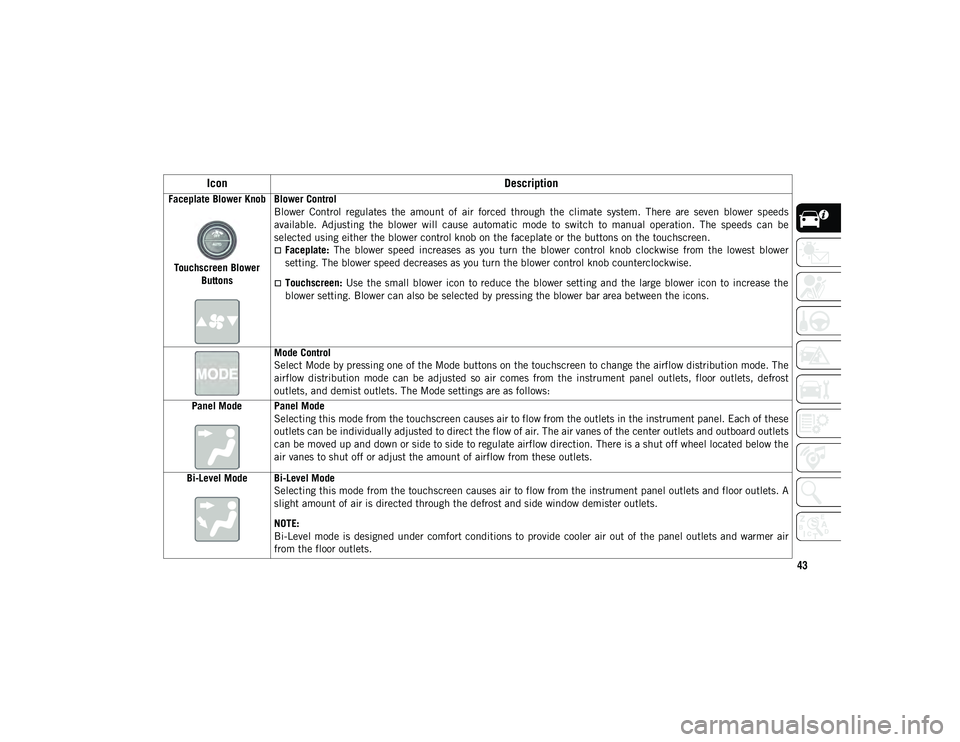
Faceplate Blower KnobTouchscreen Blower Buttons Blower Control
Blower Control regulates the amount of air forced through the climate system. There are seven blower speeds
available. Adjusting the blower will cause automatic mode to switch to manual operation. The speeds can be
selected using either the blower control knob on the faceplate or the buttons on the touchscreen.
Faceplate:
The blower speed increases as you turn the blower control knob clockwise from the lowest blower
setting. The blower speed decreases as you turn the blower control knob counterclockwise.
Touchscreen: Use the small blower icon to reduce the blower setting and the large blower icon to increase the
blower setting. Blower can also be selected by pressing the blower bar area between the icons.
Mode Control
Select Mode by pressing one of the Mode buttons on the touchscreen to change the airflow distribution mode. The
airflow distribution mode can be adjusted so air comes from the instrument panel outlets, floor outlets, defrost
outlets, and demist outlets. The Mode settings are as follows:
Panel Mode Panel Mode Selecting this mode from the touchscreen causes air to flow from the outlets in the instrument panel. Each of these
outlets can be individually adjusted to direct the flow of air. The air vanes of the center outlets and outboard outlets
can be moved up and down or side to side to regulate airflow direction. There is a shut off wheel located below the
air vanes to shut off or adjust the amount of airflow from these outlets.
Bi-Level Mode Bi-Level Mode Selecting this mode from the touchscreen causes air to flow from the instrument panel outlets and floor outlets. A
slight amount of air is directed through the defrost and side window demister outlets.
NOTE:
Bi-Level mode is designed under comfort conditions to provide cooler air out of the panel outlets and warmer air
from the floor outlets.
Icon Description
2020_JEEP_CHEROKEE_UG_RHD_UK.book Page 43
Page 178 of 332
STARTING AND OPERATING
176
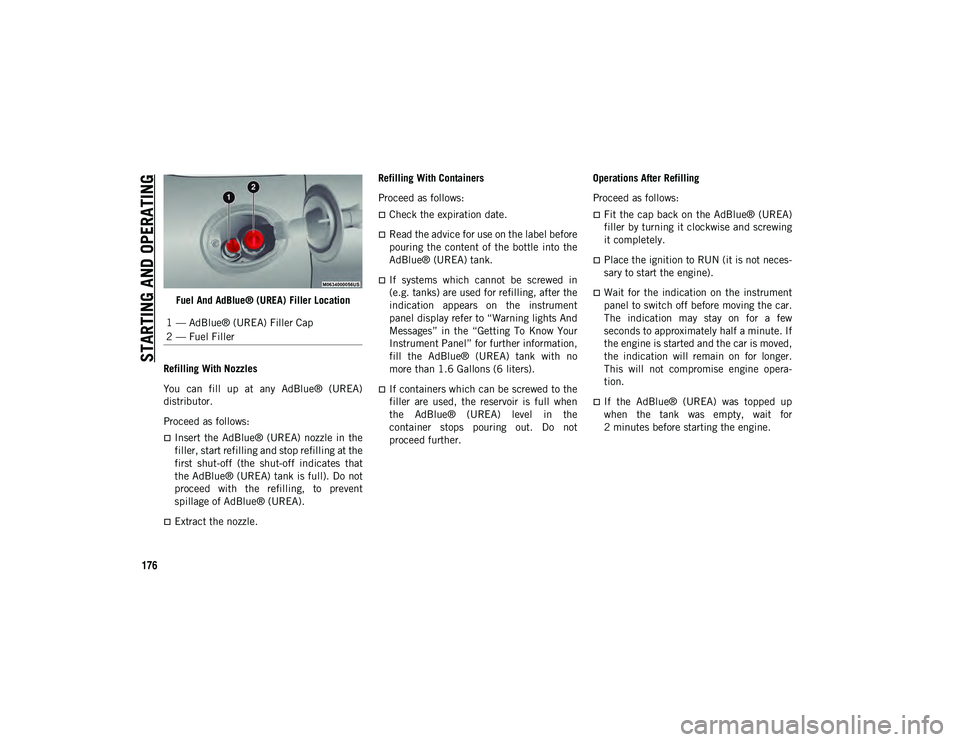
Fuel And AdBlue® (UREA) Filler Location
Refilling With Nozzles
You can fill up at any AdBlue® (UREA)
distributor.
Proceed as follows:
Insert the AdBlue® (UREA) nozzle in the
filler, start refilling and stop refilling at the
first shut-off (the shut-off indicates that
the AdBlue® (UREA) tank is full). Do not
proceed with the refilling, to prevent
spillage of AdBlue® (UREA).
Extract the nozzle. Refilling With Containers
Proceed as follows:
Check the expiration date.
Read the advice for use on the label before
pouring the content of the bottle into the
AdBlue® (UREA) tank.
If systems which cannot be screwed in
(e.g. tanks) are used for refilling, after the
indication appears on the instrument
panel display refer to “Warning lights And
Messages” in the “Getting To Know Your
Instrument Panel” for further information,
fill the AdBlue® (UREA) tank with no
more than 1.6 Gallons (6 liters).
If containers which can be screwed to the
filler are used, the reservoir is full when
the AdBlue® (UREA) level in the
container stops pouring out. Do not
proceed further.
Operations After Refilling
Proceed as follows:
Fit the cap back on the AdBlue® (UREA)
filler by turning it clockwise and screwing
it completely.
Place the ignition to RUN (it is not neces-
sary to start the engine).
Wait for the indication on the instrument
panel to switch off before moving the car.
The indication may stay on for a few
seconds to approximately half a minute. If
the engine is started and the car is moved,
the indication will remain on for longer.
This will not compromise engine opera-
tion.
If the AdBlue® (UREA) was topped up
when the tank was empty, wait for
2 minutes before starting the engine.
1 — AdBlue® (UREA) Filler Cap
2 — Fuel Filler
2020_JEEP_CHEROKEE_UG_RHD_UK.book Page 176
Page 198 of 332
IN CASE OF EMERGENCY
196
1. Remove the spare tire, jack, wheelchocks, and wheel bolt wrench.
2. If equipped with aluminum wheels where the center cap covers the wheel bolts,
use the wheel bolt wrench to pry the
center cap off carefully before raising the
vehicle. 3. Before raising the vehicle, use the wheel
bolt wrench to loosen, but not remove,
the wheel bolts on the wheel with the flat
tire. Turn the wheel bolts counterclock -
wise one turn while the wheel is still on
the ground.
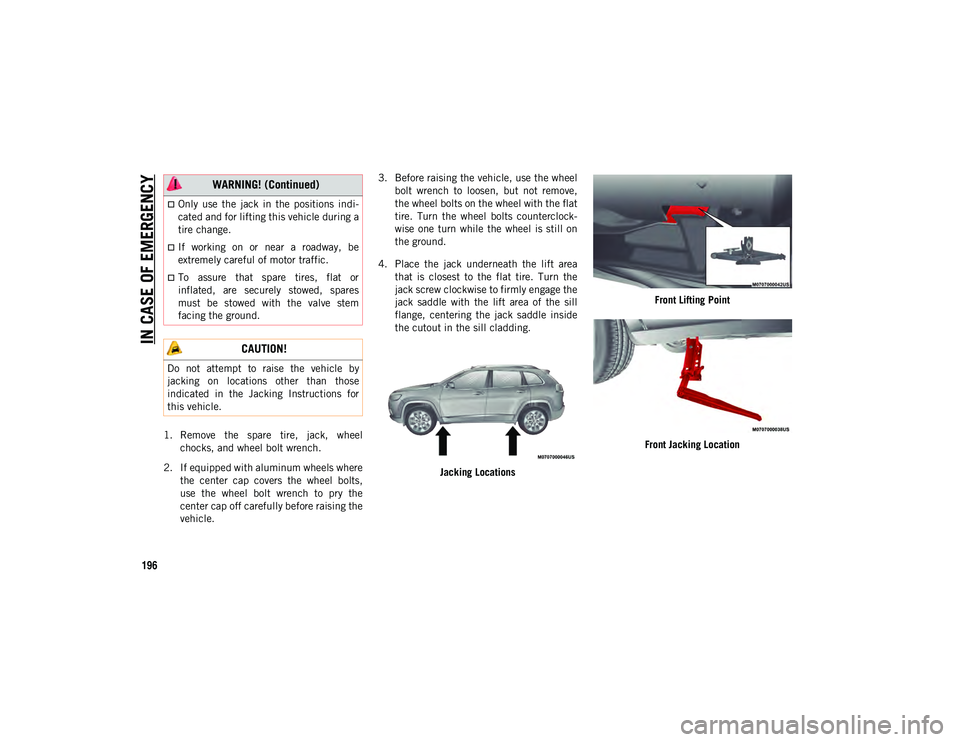
4. Place the jack underneath the lift area that is closest to the flat tire. Turn the
jack screw clockwise to firmly engage the
jack saddle with the lift area of the sill
flange, centering the jack saddle inside
the cutout in the sill cladding.
Jacking Locations Front Lifting Point
Front Jacking Location
Only use the jack in the positions indi -
cated and for lifting this vehicle during a
tire change.
If working on or near a roadway, be
extremely careful of motor traffic.
To assure that spare tires, flat or
inflated, are securely stowed, spares
must be stowed with the valve stem
facing the ground.
CAUTION!
Do not attempt to raise the vehicle by
jacking on locations other than those
indicated in the Jacking Instructions for
this vehicle.
WARNING! (Continued)
2020_JEEP_CHEROKEE_UG_RHD_UK.book Page 196
Page 200 of 332
IN CASE OF EMERGENCY
198
10. Lower the vehicle to the ground byturning the jack handle counterclock -
wise.
11. Finish tightening the wheel bolts. Push down on the wrench while at the end of
the handle for increased leverage.
Tighten the wheel bolts in a star pattern
until each wheel bolt has been tightened
twice. If in doubt about the correct tight -
ness, have them checked with a torque
wrench by an authorized dealer or at a
service station.
NOTE:
Refer to “Torque Specifications” in “Tech -
nical Specifications” for the proper lug bolt
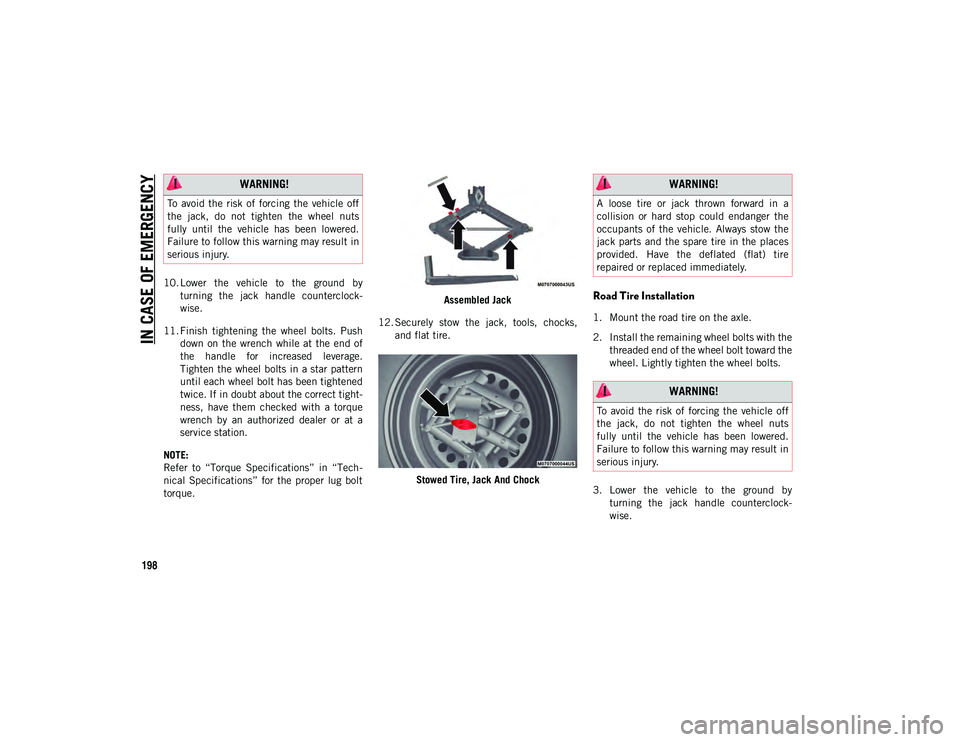
torque. Assembled Jack
12. Securely stow the jack, tools, chocks, and flat tire.
Stowed Tire, Jack And Chock
Road Tire Installation
1. Mount the road tire on the axle.
2. Install the remaining wheel bolts with thethreaded end of the wheel bolt toward the
wheel. Lightly tighten the wheel bolts.
3. Lower the vehicle to the ground by turning the jack handle counterclock -
wise.
WARNING!
To avoid the risk of forcing the vehicle off
the jack, do not tighten the wheel nuts
fully until the vehicle has been lowered.
Failure to follow this warning may result in
serious injury.
WARNING!
A loose tire or jack thrown forward in a
collision or hard stop could endanger the
occupants of the vehicle. Always stow the
jack parts and the spare tire in the places
provided. Have the deflated (flat) tire
repaired or replaced immediately.
WARNING!
To avoid the risk of forcing the vehicle off
the jack, do not tighten the wheel nuts
fully until the vehicle has been lowered.
Failure to follow this warning may result in
serious injury.
2020_JEEP_CHEROKEE_UG_RHD_UK.book Page 198
Page 271 of 332
269
UCONNECT 3 WITH 5-INCH
DISPLAY — IF EQUIPPED
Uconnect 3 With 5-inch Display At A
Glance
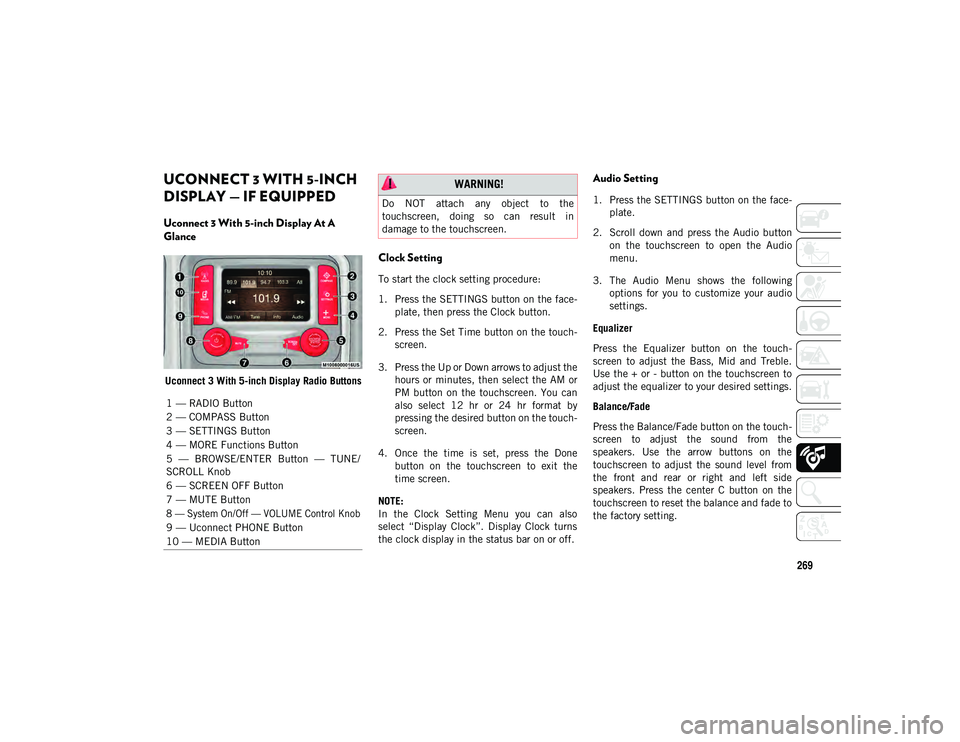
Uconnect 3 With 5-inch Display Radio Buttons
Clock Setting
To start the clock setting procedure:
1. Press the SETTINGS button on the face-
plate, then press the Clock button.
2. Press the Set Time button on the touch -
screen.
3. Press the Up or Down arrows to adjust the hours or minutes, then select the AM or
PM button on the touchscreen. You can
also select 12 hr or 24 hr format by
pressing the desired button on the touch -
screen.
4. Once the time is set, press the Done button on the touchscreen to exit the
time screen.
NOTE:
In the Clock Setting Menu you can also
select “Display Clock”. Display Clock turns
the clock display in the status bar on or off.
Audio Setting
1. Press the SETTINGS button on the face -
plate.
2. Scroll down and press the Audio button on the touchscreen to open the Audio
menu.
3. The Audio Menu shows the following options for you to customize your audio
settings.
Equalizer
Press the Equalizer button on the touch -
screen to adjust the Bass, Mid and Treble.
Use the + or - button on the touchscreen to
adjust the equalizer to your desired settings.
Balance/Fade
Press the Balance/Fade button on the touch -
screen to adjust the sound from the
speakers. Use the arrow buttons on the
touchscreen to adjust the sound level from
the front and rear or right and left side
speakers. Press the center C button on the
touchscreen to reset the balance and fade to
the factory setting.
1 — RADIO Button
2 — COMPASS Button
3 — SETTINGS Button
4 — MORE Functions Button
5 — BROWSE/ENTER Button — TUNE/
SCROLL Knob
6 — SCREEN OFF Button
7 — MUTE Button
8 — System On/Off — VOLUME Control Knob
9 — Uconnect PHONE Button
10 — MEDIA Button
WARNING!
Do NOT attach any object to the
touchscreen, doing so can result in
damage to the touchscreen.
2020_JEEP_CHEROKEE_UG_RHD_UK.book Page 269
Page 274 of 332
MULTIMEDIA
272
UCONNECT 4 WITH 7-INCH
DISPLAY
Uconnect 4 With 7-Inch Display At A
Glance
Uconnect 4 With 7-inch Display Radio Screen
NOTE:
Uconnect screen images are for illustration
purposes only and may not reflect exact soft -
ware for your vehicle. Setting The Time
1. For Uconnect 4, turn the unit on, and
then press the time display at the top of
the screen. Press the Yes button.
2. If the time is not displayed at the top of the screen, press the Settings button on
the touchscreen. In the Settings screen,
press the Clock button on the touch -
screen, and then check or uncheck this
option.
3. Press + or – next to Set Time Hours and Set Time Minutes to adjust the time.
4. If these features are not available, uncheck the Sync Time box.
5. Press X to save your settings and exit out of the Clock Setting screen.
Audio Settings
Press the Audio button on the touchscreen
to activate the Audio settings screen to
adjust Balance\Fade, Equalizer, Speed
Adjusted Volume, Surround Sound, Loud -
ness, AUX Volume Offset, Auto Play, and
Radio Off With Door.
You can return to the Radio screen by
pressing the X located at the top right. Balance/Fade
Press the Balance/Fade button on the
touchscreen to Balance audio between the
front speakers or fade the audio between
the rear and front speakers.
Pressing the Front, Rear, Left, or Right
buttons on the touchscreen or press and
drag the Speaker Icon to adjust the
Balance/Fade.
Equalizer
Press the Equalizer button on the touch -
screen to activate the Equalizer screen.
Press the + or – buttons on the touch -
screen, or press and drag over the level bar
for each of the equalizer bands. The level
value, which spans between plus or minus
nine, is displayed at the bottom of each of
the bands.
Speed Adjusted Volume
Press the Speed Adjusted Volume button
on the touchscreen to activate the Speed
Adjusted Volume screen. The Speed
Adjusted Volume is adjusted by pressing
the volume level indicator. This alters the
automatic adjustment of the audio volume
with variation to vehicle speed.
CAUTION!
Do NOT attach any object to the
touchscreen, doing so can result in
damage to the screen.
2020_JEEP_CHEROKEE_UG_RHD_UK.book Page 272
Page 279 of 332
277
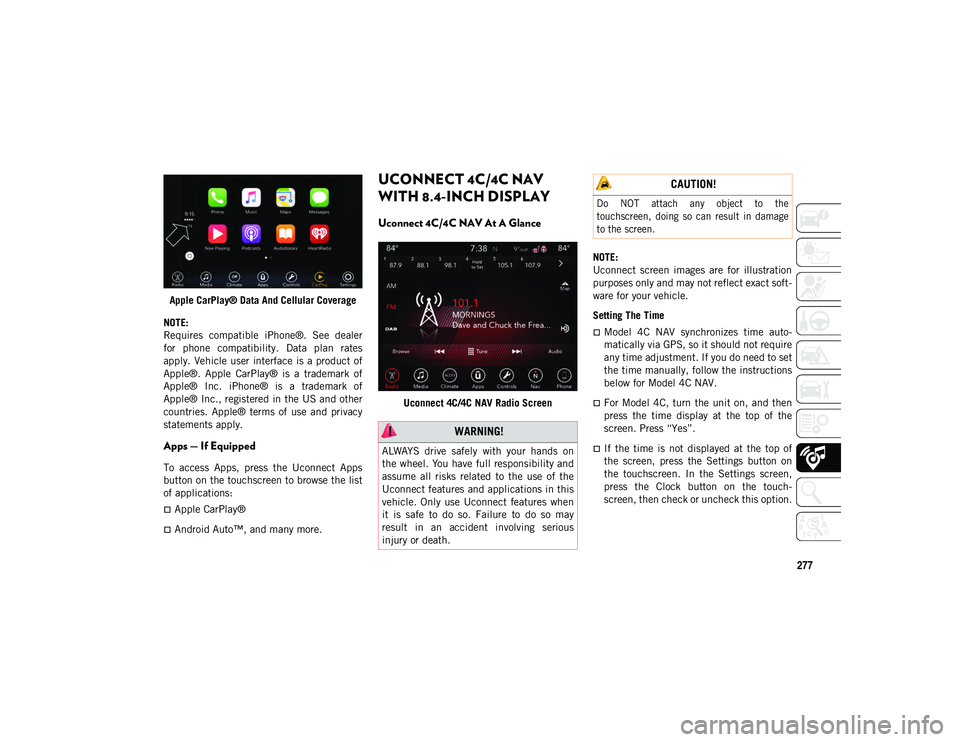
Apple CarPlay® Data And Cellular Coverage
NOTE:
Requires compatible iPhone®. See dealer
for phone compatibility. Data plan rates
apply. Vehicle user interface is a product of
Apple®. Apple CarPlay® is a trademark of
Apple® Inc. iPhone® is a trademark of
Apple® Inc., registered in the US and other
countries. Apple® terms of use and privacy
statements apply.
Apps — If Equipped
To access Apps, press the Uconnect Apps
button on the touchscreen to browse the list
of applications:
Apple CarPlay®
Android Auto™, and many more.
UCONNECT 4C/4C NAV
WITH 8.4-INCH DISPLAY
Uconnect 4C/4C NAV At A Glance
Uconnect 4C/4C NAV Radio Screen NOTE:
Uconnect screen images are for illustration
purposes only and may not reflect exact soft
-
ware for your vehicle.
Setting The Time
Model 4C NAV synchronizes time auto-
matically via GPS, so it should not require
any time adjustment. If you do need to set
the time manually, follow the instructions
below for Model 4C NAV.
For Model 4C, turn the unit on, and then
press the time display at the top of the
screen. Press “Yes”.
If the time is not displayed at the top of
the screen, press the Settings button on
the touchscreen. In the Settings screen,
press the Clock button on the touch -
screen, then check or uncheck this option.
WARNING!
ALWAYS drive safely with your hands on
the wheel. You have full responsibility and
assume all risks related to the use of the
Uconnect features and applications in this
vehicle. Only use Uconnect features when
it is safe to do so. Failure to do so may
result in an accident involving serious
injury or death.
CAUTION!
Do NOT attach any object to the
touchscreen, doing so can result in damage
to the screen.
2020_JEEP_CHEROKEE_UG_RHD_UK.book Page 277