display JEEP CHEROKEE 2023 Owners Manual
[x] Cancel search | Manufacturer: JEEP, Model Year: 2023, Model line: CHEROKEE, Model: JEEP CHEROKEE 2023Pages: 276, PDF Size: 12.55 MB
Page 5 of 276
3
WINDSHIELD WIPERS AND WASHERS ........................... 43Windshield Wiper Operation....................................... 44
Rain Sensing Wipers — If Equipped .......................... 44
Rear Window Wiper/Washer ..................................... 45
Windshield Wiper De-Icer — If Equipped ................... 45
CLIMATE CONTROLS ..........................................................45 Automatic Climate Control Descriptions And
Functions ..................................................................... 45
Automatic Temperature Control (ATC) —
If Equipped ................................................................. 48
Climate Voice Commands .......................................... 48
Operating Tips ............................................................ 48
INTERIOR STORAGE AND EQUIPMENT ............................49 Storage ........................................................................ 49
AUX/USB Control ........................................................ 50
Power Outlets .............................................................. 51
Power Inverter — If Equipped .................................... 52
WINDOWS ...........................................................................53 Power Window Controls .............................................. 53
Automatic Window Features ..................................... 53
Reset Auto-Up.............................................................. 53
Window Lockout Switch.............................................. 54
Wind Buffeting ............................................................ 54
POWER SUNROOF WITH POWER SHADE —
IF EQUIPPED ....................................................................... 54 Opening And Closing The Sunroof ............................. 55
Opening And Closing The Power Shade .................... 55
Pinch Protect Feature ................................................. 56
Venting Sunroof .......................................................... 56
Ignition Off Operation.................................................. 56
Sunroof Maintenance ................................................. 56
HOOD ...................................................................................56 Opening The Hood ...................................................... 56
Closing The Hood ........................................................ 57 LIFTGATE .............................................................................. 57
To Unlock/Open The Liftgate ......................................57
To Lock/Close The Liftgate ......................................... 58
Hands-Free Liftgate — If Equipped ............................ 58
Cargo Area Features ................................................... 59
ROOF LUGGAGE RACK — IF EQUIPPED .......................... 60
GETTING TO KNOW YOUR
INSTRUMENT PANEL
INSTRUMENT CLUSTER ..................................................... 61 Instrument Cluster Descriptions ................................. 63
INSTRUMENT CLUSTER DISPLAY
S
.............................. 63
Instrument Cluster Display Location And Controls.... 63
Oil Life Reset — If Equipped
S
................................. 64
Instrument Cluster Display Menu Items ................... 64
Instrument Cluster Display Selectable Items ............ 67
Battery Saver On/Battery Saver Mode Message —
Electrical Load Reduction Actions — If Equipped .....67
WARNING LIGHTS AND MESSAGES ................................ 68 Red Warning Lights ..................................................... 68
Yellow Warning Lights ................................................. 70
Yellow Indicator Lights ................................................ 73
Green Indicator Lights ................................................. 73
White Indicator Lights.................................................. 74
Blue Indicator Lights.................................................... 75
ONBOARD DIAGNOSTIC SYSTEM — OBD II ..................... 75 Onboard Diagnostic System (OBD II)
Cybersecurity ...............................................................75
EMISSIONS INSPECTION AND MAINTENANCE
PROGRAMS ........................................................................ 75
STARTING AND OPERATING
STARTING THE ENGINE ..................................................... 77 Normal Starting ........................................................... 77
Extreme Cold Weather (Below –20°F Or −29°C) .... 77
Extended Park Starting ............................................... 77
If Engine Fails To Start ............................................... 78
After Starting................................................................ 78
ENGINE BREAK-IN RECOMMENDATIONS........................ 78
PARKING BRAKE ................................................................ 78 Electric Park Brake (EPB) ........................................... 78
AUTOMATIC TRANSMISSION ............................................ 81 Key Ignition Park Interlock.......................................... 81
Brake/Transmission Shift Interlock (BTSI) System ... 81
9-Speed Automatic Transmission ............................. 81
Gear Ranges ................................................................ 82
FOUR-WHEEL DRIVE OPERATION .................................... 85 1-Speed Four-Wheel Drive (4WD) — If Equipped....... 85
2-Speed Four-Wheel Drive (4WD) — If Equipped....... 85
Shift Positions.............................................................. 86
Shifting Procedures ..................................................... 86
Rear Electronic Locker System — If Equipped........... 87
SELEC-TERRAIN .................................................................. 88 Description................................................................... 88
POWER STEERING ............................................................. 88
STOP/START SYSTEM........................................................ 89 Autostop Mode ............................................................ 89
Possible Reasons The Engine Does Not Autostop .... 89
To Start The Engine While In Autostop Mode ............ 89
To Manually Turn Off The Stop/Start System............ 90
To Manually Turn On The Stop/Start System ............ 90
System Malfunction .................................................... 90
23_KL_OM_EN_USC_t.book Page 3
Page 6 of 276

4
CRUISE CONTROL SYSTEMS — IF EQUIPPED .................90
Cruise Control.............................................................. 90
Adaptive Cruise Control (ACC) ................................... 92
PARKSENSE FRONT/REAR PARK ASSIST
SYSTEM — IF EQUIPPED.....................................................99 ParkSense Sensors ................................................... 100
ParkSense Display .................................................... 100
ParkSense Warning Display ..................................... 103
Enabling And Disabling ParkSense.......................... 103Service The ParkSense Park Assist System ............ 103Cleaning The ParkSense System ............................. 103
ParkSense System Usage Precautions ................... 103Side Distance Warning System ................................ 104
PARKSENSE ACTIVE PARK ASSIST
SYSTEM — IF EQUIPPED.................................................. 106 Enabling And Disabling The ParkSense Active
Park Assist System.................................................... 106
Parallel/Perpendicular Parking Space Assistance
Operation ................................................................... 107
Exiting The Parking Space ........................................ 109
LANESENSE — IF EQUIPPED .......................................... 109 LaneSense Operation ............................................... 109Turning LaneSense On Or Off................................... 110
LaneSense Warning Message.................................. 110Changing LaneSense Settings ................................. 112
PARKVIEW REAR BACK UP CAMERA ........................... 112
REFUELING THE VEHICLE .............................................. 113
VEHICLE LOADING ........................................................... 113 Certification Label ..................................................... 113 TRAILER TOWING ............................................................ 114
Common Towing Definitions .................................... 114Trailer Hitch Classification ....................................... 116
Trailer Towing Weights (Maximum Trailer Weight
Ratings) ..................................................................... 116
Trailer And Tongue Weight ...................................... 117
Towing Requirements............................................... 117
Towing Tips ............................................................... 119
RECREATIONAL TOWING (BEHIND MOTORHOME) .... 120 Towing This Vehicle Behind Another Vehicle .......... 120
Recreational Towing — Front-Wheel Drive (FWD)
Models ....................................................................... 121Recreational Towing — 4x4 Models With 1-Speed
Power Transfer Unit .................................................. 121Recreational Towing — 4x4 Models With 2-Speed
Power Transfer Unit .................................................. 121
DRIVING TIPS ................................................................... 123 On-Road Driving Tips ................................................ 123
Off-Road Driving Tips ................................................ 123
MULTIMEDIA
UCONNECT SYSTEMS ..................................................... 126
CYBERSECURITY ............................................................. 126
UCONNECT SETTINGS ..................................................... 126 Customer Programmable Features ......................... 127
STEERING WHEEL AUDIO CONTROLS —
IF EQUIPPED ..................................................................... 140 Radio Operation ........................................................ 140Media Mode .............................................................. 140
RADIO OPERATION AND MOBILE PHONES.................. 140 Regulatory And Safety Information.......................... 140 OFF-ROAD PAGES — IF EQUIPPED .................................141
Off-Road Pages Status Bar ...................................... 141Drivetrain .................................................................. 141
Pitch & Roll ............................................................... 142
Accessory Gauges .................................................... 142
Selec-Terrain — If Equipped ..................................... 142
SAFETY
SAFETY FEATURES ...........................................................143 Anti-Lock Brake System (ABS) ................................. 143
Electronic Brake Control (EBC) System ................... 143
AUXILIARY DRIVING SYSTEMS .......................................150 Blind Spot Monitoring (BSM) — If Equipped ............ 150
Forward Collision Warning (FCW) With
Mitigation — If Equipped ........................................... 154
Tire Pressure Monitoring System (TPMS) ................ 155
OCCUPANT RESTRAINT SYSTEMS ................................159 Occupant Restraint Systems Features ................... 159
Important Safety Precautions................................... 159
Seat Belt Systems .................................................... 159
Supplemental Restraint Systems (SRS) .................. 166Child Restraints ......................................................... 176
SAFETY TIPS......................................................................186 Transporting Passengers .......................................... 186
Transporting Pets ...................................................... 186Connected Vehicles................................................... 186
Safety Checks You Should Make Inside The
Vehicle ....................................................................... 187
Periodic Safety Checks You Should Make
Outside The Vehicle .................................................. 188
Exhaust Gas ............................................................... 188
Carbon Monoxide Warnings ..................................... 188
23_KL_OM_EN_USC_t.book Page 4
Page 16 of 276
14GETTING TO KNOW YOUR VEHICLE
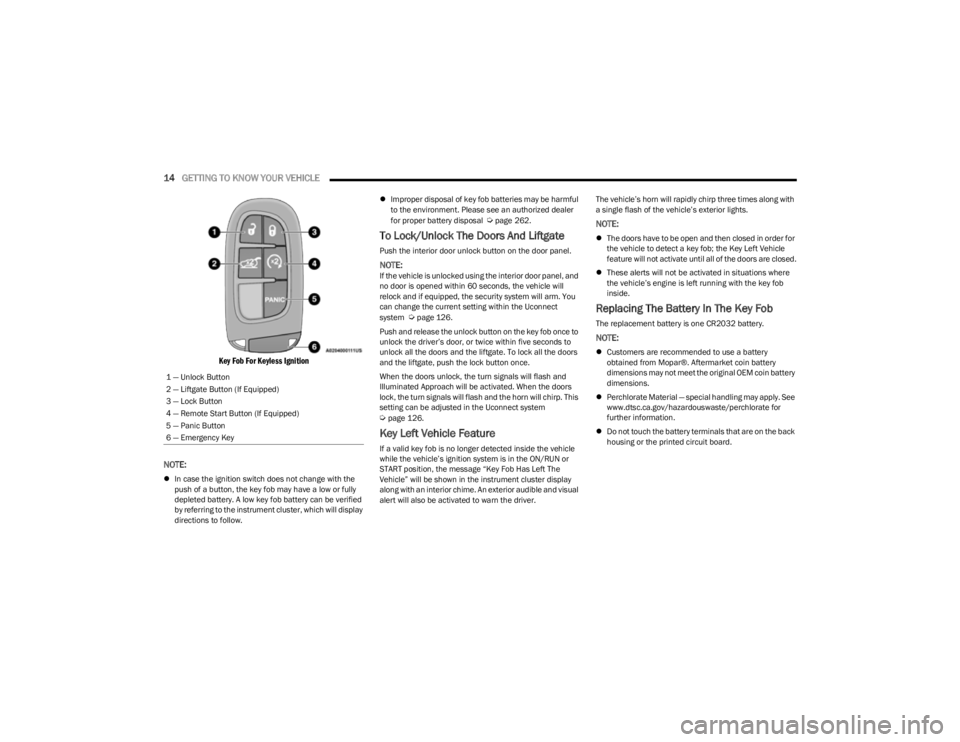
Key Fob For Keyless Ignition
NOTE:
In case the ignition switch does not change with the
push of a button, the key fob may have a low or fully
depleted battery. A low key fob battery can be verified
by referring to the instrument cluster, which will display
directions to follow.
Improper disposal of key fob batteries may be harmful
to the environment. Please see an authorized dealer
for proper battery disposal
Úpage 262.
To Lock/Unlock The Doors And Liftgate
Push the interior door unlock button on the door panel.
NOTE:If the vehicle is unlocked using the interior door panel, and
no door is opened within 60 seconds, the vehicle will
relock and if equipped, the security system will arm. You
can change the current setting within the Uconnect
system
Úpage 126.
Push and release the unlock button on the key fob once to
unlock the driver’s door, or twice within five seconds to
unlock all the doors and the liftgate. To lock all the doors
and the liftgate, push the lock button once.
When the doors unlock, the turn signals will flash and
Illuminated Approach will be activated. When the doors
lock, the turn signals will flash and the horn will chirp. This
setting can be adjusted in the Uconnect system
Úpage 126.
Key Left Vehicle Feature
If a valid key fob is no longer detected inside the vehicle
while the vehicle’s ignition system is in the ON/RUN or
START position, the message “Key Fob Has Left The
Vehicle” will be shown in the instrument cluster display
along with an interior chime. An exterior audible and visual
alert will also be activated to warn the driver. The vehicle’s horn will rapidly chirp three times along with
a single flash of the vehicle’s exterior lights.
NOTE:
The doors have to be open and then closed in order for
the vehicle to detect a key fob; the Key Left Vehicle
feature will not activate until all of the doors are closed.
These alerts will not be activated in situations where
the vehicle’s engine is left running with the key fob
inside.
Replacing The Battery In The Key Fob
The replacement battery is one CR2032 battery.
NOTE:
Customers are recommended to use a battery
obtained from Mopar®. Aftermarket coin battery
dimensions may not meet the original OEM coin battery
dimensions.
Perchlorate Material — special handling may apply. See
www.dtsc.ca.gov/hazardouswaste/perchlorate for
further information.
Do not touch the battery terminals that are on the back
housing or the printed circuit board.
1 — Unlock Button
2 — Liftgate Button (If Equipped)
3 — Lock Button
4 — Remote Start Button (If Equipped)
5 — Panic Button
6 — Emergency Key
23_KL_OM_EN_USC_t.book Page 14
Page 20 of 276
18GETTING TO KNOW YOUR VEHICLE
position. In addition to the chime, the message “Igni-
tion or Accessory ON” will display in the cluster.
The power window switches and power sunroof (if
equipped) will remain active for three minutes after the
ignition is placed in the OFF position. Opening either
front door will cancel this feature. The timing for this
feature is programmable.
REMOTE START — IF EQUIPPED
This system uses the key fob to start the engine
conveniently from outside the vehicle while still
maintaining security. The system has a range
of approximately 328 ft (100 m).
Remote Start is used to defrost windows in cold weather,
and to reach a comfortable climate in all ambient
conditions before the driver enters the vehicle.
NOTE:Obstructions between the vehicle and key fob may reduce
this range Úpage 262.
HOW TO USE REMOTE START
Push and release the Remote Start button on the key fob
twice within five seconds. The vehicle doors will lock, the
parking lights will flash, and the horn will chirp (if
programmed within the Uconnect system). Then, the
engine will start, and the vehicle will remain in the Remote
Start mode for a 15 minute cycle. Pushing the Remote
Start button a third time shuts the engine off.
NOTE:
With Remote Start, the engine will only run for
15 minutes.
Remote Start can only be used twice.
The ignition must be placed in the ON/RUN position
before the Remote Start sequence can be repeated for
a third cycle.
If an engine fault is present or fuel level is low, the
vehicle will start and then shut down in 10 seconds.
The parking lights will turn on and remain on during
Remote Start mode.
For security, power window and power sunroof opera -
tion (if equipped) are disabled when the vehicle is in
the Remote Start mode.
The ignition must be placed in the ON/RUN position
before the Remote Start sequence can be repeated for
a third cycle.
All of the following conditions must be met before the
engine will remote start:
Gear selector in PARK
Doors closed
Hood closed
Liftgate closed
Hazard switch off
Brake switch inactive (brake pedal not pressed)
Battery at an acceptable charge level
System not disabled from previous Remote Start event
Vehicle Security system indicator flashing
Ignition in OFF position
Fuel level meets minimum requirement
Vehicle Security system is not signaling an intrusion
Malfunction Indicator Light (MIL) is not illuminated
TO EXIT REMOTE START MODE
To drive the vehicle after starting the Remote Start
system, push and release the START/STOP ignition button
while pressing the brake pedal prior to the end of the
15 minute cycle. If the vehicle is not equipped with a
START/STOP ignition button, insert the key fob into the
ignition switch and place the ignition in the ON/RUN
position.
WARNING!
Do not start or run an engine in a closed garage or
confined area. Exhaust gas contains carbon
monoxide (CO) which is odorless and colorless.
Carbon monoxide is poisonous and can cause
serious injury or death when inhaled.
Keep key fobs away from children. Operation of the
Remote Start system, windows, door locks or other
controls could cause serious injury or death.
23_KL_OM_EN_USC_t.book Page 18
Page 21 of 276
GETTING TO KNOW YOUR VEHICLE19
The Remote Start system will turn the engine off if the
Remote Start button on the key fob is pushed again, or if
the engine is allowed to run for the entire 15 minute cycle.
Once the driver’s door is opened, or the ignition is placed
in the ON/RUN position, the climate controls will resume
previously set operations (temperature, blower control,
etc.).
NOTE:
For vehicles equipped with the Keyless Enter ‘n Go™ —
Passive Entry feature, the message “Remote Start
Active — Push Start Button” will show in the instrument
cluster display until you push the START/STOP ignition
button.
To avoid unintentional shutdowns, the system will
disable for two seconds after receiving a valid Remote
Start request.
REMOTE START FRONT DEFROST
A
CTIVATION — IF EQUIPPED
When Remote Start is active, and the outside ambient
temperature is 40°F (4.5°C) or below, the system will
automatically activate front defrost for 15 minutes or less.
The timing is dependent on the ambient temperature.
Once the timer expires, the system will automatically
adjust the settings depending on ambient conditions. See
“Remote Start Comfort Systems — If Equipped” in the next
section for detailed operation.
REMOTE START COMFORT SYSTEMS —
I
F EQUIPPED
When Remote Start is activated, the front and rear defrost
will automatically turn on in cold weather. The heated steering wheel and driver heated seat feature will turn on
if selected in the Comfort menu screen within Uconnect
Settings
Úpage 126. In warm weather, the driver vented
seat feature will automatically turn on when the Remote
Start is activated, if programmed in the Comfort menu
screen. The vehicle will adjust the climate control settings
depending on the outside ambient temperature.
Automatic Temperature Control (ATC) — If Equipped
The climate controls automatically adjust to the optimal
temperature and mode settings dependent on the outside
ambient temperature. This will occur until the driver’s door
is opened, or the ignition is placed in the ON/RUN position,
where the climate controls will resume their previous
settings.
Manual Temperature Control (MTC) — If Equipped
In ambient temperatures at 40°F (4.5°C) or below, the
climate settings will default to maximum heat, with
fresh air entering the cabin. If the front defrost timer
expires, the vehicle will enter Mix Mode.
In ambient temperatures from 40°F (4.5°C) to 78°F
(26°C), the climate settings will be based on the last
settings selected by the driver.
In ambient temperatures at 78°F (26°C) or above, the
climate settings will default to MAX A/C, Bi-Level Mode,
and Recirculation on.
For more information on ATC, MTC, and climate control
settings, see
Úpage 45.
NOTE:These features will stay on through the duration of Remote
Start until the driver’s door is opened, or until the ignition
is placed in the ON/RUN position. The climate control
settings will change if manually adjusted by the driver while the vehicle is in Remote Start mode, and exit auto
-
matic override. This includes the OFF button on the
climate controls, which will turn the system off.
REMOTE START WINDSHIELD WIPER
D
E-ICER ACTIVATION — IF EQUIPPED
When Remote Start is active and the outside ambient
temperature is less than 33°F (0.6°C), the Windshield
Wiper De-Icer will activate. Exiting Remote Start will
resume its previous operation. If the Windshield Wiper
De-Icer was active, the timer and operation will continue.
REMOTE START CANCEL MESSAGE
One of the following messages will display in the
instrument cluster display if the vehicle fails to remote
start, or exits Remote Start prematurely:
Remote Start Canceled — Door Open
Remote Start Canceled — Hood Open
Remote Start Canceled — Fuel Low
Remote Start Canceled — Liftgate Open
Remote Start Disabled — Start Vehicle To Reset
Remote Start Canceled — Too Cold
Remote Start Canceled — Time Expired
The message will stay active until the ignition is placed in
the ON/RUN position.
2
23_KL_OM_EN_USC_t.book Page 19
Page 27 of 276
GETTING TO KNOW YOUR VEHICLE25
HEATED STEERING WHEEL —
I
F EQUIPPED
The steering wheel contains a heating element
that helps warm your hands in cold weather.
The heated steering wheel has only one
temperature setting. Once the heated steering
wheel has been turned on, a sensor will monitor the
temperature of the steering wheel and adjust the power
level to maintain an optimum heat level.
The heated steering wheel control button is located within
the Uconnect system. You can gain access to the control
button through the climate screen or the controls screen.
Press the heated steering wheel button once to turn
the heating element on.
Press the heated steering wheel button a second time
to turn the heating element off.
NOTE:The engine must be running for the heated steering wheel
to operate. For information on use with the Remote Start system, see
Úpage 19.
UCONNECT VOICE RECOGNITION
INTRODUCING VOICE RECOGNITION
Start using Uconnect Voice Recognition with these helpful
quick tips. This section provides Voice Commands and tips
you need to know to control your vehicle’s Voice
Recognition (VR) system.
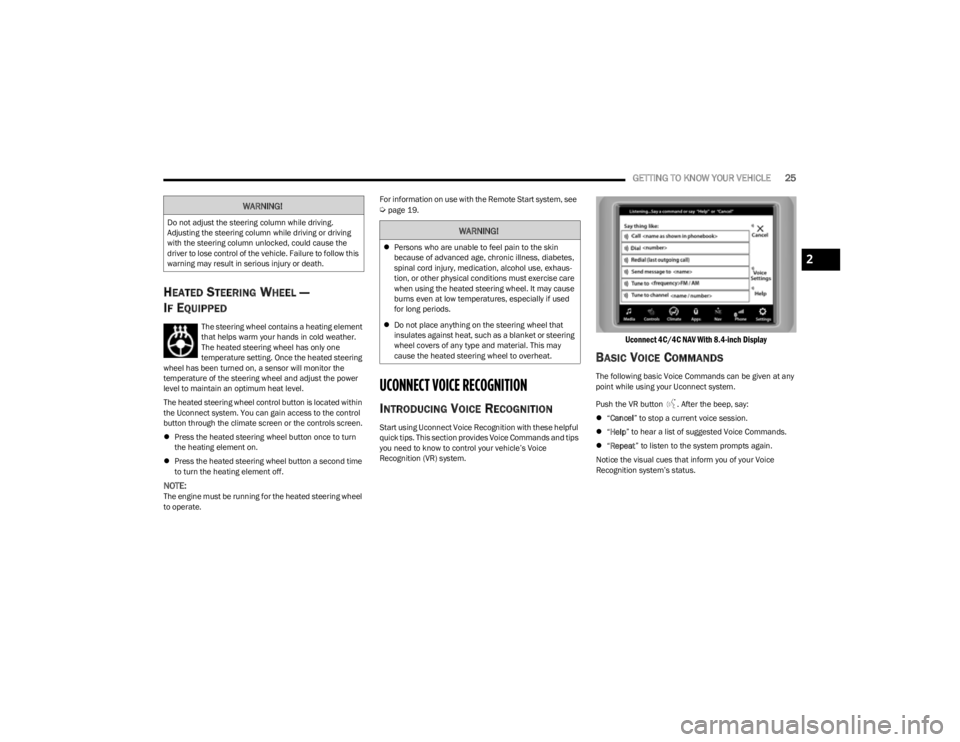
Uconnect 4C/4C NAV With 8.4-inch Display
BASIC VOICE COMMANDS
The following basic Voice Commands can be given at any
point while using your Uconnect system.
Push the VR button . After the beep, say:
“Cancel ” to stop a current voice session.
“Help ” to hear a list of suggested Voice Commands.
“Repeat ” to listen to the system prompts again.
Notice the visual cues that inform you of your Voice
Recognition system’s status.
WARNING!
Do not adjust the steering column while driving.
Adjusting the steering column while driving or driving
with the steering column unlocked, could cause the
driver to lose control of the vehicle. Failure to follow this
warning may result in serious injury or death.WARNING!
Persons who are unable to feel pain to the skin
because of advanced age, chronic illness, diabetes,
spinal cord injury, medication, alcohol use, exhaus -
tion, or other physical conditions must exercise care
when using the heated steering wheel. It may cause
burns even at low temperatures, especially if used
for long periods.
Do not place anything on the steering wheel that
insulates against heat, such as a blanket or steering
wheel covers of any type and material. This may
cause the heated steering wheel to overheat.
2
23_KL_OM_EN_USC_t.book Page 25
Page 29 of 276
GETTING TO KNOW YOUR VEHICLE27
NOTE:
Your vehicle is equipped with two key fobs, each can be
linked to either memory position 1 or 2.
Be sure to program the radio presets prior to program -
ming the memory settings.
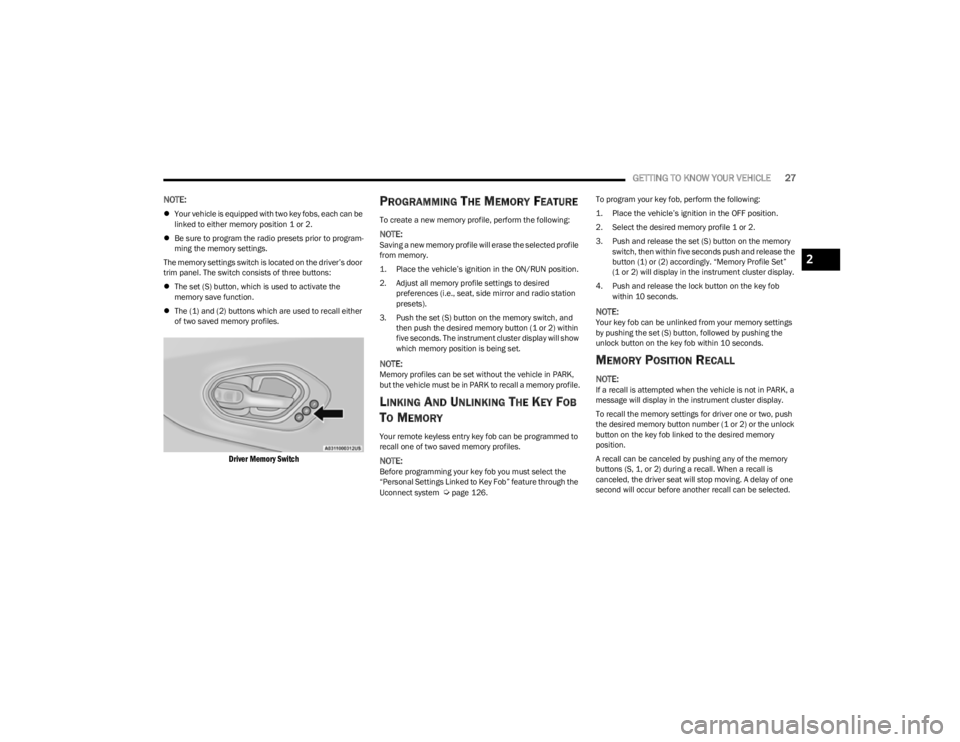
The memory settings switch is located on the driver’s door
trim panel. The switch consists of three buttons:
The set (S) button, which is used to activate the
memory save function.
The (1) and (2) buttons which are used to recall either
of two saved memory profiles.
Driver Memory Switch
PROGRAMMING THE MEMORY FEATURE
To create a new memory profile, perform the following:
NOTE:Saving a new memory profile will erase the selected profile
from memory.
1. Place the vehicle’s ignition in the ON/RUN position.
2. Adjust all memory profile settings to desired
preferences (i.e., seat, side mirror and radio station
presets).
3. Push the set (S) button on the memory switch, and then push the desired memory button (1 or 2) within
five seconds. The instrument cluster display will show
which memory position is being set.
NOTE:Memory profiles can be set without the vehicle in PARK,
but the vehicle must be in PARK to recall a memory profile.
LINKING AND UNLINKING THE KEY FOB
T
O MEMORY
Your remote keyless entry key fob can be programmed to
recall one of two saved memory profiles.
NOTE:Before programming your key fob you must select the
“Personal Settings Linked to Key Fob” feature through the
Uconnect system
Úpage 126. To program your key fob, perform the following:
1. Place the vehicle’s ignition in the OFF position.
2. Select the desired memory profile 1 or 2.
3. Push and release the set (S) button on the memory
switch, then within five seconds push and release the
button (1) or (2) accordingly. “Memory Profile Set”
(1 or 2) will display in the instrument cluster display.
4. Push and release the lock button on the key fob within 10 seconds.
NOTE:Your key fob can be unlinked from your memory settings
by pushing the set (S) button, followed by pushing the
unlock button on the key fob within 10 seconds.
MEMORY POSITION RECALL
NOTE:If a recall is attempted when the vehicle is not in PARK, a
message will display in the instrument cluster display.
To recall the memory settings for driver one or two, push
the desired memory button number (1 or 2) or the unlock
button on the key fob linked to the desired memory
position.
A recall can be canceled by pushing any of the memory
buttons (S, 1, or 2) during a recall. When a recall is
canceled, the driver seat will stop moving. A delay of one
second will occur before another recall can be selected.
2
23_KL_OM_EN_USC_t.book Page 27
Page 44 of 276
42GETTING TO KNOW YOUR VEHICLE
TURN SIGNALS
Lightly push the multifunction lever up or down to activate
the turn signals. The arrows on each side of the
instrument cluster display will flash to show proper
operation.
NOTE:
If either light remains on and does not flash, or there is
a very fast flash rate, check for a defective LED turn
signal. Please see an authorized dealer for service.
A “Turn Signal On” message will appear in the instru -
ment cluster display and a continuous chime will sound
if the vehicle is driven more than 1 mile (1.6 km) with
either turn signal on.
LANE CHANGE ASSIST — IF EQUIPPED
Lightly push the multifunction lever up or down, without
moving beyond the detent, and the turn signal will flash
three times then automatically turn off.
BATTERY SAVER
Timers are set to both the interior and exterior lights to
protect the life of your vehicle’s battery.
After 10 minutes, if the ignition is in the OFF position and
any door is left open or the dimmer control is rotated all
the way up to the dome light on position, the interior lights
will automatically turn off.
NOTE:Battery saver mode is canceled if the ignition is placed in
the ON position. If the headlights remain on while the ignition is placed in
the OFF position, the exterior lights will automatically turn
off after eight minutes. If the headlights are turned on and
left on for eight minutes while the ignition is OFF, the
exterior lights will automatically turn off.
INTERIOR LIGHTS
The interior lights come on when a door is opened.
To protect the battery, the interior lights will turn off
automatically 10 minutes after the ignition is placed in the
OFF position. This will occur if the interior lights were
turned on manually or are on because a door is open. The
Battery Protection also includes the glove compartment
light and the cargo light. To restore interior light operation
after automatic battery protection is enabled (lights off),
either place the ignition in the ON/RUN position or cycle
the light switch.
INTERIOR COURTESY LIGHTS
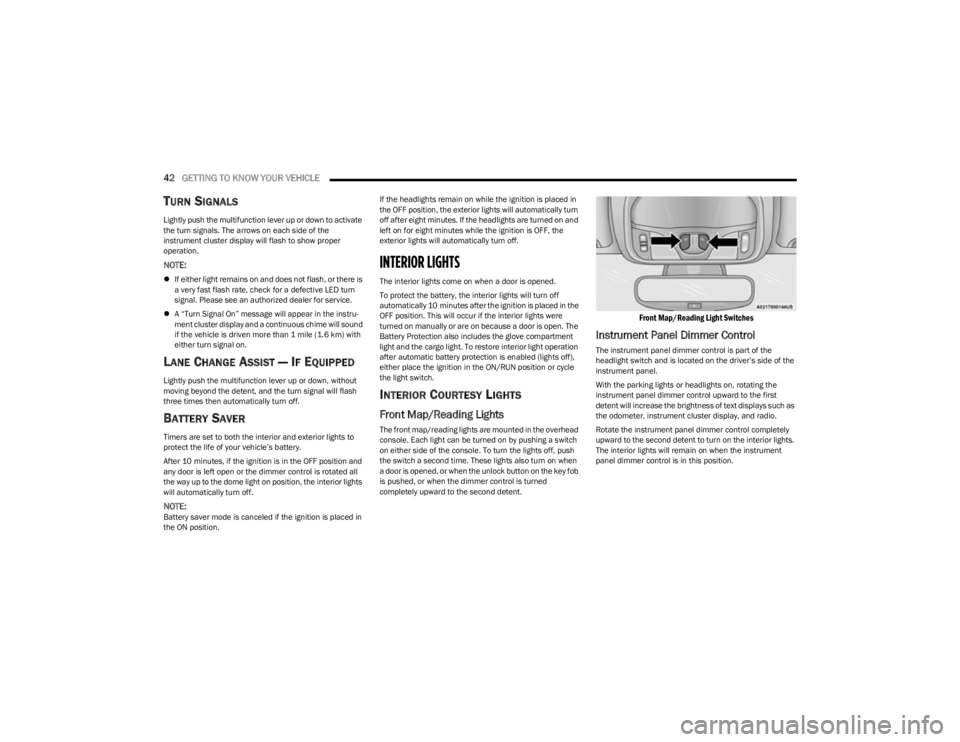
Front Map/Reading Lights
The front map/reading lights are mounted in the overhead
console. Each light can be turned on by pushing a switch
on either side of the console. To turn the lights off, push
the switch a second time. These lights also turn on when
a door is opened, or when the unlock button on the key fob
is pushed, or when the dimmer control is turned
completely upward to the second detent.
Front Map/Reading Light Switches
Instrument Panel Dimmer Control
The instrument panel dimmer control is part of the
headlight switch and is located on the driver’s side of the
instrument panel.
With the parking lights or headlights on, rotating the
instrument panel dimmer control upward to the first
detent will increase the brightness of text displays such as
the odometer, instrument cluster display, and radio.
Rotate the instrument panel dimmer control completely
upward to the second detent to turn on the interior lights.
The interior lights will remain on when the instrument
panel dimmer control is in this position.
23_KL_OM_EN_USC_t.book Page 42
Page 47 of 276

GETTING TO KNOW YOUR VEHICLE45
Use of products containing wax or silicone may reduce
Rain Sensing performance.
The Rain Sensing feature can be turned on and off
using the Uconnect system
Úpage 126.
The Rain Sensing system has protection features for the
wiper blades and arms, and will not operate under the
following conditions:
Low Ambient Temperature — When the ignition is first
placed in the ON position, the Rain Sensing system will
not operate until the wiper switch is moved, vehicle
speed is greater than 3 mph (5 km/h) or the outside
temperature is greater than 32°F (0°C).
Transmission In NEUTRAL Position — When the ignition
is ON, and the transmission is in NEUTRAL, the Rain
Sensing system will not operate until the wiper switch
is moved, vehicle speed is greater than 3 mph (5 km/
h) or the gear selector is moved out of the NEUTRAL
position.
Remote Start Mode Inhibit — On vehicles equipped with
the Remote Start system, Rain Sensing wipers are not
operational when the vehicle is in the Remote Start
mode.
REAR WINDOW WIPER/WASHER
The rear wiper/washer controls are located on the
windshield wiper/washer lever on the right side of the
steering column. The rear wiper/washer is operated by
rotating a switch, located at the middle of the lever.
Rotate the center portion of the lever upward to
the first detent for intermittent operation and to
the second detent for continuous rear wiper
operation. To use the washer, push the lever forward and
hold while spray is desired. If the lever is
pushed while in the intermittent setting, the
wiper will turn on and operate for several wipe
cycles after the end of the lever is released, and then
resume the intermittent interval previously selected.
If the lever is pushed while the wiper is in the off position,
the wiper will operate for several wipe cycles, then turn off.
NOTE:As a protective measure, the pump will stop if the switch
is held for more than 20 seconds. Once the lever is
released the pump will resume normal operation.
If the rear wiper is operating when the ignition is placed in
the OFF position, the wiper will automatically return to the
parked position.
WINDSHIELD WIPER DE-ICER —
I
F EQUIPPED
Your vehicle may be equipped with a Windshield Wiper
De-Icer feature that may be activated under the following
conditions:
Activation By Front Defrost — The Windshield Wiper
De-Icer shall be activated automatically in the case of
a cold weather manual start with full front defrost, and
when the ambient temperature is below 33°F (0.6°C).
Activation By Rear Defrost — The Windshield Wiper
De-Icer shall be activated automatically when the rear
defrost is turned on and when the ambient tempera -
ture is below 33°F (0.6°C).
Activation By Remote Start Operation — When Remote
Start is active and the outside ambient temperature is
less than 33°F (0.6°C), the Windshield Wiper De-Icer will activate. Exiting Remote Start will resume its
previous operation. If the Windshield Wiper De-Icer was
active, the timer and operation will continue.
CLIMATE CONTROLS
The Climate Control system allows you to regulate the
temperature, air flow, and direction of air circulating
throughout the vehicle. The controls are located on the
touchscreen and on the instrument panel below the radio.
AUTOMATIC CLIMATE CONTROL
D
ESCRIPTIONS AND FUNCTIONS
Uconnect 4C/4C NAV With 8.4-inch Display With Automatic
Temperature Controls
MAX A/C Button
Press and release the MAX A/C button on the
touchscreen to change the current setting to
the coldest output of air. The MAX A/C indicator
illuminates when MAX A/C is on. Pressing the
button again will cause the MAX A/C operation to exit. In
2
23_KL_OM_EN_USC_t.book Page 45
Page 49 of 276
GETTING TO KNOW YOUR VEHICLE47
Driver And Passenger Temperature Up And
Down Buttons
These buttons provide the driver and
passenger with independent temperature
control.
Push the red button on the faceplate or
touchscreen or press and slide the
temperature bar towards the red arrow button
on the touchscreen for warmer temperature
settings.
Push the blue button on the faceplate or
touchscreen or press and slide the
temperature bar towards the blue arrow button
on the touchscreen for cooler temperature
settings.
NOTE:The numbers within the temperature display will only
appear if the system is equipped with an automatic
climate control system.
SYNC Button
Press the SYNC button on the touchscreen to
toggle the SYNC feature on/off. The SYNC
indicator illuminates when SYNC is on. SYNC
synchronizes the passenger temperature
setting with the driver temperature setting. Changing the
passenger’s temperature setting while in SYNC will
automatically exit this feature.
NOTE:The SYNC button is only available on the touchscreen.
Blower Control
Blower Control regulates the amount of air
forced through the climate control system.
There are seven blower speeds available.
Adjusting the blower will cause automatic
mode to switch to manual operation. The speeds can be
selected using either the blower control knob on the
faceplate or the buttons on the touchscreen.
Faceplate
The blower speed increases as you turn the blower control
knob clockwise from the lowest blower setting. The blower
speed decreases as you turn the blower control knob
counterclockwise.
Touchscreen
Use the small blower icon to reduce the blower setting and
the large blower icon to increase the blower setting.
Blower can also be selected by pressing the blower bar
area between the icons.
Mode Control
Select Mode by pressing one of the Mode
buttons on the touchscreen to change the
airflow distribution mode. The airflow
distribution mode can be adjusted so air comes
from the instrument panel outlets, floor outlets, defrost
outlets, and demist outlets.
Panel Mode
Air comes from the outlets in the instrument
panel. Each of these outlets can be individually
adjusted to direct the flow of air. The air vanes
of the center outlets and outboard outlets can
be moved up and down or side to side to regulate airflow direction. There is a shut-off wheel located below the air
vanes to shut off or adjust the amount of airflow from
these outlets.
Bi-Level Mode
Air comes from the instrument panel outlets
and floor outlets. A slight amount of air is
directed through the defrost and side window
demister outlets.
NOTE:Bi-Level mode is designed under comfort conditions to
provide cooler air out of the panel outlets and warmer air
from the floor outlets.
Floor Mode
Air comes from the floor outlets. A slight
amount of air is directed through the defrost
and side window demister outlets.
Mix Mode
Air is directed through the floor, defrost, and
side window demister outlets. This setting
works best in cold or snowy conditions that
require extra heat to the windshield. This
setting is good for maintaining comfort while reducing
moisture on the windshield.
Climate Control OFF Button
Press and release the OFF button on the
touchscreen, or push the OFF button on the
faceplate to turn the Climate Control ON/OFF.
2
23_KL_OM_EN_USC_t.book Page 47