water pump JEEP CHEROKEE 2023 Owners Manual
[x] Cancel search | Manufacturer: JEEP, Model Year: 2023, Model line: CHEROKEE, Model: JEEP CHEROKEE 2023Pages: 276, PDF Size: 12.55 MB
Page 46 of 276

44GETTING TO KNOW YOUR VEHICLE
WINDSHIELD WIPER OPERATION
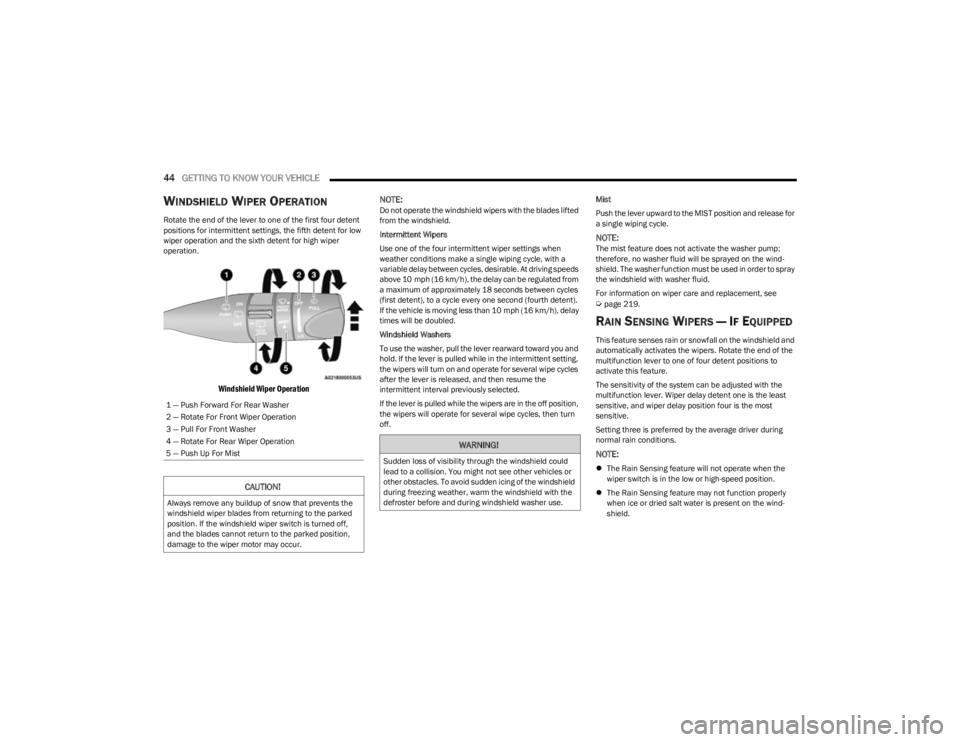
Rotate the end of the lever to one of the first four detent
positions for intermittent settings, the fifth detent for low
wiper operation and the sixth detent for high wiper
operation.
Windshield Wiper Operation
NOTE:
Do not operate the windshield wipers with the blades lifted
from the windshield.
Intermittent Wipers
Use one of the four intermittent wiper settings when
weather conditions make a single wiping cycle, with a
variable delay between cycles, desirable. At driving speeds
above 10 mph (16 km/h), the delay can be regulated from
a maximum of approximately 18 seconds between cycles
(first detent), to a cycle every one second (fourth detent).
If the vehicle is moving less than 10 mph (16 km/h), delay
times will be doubled.
Windshield Washers
To use the washer, pull the lever rearward toward you and
hold. If the lever is pulled while in the intermittent setting,
the wipers will turn on and operate for several wipe cycles
after the lever is released, and then resume the
intermittent interval previously selected.
If the lever is pulled while the wipers are in the off position,
the wipers will operate for several wipe cycles, then turn
off. Mist
Push the lever upward to the MIST position and release for
a single wiping cycle.
NOTE:The mist feature does not activate the washer pump;
therefore, no washer fluid will be sprayed on the wind
-
shield. The washer function must be used in order to spray
the windshield with washer fluid.
For information on wiper care and replacement, see
Úpage 219.
RAIN SENSING WIPERS — IF EQUIPPED
This feature senses rain or snowfall on the windshield and
automatically activates the wipers. Rotate the end of the
multifunction lever to one of four detent positions to
activate this feature.
The sensitivity of the system can be adjusted with the
multifunction lever. Wiper delay detent one is the least
sensitive, and wiper delay position four is the most
sensitive.
Setting three is preferred by the average driver during
normal rain conditions.
NOTE:
The Rain Sensing feature will not operate when the
wiper switch is in the low or high-speed position.
The Rain Sensing feature may not function properly
when ice or dried salt water is present on the wind -
shield.
1 — Push Forward For Rear Washer
2 — Rotate For Front Wiper Operation
3 — Pull For Front Washer
4 — Rotate For Rear Wiper Operation
5 — Push Up For Mist
CAUTION!
Always remove any buildup of snow that prevents the
windshield wiper blades from returning to the parked
position. If the windshield wiper switch is turned off,
and the blades cannot return to the parked position,
damage to the wiper motor may occur.
WARNING!
Sudden loss of visibility through the windshield could
lead to a collision. You might not see other vehicles or
other obstacles. To avoid sudden icing of the windshield
during freezing weather, warm the windshield with the
defroster before and during windshield washer use.
23_KL_OM_EN_USC_t.book Page 44
Page 115 of 276

STARTING AND OPERATING113
(Continued)
NOTE:If snow, ice, mud, or any foreign substance builds up on
the camera lens, clean the lens, rinse with water, and dry
with a soft cloth. Do not cover the lens.
REFUELING THE VEHICLE
There is no fuel filler cap. Two flapper doors inside the pipe
seal the system.
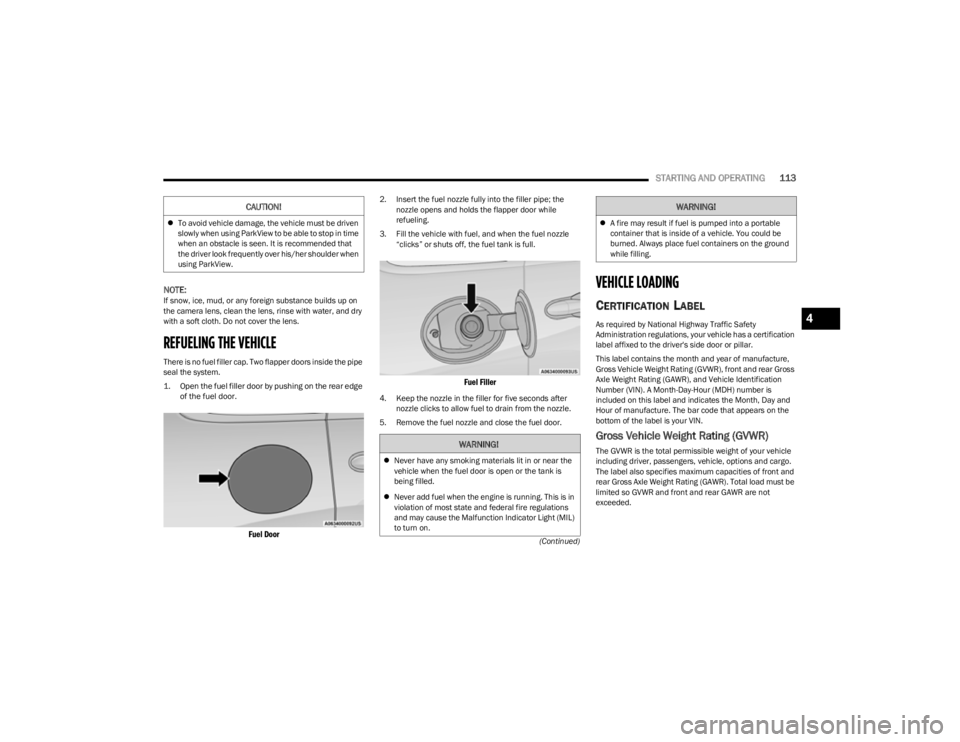
1. Open the fuel filler door by pushing on the rear edge
of the fuel door.
Fuel Door
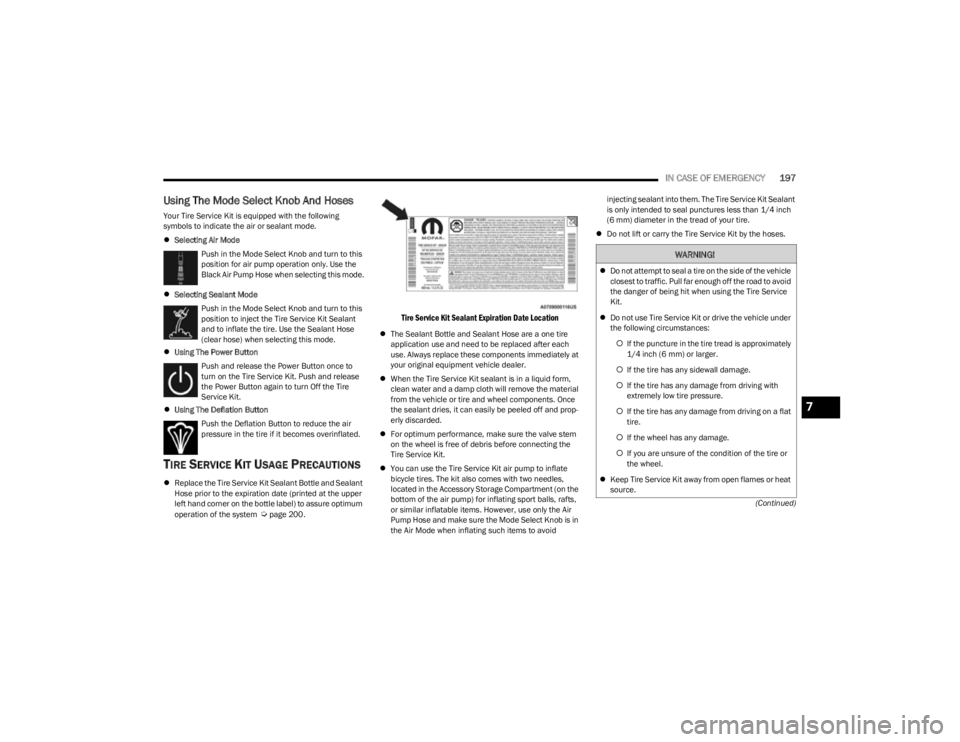
2. Insert the fuel nozzle fully into the filler pipe; the nozzle opens and holds the flapper door while
refueling.
3. Fill the vehicle with fuel, and when the fuel nozzle “clicks” or shuts off, the fuel tank is full.
Fuel Filler
4. Keep the nozzle in the filler for five seconds after nozzle clicks to allow fuel to drain from the nozzle.
5. Remove the fuel nozzle and close the fuel door.
VEHICLE LOADING
CERTIFICATION LABEL
As required by National Highway Traffic Safety
Administration regulations, your vehicle has a certification
label affixed to the driver's side door or pillar.
This label contains the month and year of manufacture,
Gross Vehicle Weight Rating (GVWR), front and rear Gross
Axle Weight Rating (GAWR), and Vehicle Identification
Number (VIN). A Month-Day-Hour (MDH) number is
included on this label and indicates the Month, Day and
Hour of manufacture. The bar code that appears on the
bottom of the label is your VIN.
Gross Vehicle Weight Rating (GVWR)
The GVWR is the total permissible weight of your vehicle
including driver, passengers, vehicle, options and cargo.
The label also specifies maximum capacities of front and
rear Gross Axle Weight Rating (GAWR). Total load must be
limited so GVWR and front and rear GAWR are not
exceeded.
To avoid vehicle damage, the vehicle must be driven
slowly when using ParkView to be able to stop in time
when an obstacle is seen. It is recommended that
the driver look frequently over his/her shoulder when
using ParkView.
CAUTION!
WARNING!
Never have any smoking materials lit in or near the
vehicle when the fuel door is open or the tank is
being filled.
Never add fuel when the engine is running. This is in
violation of most state and federal fire regulations
and may cause the Malfunction Indicator Light (MIL)
to turn on.
A fire may result if fuel is pumped into a portable
container that is inside of a vehicle. You could be
burned. Always place fuel containers on the ground
while filling.
WARNING!
4
23_KL_OM_EN_USC_t.book Page 113
Page 199 of 276

IN CASE OF EMERGENCY197
(Continued)
Using The Mode Select Knob And Hoses
Your Tire Service Kit is equipped with the following
symbols to indicate the air or sealant mode.
Selecting Air Mode
Push in the Mode Select Knob and turn to this
position for air pump operation only. Use the
Black Air Pump Hose when selecting this mode.
Selecting Sealant Mode
Push in the Mode Select Knob and turn to this
position to inject the Tire Service Kit Sealant
and to inflate the tire. Use the Sealant Hose
(clear hose) when selecting this mode.
Using The Power Button
Push and release the Power Button once to
turn on the Tire Service Kit. Push and release
the Power Button again to turn Off the Tire
Service Kit.
Using The Deflation Button
Push the Deflation Button to reduce the air
pressure in the tire if it becomes overinflated.
TIRE SERVICE KIT USAGE PRECAUTIONS
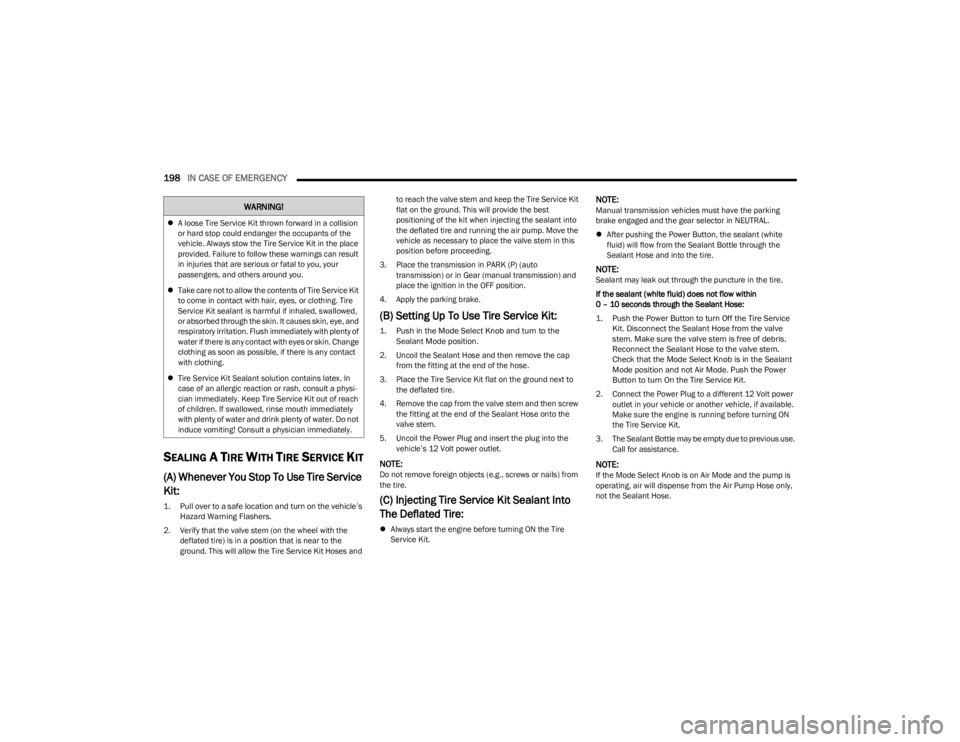
Replace the Tire Service Kit Sealant Bottle and Sealant
Hose prior to the expiration date (printed at the upper
left hand corner on the bottle label) to assure optimum
operation of the system
Úpage 200.
Tire Service Kit Sealant Expiration Date Location
The Sealant Bottle and Sealant Hose are a one tire
application use and need to be replaced after each
use. Always replace these components immediately at
your original equipment vehicle dealer.
When the Tire Service Kit sealant is in a liquid form,
clean water and a damp cloth will remove the material
from the vehicle or tire and wheel components. Once
the sealant dries, it can easily be peeled off and prop -
erly discarded.
For optimum performance, make sure the valve stem
on the wheel is free of debris before connecting the
Tire Service Kit.
You can use the Tire Service Kit air pump to inflate
bicycle tires. The kit also comes with two needles,
located in the Accessory Storage Compartment (on the
bottom of the air pump) for inflating sport balls, rafts,
or similar inflatable items. However, use only the Air
Pump Hose and make sure the Mode Select Knob is in
the Air Mode when inflating such items to avoid injecting sealant into them. The Tire Service Kit Sealant
is only intended to seal punctures less than 1/4 inch
(6 mm) diameter in the tread of your tire.
Do not lift or carry the Tire Service Kit by the hoses.
WARNING!
Do not attempt to seal a tire on the side of the vehicle
closest to traffic. Pull far enough off the road to avoid
the danger of being hit when using the Tire Service
Kit.
Do not use Tire Service Kit or drive the vehicle under
the following circumstances:
If the puncture in the tire tread is approximately
1/4 inch (6 mm) or larger.
If the tire has any sidewall damage.
If the tire has any damage from driving with
extremely low tire pressure.
If the tire has any damage from driving on a flat
tire.
If the wheel has any damage.
If you are unsure of the condition of the tire or
the wheel.
Keep Tire Service Kit away from open flames or heat
source.
7
23_KL_OM_EN_USC_t.book Page 197
Page 200 of 276

198IN CASE OF EMERGENCY
SEALING A TIRE WITH TIRE SERVICE KIT
(A) Whenever You Stop To Use Tire Service
Kit:
1. Pull over to a safe location and turn on the vehicle’s
Hazard Warning Flashers.
2. Verify that the valve stem (on the wheel with the deflated tire) is in a position that is near to the
ground. This will allow the Tire Service Kit Hoses and to reach the valve stem and keep the Tire Service Kit
flat on the ground. This will provide the best
positioning of the kit when injecting the sealant into
the deflated tire and running the air pump. Move the
vehicle as necessary to place the valve stem in this
position before proceeding.
3. Place the transmission in PARK (P) (auto transmission) or in Gear (manual transmission) and
place the ignition in the OFF position.
4. Apply the parking brake.
(B) Setting Up To Use Tire Service Kit:
1. Push in the Mode Select Knob and turn to the Sealant Mode position.
2. Uncoil the Sealant Hose and then remove the cap from the fitting at the end of the hose.
3. Place the Tire Service Kit flat on the ground next to the deflated tire.
4. Remove the cap from the valve stem and then screw the fitting at the end of the Sealant Hose onto the
valve stem.
5. Uncoil the Power Plug and insert the plug into the vehicle’s 12 Volt power outlet.
NOTE:Do not remove foreign objects (e.g., screws or nails) from
the tire.
(C) Injecting Tire Service Kit Sealant Into
The Deflated Tire:
Always start the engine before turning ON the Tire
Service Kit.
NOTE:Manual transmission vehicles must have the parking
brake engaged and the gear selector in NEUTRAL.
After pushing the Power Button, the sealant (white
fluid) will flow from the Sealant Bottle through the
Sealant Hose and into the tire.
NOTE:Sealant may leak out through the puncture in the tire.
If the sealant (white fluid) does not flow within
0 – 10 seconds through the Sealant Hose:
1. Push the Power Button to turn Off the Tire Service
Kit. Disconnect the Sealant Hose from the valve
stem. Make sure the valve stem is free of debris.
Reconnect the Sealant Hose to the valve stem.
Check that the Mode Select Knob is in the Sealant
Mode position and not Air Mode. Push the Power
Button to turn On the Tire Service Kit.
2. Connect the Power Plug to a different 12 Volt power outlet in your vehicle or another vehicle, if available.
Make sure the engine is running before turning ON
the Tire Service Kit.
3. The Sealant Bottle may be empty due to previous use. Call for assistance.
NOTE:If the Mode Select Knob is on Air Mode and the pump is
operating, air will dispense from the Air Pump Hose only,
not the Sealant Hose.
A loose Tire Service Kit thrown forward in a collision
or hard stop could endanger the occupants of the
vehicle. Always stow the Tire Service Kit in the place
provided. Failure to follow these warnings can result
in injuries that are serious or fatal to you, your
passengers, and others around you.
Take care not to allow the contents of Tire Service Kit
to come in contact with hair, eyes, or clothing. Tire
Service Kit sealant is harmful if inhaled, swallowed,
or absorbed through the skin. It causes skin, eye, and
respiratory irritation. Flush immediately with plenty of
water if there is any contact with eyes or skin. Change
clothing as soon as possible, if there is any contact
with clothing.
Tire Service Kit Sealant solution contains latex. In
case of an allergic reaction or rash, consult a physi -
cian immediately. Keep Tire Service Kit out of reach
of children. If swallowed, rinse mouth immediately
with plenty of water and drink plenty of water. Do not
induce vomiting! Consult a physician immediately.
WARNING!
23_KL_OM_EN_USC_t.book Page 198