key JEEP COMPASS 2012 1.G Owner's Manual
[x] Cancel search | Manufacturer: JEEP, Model Year: 2012, Model line: COMPASS, Model: JEEP COMPASS 2012 1.GPages: 108, PDF Size: 4.03 MB
Page 49 of 108
NOTE:
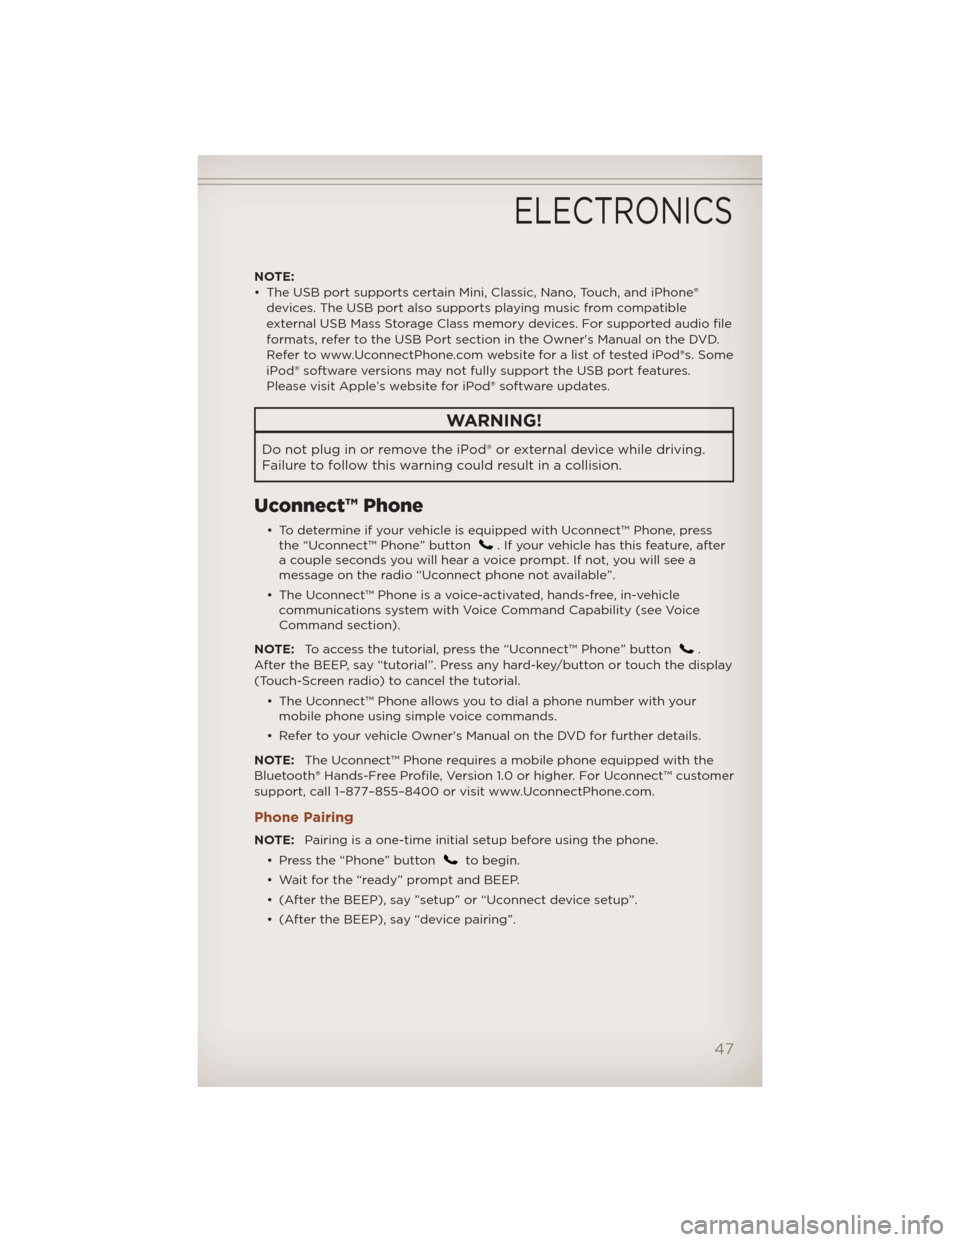
• The USB port supports certain Mini, Classic, Nano, Touch, and iPhone®
devices. The USB port also supports playing music from compatible
external USB Mass Storage Class memory devices. For supported audio file
formats, refer to the USB Port section in the Owner's Manual on the DVD.
Refer to www.UconnectPhone.com website for a list of tested iPod®s. Some
iPod® software versions may not fully support the USB port features.
Please visit Apple’s website for iPod® software updates.
WARNING!
Do not plug in or remove the iPod® or external device while driving.
Failure to follow this warning could result in a collision.
Uconnect™ Phone
• To determine if your vehicle is equipped with Uconnect™ Phone, press
the “Uconnect™ Phone” button. If your vehicle has this feature, after
a couple seconds you will hear a voice prompt. If not, you will see a
message on the radio “Uconnect phone not available”.
• The Uconnect™ Phone is a voice-activated, hands-free, in-vehicle
communications system with Voice Command Capability (see Voice
Command section).
NOTE:To access the tutorial, press the “Uconnect™ Phone” button
.
After the BEEP, say “tutorial”. Press any hard-key/button or touch the display
(Touch-Screen radio) to cancel the tutorial.
• The Uconnect™ Phone allows you to dial a phone number with your
mobile phone using simple voice commands.
• Refer to your vehicle Owner's Manual on the DVD for further details.
NOTE:The Uconnect™ Phone requires a mobile phone equipped with the
Bluetooth® Hands-Free Profile, Version 1.0 or higher. For Uconnect™ customer
support, call 1–877–855–8400 or visit www.UconnectPhone.com.
Phone Pairing
NOTE:Pairing is a one-time initial setup before using the phone.
• Press the “Phone” button
to begin.
• Wait for the “ready” prompt and BEEP.
• (After the BEEP), say ”setup” or “Uconnect device setup”.
• (After the BEEP), say “device pairing”.
ELECTRONICS
47
Page 53 of 108
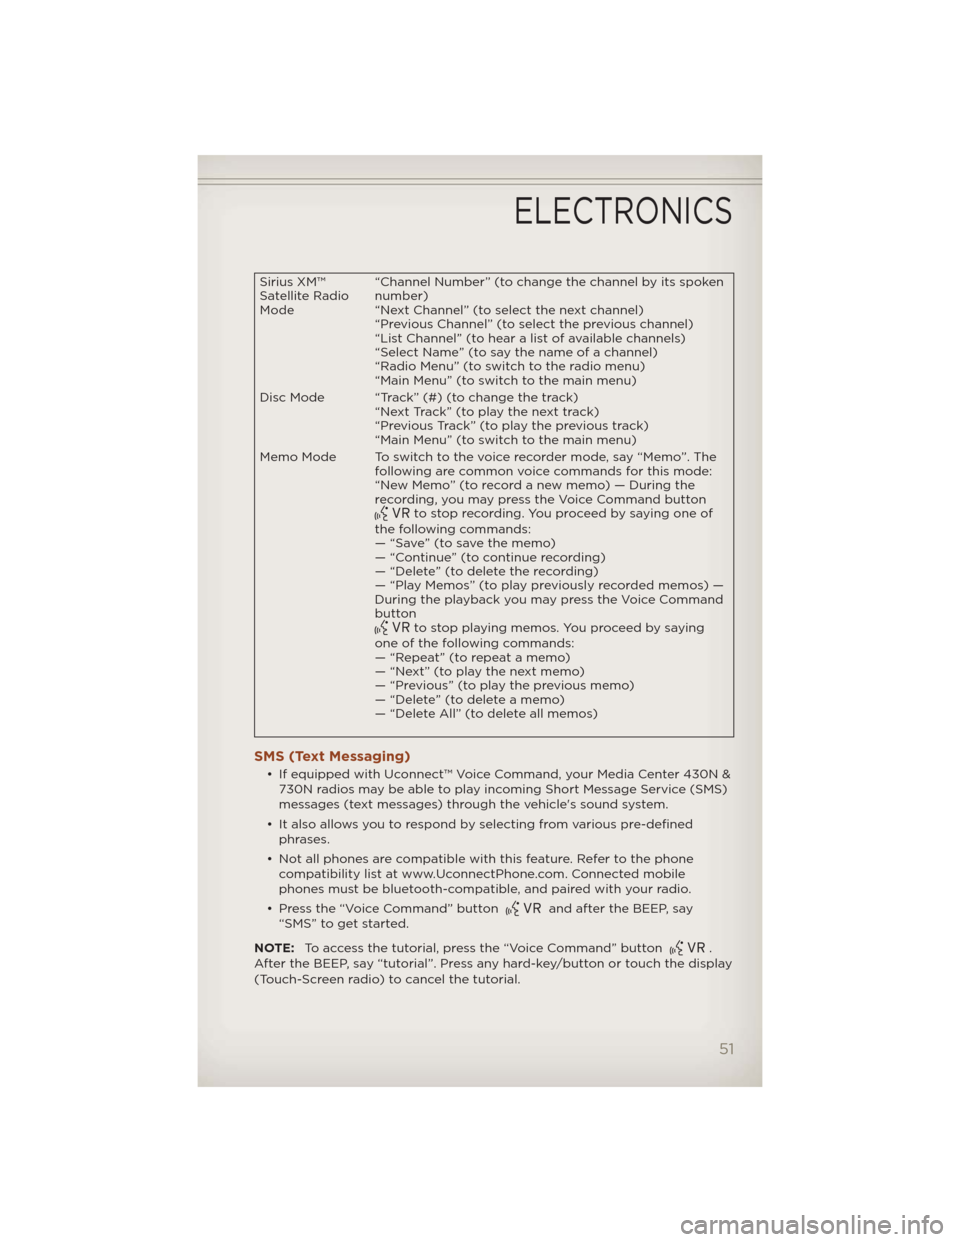
Sirius XM™
Satellite Radio
Mode“Channel Number” (to change the channel by its spoken
number)
“Next Channel” (to select the next channel)
“Previous Channel” (to select the previous channel)
“List Channel” (to hear a list of available channels)
“Select Name” (to say the name of a channel)
“Radio Menu” (to switch to the radio menu)
“Main Menu” (to switch to the main menu)
Disc Mode “Track” (#) (to change the track)
“Next Track” (to play the next track)
“Previous Track” (to play the previous track)
“Main Menu” (to switch to the main menu)
Memo Mode To switch to the voice recorder mode, say “Memo”. The
following are common voice commands for this mode:
“New Memo” (to record a new memo) — During the
recording, you may press the Voice Command button
to stop recording. You proceed by saying one of
the following commands:
— “Save” (to save the memo)
— “Continue” (to continue recording)
— “Delete” (to delete the recording)
— “Play Memos” (to play previously recorded memos) —
During the playback you may press the Voice Command
button
to stop playing memos. You proceed by saying
one of the following commands:
— “Repeat” (to repeat a memo)
— “Next” (to play the next memo)
— “Previous” (to play the previous memo)
— “Delete” (to delete a memo)
— “Delete All” (to delete all memos)
SMS (Text Messaging)
• If equipped with Uconnect™ Voice Command, your Media Center 430N &
730N radios may be able to play incoming Short Message Service (SMS)
messages (text messages) through the vehicle's sound system.
• It also allows you to respond by selecting from various pre-defined
phrases.
• Not all phones are compatible with this feature. Refer to the phone
compatibility list at www.UconnectPhone.com. Connected mobile
phones must be bluetooth-compatible, and paired with your radio.
• Press the “Voice Command” button
and after the BEEP, say
“SMS” to get started.
NOTE:To access the tutorial, press the “Voice Command” button
.
After the BEEP, say “tutorial”. Press any hard-key/button or touch the display
(Touch-Screen radio) to cancel the tutorial.
ELECTRONICS
51
Page 54 of 108
WARNING!
Any voice commanded system should be used only in safe driving
conditions following local laws and phone use. All attention should be
kept on the roadway ahead. Failure to do so may result in a collision
causing you and others to be severely injured or killed.
Bluetooth® STREAMING AUDIO
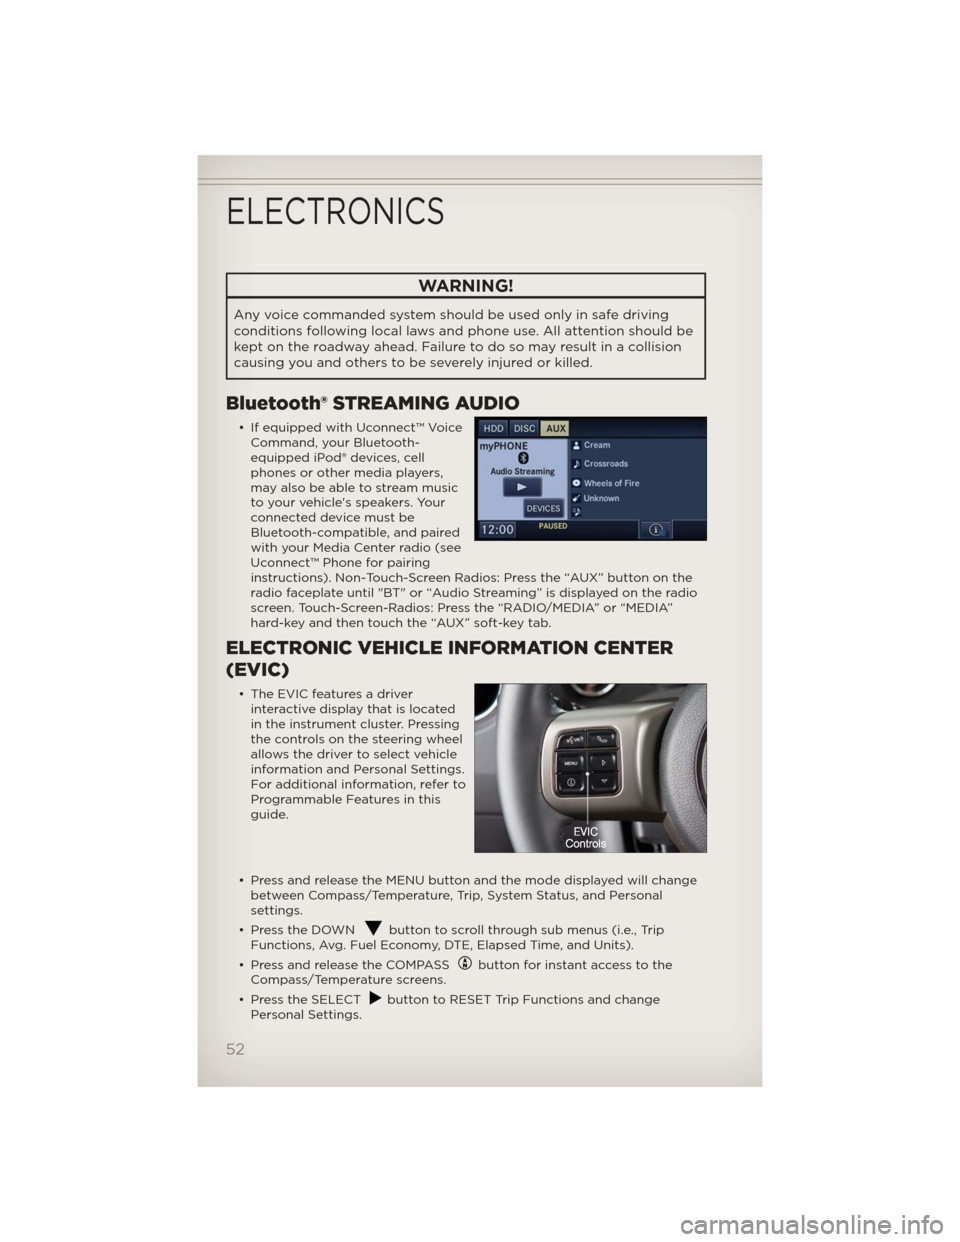
• If equipped with Uconnect™ Voice
Command, your Bluetooth-
equipped iPod® devices, cell
phones or other media players,
may also be able to stream music
to your vehicle's speakers. Your
connected device must be
Bluetooth-compatible, and paired
with your Media Center radio (see
Uconnect™ Phone for pairing
instructions). Non-Touch-Screen Radios: Press the “AUX” button on the
radio faceplate until "BT" or “Audio Streaming” is displayed on the radio
screen. Touch-Screen-Radios: Press the “RADIO/MEDIA” or “MEDIA”
hard-key and then touch the “AUX” soft-key tab.
ELECTRONIC VEHICLE INFORMATION CENTER
(EVIC)
• The EVIC features a driver
interactive display that is located
in the instrument cluster. Pressing
the controls on the steering wheel
allows the driver to select vehicle
information and Personal Settings.
For additional information, refer to
Programmable Features in this
guide.
• Press and release the MENU button and the mode displayed will change
between Compass/Temperature, Trip, System Status, and Personal
settings.
• Press the DOWN
button to scroll through sub menus (i.e., Trip
Functions, Avg. Fuel Economy, DTE, Elapsed Time, and Units).
• Press and release the COMPASS
button for instant access to the
Compass/Temperature screens.
• Press the SELECT
button to RESET Trip Functions and change
Personal Settings.
ELECTRONICS
52
Page 55 of 108
Compass Calibration
• This compass is self-calibrating, which eliminates the need to set the
compass manually. When the vehicle is new, the compass may appear
erratic and the EVIC will display “CAL” until the compass is calibrated.
• You may also calibrate the compass by completing one or more 360
degree turns (in an area free from large metal or metallic objects) until
the “CAL” message displayed in the EVIC turns off. The compass will now
function normally.
PROGRAMMABLE FEATURES
Electronic Vehicle Information Center (EVIC)
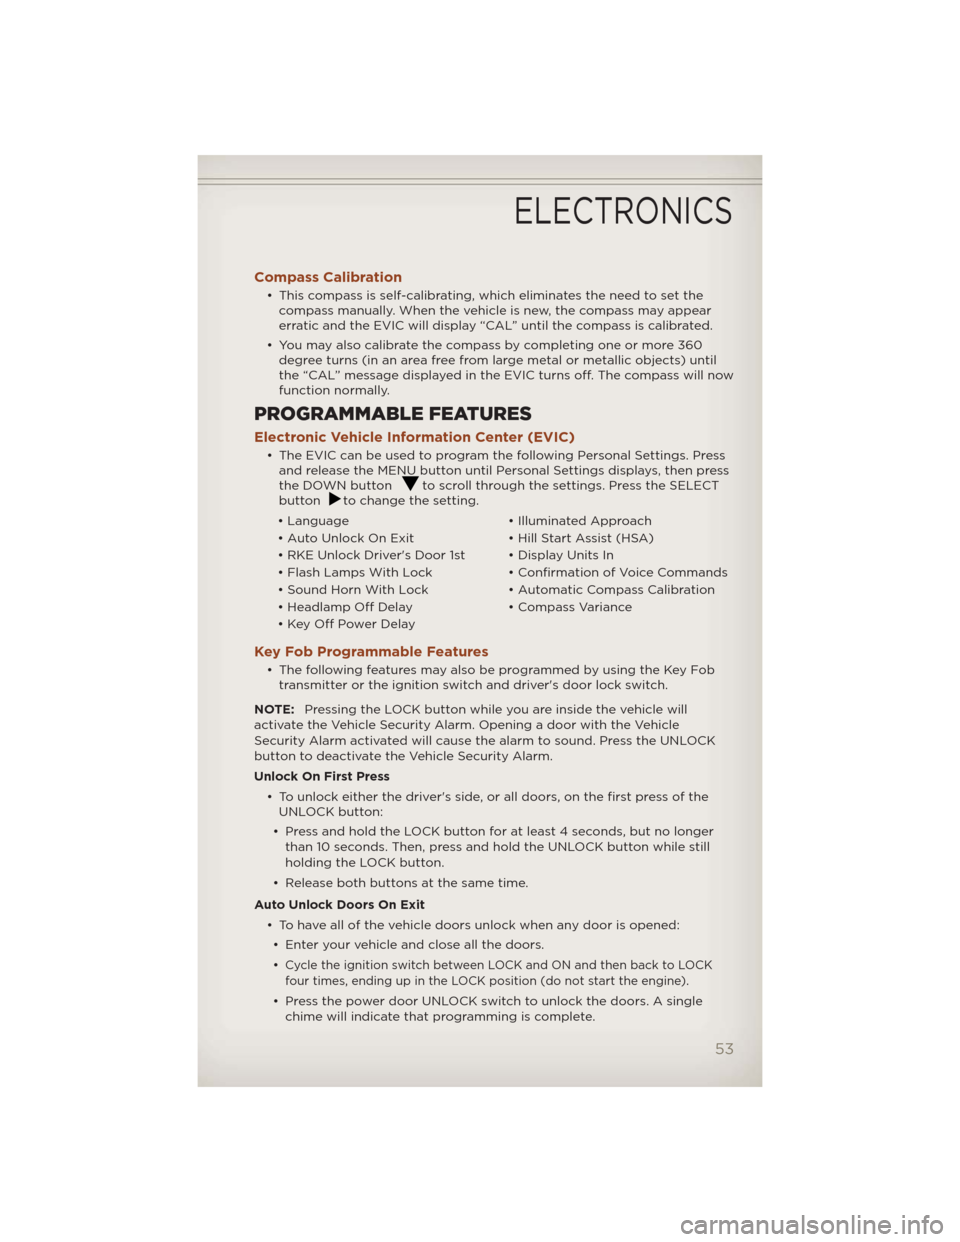
• The EVIC can be used to program the following Personal Settings. Press
and release the MENU button until Personal Settings displays, then press
the DOWN button
to scroll through the settings. Press the SELECT
buttonto change the setting.
• Language • Illuminated Approach
• Auto Unlock On Exit • Hill Start Assist (HSA)
• RKE Unlock Driver's Door 1st • Display Units In
• Flash Lamps With Lock • Confirmation of Voice Commands
• Sound Horn With Lock • Automatic Compass Calibration
• Headlamp Off Delay • Compass Variance
• Key Off Power Delay
Key Fob Programmable Features
• The following features may also be programmed by using the Key Fob
transmitter or the ignition switch and driver's door lock switch.
NOTE:Pressing the LOCK button while you are inside the vehicle will
activate the Vehicle Security Alarm. Opening a door with the Vehicle
Security Alarm activated will cause the alarm to sound. Press the UNLOCK
button to deactivate the Vehicle Security Alarm.
Unlock On First Press
• To unlock either the driver's side, or all doors, on the first press of the
UNLOCK button:
• Press and hold the LOCK button for at least 4 seconds, but no longer
than 10 seconds. Then, press and hold the UNLOCK button while still
holding the LOCK button.
• Release both buttons at the same time.
Auto Unlock Doors On Exit
• To have all of the vehicle doors unlock when any door is opened:
• Enter your vehicle and close all the doors.
•
Cycle the ignition switch between LOCK and ON and then back to LOCK
four times, ending up in the LOCK position (do not start the engine).
• Press the power door UNLOCK switch to unlock the doors. A single
chime will indicate that programming is complete.
ELECTRONICS
53
Page 64 of 108
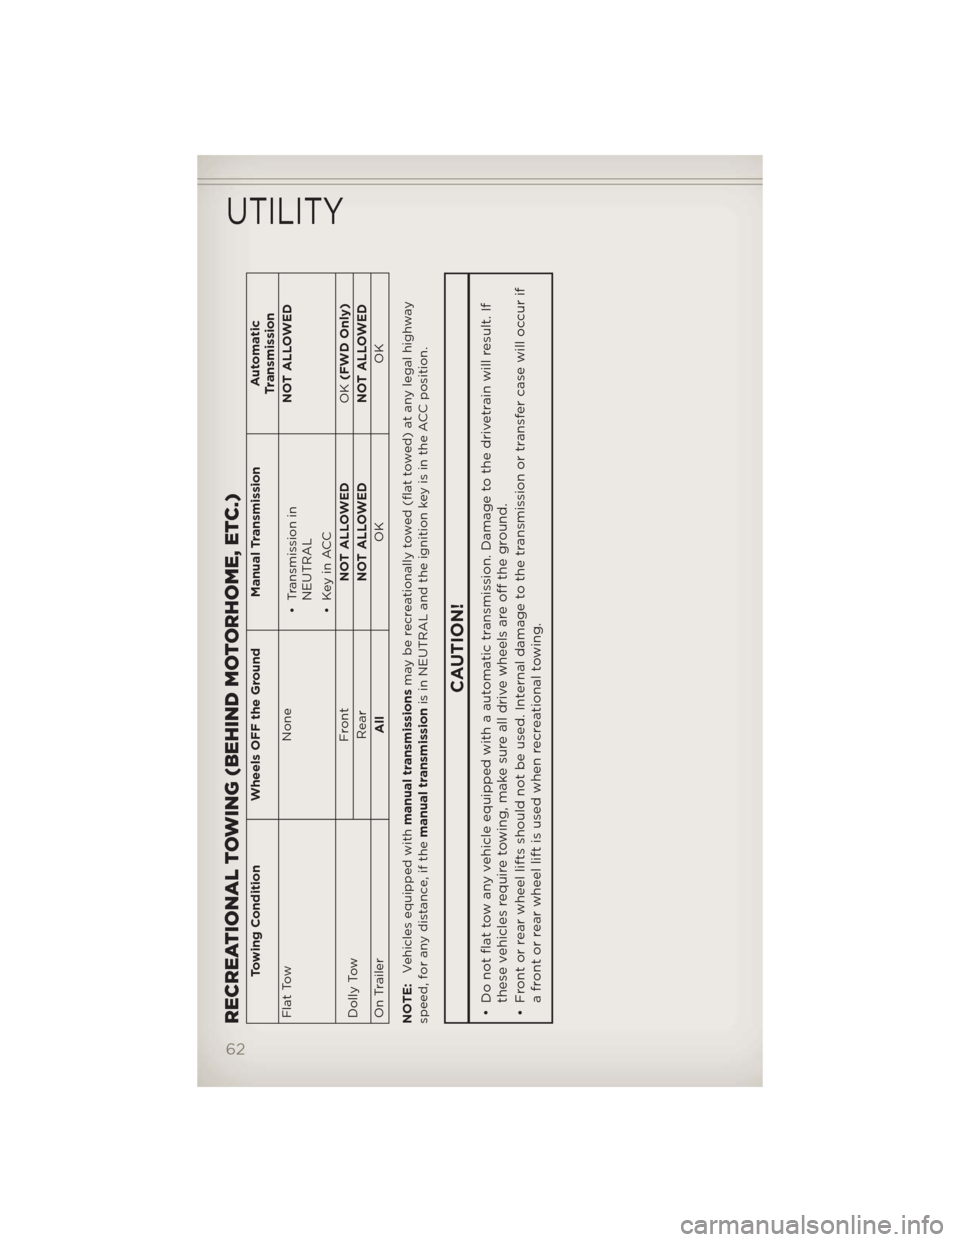
RECREATIONAL TOWING (BEHIND MOTORHOME, ETC.)
Towing Condition Wheels OFF the Ground Manual TransmissionAutomatic
Transmission
Flat Tow None
• Transmission in
NEUTRAL
• Key in ACCNOT ALLOWED
Dolly TowFront
NOT ALLOWEDOK(FWD Only)
Rear
NOT ALLOWED NOT ALLOWED
On Trailer
AllOK OK
NOTE:Vehicles equipped withmanual transmissionsmay be recreationally towed (flat towed) at any legal highway
speed, for any distance, if themanual transmissionis in NEUTRAL and the ignition key is in the ACC position.
CAUTION!
• Do not flat tow any vehicle equipped with a automatic transmission. Damage to the drivetrain will result. If
these vehicles require towing, make sure all drive wheels are off the ground.
• Front or rear wheel lifts should not be used. Internal damage to the transmission or transfer case will occur if
a front or rear wheel lift is used when recreational towing.
UTILITY
62
Page 79 of 108
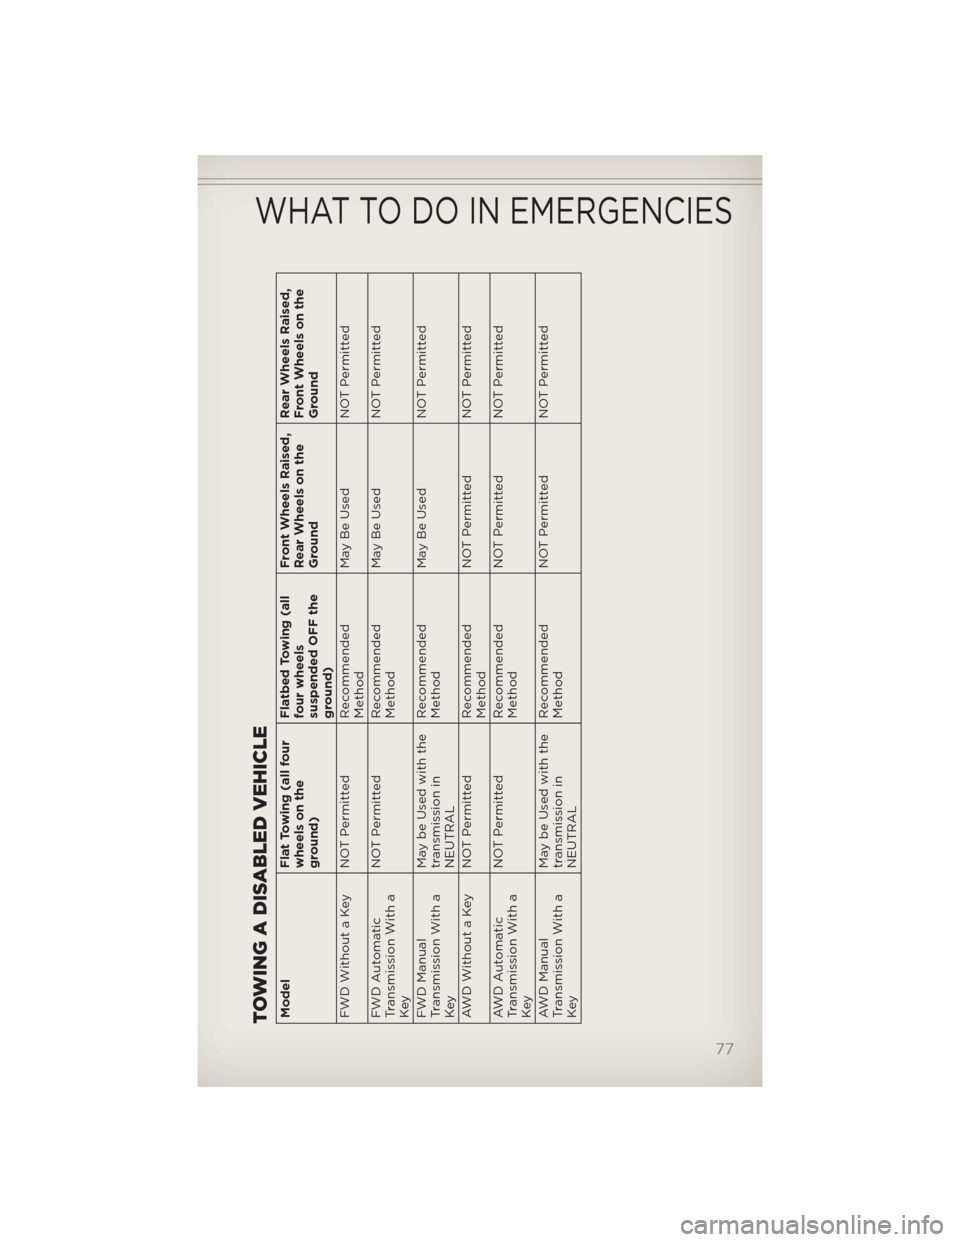
TOWING A DISABLED VEHICLEModelFlat Towing (all four
wheels on the
ground)Flatbed Towing (all
four wheels
suspended OFF the
ground)Front Wheels Raised,
Rear Wheels on the
GroundRear Wheels Raised,
Front Wheels on the
Ground
FWD Without a Key NOT Permitted Recommended
MethodMay Be Used NOT Permitted
FWD Automatic
Transmission With a
KeyNOT Permitted Recommended
MethodMay Be Used NOT Permitted
FWD Manual
Transmission With a
KeyMay be Used with the
transmission in
NEUTRALRecommended
MethodMay Be Used NOT Permitted
AWD Without a Key NOT Permitted Recommended
MethodNOT Permitted NOT Permitted
AWD Automatic
Transmission With a
KeyNOT Permitted Recommended
MethodNOT Permitted NOT Permitted
AWD Manual
Transmission With a
KeyMay be Used with the
transmission in
NEUTRALRecommended
MethodNOT Permitted NOT Permitted
WHAT TO DO IN EMERGENCIES
77
Page 97 of 108
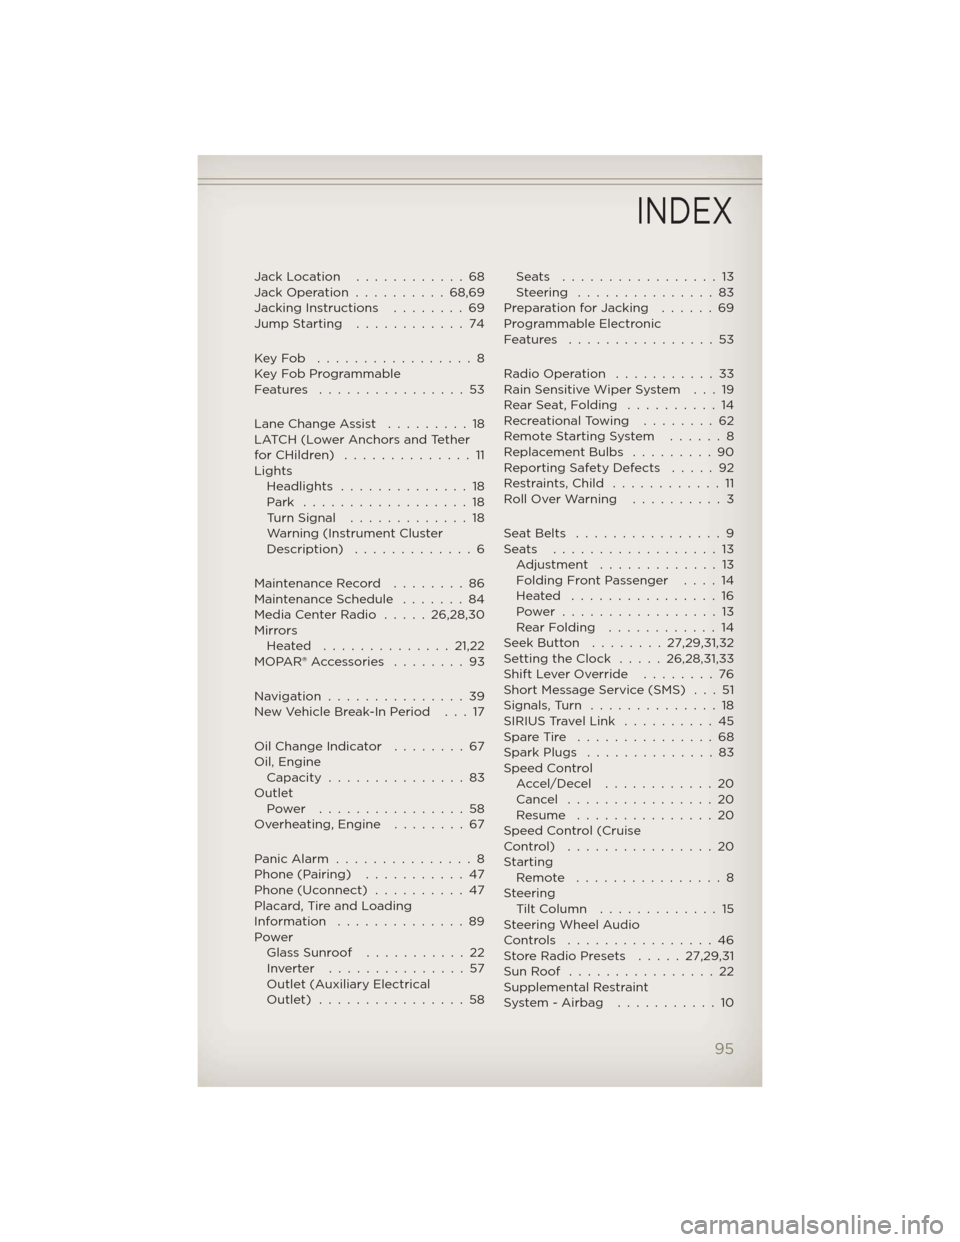
Jack Location............68
Jack Operation..........68,69
Jacking Instructions . . . .....69
Jump Starting............74
KeyFob .................8
Key Fob Programmable
Features ................53
Lane Change Assist . . . . . . . . . 18
LATCH (Lower Anchors and Tether
forCHildren) ..............11
Lights
Headlights..............18
Park ..................18
Turn Signal.............18
Warning (Instrument Cluster
Description) .............6
Maintenance Record . . ......86
Maintenance Schedule . . . . . . . 84
Media Center Radio.....26,28,30
Mirrors
Heated ..............21,22
MOPAR®Accessories ........93
Navigation...............39
New Vehicle Break-In Period . . . 17
Oil Change Indicator........67
Oil, Engine
Capacity...............83
Outlet
Power ................58
Overheating, Engine . . . . . . . . 67
PanicAlarm ...............8
Phone (Pairing)...........47
Phone (Uconnect)..........47
Placard, Tire and Loading
Information ..............89
Power
Glass Sunroof...........22
Inverter ...............57
Outlet (Auxiliary Electrical
Outlet) ................58Seats .................13
Steering ...............83
Preparation for Jacking......69
Programmable Electronic
Features ................53
Radio Operation . . . . . . . . . . . 33
Rain Sensitive Wiper System . . . 19
Rear Seat, Folding . . . . . . . . . . 14
Recreational Towing . . . . . . . . 62
Remote Starting System ......8
Replacement Bulbs . . . . . . . . . 90
Reporting Safety Defects . . . . . 92
Restraints,Child ............11
RollOverWarning ..........3
SeatBelts ................9
Seats ..................13
Adjustment . . . . .........13
Folding Front Passenger . . . . 14
Heated ................16
Power .................13
RearFolding ............14
Seek Button . . ......27,29,31,32
Setting the Clock . . . . . 26,28,31,33
Shift Lever Override . . . . . . . . 76
Short Message Service (SMS) . . . 51
Signals,Turn ..............18
SIRIUS Travel Link . . . . . . . . . . 45
Spare Tire . . . . . . . . . . . . . . . 68
Spark Plugs . . . . . . . . . . . . . . 83
Speed Control
Accel/Decel ............20
Cancel . . . . . . . . . . . . . . . . 20
Resume ...............20
Speed Control (Cruise
Control) ................20
Starting
Remote . . . . . . . . . . . . . . . . 8
Steering
TiltColumn .............15
Steering Wheel Audio
Controls ................46
Store Radio Presets . . . . . 27,29,31
SunRoof ................22
Supplemental Restraint
System-Airbag ...........10
INDEX
95
Page 108 of 108
User Guide
2012
Compass
Jeep.\fom
12MK49-926-AA
Compass
Third Edition
User Guide
Download a FREE elec\Itronic copy
of the \bwner’s Manual or Warranty
Booklet by visiting the For \bwners tab at:
www.Jeep.\fom (U.S.) or
www.Jeep.\fa (Canada).
Ge tthe free mo bile appf or your phone
http:/ /getta g.mo bi
Download a free Vehicle
Information App
by visiting your
application store, Keyword (Jeep), or
scanning the Microsoft Tag. To put
Microsoft Tags to work for you, use your
mobile phone’s browser or App store to
download a Microsoft Tag reader, like the
free one at www.gettag.mobi. Then
follow the directions to scan the code.
919046_12c_Compass_User_Guide_012512.indd 11/25/12 3:43 PM