AUX JEEP COMPASS 2013 1.G User Guide
[x] Cancel search | Manufacturer: JEEP, Model Year: 2013, Model line: COMPASS, Model: JEEP COMPASS 2013 1.GPages: 116, PDF Size: 2.71 MB
Page 33 of 116
Radio Operation
Seek Up/Down Buttons
• Press to seek through radio stations in AM or FM bands.
• Hold either button to bypass stations without stopping.
Store Radio Presets
• Press the “SET/RND” button once and SET 1 will show in the display. Then selectbutton (1–6).
• A second station may be added to each push button. Press the “SET/RND” button twice and SET 2 will show in the display. Then select button (1–6).
CD/DISC Operation
Seek Up/Down Buttons
• Press to seek through CD tracks.
• Hold either button to bypass tracks without stopping.
SET/RND Button (Random Play)
• Press this button while the CD is playing to activate Random Play.
•
This feature plays the selections on the CD in random order to provide an interesting
change of pace.
Audio Jack Operation
• The AUX/Audio Jack provides a means to connect a portable audio device, such as an MP3 player, or an iPod®, to the vehicles sound system. This requires the use of
a 3.5 mm stereo audio patch cable.
• Pressing the AUX button will change the mode to auxiliary device if the Audio Jack is connected, allowing the music from your portable device to play through the
vehicle's speakers.
• The functions of the portable device are controlled using the device buttons, not the buttons on the radio. However, the volume may be controlled using the radio or
portable device.
ELECTRONICS
31
Page 36 of 116
CD/DISC Operation
Seek Up/Down Buttons
• Press to seek through CD tracks.
• Hold either button to bypass tracks without stopping.
SET/RND Button (Random Play)
• Press this button while the CD is playing to activate Random Play.
•
This feature plays the selections on the CD in random order to provide an interesting
change of pace.
LIST Button
• Press the “LIST” button to bring up a list of all folders on the CD. Scroll up or down the list by turning the “TUNE/SCROLL” control knob.
• To select a folder from the list, press the “TUNE/SCROLL” control knob and the radio will begin playing the files contained in that folder.
Audio Jack Operation
• The AUX/Audio Jack provides a means to connect a portable audio device, such asan MP3 player, or an iPod®, to the vehicles sound system. This requires the use of
a 3.5 mm stereo audio patch cable.
• Pressing the AUX button will change the mode to auxiliary device if the Audio Jack is connected, allowing the music from your portable device to play through the
vehicle's speakers.
• The functions of the portable device are controlled using the device buttons, not the buttons on the radio. However, the volume may be controlled using the radio or
portable device.
ELECTRONICS
34
Page 39 of 116
CD/DISC Operation
Seek Up/Down Buttons
• Press to seek through CD tracks.
• Hold either button to bypass tracks without stopping.
LIST Button
• Press the “LIST” button to bring up a list of all folders on the CD. Scroll up or downthe list by turning the “TUNE/SCROLL” control knob.
• To select a folder from the list, press the “TUNE/SCROLL” control knob and the radio will begin playing the files contained in that folder.
How To Load Multiple CDs/DVDs
•
Press the “LOAD” button and then press the button with the corresponding number
(1–6) where the CD is being loaded. The radio will display “PLEASE WAIT” and
prompt when to “INSERT DISC”.
•After the radio displays “INSERT DISC”, insert the CD into the player. The radio
display will show “LOADING DISC” when the disc is loading and “READING DISC”
when the radio is reading the disc.
• Press the eject button and then the corresponding number (1–6) to eject the desired disc.
Audio Jack Operation
• The AUX/Audio Jack provides a means to connect a portable audio device, such asan MP3 player, or an iPod®, to the vehicles sound system. This requires the use of
a 3.5 mm stereo audio patch cable.
• Pressing the AUX button will change the mode to auxiliary device if the Audio Jack is connected, allowing the music from your portable device to play through the
vehicle's speakers.
• The functions of the portable device are controlled using the device buttons, not the buttons on the radio. However, the volume may be controlled using the radio or
portable device.
ELECTRONICS
37
Page 41 of 116
Menu
•Press the “MENU” hard-key to access the System Setup menu and the My Files menu.
• Press the “MENU” hard-key in an active mode (SAT, CD, AUX, etc.) to changemode specific settings.
Equalizer, Balance And Fade
Audio Control Menu
• Press the “AUDIO” hard-key on theright side of the radio.
•
Use either the arrow soft-keys or the
cross-hair on the screen to change Bal-
ance and Fade. The “CENTER” soft-key
resets the settings.
•Touch the “Equalizer” soft-key and use
either the arrow soft-keys or the sliders on
the screen to adjust BASS, MID, and/or
TREBLE.
Display Settings
• Press the “MENU” hard-key and touch the “Display Settings” soft-key
to access the Display Settings menu.
• Select the “Daytime Colors” soft-key to switch to manual daytime mode and
to adjust the brightness of the display
using daytime colors.
• Select the “Nighttime Colors” soft-key to switch to manual nighttime mode
and to adjust the brightness of the display using nighttime colors.
•
Select the “Auto Color Mode” soft-key to switch to automatic daytime/nighttime mode
and to control the brightness of the display using the dimmer switch of the vehicle.
• Touch the “EXIT” soft-key to save your settings.
ELECTRONICS
39
Page 43 of 116
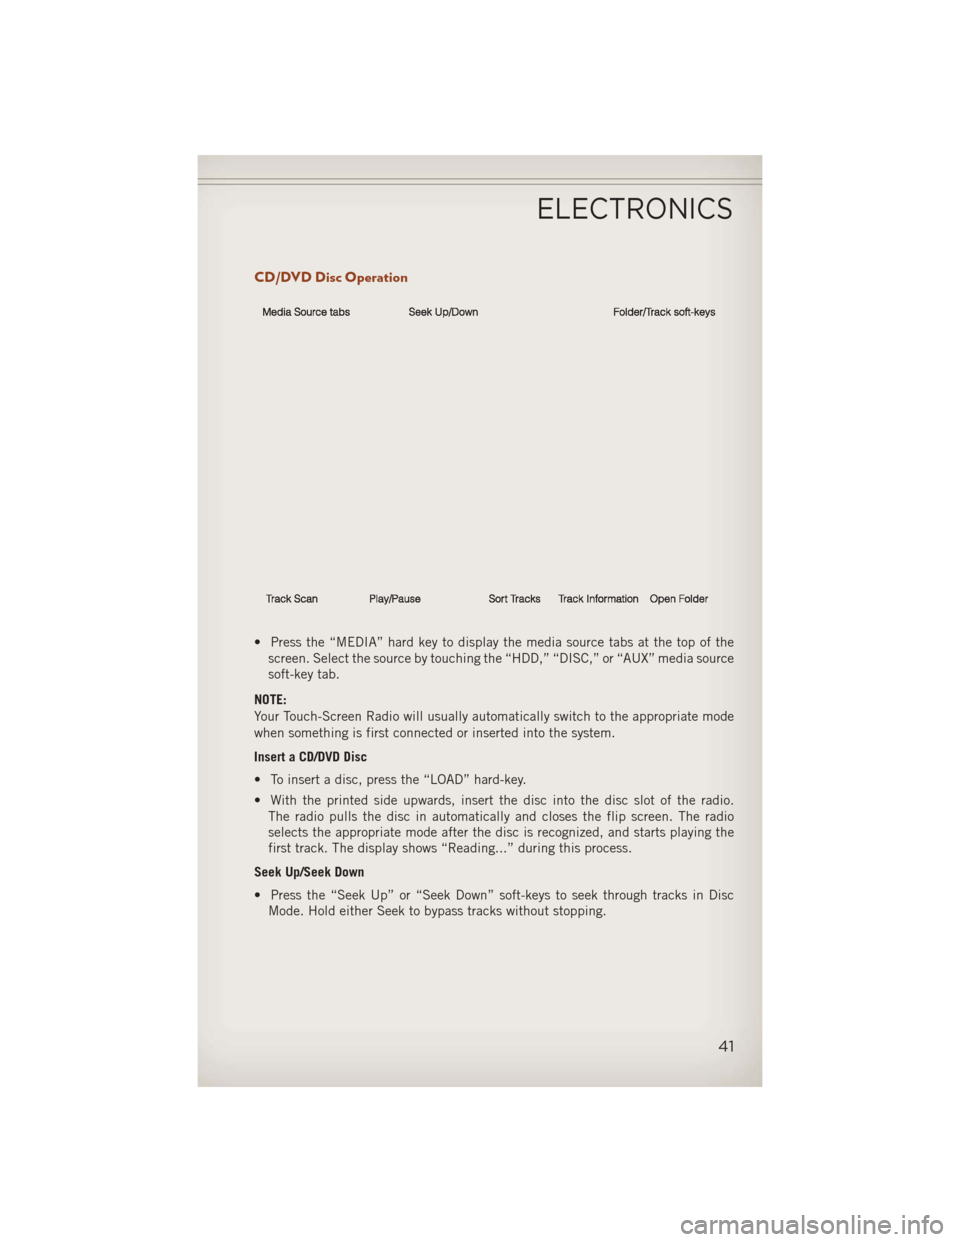
CD/DVD Disc Operation
• Press the “MEDIA” hard key to display the media source tabs at the top of thescreen. Select the source by touching the “HDD,” “DISC,” or “AUX” media source
soft-key tab.
NOTE:
Your Touch-Screen Radio will usually automatically switch to the appropriate mode
when something is first connected or inserted into the system.
Insert a CD/DVD Disc
• To insert a disc, press the “LOAD” hard-key.
• With the printed side upwards, insert the disc into the disc slot of the radio. The radio pulls the disc in automatically and closes the flip screen. The radio
selects the appropriate mode after the disc is recognized, and starts playing the
first track. The display shows “Reading...” during this process.
Seek Up/Seek Down
• Press the “Seek Up” or “Seek Down” soft-keys to seek through tracks in Disc Mode. Hold either Seek to bypass tracks without stopping.
ELECTRONICS
41
Page 44 of 116
Audio Jack Operation
• The AUX/Audio Jack provides a means to connect a portable audio device, such asan MP3 player or an iPod®, to the vehicles sound system. This requires the use of
a 3.5 mm stereo audio patch cable.
• Pressing the “MEDIA” hard-key and then the “AUX” soft-key to change the mode to auxiliary device if the Audio Jack is connected, allowing the music from your
portable device to play through the vehicle's speakers.
• The functions of the portable device are controlled using the device itself, not the buttons on the radio. However, the volume may be controlled using the radio or
portable device.
Hard Disk Drive (HDD) Operation
• The Hard Disk Drive (HDD) mode gives you access to the audio files on the internalhard disk drive. It functions similar to a CD player, with the exception that the
internal HDD can hold more tracks.
• It is also possible to import display pictures to the internal hard disk drive. The pictures can be displayed on the right half of the radio screen.
• Before using the HDD mode, you will need to copy songs and pictures to the internal hard drive. Songs and pictures can be added to the hard drive by using a
CD or USB device (e.g. thumb drive or memory stick).
NOTE:
HDD supports only .jpg/JPEG formats for photos.
NOTE:
WMA/MP3 Files and Selective Songs from a CD can also be added to the HDD.
See the Uconnect
®430/430N User's Manual for more information.
Copying Music From CD
• Press the “LOAD” hard-key.
• Insert a disc, then press the “MY FILES” hard-key and then select “MY MUSIC soft-key.”
• Touch the “Add Music Files to HDD” soft-key, then touch the “Disc” soft-key in the next screen to start the process.
NOTE:
• You might need to select the folder or title depending on the CD, then press
“DONE” to start the copy process.
• The copy progress is shown in the lower left corner of the screen.
ELECTRONICS
42
Page 54 of 116
STEERING WHEEL AUDIO CONTROLS
•The steering wheel audio controls are
located on the rear surface of the steer-
ing wheel.
Right Switch
•Press the switch up or down to increase
or decrease the volume.
• Press the button in the center to change modes AM/FM/CD/SAT.
Left Switch
• Press the switch up or down to search for the next listenable station or select the
next or previous CD track.
• Press the button in the center to select the next preset station (radio) or to change CDs if equipped with a CD Changer.
iPod®/USB/MP3 CONTROL
• There are many ways to play music from iPod®/MP3 players or USB devices
through your vehicle's sound system.
• The remote USB port, located within the front storage area, allows you to plug an iPod
®into the vehicle's sound system.
• Non-Touch-Screen Radios: To hear audio from devices connected to the USB port, press the “AUX” button on the radio faceplate.
• Touch-Screen Radios: To hear audio from devices connected to the USB port, press the “MEDIA” hard-key, then touch the “AUX” or “iPod
®” soft-key.
• When connected to this feature: •
The iPod®can be controlled using the
radio buttons to Play, Browse, and List
the iPod
®or external devices contents.
• The iPod®battery charges when
plugged into the USB port (if sup-
ported by the specific audio device).
• Compatible iPod
®devices may also
be controllable using voice commands. Refer to the Owner's Manual on the DVD
for details.
ELECTRONICS
52
Page 61 of 116
Voice Text Reply
•If equipped with Uconnect®Voice Command, your Uconnect®430N, 730N & 731N
radios may be able to play incoming Short Message Service (SMS) messages (text
messages) through the vehicle's sound system.
• It also allows you to respond by selecting from various pre-defined phrases.
• Not all phones are compatible with this feature. Refer to the phone compatibility list at www.UconnectPhone.com. Connected mobile phones must be bluetooth-
compatible, and paired with your radio.
• Press the “Voice Command” button
and after the BEEP, say “SMS” to get
started.
NOTE:
To access the tutorial, press the “Voice Command” button
. After the BEEP,
say “tutorial”. Press any hard-key/button or touch the display (Touch-Screen radio) to
cancel the tutorial.
WARNING!
Any voice commanded system should be used only in safe driving conditions
following applicable laws regarding phone use. Your attention should be focused
on safely operating the vehicle. Failure to do so may result in a collision causing
you and others to be severely injured or killed.
Bluetooth® STREAMING AUDIO
• If equipped with Uconnect®Voice
Command, your Bluetooth-equipped
iPod
®devices, cell phones or other
media players, may also be able to
stream music to your vehicle's speak-
ers. Your connected device must be
Bluetooth-compatible, and paired with
your radio (see Uconnect
®Phone for
pairing instructions).
• Non-Touch-Screen Radios: Press the “AUX” button on the radio faceplate until "BT" or “Audio Streaming” is displayed on the radio screen.
• Touch-Screen-Radios: Press the “RADIO/MEDIA” or “MEDIA” hard-key and then touch the “AUX” soft-key tab.
ELECTRONICS
59
Page 105 of 116
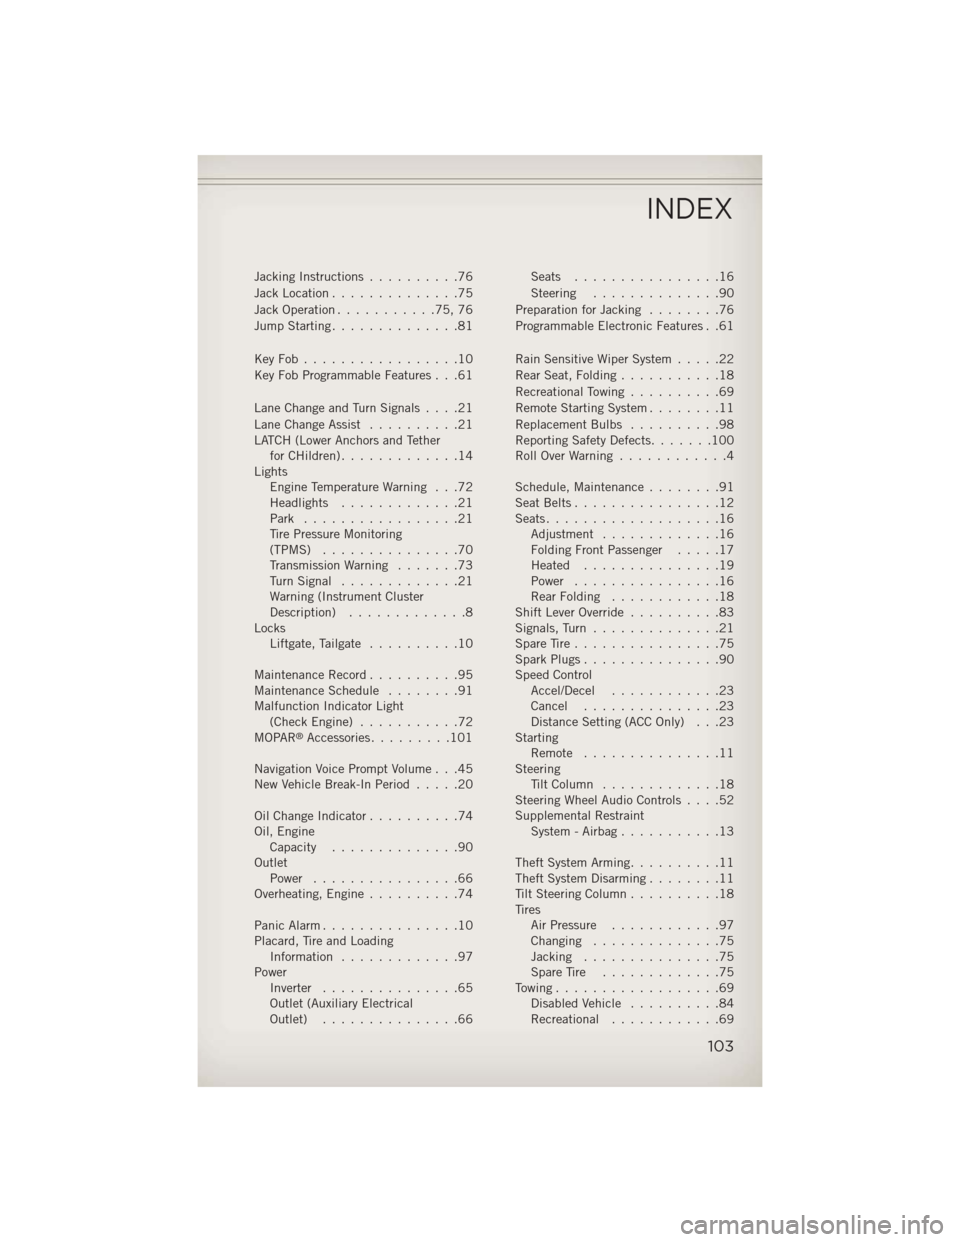
Jacking Instructions..........76
Jack Location ..............75
Jack Operation ...........75,76
Jump Starting ..............81
KeyFob.................10
Key Fob Programmable Features . . .61
Lane Change and Turn Signals ....21
Lane Change Assist ..........21
LATCH (Lower Anchors and Tether forCHildren).............14
Lights Engine Temperature Warning . . .72
Headlights .............21
Park .................21
Tire Pressure Monitoring
(TPMS) ...............70
Transmission Warning .......73
TurnSignal .............21
Warning (Instrument Cluster
Description) .............8
Locks Liftgate, Tailgate ..........10
Maintenance Record ..........95
MaintenanceSchedule ........91
Malfunction Indicator Light (CheckEngine) ...........72
MOPAR
®Accessories .........101
Navigation Voice Prompt Volume . . .45
New Vehicle Break-In Period .....20
OilChangeIndicator..........74
Oil, Engine Capacity ..............90
Outlet Power ................66
Overheating, Engine ..........74
Panic Alarm ...............10
Placard, Tire and Loading Information .............97
Power Inverter ...............65
Outlet (Auxiliary Electrical
Outlet) ...............66 Seats ................16
Steering
..............90
Preparation for Jacking ........76
Programmable Electronic Features . .61
Rain Sensitive Wiper System .....22
Rear Seat, Folding ...........18
Recreational Towing ..........69
Remote Starting System ........11
Replacement Bulbs ..........98
Reporting Safety Defects .......100
RollOverWarning ............4
Schedule,Maintenance........91
Seat Belts ................12
Seats ...................16
Adjustment .............16
Folding Front Passenger .....17
Heated ...............19
Power ................16
Rear Folding ............18
Shift Lever Override ..........83
Signals, Turn ..............21
SpareTire................75
SparkPlugs...............90
Speed Control Accel/Decel ............23
Cancel ...............23
Distance Setting (ACC Only) . . .23
Starting Remote ...............11
Steering TiltColumn .............18
Steering Wheel Audio Controls ....52
Supplemental Restraint System - Airbag ...........13
Theft System Arming ..........11
Theft System Disarming ........11
Tilt Steering Column ..........18
Tires Air Pressure ............97
Changing ..............75
Jacking ...............75
SpareTire .............75
Towing..................69 Disabled Vehicle ..........84
Recreational ............69
INDEX
103