turn signal JEEP COMPASS 2014 1.G Owner's Manual
[x] Cancel search | Manufacturer: JEEP, Model Year: 2014, Model line: COMPASS, Model: JEEP COMPASS 2014 1.GPages: 124, PDF Size: 2.64 MB
Page 75 of 124
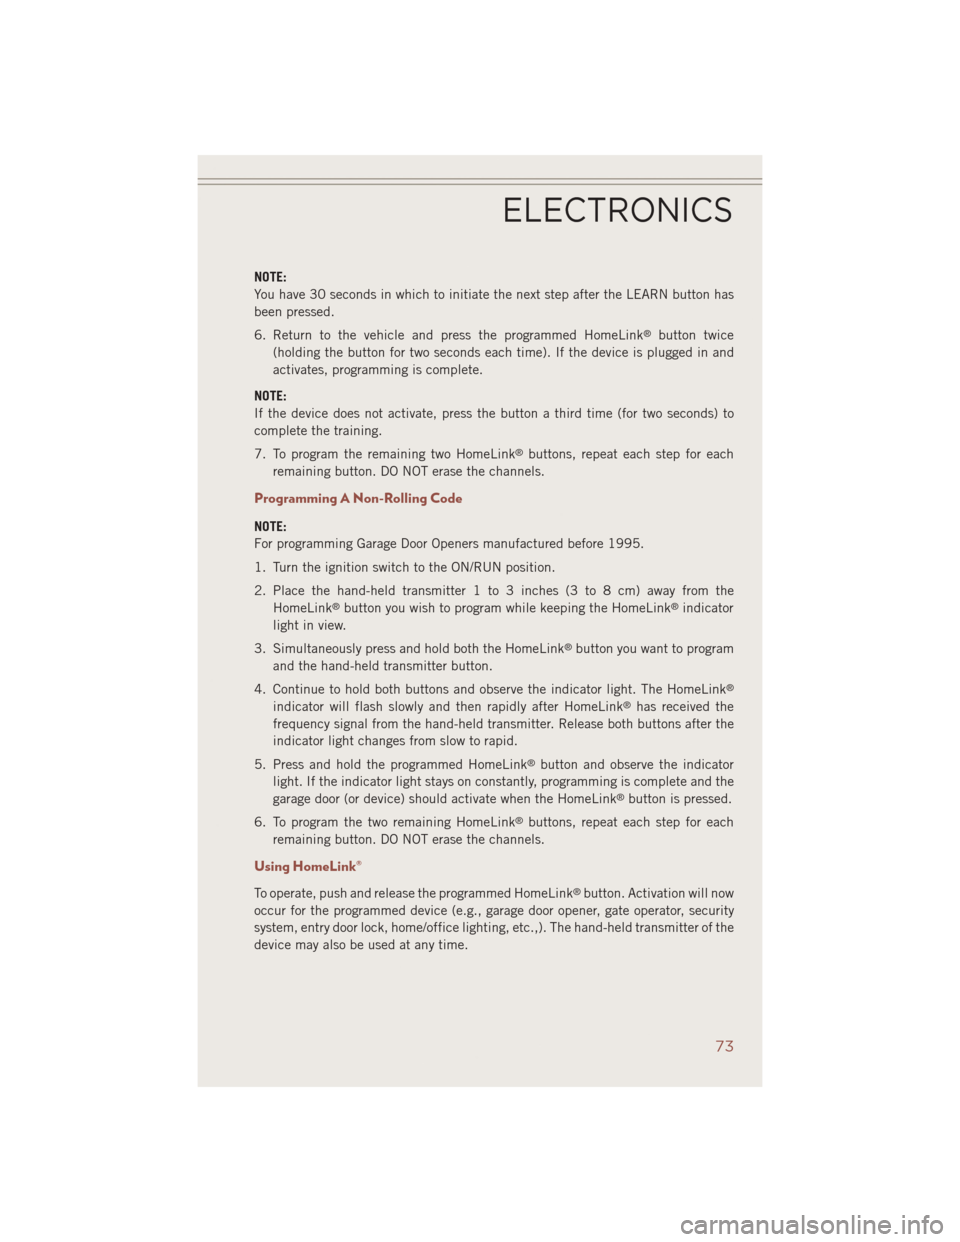
NOTE:
You have 30 seconds in which to initiate the next step after the LEARN button has
been pressed.
6. Return to the vehicle and press the programmed HomeLink
®button twice
(holding the button for two seconds each time). If the device is plugged in and
activates, programming is complete.
NOTE:
If the device does not activate, press the button a third time (for two seconds) to
complete the training.
7. To program the remaining two HomeLink
®buttons, repeat each step for each
remaining button. DO NOT erase the channels.
Programming A Non-Rolling Code
NOTE:
For programming Garage Door Openers manufactured before 1995.
1. Turn the ignition switch to the ON/RUN position.
2. Place the hand-held transmitter 1 to 3 inches (3 to 8 cm) away from the HomeLink
®button you wish to program while keeping the HomeLink®indicator
light in view.
3. Simultaneously press and hold both the HomeLink
®button you want to program
and the hand-held transmitter button.
4. Continue to hold both buttons and observe the indicator light. The HomeLink
®
indicator will flash slowly and then rapidly after HomeLink®has received the
frequency signal from the hand-held transmitter. Release both buttons after the
indicator light changes from slow to rapid.
5. Press and hold the programmed HomeLink
®button and observe the indicator
light. If the indicator light stays on constantly, programming is complete and the
garage door (or device) should activate when the HomeLink
®button is pressed.
6. To program the two remaining HomeLink
®buttons, repeat each step for each
remaining button. DO NOT erase the channels.
Using HomeLink®
To operate, push and release the programmed HomeLink®button. Activation will now
occur for the programmed device (e.g., garage door opener, gate operator, security
system, entry door lock, home/office lighting, etc.,). The hand-held transmitter of the
device may also be used at any time.
ELECTRONICS
73
Page 83 of 124
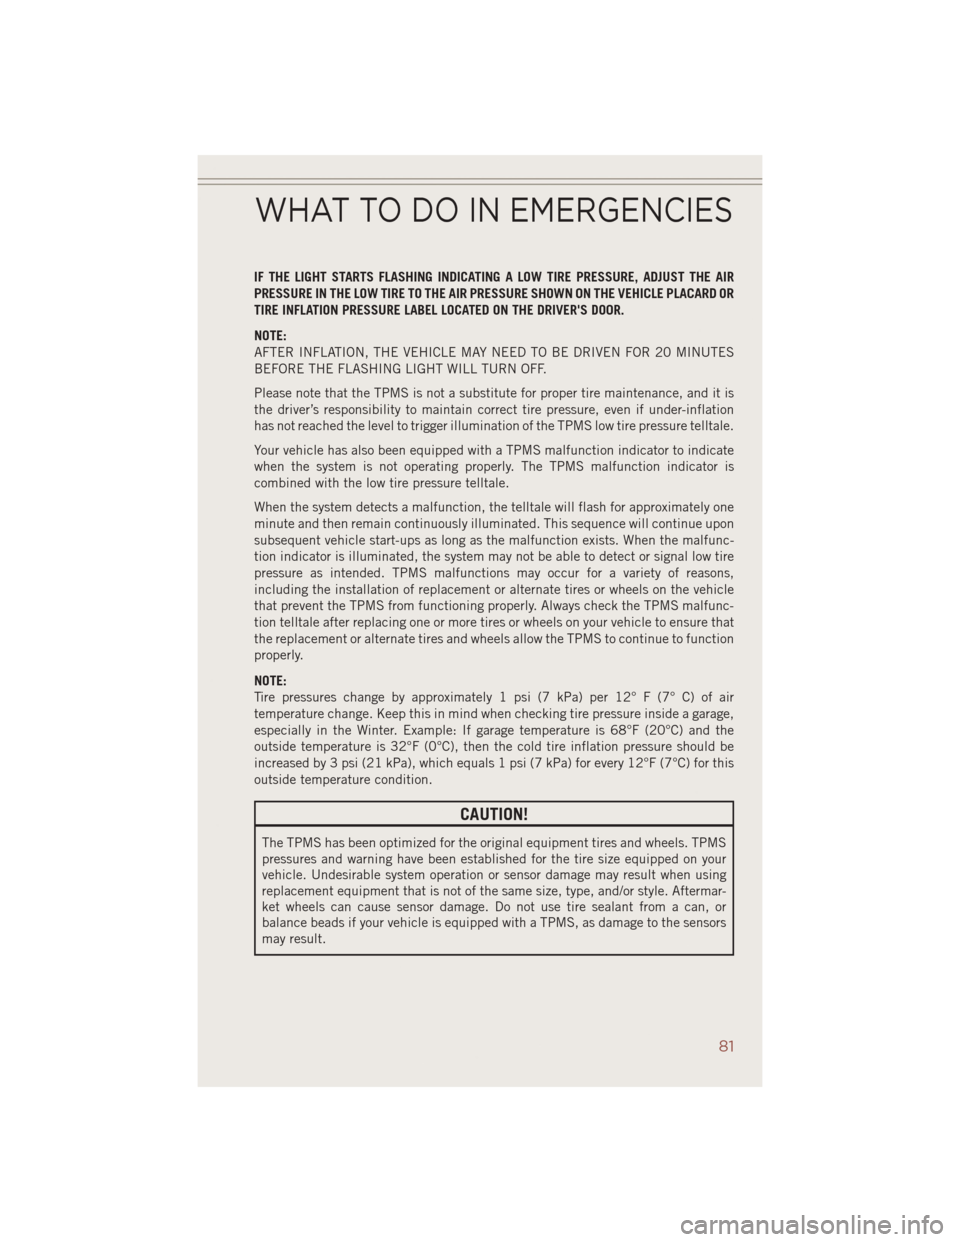
IF THE LIGHT STARTS FLASHING INDICATING A LOW TIRE PRESSURE, ADJUST THE AIR
PRESSURE IN THE LOW TIRE TO THE AIR PRESSURE SHOWN ON THE VEHICLE PLACARD OR
TIRE INFLATION PRESSURE LABEL LOCATED ON THE DRIVER'S DOOR.
NOTE:
AFTER INFLATION, THE VEHICLE MAY NEED TO BE DRIVEN FOR 20 MINUTES
BEFORE THE FLASHING LIGHT WILL TURN OFF.
Please note that the TPMS is not a substitute for proper tire maintenance, and it is
the driver’s responsibility to maintain correct tire pressure, even if under-inflation
has not reached the level to trigger illumination of the TPMS low tire pressure telltale.
Your vehicle has also been equipped with a TPMS malfunction indicator to indicate
when the system is not operating properly. The TPMS malfunction indicator is
combined with the low tire pressure telltale.
When the system detects a malfunction, the telltale will flash for approximately one
minute and then remain continuously illuminated. This sequence will continue upon
subsequent vehicle start-ups as long as the malfunction exists. When the malfunc-
tion indicator is illuminated, the system may not be able to detect or signal low tire
pressure as intended. TPMS malfunctions may occur for a variety of reasons,
including the installation of replacement or alternate tires or wheels on the vehicle
that prevent the TPMS from functioning properly. Always check the TPMS malfunc-
tion telltale after replacing one or more tires or wheels on your vehicle to ensure that
the replacement or alternate tires and wheels allow the TPMS to continue to function
properly.
NOTE:
Tire pressures change by approximately 1 psi (7 kPa) per 12° F (7° C) of air
temperature change. Keep this in mind when checking tire pressure inside a garage,
especially in the Winter. Example: If garage temperature is 68°F (20°C) and the
outside temperature is 32°F (0°C), then the cold tire inflation pressure should be
increased by 3 psi (21 kPa), which equals 1 psi (7 kPa) for every 12°F (7°C) for this
outside temperature condition.
CAUTION!
The TPMS has been optimized for the original equipment tires and wheels. TPMS
pressures and warning have been established for the tire size equipped on your
vehicle. Undesirable system operation or sensor damage may result when using
replacement equipment that is not of the same size, type, and/or style. Aftermar-
ket wheels can cause sensor damage. Do not use tire sealant from a can, or
balance beads if your vehicle is equipped with a TPMS, as damage to the sensors
may result.
WHAT TO DO IN EMERGENCIES
81
Page 113 of 124
WHEEL AND WHEEL TRIM CARE
All wheels and wheel trim, especially aluminum and chrome plated wheels, should
be cleaned regularly with a mild soap and water to prevent corrosion.
To remove heavy soil and/or excessive brake dust, use MOPAR
®Wheel Cleaner or
equivalent or select a non-abrasive, non-acidic cleaner.
CAUTION!
Do not use scouring pads, steel wool, a bristle brush, or metal polishes. Do not use
oven cleaner. These products may damage the wheel's protective finish. Avoid
automatic car washes that use acidic solutions or harsh brushes that may damage
the wheel's protective finish. Only MOPAR
®Wheel Cleaner or equivalent is
recommended.
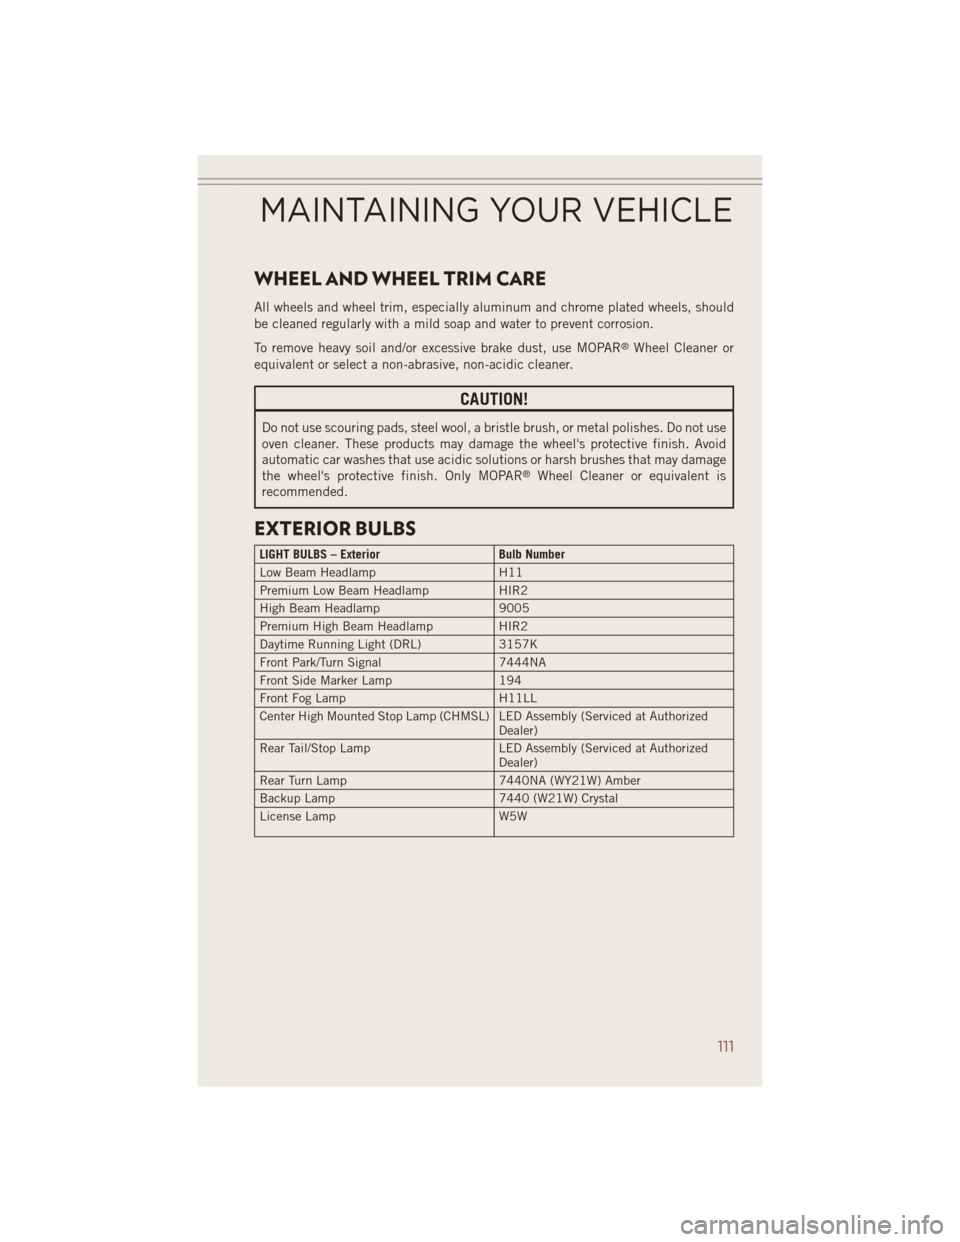
EXTERIOR BULBS
LIGHT BULBS – Exterior Bulb Number
Low Beam Headlamp H11
Premium Low Beam Headlamp HIR2
High Beam Headlamp 9005
Premium High Beam Headlamp HIR2
Daytime Running Light (DRL) 3157K
Front Park/Turn Signal 7444NA
Front Side Marker Lamp 194
Front Fog Lamp H11LL
Center High Mounted Stop Lamp (CHMSL) LED Assembly (Serviced at Authorized Dealer)
Rear Tail/Stop Lamp LED Assembly (Serviced at Authorized
Dealer)
Rear Turn Lamp 7440NA (WY21W) Amber
Backup Lamp 7440 (W21W) Crystal
License Lamp W5W
MAINTAINING YOUR VEHICLE
111
Page 119 of 124
Electronic Vehicle Information
Center(EVIC) ............69
ExitMenu ..............69
Language (Selecting The
Language)..............70
Travel Time.............69
Trip Functions ...........69
Units (Set Units) ..........70
Emergency, In Case of Brake Warning Light .......82
Jacking ...............86
Jump Starting ...........92
Overheating ............85
Towing ...............80
Engine Break-In Recommendations . . .25
Compartment ...........100
Jump Starting ...........92
Oil Selection ...........102
Overheating ............85
Event Data Recorder ..........98
Exterior Lights .............111
Flash-To-Pass..............26
FlatTire.................86
Fluid Capacities ............102
Fluids .................102
FogLights .............26,27
Folding Front Passenger Seat .....21
FoldingRearSeat ...........22
Four Wheel Drive Operation ......76
Freeing A Stuck Vehicle ........97
Front Heated Seats ...........23
Front Wipers Mist .................27
Fuel Filler Cap (Gas Cap) ........84
Specifications ..........102
Garage Door Opener (HomeLink
®) . .71
Gas Cap (Fuel Filler Cap) .......84
GPS Navigation (Uconnect
®gps) . . .57
Hard Drive (HDD) ............52
Headlights................26 Dimmer Switch ..........26
HighBeam .............26
Heated Mirrors ...........31,32 Heated Seats
..............23
High Beam/Low Beam Select (Dimmer) Switch ................26
HomeLink
®(Garage Door Opener) . .71
Hood Release ..............99
Instrument Cluster Indicators ..............9
Instrument Cluster Warning Lights . . .8
Interior and Instrument Lights . . .6, 7
Intermittent Wipers (Delay Wipers) . .27
Introduction ...............2
Inverter Outlet (115V) .........74
Inverter, Power .............74
iPod
®/USB/MP3 Control ........62
Bluetooth®Streaming Audio . . .69
Jacking Instructions ..........87
Jack Location ..............86
Jack Operation ...........86,87
Jump Starting ..............92
KeyFob.................10 Arm The Alarm ...........12
Disarm The Alarm .........13
Lock The Doors ...........10
Panic Alarm ............10
Remote Start ............11
Unlock The Doors .........10
Key Fob Programmable Features . . .70
LaneChangeandTurnSignals....27
Lane Change Assist ..........27
LATCH (Lower Anchors and Tether for CHildren)............15,16
Lights Engine Temperature Warning . . .82
Headlights .............26
Park .................26
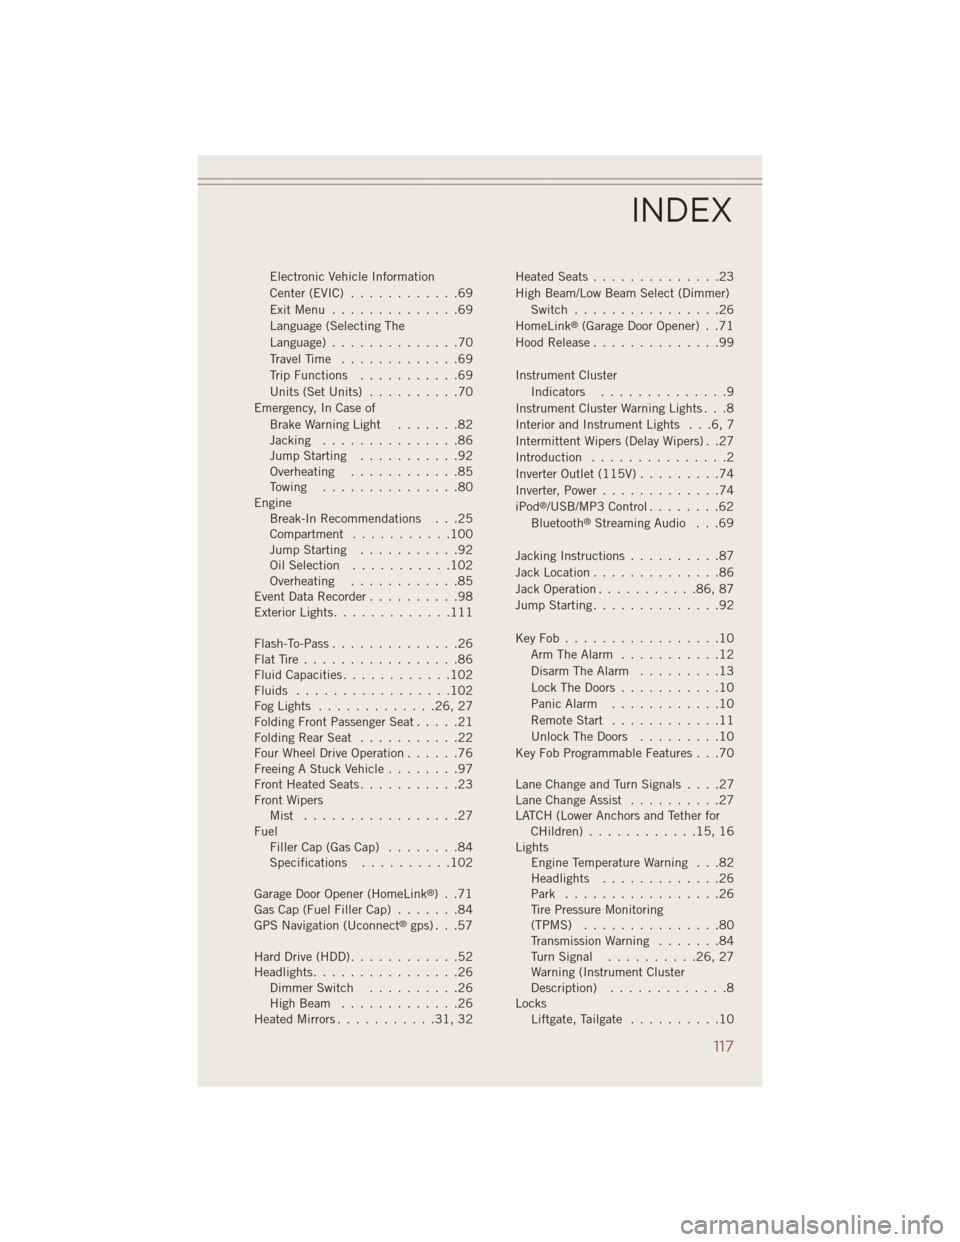
Tire Pressure Monitoring
(TPMS) ...............80
Transmission Warning .......84
TurnSignal ..........26,27
Warning (Instrument Cluster
Description) .............8
Locks Liftgate, Tailgate ..........10
INDEX
117
Page 120 of 124
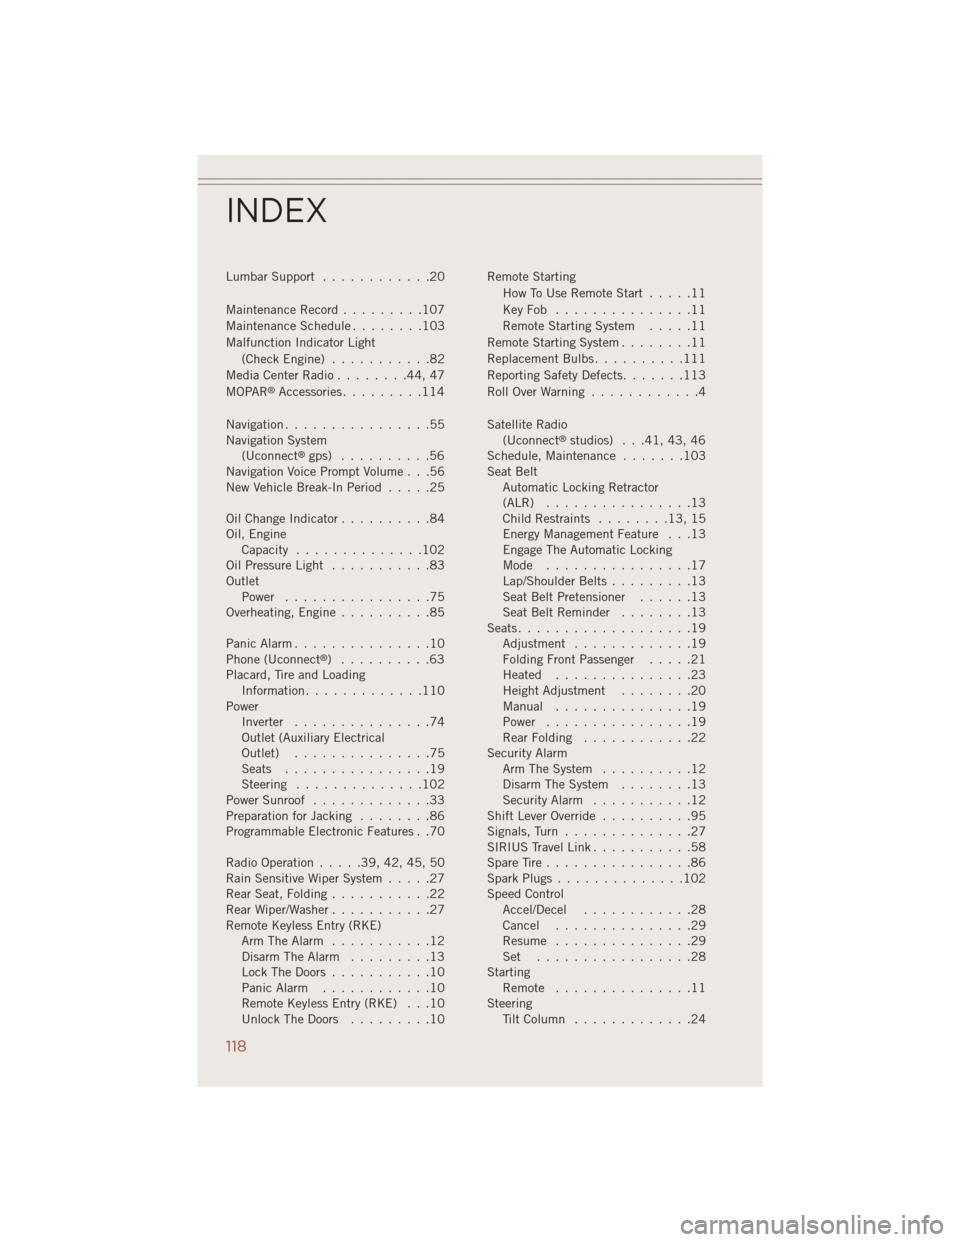
Lumbar Support............20
Maintenance Record .........107
MaintenanceSchedule........103
Malfunction Indicator Light (CheckEngine) ...........82
Media Center Radio ........44,47
MOPAR
®Accessories .........114
Navigation ................55
Navigation System (Uconnect
®gps) ..........56
Navigation Voice Prompt Volume . . .56
New Vehicle Break-In Period .....25
Oil Change Indicator ..........84
Oil, Engine Capacity ..............102
Oil Pressure Light ...........83
Outlet Power ................75
Overheating, Engine ..........85
Panic Alarm ...............10
Phone (Uconnect
®) ..........63
Placard, Tire and Loading Information .............110
Power Inverter ...............74
Outlet (Auxiliary Electrical
Outlet) ...............75
Seats ................19
Steering ..............102
Power Sunroof .............33
Preparation for Jacking ........86
Programmable Electronic Features . .70
Radio Operation .....39,42,45,50
Rain Sensitive Wiper System .....27
RearSeat,Folding...........22
RearWiper/Washer...........27
Remote Keyless Entry (RKE) Arm The Alarm ...........12
Disarm The Alarm .........13
Lock The Doors ...........10
Panic Alarm ............10
Remote Keyless Entry (RKE) . . .10
Unlock The Doors .........10 Remote Starting
HowToUseRemoteStart .....11
KeyFob ...............11
Remote Starting System .....11
Remote Starting System ........11
Replacement Bulbs ..........111
Reporting Safety Defects .......113
RollOverWarning ............4
Satellite Radio (Uconnect
®studios) . . .41, 43, 46
Schedule,Maintenance .......103
Seat Belt Automatic Locking Retractor
(ALR) ................13
Child Restraints ........13,15
Energy Management Feature . . .13
Engage The Automatic Locking
Mode ................17
Lap/Shoulder Belts .........13
Seat Belt Pretensioner ......13
SeatBeltReminder ........13
Seats ...................19
Adjustment .............19
Folding Front Passenger .....21
Heated ...............23
Height Adjustment ........20
Manual ...............19
Power ................19
RearFolding ............22
Security Alarm Arm The System ..........12
Disarm The System ........13
Security Alarm ...........12
Shift Lever Override ..........95
Signals, Turn ..............27
SIRIUS Travel Link ...........58
SpareTire................86
SparkPlugs..............102
Speed Control Accel/Decel ............28
Cancel ...............29
Resume ...............29
Set .................28
Starting Remote ...............11
Steering TiltColumn .............24
INDEX
118
Page 121 of 124
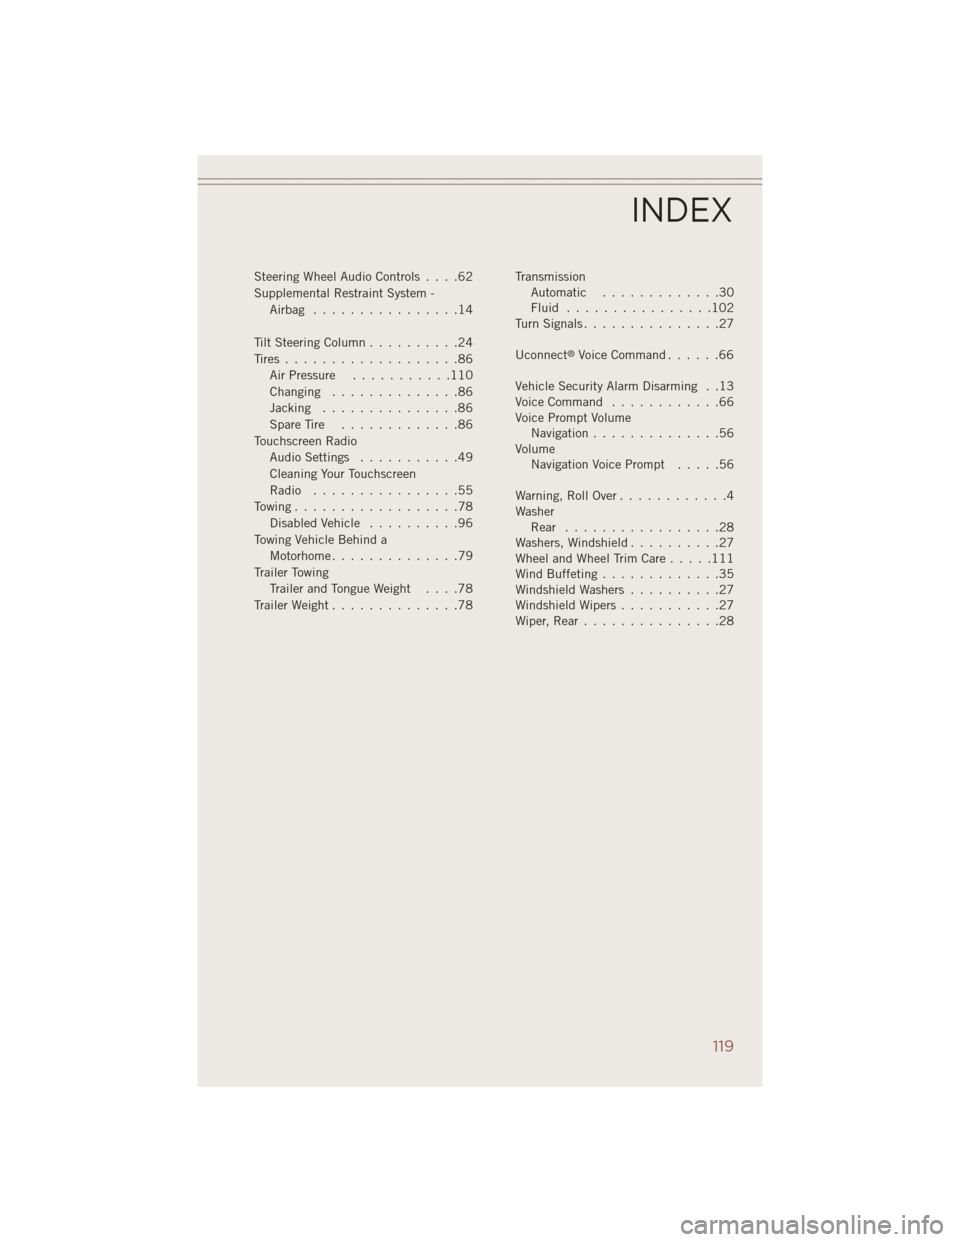
Steering Wheel Audio Controls....62
Supplemental Restraint System - Airbag ................14
Tilt Steering Column ..........24
Tires...................86 Air Pressure ...........110
Changing ..............86
Jacking ...............86
SpareTire .............86
Touchscreen Radio Audio Settings ...........49
Cleaning Your Touchscreen
Radio ................55
Towing..................78 Disabled Vehicle ..........96
Towing Vehicle Behind a Motorhome..............79
Trailer Towing Trailer and Tongue Weight ....78
Trailer Weight ..............78 Transmission
Automatic .............30
Fluid ................102
TurnSignals...............27
Uconnect
®VoiceCommand......66
Vehicle Security Alarm Disarming . .13
Voice Command ............66
Voice Prompt Volume Navigation ..............56
Volume Navigation Voice Prompt .....56
Warning, Roll Over ............4
Washer Rear .................28
Washers, Windshield ..........27
WheelandWheelTrimCare.....111
Wind Buffeting .............35
Windshield Washers ..........27
Windshield Wipers ...........27
Wiper,Rear...............28
INDEX
119