lug pattern JEEP COMPASS 2015 1.G Owners Manual
[x] Cancel search | Manufacturer: JEEP, Model Year: 2015, Model line: COMPASS, Model: JEEP COMPASS 2015 1.GPages: 560, PDF Size: 11.51 MB
Page 322 of 560

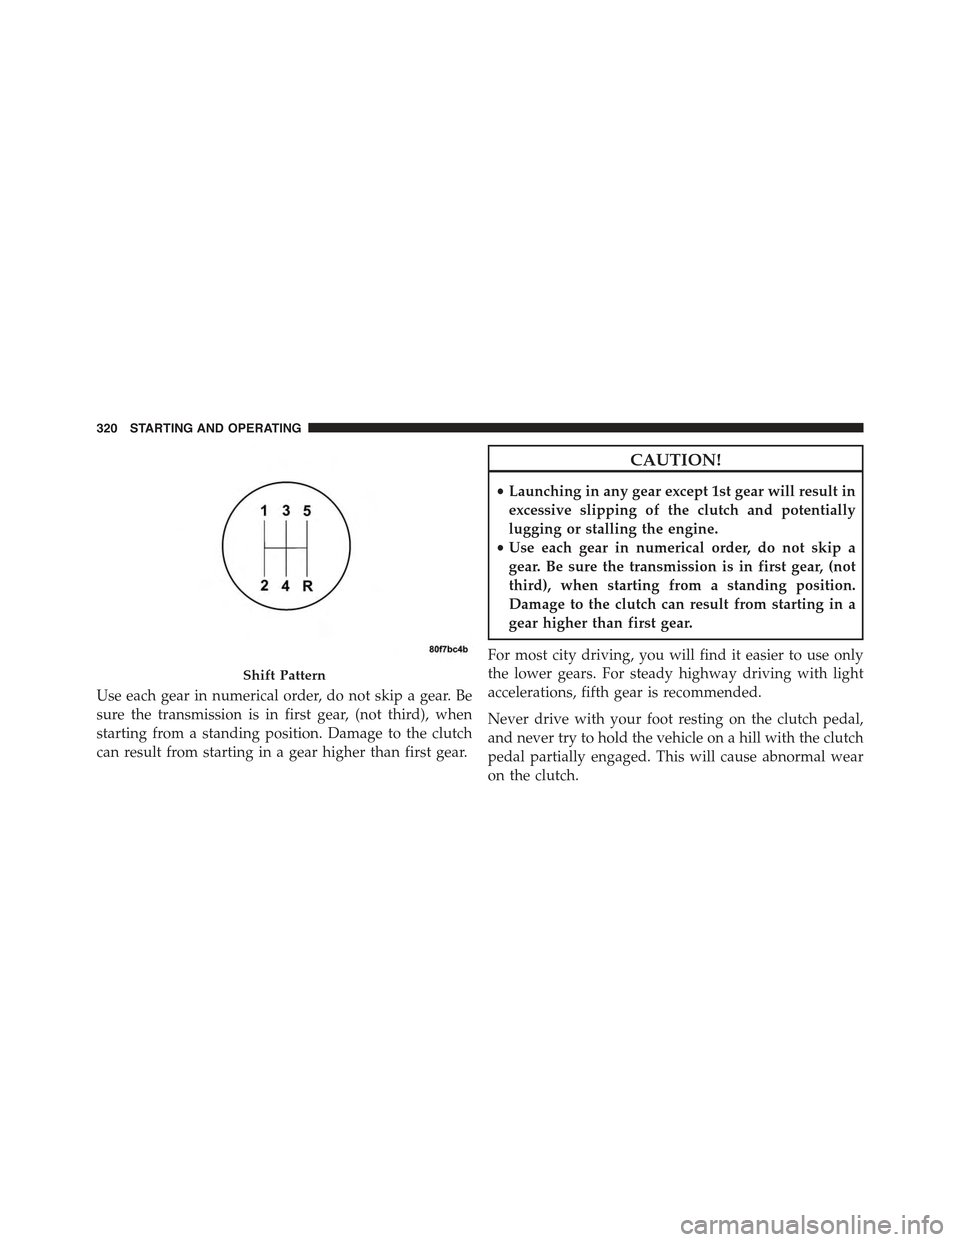
Use each gear in numerical order, do not skip a gear. Be
sure the transmission is in first gear, (not third), when
starting from a standing position. Damage to the clutch
can result from starting in a gear higher than first gear.
CAUTION!
•Launching in any gear except 1st gear will result in
excessive slipping of the clutch and potentially
lugging or stalling the engine.
•Use each gear in numerical order, do not skip a
gear. Be sure the transmission is in first gear, (not
third), when starting from a standing position.
Damage to the clutch can result from starting in a
gear higher than first gear.
For most city driving, you will find it easier to use only
the lower gears. For steady highway driving with light
accelerations, fifth gear is recommended.
Never drive with your foot resting on the clutch pedal,
and never try to hold the vehicle on a hill with the clutch
pedal partially engaged. This will cause abnormal wear
on the clutch.
Shift Pattern
320 STARTING AND OPERATING
Page 433 of 560

Inspect the wheel mounting surface prior to mounting
the tire and remove any corrosion or loose particles.
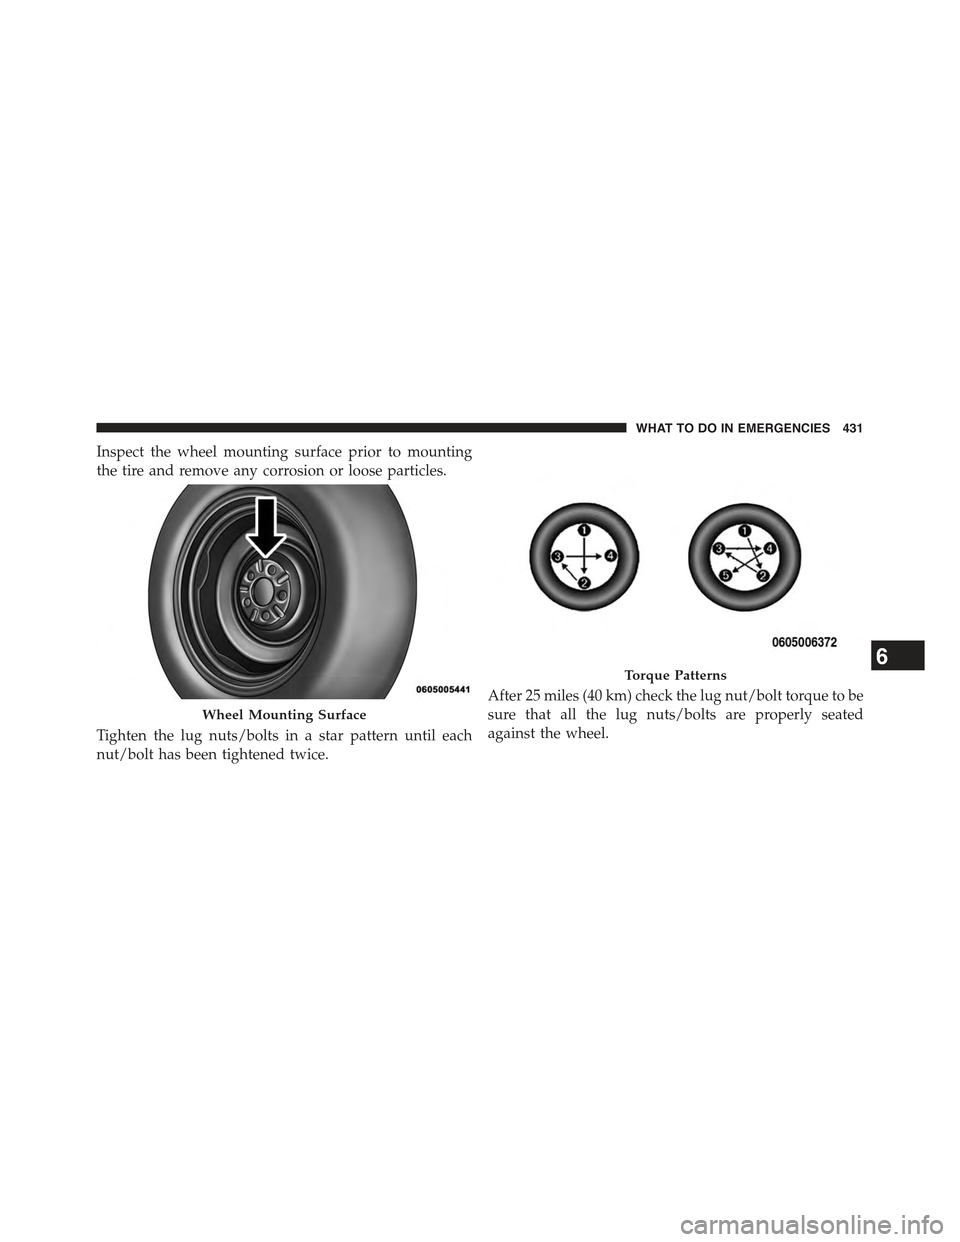
Tighten the lug nuts/bolts in a star pattern until each
nut/bolt has been tightened twice.
After 25 miles (40 km) check the lug nut/bolt torque to be
sure that all the lug nuts/bolts are properly seated
against the wheel.
Wheel Mounting Surface
Torque Patterns6
WHAT TO DO IN EMERGENCIES 431
Page 442 of 560

7.Finish tightening the lug nuts. Push down on the
wrench while at the end of the handle for increased
leverage. Tighten the lug nuts in a star pattern until each
lug nut has been tightened twice. Refer to “Torque
Specifications” in this section for proper lug nut torque.
8.Remove the wheel blocks and lower the jack until it is
free. Release the parking brake. Reassemble the lug
wrench to the jack assembly and stow it in the spare tire
area. Secure the assembly using the means provided.
WARNING!
A loose tire or jack thrown forward in a collision or
hard stop could endanger the occupants of the ve-
hicle. Always stow the jack parts and the spare tire in
the places provided.
9. Place the deflated (flat) tire in the cargo area,have the
tire repaired or replaced as soon as possible.
WARNING!
A loose tire thrown forward in a collision or hard stop
could injure the occupants in the vehicle. Have the
deflated (flat) tire repaired or replaced immediately.
10. Check the spare tire pressure as soon as possible.
Correct the tire pressure as required.
11. After 25 miles (40 km) check the lug nut torque with
a torque wrench to ensure that all lug nuts are
properly seated against the wheel.
Road Tire Installation
Vehicles Equipped With Wheel Covers
1. Mount the road tire on the axle.
2.Align the valve notch in the wheel cover with the valve
stem on the wheel. Install the cover by hand. Do not use
a hammer or excessive force to install the cover.
440 WHAT TO DO IN EMERGENCIES