clock JEEP COMPASS 2019 Owner handbook (in English)
[x] Cancel search | Manufacturer: JEEP, Model Year: 2019, Model line: COMPASS, Model: JEEP COMPASS 2019Pages: 362, PDF Size: 6.23 MB
Page 215 of 362
Road Tire Installation
1. Mount the road tire on the axle.
2. Install the remaining wheel bolts with the
threaded end of the wheel bolt toward the
wheel. Lightly tighten the wheel bolts.
WARNING!
To avoid the risk of forcing the vehicle off
the jack, do not tighten the wheel bolts
fully until the vehicle has been lowered.
Failure to follow this warning may result in
serious injury.
3. Lower the vehicle to the ground by turning
the jack handle counterclockwise.
4. Finish tightening the wheel bolts. Push
down on the wrench while at the end of
the handle for increased leverage. Tighten
the wheel bolts in a star pattern until each
wheel bolt has been tightened twice. Re-
fer to “Wheel And Tire Torque Specifica-
tions” in “Technical Specifications” for
the proper lug bolt torque. If in doubt
about the correct tightness, have them
checked with a torque wrench by an au-
thorized dealer or service station.5. Lower the jack until it is free. Remove the
wheel blocks. Reassemble the lug wrench
to the jack assembly and stow it in the
spare tire area. Secure the assembly using
the means provided. Release the parking
brake before driving the vehicle.
6. After 25 miles (40 km), check the wheel
bolt torque with a torque wrench to ensure
that all wheel bolts are properly seated
against the wheel.
EC Declaration Of Conformance
1. The undersigned,Jaswant Singh, repre-
senting the Moonlight Tools Pvt. Ltd.,
herewith declares that the machinery de-
scribed below fulfills all the relevant pro-
visions of:
• The EC-directive 2006/42/EC on
Machinery2. Description of machinery.
a.
Generic Denomination:Pantograph jack
b.Function:Lifting Motor Vehicle
Model
CodeModel
NameType Working
load
M6 (556) MPV MLF1 1250Kg
3. Manufacturer Detail
Moonlight Tools Pvt. Ltd.
Vill. Jaspalon, G.T. Road Doraha
Distt. Ludhiana (141421) Punjab (India)
Teh. PH. No. 01628 258302
4. Authorized Person to compile the techni-
cal file
Mr. jaswant Singh DGM (QA & Dev.)
Moonlight Tools Pvt. Ltd.
Ludhiana
5. Reference standard : PF-90065
Date Place Signature Seal
29–03–
2017Doraha
Ludhiana
213
Page 286 of 362
CAUTION!
Do NOT attach any object to the touchscreen,
doing so can result in damage to the touch-
screen.
Clock Setting
To start the clock setting procedure:
1.
Press the “Settings” button on the faceplate,
then press the “Clock and Date” button.
2. Press the “Set Time” button on the
touchscreen.
3. Press the “Up” or “Down” arrows to ad-
just the hours or minutes, then select the
“AM” or “PM” button on the touchscreen.
You can also select 12hr or 24hr format
by pressing the desired button on the
touchscreen.
4. Once the time is set, press the “Done”
button on the touchscreen to exit the time
screen.
NOTE:
In the Clock Setting Menu you can also select
“Display Clock”. Display Clock turns the
clock display in the status bar on or off.
Audio Setting
1. Press the “Settings” button on the
faceplate.
2. Scroll down and press the “Audio” button
on the touchscreen to open the Audio
menu.
3. The Audio Menu shows the following op-
tions for you to customize your audio
settings.
Equalizer
Press the “Equalizer” button on the touch-
screen to adjust the Bass, Mid and Treble.
Use the “+” or “-” button on the touchscreen
to adjust the equalizer to your desired set-
tings.
Balance/Fade
Press the “Balance/Fade” button on the
touchscreen to adjust the sound from the
speakers. Use the arrow buttons on the
touchscreen to adjust the sound level from
the front and rear or right and left side speak-
ers. Press the center “C” button on the
touchscreen to reset the balance and fade to
the factory setting.Speed Adjusted Volume — If Equipped
Press the “Speed Adjusted Volume” button
on the touchscreen to select between OFF, 1,
2 or 3. This will decrease the radio volume
relative to a decrease in vehicle speed.
Loudness — If Equipped
Press the “Loudness” button on the touch-
screen to select the Loudness feature. When
this feature is activated it improves sound
quality at lower volumes.
Surround Sound — If Equipped
Press the “Surround Sound” button on the
touchscreen, select “On” or “Off” followed
by pressing the back arrow button on the
touchscreen. When this feature is activated,
it provides simulated surround sound mode.
MULTIMEDIA
284
Page 290 of 362
UCONNECT 4 WITH 7-INCH
DISPLAY
Uconnect 4 At A Glance
CAUTION!
Do NOT attach any object to the touch-
screen, doing so can result in damage to
the screen.NOTE:
Uconnect screen images are for illustration
purposes only and may not reflect exact soft-
ware for your vehicle.
Setting The Time
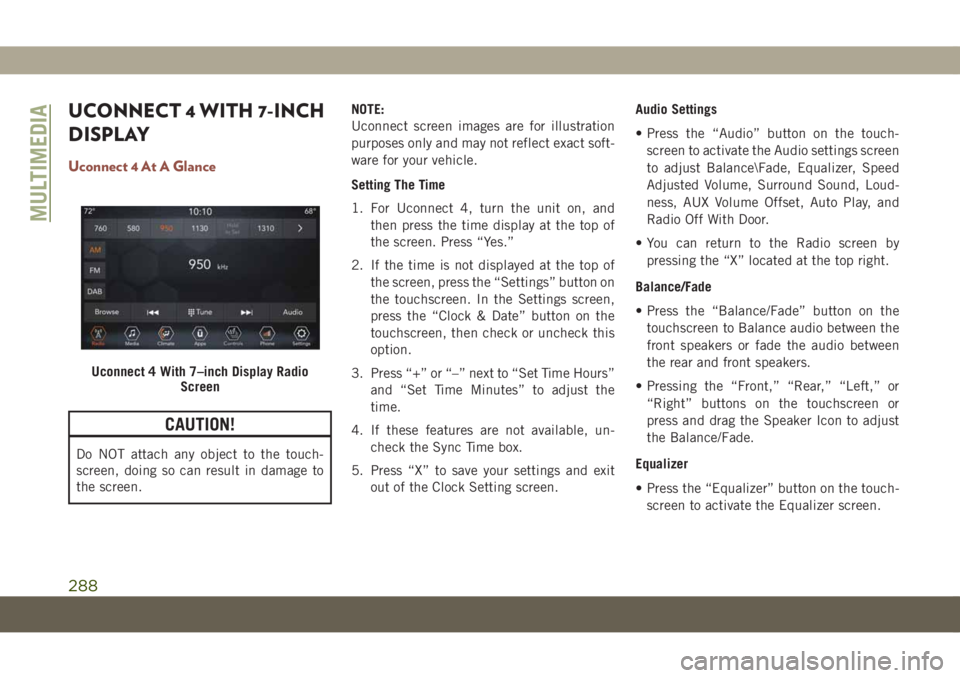
1. For Uconnect 4, turn the unit on, and
then press the time display at the top of
the screen. Press “Yes.”
2. If the time is not displayed at the top of
the screen, press the “Settings” button on
the touchscreen. In the Settings screen,
press the “Clock & Date” button on the
touchscreen, then check or uncheck this
option.
3. Press “+” or “–” next to “Set Time Hours”
and “Set Time Minutes” to adjust the
time.
4. If these features are not available, un-
check the Sync Time box.
5. Press “X” to save your settings and exit
out of the Clock Setting screen.Audio Settings
• Press the “Audio” button on the touch-
screen to activate the Audio settings screen
to adjust Balance\Fade, Equalizer, Speed
Adjusted Volume, Surround Sound, Loud-
ness, AUX Volume Offset, Auto Play, and
Radio Off With Door.
• You can return to the Radio screen by
pressing the “X” located at the top right.
Balance/Fade
• Press the “Balance/Fade” button on the
touchscreen to Balance audio between the
front speakers or fade the audio between
the rear and front speakers.
• Pressing the “Front,” “Rear,” “Left,” or
“Right” buttons on the touchscreen or
press and drag the Speaker Icon to adjust
the Balance/Fade.
Equalizer
• Press the “Equalizer” button on the touch-
screen to activate the Equalizer screen.
Uconnect 4 With 7–inch Display Radio
Screen
MULTIMEDIA
288
Page 298 of 362
UCONNECT 4C/4C NAV
WITH 8.4–INCH DISPLAY
Uconnect 4C/4C NAV At A Glance
WARNING!
ALWAYS drive safely with your hands on
the wheel. You have full responsibility and
assume all risks related to the use of the
Uconnect features and applications in this
vehicle. Only use Uconnect when it is safe
to do so. Failure to do so may result in an
accident involving serious injury or death.
CAUTION!
Do not attach any object to touchscreen,
doing so can result in damage to the
touchscreen.
Setting The Time
• Model Uconnect 4C/4C NAV synchronizes
time automatically via GPS, so it should not
require any time adjustment. If you do need
to set the time manually, follow the instruc-
tions below for Model Uconnect 4C/4C
NAV.
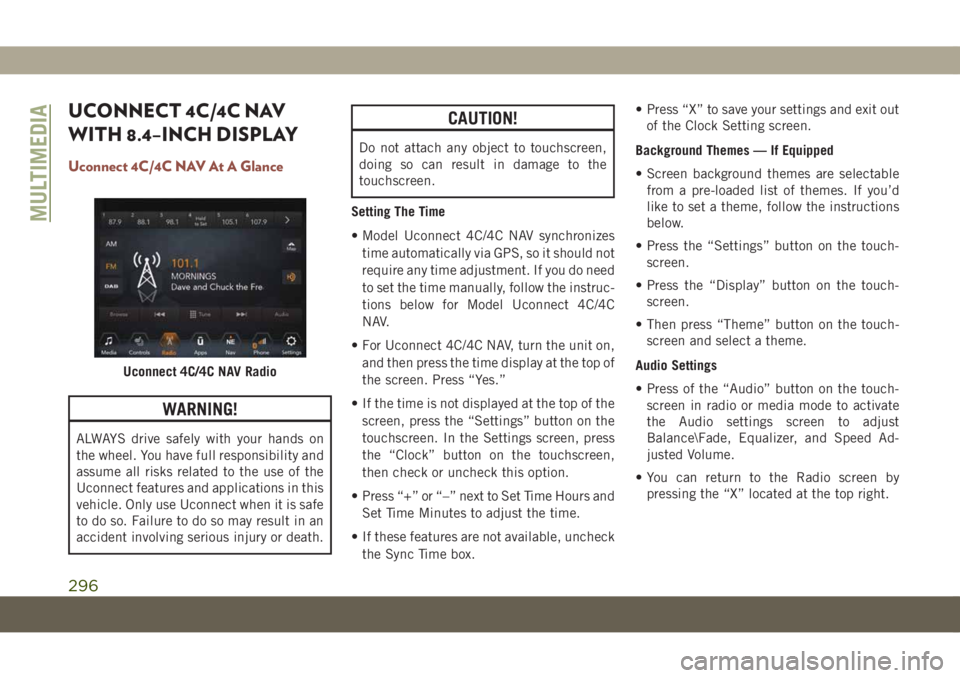
• For Uconnect 4C/4C NAV, turn the unit on,
and then press the time display at the top of
the screen. Press “Yes.”
• If the time is not displayed at the top of the
screen, press the “Settings” button on the
touchscreen. In the Settings screen, press
the “Clock” button on the touchscreen,
then check or uncheck this option.
• Press “+” or “–” next to Set Time Hours and
Set Time Minutes to adjust the time.
• If these features are not available, uncheck
the Sync Time box.• Press “X” to save your settings and exit out
of the Clock Setting screen.
Background Themes — If Equipped
• Screen background themes are selectable
from a pre-loaded list of themes. If you’d
like to set a theme, follow the instructions
below.
• Press the “Settings” button on the touch-
screen.
• Press the “Display” button on the touch-
screen.
• Then press “Theme” button on the touch-
screen and select a theme.
Audio Settings
• Press of the “Audio” button on the touch-
screen in radio or media mode to activate
the Audio settings screen to adjust
Balance\Fade, Equalizer, and Speed Ad-
justed Volume.
• You can return to the Radio screen by
pressing the “X” located at the top right.
Uconnect 4C/4C NAV Radio
MULTIMEDIA
296
Page 309 of 362
UCONNECT SETTINGS
The Uconnect system allows you to access
Customer Programmable feature settings
such as Display, Units, Voice, Clock, Safety &
Driving Assistance, Lights, Doors & Locks,
Auto-On Comfort, Engine Off Options, Audio,
Phone/Bluetooth, Restore Settings, Clear
Personal Data, and System Information
through buttons on the touchscreen.
Push the SETTINGS button (Uconnect
3 With 5–inch Display and Uconnect 4 With
7–inch Display), or press the “Apps” button
(Uconnect 4C/4C NAV With 8.4–inch Dis-
play) located near the bottom of the touch-
screen, then press the “Settings” button on
the touchscreen to access the Settings
screen. When making a selection, scroll up or
down until the preferred setting is high-
lighted, then press the preferred setting until
a check-mark appears next to the setting,
showing that setting has been selected.The following feature settings are available:• Language • Auto-On Comfort
& Remote Start
— If Equipped
• Display • Engine Off
Options
• Units • Audio
• Voice • Radio Setup
• Clock or
Time & Date• Phone/Bluetooth
• Safety & Driving
Assistance• Restore Settings
• Brakes • Clear Personal
Data
• Lights • System
Information
• Doors & Locks
NOTE:
Depending on the vehicles options, feature
settings may vary.
Refer to “Uconnect Settings” in “Multimedia”
in the Owner’s Manual for further information.
TIPS CONTROLS AND
GENERAL INFORMATION
Steering Wheel Audio Controls
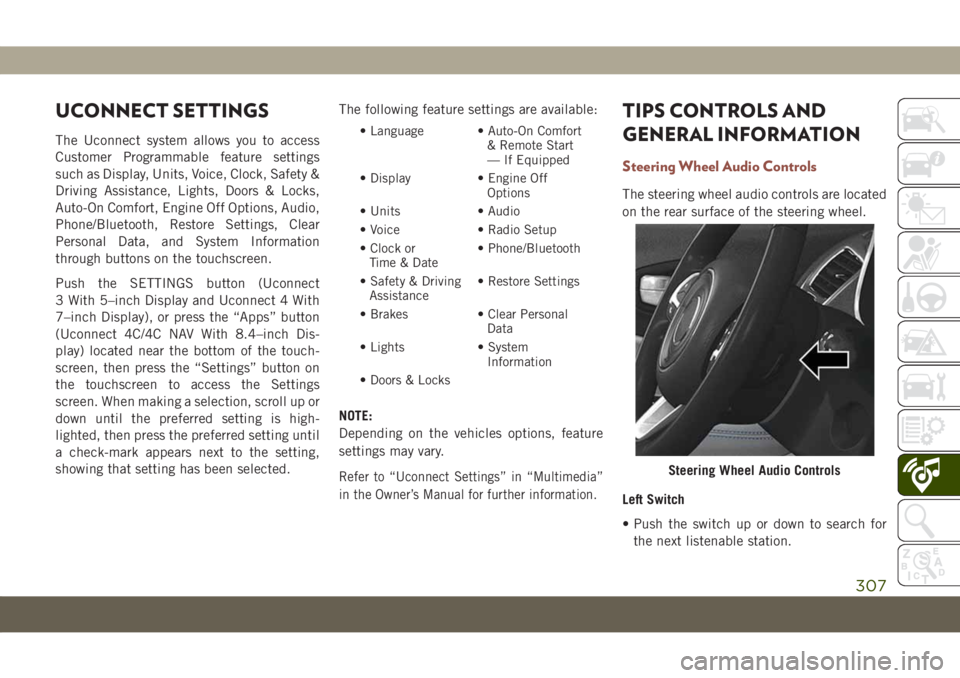
The steering wheel audio controls are located
on the rear surface of the steering wheel.
Left Switch
• Push the switch up or down to search for
the next listenable station.
Steering Wheel Audio Controls
307
Page 352 of 362
Bulbs, Light.................140
Camera, Rear................179
Capacities, Fluid..............274
Caps, Filler
Fuel....................180
Oil (Engine)...............240
Radiator (Coolant Pressure)......247
Carbon Monoxide Warning.....138, 272
Car Washes..................260
Chains, Tire..................257
Change Oil Indicator.............61
Changing A Flat Tire.........208, 250
Check Engine Light (Malfunction
Indicator Light)..............77
Checking Your Vehicle For Safety. . . .138
Checks, Safety................138
Child Safety Locks..............23
Cleaning
Windshield Wiper Blades.......245
Climate Control................39
Clock Settings................284
Compact Spare Tire.............256
Computer, Trip/Travel.............64
Cooling Pressure Cap (Radiator Cap) . .247
Cooling System...............247
Coolant Level..............247Cooling Capacity............274
Pressure Cap...............247
Radiator Cap...............247
Selection Of Coolant
(Antifreeze)............274, 276
Cruise Light.............74, 75, 76
Customer Assistance............332
Customer Programmable Features. . . .307
Cybersecurity.................282
Daytime Running Lights........33, 34
Dealer Service................245
Defroster, Windshield............139
Diagnostic System, Onboard........76
Diesel Fuel.................
.272
Diesel Fuel Requirements
.........272
Dimmer Switch
Headlight...............33, 34
Dipsticks
Oil (Engine)...............243
Disabled Vehicle Towing..........226
Do Not Disturb............320, 329
Door Ajar.................66, 67
Door Ajar Light..............66, 67
Drag And Drop Menu............289
Driver’s Seat Back Tilt............24Easy Entry Seats...............27
Electrical Outlet, Auxiliary
(Power Outlet)...............56
Electric Brake Control System.......80
Anti-Lock Brake System.........79
Traction Control System.........80
Electric Parking Brake...........145
Electronic Speed Control
(Cruise Control)..............163
Electronic Stability Control (ESC).....82
Electronic Throttle Control
Warning Light...............66
Emergency, In Case Of
Hazard Warning Flasher........193
Jacking...............208, 250
Jump Starting..............220
Tow Hooks................228
Towing...................226
Emission Control System
Maintenance................77
Emissions...................280
Engine.....................240
Checking Oil Level...........243
Coolant (Antifreeze)..........276
Cooling..................247
Exhaust Gas Caution.......138, 272
Jump Starting..............220
INDEX
350