warning JEEP COMPASS 2021 Owner handbook (in English)
[x] Cancel search | Manufacturer: JEEP, Model Year: 2021, Model line: COMPASS, Model: JEEP COMPASS 2021Pages: 328, PDF Size: 8.85 MB
Page 122 of 328
SAFETY
120
Seat Belts For Older Children
Children over 1.50 m in height can wear seat
belts instead of using child restraints.
Use this simple 5-step test to decide
whether the seat belt properly fits the child
or if they should still use a Group 2 or Group
3 child restraint to improve the fit of the seat
belt:
1. Can the child sit all the way back againstthe back of the vehicle seat?
2. Do the child’s knees bend comfortably over the front of the vehicle seat – while
the child is still sitting all the way back?
3. Does the shoulder belt cross the child’s shoulder between the neck and arm?
4. Is the lap part of the belt as low as possible, touching the child’s thighs and
not the stomach?
5. Can the child stay seated like this for the whole trip?
If the answer to any of these questions was
“no,” then the child still needs to use a
Group 2 or 3 child restraint in this vehicle. If
the child is using the lap/shoulder belt,
check belt fit periodically and make sure the seat belt buckle is latched. A child’s
squirming or slouching can move the belt out
of position. If the shoulder belt contacts the
face or neck, move the child closer to the
center of the vehicle, or use a booster seat to
position the seat belt on the child correctly.
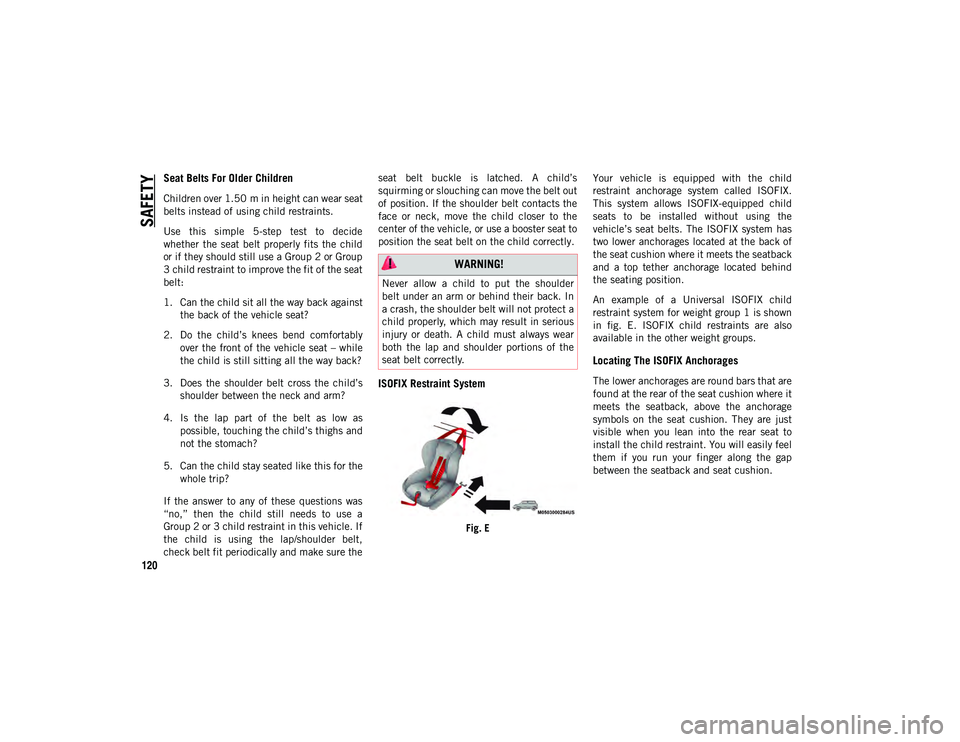
ISOFIX Restraint System
Fig. E
Your vehicle is equipped with the child
restraint anchorage system called ISOFIX.
This system allows ISOFIX-equipped child
seats to be installed without using the
vehicle’s seat belts. The ISOFIX system has
two lower anchorages located at the back of
the seat cushion where it meets the seatback
and a top tether anchorage located behind
the seating position.
An example of a Universal ISOFIX child
restraint system for weight group 1 is shown
in fig. E. ISOFIX child restraints are also
available in the other weight groups.
Locating The ISOFIX Anchorages
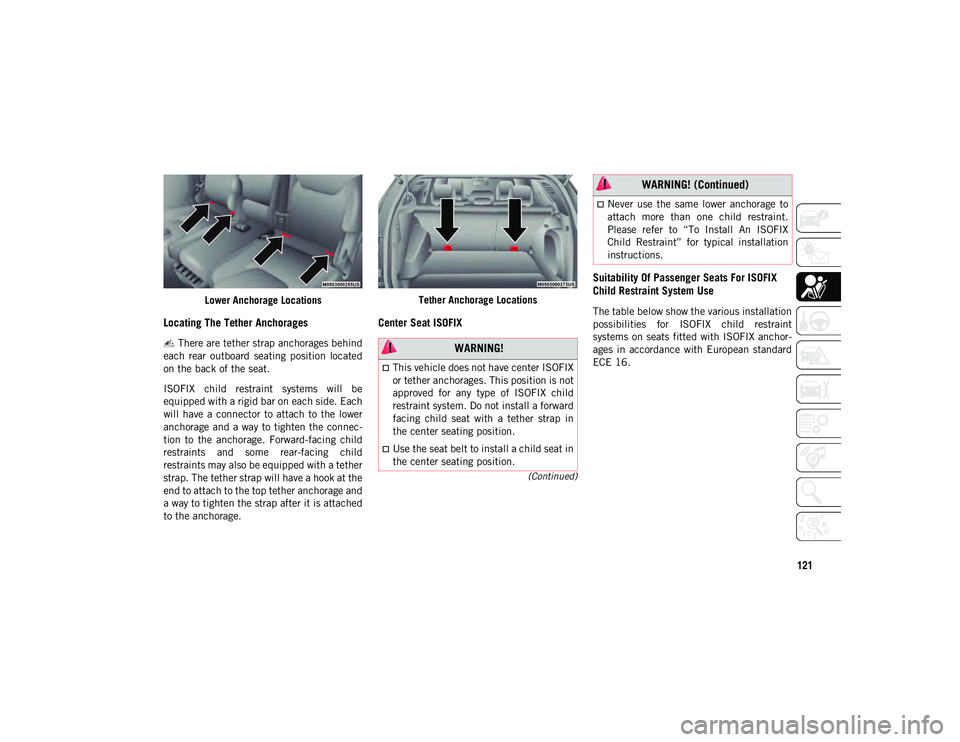
The lower anchorages are round bars that are
found at the rear of the seat cushion where it
meets the seatback, above the anchorage
symbols on the seat cushion. They are just
visible when you lean into the rear seat to
install the child restraint. You will easily feel
them if you run your finger along the gap
between the seatback and seat cushion.
WARNING!
Never allow a child to put the shoulder
belt under an arm or behind their back. In
a crash, the shoulder belt will not protect a
child properly, which may result in serious
injury or death. A child must always wear
both the lap and shoulder portions of the
seat belt correctly.
2020_JEEP_M6_UG_UK.book Page 120
Page 123 of 328
121
(Continued)
Lower Anchorage Locations
Locating The Tether Anchorages
There are tether strap anchorages behind
each rear outboard seating position located
on the back of the seat.
ISOFIX child restraint systems will be
equipped with a rigid bar on each side. Each
will have a connector to attach to the lower
anchorage and a way to tighten the connec -
tion to the anchorage. Forward-facing child
restraints and some rear-facing child
restraints may also be equipped with a tether
strap. The tether strap will have a hook at the
end to attach to the top tether anchorage and
a way to tighten the strap after it is attached
to the anchorage. Tether Anchorage Locations
Center Seat ISOFIX
Suitability Of Passenger Seats For ISOFIX
Child Restraint System UseThe table below show the various installation
possibilities for ISOFIX child restraint
systems on seats fitted with ISOFIX anchor
-
ages in accordance with European standard
ECE 16.
WARNING!
This vehicle does not have center ISOFIX
or tether anchorages. This position is not
approved for any type of ISOFIX child
restraint system. Do not install a forward
facing child seat with a tether strap in
the center seating position.
Use the seat belt to install a child seat in
the center seating position.
Never use the same lower anchorage to
attach more than one child restraint.
Please refer to “To Install An ISOFIX
Child Restraint” for typical installation
instructions.
WARNING! (Continued)
2020_JEEP_M6_UG_UK.book Page 121
Page 126 of 328
SAFETY
124
6. Test that the child restraint is installedtightly by pulling back and forth on the
child seat at the belt path. It should not
move more than 25 mm in any direction.Installing Child Restraints Using The Top
Tether Anchorage:
1. Look behind the seating position whereyou plan to install the child restraint to
find the tether anchorage. You may need
to move the seat forward to provide better
access to the tether anchorage. If there is
no top tether anchorage for that seating
position, move the child restraint to
another position in the vehicle if one is
available.
2. Route the tether strap to provide the most direct path for the strap between
the anchor and the child seat. If your
vehicle is equipped with adjustable rear
head restraints, raise the head restraint,
and where possible, route the tether
strap under the head restraint and
between the two posts. If not possible,
lower the head restraint and pass the
tether strap around the outboard side of
the head restraint.
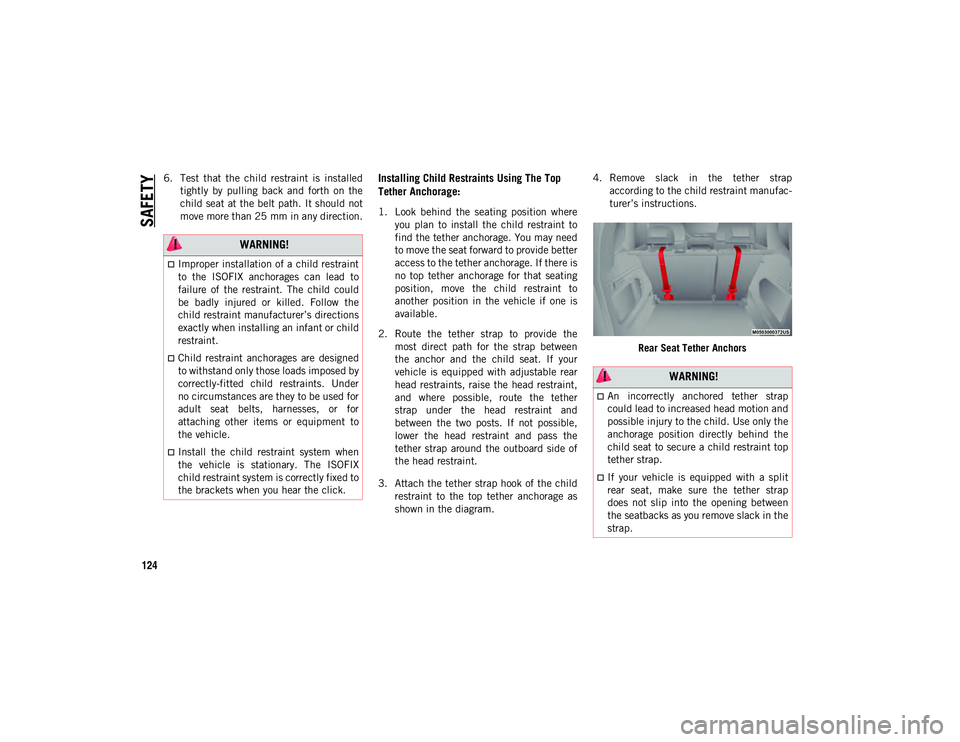
3. Attach the tether strap hook of the child restraint to the top tether anchorage as
shown in the diagram. 4. Remove slack in the tether strap
according to the child restraint manufac -
turer’s instructions.
Rear Seat Tether Anchors
WARNING!
Improper installation of a child restraint
to the ISOFIX anchorages can lead to
failure of the restraint. The child could
be badly injured or killed. Follow the
child restraint manufacturer’s directions
exactly when installing an infant or child
restraint.
Child restraint anchorages are designed
to withstand only those loads imposed by
correctly-fitted child restraints. Under
no circumstances are they to be used for
adult seat belts, harnesses, or for
attaching other items or equipment to
the vehicle.
Install the child restraint system when
the vehicle is stationary. The ISOFIX
child restraint system is correctly fixed to
the brackets when you hear the click.
WARNING!
An incorrectly anchored tether strap
could lead to increased head motion and
possible injury to the child. Use only the
anchorage position directly behind the
child seat to secure a child restraint top
tether strap.
If your vehicle is equipped with a split
rear seat, make sure the tether strap
does not slip into the opening between
the seatbacks as you remove slack in the
strap.
2020_JEEP_M6_UG_UK.book Page 124
Page 127 of 328
125
Suitability of Passenger Seats for i-Size
Child Restraint System Use
The rear outboard seats of the vehicle are
type-approved to house the state-of-the-art
i-Size child restraint systems.
These child restraint systems, built and
type-approved according to the i-Size (ECE
R129) standard, ensure better safety condi-
tions to carry children on board a vehicle:
The child must be transported rearward
facing until 15 months:
Child restraint system protection is
increased in the event of a side collision:
The use of the ISOFIX system is promoted
to avoid faulty installation of the child
restraint system:
Efficiency in the choice of the child
restraint system, which isn't made
according to weight anymore but
according to the child's height, is
increased:
Compatibility between the vehicle seats
and the child restraint systems is better:
the i-Size child restraint systems can be
considered as "Super ISOFIX"; this means
that they can be perfectly fitted in
type-approved i-Size seats, but can also be
fitted in ISOFIX (ECE R44) type-approved
seats.
NOTE:
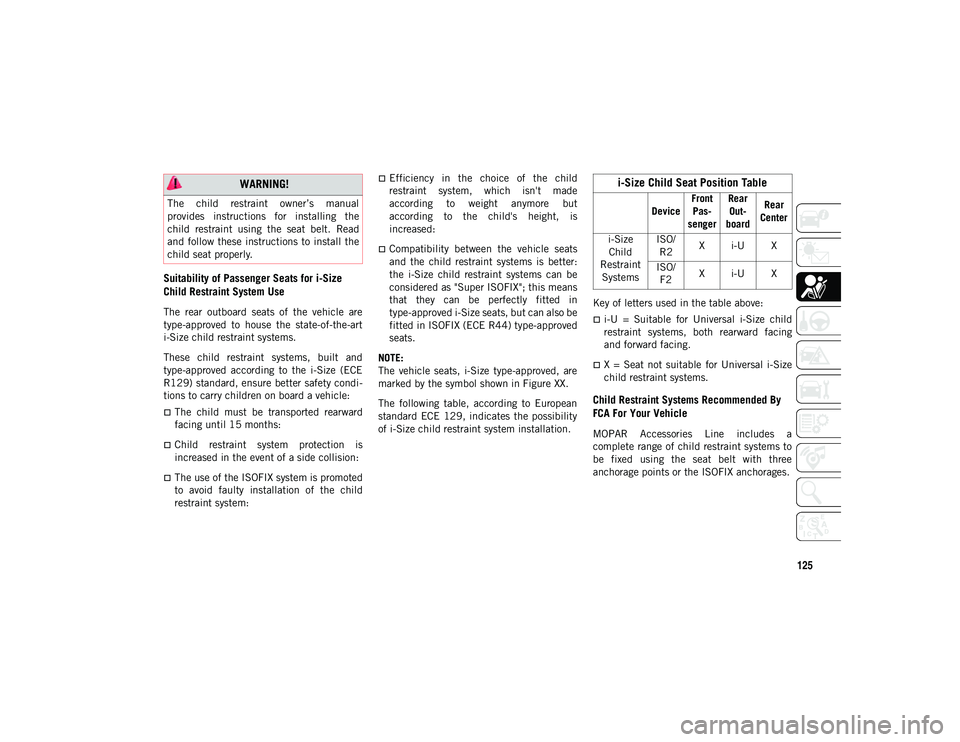
The vehicle seats, i-Size type-approved, are
marked by the symbol shown in Figure XX.
The following table, according to European
standard ECE 129, indicates the possibility
of i-Size child restraint system installation. Key of letters used in the table above:
i-U = Suitable for Universal i-Size child
restraint systems, both rearward facing
and forward facing.
X = Seat not suitable for Universal i-Size
child restraint systems.
Child Restraint Systems Recommended By
FCA For Your Vehicle
MOPAR Accessories Line includes a
complete range of child restraint systems to
be fixed using the seat belt with three
anchorage points or the ISOFIX anchorages.
WARNING!
The child restraint owner’s manual
provides instructions for installing the
child restraint using the seat belt. Read
and follow these instructions to install the
child seat properly.
i-Size Child Seat Position Table
Device
Front
Pas -
senger Rear
Out -
board Rear
Center
i-Size Child
Restraint Systems ISO/
R2 X i-U X
ISO/ F2 X i-U X
2020_JEEP_M6_UG_UK.book Page 125
Page 130 of 328
SAFETY
128
SAFETY TIPS
Transporting Passengers
NEVER TRANSPORT PASSENGERS IN THE
CARGO AREA.
Exhaust Gas
The best protection against carbon monoxide
entry into the vehicle body is a properly
maintained engine exhaust system.Whenever a change is noticed in the sound of
the exhaust system, when exhaust fumes can
be detected inside the vehicle, or when the
underside or rear of the vehicle is damaged,
have a competent mechanic inspect the
complete exhaust system and adjacent body
areas for broken, damaged, deteriorated, or
mispositioned parts. Open seams or loose
connections could permit exhaust fumes to
seep into the passenger compartment. In
addition, inspect the exhaust system each
time the vehicle is raised for lubrication or oil
change. Replace as required.
Safety Checks You Should Make Inside
The Vehicle
Seat Belts
Inspect the seat belt system periodically,
checking for cuts, frays, and loose parts.
Damaged parts must be replaced immedi
-
ately. Do not disassemble or modify the
system.
Front seat belt assemblies must be replaced
after a collision. Rear seat belt assemblies
must be replaced after a collision if they
have been damaged (i.e., bent retractor, torn
webbing, etc.). If there is any question
regarding seat belt or retractor condition,
replace the seat belt.
WARNING!
Do not leave children or animals inside
parked vehicles in hot weather. Interior
heat build-up may cause serious injury or
death.
It is extremely dangerous to ride in a
cargo area, inside or outside of a vehicle.
In a collision, people riding in these
areas are more likely to be seriously
injured or killed.
Do not allow people to ride in any area of
your vehicle that is not equipped with
seats and seat belts.
Be sure everyone in your vehicle is in a
seat and using a seat belt properly.
WARNING!
Exhaust gases can injure or kill. They
contain carbon monoxide (CO), which is
colorless and odorless. Breathing it can
make you unconscious and can eventually
poison you. To avoid breathing (CO), follow
these safety tips:
Do not run the engine in a closed garage
or in confined areas any longer than
needed to move your vehicle in or out of
the area.
If you are required to drive with the
trunk/liftgate/rear doors open, make sure
that all windows are closed and the
climate control BLOWER switch is set at
high speed. DO NOT use the recircula-
tion mode.
If it is necessary to sit in a parked vehicle
with the engine running, adjust your
heating or cooling controls to force
outside air into the vehicle. Set the
blower at high speed.
2020_JEEP_M6_UG_UK.book Page 128
Page 131 of 328
129
(Continued)
(Continued)
Air Bag Warning Light
The Air Bag warning light will turn on for
four to eight seconds as a bulb check when
the ignition switch is first turned to ON/RUN.
If the light is either not on during starting,
stays on, or turns on while driving, have the
system inspected at an authorized dealer as
soon as possible. After the bulb check, this
light will illuminate with a single chime when
a fault with the Air Bag System has been
detected. It will stay on until the fault is
removed. If the light comes on intermittently
or remains on while driving, have an autho
-
rized dealer service the vehicle immediately.
Refer to “Occupant Restraint Systems” in
“Safety” for further information.
Defroster
Check operation by selecting the defrost
mode and place the blower control on high
speed. You should be able to feel the air
directed against the windshield. See an
authorized dealer for service if your defroster
is inoperable.
Floor Mat Safety Information
Always use floor mats designed to fit your
vehicle. Only use a floor mat that does not interfere with the operation of the acceler
-
ator, brake or clutch pedals. Only use a floor
mat that is securely attached using the floor
mat fasteners so it cannot slip out of position
and interfere with the accelerator, brake or
clutch pedals or impair safe operation of your
vehicle in other ways.
WARNING!
An improperly attached, damaged, folded,
or stacked floor mat, or damaged floor mat
fasteners may cause your floor mat to
interfere with the accelerator, brake, or
clutch pedals and cause a loss of vehicle
control. To prevent SERIOUS INJURY or
DEATH:
ALWAYS securely attach your floor
mat using the floor mat fasteners. DO
NOT install your floor mat upside down
or turn your floor mat over. Lightly pull to
confirm mat is secured using the floor
mat fasteners on a regular basis.
ALWAYS REMOVE THE EXISTING
FLOOR MAT FROM THE VEHICLE
before installing any other floor mat.
NEVER install or stack an additional
floor mat on top of an existing floor mat.
ONLY install floor mats designed to fit
your vehicle. NEVER install a floor mat
that cannot be properly attached and
secured to your vehicle. If a floor mat
needs to be replaced, only use a FCA
approved floor mat for the specific make,
model, and year of your vehicle.
ONLY use the driver’s side floor mat on
the driver’s side floor area. To check for
interference, with the vehicle properly
parked with the engine off, fully depress
the accelerator, the brake, and the
clutch pedal (if present) to check for
interference. If your floor mat interferes
with the operation of any pedal, or is not
secure to the floor, remove the floor mat
from the vehicle and place the floor mat
in your trunk.
ONLY use the passenger’s side floor mat
on the passenger’s side floor area.
ALWAYS make sure objects cannot fall
or slide into the driver’s side floor area
when the vehicle is moving. Objects can
become trapped under accelerator,
brake, or clutch pedals and could cause
a loss of vehicle control.
WARNING! (Continued)
2020_JEEP_M6_UG_UK.book Page 129
Page 132 of 328
SAFETY
130
Periodic Safety Checks You Should Make
Outside The Vehicle
Tires
Examine tires for excessive tread wear and
uneven wear patterns. Check for stones,
nails, glass, or other objects lodged in the
tread or sidewall. Inspect the tread for cuts
and cracks. Inspect sidewalls for cuts,
cracks, and bulges. Check the wheel nuts for
tightness. Check the tires (including spare)
for proper cold inflation pressure.
Lights
Have someone observe the operation of
brake lights and exterior lights while you
work the controls. Check turn signal and high
beam indicator lights on the instrument
panel.
Door Latches
Check for proper closing, latching, and
locking.
Fluid Leaks
Check area under the vehicle after overnight
parking for fuel, coolant, oil, or other fluid
leaks. Also, if gasoline fumes are detected or
if fuel, or brake fluid leaks are suspected, the
cause should be located and corrected
immediately.
NEVER place any objects under the floor
mat (e.g., towels, keys, etc.). These
objects could change the position of the
floor mat and may cause interference
with the accelerator, brake, or clutch
pedals.
If the vehicle carpet has been removed
and re-installed, always properly attach
carpet to the floor and check the floor
mat fasteners are secure to the vehicle
carpet. Fully depress each pedal to
check for interference with the acceler-
ator, brake, or clutch pedals then
re-install the floor mats.
It is recommended to only use mild soap
and water to clean your floor mats. After
cleaning, always check your floor mat
has been properly installed and is
secured to your vehicle using the floor
mat fasteners by lightly pulling mat.
WARNING! (Continued)
2020_JEEP_M6_UG_UK.book Page 130
Page 133 of 328
131
(Continued)
STARTING AND OPERATING
STARTING THE ENGINE
Before starting your vehicle, adjust your seat,
adjust both inside and outside mirrors, and
fasten your seat belts.Start the engine with the gear selector in the
NEUTRAL or PARK position. Apply the brake
before shifting to any driving range.
Normal Starting — Gasoline Engine
NOTE:
Normal starting of either a cold or a warm
engine is obtained without pumping or
pressing the accelerator pedal.
Place the ignition switch in the START posi-
tion and release when the engine starts. If
the engine fails to start within 10 seconds,
place the ignition switch in the LOCK/OFF
position, wait 10 to 15 seconds, then repeat
the “Normal Starting” procedure.
Tip Start Feature
Place the ignition switch to START position
and release it as soon as the starter engages.
The starter motor will continue to run, and
will automatically disengage itself when the
engine is running. If the engine fails to start, place the ignition switch in the OFF position,
wait 10 to 15 seconds, then repeat the
“Normal Starting” procedure.
Automatic Transmission
The gear selector must be in the NEUTRAL
or PARK position before you can start the
engine. Apply the brakes before shifting into
any driving gear. WARNING!
When exiting the vehicle, always remove
the key fob from the vehicle and lock
your vehicle.
Never leave children alone in a vehicle,
or with access to an unlocked vehicle.
Allowing children to be in a vehicle unat
-
tended is dangerous for a number of
reasons. A child or others could be seri -
ously or fatally injured. Children should
be warned not to touch the parking
brake, brake pedal or the transmission
gear selector.
Do not leave the key fob in or near the
vehicle, or in a location accessible to
children, and do not leave the ignition of
a vehicle equipped with Keyless
Enter-N-Go in the ACC or ON/RUN
mode. A child could operate power
windows, other controls, or move the
vehicle.
Do not leave children or animals inside
parked vehicles in hot weather. Interior
heat build-up may cause serious injury or
death.
WARNING! (Continued)
CAUTION!
Damage to the transmission may occur if
the following precautions are not observed:
Do not shift between PARK, REVERSE,
NEUTRAL, or DRIVE when the engine is
above idle speed.
Shift into or out of PARK or REVERSE
only after the vehicle has come to a
complete stop.
Before shifting into any gear, make sure
your foot is firmly on the brake pedal.
2020_JEEP_M6_UG_UK.book Page 131
Page 135 of 328
133
(Continued)
Stopping The Engine
Vehicles Equipped With A Mechanical Key Fob:
To turn off the engine, proceed as follows:
1. Park the car in a position that does notcause a traffic hazard.
2. Place the transmission in gear (models with a manual transmission) or place the
transmission in PARK (P) (models with
automatic transmission).
3. With the engine idling, place the ignition in the STOP/OFF position.
4. Remove the key from the ignition when the engine is shut off.
Vehicles Equipped With Electronic Key
(Keyless Ignition):
To shut off the engine with vehicle speed
greater than 5 mph (8 km/h), you must push
and hold the START/STOP button or push
the START/STOP button three times consec -
utively within a few seconds. The engine will
shut down, and the ignition will be placed in
the RUN position.
Turning Off the car (placing the ignition from
the RUN position to the STOP position), the
power supply to the accessories are main -
tained for a period of three minutes. Opening the driver side door with the ignition
in RUN will sound a short chime that
reminds the driver to place the ignition to
STOP.
When the ignition is in the STOP/OFF posi
-
tion, the window switches remains active for
three minutes. Opening a front door will
cancel this function.
After severe driving, idle the engine to allow
the temperature inside the engine compart -
ment to cool before shutting off the engine.
Normal Starting — Diesel Engine
Before starting your vehicle, adjust your seat,
both inside and outside mirrors, and fasten
your seat belts.
The starter is allowed to crank for up to
30-second intervals. Waiting a few minutes
between such intervals will protect the
starter from overheating.
WARNING!
Before exiting a vehicle, always come to
a complete stop, then shift the auto-
matic transmission into PARK and apply
the parking brake.
Always make sure the keyless ignition
node is in the OFF mode, key fob is
removed from the vehicle and vehicle is
locked.
Never leave children alone in a vehicle,
or with access to an unlocked vehicle.
Leaving children in a vehicle unattended
is dangerous for a number of reasons. A
child or others could be seriously or
fatally injured. Children should be
warned not to touch the parking brake,
brake pedal or the gear selector.
Do not leave the key fob in or near the
vehicle, or in a location accessible to
children, and do not leave the ignition of
a vehicle equipped with Keyless
Enter-N-Go in the ACC or ON/RUN
mode. A child could operate power
windows, other controls, or move the
vehicle.
Do not leave children or animals inside
parked vehicles in hot weather. Interior
heat build-up may cause serious injury or
death.
WARNING! (Continued)
2020_JEEP_M6_UG_UK.book Page 133
Page 136 of 328
STARTING AND OPERATING
134
NOTE:
Engine start up in very low ambient tempera-
ture could result in evident white smoke.
This condition will disappear as the engine
warms up.
Normal Starting Procedure — Keyless
Enter-N-Go
Observe the instrument panel telltales when
starting the engine.
NOTE:
Normal starting of either a cold or a warm
engine is obtained without pumping or
pressing the accelerator pedal.
1. Always apply the parking brake.
2. Press and hold the brake pedal while pushing the ENGINE START/STOP
button once. NOTE:
A delay of the start of up to five seconds is
possible under very cold conditions. The
“Wait to Start” telltale will be illuminated
during the pre-heat process. When the
engine Wait To Start light goes off the engine
will automatically crank.
3. The system will automatically engage the
starter to crank the engine. If the vehicle
fails to start, the starter will disengage
automatically after 30 seconds.
4. If you wish to stop the cranking of the engine prior to the engine starting, push
the button again.
5. Check that the oil pressure warning light has turned off.
6. Release the parking brake.
PARK BRAKE
Electric Park Brake (EPB)
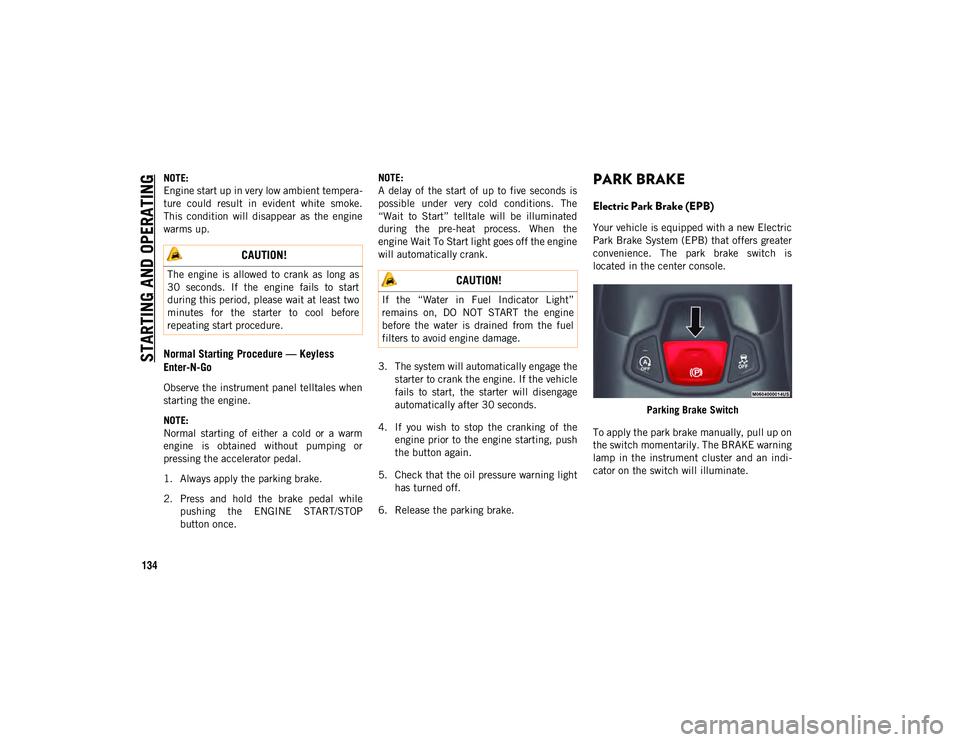
Your vehicle is equipped with a new Electric
Park Brake System (EPB) that offers greater
convenience. The park brake switch is
located in the center console.
Parking Brake Switch
To apply the park brake manually, pull up on
the switch momentarily. The BRAKE warning
lamp in the instrument cluster and an indi -
cator on the switch will illuminate.
CAUTION!
The engine is allowed to crank as long as
30 seconds. If the engine fails to start
during this period, please wait at least two
minutes for the starter to cool before
repeating start procedure. CAUTION!
If the “Water in Fuel Indicator Light”
remains on, DO NOT START the engine
before the water is drained from the fuel
filters to avoid engine damage.
2020_JEEP_M6_UG_UK.book Page 134