ESP JEEP GLADIATOR 2023 Owners Manual
[x] Cancel search | Manufacturer: JEEP, Model Year: 2023, Model line: GLADIATOR, Model: JEEP GLADIATOR 2023Pages: 448, PDF Size: 17.37 MB
Page 2 of 448

WARNING: Operating, servicing and maintaining a passenger vehicle or off-highway
motor vehicle can expose you to chemicals including engine exhaust, carbon monoxide,
phthalates, and lead, which are known to the State of California to cause cancer and
birth defects or other reproductive harm. To minimize exposure, avoid breathing exhaust,
do not idle the engine except as necessary, service your vehicle in a well-ventilated area
and wear gloves or wash your hands frequently when servicing your vehicle. For more
information go to www.P65Warnings.ca.gov/passenger-vehicle.
The driver’s primary responsibility is the safe operation of the vehicle. Driving while distracted can result in loss of vehicle control, resulting in an accident
and personal injury. FCA US LLC strongly recommends that the driver use extreme caution when using any device or feature that may take their attention
off the road. Use of any electrical devices, such as cellular telephones, computers, portable radios, vehicle navigation or other devices by the driver while
the vehicle is moving is dangerous and could lead to a serious accident. Texting while driving is also dangerous and should never be done while the vehicle
is moving. If you find yourself unable to devote your full attention to vehicle operation, pull off the road to a safe location and stop your vehicle. Some states
or provinces prohibit the use of cellular telephones or texting while driving. It is always the driver’s responsibility to comply with all local laws.
This Owner’s Manual has been prepared to help you get acquainted with your new Jeep
® brand vehicle and to provide a convenient reference source for
common questions.
Not all features shown in this manual may apply to your vehicle. For additional information, visit mopar.com/om (USA), owners.mopar.ca (Canada) or your
local Jeep
® brand dealer.
U.S. Residents: If you are the first registered retail owner of your vehicle, you may obtain a complimentary printed copy of the Warranty Booklet by calling
1-877-426-5337 or by contacting your dealer. Replacement kits can be purchased by visiting www.techauthority.com.
Canadian Residents: If you are the first registered retail owner of your vehicle, you may obtain a complimentary printed copy of the Warranty Booklet or
purchase a replacement kit by calling 1-800-387-1143 or by contacting your dealer.
DRIVING AND ALCOHOL
Drunk driving is one of the most frequent causes of accidents. Your driving ability can be seriously impaired with blood alcohol levels far below the legal
minimum. If you are drinking, don’t drive. Ride with a designated non-drinking driver, call a cab, a rideshare, a friend or use public transportation.
WARNING
Driving after drinking can lead to an accident. Your perceptions are less sharp, your reflexes are slower and your judgment is impaired when you have been
drinking. Never drink and then drive.
This Owner’s Manual illustrates and describes the operation of features and equipment that are either standard or optional on this vehicle. This manual may
also include a description of features and equipment that are no longer available or were not ordered on this vehicle. Please disregard any features and
equipment described in this manual that are not on this vehicle.
FCA US LLC reserves the right to make changes in design and specifications, and/or make
additions to or improvements to its products without imposing any obligation upon itself to install them on products previously manufactured.
With respect to any vehicles sold in Canada, the name FCA US LLC shall be deemed to be deleted and the name FCA Canada Inc. used in substitution
therefore.
This Owner’s Manual is intended to familiarize you with the important features of your vehicle. Your most up-to-date Owner’s Manual, Navigation/Uconnect
manuals and Warranty Booklet can be found by visiting the website on the back cover.
ROADSIDE ASSISTANCE
24 HOURS, 7 DAYS A WEEK AT YOUR SERVICE. CALL 1-800-521-2779 OR VISIT CHRYSLER.RSAHELP.COM (USA)
CALL 1-800-363-4869 OR VISIT FCA.ROADSIDEAID.COM (CANADA) SERVICES: Flat Tire Service, Out Of Gas/Fuel Delivery, Battery Jump Assistance, Lockout Service and Towing Service
Please see the Customer Assistance chapter in this Owner’s Manual for further information.
FCA US LLC reserves the right to modify the terms or discontinue the Roadside Assistance Program at any time. The Roadside Assistance Program is subject to restrictions and
conditions of use, that are determined solely by FCA US LLC.
Page 9 of 448
7
TOWING A DISABLED VEHICLE .......................... 350 Four–Wheel Drive Models ............................ 351
Without The Key Fob ..................................... 351
Emergency Tow Hooks —
If Equipped .................................................... 351
ENHANCED ACCIDENT RESPONSE SYSTEM
(EARS) .................................................................. 352
EVENT DATA RECORDER (EDR) ......................... 352
SERVICING AND MAINTENANCE
SCHEDULED SERVICING — GASOLINE
ENGINE ................................................................. 353
Maintenance Plan ......................................... 354
SCHEDULED SERVICING — DIESEL ENGINE .... 357
Maintenance Plan — Diesel Fuel Up To
B5 Biodiesel................................................... 358Additional Maintenance — B6 To B20
Biodiesel ........................................................ 361
ENGINE COMPARTMENT .................................... 362
3.6L Gasoline Engine ................................... 3623.0L Diesel Engine ........................................ 363
Checking Oil Level ......................................... 364
Adding Washer Fluid ..................................... 364
Maintenance-Free Battery ............................ 364
Pressure Washing ......................................... 365 VEHICLE MAINTENANCE..................................... 365
Engine Oil ....................................................... 365
Engine Oil Filter ............................................. 366Engine Air Cleaner Filter ............................... 366
Draining Fuel/Water Separator Filter —
Diesel Engine ................................................. 368
Fuel Filter Replacement — Diesel Engine .... 369
Priming If The Engine Has Run Out Of
Fuel — Diesel Engine .................................... 370
Intervention Regeneration Strategy —
Message Process Flow ................................ 371Diesel Exhaust Fluid ..................................... 371
Accessory Drive Belt Inspection ................... 372Air Conditioner Maintenance........................ 372
Body Lubrication ........................................... 374Windshield Wiper Blades.............................. 374Exhaust System ............................................ 376
Cooling System .............................................. 377
Charge Air Cooler — Inter-Cooler
(Diesel Engine) .............................................. 379
Brake System ............................................... 380
Front/Rear Axle Fluid ................................... 380Transfer Case ............................................... 381
Manual Transmission — If Equipped............ 381
Automatic Transmission —
If Equipped .................................................... 381
Fuses ............................................................. 382Bulb Replacement ........................................ 392 TIRES ..................................................................... 395
Tire Safety Information ................................. 395
Tires — General Information ......................... 401
Tire Types....................................................... 405Spare Tires — If Equipped ............................ 406
Wheel And Wheel Trim Care......................... 407
Snow Traction Devices ................................. 408
Tire Rotation Recommendations ................. 409
DEPARTMENT OF TRANSPORTATION
UNIFORM TIRE QUALITY GRADES .................... 410
Treadwear...................................................... 410
Traction Grades ............................................. 410Temperature Grades..................................... 410
STORING THE VEHICLE ....................................... 411
BODYWORK .......................................................... 411
Protection From Atmospheric Agents .......... 411
Body And Underbody Maintenance ............. 412
Preserving The Bodywork ............................. 412
INTERIORS ........................................................... 414
Carpet Safety Information ............................ 414
Carpet Removal............................................. 415Seats And Fabric Parts ................................. 416
Plastic And Coated Parts .............................. 417
Leather Surfaces........................................... 417
Glass Surfaces ............................................. 417
23_JT_OM_EN_USC_t.book Page 7
Page 17 of 448
15
GETTING TO KNOW YOUR VEHICLE
KEYS
KEY FOB
Your vehicle is equipped with a key fob which
supports Passive Entry, Remote Keyless Entry
(RKE), Keyless Enter ‘n Go™ (if equipped), and
Remote Start (if equipped). The key fob allows you to
lock or unlock the doors and tailgate from distances
up to approximately 66 ft (20 m). The key fob does
not need to be pointed at the vehicle to activate the
system. The key fob also contains a mechanical key.
NOTE:
The key fob’s wireless signal may be blocked if
the key fob is located next to a mobile phone,
laptop, or other electronic device. This may
result in poor performance.
With the ignition in the ON/RUN position, and
the vehicle moving at 2 mph (4 km/h), all RKE commands are disabled.
Key Fob
NOTE:
In case the ignition switch does not change with
the push of a button, the key fob may have a low
or fully depleted battery. A low key fob battery
condition may be indicated by a message in the
instrument cluster display, or by the LED light on
the key fob. If the LED key fob light no longer illu-
minates from key fob button pushes, then the
key fob battery requires replacement.
Improper disposal of key fob batteries may be
harmful to the environment. Please see an
authorized dealer for proper battery disposal
Ú page 432.
WARNING!
Push the Mechanical Key Release Button only
with the key fob facing away from your body,
especially your eyes and objects that may be
damaged, such as clothing.
CAUTION!
The electrical components inside of the key fob
may be damaged if the key fob is subjected to
strong electrical shocks. In order to ensure
complete effectiveness of the electronic devices
inside of the key fob, avoid exposing the key fob
to direct sunlight.
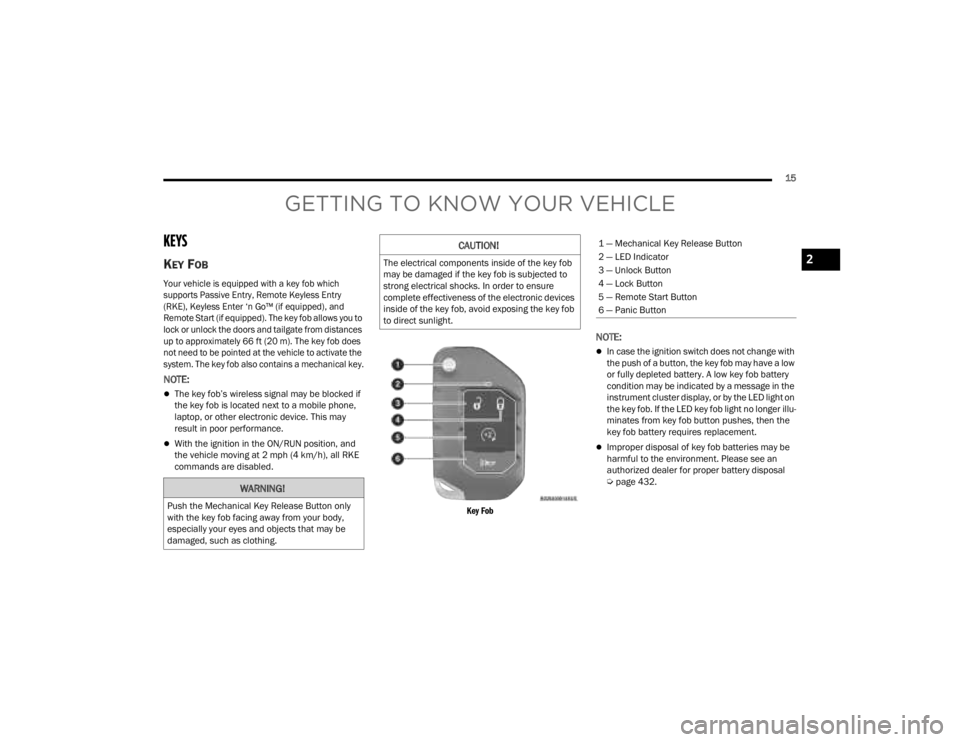
1 — Mechanical Key Release Button
2 — LED Indicator
3 — Unlock Button
4 — Lock Button
5 — Remote Start Button
6 — Panic Button
2
23_JT_OM_EN_USC_t.book Page 15
Page 27 of 448
GETTING TO KNOW YOUR VEHICLE25
(Continued)
POWER DOOR LOCKS — IF EQUIPPED
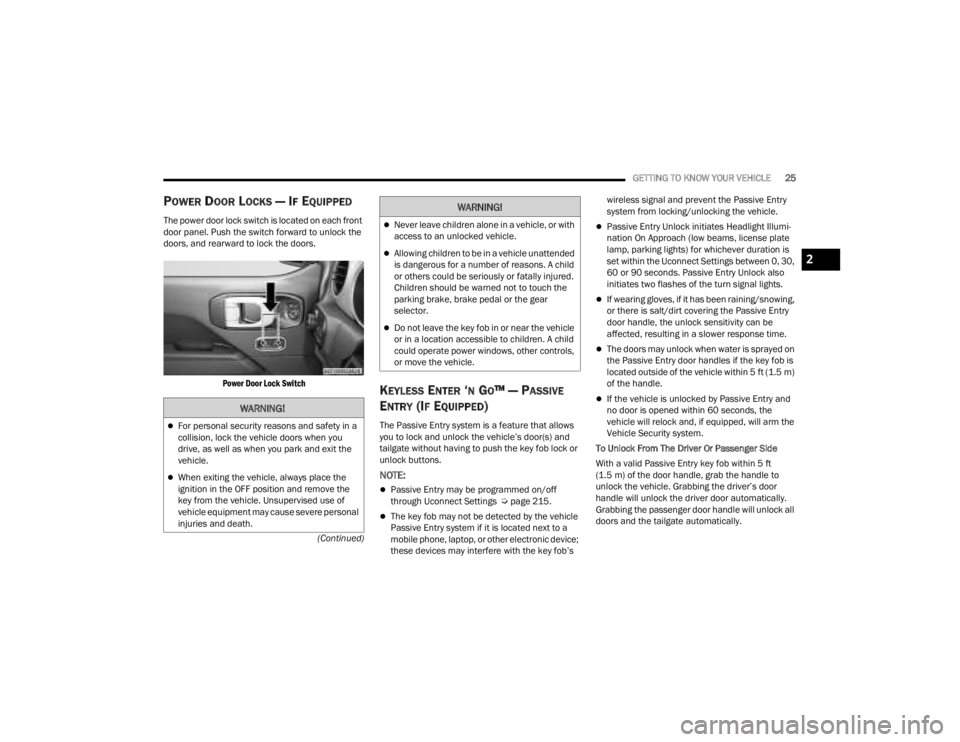
The power door lock switch is located on each front
door panel. Push the switch forward to unlock the
doors, and rearward to lock the doors.
Power Door Lock Switch
KEYLESS ENTER ‘N GO™ — PASSIVE
E
NTRY (IF EQUIPPED)
The Passive Entry system is a feature that allows
you to lock and unlock the vehicle’s door(s) and
tailgate without having to push the key fob lock or
unlock buttons.
NOTE:
Passive Entry may be programmed on/off
through Uconnect Settings Ú page 215.
The key fob may not be detected by the vehicle
Passive Entry system if it is located next to a
mobile phone, laptop, or other electronic device;
these devices may interfere with the key fob’s wireless signal and prevent the Passive Entry
system from locking/unlocking the vehicle.
Passive Entry Unlock initiates Headlight Illumi
-
nation On Approach (low beams, license plate
lamp, parking lights) for whichever duration is
set within the Uconnect Settings between 0, 30,
60 or 90 seconds. Passive Entry Unlock also
initiates two flashes of the turn signal lights.
If wearing gloves, if it has been raining/snowing,
or there is salt/dirt covering the Passive Entry
door handle, the unlock sensitivity can be
affected, resulting in a slower response time.
The doors may unlock when water is sprayed on
the Passive Entry door handles if the key fob is
located outside of the vehicle within 5 ft (1.5 m)
of the handle.
If the vehicle is unlocked by Passive Entry and
no door is opened within 60 seconds, the
vehicle will relock and, if equipped, will arm the
Vehicle Security system.
To Unlock From The Driver Or Passenger Side
With a valid Passive Entry key fob within 5 ft
(1.5 m) of the door handle, grab the handle to
unlock the vehicle. Grabbing the driver’s door
handle will unlock the driver door automatically.
Grabbing the passenger door handle will unlock all
doors and the tailgate automatically.WARNING!
For personal security reasons and safety in a
collision, lock the vehicle doors when you
drive, as well as when you park and exit the
vehicle.
When exiting the vehicle, always place the
ignition in the OFF position and remove the
key from the vehicle. Unsupervised use of
vehicle equipment may cause severe personal
injuries and death.
Never leave children alone in a vehicle, or with
access to an unlocked vehicle.
Allowing children to be in a vehicle unattended
is dangerous for a number of reasons. A child
or others could be seriously or fatally injured.
Children should be warned not to touch the
parking brake, brake pedal or the gear
selector.
Do not leave the key fob in or near the vehicle
or in a location accessible to children. A child
could operate power windows, other controls,
or move the vehicle.
WARNING!
2
23_JT_OM_EN_USC_t.book Page 25
Page 45 of 448
GETTING TO KNOW YOUR VEHICLE43
(Continued)
SEATS
Seats are a part of the Occupant Restraint system
of the vehicle.
MANUAL ADJUSTMENT FRONT SEATS
Manual Front Seat Forward/Rearward
Adjustment
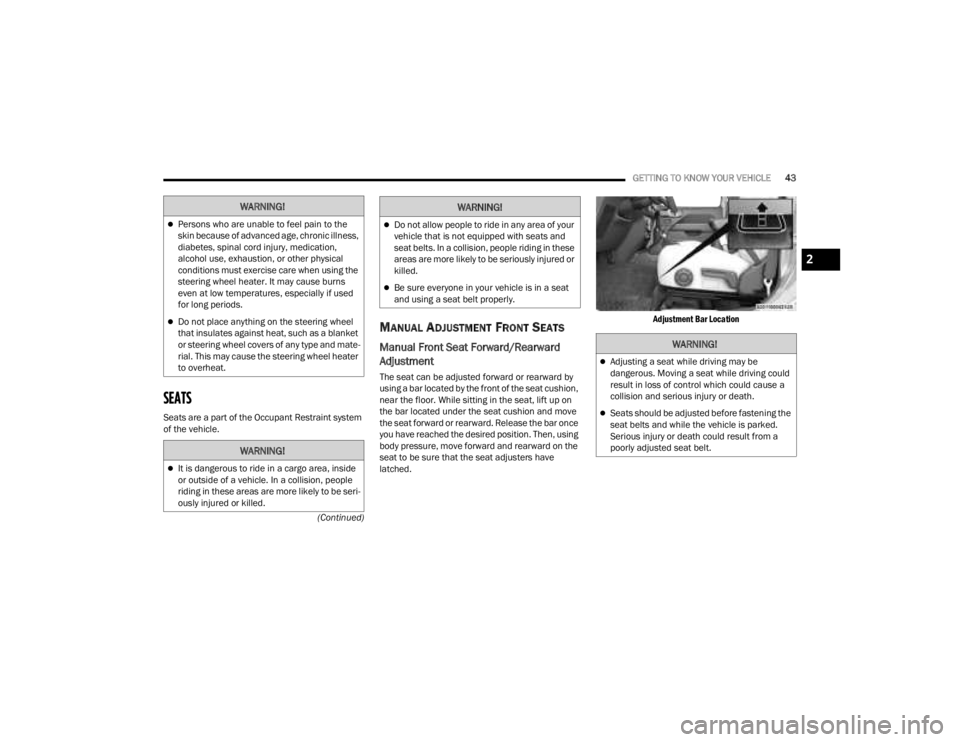
The seat can be adjusted forward or rearward by
using a bar located by the front of the seat cushion,
near the floor. While sitting in the seat, lift up on
the bar located under the seat cushion and move
the seat forward or rearward. Release the bar once
you have reached the desired position. Then, using
body pressure, move forward and rearward on the
seat to be sure that the seat adjusters have
latched.
Adjustment Bar Location
WARNING!
Persons who are unable to feel pain to the
skin because of advanced age, chronic illness,
diabetes, spinal cord injury, medication,
alcohol use, exhaustion, or other physical
conditions must exercise care when using the
steering wheel heater. It may cause burns
even at low temperatures, especially if used
for long periods.
Do not place anything on the steering wheel
that insulates against heat, such as a blanket
or steering wheel covers of any type and mate
-
rial. This may cause the steering wheel heater
to overheat.
WARNING!
It is dangerous to ride in a cargo area, inside
or outside of a vehicle. In a collision, people
riding in these areas are more likely to be seri -
ously injured or killed.
Do not allow people to ride in any area of your
vehicle that is not equipped with seats and
seat belts. In a collision, people riding in these
areas are more likely to be seriously injured or
killed.
Be sure everyone in your vehicle is in a seat
and using a seat belt properly.
WARNING!
WARNING!
Adjusting a seat while driving may be
dangerous. Moving a seat while driving could
result in loss of control which could cause a
collision and serious injury or death.
Seats should be adjusted before fastening the
seat belts and while the vehicle is parked.
Serious injury or death could result from a
poorly adjusted seat belt.
2
23_JT_OM_EN_USC_t.book Page 43
Page 49 of 448
GETTING TO KNOW YOUR VEHICLE47
HEATED SEATS — IF EQUIPPED
The heated seat control buttons are
located on the center instrument panel
below the touchscreen and also in the
Climate Control touchscreen menu.
Press the heated seat button once to turn the HI
setting on.
Press the heated seat button a second time to
turn the MED setting on.
Press the heated seat button a third time to turn
the LO setting on.
Press the heated seat button a fourth time to
turn the heating elements off.
NOTE:
The engine must be running for the heated
seats to operate.
The level of heat selected will stay on until the
operator changes it.
For information on use with the Remote Start
system, see Ú page 21.REAR SEAT ARMREST — IF EQUIPPED
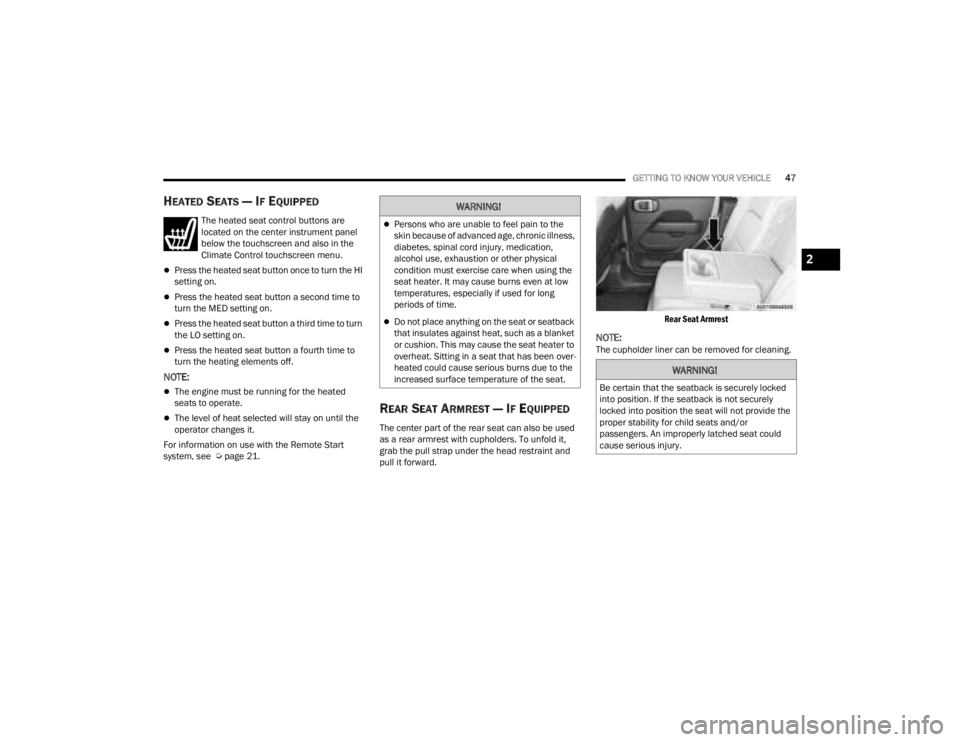
The center part of the rear seat can also be used
as a rear armrest with cupholders. To unfold it,
grab the pull strap under the head restraint and
pull it forward.
Rear Seat Armrest
NOTE:The cupholder liner can be removed for cleaning.
WARNING!
Persons who are unable to feel pain to the
skin because of advanced age, chronic illness,
diabetes, spinal cord injury, medication,
alcohol use, exhaustion or other physical
condition must exercise care when using the
seat heater. It may cause burns even at low
temperatures, especially if used for long
periods of time.
Do not place anything on the seat or seatback
that insulates against heat, such as a blanket
or cushion. This may cause the seat heater to
overheat. Sitting in a seat that has been over
-
heated could cause serious burns due to the
increased surface temperature of the seat.
WARNING!
Be certain that the seatback is securely locked
into position. If the seatback is not securely
locked into position the seat will not provide the
proper stability for child seats and/or
passengers. An improperly latched seat could
cause serious injury.
2
23_JT_OM_EN_USC_t.book Page 47
Page 54 of 448
52GETTING TO KNOW YOUR VEHICLE
POWER MIRRORS — IF EQUIPPED
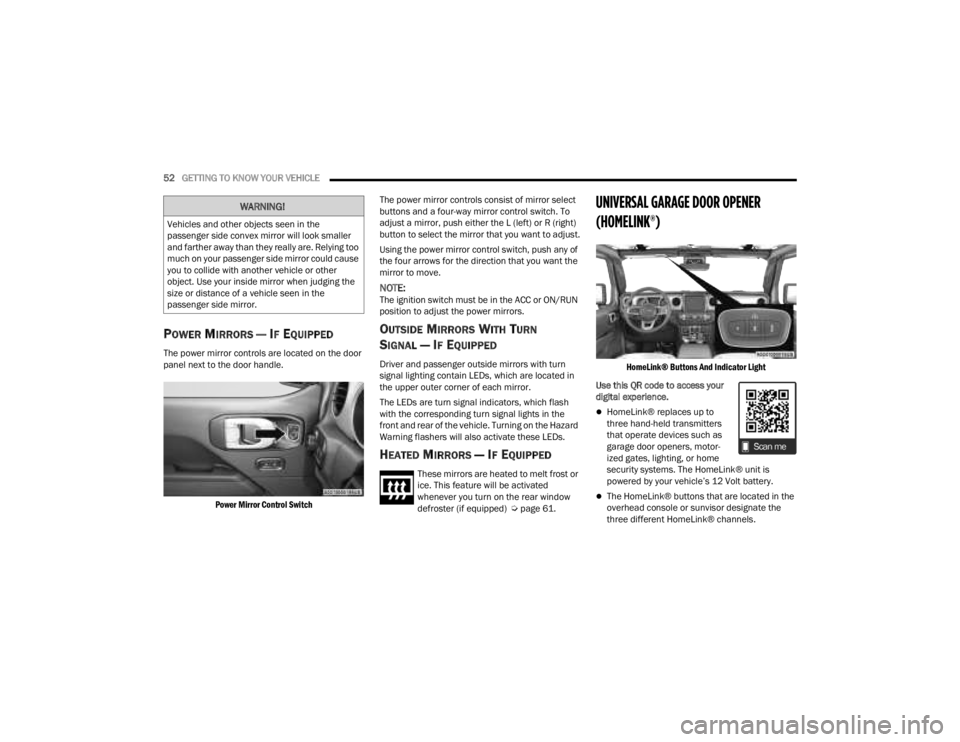
The power mirror controls are located on the door
panel next to the door handle.
Power Mirror Control Switch
The power mirror controls consist of mirror select
buttons and a four-way mirror control switch. To
adjust a mirror, push either the L (left) or R (right)
button to select the mirror that you want to adjust.
Using the power mirror control switch, push any of
the four arrows for the direction that you want the
mirror to move.
NOTE:The ignition switch must be in the ACC or ON/RUN
position to adjust the power mirrors.
OUTSIDE MIRRORS WITH TURN
SIGNAL — IF EQUIPPED
Driver and passenger outside mirrors with turn
signal lighting contain LEDs, which are located in
the upper outer corner of each mirror.
The LEDs are turn signal indicators, which flash
with the corresponding turn signal lights in the
front and rear of the vehicle. Turning on the Hazard
Warning flashers will also activate these LEDs.
HEATED MIRRORS — IF EQUIPPED
These mirrors are heated to melt frost or
ice. This feature will be activated
whenever you turn on the rear window
defroster (if equipped) Ú
page 61.
UNIVERSAL GARAGE DOOR OPENER
(HOMELINK®)
HomeLink® Buttons And Indicator Light
Use this QR code to access your
digital experience.
HomeLink® replaces up to
three hand-held transmitters
that operate devices such as
garage door openers, motor -
ized gates, lighting, or home
security systems. The HomeLink® unit is
powered by your vehicle’s 12 Volt battery.
The HomeLink® buttons that are located in the
overhead console or sunvisor designate the
three different HomeLink® channels.
WARNING!
Vehicles and other objects seen in the
passenger side convex mirror will look smaller
and farther away than they really are. Relying too
much on your passenger side mirror could cause
you to collide with another vehicle or other
object. Use your inside mirror when judging the
size or distance of a vehicle seen in the
passenger side mirror.
23_JT_OM_EN_USC_t.book Page 52
Page 79 of 448
GETTING TO KNOW YOUR VEHICLE77
NOTE:Please refer to the information on the bottom of
the Jeep® wireless speaker for electrical and
safety information before installing or operating
the Jeep® wireless speaker. Directive 2014/53/EU Article 10 Obligations of
Manufacturers
2. Manufacturers shall ensure that radio
equipment shall be so constructed that it can be
operated in at least one Member State without
infringing applicable requirements on the use of
radio spectrum.
10. In cases of restrictions on putting in to service
or of requirements for authorization of use,
information available on the packaging shall allow
the identification of the Member States or the
geographical area within a Member State where
restrictions on putting into service or requirements
for authorization of use exist. The Commission may
adopt implementing acts specifying how to present
that information. Those implementing acts shall be
adopted in accordance with the advisory
procedure referred to in Article 45 (2).
The Bluetooth® word mark and logos are
registered trademarks owned by Bluetooth SIG,
Inc. and any use of such marks by FCA US LLC is
under license. Other trademarks and trade names
are those of their respective owners.
POWER OUTLETS
There is a 12 Volt (13 A) auxiliary power outlet that
can provide power for accessories designed for
use with the standard power outlet adapters.
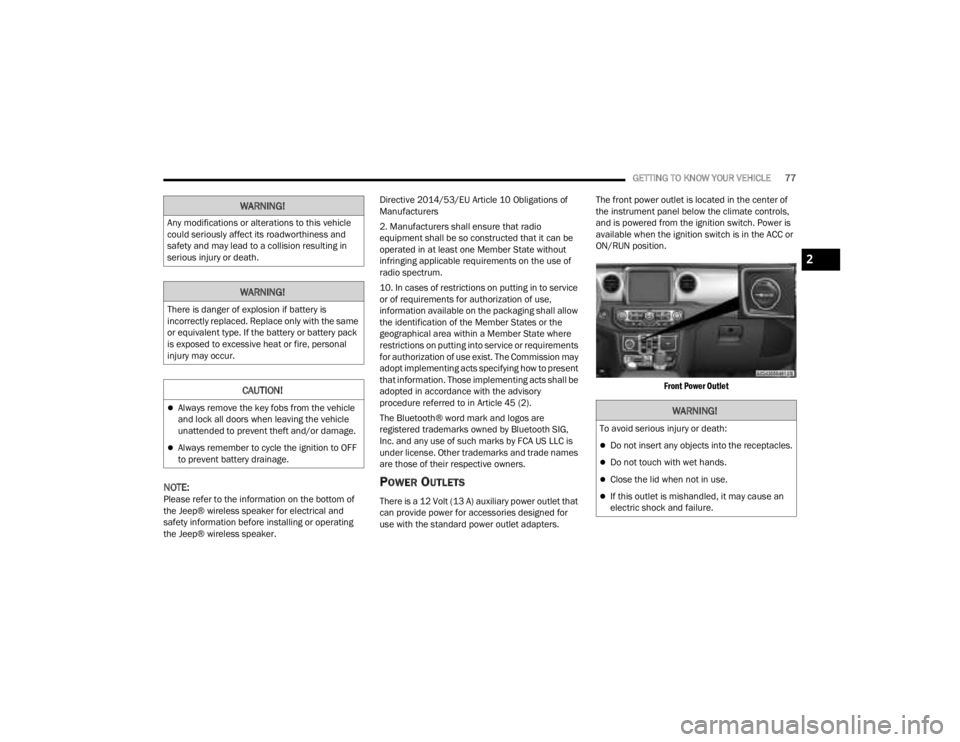
The front power outlet is located in the center of
the instrument panel below the climate controls,
and is powered from the ignition switch. Power is
available when the ignition switch is in the ACC or
ON/RUN position.
Front Power Outlet
WARNING!
Any modifications or alterations to this vehicle
could seriously affect its roadworthiness and
safety and may lead to a collision resulting in
serious injury or death.
WARNING!
There is danger of explosion if battery is
incorrectly replaced. Replace only with the same
or equivalent type. If the battery or battery pack
is exposed to excessive heat or fire, personal
injury may occur.
CAUTION!
Always remove the key fobs from the vehicle
and lock all doors when leaving the vehicle
unattended to prevent theft and/or damage.
Always remember to cycle the ignition to OFF
to prevent battery drainage.
WARNING!
To avoid serious injury or death:
Do not insert any objects into the receptacles.
Do not touch with wet hands.
Close the lid when not in use.
If this outlet is mishandled, it may cause an
electric shock and failure.
2
23_JT_OM_EN_USC_t.book Page 77
Page 136 of 448
134GETTING TO KNOW YOUR INSTRUMENT PANEL
Oil Pressure Warning Light
This warning light will illuminate, and a
chime will sound, to indicate low engine
oil pressure. If the light and chime turn on
while driving, safely stop the vehicle and
turn off the engine as soon as possible. After the
vehicle is safely stopped, restart the engine and
monitor the Oil Pressure Warning Light. If the Oil
Pressure Warning Light is still illuminated, turn the
engine OFF and contact an authorized dealer for
further assistance. Do not operate the vehicle until
the cause is corrected. If the light is no longer
illuminated, the engine can be operated but it is
recommended to take the vehicle to an authorized
dealer as soon as possible.
Do not operate the vehicle until the cause is
corrected. This light does not indicate how much oil
is in the engine. The engine oil level must be
checked under the hood.
Oil Temperature Warning Light
This warning light will illuminate to
indicate the engine oil temperature is
high. If the light turns on while driving,
stop the vehicle and shut off the engine
as soon as possible. Wait for oil temperature to
return to normal levels.
Seat Belt Reminder Warning Light
This warning light indicates when the
driver or passenger seat belt is
unbuckled. When the ignition is first
placed in the ON/RUN or ACC/ON/RUN
position and if the driver’s seat belt is unbuckled,
a chime will sound and the light will turn on. When
driving, if the driver or front passenger seat belt
remains unbuckled, the Seat Belt Reminder Light
will flash or remain on continuously and a chime
will sound Ú page 299.
Rear Seat Belt Reminder Indicator Light —
If Equipped With A Base Instrument
Cluster
This light indicates when a rear seat belt
is unbuckled in the second row. When
the ignition is first placed in the ON/RUN
or ACC/ON/RUN position, and if a seat
belt in the second row is unbuckled, a light
corresponding to the specific seat will turn on in
the upper right portion of the instrument cluster
display, momentarily replacing the configurable
corner information. If a second row seat belt that
was buckled at the start of the trip is unbuckled,
the Rear Seat Belt Reminder Light will change from
the buckled to the unbuckled symbol, and a chime
will sound Ú page 299.
Transmission Temperature Warning
Light — If Equipped
This warning light will illuminate to warn of
a high transmission fluid temperature.
This may occur with strenuous usage such
as trailer towing. If this light turns on, stop
the vehicle and run the engine at idle or slightly
faster, with the transmission in PARK (P) or NEUTRAL
(N), until the light turns off. Once the light turns off,
you may continue to drive normally. If Manual
transmission equipped, this warning will illuminate
to warn of high clutch temperature. This may occur
with driver misuse of clutch pedal or resting foot on
the clutch pedal or partially engaging the clutch for
longer duration. If the light turns on, it will be with an
additional CLUTCH HOT message. Stop the vehicle
safely and run the engine at idle with transmission
gear in NEUTRAL (N) until the light turns off. Once the
light turns off, follow the message displayed in the
instrument cluster.
23_JT_OM_EN_USC_t.book Page 134
Page 139 of 448
GETTING TO KNOW YOUR INSTRUMENT PANEL137
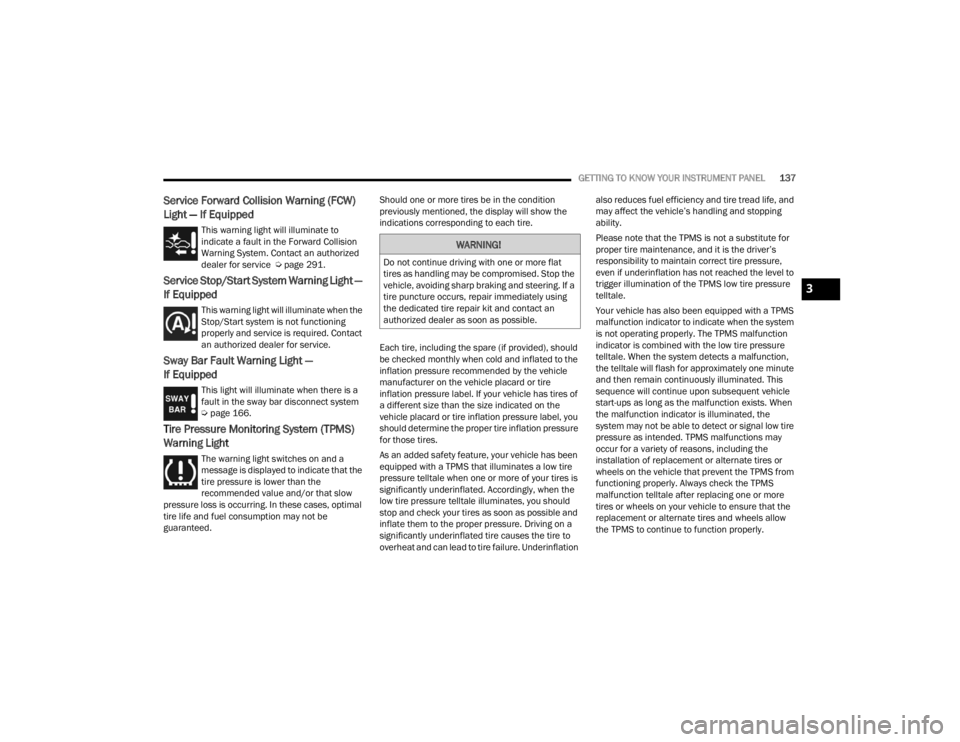
Service Forward Collision Warning (FCW)
Light — If Equipped
This warning light will illuminate to
indicate a fault in the Forward Collision
Warning System. Contact an authorized
dealer for service Úpage 291.
Service Stop/Start System Warning Light —
If Equipped
This warning light will illuminate when the
Stop/Start system is not functioning
properly and service is required. Contact
an authorized dealer for service.
Sway Bar Fault Warning Light —
If Equipped
This light will illuminate when there is a
fault in the sway bar disconnect system
Úpage 166.
Tire Pressure Monitoring System (TPMS)
Warning Light
The warning light switches on and a
message is displayed to indicate that the
tire pressure is lower than the
recommended value and/or that slow
pressure loss is occurring. In these cases, optimal
tire life and fuel consumption may not be
guaranteed. Should one or more tires be in the condition
previously mentioned, the display will show the
indications corresponding to each tire.
Each tire, including the spare (if provided), should
be checked monthly when cold and inflated to the
inflation pressure recommended by the vehicle
manufacturer on the vehicle placard or tire
inflation pressure label. If your vehicle has tires of
a different size than the size indicated on the
vehicle placard or tire inflation pressure label, you
should determine the proper tire inflation pressure
for those tires.
As an added safety feature, your vehicle has been
equipped with a TPMS that illuminates a low tire
pressure telltale when one or more of your tires is
significantly underinflated. Accordingly, when the
low tire pressure telltale illuminates, you should
stop and check your tires as soon as possible and
inflate them to the proper pressure. Driving on a
significantly underinflated tire causes the tire to
overheat and can lead to tire failure. Underinflation also reduces fuel efficiency and tire tread life, and
may affect the vehicle’s handling and stopping
ability.
Please note that the TPMS is not a substitute for
proper tire maintenance, and it is the driver’s
responsibility to maintain correct tire pressure,
even if underinflation has not reached the level to
trigger illumination of the TPMS low tire pressure
telltale.
Your vehicle has also been equipped with a TPMS
malfunction indicator to indicate when the system
is not operating properly. The TPMS malfunction
indicator is combined with the low tire pressure
telltale. When the system detects a malfunction,
the telltale will flash for approximately one minute
and then remain continuously illuminated. This
sequence will continue upon subsequent vehicle
start-ups as long as the malfunction exists. When
the malfunction indicator is illuminated, the
system may not be able to detect or signal low tire
pressure as intended. TPMS malfunctions may
occur for a variety of reasons, including the
installation of replacement or alternate tires or
wheels on the vehicle that prevent the TPMS from
functioning properly. Always check the TPMS
malfunction telltale after replacing one or more
tires or wheels on your vehicle to ensure that the
replacement or alternate tires and wheels allow
the TPMS to continue to function properly.
WARNING!
Do not continue driving with one or more flat
tires as handling may be compromised. Stop the
vehicle, avoiding sharp braking and steering. If a
tire puncture occurs, repair immediately using
the dedicated tire repair kit and contact an
authorized dealer as soon as possible.
3
23_JT_OM_EN_USC_t.book Page 137