fuel type JEEP GRAND CHEROKEE 2008 WK / 3.G Owners Manual
[x] Cancel search | Manufacturer: JEEP, Model Year: 2008, Model line: GRAND CHEROKEE, Model: JEEP GRAND CHEROKEE 2008 WK / 3.GPages: 490, PDF Size: 6.86 MB
Page 277 of 490

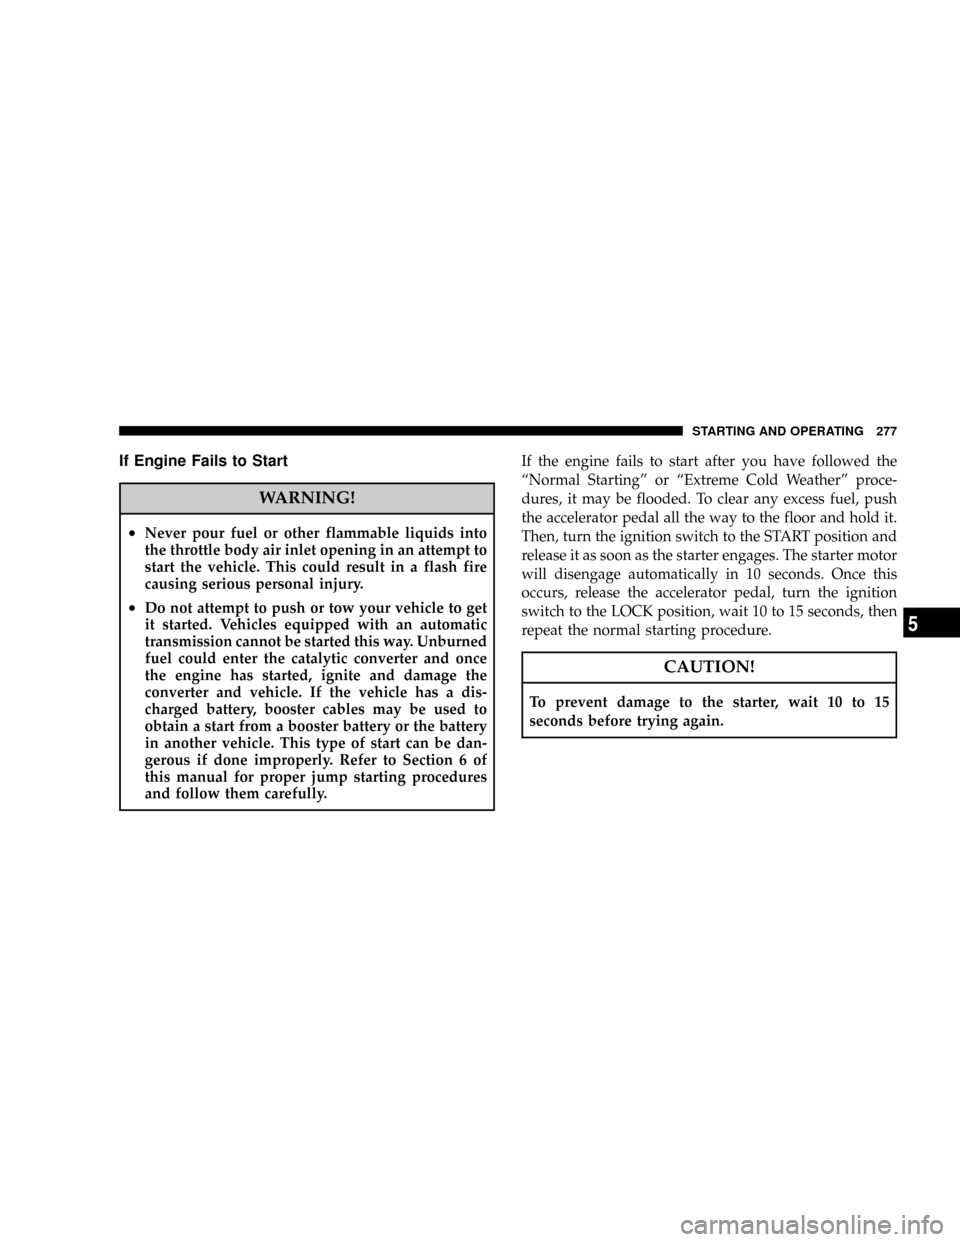
If Engine Fails to Start
WARNING!
²Never pour fuel or other flammable liquids into
the throttle body air inlet opening in an attempt to
start the vehicle. This could result in a flash fire
causing serious personal injury.
²Do not attempt to push or tow your vehicle to get
it started. Vehicles equipped with an automatic
transmission cannot be started this way. Unburned
fuel could enter the catalytic converter and once
the engine has started, ignite and damage the
converter and vehicle. If the vehicle has a dis-
charged battery, booster cables may be used to
obtain a start from a booster battery or the battery
in another vehicle. This type of start can be dan-
gerous if done improperly. Refer to Section 6 of
this manual for proper jump starting procedures
and follow them carefully.If the engine fails to start after you have followed the
ªNormal Startingº or ªExtreme Cold Weatherº proce-
dures, it may be flooded. To clear any excess fuel, push
the accelerator pedal all the way to the floor and hold it.
Then, turn the ignition switch to the START position and
release it as soon as the starter engages. The starter motor
will disengage automatically in 10 seconds. Once this
occurs, release the accelerator pedal, turn the ignition
switch to the LOCK position, wait 10 to 15 seconds, then
repeat the normal starting procedure.
CAUTION!
To prevent damage to the starter, wait 10 to 15
seconds before trying again.
STARTING AND OPERATING 277
5
Page 281 of 490

If temperatures are below 32ÉF (0ÉC), operate the engine
at moderate speeds for 5 minutes before full loads are
applied.
Engine Idling - In Cold Weather
Avoid prolonged idling in ambient temperatures below
0ÉF (-18ÉC). Long periods of idling may be harmful to
your engine because combustion chamber temperatures
can drop so low that the fuel may not burn completely.
Incomplete combustion allows carbon and varnish to
form on piston rings and injector nozzles. Also, the
unburned fuel can enter the crankcase, diluting the oil
and causing rapid wear to the engine.
Stopping The Engine
Before turning off your turbo diesel engine, always
allow the engine to return to normal idle speed and runfor several seconds. This assures proper lubrication of
the turbocharger. This is particularly necessary after
any period of hard driving.
Idle the engine a few minutes before routine shutdown.
After full load operation, idle the engine 3 to 5 minutes
before shutting it down. This idle period will allow the
lubricating oil and coolant to carry excess heat away from
the combustion chamber, bearings, internal components,
and turbocharger. This is especially important for turbo-
charged, charge air cooled engines.
The following chart should be used as a guide in deter-
mining the amount of engine idle time required to
sufficiently cool down the turbocharger before shut
down, depending upon the type of driving and the
amount of cargo.
STARTING AND OPERATING 281
5
Page 319 of 490

2. EconomyÐ
Improper inflation pressures can cause uneven wear
patterns to develop across the tire tread. These abnormal
wear patterns will reduce tread life resulting in a need for
earlier tire replacement. Under inflation also increases
tire rolling resistance and results in higher fuel consump-
tion.
3. Ride Comfort and Vehicle StabilityÐ
Proper tire inflation contributes to a comfortable ride.
Over inflation produces a jarring and uncomfortable ride.
Both under inflation and over inflation affect the stability
of the vehicle and can produce a feeling of sluggish
response or over responsiveness in the steering.
Unequal tire pressures can cause erratic and unpredict-
able steering response.
Unequal tire pressure from side to side may cause the
vehicle to drift left or right.Tire Inflation Pressures
The proper cold tire inflation pressure is listed on either
the face of the driver's door or the driver's side ªBº pillar.
The pressure should be checked and adjusted as well as
inspecting for signs of tire wear or visible damage at least
once a month. Use a good quality pocket-type gauge to
Tire Placard Location
STARTING AND OPERATING 319
5
Page 328 of 490

Telltale Lightº will turn OFF only after the tires have been
inflated to the vehicle's recommended cold tire pressure
value.
CAUTION!
The TPMS has been optimized for the original
equipment tires and wheels. TPMS pressures have
been established for the tire size equipped on your
vehicle. Undesirable system operation or sensor
damage may result when using replacement equip-
ment that is not of the same size, type, and/or style.
Aftermarket wheels can cause sensor damage. Do not
use aftermarket tire sealants or balance beads if your
vehicle is equipped with a TPMS, as damage to the
sensors may result.
CAUTION!
After inspecting or adjusting the tire pressure always
reinstall the valve stem cap. This will prevent mois-
ture and dirt from entering the valve stem, which
could damage the Tire Pressure Monitoring Sensor.
NOTE:
²The TPMS is not intended to replace normal tire care
and maintenance, or to provide warning of a tire
failure or condition.
²The TPMS should not be used as a tire pressure gauge
while adjusting your tire pressure.
²Driving on a significantly under-inflated tire causes
the tire to overheat and can lead to tire failure.
Under-inflation also reduces fuel efficiency and tire
tread life, and may affect the vehicle's handling and
stopping ability.
328 STARTING AND OPERATING
Page 412 of 490

²Make sure that the radiator and coolant recovery
bottle hoses are not kinked or obstructed.
²Keep the front of the radiator clean. If your vehicle is
equipped with air conditioning, keep the front of the
condenser clean, also.
²Do not change the thermostat for summer or winter
operation. If replacement is ever necessary, install
ONLY the correct type thermostat. Other designs may
result in unsatisfactory cooling performance, poor gas
mileage, and increased emissions.
Hoses and Vacuum/Vapor Harnesses
Inspect surfaces of hoses and nylon tubing for evidence
of heat and mechanical damage. Hard or soft spots,
brittle rubber, cracking, tears, cuts, abrasions, and exces-
sive swelling indicate deterioration of the rubber.Pay particular attention to the hoses nearest to high heat
sources such as the exhaust manifold. Inspect hose rout-
ing to be sure hoses do not touch any heat source or
moving component that may cause heat damage or
mechanical wear.
Insure nylon tubing in these areas has not melted or
collapsed. Inspect all hose connections such as clamps
and couplings to make sure they are secure and no leaks
are present. Components should be replaced immedi-
ately if there is any evidence of degradation that could
cause failure.Fuel System Connections
Electronic Fuel Injection high pressure fuel systems are
designed with tubes and special connects, connections
and clamps which have unique material characteristics to
provide adequate sealing and resist attack by deterio-
rated gasoline.
412 MAINTAINING YOUR VEHICLE
Page 471 of 490

Fluid Type........................... 417
Special Additives...................... 417
Torque Converter...................... 291
Autostick............................. 287
Auxiliary Electrical Outlet (Power Outlet)...... 168
Auxiliary Power Outlet................... 168
Battery............................... 401
Emergency Starting..................... 378
Keyless Transmitter Replacement (RKE)....... 25
Saving Feature (Protection)............... 124
Belts, Drive............................ 398
Belts, Seat.............................. 37
Body Mechanism Lubrication............... 405
B-Pillar Location........................ 314
Brake Assist System...................... 140
Brake Control System, Electronic............. 138
Brake Fluid............................ 414
Brake System........................... 413Anti-Lock (ABS)....................138,305
Fluid Check.......................... 414
Hoses.............................. 413
Master Cylinder....................... 414
Parking............................. 304
Warning Light........................ 188
Brake/Transmission Interlock............... 285
Break-In Recommendations, New Vehicle........ 68
Bulb Replacement.....................434,435
Calibration, Compass..................... 205
Camera, Rear........................... 156
Capacities, Fluid........................ 440
Caps, Filler
Fuel................................ 346
Radiator (Coolant Pressure)............... 409
Car Washes............................ 422
Carbon Monoxide Warning...............69,340
Cargo Area Cover....................... 173
INDEX 471
10
Page 490 of 490

INTRODUCTION INTRODUCTION ROLLOVER WARNING HOW TO USE THIS MANUAL WARNINGS AND CAUTIONS VEHICLE IDENTIFICATION NUMBER VEHICLE MODIFICATIONS/ALTERATIONS THINGS TO KNOW BEFORE STARTING YOUR VEHICLE A WORD
ABOUT YOUR KEYS Wireless Ignition Node (WIN)Fob with Integrated Key (FOBIK)Ignition Key RemovalKey-In-Ignition ReminderSENTRY KEY Replacement KeysCustomer Key (Fob) ProgrammingGeneral InformationSECURITY ALARM SYSTEM - IF EQUIPPED To Set
the AlarmTo Disarm the SystemILLUMINATED ENTRY REMOTE KEYLESS ENTRY To Unlock the DoorsTo Lock the DoorsTo Release the Liftgate Flipper GlassUsing The Panic AlarmProgramming Additional TransmittersTransmitter Battery ServiceGeneral Information
REMOTE STARTING SYSTEM - IF EQUIPPED DOOR LOCKS Manual Door LocksPower Door LocksChild Protection Door LockWINDOWS Power WindowsWind BuffetingLIFTGATE Liftgate Flipper GlassOCCUPANT RESTRAINTS Lap/Shoulder BeltsLap/Shoulder Belt
Operating InstructionsAdjustable Upper Shoulder Belt AnchorageAutomatic Locking Mode - If EquippedEnergy Management FeatureSeat Belt PretensionersEnhanced Seat Belt Use Reminder System (BeltAlert)Seat Belts and Pregnant WomenSeat Belt ExtenderDriver And
Front Passenger Supplemental Restraint Systems (SRS) Child RestraintENGINE BREAK-IN RECOMMENDATIONS SAFETY TIPS Exhaust GasSafety Checks You Should Make Inside The VehicleSafety Checks You Should Make Outside The VehicleUNDERSTANDING
THE FEATURES OF YOUR VEHICLE MIRRORS Inside Day/Night MirrorAutomatic Dimming Mirror - If EquippedOutside MirrorsExterior Mirrors Folding FeatureDrivers and Front Passenger Outside Automatic Dimming Mirror - If EquippedPower Remote Control Mirrors
- If EquippedHeated Remote Control Mirrors - If EquippedLighted Vanity Mirrors - If EquippedHANDS-FREE COMMUNICATION (UConnect) - IF EQUIPPED OperationPhone Call FeaturesUConnect System FeaturesAdvanced Phone ConnectivityThings You Should Know
About Your UConnect SystemGeneral InformationSEATS Front Manual Seat AdjustmentFront Seat Adjustment - ReclineManual Lumbar Support Adjustment8 - Way Drivers Power Seat4 - Way Passengers Power Seat - If EquippedHead RestraintsFront Heated Seats-If
EquippedRear Heated Seats - If Equipped60/40 Split Rear SeatDRIVER MEMORY SEAT - IF EQUIPPED Setting Memory Positions and Linking Remote Keyless Entry Transmitter to MemoryMemory Position RecallTo Disable A Transmitter Linked to MemoryEasy Entry/Exit
SeatTO OPEN AND CLOSE THE HOOD LIGHTS Multi-Function Control LeverBattery Saver Feature-Exterior/Interior LightsHeadlights and Parking LightsAutomatic Headlight System - If EquippedSmartBeams - If EquippedInstrument Panel and Interior LightsDaytime Running
Lights - If EquippedAutomatic Headlight Leveling - HID Headlights OnlyLights-On ReminderFog Lights - If EquippedTurn SignalsHigh Beam SwitchPassing LightHeadlight Time DelayInterior LightsFront Map/Reading LightsWINDSHIELD WIPERS AND WASHERS MistSpeed
Sensitive Intermittent Wiper SystemRain Sensing Wipers-If EquippedTILT/TELESCOPING STEERING COLUMN ADJUSTABLE PEDALS - IF EQUIPPED ELECTRONICSPEED CONTROL - IF EQUIPPED Electronic Speed Control OperationTo ActivateTo Set At A Desired
SpeedTo DeactivateTo Resume SpeedTo Vary The Speed SettingTo Accelerate For PassingELECTRONIC BRAKE CONTROL SYSTEM ABS (Anti-Lock Brake System)TCS (Traction Control System)BAS (Brake Assist System)ERM (Electronic Roll Mitigation)ESP (Electronic
Stability Program)TSC (Trailer Sway Control)HSA (Hill Start Assist) (4WD Models with NV245 Two-Speed Transfer Case Only)HDC (Hill Descent Control) (4WD Models with NV245 Two-Speed Transfer Case Only)ESP/BAS Warning Lamp and ESP/TCS Indicator LightREAR
PARK ASSIST SYSTEM- IF EQUIPPED Rear Park Assist SensorsRear Park Assist Warning DisplayEnable/Disable the Rear Park Assist SystemService the RearPark Assist SystemCleaning the Rear Park Assist SystemREAR CAMERA - IF EQUIPPED Turning the Rear
Camera OnTurning the Rear Camera OffOVERHEAD CONSOLE Courtesy/Reading LightsSunglasses StorageGARAGE DOOR OPENER - IF EQUIPPED Programming HomeLinkGate Operator/Canadian ProgrammingUsing HomeLinkReprogramming a Single HomeLink
ButtonSecurityTroubleshooting TipsGeneral InformationPOWER SUNROOF - IF EQUIPPED Opening Sunroof - ExpressClosing Sunroof - ExpressPinch Protect FeaturePinch Protect OverrideVenting Sunroof - ExpressSunshade OperationWind BuffetingSunroof Maintenance
Ignition Off OperationSunroof Fully ClosedPOWER OUTLETS Front Power OutletRear Power Outlet - If EquippedPOWER INVERTER - IF EQUIPPED CUP HOLDERS CARGO AREA FEATURES Cargo LightRear Storage CompartmentRetractable Cargo Area Cover - If
EquippedCargo Tie-Down HooksCargo Load FloorREAR WINDOW FEATURES Rear Window Wiper/Washer - If EquippedRear Window Defroster - If EquippedROOF LUGGAGE RACK - IF EQUIPPED UNDERSTANDING YOUR INSTRUMENT PANEL INSTRUMENT PANEL
AND CONTROLS INSTRUMENT CLUSTER Gasoline Engine Diesel Engine INSTRUMENT CLUSTER DESCRIPTION ELECTRONIC VEHICLE INFORMATION CENTER (EVIC) Electronic Vehicle Information Center (EVIC) DisplaysEngine Oil Change Indicator System
Trip FunctionsCompass DisplayPersonal Settings (Customer Programmable Features)System StatusRADIO GENERAL INFORMATION Radio Broadcast SignalsTwo Types of SignalsElectrical DisturbancesAM ReceptionFM ReceptionSALES CODE REQ - AM/FM STEREO
RADIO AND 6-DISC CD/DVD CHANGER (MP3/WMA AUX JACK) Operating Instructions - Radio ModeOperation Instructions - (DISC MODE for CD and MP3/WMA Audio Play, DVD-VIDEO)Notes On Playing MP3/WMA FilesLIST Button (DISC Mode for MP3/WMA Play)
INFO Button (DISC Mode for MP3/WMA Play)SALES CODE RES - AM/FM STEREO RADIO WITH CD PLAYER (MP3 AUX JACK) Operating Instructions - Radio ModeOperationInstructions - CD MODE for CD and MP3 Audio PlayNotes On Playing MP3 FilesLIST Button
(CD Mode for MP3 Play)INFO Button (CD Mode for MP3 Play)SALES CODE REN - MULTIMEDIA SYSTEM - IF EQUIPPED Operating Instructions - Satellite Radio (If Equipped)Operating Instructions - Hands-Free Communication (UConnect) (If Equipped)Clock Setting
ProcedureSALES CODE RER - AM/FM/CD/DVD RADIO WITH NAVIGATION SYSTEM - IF EQUIPPED Operating Instructions - Satellite RadioClock Setting ProcedureUNIVERSAL CONSUMER INTERFACE (UCI) - IF EQUIPPED Connecting the iPodControlling the iPod
using Radio ButtonsPlay ModeList or Browse ModeSATELLITE RADIO (RSC) - IF EQUIPPED (REQ AND RES RADIOS ONLY) System ActivationElectronic Serial Number/Sirius Identification Number (ENS/SID)Selecting Satellite ModeSatellite AntennaReception Quality
Operating Instructions - Satellite ModeOperating Instructions - Hands Free Phone (If Equipped)Operating Instructions - Video Entertainment System (VES) (If Equipped)VIDEO ENTERTAINMENT SYSTEM (SALES CODE XRV) - IF EQUIPPED REMOTE SOUND SYSTEM
CONTROLS - IF EQUIPPED Radio OperationCD PlayerCD/DVD DISC MAINTENANCE RADIO OPERATION AND CELLULAR PHONES CLIMATE CONTROLS Manual Air Conditioning and Heating System - If EquippedAutomatic Temperature Control - If EquippedOperating
TipsOperating Tips Chart STARTING AND OPERATING STARTING PROCEDURE Normal Starting - Gasoline EnginesExtremely Cold Weather (below -20 degrees F or -29 degrees C)If Engine Fails to StartAfter StartingNormal Starting - Diesel EnginesENGINE BLOCK
HEATER - IF EQUIPPED AUTOMATIC TRANSMISSION Shift Lock Manual Override - If EquippedBrake/Transmission Interlock System5-Speed Automatic TransmissionGear RangesRocking the VehicleFOUR-WHEEL DRIVE OPERATION Quadra-Trac I Operating
Instructions/Precautions - If EquippedQuadra-Trac II Operating Instructions/Precautions - If EquippedShift PositionsShifting ProceduresQuadra-Drive II System - If EquippedON-ROAD DRIVING TIPS OFF-ROAD DRIVING TIPS When To Use 4WD LOW Range - If Equipped
Driving Through WaterDriving In Snow, Mud and SandHill ClimbingTraction DownhillAfter Driving Off-RoadPARKING BRAKE ANTI-LOCK BRAKE SYSTEM POWER STEERING MULTI DISPLACEMENT SYSTEM (MDS) - 5.7L Engine Only TIRE SAFETY INFORMATION
Tire Markings Tire Identification Number (TIN)Tire Loading and Tire PressureTIRES - GENERAL INFORMATION Tire PressureTire Inflation PressuresTire Pressures for High Speed OperationRadial-Ply TiresTire SpinningTread Wear IndicatorsLife of TireReplacement Tires
Alignment and BalanceTIRE CHAINS TIRE ROTATION RECOMMENDATIONS TIRE PRESSURE MONITOR SYSTEM (TPMS) Base System - If EquippedPremium System - If EquippedGeneral InformationFUEL REQUIREMENTS 3.7/4.7L Engines (If Equipped)5.7L Engines
(If Equipped)Reformulated GasolineGasoline/Oxygenate BlendsMMT In GasolineMaterials Added To FuelFuel System CautionsCarbon Monoxide WarningsFLEXIBLE FUEL (4.7L ENGINE ONLY) - IF EQUIPPED E-85 General InformationETHANOL FUEL (E-85)Fuel
RequirementsSelection Of Engine Oil For Flexible Fuel Vehicles (E-85) and Gasoline VehiclesStartingCruising RangeReplacement PartsFUEL REQUIREMENTS (DIESEL ENGINES) ADDING FUEL Fuel Filler Cap (Gas Cap)VEHICLE LOADING Certification LabelTRAILER
TOWING Common Towing DefinitionsTrailer Hitch ClassificationTrailer Towing Weights (Maximum Trailer Weight Ratings)Trailer and Tongue WeightTowing RequirementsTowing TipsRECREATIONAL TOWING (BEHIND MOTORHOME, ETC.) Towing - 2WD ModelsTowing
- Quadra-Trac I (Single-Speed Transfer Case) 4WD ModelsTowing - Quadra-Trac II /Quadra-Drive II 4WD ModelsSNOW PLOW WHAT TO DO IN EMERGENCIES HAZARDWARNING FLASHERS IF YOUR ENGINE OVERHEATS JACKING AND TIRE CHANGING Jack
LocationSpare Tire StowageSpare Tire RemovalPreparations For JackingJacking InstructionsJUMP STARTING EMERGENCY TOW HOOKS - IF EQUIPPED TOWINGA DISABLED VEHICLE 2WD Models Only4WD Models OnlyMAINTAINING YOUR VEHICLE ENGINE
COMPARTMENT - 3.7L ENGINE COMPARTMENT - 4.7L ENGINE COMPARTMENT - 5.7L ENGINE COMPARTMENT - 3.0L DIESEL ONBOARD DIAGNOSTIC SYSTEM - OBD II Loose Fuel Filler Cap MessageEMISSIONS INSPECTION AND MAINTENANCE PROGRAMS
REPLACEMENT PARTS DEALER SERVICE MAINTENANCE PROCEDURES Engine OilDrive Belts - Check Condition and TensionSpark PlugsSpark Plug WiresEngine AirCleaner FilterCatalytic ConverterCrankcase Emission Control SystemMaintenance-Free BatteryAir
Conditioner MaintenancePower Steering Fluid CheckBody LubricationWindshield Wiper BladesWindshield Washers - Front and RearExhaust SystemCooling SystemHoses and Vacuum/Vapor HarnessesFuel System ConnectionsBrake SystemFront/Rear Axle FluidTransfer
CaseAutomatic TransmissionMaintenance After Off-Road DrivingAppearance Care And Protection From CorrosionFUSE PANEL Interior FusesUnderhoodFuses (Power Distribution Center) Underhood Fuses (Integrated Power Module) VEHICLE STORAGE REPLACEMENT
BULBS BULB REPLACEMENT High Intensity Discharge Headlights (HID) - If EquippedHead LightFront Turn SignalFront Fog LightRear Tail, Stop, Turn Signal, and Back-Up LightsCenter High Mounted Stop Light (CHMSL)FLUIDS AND CAPACITIES FLUIDS, LUBRICANTS,
AND GENUINE PARTS EngineChassisMAINTENANCE SCHEDULES EMISSION CONTROL SYSTEM MAINTENANCE MAINTENANCE SCHEDULE - GASOLINE ENGINES Required Maintenance IntervalsMAINTENANCE SCHEDULES - DIESEL ENGINE Schedule B
- Diesel EngineSchedule A - Diesel EngineIF YOU NEED CONSUMER ASSISTANCE SUGGESTIONS FOR OBTAINING SERVICE FOR YOUR VEHICLE Prepare For The AppointmentPrepare A ListBe Reasonable With RequestsIF YOU NEED ASSISTANCE WARRANTY
INFORMATION (U.S. Vehicles Only) MOPAR PARTS REPORTING SAFETY DEFECTS In CanadaPUBLICATION ORDER FORMS DEPARTMENT OF TRANSPORTATION UNIFORM TIREQUALITY GRADES TreadwearTraction GradesTemperature GradesINDEX