warning JEEP GRAND CHEROKEE 2010 Owner handbook (in English)
[x] Cancel search | Manufacturer: JEEP, Model Year: 2010, Model line: GRAND CHEROKEE, Model: JEEP GRAND CHEROKEE 2010Pages: 350, PDF Size: 4.58 MB
Page 110 of 350
WARNING!
Be sure the hood is fully latched before driving
your vehicle. If the hood is not fully latched, it
could open when the vehicle is in motion and
block your vision. Failure to follow this warn-
ing could result in serious injury or death.
LIGHTS
Headlight Switch
The headlight switch is located on the left side
of the instrument panel, next to the steering
wheel. The headlight switch controls the opera-
tion of the headlights, parking lights, instrument
panel lights, cargo lights and fog lights (if
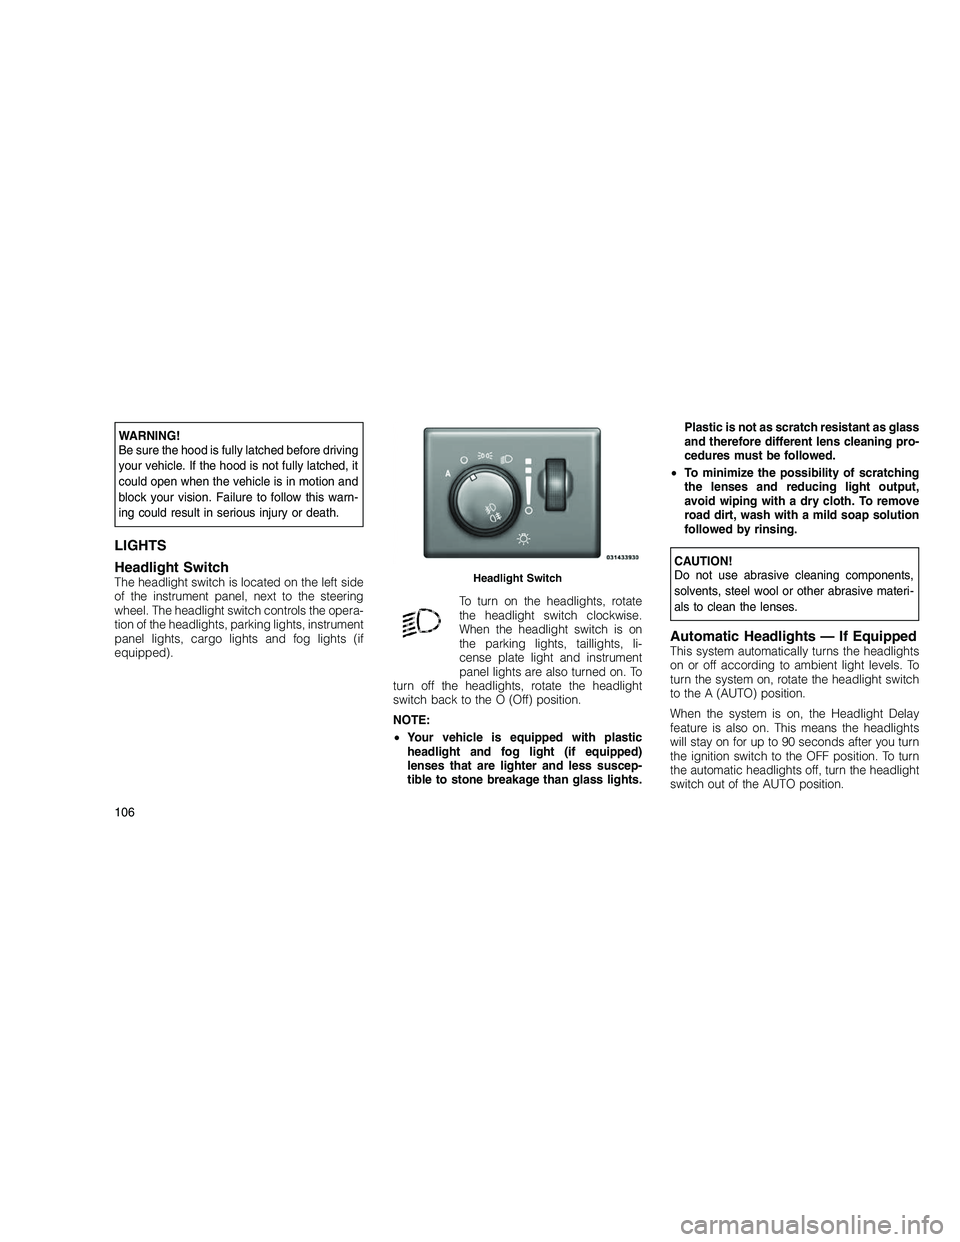
equipped).To turn on the headlights, rotate
the headlight switch clockwise.
When the headlight switch is on
the parking lights, taillights, li-
cense plate light and instrument
panel lights are also turned on. To
turn off the headlights, rotate the headlight
switch back to the O (Off) position.
NOTE:
• Your vehicle is equipped with plastic
headlight and fog light (if equipped)
lenses that are lighter and less suscep-
tible to stone breakage than glass lights. Plastic is not as scratch resistant as glass
and therefore different lens cleaning pro-
cedures must be followed.
• To minimize the possibility of scratching
the lenses and reducing light output,
avoid wiping with a dry cloth. To remove
road dirt, wash with a mild soap solution
followed by rinsing.
CAUTION!
Do not use abrasive cleaning components,
solvents, steel wool or other abrasive materi-
als to clean the lenses.
Automatic Headlights — If EquippedThis system automatically turns the headlights
on or off according to ambient light levels. To
turn the system on, rotate the headlight switch
to the A (AUTO) position.
When the system is on, the Headlight Delay
feature is also on. This means the headlights
will stay on for up to 90 seconds after you turn
the ignition switch to the OFF position. To turn
the automatic headlights off, turn the headlight
switch out of the AUTO position.
Headlight Switch
106
Page 117 of 350
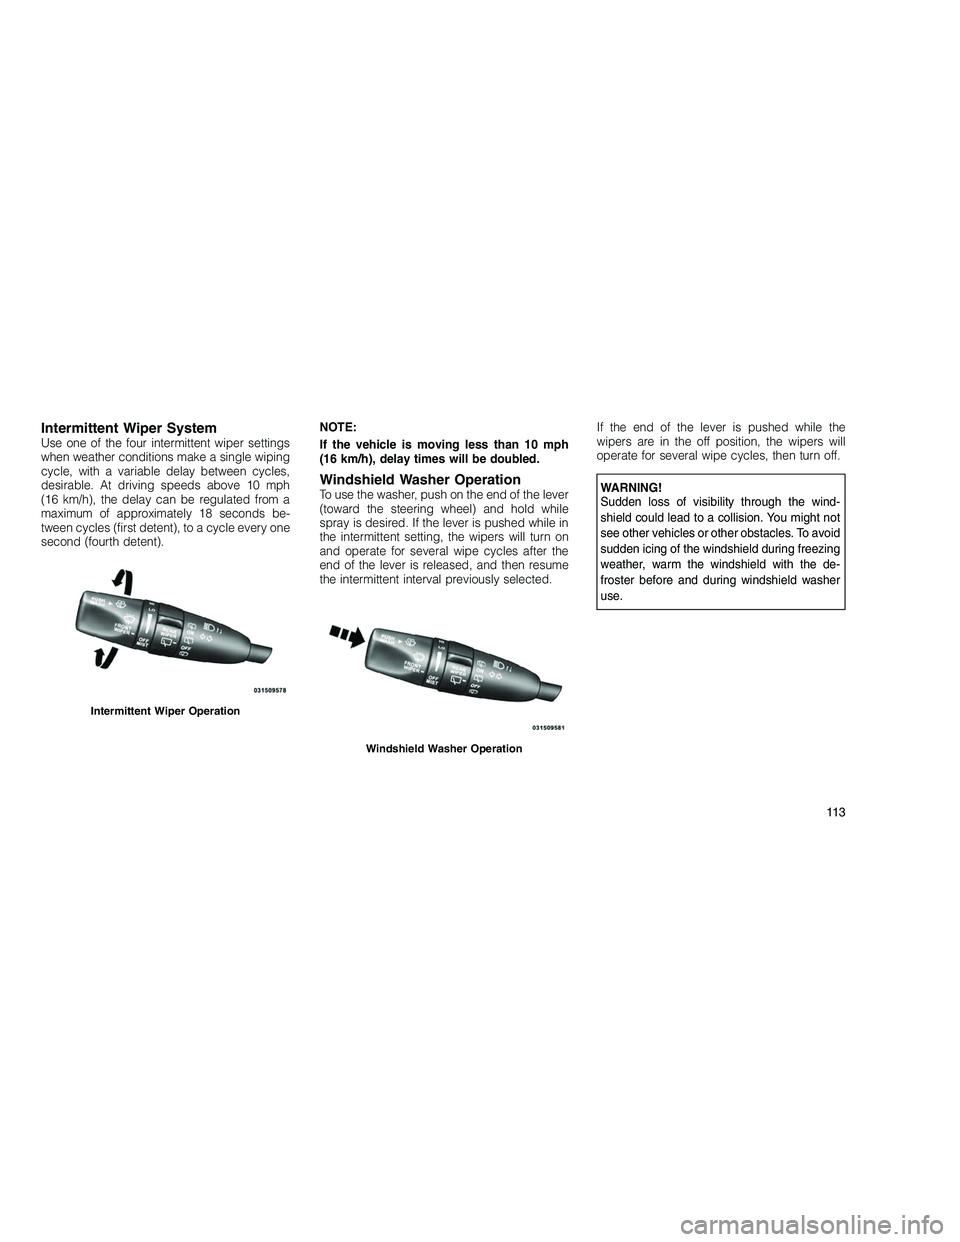
Intermittent Wiper SystemUse one of the four intermittent wiper settings
when weather conditions make a single wiping
cycle, with a variable delay between cycles,
desirable. At driving speeds above 10 mph
(16 km/h), the delay can be regulated from a
maximum of approximately 18 seconds be-
tween cycles (first detent), to a cycle every one
second (fourth detent).NOTE:
If the vehicle is moving less than 10 mph
(16 km/h), delay times will be doubled.
Windshield Washer OperationTo use the washer, push on the end of the lever
(toward the steering wheel) and hold while
spray is desired. If the lever is pushed while in
the intermittent setting, the wipers will turn on
and operate for several wipe cycles after the
end of the lever is released, and then resume
the intermittent interval previously selected.If the end of the lever is pushed while the
wipers are in the off position, the wipers will
operate for several wipe cycles, then turn off.WARNING!
Sudden loss of visibility through the wind-
shield could lead to a collision. You might not
see other vehicles or other obstacles. To avoid
sudden icing of the windshield during freezing
weather, warm the windshield with the de-
froster before and during windshield washer
use.
Intermittent Wiper Operation
Windshield Washer Operation
11 3
Page 119 of 350
TILT/TELESCOPING STEERING
COLUMN
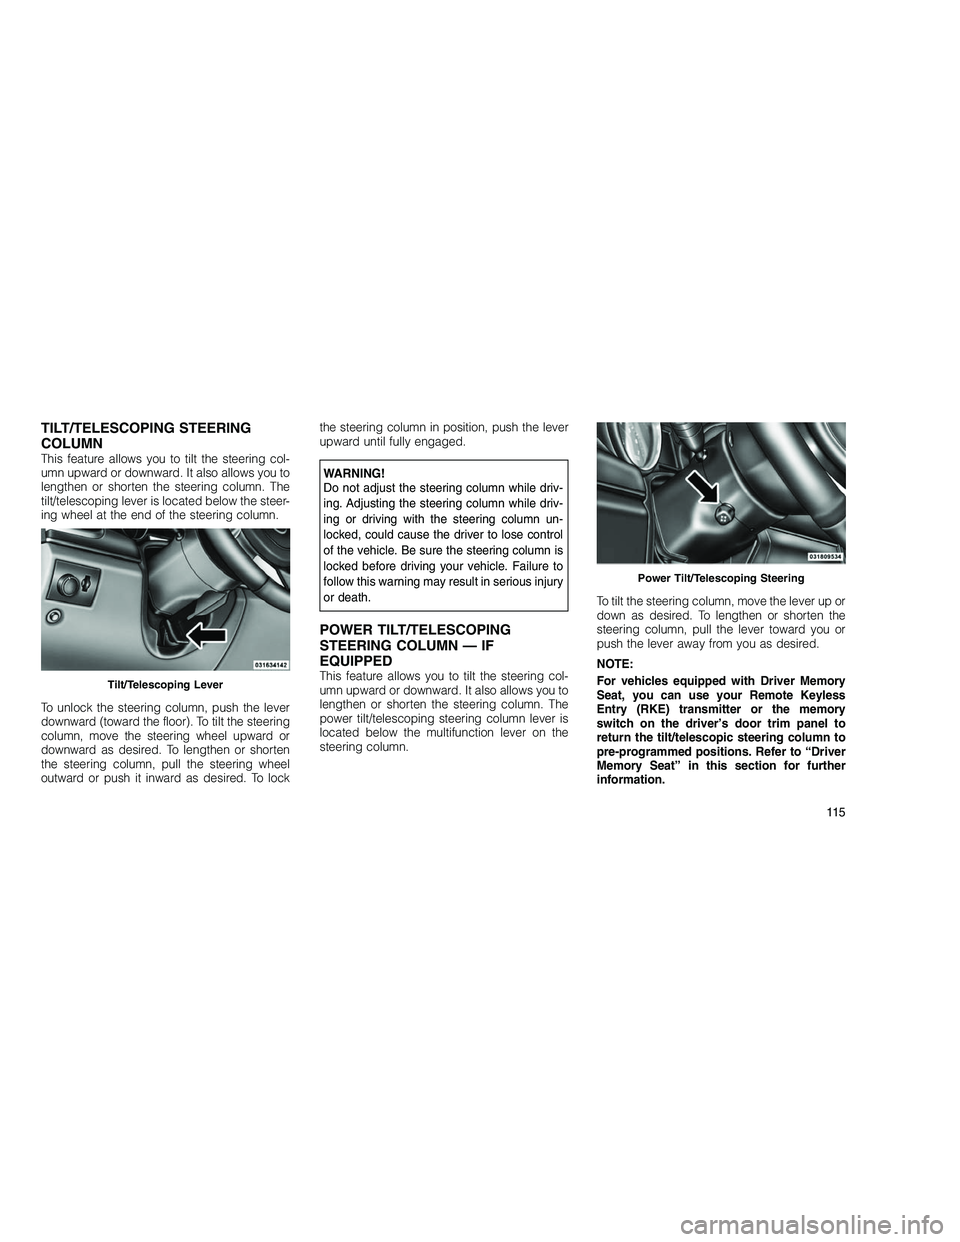
This feature allows you to tilt the steering col-
umn upward or downward. It also allows you to
lengthen or shorten the steering column. The
tilt/telescoping lever is located below the steer-
ing wheel at the end of the steering column.
To unlock the steering column, push the lever
downward (toward the floor). To tilt the steering
column, move the steering wheel upward or
downward as desired. To lengthen or shorten
the steering column, pull the steering wheel
outward or push it inward as desired. To lockthe steering column in position, push the lever
upward until fully engaged.WARNING!
Do not adjust the steering column while driv-
ing. Adjusting the steering column while driv-
ing or driving with the steering column un-
locked, could cause the driver to lose control
of the vehicle. Be sure the steering column is
locked before driving your vehicle. Failure to
follow this warning may result in serious injury
or death.
POWER TILT/TELESCOPING
STEERING COLUMN — IF
EQUIPPED
This feature allows you to tilt the steering col-
umn upward or downward. It also allows you to
lengthen or shorten the steering column. The
power tilt/telescoping steering column lever is
located below the multifunction lever on the
steering column.
To tilt the steering column, move the lever up or
down as desired. To lengthen or shorten the
steering column, pull the lever toward you or
push the lever away from you as desired.
NOTE:
For vehicles equipped with Driver Memory
Seat, you can use your Remote Keyless
Entry (RKE) transmitter or the memory
switch on the driver’s door trim panel to
return the tilt/telescopic steering column to
pre-programmed positions. Refer to “Driver
Memory Seat” in this section for further
information.Tilt/Telescoping Lever
Power Tilt/Telescoping Steering
11 5
Page 120 of 350
WARNING!
Do not adjust the steering column while driv-
ing. Adjusting the steering column while driv-
ing or driving with the steering column un-
locked, could cause the driver to lose control
of the vehicle. Be sure the steering column is
locked before driving your vehicle. Failure to
follow this warning may result in serious injury
or death.
HEATED STEERING WHEEL —
IF EQUIPPED
The steering wheel contains a heating element
that helps warm your hands in cold weather.
The heated steering wheel has only one tem-
perature setting. Once the heated steering
wheel has been turned on it will operate for
approximately 58 to 70 minutes before auto-
matically shutting off. The heated steering
wheel can shut off early or may not turn on
when the steering wheel is already warm.
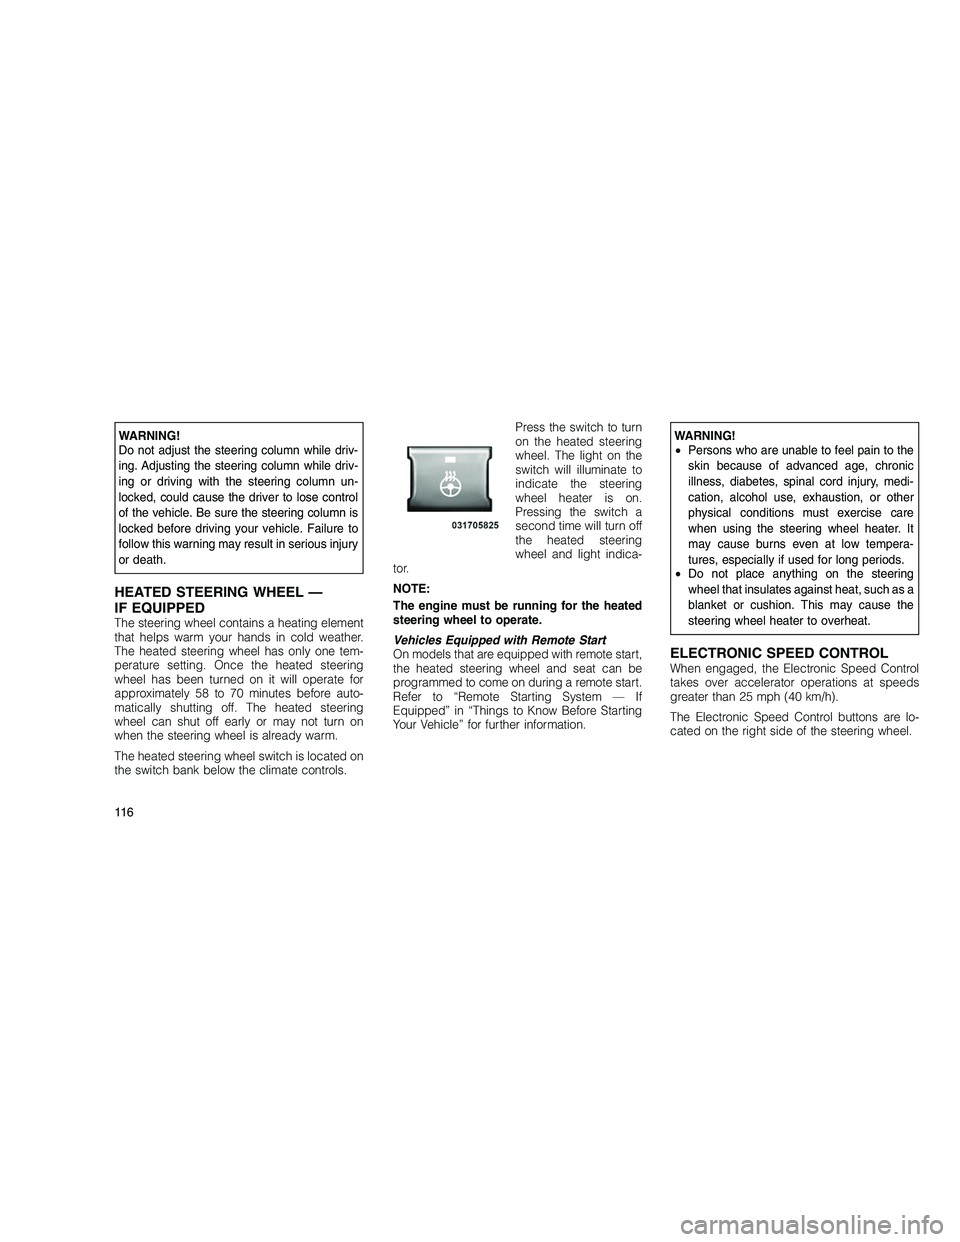
The heated steering wheel switch is located on
the switch bank below the climate controls.Press the switch to turn
on the heated steering
wheel. The light on the
switch will illuminate to
indicate the steering
wheel heater is on.
Pressing the switch a
second time will turn off
the heated steering
wheel and light indica-
tor.
NOTE:
The engine must be running for the heated
steering wheel to operate.
Vehicles Equipped with Remote Start
On models that are equipped with remote start,
the heated steering wheel and seat can be
programmed to come on during a remote start.
Refer to “Remote Starting System — If
Equipped” in “Things to Know Before Starting
Your Vehicle” for further information.
WARNING!
• Persons who are unable to feel pain to the
skin because of advanced age, chronic
illness, diabetes, spinal cord injury, medi-
cation, alcohol use, exhaustion, or other
physical conditions must exercise care
when using the steering wheel heater. It
may cause burns even at low tempera-
tures, especially if used for long periods.
• Do not place anything on the steering
wheel that insulates against heat, such as a
blanket or cushion. This may cause the
steering wheel heater to overheat.
ELECTRONIC SPEED CONTROLWhen engaged, the Electronic Speed Control
takes over accelerator operations at speeds
greater than 25 mph (40 km/h).
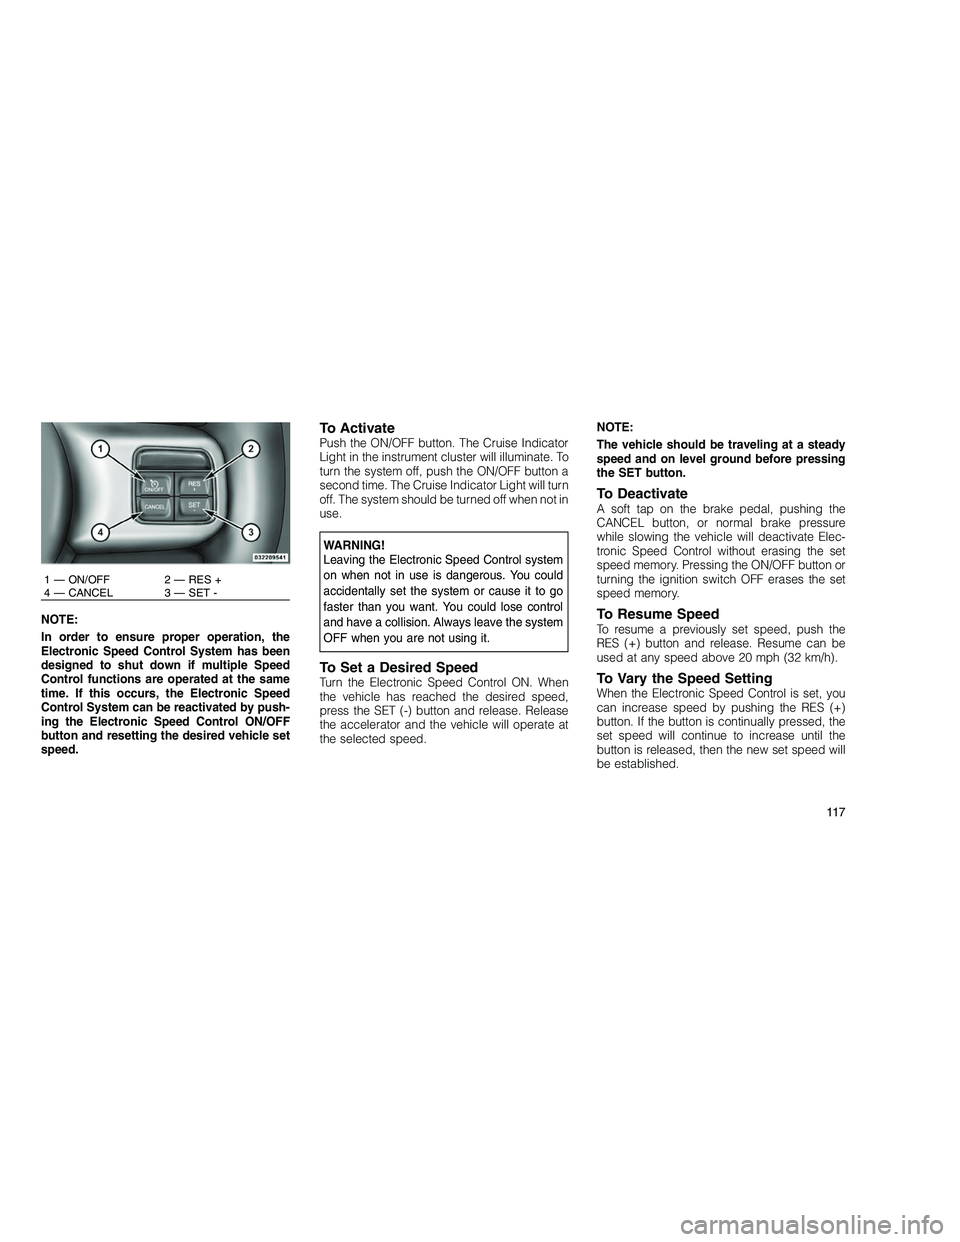
The Electronic Speed Control buttons are lo-
cated on the right side of the steering wheel.
11 6
Page 121 of 350
NOTE:
In order to ensure proper operation, the
Electronic Speed Control System has been
designed to shut down if multiple Speed
Control functions are operated at the same
time. If this occurs, the Electronic Speed
Control System can be reactivated by push-
ing the Electronic Speed Control ON/OFF
button and resetting the desired vehicle set
speed.
To ActivatePush the ON/OFF button. The Cruise Indicator
Light in the instrument cluster will illuminate. To
turn the system off, push the ON/OFF button a
second time. The Cruise Indicator Light will turn
off. The system should be turned off when not in
use.
WARNING!
Leaving the Electronic Speed Control system
on when not in use is dangerous. You could
accidentally set the system or cause it to go
faster than you want. You could lose control
and have a collision. Always leave the system
OFF when you are not using it.
To Set a Desired SpeedTurn the Electronic Speed Control ON. When
the vehicle has reached the desired speed,
press the SET (-) button and release. Release
the accelerator and the vehicle will operate at
the selected speed.NOTE:
The vehicle should be traveling at a steady
speed and on level ground before pressing
the SET button.
To DeactivateA soft tap on the brake pedal, pushing the
CANCEL button, or normal brake pressure
while slowing the vehicle will deactivate Elec-
tronic Speed Control without erasing the set
speed memory. Pressing the ON/OFF button or
turning the ignition switch OFF erases the set
speed memory.
To Resume SpeedTo resume a previously set speed, push the
RES (+) button and release. Resume can be
used at any speed above 20 mph (32 km/h).
To Vary the Speed SettingWhen the Electronic Speed Control is set, you
can increase speed by pushing the RES (+)
button. If the button is continually pressed, the
set speed will continue to increase until the
button is released, then the new set speed will
be established.
1 — ON/OFF 2 — RES +
4 — CANCEL 3 — SET -
11 7
Page 122 of 350
Pressing the RES (+) button once will result in a
1 mph (2 km/h) increase in set speed. Each
subsequent tap of the button results in an
increase of 1 mph (2 km/h).
To decrease speed while the Electronic Speed
Control is set, push the SET (-) button. If the
button is continually held in the SET (-) position,
the set speed will continue to decrease until the
button is released. Release the button when the
desired speed is reached, and the new set
speed will be established.
Pressing the SET (-) button once will result in a
1 mph (2 km/h) decrease in set speed. Each
subsequent tap of the button results in a de-
crease of 1 mph (2 km/h).
To Accelerate for PassingPress the accelerator as you would normally.
When the pedal is released, the vehicle will
return to the set speed.Using Electronic Speed Control On Hills
The transmission may downshift on hills to
maintain the vehicle set speed.
NOTE:
The Electronic Speed Control system main-
tains speed up and down hills. A slight
speed change on moderate hills is normal.
On steep hills, a greater speed loss or gain may
occur so it may be preferable to drive without
Electronic Speed Control.
WARNING!
Electronic Speed Control can be dangerous
where the system cannot maintain a constant
speed. Your vehicle could go too fast for the
conditions, and you could lose control and
have a collision. Do not use Electronic Speed
Control in heavy traffic or on roads that are
winding, icy, snow-covered or slippery.
ADAPTIVE CRUISE CONTROL
(ACC) — IF EQUIPPED
Adaptive Cruise Control (ACC) increases the
driving convenience provided by cruise control
while traveling on highways and major road-
ways. However, it is not a safety system and not
designed to prevent collisions.
ACC will allow you to keep cruise control en-
gaged in light to moderate traffic conditions
without the constant need to reset your cruise
control. ACC utilizes a radar sensor designed
to detect a vehicle directly ahead of you.
NOTE:
•
If the sensor does not detect a vehicle
ahead of you, ACC will maintain a fixed
set speed.
• If the ACC sensor detects a vehicle ahead,
ACC will apply limited braking or accel-
eration (not to exceed the original Set
Speed) automatically to maintain a preset
following distance, while matching the
speed of the vehicle ahead.
11 8
Page 123 of 350
WARNING!
•Adaptive Cruise Control (ACC) is a conve-
nience system. It is not a substitute for
active driving involvement. It is always the
driver’s responsibility to be attentive of
road, traffic, and weather conditions, ve-
hicle speed, distance to the vehicle ahead;
and, most importantly, brake operation to
ensure safe operation of the vehicle under
all road conditions. Your complete attention
is always required while driving to maintain
safe control of your vehicle. Failure to fol-
low these warnings can result in a collision
or serious personal injury.
• The ACC system:
� Does not react to pedestrians, oncoming
vehicles, and stationary objects (i.e., a
stopped vehicle in a traffic jam or a
disabled vehicle).
� Cannot take street, traffic, and weather
conditions into account, and may be
limited upon adverse sight distance con-
ditions.
(Continued)WARNING!(Continued)
� Does not predict the lane curvature or
the movement of preceding vehicles and
will not compensate for such changes.
� Does not always fully recognize com-
plex driving conditions, which can result
in wrong or missing distance warnings.
� Can only apply a maximum of 25% of
the vehicle’s braking capability, and will
not bring the vehicle to a complete stop.
WARNING!
You should switch off the ACC system:
• When driving in fog, heavy rain, heavy
snow, sleet, heavy traffic, and complex
driving situations (i.e., in highway construc-
tion zones).
• When entering a turn lane or highway off
ramp; when driving on roads that are wind-
ing, icy, snow-covered, slippery, or have
steep uphill or downhill slopes; and when
towing a trailer.
(Continued)
WARNING!(Continued)
• When circumstances do not allow safe
driving at a constant speed.
Failure to follow these warnings can result in a
collision or serious personal injury.
The Cruise Control system has two control
modes:
• Adaptive Cruise Control mode for maintain-
ing an appropriate distance between ve-
hicles.
• Normal (fixed speed) cruise control mode for
cruising at a constant preset speed. For
additional information, refer to “Normal
(Fixed Speed) Cruise Control Mode” in this
section. Note:The system will not react to
preceding vehicles. Always be aware of the
mode selected.
You can change the mode by using the Cruise
Control buttons. The two control modes func-
tion differently. Always confirm which mode is
selected.
11 9
Page 125 of 350
WARNING!
Leaving the Adaptive Cruise Control (ACC)
system on when not in use is dangerous. You
could accidentally set the system or cause it
to go faster than you want. You could lose
control and have a collision. Always leave the
system off when you are not using it.
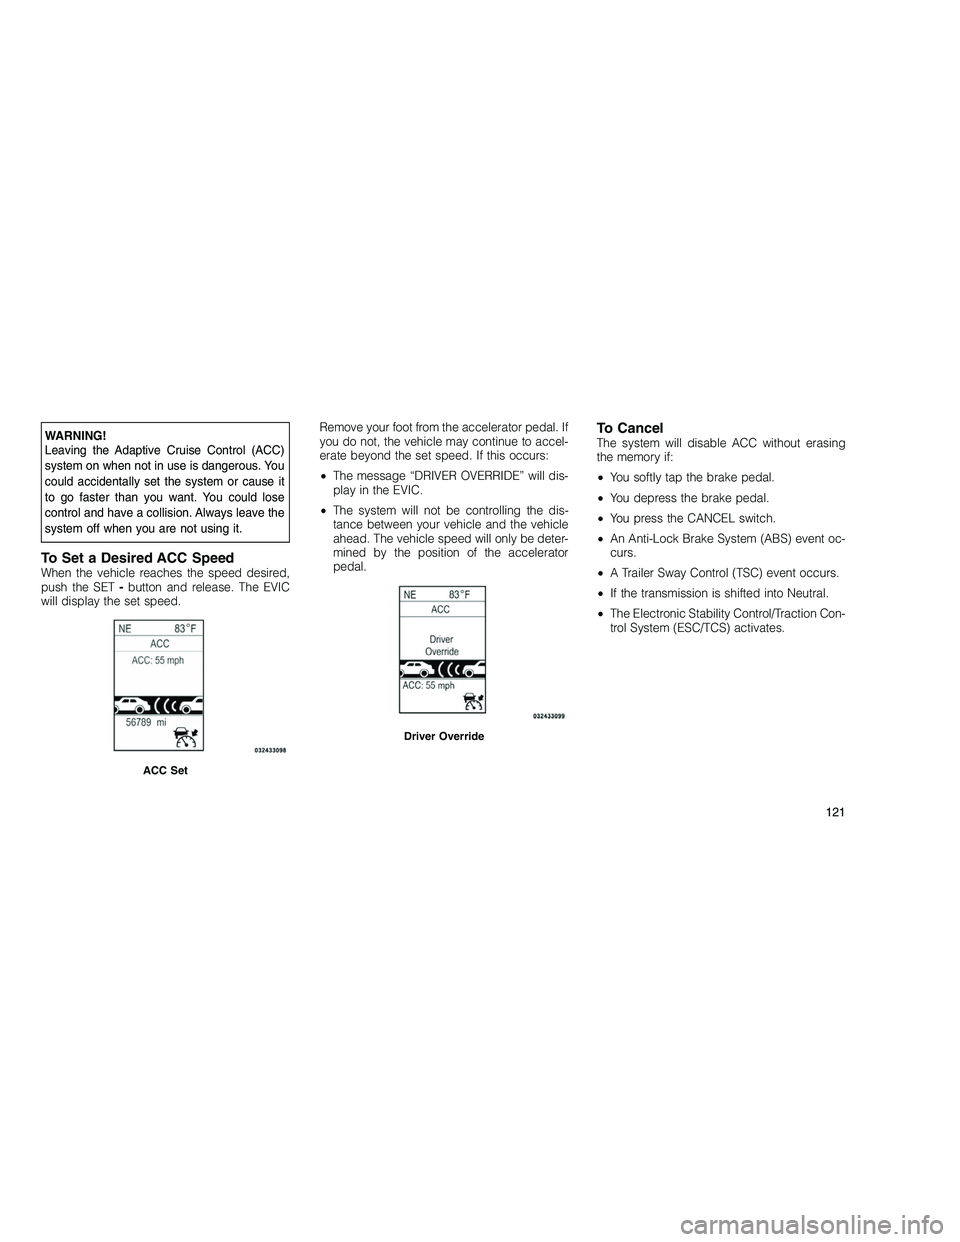
To Set a Desired ACC SpeedWhen the vehicle reaches the speed desired,
push the SET-button and release. The EVIC
will display the set speed. Remove your foot from the accelerator pedal. If
you do not, the vehicle may continue to accel-
erate beyond the set speed. If this occurs:
•
The message “DRIVER OVERRIDE” will dis-
play in the EVIC.
• The system will not be controlling the dis-
tance between your vehicle and the vehicle
ahead. The vehicle speed will only be deter-
mined by the position of the accelerator
pedal.
To CancelThe system will disable ACC without erasing
the memory if:
• You softly tap the brake pedal.
• You depress the brake pedal.
• You press the CANCEL switch.
• An Anti-Lock Brake System (ABS) event oc-
curs.
• A Trailer Sway Control (TSC) event occurs.
• If the transmission is shifted into Neutral.
• The Electronic Stability Control/Traction Con-
trol System (ESC/TCS) activates.
ACC Set
Driver Override
121
Page 126 of 350
NOTE:
If ACC is resumed or set with the ESC/TCS
off, ESC will automatically be re-engaged.
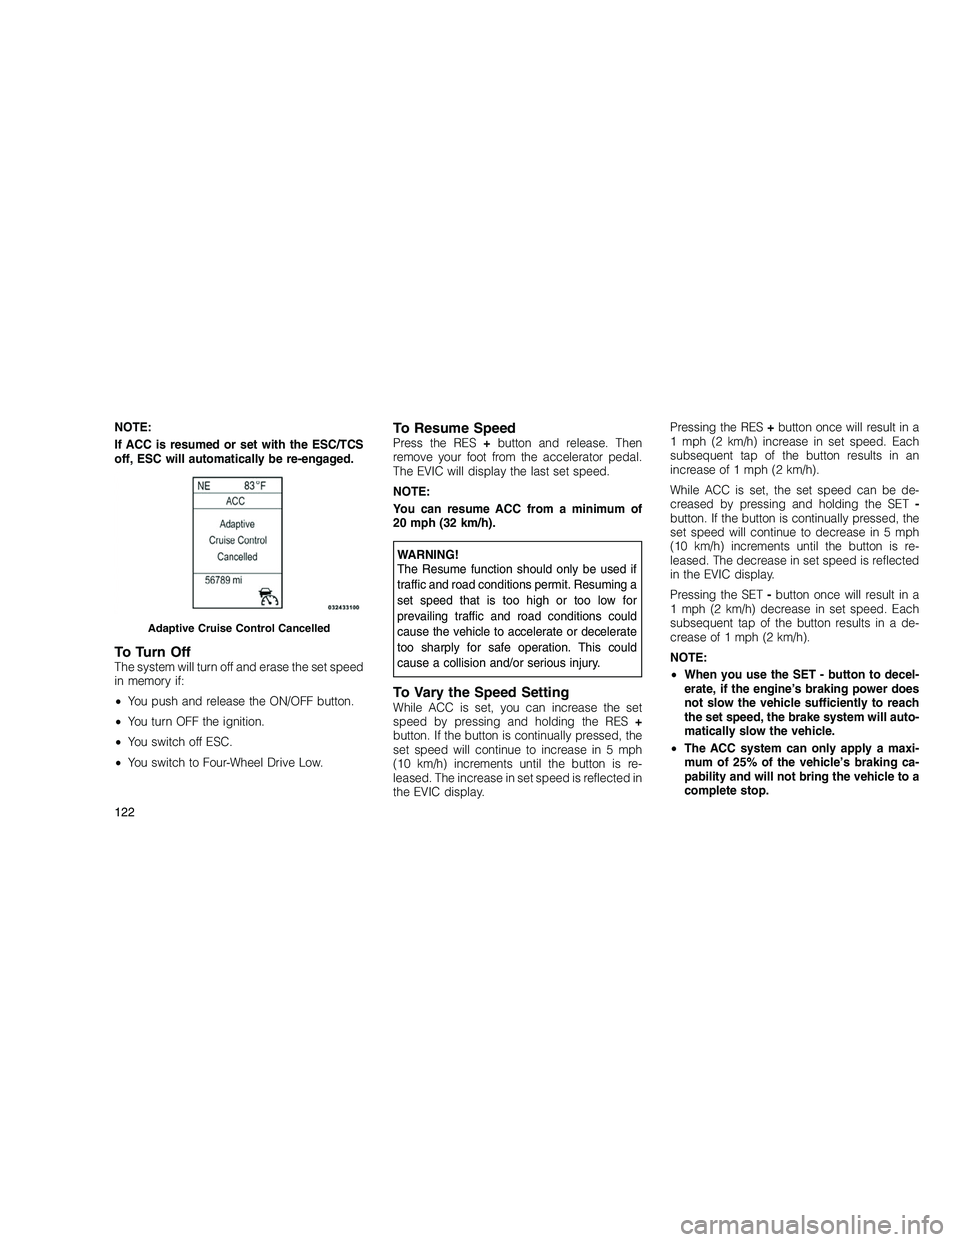
To Turn OffThe system will turn off and erase the set speed
in memory if:
•You push and release the ON/OFF button.
• You turn OFF the ignition.
• You switch off ESC.
• You switch to Four-Wheel Drive Low.
To Resume SpeedPress the RES +button and release. Then
remove your foot from the accelerator pedal.
The EVIC will display the last set speed.
NOTE:
You can resume ACC from a minimum of
20 mph (32 km/h).
WARNING!
The Resume function should only be used if
traffic and road conditions permit. Resuming a
set speed that is too high or too low for
prevailing traffic and road conditions could
cause the vehicle to accelerate or decelerate
too sharply for safe operation. This could
cause a collision and/or serious injury.
To Vary the Speed SettingWhile ACC is set, you can increase the set
speed by pressing and holding the RES +
button. If the button is continually pressed, the
set speed will continue to increase in 5 mph
(10 km/h) increments until the button is re-
leased. The increase in set speed is reflected in
the EVIC display. Pressing the RES
+button once will result in a
1 mph (2 km/h) increase in set speed. Each
subsequent tap of the button results in an
increase of 1 mph (2 km/h).
While ACC is set, the set speed can be de-
creased by pressing and holding the SET -
button. If the button is continually pressed, the
set speed will continue to decrease in 5 mph
(10 km/h) increments until the button is re-
leased. The decrease in set speed is reflected
in the EVIC display.
Pressing the SET -button once will result in a
1 mph (2 km/h) decrease in set speed. Each
subsequent tap of the button results in a de-
crease of 1 mph (2 km/h).
NOTE:
• When you use the SET - button to decel-
erate, if the engine’s braking power does
not slow the vehicle sufficiently to reach
the set speed, the brake system will auto-
matically slow the vehicle.
• The ACC system can only apply a maxi-
mum of 25% of the vehicle’s braking ca-
pability and will not bring the vehicle to a
complete stop.
Adaptive Cruise Control Cancelled
122
Page 128 of 350
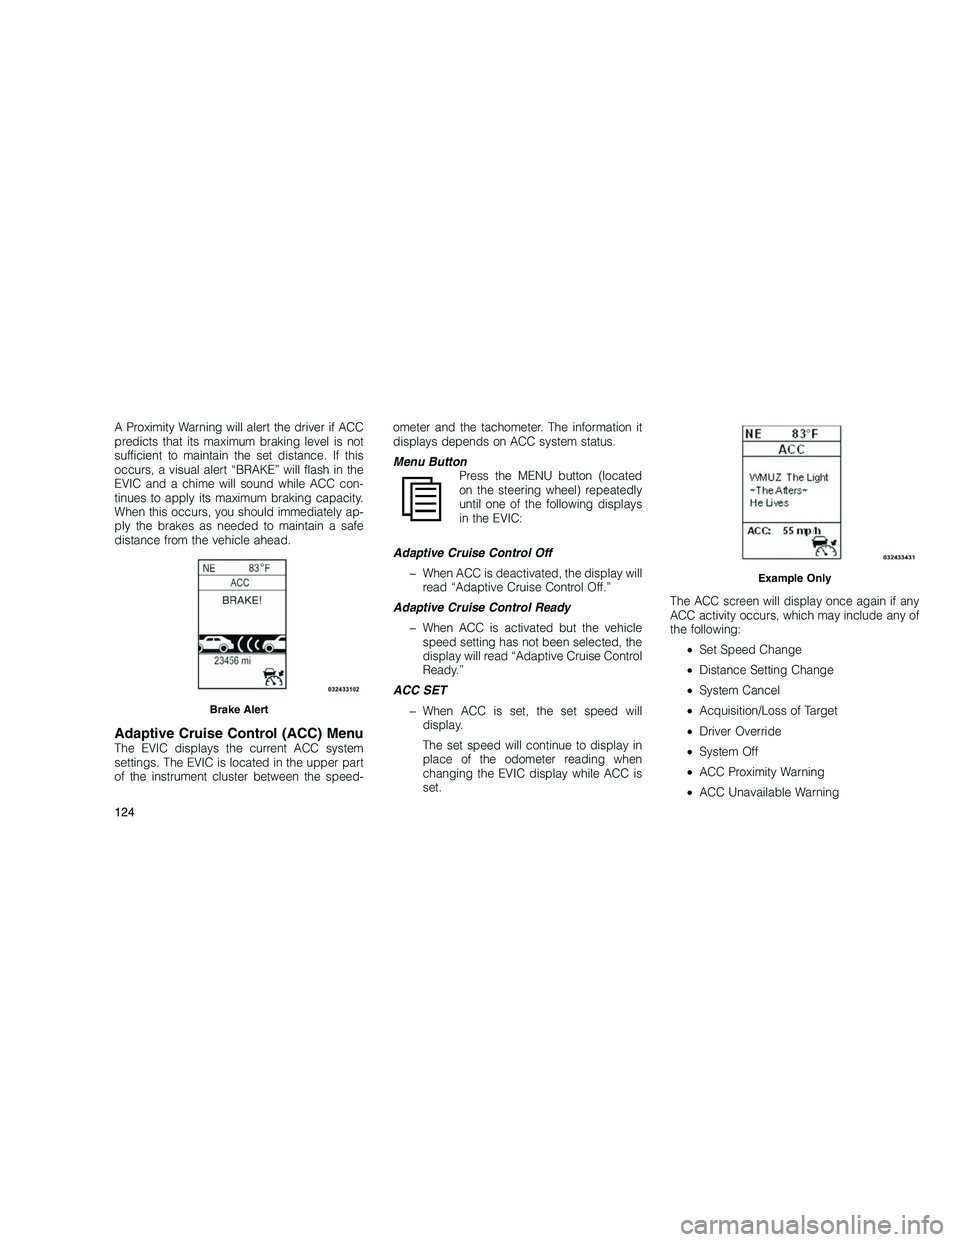
A Proximity Warning will alert the driver if ACC
predicts that its maximum braking level is not
sufficient to maintain the set distance. If this
occurs, a visual alert “BRAKE” will flash in the
EVIC and a chime will sound while ACC con-
tinues to apply its maximum braking capacity.
When this occurs, you should immediately ap-
ply the brakes as needed to maintain a safe
distance from the vehicle ahead.
Adaptive Cruise Control (ACC) MenuThe EVIC displays the current ACC system
settings. The EVIC is located in the upper part
of the instrument cluster between the speed-ometer and the tachometer. The information it
displays depends on ACC system status.
Menu Button
Press the MENU button (located
on the steering wheel) repeatedly
until one of the following displays
in the EVIC:
Adaptive Cruise Control Off � When ACC is deactivated, the display willread “Adaptive Cruise Control Off.”
Adaptive Cruise Control Ready � When ACC is activated but the vehiclespeed setting has not been selected, the
display will read “Adaptive Cruise Control
Ready.”
ACC SET � When ACC is set, the set speed willdisplay.
The set speed will continue to display in
place of the odometer reading when
changing the EVIC display while ACC is
set. The ACC screen will display once again if any
ACC activity occurs, which may include any of
the following:
•Set Speed Change
• Distance Setting Change
• System Cancel
• Acquisition/Loss of Target
• Driver Override
• System Off
• ACC Proximity Warning
• ACC Unavailable Warning
Brake Alert
Example Only
124