key JEEP GRAND CHEROKEE 2010 WK / 3.G User Guide
[x] Cancel search | Manufacturer: JEEP, Model Year: 2010, Model line: GRAND CHEROKEE, Model: JEEP GRAND CHEROKEE 2010 WK / 3.GPages: 84, PDF Size: 14.64 MB
Page 3 of 84
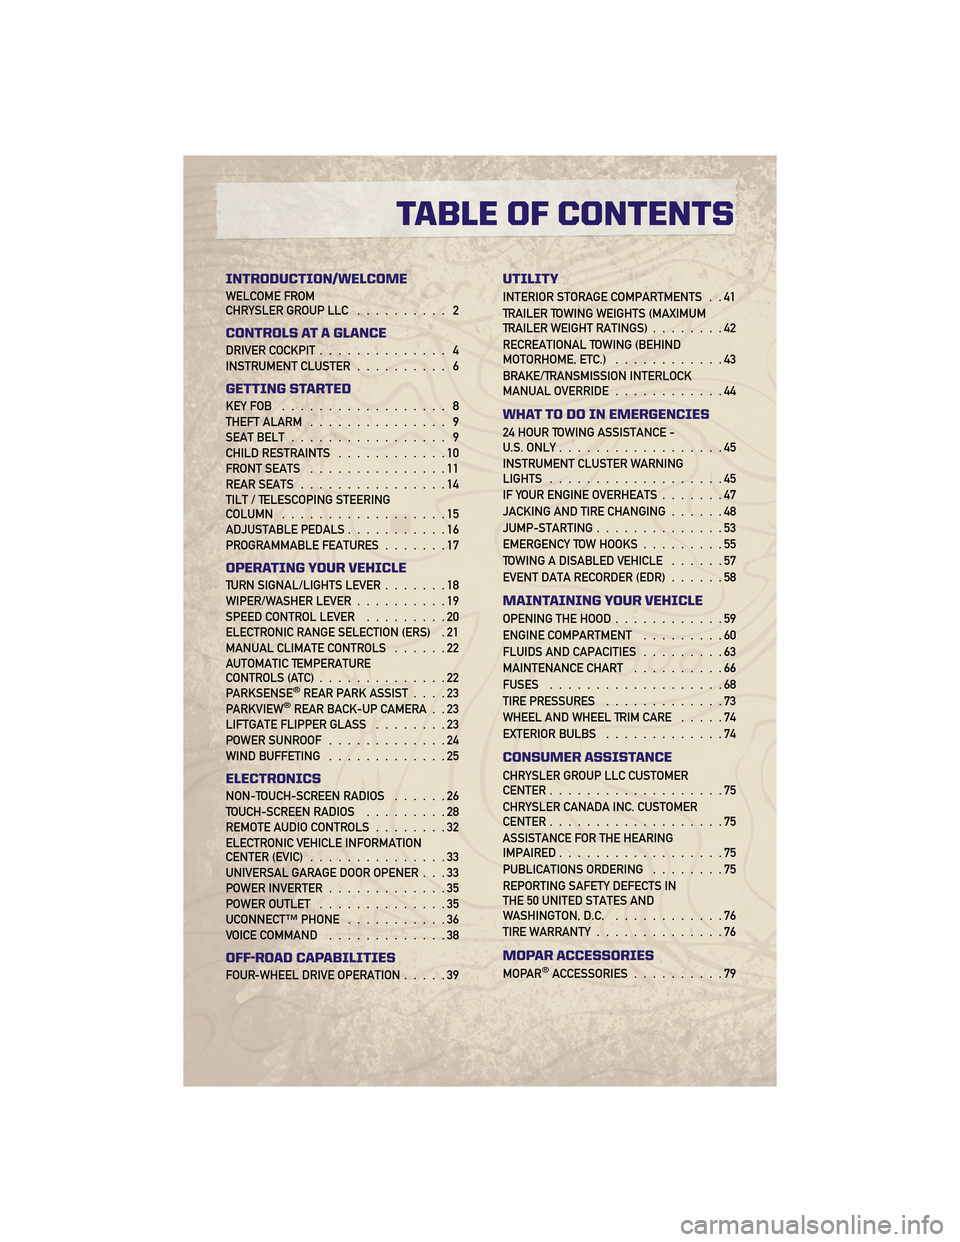
INTRODUCTION/WELCOME
WELCOME FROM
CHRYSLER GROUP LLC.......... 2
CONTROLS AT A GLANCE
DRIVER COCKPIT.............. 4
INSTRUMENT CLUSTER .......... 6
GETTING STARTED
KEYFOB .................. 8
THEFT ALARM............... 9
SEAT BELT ................. 9
CHILD RESTRAINTS ............10
FRONT SEATS ...............11
REAR SEATS ................14
TILT / TELESCOPING STEERING
COLUMN ..................15
ADJUSTABLE PEDALS ...........16
PROGRAMMABLE FEATURES .......17
OPERATING YOUR VEHICLE
TURN SIGNAL/LIGHTS LEVER .......18
WIPER/WASHER LEVER ..........19
SPEED CONTROL LEVER .........20
ELECTRONIC RANGE SELECTION (ERS) . 21
MANUAL CLIMATE CONTROLS ......22
AUTOMATIC TEMPERATURE
CONTROLS (ATC) ..............22
PARKSENSE
®REAR PARK ASSIST ....23
PARKVIEW®REAR BACK-UP CAMERA . . 23
LIFTGATE FLIPPER GLASS ........23
POWER SUNROOF .............24
WIND BUFFETING .............25
ELECTRONICS
NON-TOUCH-SCREEN RADIOS ......26
TOUCH-SCREEN RADIOS .........28
REMOTE AUDIO CONTROLS ........32
ELECTRONIC VEHICLE INFORMATION
CENTER (EVIC) ...............33
UNIVERSAL GARAGE DOOR OPENER . . . 33
POWER INVERTER .............35
POWER OUTLET ..............35
UCONNECT™ PHONE ...........36
VOICE COMMAND .............38
OFF-ROAD CAPABILITIES
FOUR-WHEEL DRIVE OPERATION .....39
UTILITY
INTERIOR STORAGE COMPARTMENTS . . 41
TRAILER TOWING WEIGHTS (MAXIMUM
TRAILER WEIGHT RATINGS)........42
RECREATIONAL TOWING (BEHIND
MOTORHOME, ETC.) ............43
BRAKE/TRANSMISSION INTERLOCK
MANUAL OVERRIDE ............44
WHAT TO DO IN EMERGENCIES
24 HOUR TOWING ASSISTANCE -
U.S. ONLY..................45
INSTRUMENT CLUSTER WARNING
LIGHTS ...................45
IF YOUR ENGINE OVERHEATS .......47
JACKING AND TIRE CHANGING ......48
JUMP-STARTING ..............53
EMERGENCY TOW HOOKS .........55
TOWING A DISABLED VEHICLE ......57
EVENT DATA RECORDER (EDR) ......58
MAINTAINING YOUR VEHICLE
OPENING THE HOOD............59
ENGINE COMPARTMENT .........60
FLUIDS AND CAPACITIES .........63
MAINTENANCE CHART ..........66
FUSES ...................68
TIRE PRESSURES .............73
WHEEL AND WHEEL TRIM CARE .....74
EXTERIOR BULBS .............74
CONSUMER ASSISTANCE
CHRYSLER GROUP LLC CUSTOMER
CENTER...................75
CHRYSLER CANADA INC. CUSTOMER
CENTER ...................75
ASSISTANCE FOR THE HEARING
IMPAIRED ..................75
PUBLICATIONS ORDERING ........75
REPORTING SAFETY DEFECTS IN
THE 50 UNITED STATES AND
WASHINGTON, D.C. ............76
TIRE WARRANTY ..............76
MOPAR ACCESSORIES
MOPAR®ACCESSORIES..........79
TABLE OF CONTENTS
Page 9 of 84
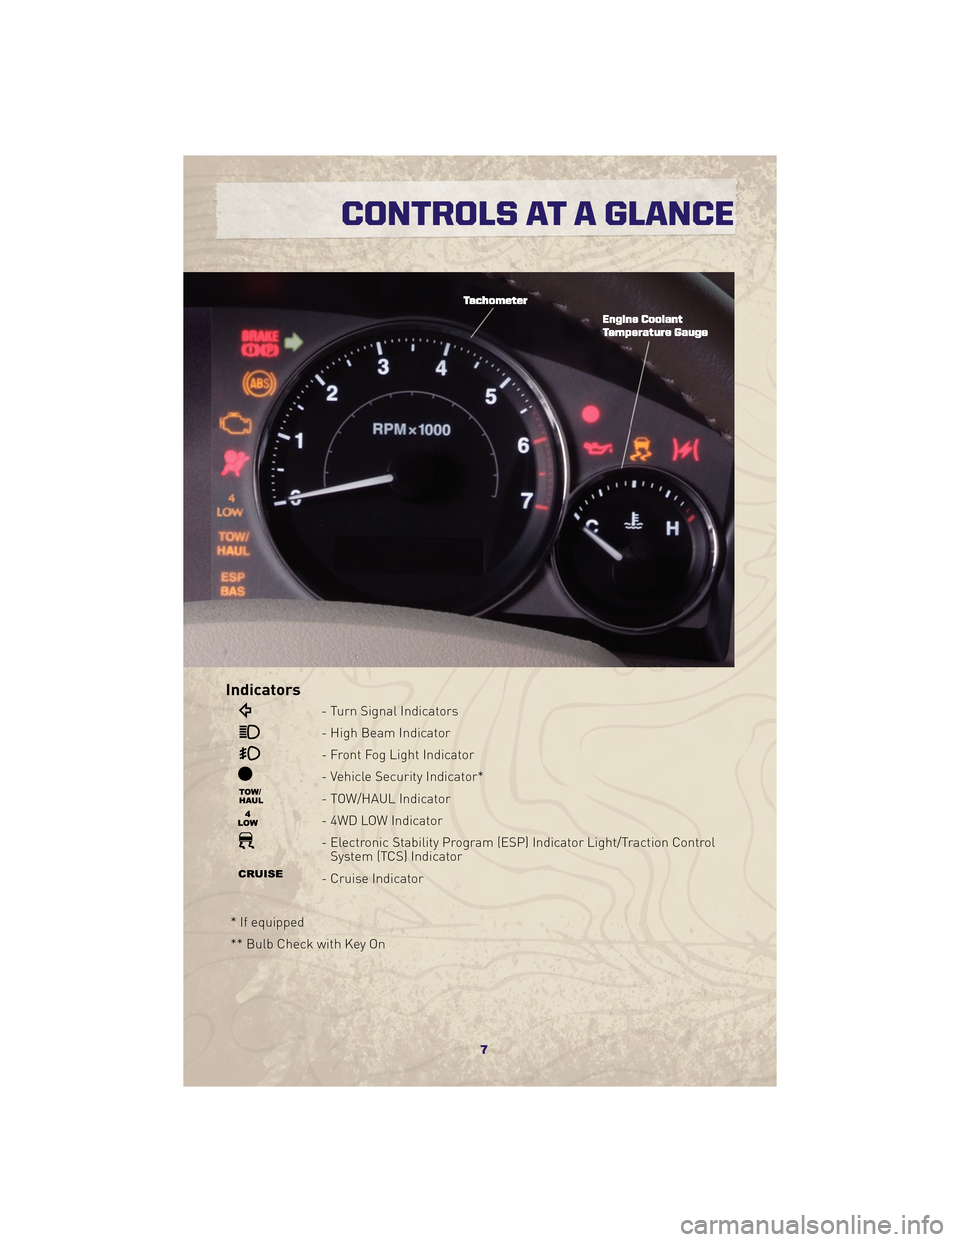
Indicators
- Turn Signal Indicators
- High Beam Indicator
- Front Fog Light Indicator
- Vehicle Security Indicator*
- TOW/HAUL Indicator
- 4WD LOW Indicator
- Electronic Stability Program (ESP) Indicator Light/Traction ControlSystem (TCS) Indicator
- Cruise Indicator
* If equipped
** Bulb Check with Key On
7
CONTROLS AT A GLANCE
Page 10 of 84
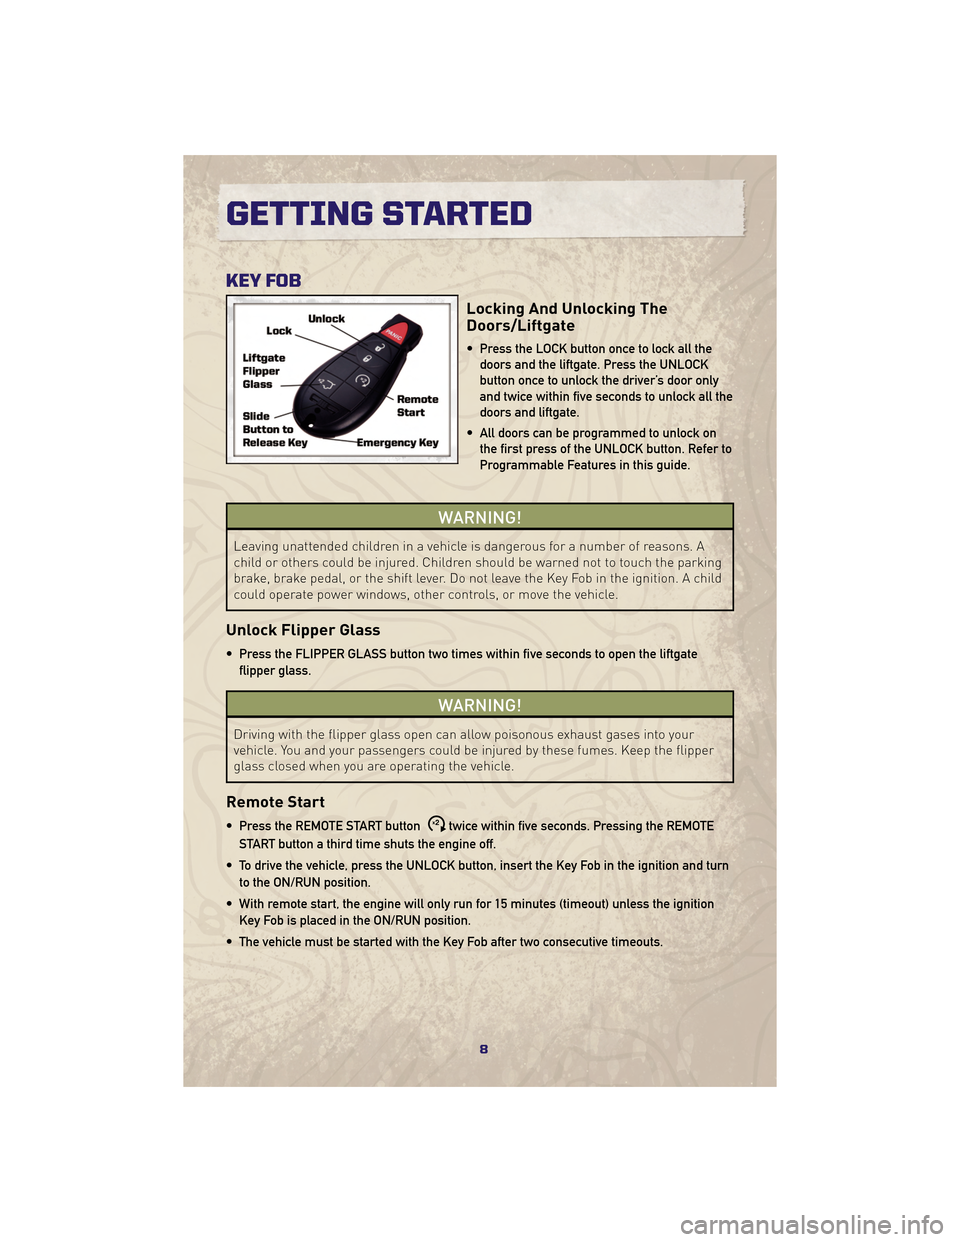
KEY FOB
Locking And Unlocking The
Doors/Liftgate
• Press the LOCK button once to lock all thedoors and the liftgate. Press the UNLOCK
button once to unlock the driver’s door only
and twice within five seconds to unlock all the
doors and liftgate.
• All doors can be programmed to unlock on the first press of the UNLOCK button. Refer to
Programmable Features in this guide.
WARNING!
Leaving unattended children in a vehicle is dangerous for a number of reasons. A
child or others could be injured. Children should be warned not to touch the parking
brake, brake pedal, or the shift lever. Do not leave the Key Fob in the ignition. A child
could operate power windows, other controls, or move the vehicle.
Unlock Flipper Glass
• Press the FLIPPER GLASS button two times within five seconds to open the liftgate
flipper glass.
WARNING!
Driving with the flipper glass open can allow poisonous exhaust gases into your
vehicle. You and your passengers could be injured by these fumes. Keep the flipper
glass closed when you are operating the vehicle.
Remote Start
• Press the REMOTE START buttonx2twice within five seconds. Pressing the REMOTE
START button a third time shuts the engine off.
• To drive the vehicle, press the UNLOCK button, insert the Key Fob in the ignition and turn to the ON/RUN position.
• With remote start, the engine will only run for 15 minutes (timeout) unless the ignition Key Fob is placed in the ON/RUN position.
• The vehicle must be started with the Key Fob after two consecutive timeouts.
GETTING STARTED
8
Page 11 of 84
WARNING!
• Do not start or run an engine in a closed garage or confined area. Exhaust gascontains Carbon Monoxide (CO) which is odorless and colorless. Carbon Monoxide
is poisonous and can cause serious injury or death when inhaled.
• Keep Key Fob transmitters away from children. Operation of the Remote Start System, windows, door locks or other controls could cause serious injury or
death.
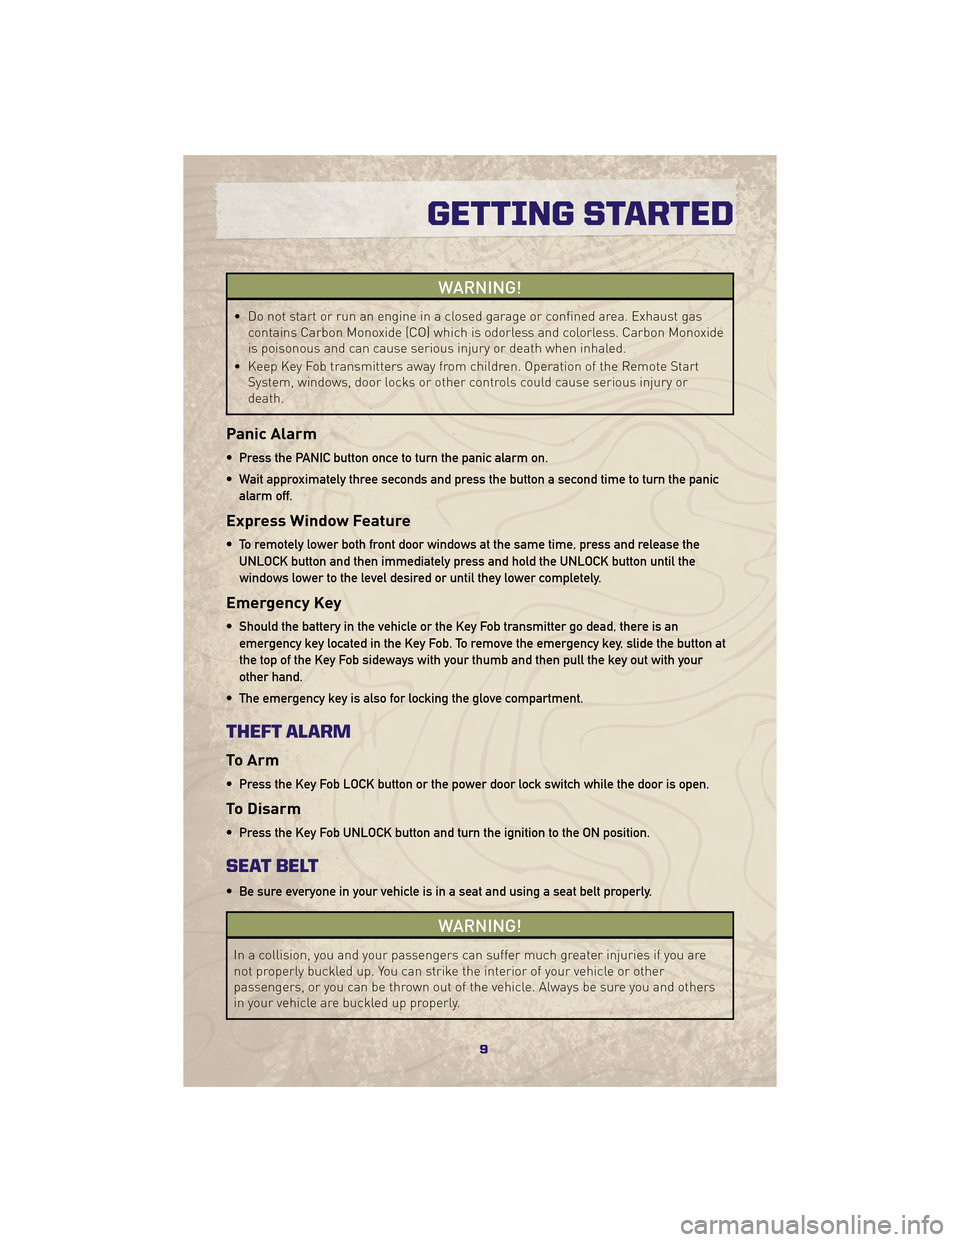
Panic Alarm
• Press the PANIC button once to turn the panic alarm on.
• Wait approximately three seconds and press the button a second time to turn the panic
alarm off.
Express Window Feature
• To remotely lower both front door windows at the same time, press and release theUNLOCK button and then immediately press and hold the UNLOCK button until the
windows lower to the level desired or until they lower completely.
Emergency Key
• Should the battery in the vehicle or the Key Fob transmitter go dead, there is anemergency key located in the Key Fob. To remove the emergency key, slide the button at
the top of the Key Fob sideways with your thumb and then pull the key out with your
other hand.
• The emergency key is also for locking the glove compartment.
THEFT ALARM
To Arm
• Press the Key Fob LOCK button or the power door lock switch while the door is open.
To Disarm
• Press the Key Fob UNLOCK button and turn the ignition to the ON position.
SEAT BELT
• Be sure everyone in your vehicle is in a seat and using a seat belt properly.
WARNING!
In a collision, you and your passengers can suffer much greater injuries if you are
not properly buckled up. You can strike the interior of your vehicle or other
passengers, or you can be thrown out of the vehicle. Always be sure you and others
in your vehicle are buckled up properly.
9
GETTING STARTED
Page 16 of 84
CAUTION!
Repeated overheating of the seat could damage the heating element and/or degrade
the material of the seat.
Memory Seats
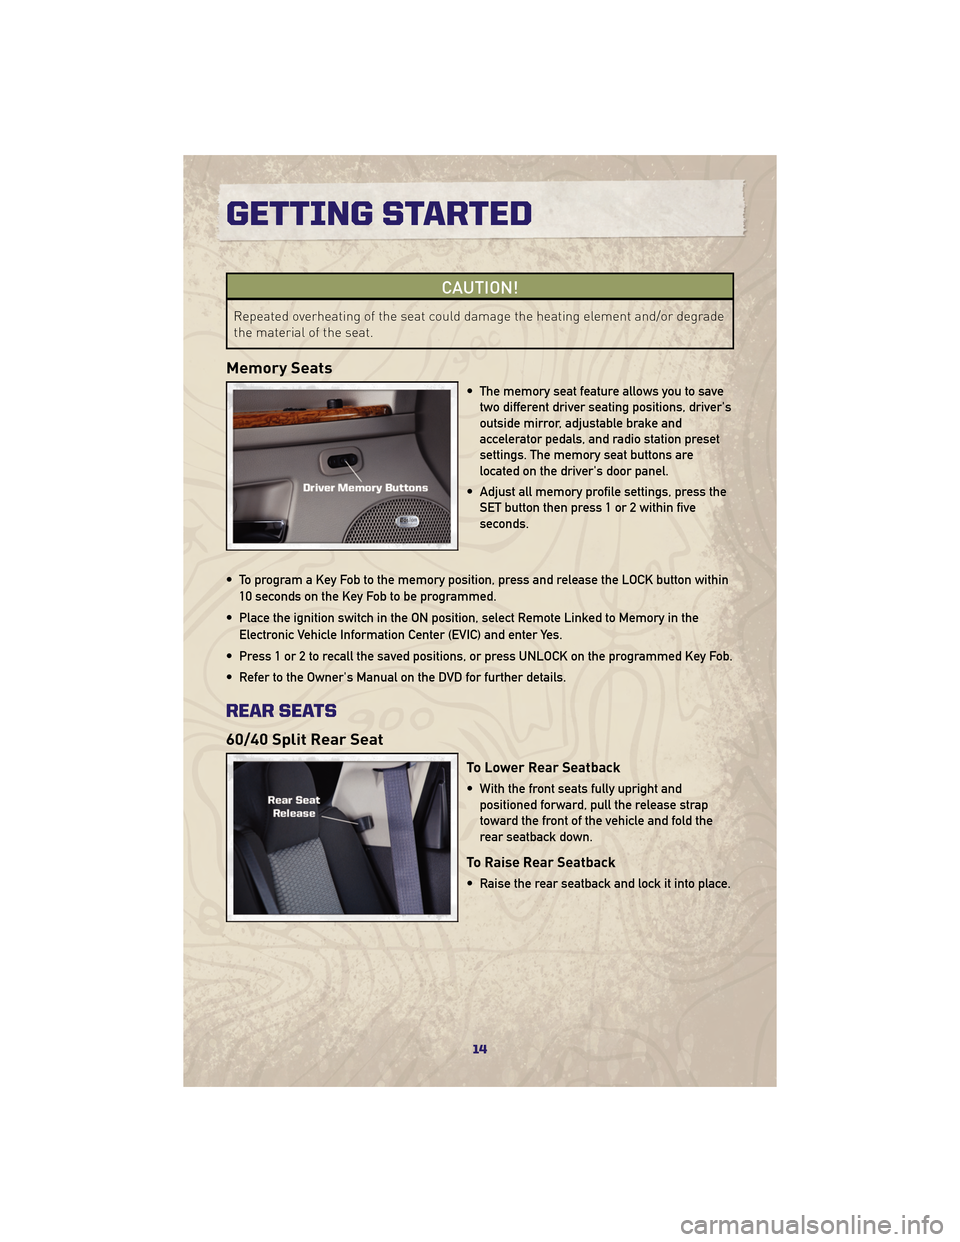
• The memory seat feature allows you to savetwo different driver seating positions, driver's
outside mirror, adjustable brake and
accelerator pedals, and radio station preset
settings. The memory seat buttons are
located on the driver's door panel.
• Adjust all memory profile settings, press the SET button then press 1 or 2 within five
seconds.
• To program a Key Fob to the memory position, press and release the LOCK button within 10 seconds on the Key Fob to be programmed.
• Place the ignition switch in the ON position, select Remote Linked to Memory in the Electronic Vehicle Information Center (EVIC) and enter Yes.
• Press 1 or 2 to recall the saved positions, or press UNLOCK on the programmed Key Fob.
• Refer to the Owner's Manual on the DVD for further details.
REAR SEATS
60/40 Split Rear Seat
To Lower Rear Seatback
• With the front seats fully upright and positioned forward, pull the release strap
toward the front of the vehicle and fold the
rear seatback down.
To Raise Rear Seatback
• Raise the rear seatback and lock it into place.
GETTING STARTED
14
Page 19 of 84
PROGRAMMABLE FEATURES
Electronic Vehicle Information Center (EVIC) – If Equipped
• The EVIC can be used to program the following Personal Settings. Press and release theMENU button
until Personal Settings displays, then press the SCROLL buttonto
scroll through the settings. Press the FUNCTION SELECT button
to change the setting.
• Language • Easy Entry/Exit Seat
• Auto Door Locks • Key-Off Power Delay
• Auto UNLK On Exit • Illuminated Approach
• RKE Unlock • Display Units of Measure In
• Sound Horn With RKE Lock • Display ECO
• Flash Lamp Lock • Automatic High Beams
• Headlamp Off Delay • Hill Start Assist
• Turn Headlamps On With Wipers • Rain Sensing Intermittent Wipers
17
GETTING STARTED
Page 26 of 84
WARNING!
Driving with the flipper glass open can allow poisonous exhaust gases into your
vehicle. You and your passengers could be injured by these fumes. Keep the flipper
glass closed when you are operating the vehicle.
POWER SUNROOF
• The power sunroof switch is located on the overhead console.
WARNING!
• Never leave children in a vehicle with the key in the ignition switch. Occupants,particularly unattended children, can become entrapped by the power sunroof
while operating the power sunroof switch. Such entrapment may result in serious
injury or death.
• In an accident, there is a greater risk of being thrown from a vehicle with an open sunroof. You could also be seriously injured or killed. Always fasten your seat belt
properly and make sure all passengers are properly secured too.
• Do not allow small children to operate the sunroof. Never allow your fingers, other body parts, or any object to project through the sunroof opening. Injury may result.
Opening Sunroof
Express
• Press the switch rearward and release. The sunroof will fully open and stop
automatically.
Closing Sunroof
Express
• Press the switch forward and release. The sunroof will close automatically from anyposition.
Manual Open/Close
• Press and hold the switch rearward to open or forward to close the sunroof. Any releaseof the switch will stop the movement, and the sunroof will remain in a partially open or
closed position until the switch is pressed again.
Venting Sunroof
• Press and release the "VENT" button, and the sunroof will open to the vent position. Thisis called “Express Vent” and will occur regardless of sunroof position. During Express
Vent operation, any movement of the switch will stop the sunroof.
OPERATING YOUR VEHICLE
24
Page 31 of 84
Multimedia Radio – Sales Code RBZ
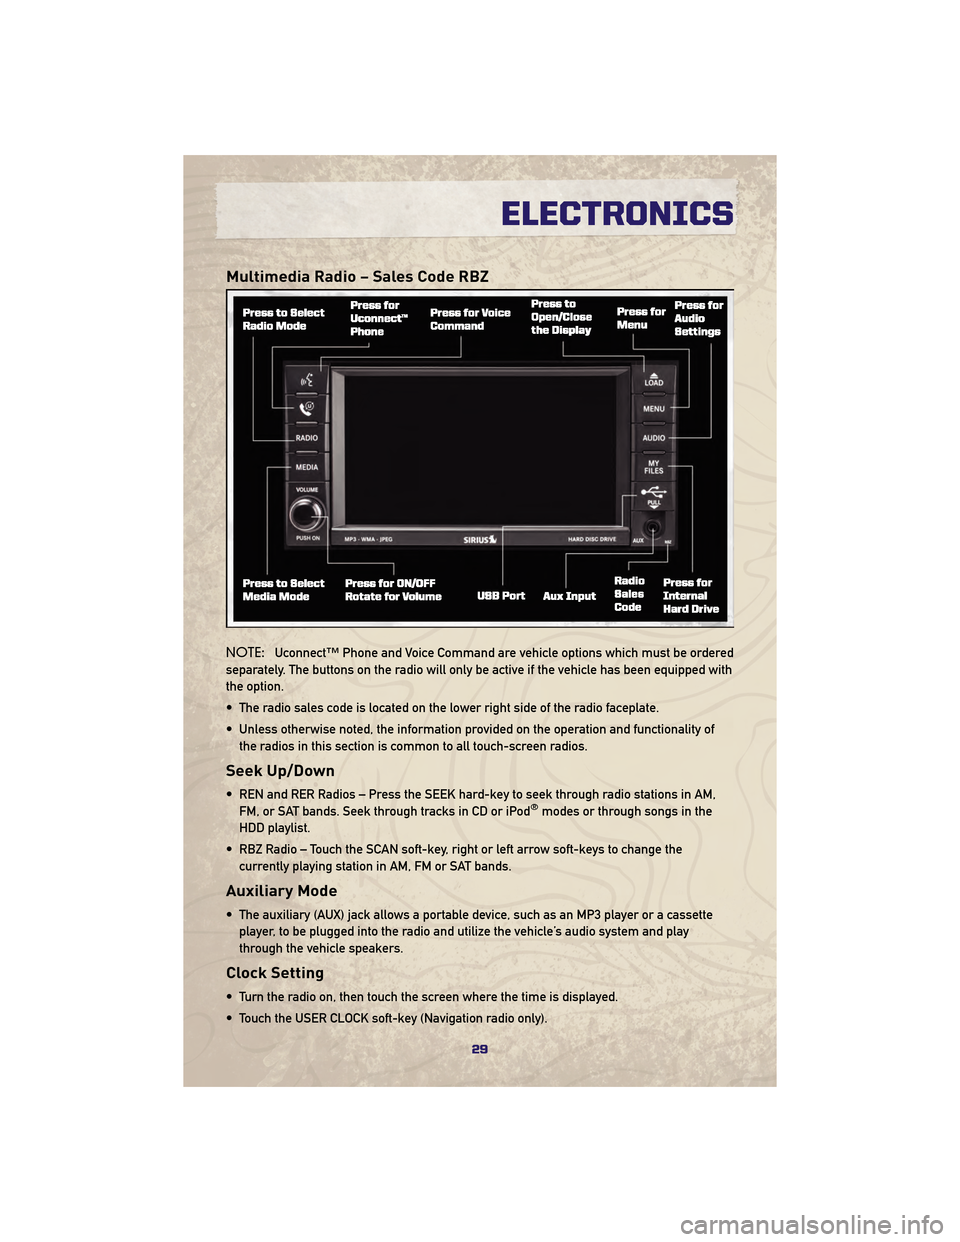
NOTE:Uconnect™ Phone and Voice Command are vehicle options which must be ordered
separately. The buttons on the radio will only be active if the vehicle has been equipped with
the option.
• The radio sales code is located on the lower right side of the radio faceplate.
• Unless otherwise noted, the information provided on the operation and functionality of the radios in this section is common to all touch-screen radios.
Seek Up/Down
• REN and RER Radios – Press the SEEK hard-key to seek through radio stations in AM,FM, or SAT bands. Seek through tracks in CD or iPod®modes or through songs in the
HDD playlist.
• RBZ Radio – Touch the SCAN soft-key, right or left arrow soft-keys to change the currently playing station in AM, FM or SAT bands.
Auxiliary Mode
• The auxiliary (AUX) jack allows a portable device, such as an MP3 player or a cassetteplayer, to be plugged into the radio and utilize the vehicle’s audio system and play
through the vehicle speakers.
Clock Setting
• Turn the radio on, then touch the screen where the time is displayed.
• Touch the USER CLOCK soft-key (Navigation radio only).
29
ELECTRONICS
Page 32 of 84
• To adjust the hours, touch either the HOUR FORWARD or HOUR BACKWARD soft-key.
• To adjust the minutes, touch either the MINUTE FORWARD or MINUTE BACKWARDsoft-key.
• To save the new time setting, touch the screen where the word “Save” is displayed.
Store Radio Presets
• For REN and RER: Press the RADIO/MEDIA hard-key repeatedly until AM FM SAT is displayed in the upper left corner of the screen.
• For RBZ: Press the RADIO hard-key to display AM FM SAT in the upper left corner of the screen.
• Select the radio band by touching either the AM, FM, or SAT soft-key.
• Find the station to store by either pressing the SEEK UP/DOWN hard-key (REN and RER), touching the right and left arrow soft-keys (RBZ), touching the SCAN soft-key, or by using
the DIRECT TUNE soft-key.
• Once the station is found, touch and hold one of the PRESET soft-keys in the list to the right, until you hear a confirmation beep.
Hard Disk Drive Operation
Copy Complete Audio Disc To Hard-Drive
• Press the OPEN/CLOSE hard-key (REN and RER) or LOAD hard-key (RBZ) and insert adisc, then press the MENU hard-key.
• Touch the MY FILES soft-key, then select MY MUSIC.
• Touch the IMPORT MUSIC soft-key, then touch the FROM DISC soft-key in the next screen to start the process.
Copying From USB
• Insert a USB device, then select MY MUSIC.
• Touch the IMPORT MUSIC FILES soft-key, then touch the FROM USB soft-key in the nextscreen.
• Select the folders or titles you would like to copy, then touch the DONE soft-key to start the copy process.
Copy Pictures To The Hard-Drive
• Insert either a CD or a USB device containing your pictures.
• Touch the MY FILES soft-key, then go to the MANAGE MY FILES screen.
• Touch the MY PICTURES soft-key to get an overview of the currently stored images.
• Touch one of the ADD PICTURES soft-keys, then select the type of media inserted.
• Use the PAGE soft-keys to page through a list of pictures and press the picture you wouldlike to import.
• Confirm your selection by touching the YES soft-key. The imported picture is now available in the MANAGE MY PICTURES screen.
ELECTRONICS
30
Page 33 of 84
• In order to display the imported picture in the radio screen, touch the desired picturesoft-key.
• Select this picture by pressing the PICTURE VIEW soft-key. A check mark indicates the currently used picture.
Cleaning Your Touch-Screen Radio
• Do not spray any liquid or caustic chemicals directly on the screen. Use a clean and drymicro fiber lens cleaning cloth in order to clean the touch-screen.
• If necessary, use a lint-free cloth dampened with a cleaning solution such as isopropyl alcohol or an isopropyl alcohol and water solution ratio of 50:50. Be sure to follow the
solvent manufacturer's precautions and directions.
Navigation
Navigation Radio – RER Only
• Navigation radios require digital data from a navigation database. The data in thenavigation database is licensed from Navigation Technologies®. Not all roads are
digitized.
• For software updates, visit http://www.chrysler.com/en/owners/mygig/ website, visit http://www.navteq.com website, or contact your authorized dealer for the latest available
software.
NOTE: Many features of this radio are speed dependent. For your own safety, it is not
possible to use the touch-screen keyboard to enter a name (e.g., street name) while the
vehicle is in motion. Pull over at a safe location to complete your task.
• The Navigation system receives GPS signals from satellites to display the position of your vehicle.
New Destination
• Press the NAV hard-key to access the Navigation Main Menu.
• Touch the NEW DESTINATION soft-key to program a destination, then select thedestination soft-key of your choice.
Program/Storing Home Address
• Press the NAV hard-key to access the Navigation Main Menu.
• Touch the GUIDE ME HOME soft-key, then touch the STREET ADDRESS soft-key.
• Touch the STATE soft-key, then enter your state name into the speller; select your statefrom the list and press the CHANGE soft-key.
• Touch the INPUT STREET NAME soft-key and enter your street name into the speller.
• Touch the CONTINUE soft-key and enter your address into the speller; touch the CONTINUE soft-key again.
• Touch the city name and touch the SAVE soft-key to complete programming.
31
ELECTRONICS