key JEEP GRAND CHEROKEE 2014 WK2 / 4.G Workshop Manual
[x] Cancel search | Manufacturer: JEEP, Model Year: 2014, Model line: GRAND CHEROKEE, Model: JEEP GRAND CHEROKEE 2014 WK2 / 4.GPages: 220, PDF Size: 6.12 MB
Page 107 of 220
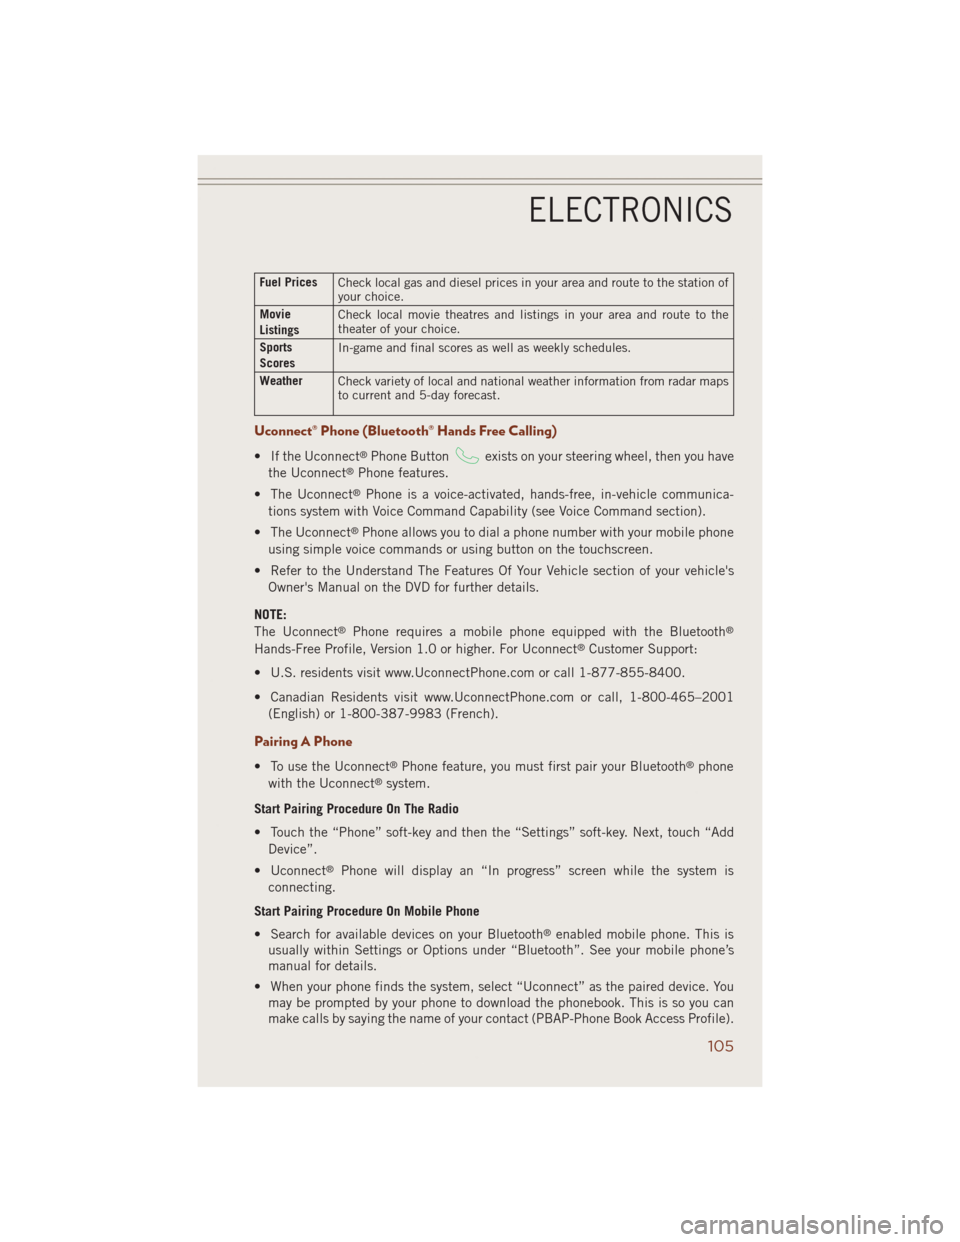
Fuel Prices
Check local gas and diesel prices in your area and route to the station of
your choice.
Movie
ListingsCheck local movie theatres and listings in your area and route to the
theater of your choice.
Sports
ScoresIn-game and final scores as well as weekly schedules.
Weather
Check variety of local and national weather information from radar maps
to current and 5-day forecast.
Uconnect® Phone (Bluetooth® Hands Free Calling)
• If the Uconnect®Phone Buttonexists on your steering wheel, then you have
the Uconnect®Phone features.
• The Uconnect
®Phone is a voice-activated, hands-free, in-vehicle communica-
tions system with Voice Command Capability (see Voice Command section).
• The Uconnect
®Phone allows you to dial a phone number with your mobile phone
using simple voice commands or using button on the touchscreen.
• Refer to the Understand The Features Of Your Vehicle section of your vehicle's
Owner's Manual on the DVD for further details.
NOTE:
The Uconnect
®Phone requires a mobile phone equipped with the Bluetooth®
Hands-Free Profile, Version 1.0 or higher. For Uconnect®Customer Support:
• U.S. residents visit www.UconnectPhone.com or call 1-877-855-8400.
• Canadian Residents visit www.UconnectPhone.com or call, 1-800-465–2001
(English) or 1-800-387-9983 (French).
Pairing A Phone
• To use the Uconnect®Phone feature, you must first pair your Bluetooth®phone
with the Uconnect®system.
Start Pairing Procedure On The Radio
• Touch the “Phone” soft-key and then the “Settings” soft-key. Next, touch “Add
Device”.
• Uconnect
®Phone will display an “In progress” screen while the system is
connecting.
Start Pairing Procedure On Mobile Phone
• Search for available devices on your Bluetooth
®enabled mobile phone. This is
usually within Settings or Options under “Bluetooth”. See your mobile phone’s
manual for details.
• When your phone finds the system, select “Uconnect” as the paired device. You
may be prompted by your phone to download the phonebook. This is so you can
make calls by saying the name of your contact (PBAP-Phone Book Access Profile).
ELECTRONICS
105
Page 108 of 220
Complete The Pairing Procedure
• When prompted on the phone, verify with radio password shown on the Uconnect
®
Screen.
• If your phone asks you to accept a connection request from Uconnect
®, select
“Yes”. If available, check the box telling it not to ask again – that way your phone
will automatically connect each time you start the vehicle.
Select The Mobile Phone's Priority Level
• When the pairing process has successfully completed, the system will prompt you
to choose whether or not this is your favorite phone. Selecting “Yes” will make this
phone the highest priority. This phone will take precedence over other paired
phones within range. Only one phone can be paired at a time.
• You are now ready to make hands-free calls. Press the “Uconnect
®Phone” button
on your steering wheel to begin.
Making A Phone Call
• Press the Uconnect®Phone button.
• After the BEEP, say “dial” then the number (or “call” then the name as listed in
your phone; see Phonebook).
NOTE:
You can also initiate a call by using the touchscreen on the Phone main screen.
Receiving A Call – Accept (And End)
• When an incoming call rings/is announced on Uconnect®, press the Phone
button
.
• To end a call, press the Hang Up or Phone button
.
Mute (Or Unmute) Microphone During Call
• During a call, press the “Mute” button on the touchscreen on the Phone main
screen to mute and unmute the call.
Transfer Ongoing Call Between Handset And Vehicle
• During an on-going call, touch the “Transfer” soft-key on the Phone main screen
to transfer an on-going call between handset and vehicle.
Common Phone Commands (Examples)
• “Call John Smith”
• “Call John Smith mobile”
• “Dial 1 248 555 1212”
• “Call Emergency”
• “Call Towing Assistance”
• “Redial”
ELECTRONICS
106
Page 109 of 220
Phonebook
• Uconnect®radios automatically downloads your phonebook from your paired
phone, if this feature is supported by your phone. Entries are updated each time
that the phone is connected. If your phone book entries do not appear, check the
settings on your phone. Some phones require you to enable this feature manually.
• Your phonebook can be browsed on your radio screen, but editing can only be done
on your phone. To browse, touch the “Phone” soft-key, then the “Phonebook”
soft-key.
• Favorite phonebook entries can be saved as Favorites for quicker access. Favorites
are shown at the top of your main phone screen.
Voice Command Tips
• Using complete names (i.e; Call John Doe vs. Call John) will result in greater
system accuracy.
• You can “chain” commands together for faster results. Say “Call John Doe,
mobile”, for example.
• If you are listening to available voice command options, you do not have to listen
to the entire list. When you hear the command that you need, press the
button on the steering wheel, wait for the beep and say your command.
Changing The Volume
• Start a dialogue by pressing the Phone button, then say a command for
example - "Help".
• Use the radio ON/OFF VOLUME rotary knob to adjust the volume to a comfortable
level while the Uconnect
®system is speaking. Please note the volume setting for
Uconnect®is different than the audio system.
NOTE:
To access help, press the Uconnect
®Phonebutton on the steering wheel and
say "help." Touch the display or push either
orbutton and say "cancel"
to cancel the help session.
ELECTRONICS
107
Page 117 of 220
• Push the BACK/LEFTbutton to access the information screens or sub-menu
screens of a main menu item.
• Push theOKbutton to access/select the information screens or sub-menu screens
of a main menu item. Push and hold the OK button for two seconds to reset
displayed/selected features that can be reset.
Compass Calibration
This compass is self-calibrating, which eliminates the need to set the compass
manually. When the vehicle is new, the compass may appear erratic and the EVIC will
display “– –” until the compass is calibrated.
You may also calibrate the compass by completing one or more 360 degree turns (in
an area free from large metal or metallic objects) until the “– –” message displayed
in the EVIC turns off. The compass will now function normally.
PROGRAMMABLE FEATURES
EVIC Programmable Features
The EVIC can be used to view or change the following settings. Push the UPor
DOWN
button until System Setup displays, then push the RIGHTbutton.
Scroll through the settings using the UP or DOWN buttons. Push the OK button to
change the setting. Push the BACK/LEFT
button to scroll back to a previous
menu or sub menu.
• Radio Info • Trip Info
• Fuel Economy Info • Tire Pressure
• Cruise Control Info • Vehicle Info
• Digital Vehicle Speed • Stored Warning Messages
• Screen Setup
Uconnect® Customer Programmable Features
• The Uconnect®system allows you to access Customer Programmable feature
settings such as Display, Clock, Safety/Assistance, Lights, Doors & Locks, Auto-On
Comfort & Remote Start, Engine Off Operation, Compass Settings, Audio, Trailer
Brake, Phone/Bluetooth
®, Suspension and SiriusXM Setup and System Informa-
tion through soft-keys.
ELECTRONICS
115
Page 118 of 220
• Touch the “Controls” or “Apps” soft-key located near the bottom of the screen,
then touch the “settings” soft-key to access the Settings screen. When making a
selection, scroll up or down until the preferred setting is highlighted, then press
and release the preferred setting until a check-mark appears next to the setting,
showing that setting has been selected. The following feature settings are
available:
• Display • Clock
• Safety & Driving Assistance • Doors & Locks
• Auto-On Comfort • Engine Off Options
• Compass (Uconnect
®5.0) • Audio
• Phone/Bluetooth®• SiriusXM Setup
• Lights • Trailer Brake
• Suspension • System Information
• Units • Voice
NOTE:
Depending on the vehicles options, feature settings may vary.
EVIC Reconfigurable Screen Setup
The following settings allow you to change what information is displayed in the
instrument cluster as well as the location that information is displayed.
Trip A
• Press and release the UP or DOWN arrow button until the Trip A icon is highlighted
in the EVIC (Toggle left or right to select Trip A or Trip B). Press and release the OK
button to display the Trip A information.
Trip B
• Press and release the UP or DOWN arrow button until the Trip B icon is highlighted
in the EVIC (Toggle left or right to select Trip A or Trip B). Press and release the OK
button to display the Trip B information.
Fuel Economy
• Press and release the UP or DOWN arrow button until the Fuel Economy icon is
highlighted. Press the RIGHT arrow button and the next screen will display the
following:
• Average Fuel Economy/Miles Per Gallon (MPG Bargraph)
• Range To Empty (RTE)
• Current Miles Per Gallon (MPG)
ELECTRONICS
116
Page 122 of 220
POWER OUTLETS
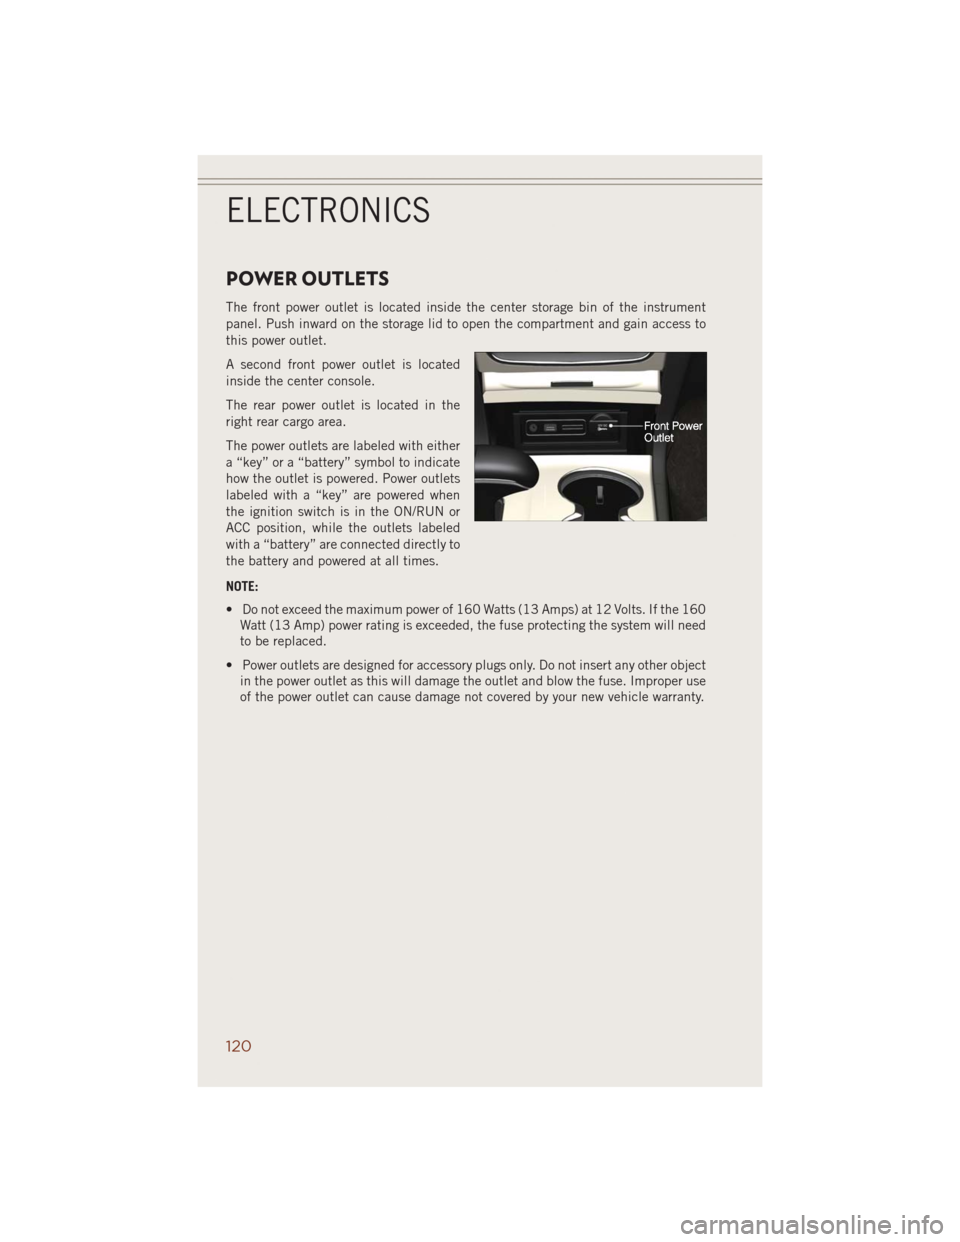
The front power outlet is located inside the center storage bin of the instrument
panel. Push inward on the storage lid to open the compartment and gain access to
this power outlet.
A second front power outlet is located
inside the center console.
The rear power outlet is located in the
right rear cargo area.
The power outlets are labeled with either
a “key” or a “battery” symbol to indicate
how the outlet is powered. Power outlets
labeled with a “key” are powered when
the ignition switch is in the ON/RUN or
ACC position, while the outlets labeled
with a “battery” are connected directly to
the battery and powered at all times.
NOTE:
• Do not exceed the maximum power of 160 Watts (13 Amps) at 12 Volts. If the 160
Watt (13 Amp) power rating is exceeded, the fuse protecting the system will need
to be replaced.
• Power outlets are designed for accessory plugs only. Do not insert any other object
in the power outlet as this will damage the outlet and blow the fuse. Improper use
of the power outlet can cause damage not covered by your new vehicle warranty.
ELECTRONICS
120
Page 148 of 220
Exhaust Service Required — See Dealer Now
This message indicates regeneration has been disabled due to a system malfunction.
The Powertrain control Module (PCM) will register a fault code and the instrument
panel will display the Malfunction Indicator Light (MIL).
CAUTION!
See your authorized dealer, as damage to the exhaust system could occur soon
with continued operation.
Exhaust Filter Full — Power Reduced See Dealer
The PCM derates the engine in order to limit the likelihood of permanent damage to
the after-treatment system. If this condition is not corrected and a dealer service is
not performed, extensive exhaust after-treatment damage can occur. Have your
vehicle serviced by your local authorized dealer.
CAUTION!
See your authorized dealer, as damage to the exhaust system could occur with the
exhaust filter full.
DIESEL EXHAUST FLUID
Diesel Exhaust Fluid (DEF) sometimes known simply by the name of its active
component, UREA – is a key component of selective catalytic reduction (SCR)
systems, which help diesel vehicles meet stringent emission regulations. DEF is a
liquid reducing agent that reacts with engine exhaust in the presence of a catalyst to
convert smog-forming nitrogen oxides (NOx) into harmless nitrogen and water vapor.
Your vehicle is equipped with a Selective Catalytic Reduction system in order to meet
the very stringent diesel emissions standards required by the Environmental Protec-
tion Agency. Selective Catalytic Reduction (SCR) is the first and only technology in
decades to be as good for the environment as it is good for business and vehicle
performance.
The purpose of the SCR system is to reduce levels of NOx (oxides of nitrogen emitted
from engines) that are harmful to our health and the environment to an almost
near-zero level. Small quantities of Diesel Exhaust Fluid (DEF) are injected into the
exhaust upstream of a catalyst where, when vaporized, convert smog-forming
nitrogen oxides (NOx) into harmless nitrogen (N2) and water vapor (H2O), two
natural components of the air we breathe. You can operate with the comfort that your
vehicle is contributing to a cleaner, healthier world environment for this and
generations to come.
DIESEL
146
Page 155 of 220
- Malfunction Indicator Light (MIL)
The Malfunction Indicator Light (MIL) is part of an onboard diagnostic system called
OBD II that monitors engine and automatic transmission control systems. The light
will illuminate when the key is in the ON/RUN position before engine start. If the bulb
does not come on when turning the key from OFF to ON/RUN, have the condition
checked promptly.
Certain conditions, poor fuel quality, etc., may illuminate the light after engine start.
The vehicle should be serviced if the light stays on through several of your typical
driving cycles. In most situations, the vehicle will drive normally and will not require
towing.
CAUTION!
Prolonged driving with the Malfunction Indicator Light (MIL) on could cause
damage to the engine control system. It also could affect fuel economy and
driveability. If the MIL is flashing, severe catalytic converter damage and power
loss will soon occur. Immediate service is required.
WARNING!
A malfunctioning catalytic converter, as referenced above, can reach higher tempera-
tures than in normal operating conditions. This can cause a fire if you drive slowly or
park over flammable substances such as dry plants, wood, cardboard, etc. This could
result in death or serious injury to the driver, occupants or others.
- Electronic Stability Control (ESC) Activation/Malfunction Indicator Light
The “ESC Activation/Malfunction Indicator Light” in the instrument cluster will
come on when the ignition switch is turned to the ON/RUN position. It should go out
with the engine running. If the “ESC Activation/Malfunction Indicator Light” comes
on continuously with the engine running, a malfunction has been detected in the
ESC system. If this light remains on after several ignition cycles, and the vehicle has
been driven several miles (kilometers) at speeds greater than 30 mph (48 km/h), see
your authorized dealer as soon as possible to have the problem diagnosed and
corrected.
NOTE:
• The “ESC Off Indicator Light” and the “ESC Activation/Malfunction Indicator
Light” come on momentarily each time the ignition switch is turned to ON/RUN.
• Each time the ignition is turned to ON/RUN, the ESC system will be ON, even if
it was turned off previously.
WHAT TO DO IN EMERGENCIES
153
Page 157 of 220
- Electronic Throttle Control (ETC) Light
This light informs you of a problem with the Electronic Throttle Control (ETC) system.
If a problem is detected, the light will come on while the engine is running. Cycle the
ignition key when the vehicle has completely stopped and the shift lever/gear selector
is placed in the PARK position; the light should turn off.
If the light remains lit with the engine running, your vehicle will usually be drivable;
however, see an authorized service center immediately. If the light is flashing when the
engine is running, immediate service is required and you may experience reduced
performance, an elevated/rough idle or engine stall and your vehicle may require towing.
- Air Bag Warning Light
This light will turn on for four to eight seconds as a bulb check when the ignition
switch is first turned to the ON/RUN position. If the light is either not on during
starting, stays on, or turns on while driving, have the system inspected at an
authorized dealer as soon as possible. Refer to “Occupant Restraints” in “Things To
Know Before Starting Your Vehicle” of your Owner’s Manual for further information.
NOTE:
The Air Bag System is designed to be maintenance free.
Oil Change Indicator
Message
If an “oil change” message (shown as Oil Change Due) appears and a single chime
sounds, it is time for your next required oil change:
1. Without pressing the brake pedal, push the ENGINE START/STOP button and
cycle the ignition to the ON/RUN position (do not start the engine.)
2. Fully depress the accelerator pedal, slowly, three times within 10 seconds.
3. Without pressing the brake pedal, push the ENGINE START/STOP button once to
return the ignition to the OFF/LOCK position.
- Engine Temperature Warning Light
This light warns of an overheated engine condition.
If the light turns on and a warning chime sounds while driving, safely pull over and
stop the vehicle. If the A/C system is on, turn it off. Also, shift the transmission into
NEUTRAL and idle the vehicle. If the temperature reading does not return to normal,
turn the engine off immediately.
We recommend that you do not operate the vehicle or engine damage will occur. Have
the vehicle serviced immediately.
WHAT TO DO IN EMERGENCIES
155
Page 204 of 220
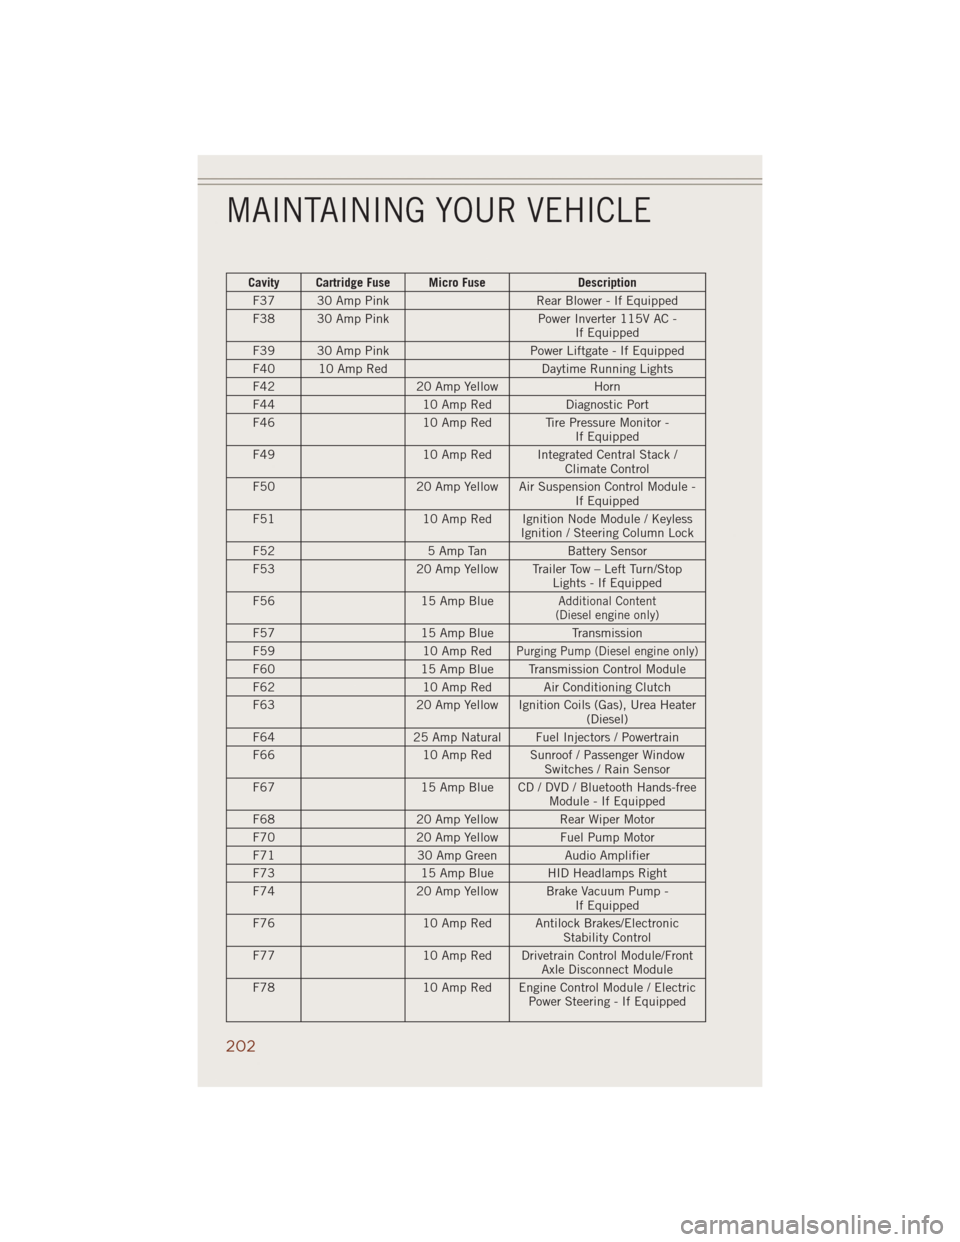
Cavity Cartridge Fuse Micro Fuse Description
F37 30 Amp Pink Rear Blower - If Equipped
F38 30 Amp Pink Power Inverter 115V AC -
If Equipped
F39 30 Amp Pink Power Liftgate - If Equipped
F40 10 Amp Red Daytime Running Lights
F42 20 Amp Yellow Horn
F44 10 Amp Red Diagnostic Port
F46 10 Amp Red Tire Pressure Monitor -
If Equipped
F49 10 Amp Red Integrated Central Stack /
Climate Control
F50 20 Amp Yellow Air Suspension Control Module -
If Equipped
F51 10 Amp Red Ignition Node Module / Keyless
Ignition / Steering Column Lock
F52 5 Amp Tan Battery Sensor
F53 20 Amp Yellow Trailer Tow – Left Turn/Stop
Lights - If Equipped
F56 15 Amp Blue
Additional Content
(Diesel engine only)
F57 15 Amp Blue Transmission
F59 10 Amp Red
Purging Pump (Diesel engine only)
F60 15 Amp Blue Transmission Control Module
F62 10 Amp Red Air Conditioning Clutch
F63 20 Amp Yellow Ignition Coils (Gas), Urea Heater
(Diesel)
F64 25 Amp Natural Fuel Injectors / Powertrain
F66 10 Amp Red Sunroof / Passenger Window
Switches / Rain Sensor
F67 15 Amp Blue CD / DVD / Bluetooth Hands-free
Module - If Equipped
F68 20 Amp Yellow Rear Wiper Motor
F70 20 Amp Yellow Fuel Pump Motor
F71 30 Amp Green Audio Amplifier
F73 15 Amp Blue HID Headlamps Right
F74 20 Amp Yellow Brake Vacuum Pump -
If Equipped
F76 10 Amp Red Antilock Brakes/Electronic
Stability Control
F77 10 Amp Red Drivetrain Control Module/Front
Axle Disconnect Module
F78 10 Amp Red Engine Control Module / Electric
Power Steering - If Equipped
MAINTAINING YOUR VEHICLE
202