lock JEEP GRAND CHEROKEE 2016 WK2 / 4.G Owner's Manual
[x] Cancel search | Manufacturer: JEEP, Model Year: 2016, Model line: GRAND CHEROKEE, Model: JEEP GRAND CHEROKEE 2016 WK2 / 4.GPages: 276, PDF Size: 10.84 MB
Page 47 of 276
Automatic Headlights — If Equipped
This system automatically turns the headlights on or off according to ambient light
levels. To turn the system on, rotate the headlight switch to the A (AUTO) position.
When the system is on, the Headlight Delay feature is also on. This means the
headlights will stay on for up to 90 seconds after you turn the ignition switch to the
OFF position. To turn the automatic headlights off, turn the headlight switch out of
the AUTO position.
NOTE:
The engine must be running before the headlights will turn on in the Automatic
Mode.
Automatic High Beam — If Equipped
The Automatic High Beam Headlamp Control system provides increased forward
lighting at night by automating high beam control through the use of a digital camera
mounted on the inside rearview mirror. This camera detects vehicle specific light and
automatically switches from high beams to low beams until the approaching vehicle
is out of view.
NOTE:
• The Automatic High Beam Headlamp Control can be turned on or off using theUconnect System. Refer to “Uconnect Settings” in “Understanding Your Instru-
ment Panel” in the Owner’s Manual on the DVD for further information.
• Broken, muddy, or obstructed headlights and taillights of vehicles in the field of view will cause headlights to remain on longer (closer to the vehicle). Also, dirt,
film, and other obstructions on the windshield or camera lens will cause the
system to function improperly.
• To opt out of the Advanced Auto High-Beam Sensitivity Control (default) and enter Reduced High-Beam Sensitivity Control (not recommended), toggle highbeam
lever 6 full on/off cycles within 10 seconds of ignition ON. System will return to
default setting upon ignition off.
If the windshield or Automatic High Beam Headlamp Control mirror is replaced, the
mirror must be re-aimed to ensure proper performance. See your local authorized
dealer.
Interior Lights
Courtesy and dome lights are turned on when the front doors are opened or when the
dimmer control (rotating wheel on the right side of the headlight switch) is rotated to
its farthest upward position. If your vehicle is equipped with Remote Keyless Entry
(RKE) and the UNLOCK button is pressed on the RKE transmitter the courtesy and
dome lights will turn on. When a door is open and the interior lights are on, rotating
the dimmer control all the way down, to the OFF detent, will cause all the interior
lights to go out. This is also known as the “Party” mode because it allows the doors
to stay open for extended periods of time without discharging the vehicle’s battery.
OPERATING YOUR VEHICLE
45
Page 61 of 276
TRANSMISSION GEAR SELECTOR
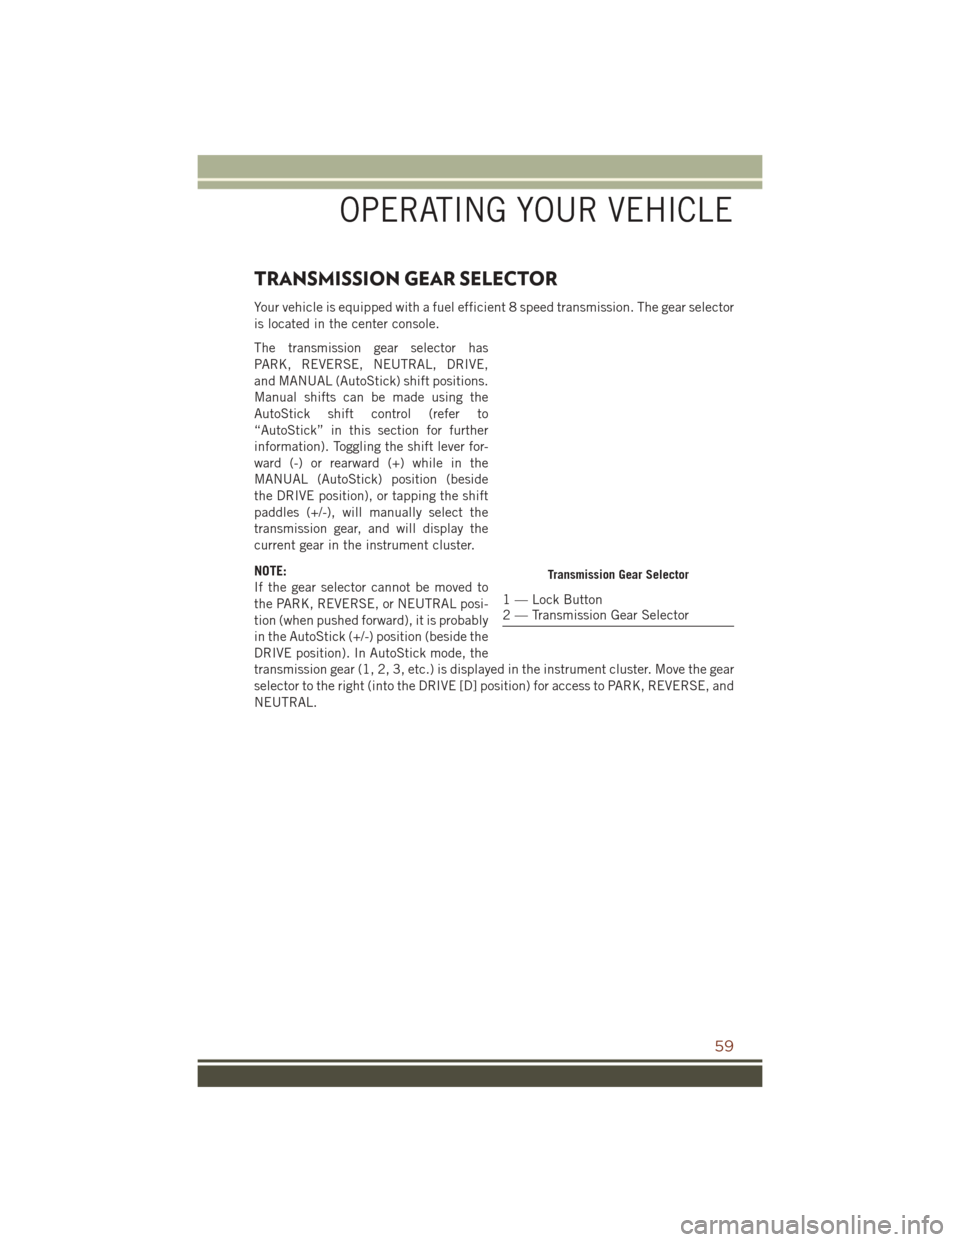
Your vehicle is equipped with a fuel efficient 8 speed transmission. The gear selector
is located in the center console.
The transmission gear selector has
PARK, REVERSE, NEUTRAL, DRIVE,
and MANUAL (AutoStick) shift positions.
Manual shifts can be made using the
AutoStick shift control (refer to
“AutoStick” in this section for further
information). Toggling the shift lever for-
ward (-) or rearward (+) while in the
MANUAL (AutoStick) position (beside
the DRIVE position), or tapping the shift
paddles (+/-), will manually select the
transmission gear, and will display the
current gear in the instrument cluster.
NOTE:
If the gear selector cannot be moved to
the PARK, REVERSE, or NEUTRAL posi-
tion (when pushed forward), it is probably
in the AutoStick (+/-) position (beside the
DRIVE position). In AutoStick mode, the
transmission gear (1, 2, 3, etc.) is displayed in the instrument cluster. Move the gear
selector to the right (into the DRIVE [D] position) for access to PARK, REVERSE, and
NEUTRAL.
Transmission Gear Selector
1 — Lock Button
2 — Transmission Gear Selector
OPERATING YOUR VEHICLE
59
Page 75 of 276
Pinch Protection Feature
This feature will detect an obstruction in the opening of the sunroof during Express
Close operation. If an obstruction in the path of the sunroof is detected, the sunroof
will automatically retract. Remove the obstruction if this occurs. Next, push the
switch forward and release to Express Close.
NOTE:
If three consecutive sunroof close attempts result in Pinch Protect reversals, the
fourth close attempt will be a Manual Close movement with Pinch Protect disabled.
WARNING!
• Do not let children play with the sunroof. Never leave children unattended in avehicle, or with access to an unlocked vehicle. Do not leave the Key Fob in or
near the vehicle, and do not leave the ignition of a vehicle equipped with
Keyless Enter-N-Go in the ACC or ON/RUN mode. Occupants, particularly
unattended children, can become entrapped by the power sunroof while
operating the power sunroof switch. Such entrapment may result in serious
injury or death.
• In a collision, there is a greater risk of being thrown from a vehicle with an open
sunroof. You could also be severely injured or killed. Always fasten your seat
belt properly and make sure all passengers are properly secured.
• Do not allow small children to operate the sunroof. Never allow your fingers,
other body parts, or any object to project through the sunroof opening. Injury
may result.
WIND BUFFETING
Wind buffeting can be described as a helicopter-type percussion sound. If buffeting
occurs with the rear windows open, adjust the front and rear windows together.
If buffeting occurs with the sunroof open, adjust the sunroof opening, or adjust any
window. This will minimize buffeting.
OPERATING YOUR VEHICLE
73
Page 81 of 276
Uconnect Access enhances your ownership and driving experience by connecting
your vehicle to an operable 1X (voice/data) or 3G (data) network. When connected to
an operable 1X (voice/data) or 3G (data) network, you can:
• Place a call to a local 9-1-1 Operator for emergency assistance.
• Remotely lock/unlock your doors and start your vehicle from virtually anywhere,using the Uconnect Access App from your device. You can also do so by logging
into Mopar Owner Connect, or by calling Uconnect Care when your vehicle has an
operable 1X (voice/data) or 3G (data) network connection. Services can only be
used where coverage is available; see coverage map for details.
• Turn your vehicle into a WiFi Hotspot and connect your devices to the internet.
• Receive text or email notifications if your vehicle's theft alarm goes off.
• Receive stolen vehicle assistance, using GPS technology to help authorities locate your vehicle if it is stolen.
• Listen to your text messages or send free-form text messages with your voice while keeping your hands on the wheel, using the Voice Texting feature. Requires a
device that supports Bluetooth Message Access Profile (MAP).
• Search for places to eat, shop, relax and play with Yelp, using your voice or on-screen menu. Then navigate to them (navigation standard on Uconnect 8.4AN,
optional on Uconnect 8.4A).
• Get operator assistance using the ASSIST button on your interior rearview mirror.
Before you drive, familiarize yourself with the easy-to-use Uconnect Access.
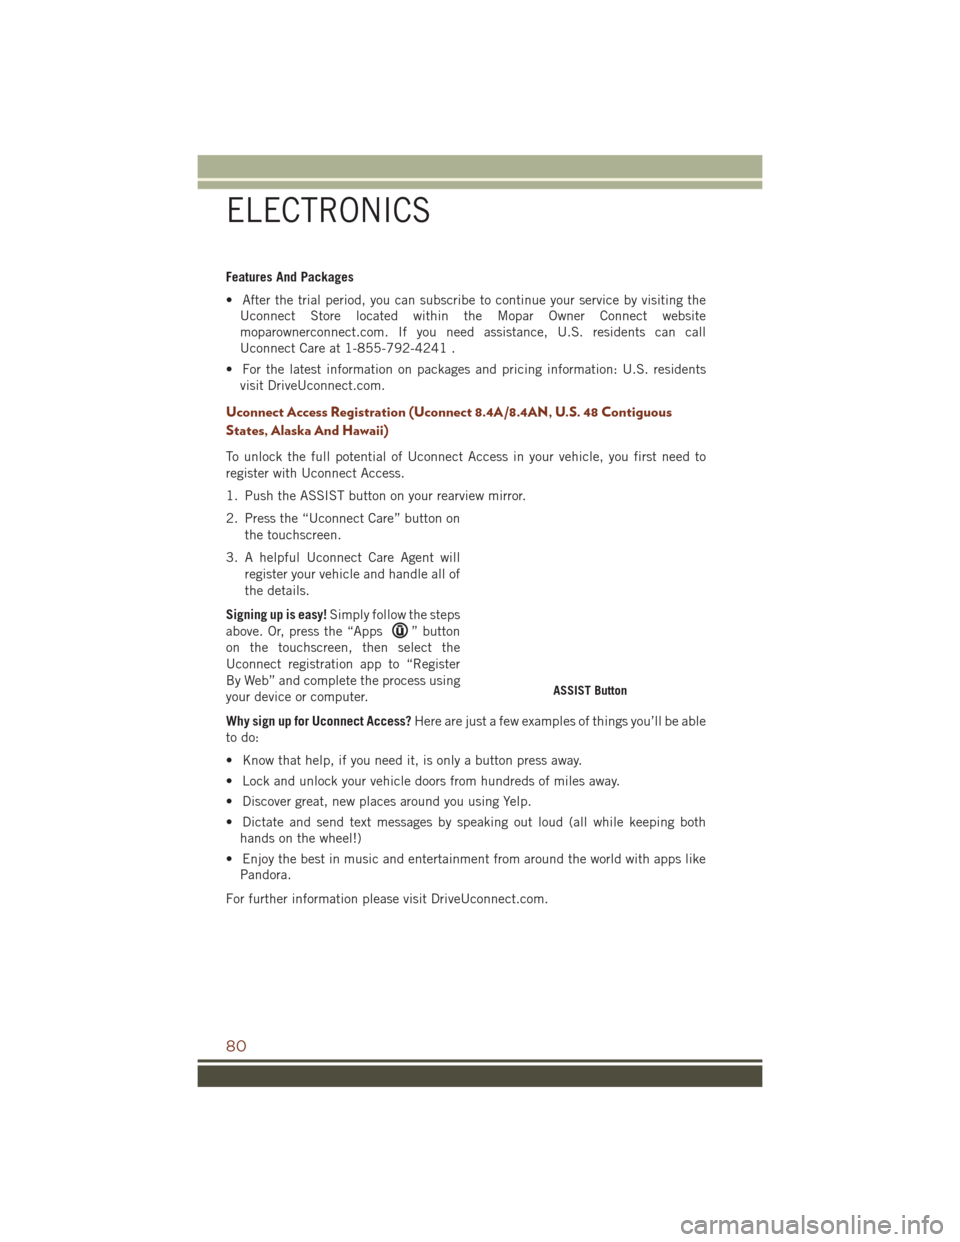
1. The ASSIST and 9-1-1 buttons are located on your rearview mirror. The ASSIST button is used for contacting Roadside Assistance, Vehicle Care and Uconnect
Care. The 9-1-1 button connects you to emergency services.
NOTE:
Vehicles sold in Canada and Mexico DO NOT have 9-1-1 call system capabilities.
9-1-1 or other emergency line operators in Canada and Mexico may not answer or
respond to 9-1-1 system calls.
2. The Uconnect “Apps
” button in the center of the menu bar of the radio
touchscreen. This is where you can begin your registration process, manage your
Apps and purchase WiFi on demand.
3. The Uconnect Voice Command and Uconnect Phone buttons are located on the left side of your steering wheel. These buttons let you use your voice to give
commands, make phone calls, send and receive text messages hands-free, enter
navigation destinations, and control your radio and media devices.
Included Trial Period For New Vehicles
Your new vehicle may come with an included trial period for use of the Uconnect
Access Services starting at the date of vehicle purchase (date based on vehicle sales
notification from your dealer). To activate the trial, you must first register with Uconnect
Access. After the trial period, if you wish to continue your Uconnect Access Services
you can choose to purchase a subscription.
ELECTRONICS
79
Page 82 of 276
Features And Packages
• After the trial period, you can subscribe to continue your service by visiting theUconnect Store located within the Mopar Owner Connect website
moparownerconnect.com. If you need assistance, U.S. residents can call
Uconnect Care at 1-855-792-4241 .
• For the latest information on packages and pricing information: U.S. residents visit DriveUconnect.com.
Uconnect Access Registration (Uconnect 8.4A/8.4AN, U.S. 48 Contiguous
States, Alaska And Hawaii)
To unlock the full potential of Uconnect Access in your vehicle, you first need to
register with Uconnect Access.
1. Push the ASSIST button on your rearview mirror.
2. Press the “Uconnect Care” button on
the touchscreen.
3. A helpful Uconnect Care Agent will register your vehicle and handle all of
the details.
Signing up is easy! Simply follow the steps
above. Or, press the “Apps
” button
on the touchscreen, then select the
Uconnect registration app to “Register
By Web” and complete the process using
your device or computer.
Why sign up for Uconnect Access? Here are just a few examples of things you’ll be able
to do:
• Know that help, if you need it, is only a button press away.
• Lock and unlock your vehicle doors from hundreds of miles away.
• Discover great, new places around you using Yelp.
• Dictate and send text messages by speaking out loud (all while keeping both hands on the wheel!)
• Enjoy the best in music and entertainment from around the world with apps like Pandora.
For further information please visit DriveUconnect.com.
ASSIST Button
ELECTRONICS
80
Page 83 of 276
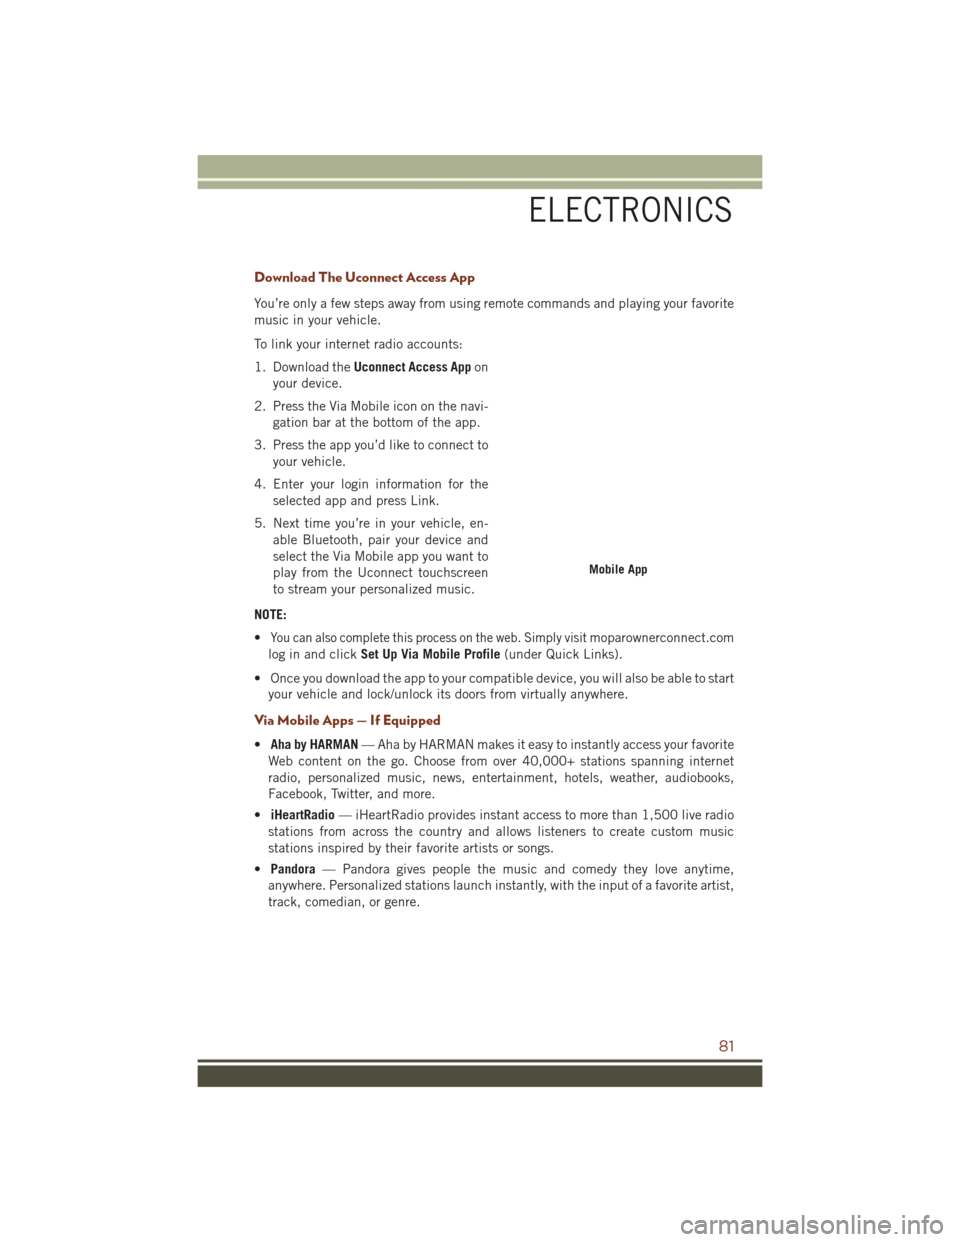
Download The Uconnect Access App
You’re only a few steps away from using remote commands and playing your favorite
music in your vehicle.
To link your internet radio accounts:
1. Download theUconnect Access App on
your device.
2. Press the Via Mobile icon on the navi- gation bar at the bottom of the app.
3. Press the app you’d like to connect to your vehicle.
4. Enter your login information for the selected app and press Link.
5. Next time you’re in your vehicle, en- able Bluetooth, pair your device and
select the Via Mobile app you want to
play from the Uconnect touchscreen
to stream your personalized music.
NOTE:
•
You can also complete this process on the web. Simply visitmoparownerconnect.com
log in and click Set Up Via Mobile Profile (under Quick Links).
• Once you download the app to your compatible device, you will also be able to start your vehicle and lock/unlock its doors from virtually anywhere.
Via Mobile Apps — If Equipped
• Aha by HARMAN — Aha by HARMAN makes it easy to instantly access your favorite
Web content on the go. Choose from over 40,000+ stations spanning internet
radio, personalized music, news, entertainment, hotels, weather, audiobooks,
Facebook, Twitter, and more.
• iHeartRadio — iHeartRadio provides instant access to more than 1,500 live radio
stations from across the country and allows listeners to create custom music
stations inspired by their favorite artists or songs.
• Pandora — Pandora gives people the music and comedy they love anytime,
anywhere. Personalized stations launch instantly, with the input of a favorite artist,
track, comedian, or genre.
Mobile App
ELECTRONICS
81
Page 89 of 276
Uconnect Access Remote Features
If you own a compatible iPhone or Android powered device, the Uconnect Access App
allows you to remotely lock or unlock your doors, start your engine or activate your
horn and lights from virtually anywhere. Your vehicle must be equipped with remote
start and your vehicle must have an operable 1X (voice/data) or 3G (data) network
connection). Services can only be used where coverage is available; see coverage
map for details. You can download the App from Mopar Owner Connect or from the
App Store (iPhone) or Google Play store. Visit UconnectPhone.com to determine if
your device is compatible. For Uconnect Phone customer support and to determine
if your device is compatible.
U.S. residents - visit UconnectPhone.com or call 1-877-855-8400.
Remote Start (If Equipped)— This feature provides the ability to start the engine on
your vehicle, without the keys and from virtually any distance. You can send a request
to your vehicle in one of two ways:
1. Using the Uconnect Access App from a compatible device.
2. From the Mopar Owner Connect website.
• After 15 minutes if you have not entered your vehicle with the key, the enginewill shut off automatically.
• You can also send a command to turn-off an engine that has been remote started.
• This remote function requires your vehicle to be equipped with a factory- installed Remote Start system. To utilize this feature after the Uconnect Access
App is downloaded, login with your user name and password.
NOTE:
Your four digit Uconnect Security PIN is required to confirm the request. • You can set-up notifications for your account to receive an email or text (SMS)message every time a command is sent. Login to Mopar Owner Connect
moparownerconnect.com and click on Edit Profile to manage Uconnect
Notifications.
Remote Door Lock/Unlock — This feature provides the ability to lock or unlock the door
on your vehicle, without the keys and from virtually any distance. You can send a
request to your vehicle in one of three ways:
1. Using the Uconnect Access App from a compatible device.
2. From the Mopar Owner Connect website.
3. By contacting the Uconnect Care on the phone.
To use this feature after the Uconnect Access App is downloaded, login using your
user name and password. You will need your four digit Uconnect Security PIN to
confirm the request. Press the “closed lock” icon on your Uconnect Access App to
lock the doors, and press the “open Lock” icon to unlock the driver’s door.
ELECTRONICS
87
Page 92 of 276
UCONNECT 5.0
Clock Setting
To start the clock setting procedure:
1. Push the MORE button on the faceplate. Next press the “Settings” button on thetouchscreen and then press the “Clock and Date” button on the touchscreen.
2. Press the “Set Time” button on the touchscreen.
3. Press the “Up” or “Down” arrows to adjust the hours or minutes, next select the “AM” or “PM” button on the touchscreen. You can also select 12hr or 24hr format
by pressing the desired button on the touchscreen.
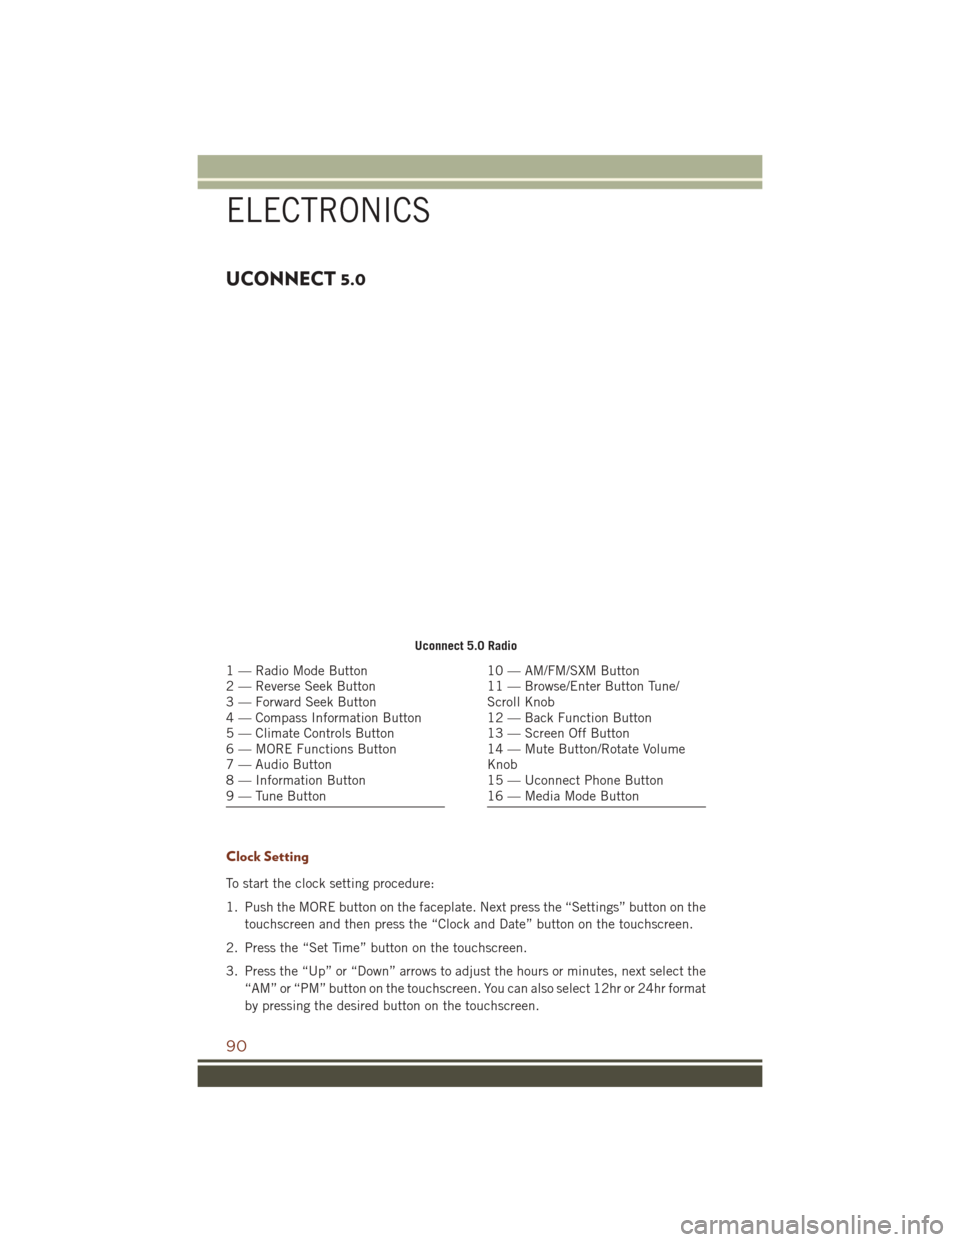
Uconnect 5.0 Radio
1 — Radio Mode Button
2 — Reverse Seek Button
3 — Forward Seek Button
4 — Compass Information Button
5 — Climate Controls Button
6 — MORE Functions Button
7 — Audio Button
8 — Information Button
9 — Tune Button10 — AM/FM/SXM Button
11 — Browse/Enter Button Tune/
Scroll Knob
12 — Back Function Button
13 — Screen Off Button
14 — Mute Button/Rotate Volume
Knob
15 — Uconnect Phone Button
16 — Media Mode Button
ELECTRONICS
90
Page 93 of 276
4. Once the time is set press the “Done” button on the touchscreen to exit the timescreen.
NOTE:
In the Clock Setting Menu you can also select the “Show Time Status” button on the
touchscreen, then select from “On” or “Off” to display the time in the status bar.
Equalizer, Balance And Fade
1. Push the MORE button on the faceplate. Next press the “Settings” button on the touchscreen.
2. Then scroll down and press the “Audio” button on the touchscreen to get to the Audio menu.
3. The Audio Menu shows the following options for you to customize your audio settings.
Equalizer
• Press the “Equalizer” button on the touchscreen to adjust the Bass, Mid and Treble. Use the “+” or “–” button on the touchscreen to adjust the equalizer to your
desired settings. Press the “Back Arrow” button on the touchscreen when done.
Balance/Fade
• Press the “Balance/Fade” button on the touchscreen to adjust the sound from the speakers. Use the arrow button on the touchscreen to adjust the sound level from
the front and rear or right and left side speakers. Press the Center “C” button on
the touchscreen to reset the balance and fade to the factory setting. Press the
“Back Arrow” button on the touchscreen when done.
Speed Adjusted Volume
• Press the “Speed Adjusted Volume” button on the touchscreen to select between OFF, 1, 2 or 3. This will decrease the radio volume relative to a decrease in vehicle
speed. Press the “Back Arrow” button on the touchscreen when done.
Loudness
• Press the “Loudness” button on the touchscreen to select the Loudness feature. When this feature is activated it improves sound quality at lower volumes.
Surround Sound
• Press the “Surround Sound” button on the touchscreen, select “On” or “Off” followed by pressing the “Back Arrow” button on the touchscreen. When this
feature is activated, it provides simulated surround sound mode.
Radio Operation
Seek Up/Seek Down
• Press the up or down button to seek through radio stations in AM, FM or SXMbands.
• Hold either button to bypass stations without stopping.
ELECTRONICS
91
Page 103 of 276
CAUTION!
Do NOT attach any object to the touchscreen, doing so can result in damage to the
screen.
Setting The Time
• Model 8.4AN synchronizes time automatically via GPS, so it should not require any time adjustment. If you do need to set the time manually, follow the
instructions below for Model 8.4A.
• For Model 8.4A, turn the unit on, then press the time display at the top of the screen. Press “Yes.”
• If the time is not displayed at the top of the screen, press the “Settings” button on the touchscreen. In the Settings screen, press the “Clock” button on the touch-
screen, then check or uncheck this option.
• Press “+” or “–” next to Set Time Hours and Set Time Minutes to adjust the time.
• If these features are not available, uncheck the Sync Time box.
• Press “X” to save your settings and exit out of the Clock Setting screen.
Background Themes
• Screen background themes are selectable from a pre-loaded list of themes. If you’d like to set a theme, follow the instructions below.
• Press the “Settings” button on the touchscreen.
• Press the “Display” button on the touchscreen.
• Then press “Set Theme” button on the touchscreen and select a theme.
Audio Settings
• Press of the “Audio” button on the touchscreen to activate the Audio settings screen to adjust Balance\Fade, Equalizer, and Speed Adjusted Volume.
• You can return to the Radio screen by pressing the “X” located at the top right.
Balance/Fade
• Press the “Balance/Fade” button on the touchscreen to Balance audio between the front speakers or fade the audio between the rear and front speakers.
• Pressing the “Front,” “Rear,” “Left,” or “Right” buttons on the touchscreen or press and drag the Speaker Icon to adjust the Balance/Fade.
Equalizer
• Press the “Equalizer” button on the touchscreen to activate the Equalizer screen.
• Press the “+” or “–” buttons on the touchscreen, or press and drag over the level bar for each of the equalizer bands. The level value, which spans between plus or
minus 9, is displayed at the bottom of each of the Bands.
ELECTRONICS
101