run flat JEEP GRAND CHEROKEE 2016 WK2 / 4.G User Guide
[x] Cancel search | Manufacturer: JEEP, Model Year: 2016, Model line: GRAND CHEROKEE, Model: JEEP GRAND CHEROKEE 2016 WK2 / 4.GPages: 276, PDF Size: 10.84 MB
Page 23 of 276
WARNING!
• Side Air Bags need room to inflate. Do not lean against the door or window. Situpright in the center of the seat.
• Being too close to the Side Air Bags during deployment could cause you to be
severely injured or killed.
• Relying on the Side Air Bags alone could lead to more severe injuries in a
collision. The Side Air Bags work with your seat belt to restrain you properly. In
some collisions, Side Air Bags won’t deploy at all. Always wear your seat belt
even though you have Side Air Bags.
• This vehicle is equipped with left and right Supplemental Side Air Bag
Inflatable Curtains (SABICs). Do not stack luggage or other cargo up high
enough to block the deployment of the SABICs. The trim covering above the
side windows where the SABIC and its deployment path are located should
remain free from any obstructions.
• This vehicle is equipped with SABICs. In order for the SABICs to work as
intended, do not install any accessory items in your vehicle which could alter
the roof. Do not add an aftermarket sunroof to your vehicle. Do not add roof
racks that require permanent attachments (bolts or screws) for installation on
the vehicle roof. Do not drill into the roof of the vehicle for any reason.
• Do not use accessory seat covers or place objects between you and the Side Air
Bags; the performance could be adversely affected and/or objects could be
pushed into you, causing serious injury.
Enhanced Accident Response System
In the event of an impact, if the communication network remains intact, and the
power remains intact, depending on the nature of the event, the ORC will determine
whether to have the Enhanced Accident Response System perform the following
functions:
• Cut off fuel to the engine.
• Flash hazard lights as long as the battery has power or until the hazard light button
is pushed. The hazard lights can be deactivated by pushing the hazard light
button.
• Turn on the interior lights, which remain on as long as the battery has power.
• Unlock the power door locks.
Enhanced Accident Response System Reset Procedure
In order to reset the Enhanced Accident Response System functions after an event,
the ignition switch must be changed from ignition START or ON/RUN to ignition OFF.
Carefully check the vehicle for fuel leaks in the engine compartment and on the
ground near the engine compartment and fuel tank before resetting the system and
starting the engine.
GETTING STARTED
21
Page 24 of 276
Air Bag Warning Light
The air bags must be ready to inflate for your protection in a collision. The Occupant
Restraint Controller (ORC) monitors the internal circuits and interconnecting wiring
associated with air bag system electrical components.
The ORC monitors the readiness of the electronic parts of the air bag system
whenever the ignition switch is in the START or ON/RUN position. If the ignition
switch is in the OFF position or in the ACC position, the air bag system is not on and
the air bags will not inflate.
The ORC turns on the Air Bag Warning Light in the instrument panel for approxi-
mately four to eight seconds for a self-check when the ignition switch is first turned
to the ON/RUN position. After the self-check, the Air Bag Warning Light will turn off.
If the ORC detects a malfunction in any part of the system, it turns on the Air Bag
Warning Light, either momentarily or continuously. A single chime will sound to alert
you if the light comes on again after initial startup.
If the Air Bag Warning Light in the instrument panel is not on during the four to eight
seconds when the ignition switch is first turned to the ON/RUN position, stays on, or
turns on while driving, have the vehicle serviced by an authorized service center
immediately.
NOTE:
If the speedometer, tachometer, or any engine related gauges are not working, the
Occupant Restraint Controller (ORC) may also be disabled. In this condition the air
bags may not be ready to inflate for your protection. Have an authorized dealer
service the air bag system immediately.
Event Data Recorder (EDR)
This vehicle is equipped with an event data recorder (EDR). The main purpose of an
EDR is to record, in certain crash or near crash-like situations, such as an air bag
deployment or hitting a road obstacle, data that will assist in understanding how a
vehicle’s systems performed. The EDR is designed to record data related to vehicle
dynamics and safety systems for a short period of time, typically 30 seconds or less.
The EDR in this vehicle is designed to record such data as:
• How various systems in your vehicle were operating;
• Whether or not the driver and passenger safety belts were buckled/fastened;
• How far (if at all) the driver was depressing the accelerator and/or brake pedal;and,
• How fast the vehicle was traveling.
GETTING STARTED
22
Page 162 of 276
• Aero Mode (Lowers the vehicle approximately 0.6 in (15 mm) – This positionprovides improved aerodynamics by lowering the vehicle. The vehicle will auto-
matically enter Aero Mode when the vehicle speed remains between 52 mph
(83 km/h) and 56 mph (90 km/h) for greater than 20 seconds or if the vehicle
speed exceeds 56 mph (90 km/h). The vehicle will return to NRH from Aero Mode
if the vehicle speed remains between 20 mph (32 km/h) and 25 mph (40 km/h) for
greater than 20 seconds or if the vehicle speed falls below 20 mph (32 km/h). The
vehicle will enter Aero Mode, regardless of vehicle speed if the gear selector is in
the “SPORT” position.
• Transport Mode — To assist with flat bed towing, the air suspension system has a feature which will put the vehicle into Entry/Exit height and disable the automatic
load leveling system. Refer to “Programmable Features" (Uconnect Customer
Programmable Features) in “Electronics” for further information. Transport Mode
is selectable within the Suspension features.
NOTE:
This mode is intended to be enabled with engine running.
WARNING!
• You or others could be injured if you leave the vehicle unattended with the transfer case in the N (Neutral) position without first fully engaging the parking
brake. The transfer case N (Neutral) position disengages both the front and rear
driveshafts from the powertrain and will allow the vehicle to move regardless of
the transmission position. The parking brake should always be applied when
the driver is not in the vehicle.
• The air suspension system uses a high pressure volume of air to operate the
system. To avoid personal injury or damage to the system, see your authorized
dealer for service.
HILL START ASSIST/HILL DESCENT CONTROL/SELEC
SPEED CONTROL — IF EQUIPPED
• The Hill Start Assist system assists the driver when starting a vehicle from a stopon a hill.
• The Hill Descent Control system maintains vehicle speed while descending hills during off-road driving situations and is available in 4WD LOW range.
• The Selec Speed Control feature allows the driver to travel at slow speeds on level ground, uphill or downhill without actively controlling either the throttle or brake.
• Refer to your Owner's Manual on the DVD for further details.
OFF-ROAD CAPABILITIES (4WD OPERATION)
160
Page 169 of 276
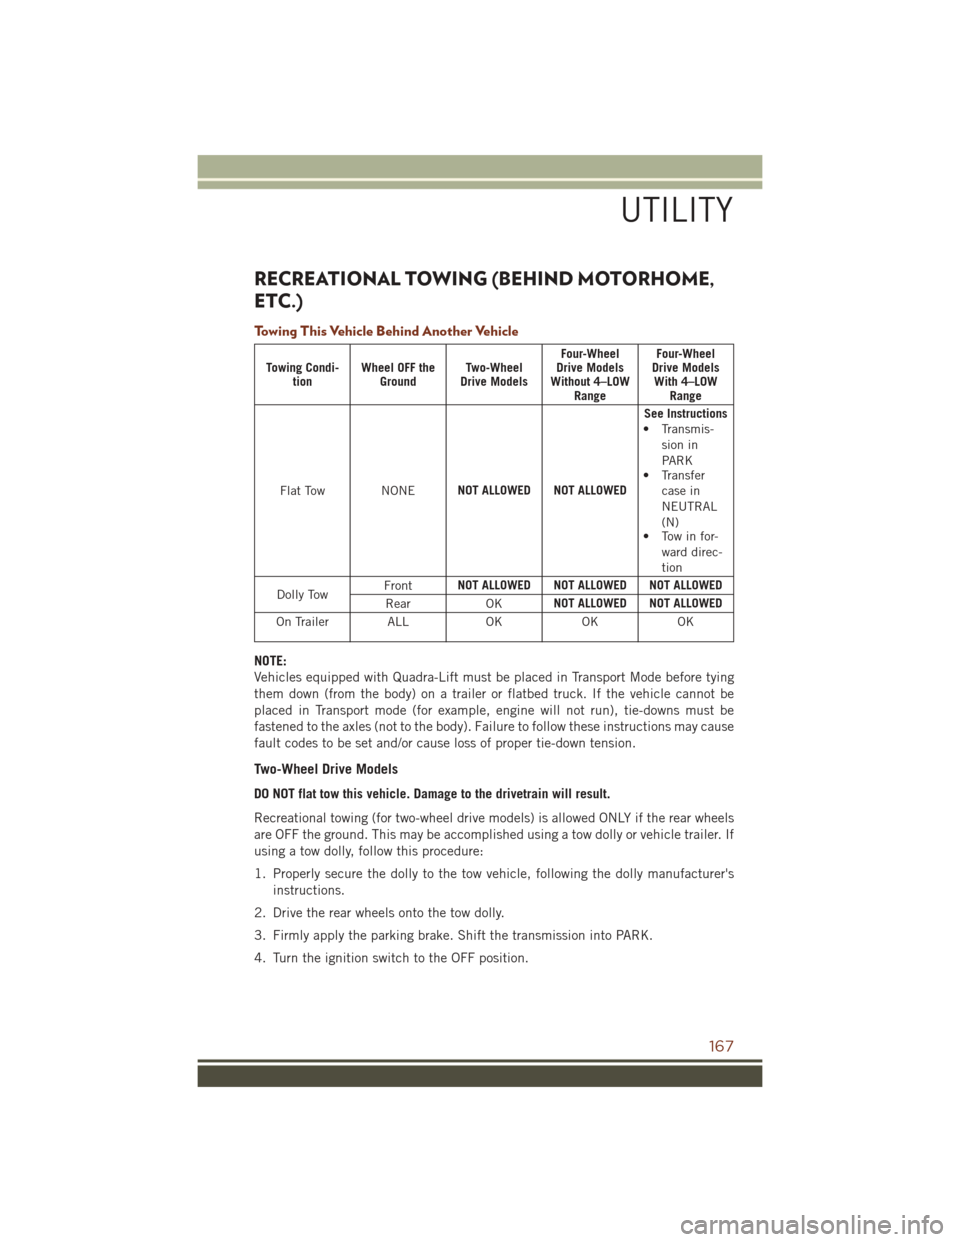
RECREATIONAL TOWING (BEHIND MOTORHOME,
ETC.)
Towing This Vehicle Behind Another Vehicle
Towing Condi-tion Wheel OFF the
Ground Two-Wheel
Drive Models Four-Wheel
Drive Models
Without 4–LOW Range Four-Wheel
Drive Models With 4–LOW Range
Flat Tow NONE NOT ALLOWED NOT ALLOWED See Instructions
• Transmis- sion in
PARK
• Transfer
case in
NEUTRAL
(N)
• Tow in for-
ward direc-
tion
Dolly Tow Front
NOT ALLOWED NOT ALLOWED NOT ALLOWED
Rear OKNOT ALLOWED NOT ALLOWED
On Trailer ALL OKOKOK
NOTE:
Vehicles equipped with Quadra-Lift must be placed in Transport Mode before tying
them down (from the body) on a trailer or flatbed truck. If the vehicle cannot be
placed in Transport mode (for example, engine will not run), tie-downs must be
fastened to the axles (not to the body). Failure to follow these instructions may cause
fault codes to be set and/or cause loss of proper tie-down tension.
Two-Wheel Drive Models
DO NOT flat tow this vehicle. Damage to the drivetrain will result.
Recreational towing (for two-wheel drive models) is allowed ONLY if the rear wheels
are OFF the ground. This may be accomplished using a tow dolly or vehicle trailer. If
using a tow dolly, follow this procedure:
1. Properly secure the dolly to the tow vehicle, following the dolly manufacturer's
instructions.
2. Drive the rear wheels onto the tow dolly.
3. Firmly apply the parking brake. Shift the transmission into PARK.
4. Turn the ignition switch to the OFF position.
UTILITY
167
Page 193 of 276
– Electronic Throttle Control (ETC) Light
This light informs you of a problem with the Electronic Throttle Control (ETC) system.
If a problem is detected, the light will come on while the engine is running. Cycle the
ignition when the vehicle has completely stopped and the gear selector is placed in
the PARK position; the light should turn off.
If the light remains lit with the engine running, your vehicle will usually be drivable;
however, see an authorized service center immediately. If the light is flashing when
the engine is running, immediate service is required and you may experience reduced
performance, an elevated/rough idle or engine stall and your vehicle may require
towing.
– Tire Pressure Monitoring System (TPMS) Light
Each tire, including the spare (if provided), should be checked monthly, when cold
and inflated to the inflation pressure recommended by the vehicle manufacturer on
the vehicle placard or tire inflation pressure label. (If your vehicle has tires of a
different size than the size indicated on the vehicle placard or tire inflation pressure
label, you should determine the proper tire inflation pressure for those tires.)
As an added safety feature, your vehicle has been equipped with a Tire Pressure
Monitoring System (TPMS) which display in the Electronic Vehicle Information
Center (EVIC) or Driver Information Display (DID) when one or more of your tires is
significantly under-inflated. Accordingly, when the low tire pressure EVIC or DID
display illuminates, you should stop and check your tires as soon as possible, and
inflate them to the proper pressure. Driving on a significantly under-inflated tire
causes the tire to overheat and can lead to tire failure. Under-inflation also reduces
fuel efficiency and tire tread life, and may affect the vehicle’s handling and stopping
ability.
IF THE LIGHT STARTS FLASHING INDICATING A LOW TIRE PRESSURE, ADJUST THE AIR
PRESSURE IN THE LOW TIRE TO THE AIR PRESSURE SHOWN ON THE VEHICLE PLACARD OR
TIRE INFLATION PRESSURE LABEL LOCATED ON THE DRIVER'S DOOR.
NOTE:
After inflation, the vehicle may need to be driven for 20 minutes before the flashing light
will turn off.
Please note that the TPMS is not a substitute for proper tire maintenance, and it is
the driver’s responsibility to maintain correct tire pressure, even if under-inflation
has not reached the level to trigger illumination of the TPMS low EVIC or DID display.
WHAT TO DO IN EMERGENCIES
191
Page 194 of 276
Your vehicle has also been equipped with a TPMS malfunction indicator to indicate
when the system is not operating properly. The TPMS malfunction indicator is
combined with the low tire pressure telltale. When the system detects a malfunction,
the telltale will flash for approximately one minute and then remain continuously
illuminated. This sequence will continue each time the vehicle is restarted as long as
the malfunction exists.
When the malfunction indicator is illuminated, the system may not be able to detect
or signal low tire pressure as intended. TPMS malfunctions may occur for a variety of
reasons, including the installation of replacement or alternate tires or wheels on the
vehicle that prevent the TPMS from functioning properly. Always check the TPMS
malfunction telltale after replacing one or more tires or wheels on your vehicle, to
ensure that the replacement or alternate tires and wheels allow the TPMS to continue
to function properly.
NOTE:
Tire pressures change by approximately 1 psi (7 kPa) per 12° F (7° C) of air
temperature change. Keep this in mind when checking tire pressure inside a garage,
especially in the Winter. Example: If garage temperature is 68°F (20°C) and the
outside temperature is 32°F (0°C), then the cold tire inflation pressure should be
increased by 3 psi (21 kPa), which equals 1 psi (7 kPa) for every 12°F (7°C) for this
outside temperature condition.
CAUTION!
The TPMS has been optimized for the original equipment tires and wheels. TPMS
pressures and warning have been established for the tire size equipped on your
vehicle. Undesirable system operation or sensor damage may result when using
replacement equipment that is not of the same size, type, and/or style. Aftermar-
ket wheels can cause sensor damage. Do not use tire sealant from a can, or
balance beads if your vehicle is equipped with a TPMS, as damage to the sensors
may result.
– Seat Belt Reminder Light
When the ignition switch is first turned to the ON/RUN position, this light will turn on
for four to eight seconds as a bulb check. During the bulb check, if the driver's seat
belt is unbuckled, a chime will sound. After the bulb check or when driving, if the
driver or front passenger seat belt remains unbuckled, the Seat Belt Indicator Light
will flash or remain on continuously. Refer to “Seat Belt Systems” in “Things To
Know Before Starting” in your Owner’s Manual on the DVD for further information.
WHAT TO DO IN EMERGENCIES
192
Page 200 of 276
JACKING AND TIRE CHANGING
WARNING!
• Do not attempt to change a tire on the side of the vehicle close to movingtraffic. Pull far enough off the road to avoid the danger of being hit when
operating the jack or changing the wheel.
• Being under a jacked-up vehicle is dangerous. The vehicle could slip off the
jack and fall on you. You could be crushed. Never put any part of your body
under a vehicle that is on a jack. If you need to get under a raised vehicle, take
it to a service center where it can be raised on a lift.
• Never start or run the engine while the vehicle is on a jack.
• The jack is designed to be used as a tool for changing tires only. The jack
should not be used to lift the vehicle for service purposes. The vehicle should
be jacked on a firm level surface only. Avoid ice or slippery areas.
Run Flat Tires — SRT Models
This vehicle is equipped with “run flat” tires. Run flat tires allow the vehicle to be
driven approximately 50 miles (80km) at 55 mph (88km/h). Tire service should be
obtained to avoid prolonged run flat feature usage.
WARNING!
Do not exceed 50 mph (80 km/h) if the “Tire Pressure Monitoring Telltale Light”
is illuminated. Vehicle handling and braking may be reduced. You could have a
collision and be severely or fatally injured.
WHAT TO DO IN EMERGENCIES
198
Page 203 of 276
Jacking Instructions
WARNING!
Carefully follow these tire changing warnings to help prevent personal injury or
damage to your vehicle:
• Always park on a firm, level surface as far from the edge of the roadway aspossible before raising the vehicle.
• Turn on the Hazard Warning flasher.
• Chock the wheel diagonally opposite the wheel to be raised.
• Set the parking brake firmly and set an automatic transmission in PARK.
• Never start or run the engine with the vehicle on a jack.
• Do not let anyone sit in the vehicle when it is on a jack.
• Do not get under the vehicle when it is on a jack. If you need to get under a
raised vehicle, take it to a service center where it can be raised on a lift.
• Only use the jack in the positions indicated and for lifting this vehicle during
a tire change.
• If working on or near a roadway, be extremely careful of motor traffic.
• To assure that spare tires, flat or inflated, are securely stowed, spares must be
stowed with the valve stem facing the ground.
CAUTION!
Do not attempt to raise the vehicle by jacking on locations other than those
indicated in the Jacking Instructions for this vehicle.
1. Remove the spare tire, jack, and tools from storage.
2. Loosen (but do not remove) the wheel lug nuts by turning them to the left, one turn, while the wheel is still on the ground.
Warning Label
WHAT TO DO IN EMERGENCIES
201
Page 214 of 276
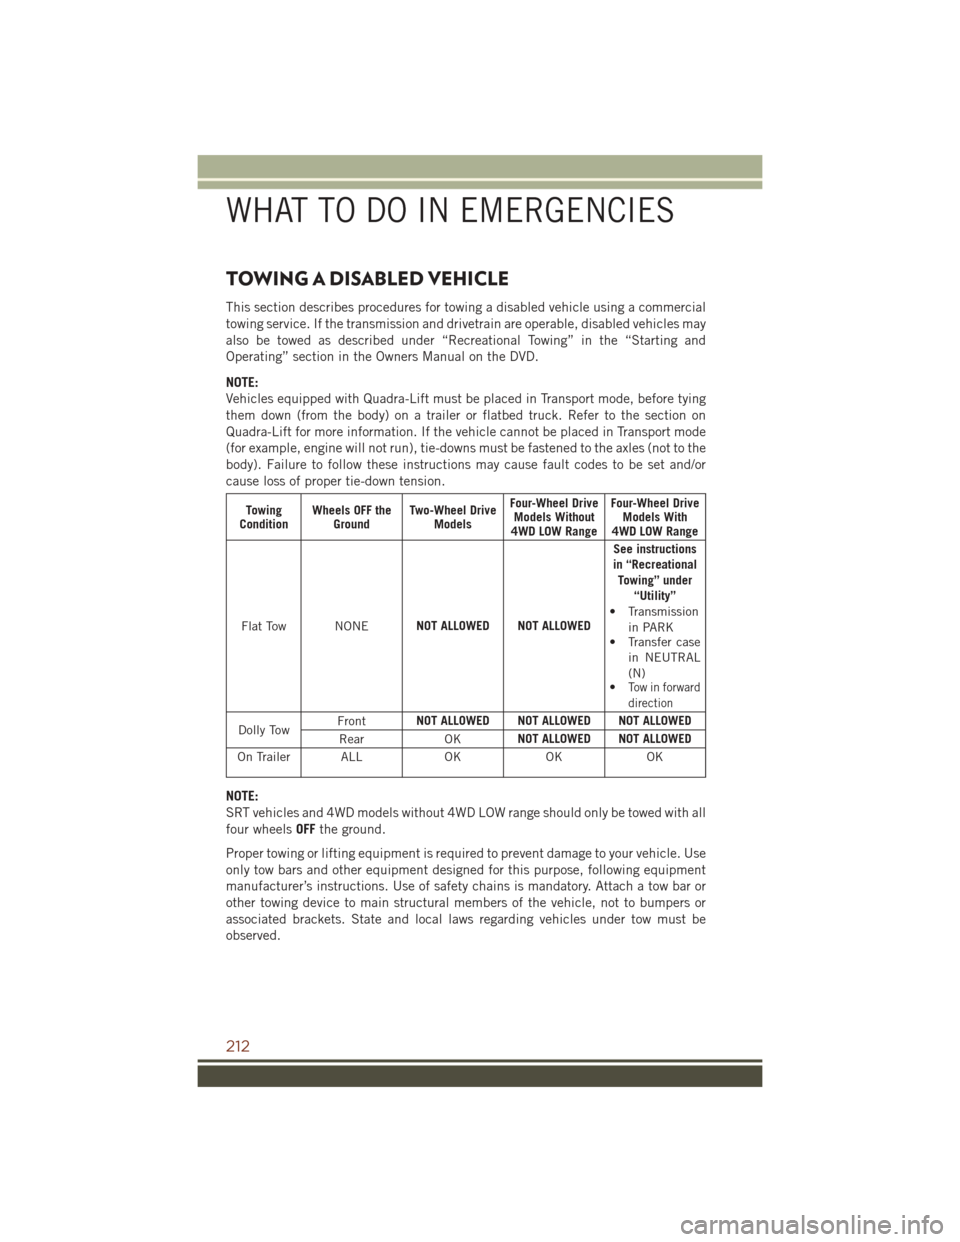
TOWING A DISABLED VEHICLE
This section describes procedures for towing a disabled vehicle using a commercial
towing service. If the transmission and drivetrain are operable, disabled vehicles may
also be towed as described under “Recreational Towing” in the “Starting and
Operating” section in the Owners Manual on the DVD.
NOTE:
Vehicles equipped with Quadra-Lift must be placed in Transport mode, before tying
them down (from the body) on a trailer or flatbed truck. Refer to the section on
Quadra-Lift for more information. If the vehicle cannot be placed in Transport mode
(for example, engine will not run), tie-downs must be fastened to the axles (not to the
body). Failure to follow these instructions may cause fault codes to be set and/or
cause loss of proper tie-down tension.
Towing
Condition Wheels OFF the
Ground Two-Wheel Drive
Models Four-Wheel Drive
Models Without
4WD LOW Range Four-Wheel Drive
Models With
4WD LOW Range
Flat Tow NONE NOT ALLOWED NOT ALLOWED See instructions
in “Recreational Towing” under “Utility”
• Transmission
in PARK
• Transfer case
in NEUTRAL
(N)
•
Tow in forward
direction
Dolly Tow Front
NOT ALLOWED NOT ALLOWED NOT ALLOWED
Rear OKNOT ALLOWED NOT ALLOWED
On Trailer ALL OKOKOK
NOTE:
SRT vehicles and 4WD models without 4WD LOW range should only be towed with all
four wheelsOFFthe ground.
Proper towing or lifting equipment is required to prevent damage to your vehicle. Use
only tow bars and other equipment designed for this purpose, following equipment
manufacturer’s instructions. Use of safety chains is mandatory. Attach a tow bar or
other towing device to main structural members of the vehicle, not to bumpers or
associated brackets. State and local laws regarding vehicles under tow must be
observed.
WHAT TO DO IN EMERGENCIES
212
Page 215 of 276
If you must use the accessories (wipers, defrosters, etc.) while being towed, the
ignition must be in the ON/RUN position, not the ACC position.
If the key fob is unavailable, or the vehicle's battery is discharged, refer to “Manual
Park Release” in this section for instructions on shifting the transmission out of
PARK for towing.
CAUTION!
• Do not use sling type equipment when towing. Vehicle damage may occur.
• When securing the vehicle to a flat bed truck, do not attach to front or rearsuspension components. Damage to your vehicle may result from improper
towing.
Two-Wheel Drive Models
The manufacturer recommends towing your vehicle with all four wheels OFFthe
ground using a flatbed.
If flatbed equipment is not available, and the transmission is operable, the vehicle
may be towed (with rear wheels on the ground) under the following conditions:
• The transmission must be in NEUTRAL. Refer to "Manual Park Release" in this section for instructions on shifting the transmission to NEUTRAL when the engine
is off.
• The towing speed must not exceed 30 mph (48 km/h).
• The towing distance must not exceed 30 miles (48 km).
If the transmission is not operable, or the vehicle must be towed faster than 30 mph
(48 km/h) or farther than 30 miles (48 km), tow with the rear wheels OFFthe ground.
Acceptable methods are to tow the vehicle on a flatbed, or with the front wheels
raised and the rear wheels on a towing dolly, or (when using a suitable steering wheel
stabilizer to hold the front wheels in the straight position) with the rear wheels raised
and the front wheels on the ground.
CAUTION!
Towing faster than 30 mph (48 km/h) or farther than 30 miles (48 km) with rear
wheels on the ground can cause severe transmission damage. Damage from
improper towing is not covered under the New Vehicle Limited Warranty.
WHAT TO DO IN EMERGENCIES
213