center console JEEP GRAND CHEROKEE 2017 WK2 / 4.G Owners Manual
[x] Cancel search | Manufacturer: JEEP, Model Year: 2017, Model line: GRAND CHEROKEE, Model: JEEP GRAND CHEROKEE 2017 WK2 / 4.GPages: 633, PDF Size: 6.6 MB
Page 55 of 633
Rear Heated Seats — If Equipped
On some models, the two rear outboard seats may be
equipped with heated seats. There are two heated seat
switches that allow the rear passengers to operate the seats
independently. The heated seat switches for each heater are
located on the rear of the center console.You can choose from HI, LO or OFF heat settings. Amber
indicator lights in each switch indicate the level of heat in
use. Two indicator lights will illuminate for HI, one for LO
and none for OFF.
Push the switch once to select HI-level heating.
Push the switch a second time to select LO-level
heating. Push the switch a third time to shut the
heating elements OFF.
When the HI-level setting is selected, the heater will
provide a boosted heat level during the first four minutes
of operation. Then, the heat output will drop to the normal
HI-level. If the HI-level setting is selected, the system will
automatically switch to LO-level after approximately 60
minutes of continuous operation. At that time, the number
of indicator lights changes from two to one, indicating the
change. The LO-level setting will turn OFF automatically
after approximately 45 minutes.
WARNING!
• Persons who are unable to feel pain to the skin
because of advanced age, chronic illness, diabetes,
(Continued)
Rear Heated Seat Switches
3
GETTING TO KNOW YOUR VEHICLE 53
Page 76 of 633
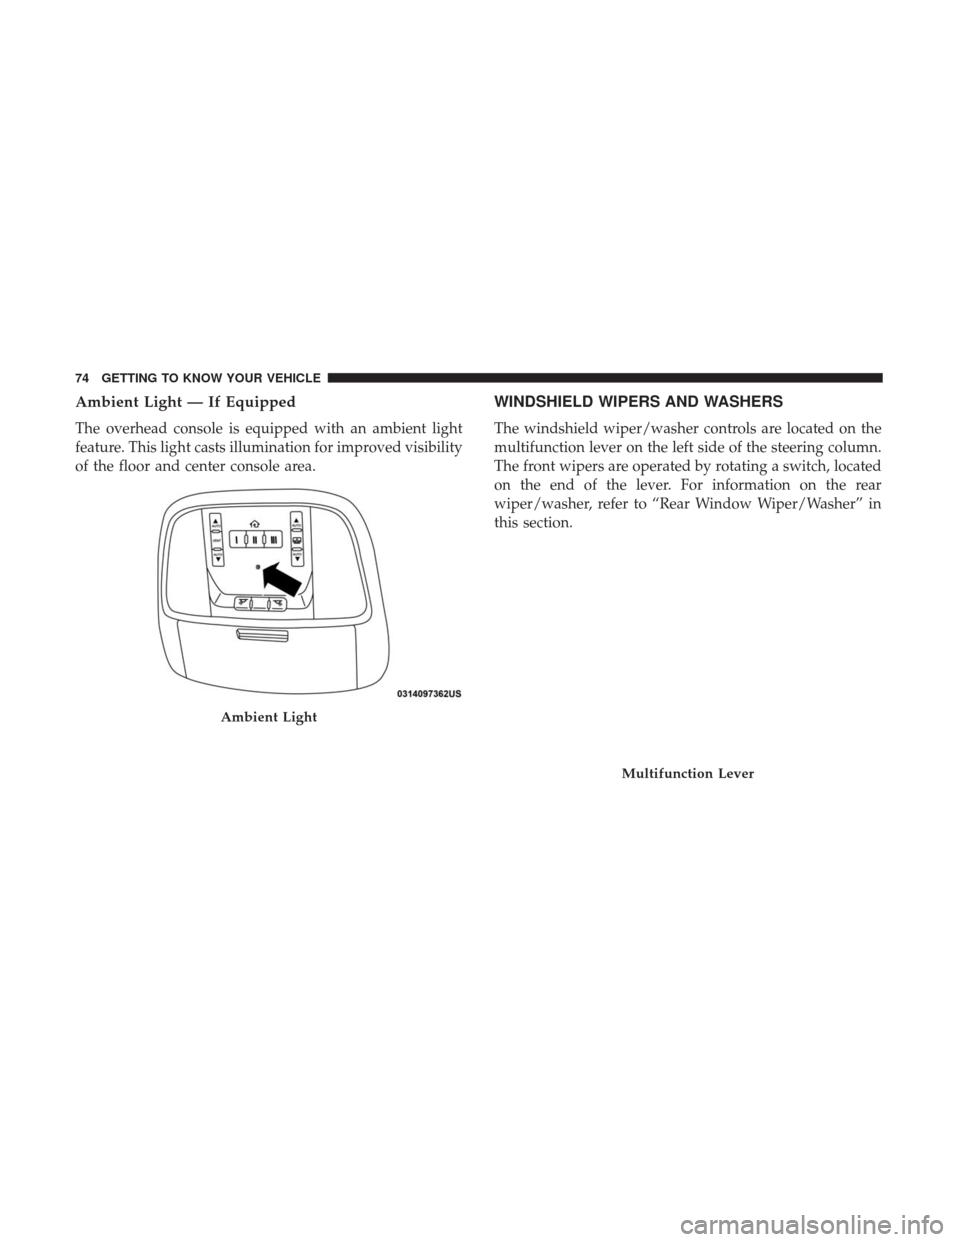
Ambient Light — If Equipped
The overhead console is equipped with an ambient light
feature. This light casts illumination for improved visibility
of the floor and center console area.
WINDSHIELD WIPERS AND WASHERS
The windshield wiper/washer controls are located on the
multifunction lever on the left side of the steering column.
The front wipers are operated by rotating a switch, located
on the end of the lever. For information on the rear
wiper/washer, refer to “Rear Window Wiper/Washer” in
this section.
Ambient Light
Multifunction Lever
74 GETTING TO KNOW YOUR VEHICLE
Page 111 of 633
GARAGE DOOR OPENER — IF EQUIPPED
HomeLink replaces up to three hand-held transmitters that
operate devices such as garage door openers, motorized
gates, lighting or home security systems. The HomeLink
unit is powered by your vehicle’s 12 Volt battery.
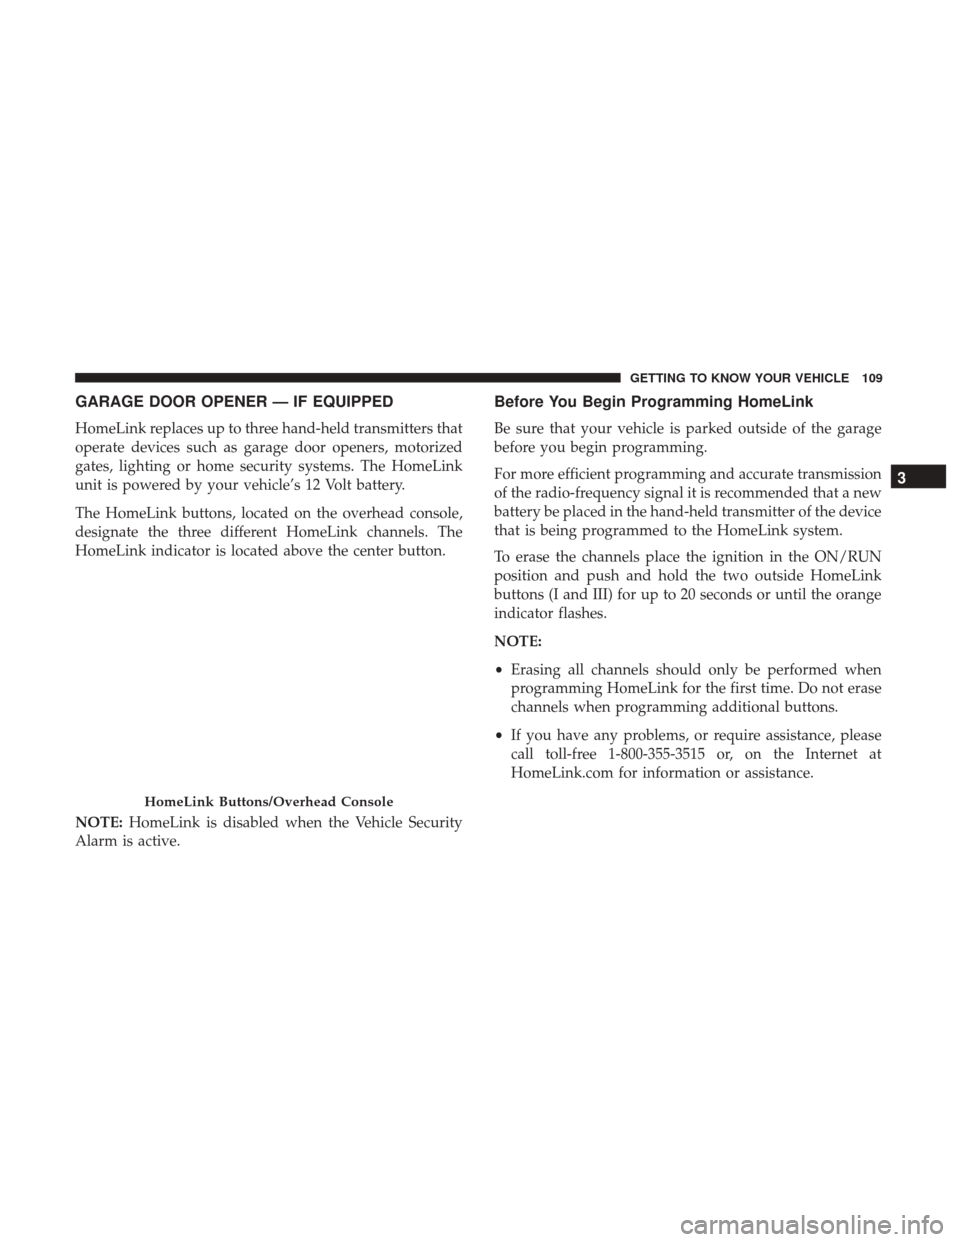
The HomeLink buttons, located on the overhead console,
designate the three different HomeLink channels. The
HomeLink indicator is located above the center button.
NOTE:HomeLink is disabled when the Vehicle Security
Alarm is active.
Before You Begin Programming HomeLink
Be sure that your vehicle is parked outside of the garage
before you begin programming.
For more efficient programming and accurate transmission
of the radio-frequency signal it is recommended that a new
battery be placed in the hand-held transmitter of the device
that is being programmed to the HomeLink system.
To erase the channels place the ignition in the ON/RUN
position and push and hold the two outside HomeLink
buttons (I and III) for up to 20 seconds or until the orange
indicator flashes.
NOTE:
• Erasing all channels should only be performed when
programming HomeLink for the first time. Do not erase
channels when programming additional buttons.
• If you have any problems, or require assistance, please
call toll-free 1-800-355-3515 or, on the Internet at
HomeLink.com for information or assistance.
HomeLink Buttons/Overhead Console
3
GETTING TO KNOW YOUR VEHICLE 109
Page 118 of 633
Door Storage
Large storage areas are built into the door panels for easy
access.
Console Features
The center console contains both an upper and a lower
storage area.
Door Panel StorageStorage Compartment
116 GETTING TO KNOW YOUR VEHICLE
Page 120 of 633
Your vehicle may have an optional CD or DVD player
located in the center console.
WARNING!
Do not operate this vehicle with a console compart-
ment lid in the open position. Driving with the console
compartment lid open may result in injury in a colli-
sion.
Overhead Console
The overhead console contains courtesy/reading lights
and storage for sunglasses. Universal Garage Door Opener
(HomeLink), power liftgate and power sunroof switches
may also be included, if equipped.
Lower Storage Compartment CD/DVD Player — IfEquipped
Overhead Console
118 GETTING TO KNOW YOUR VEHICLE
Page 123 of 633
Cupholders
There are two cupholders for the front seat passengers
located in the center console.There are two cupholders for the rear seat passengers
located in the fold-down center armrest.
Front Cupholders
Rear Cupholders
3
GETTING TO KNOW YOUR VEHICLE 121
Page 125 of 633
The front power outlet is located inside the storage area on
the center stack of the instrument panel. Push inward on
the storage lid to open the compartment and gain access to
this power outlet.In addition to the front power outlet, there is also a power
outlet located in the storage area of the center console.
Front Power Outlet
Center Console Outlet
3
GETTING TO KNOW YOUR VEHICLE 123
Page 128 of 633
Power Inverter — If Equipped
There is a 115 Volt, 150 Watt inverter outlet located on the
back of the center console to convert DC current to AC
current. This outlet can power cellular phones, electronics
and other low power devices requiring power up to 150
Watts. Certain high-end video games consoles will exceed
this power limit, as will most new computers and power
tools.
The power inverter is designed with built-in overload
protection. If the power rating of 150 Watts is exceeded, the
power inverter will automatically shut down. Once the
electrical device has been removed from the outlet theinverter should automatically reset. To avoid overloading
the circuit, check the power ratings on electrical devices
prior to using the inverter.
WARNING!
To avoid serious injury or death:
•
Do not insert any objects into the receptacles.
• Do not touch with wet hands.
• Close the lid when not in use.
• If this outlet is mishandled, it may cause an electric
shock and failure.
ROOF LUGGAGE RACK — IF EQUIPPED
The crossbars and siderails are designed to carry the
weight on vehicles equipped with a luggage rack. The load
must not exceed 150 lbs (68 kg), and should be uniformly
distributed over the luggage rack crossbars.
NOTE: If not equipped with crossbars, your authorized
dealer can order and install MOPAR crossbars built spe-
cifically for this roof rack system.
Distribute cargo weight evenly on the roof rack crossbars.
The roof rack does not increase the total load carrying
Power Inverter
126 GETTING TO KNOW YOUR VEHICLE
Page 290 of 633
7. When the NEUTRAL (N) indicator light turns off,release the NEUTRAL (N) button.
8. After the NEUTRAL (N) button has been released, the transfer case will shift to the position indicated by the
selector switch.
Quadra-Drive II System — If Equipped
The optional Quadra-Drive II System features two torque
transfer couplings. The couplings include an Electronic
Limited-Slip Differential (ELSD) rear axle and the Quadra-
Trac II transfer case. The optional ELSD axle is fully
automatic and requires no driver input to operate. Under normal driving conditions, the unit functions as a standard
axle, balancing torque evenly between left and right
wheels. With a traction difference between left and right
wheels, the coupling will sense a speed difference. As one
wheel begins to spin faster than the other, torque will
automatically transfer from the wheel that has less traction,
to the wheel that has traction. While the transfer case and
axle coupling differ in design, their operation is similar.
Follow the Quadra-Trac II transfer case shifting informa-
tion, preceding this section, for shifting this system.
QUADRA-LIFT — IF EQUIPPED
Description
The Quadra-Lift air suspension system provides full time
load leveling capability along with the benefit of vehicle
height adjustment by the push of a button. The vehicle will
automatically raise and lower the ride height to adapt to
the appropriate driving conditions. At higher speeds, the
vehicle will lower to an aerodynamic ride height and when
operating in off-road modes, the vehicle will raise the ride
height accordingly. The buttons near the terrain switch in
the center console area can be used to set preferred ride
height to match the appropriate conditions.
NEUTRAL (N) Switch
288 STARTING AND OPERATING
Page 418 of 633
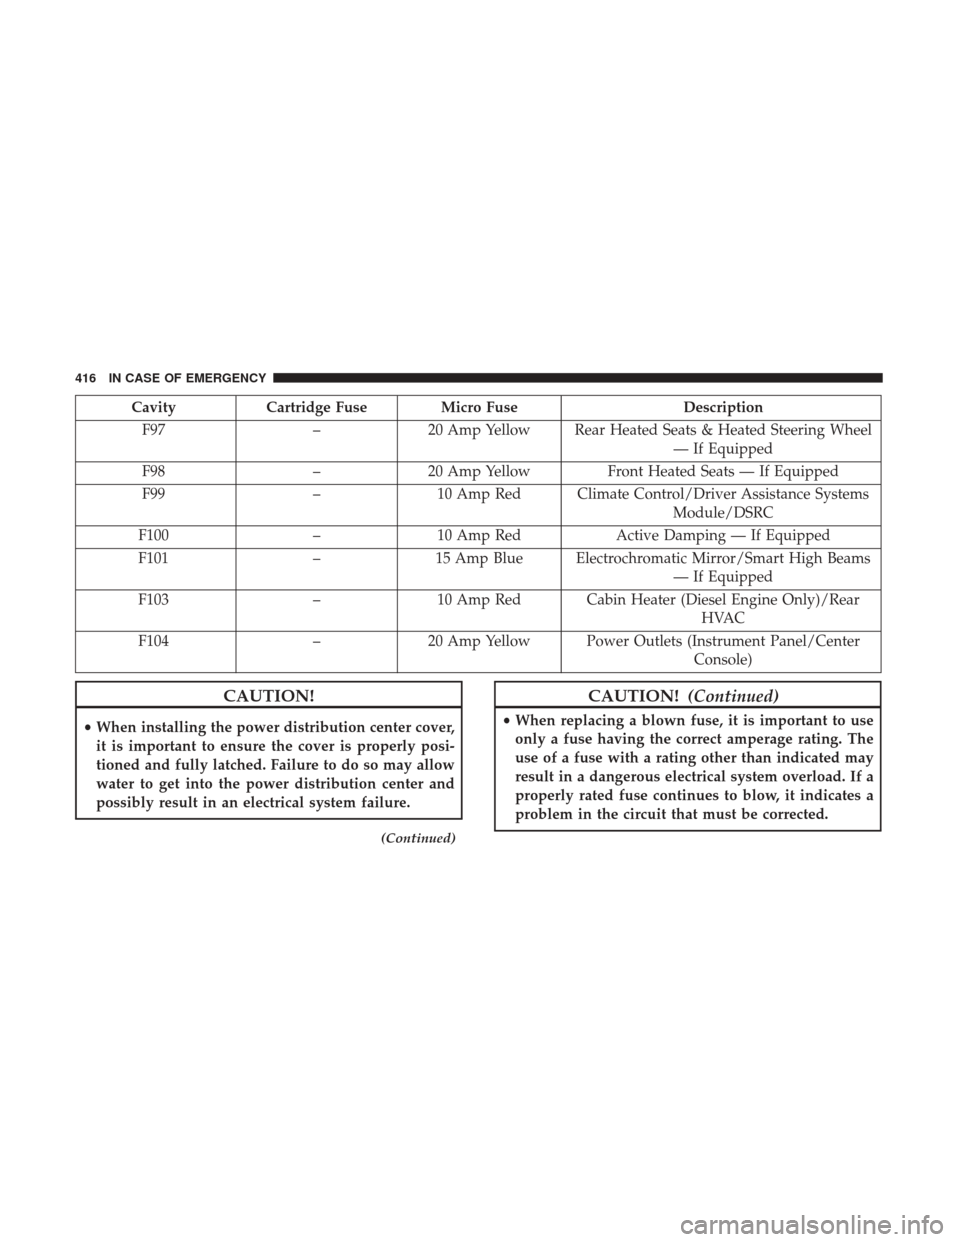
CavityCartridge Fuse Micro Fuse Description
F97 –20 Amp Yellow Rear Heated Seats & Heated Steering Wheel
— If Equipped
F98 –20 Amp Yellow Front Heated Seats — If Equipped
F99 –10 Amp Red Climate Control/Driver Assistance Systems
Module/DSRC
F100 –10 Amp Red Active Damping — If Equipped
F101 –15 Amp Blue Electrochromatic Mirror/Smart High Beams
— If Equipped
F103 –10 Amp Red Cabin Heater (Diesel Engine Only)/Rear
HVAC
F104 –20 Amp Yellow Power Outlets (Instrument Panel/Center
Console)
CAUTION!
•When installing the power distribution center cover,
it is important to ensure the cover is properly posi-
tioned and fully latched. Failure to do so may allow
water to get into the power distribution center and
possibly result in an electrical system failure.
(Continued)
CAUTION! (Continued)
•When replacing a blown fuse, it is important to use
only a fuse having the correct amperage rating. The
use of a fuse with a rating other than indicated may
result in a dangerous electrical system overload. If a
properly rated fuse continues to blow, it indicates a
problem in the circuit that must be corrected.
416 IN CASE OF EMERGENCY