change wheel JEEP GRAND CHEROKEE 2017 WK2 / 4.G Owner's Manual
[x] Cancel search | Manufacturer: JEEP, Model Year: 2017, Model line: GRAND CHEROKEE, Model: JEEP GRAND CHEROKEE 2017 WK2 / 4.GPages: 372
Page 185 of 372
To enable the ParkSense Active Park Assist
system, push the ParkSense Active Park As-
sist switch once (LED turns on).
To disable the ParkSense Active Park Assist
system, push the ParkSense Active Park As-
sist switch again (LED turns off).
When the ParkSense Active Park Assist sys-
tem is enabled the “Active ParkSense
Searching - Push OK to Switch to Perpen-
dicular” message will appear in the instru-
ment cluster display. You may switch to per-
pendicular parking if you desire. Push the OKbutton on the left side steering wheel switch
to change your parking space setting. You
may switch back to parallel parking if you
desire.
Refer to your Owner's Manual at
www.jeep.com/en/owners/manuals/ for fur-
ther information.
LANESENSE
LaneSense Operation
The LaneSense system is operational at
speeds above 37 mph (60 km/h) and below
112 mph (180 km/h). The LaneSense system
uses a forward looking camera to detect lane
markings and measure vehicle position
within the lane boundaries.
When both lane markings are detected and
the driver unintentionally drifts out of the
lane (no turn signal applied), the LaneSense
system provides a haptic warning in the form
of torque applied to the steering wheel to
prompt the driver to remain within the lane
boundaries. If the driver continues to unin-
tentionally drift out of the lane, the La-neSense system provides a visual warning
through the instrument cluster display to
prompt the driver to remain within the lane
boundaries.
The driver may manually override the haptic
warning by applying torque into the steering
wheel at any time.
When only a single lane marking is detected
and the driver unintentionally drifts across
the lane marking (no turn signal applied), the
LaneSense system provides a visual warning
through the instrument cluster display to
prompt the driver to remain within the lane.
When only a single lane marking is detected,
a haptic (torque) warning will not be pro-
vided.
NOTE:
When operating conditions have been met,
the LaneSense system will monitor if the
driver’s hands are on the steering wheel and
provides an audible warning to the driver
when the driver’s hands are not detected on
the steering wheel. The system will cancel if
the driver does not return their hands to the
wheel.
ParkSense Active Park Assist Switch Lo-
cation
183
Page 186 of 372
Turning LaneSense ON Or OFF
The default status of LaneSense is “OFF”.
The LaneSense button is located on the
switch panel below the Uconnect display.
To turn the LaneSense system ON, push the
LaneSense button to turn the system ON
(LED turns off). A “Lane Sense On” message
is shown in the instrument cluster display.
To turn the LaneSense system OFF, push the
LaneSense button once to turn the system
OFF (LED turns on).
NOTE:
The LaneSense system will retain the last
system state ON or OFF from the last ignition
cycle when the ignition is changed to the
ON/RUN position.
LaneSense Warning Message
The LaneSense system will indicate the cur-
rent lane drift condition through the instru-
ment cluster display.7.0 Instrument Cluster Display
When the LaneSense system is ON; the lane
lines are gray when both of the lane bound-
aries have not been detected and the La-
neSense indicator is solid white.
Left Lane Departure — Only Left Lane Detected
• When the LaneSense system is ON, the
LaneSense indicator is solid white when
only the left lane marking has been de-
tected and the system is ready to provide
visual warnings in the instrument cluster
display if an unintentional lane departure
occurs.
• When the LaneSense system senses the lane has been approached and is in a lane
departure situation, the left thick lane line
flashes yellow (on/off), the left thin line
remains solid yellow and the LaneSense
indicator changes from solid white to
flashing yellow.
NOTE:
The LaneSense system operates with the
similar behavior for a right lane departure
when only the right lane marking has been
detected. Left Lane Departure — Both Lanes Detected
• When the LaneSense system is ON, the
lane lines turn from gray to white to indi-
cate that both of the lane markings have
been detected. The LaneSense indicator
is solid green when both lane markings
have been detected and the system is ON
to provide visual warnings in the instru-
ment cluster display and a torque warning
in the steering wheel if an unintentional
lane departure occurs.
• When the LaneSense system senses a lane drift situation, the left thick lane line and
left thin line turn solid yellow. The La-
neSense indicator changes from solid
green to solid yellow. At this time torque is
applied to the steering wheel in the oppo-
site direction of the lane boundary.
For example: If approaching the left side of
the lane the steering wheel will turn to the
right.
• When the LaneSense system senses the lane has been approached and is in a lane
departure situation, the left thick lane line
flashes yellow (on/off) and the left thin
line remains solid yellow. The LaneSense
indicator changes from solid yellow to
STARTING AND OPERATING
184
Page 218 of 372
WARNING!
Do not attempt to change a tire on the side
of the vehicle closest to moving traffic,
pull far enough off the road to avoid being
hit when operating the jack or changing
the wheel.
2. Turn on the Hazard Warning flasher.
3. Set the parking brake.
4. Place the gear selector into PARK.
5. Turn the ignition OFF.
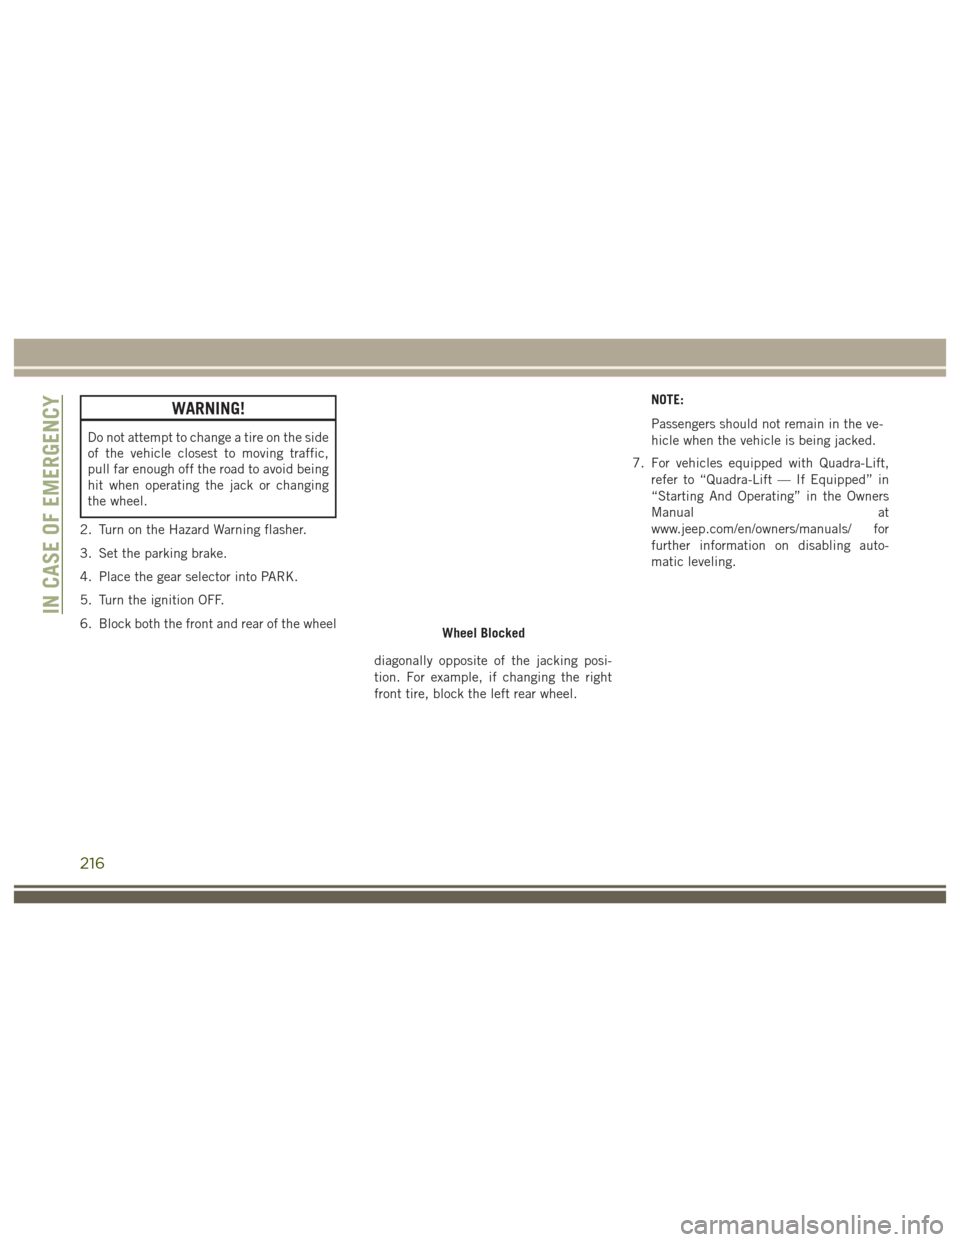
6. Block both the front and rear of the wheel
diagonally opposite of the jacking posi-
tion. For example, if changing the right
front tire, block the left rear wheel.NOTE:
Passengers should not remain in the ve-
hicle when the vehicle is being jacked.
7. For vehicles equipped with Quadra-Lift, refer to “Quadra-Lift — If Equipped” in
“Starting And Operating” in the Owners
Manual at
www.jeep.com/en/owners/manuals/ for
further information on disabling auto-
matic leveling.
Wheel Blocked
IN CASE OF EMERGENCY
216
Page 219 of 372
Jacking Instructions
WARNING!
Carefully follow these tire changing warn-
ings to help prevent personal injury or
damage to your vehicle:
• Always park on a firm, level surface asfar from the edge of the roadway as
possible before raising the vehicle.
• Turn on the Hazard Warning flasher.
• Chock the wheel diagonally opposite the
wheel to be raised.
• Set the parking brake firmly and set an
automatic transmission in PARK.
• Never start or run the engine with the
vehicle on a jack.
• Do not let anyone sit in the vehicle when
it is on a jack.
• Do not get under the vehicle when it is
on a jack. If you need to get under a
raised vehicle, take it to a service center
where it can be raised on a lift.
• Only use the jack in the positions indi-
cated and for lifting this vehicle during a
tire change.
WARNING!
• If working on or near a roadway, beextremely careful of motor traffic.
• To assure that spare tires, flat or in-
flated, are securely stowed, spares must
be stowed with the valve stem facing the
ground.
CAUTION!
Do not attempt to raise the vehicle by
jacking on locations other than those indi-
cated in the Jacking Instructions for this
vehicle.
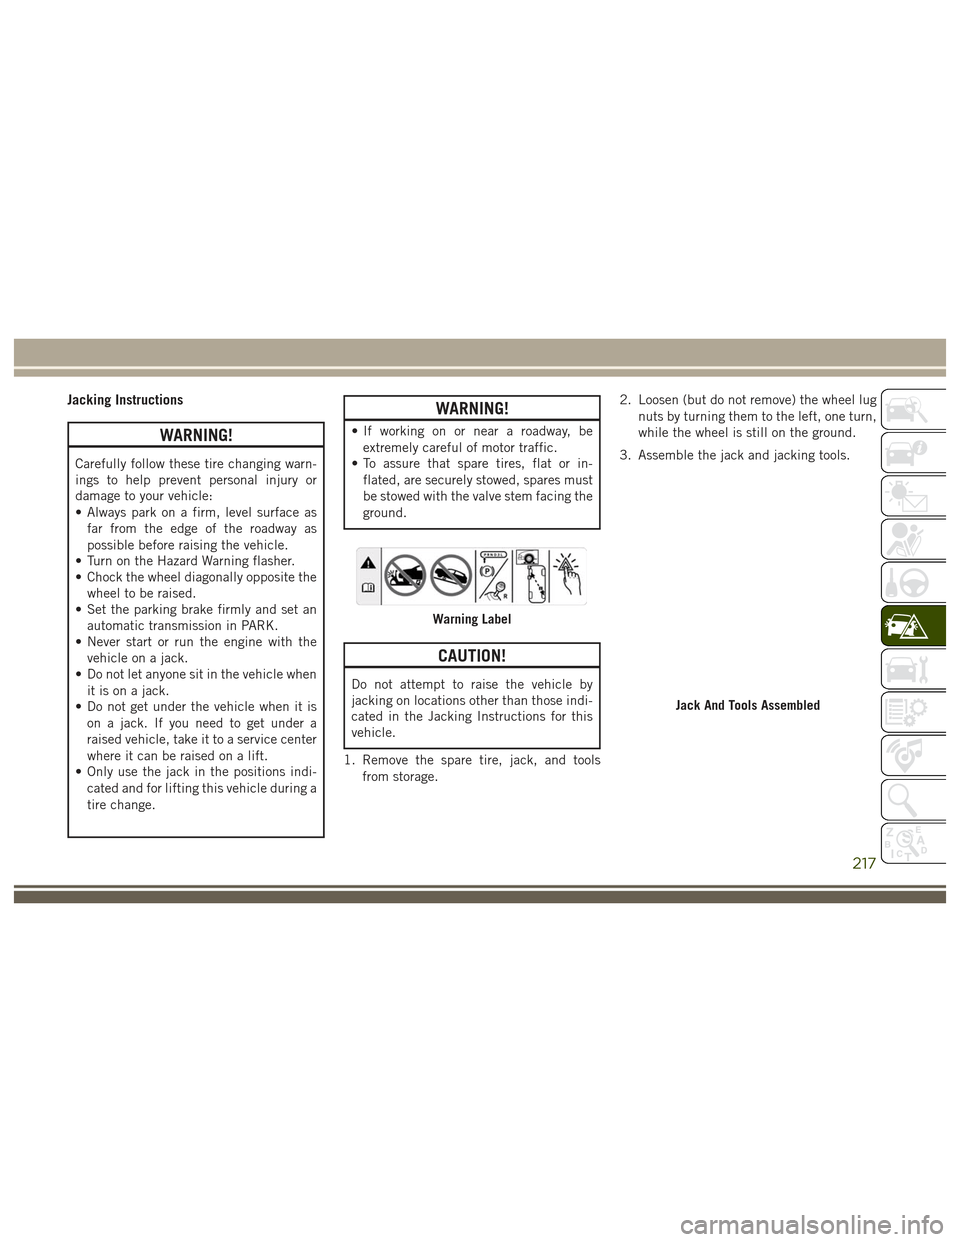
1. Remove the spare tire, jack, and tools from storage. 2. Loosen (but do not remove) the wheel lug
nuts by turning them to the left, one turn,
while the wheel is still on the ground.
3. Assemble the jack and jacking tools.
Warning Label
Jack And Tools Assembled
217
Page 238 of 372
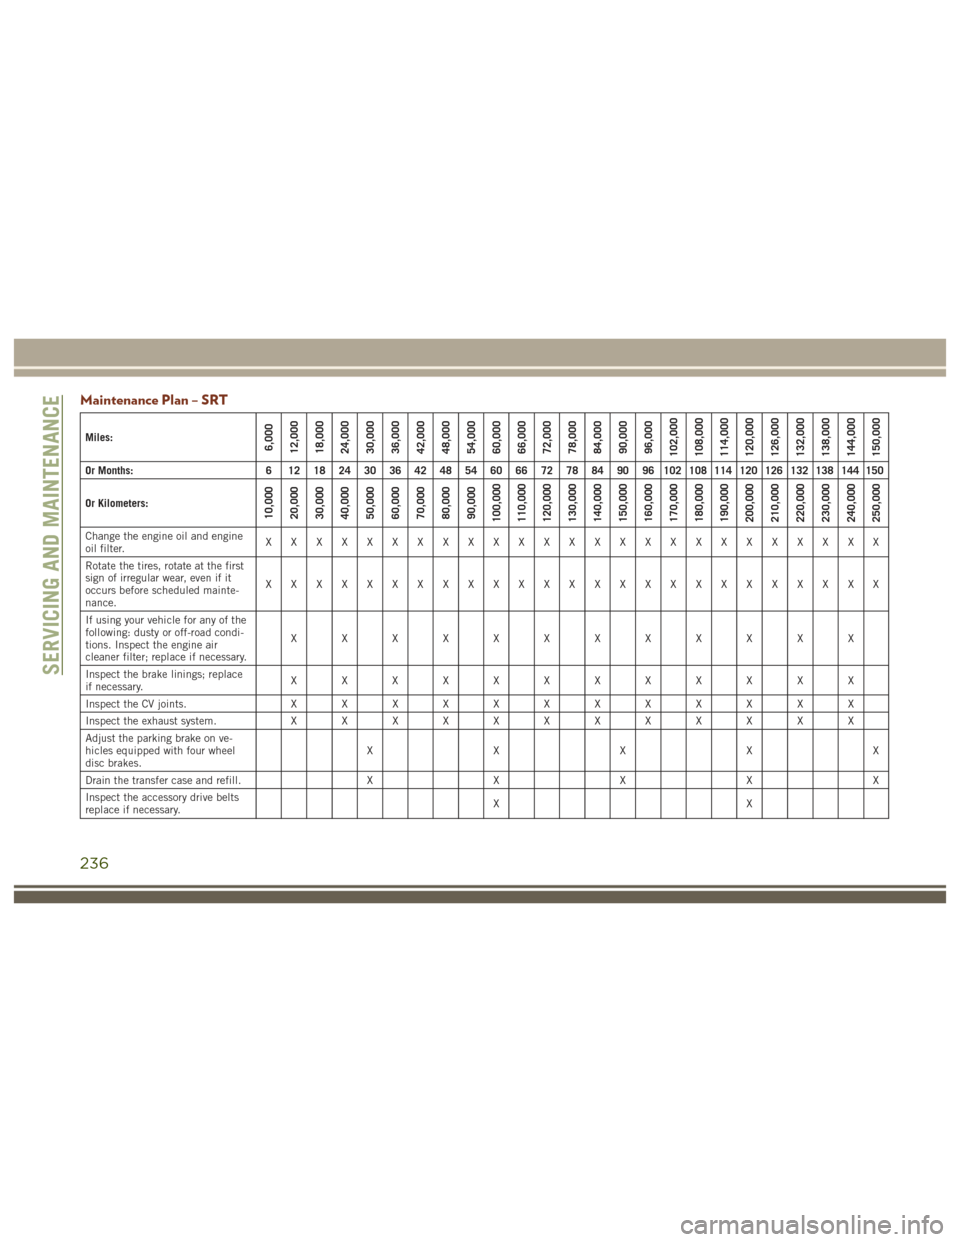
Maintenance Plan – SRT
Miles:6,000
12,000
18,000
24,000
30,000
36,000
42,000
48,000
54,000
60,000
66,000
72,000
78,000
84,000
90,000
96,000
102,000
108,000
114,000
120,000
126,000
132,000
138,000
144,000
150,000
Or Months: 6 12 18 24 30 36 42 48 54 60 66 72 78 84 90 96 102 108 114 120 126 132 138 144 150
Or Kilometers:
10,000
20,000
30,000
40,000
50,000
60,000
70,000
80,000
90,000
100,000
110,000
120,000
130,000
140,000
150,000
160,000
170,000
180,000
190,000
200,000
210,000
220,000
230,000
240,000
250,000
Change the engine oil and engine
oil filter. XXXXXXXXXXXXXXXXXXXXXXXXX
Rotate the tires, rotate at the first
sign of irregular wear, even if it
occurs before scheduled mainte-
nance. XXXXXXXXXXXXXXXXXXXXXXXXX
If using your vehicle for any of the
following: dusty or off-road condi-
tions. Inspect the engine air
cleaner filter; replace if necessary. XXXXXXXXXXXX
Inspect the brake linings; replace
if necessary. XXXXXXXXXXXX
Inspect the CV joints. X X X X X X X X X X X X
Inspect the exhaust system. X X X X X X X X X X X X
Adjust the parking brake on ve-
hicles equipped with four wheel
disc brakes. XXXXX
Drain the transfer case and refill. X X X X X
Inspect the accessory drive belts
replace if necessary. XX
SERVICING AND MAINTENANCE
236
Page 291 of 372
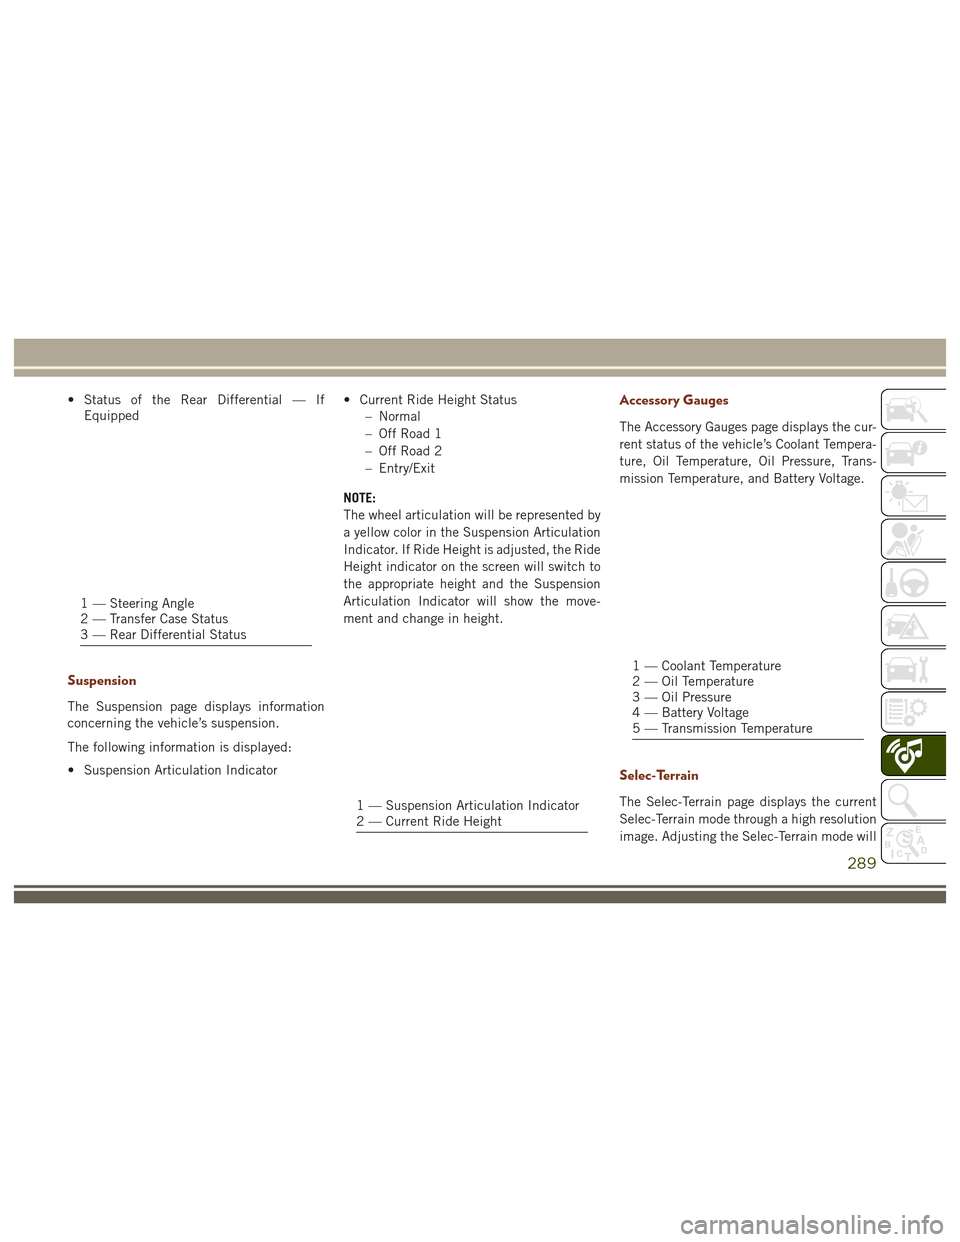
• Status of the Rear Differential — IfEquipped
Suspension
The Suspension page displays information
concerning the vehicle’s suspension.
The following information is displayed:
• Suspension Articulation Indicator • Current Ride Height Status
– Normal
– Off Road 1
– Off Road 2
– Entry/Exit
NOTE:
The wheel articulation will be represented by
a yellow color in the Suspension Articulation
Indicator. If Ride Height is adjusted, the Ride
Height indicator on the screen will switch to
the appropriate height and the Suspension
Articulation Indicator will show the move-
ment and change in height.
Accessory Gauges
The Accessory Gauges page displays the cur-
rent status of the vehicle’s Coolant Tempera-
ture, Oil Temperature, Oil Pressure, Trans-
mission Temperature, and Battery Voltage.
Selec-Terrain
The Selec-Terrain page displays the current
Selec-Terrain mode through a high resolution
image. Adjusting the Selec-Terrain mode will
1 — Steering Angle
2 — Transfer Case Status
3 — Rear Differential Status
1 — Suspension Articulation Indicator
2 — Current Ride Height
1 — Coolant Temperature
2 — Oil Temperature
3 — Oil Pressure
4 — Battery Voltage
5 — Transmission Temperature
289
Page 292 of 372
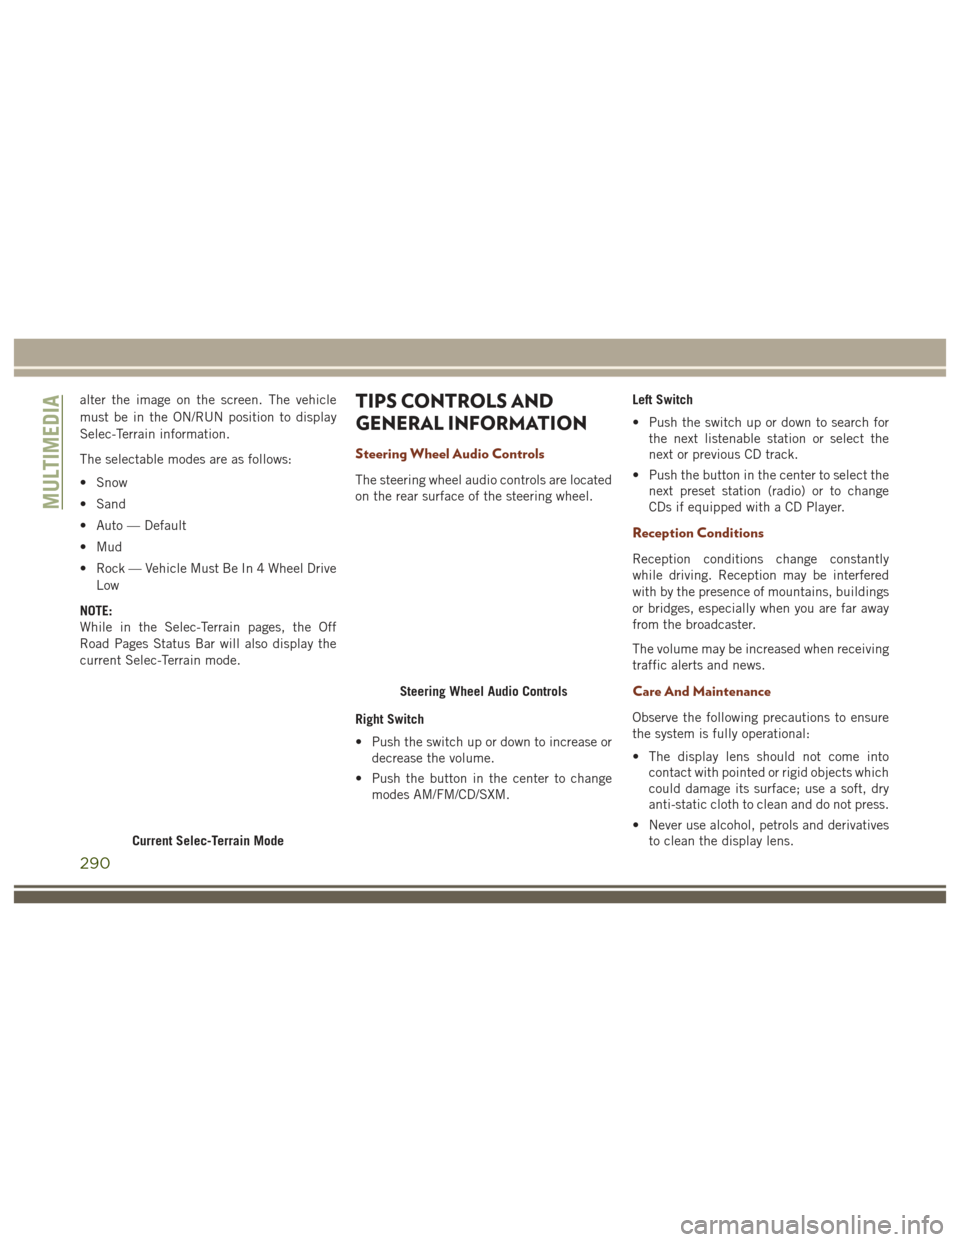
alter the image on the screen. The vehicle
must be in the ON/RUN position to display
Selec-Terrain information.
The selectable modes are as follows:
• Snow
• Sand
• Auto — Default
• Mud
• Rock — Vehicle Must Be In 4 Wheel DriveLow
NOTE:
While in the Selec-Terrain pages, the Off
Road Pages Status Bar will also display the
current Selec-Terrain mode.TIPS CONTROLS AND
GENERAL INFORMATION
Steering Wheel Audio Controls
The steering wheel audio controls are located
on the rear surface of the steering wheel.
Right Switch
• Push the switch up or down to increase or decrease the volume.
• Push the button in the center to change modes AM/FM/CD/SXM. Left Switch
• Push the switch up or down to search for
the next listenable station or select the
next or previous CD track.
• Push the button in the center to select the next preset station (radio) or to change
CDs if equipped with a CD Player.
Reception Conditions
Reception conditions change constantly
while driving. Reception may be interfered
with by the presence of mountains, buildings
or bridges, especially when you are far away
from the broadcaster.
The volume may be increased when receiving
traffic alerts and news.
Care And Maintenance
Observe the following precautions to ensure
the system is fully operational:
• The display lens should not come intocontact with pointed or rigid objects which
could damage its surface; use a soft, dry
anti-static cloth to clean and do not press.
• Never use alcohol, petrols and derivatives to clean the display lens.
Current Selec-Terrain Mode
Steering Wheel Audio Controls
MULTIMEDIA
290
Page 293 of 372
• Prevent any liquid from entering the sys-tem: this could damage it beyond repair.
Anti-theft Protection
The system is equipped with an anti-theft
protection system based on the exchange of
information with the electronic control unit
(Body Computer) on the vehicle.
This guarantees maximum safety and pre-
vents the secret code from being entered
after the power supply has been discon-
nected.
If the check has a positive outcome, the
system will start to operate, whereas if the
comparison codes are not the same or if the
electronic control unit (Body Computer) is
replaced, the system will ask the user to enter
the secret code according to the procedure
described in the paragraph below.
Entering The Secret Code
When the system is switched on, if the code is
requested, the display will show "Please enter
Anti-Theft Code" followed by the screen
showing a keypad to enter the secret code. The secret code has four numbers from 0 to
9: to insert the code numbers, rotate the
BROWSE/ENTER dial and press to confirm.
After entering the fourth number the system
will start functioning.
If an incorrect code is entered, the system
displays "Incorrect Code" to notify the user of
the need to enter the correct code.
After the 3 available attempts to enter the
code, the system displays "Incorrect Code.
Radio locked. Wait for 30 minutes". After the
text has disappeared it is possible to start the
code entering procedure again.
Vehicle Radio Passport
This document certifies ownership of the sys-
tem. The vehicle radio passport shows the
system model, serial number and secret
code.
In case you lose the radio passport, please go
to Jeep Assistance Network with an ID and
the car papers.
Keep the vehicle radio passport in a safe place
so that you can give the information to the
relevant authorities if the system is stolen.
UCONNECT ACCESS
Uconnect Access — If Equipped (Available
On Uconnect 8.4/8.4 NAV — U.S.
Residents Only)
WARNING!
ALWAYS drive safely with your hands on
the wheel. You have full responsibility and
assume all risks related to the use of the
Uconnect features and applications in this
vehicle. Only use Uconnect when it is safe
to do so. Failure to do so may result in an
accident involving serious injury or death.
WARNING!
ALWAYS obey traffic laws and pay atten-
tion to the road. Some Uconnect Access
services, including 9-1-1 and Assist, will
NOT work without an operable 1X (voice/
data) or 3G (data) network connection.
NOTE:
Your vehicle may be transmitting data as
authorized by the subscriber.
291
Page 325 of 372
Audio Jack (AUX)
• The AUX allows a device to be plugged intothe radio and utilize the vehicle’s sound
system, using a 3.5 mm audio cable, to
amplify the source and play through the
vehicle speakers.
• Pressing the “AUX” button on the touch- screen will change the mode to auxiliary
device if the audio jack is connected,
allowing the music from your device to be
heard through the vehicle's speakers. To
activate the AUX, plug in the audio jack.
• The functions of the device are controlled using the device buttons. The volume may
be controlled using the radio or device.
• To route the audio cable out of the center console, use the access cut out in the front
of the console.
USB Port
• Connect your compatible device using aUSB cable into the USB Port. USB
Memory sticks with audio files can also be
used. Audio from the device can be played
on the vehicles sound system while provid-
ing metadata (artist, track title, album,
etc.) information on the radio display. • When connected, the compatible USB de-
vice can be controlled using the radio or
Steering Wheel Audio Controls to play,
skip to the next or previous track, browse,
and list the contents.
• The battery charges when plugged into the USB port (if supported by the specific
device).
• To route the USB cable out of the center console, use the access cut out.
NOTE:
When connecting your device for the first
time, the system may take several minutes to
read your music, depending on the number of
files. For example, the system will take ap-
proximately five minutes for every
1,000 songs loaded on the device. Also dur-
ing the reading process, the Shuffle and
Browse functions will be disabled. This pro-
cess is needed to ensure the full use of your
features and only happens the first time it is
connected. After the first time, the reading
process of your device will take considerably
less time unless changes are made or new
songs are added to the playlist.
SD Card
• Play songs stored on an SD card inserted into the SD card slot.
• Song playback can be controlled using the radio or Steering Wheel Audio Controls to
play, skip to the next or previous track,
browse, and list the contents.
Bluetooth Streaming Audio
If using a Bluetooth equipped device you may
also be able to stream music to your vehicle's
sound system. Your connected device must
be Bluetooth compatible and paired with your
system (see Uconnect Phone for pairing in-
structions). You can access the music from
your connected Bluetooth device by pressing
the Bluetooth button on the touchscreen
while in Media mode.
323
Page 334 of 372
NOTE:
• The Uconnect Phone requires a mobilephone equipped with the Bluetooth
Hands-Free Profile, Version 1.0 or higher.
• Most mobile phones/devices are compat- ible with the Uconnect system, however
some mobile phones/devices may not be
equipped with all of the required features
to utilize all of the Uconnect system fea-
tures.
• For Uconnect Customer Care: •
U.S. residents visitUconnectPhone.com
or call 1-877-855-8400.
General Information
This device complies with Part 15 of the FCC
rules and RSS 210 of Industry Canada. Op-
eration is subject to the following conditions:
• Changes or modifications not expressly approved by the party responsible for com-
pliance could void the user’s authority to
operate the equipment.
• This device may not cause harmful inter- ference. • This device must accept any interference
received, including interference that may
cause undesired operation.
Uconnect Phone (Bluetooth Hands Free
Calling)
The Uconnect Phone feature enables you to
place and receive hands-free mobile phone
calls. Drivers can also place mobile phone
calls using their voice or by using the buttons
on the touchscreen (see Voice Command sec-
tion).
The hands-free calling feature is made pos-
sible through Bluetooth technology — the
global standard that enables different elec-
tronic devices to connect to each other wire-
lessly.
If the Uconnect Phone Button
exists on
your steering wheel, you then have the
Uconnect Phone features.
NOTE:
• The Uconnect Phone requires a mobile phone equipped with the Bluetooth
Hands-Free Profile, Version 1.0 or higher. • Most mobile phones/devices are compat-
ible with the Uconnect system, however
some mobile phones/devices may not be
equipped with all of the required features
to utilize all of the Uconnect system fea-
tures.
• For Uconnect Customer Care: •
U.S. residents visitUconnectPhone.com
or call 1-877-855-8400.
Pairing (Wirelessly Connecting) Your
Mobile Phone To The Uconnect System
Mobile phone pairing is the process of estab-
lishing a wireless connection between a cel-
lular phone and the Uconnect system.
NOTE:
• To use the Uconnect Phone feature, you first must determine if your mobile phone
and software are compatible with the
Uconnect system. Please visit
UconnectPhone.com for complete mobile
phone compatibility information.
• Mobile phone pairing is not available while the vehicle is in motion.
MULTIMEDIA
332