battery JEEP GRAND CHEROKEE 2017 WK2 / 4.G Owner's Manual
[x] Cancel search | Manufacturer: JEEP, Model Year: 2017, Model line: GRAND CHEROKEE, Model: JEEP GRAND CHEROKEE 2017 WK2 / 4.GPages: 372
Page 233 of 372
SERVICING AND MAINTENANCE
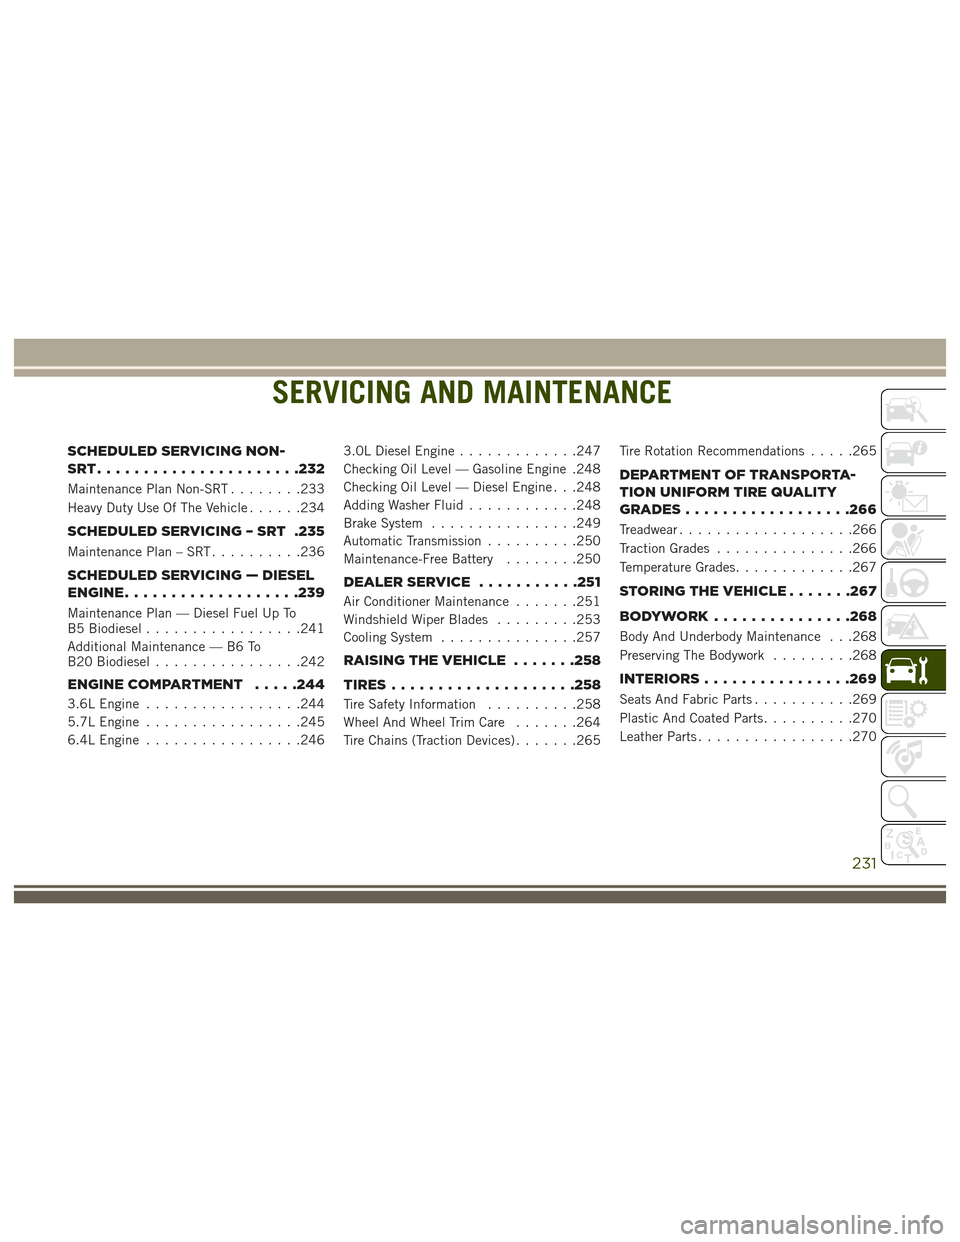
SCHEDULED SERVICING NON-
SRT......................232
Maintenance Plan Non-SRT........233
Heavy Duty Use Of The Vehicle ......234
SCHEDULED SERVICING – SRT .235
Maintenance Plan – SRT..........236
SCHEDULED SERVICING — DIESEL
ENGINE.................. .239
Maintenance Plan — Diesel Fuel Up To
B5 Biodiesel.................241
Additional Maintenance — B6 To
B20 Biodiesel ................242
ENGINE COMPARTMENT .....244
3.6L Engine.................244
5.7L Engine .................245
6.4L Engine .................246 3.0L Diesel Engine
.............247
Checking Oil Level — Gasoline Engine .248
Checking Oil Level — Diesel Engine . . .248
Adding Washer Fluid ............248
Brake System ................249
Automatic Transmission ..........250
Maintenance-Free Battery ........250
DEALERSERVICE .......... .251
Air Conditioner Maintenance.......251
Windshield Wiper Blades .........253
Cooling System ...............257
RAISINGTHEVEHICLE .......258
TIRES................... .258
Tire Safety Information..........258
Wheel And Wheel Trim Care .......264
Tire Chains (Traction Devices) .......265Tire Rotation Recommendations
.....265
DEPARTMENT OF TRANSPORTA-
TION UNIFORM TIRE QUALITY
GRADES................. .266
Treadwear...................266
Traction Grades ...............266
Temperature Grades .............267
STORINGTHEVEHICLE.......267
BODYWORK...............268
Body And Underbody Maintenance . . .268
Preserving The Bodywork .........268
INTERIORS............... .269
Seats And Fabric Parts...........269
Plastic And Coated Parts ..........270
Leather Parts .................270
SERVICING AND MAINTENANCE
231
Page 234 of 372
SCHEDULED SERVICING
NON-SRT
Your vehicle is equipped with an automatic
oil change indicator system. The oil change
indicator system will remind you that it is
time to take your vehicle in for scheduled
maintenance.
Based on engine operation conditions, the oil
change indicator message will illuminate.
This means that service is required for your
vehicle. Operating conditions such as fre-
quent short-trips, trailer tow, extremely hot or
cold ambient temperatures, and E85 fuel
usage will influence when the “Oil Change
Required” message is displayed. Severe op-erating conditions can cause the change oil
message to illuminate as early as
3,500 miles (5,600 km) since last reset.
Have your vehicle serviced as soon as pos-
sible, within the next 500 miles (805 km).
Your authorized dealer will reset the oil
change indicator message after completing
the scheduled oil change.
NOTE:
Under no circumstances should oil change
intervals exceed 10,000 miles (16,000 km),
twelve months or 350 hours of engine run
time, whichever comes first. The 350 hours
of engine run or idle time is generally only a
concern for fleet customers. Once A Month Or Before A Long Trip:
• Check engine oil level.
• Check windshield washer fluid level.
• Check the tire inflation pressures and look
for unusual wear or damage.
• Check the fluid levels of the coolant reser- voir, brake master cylinder and fill as
needed.
• Check function of all interior and exterior lights
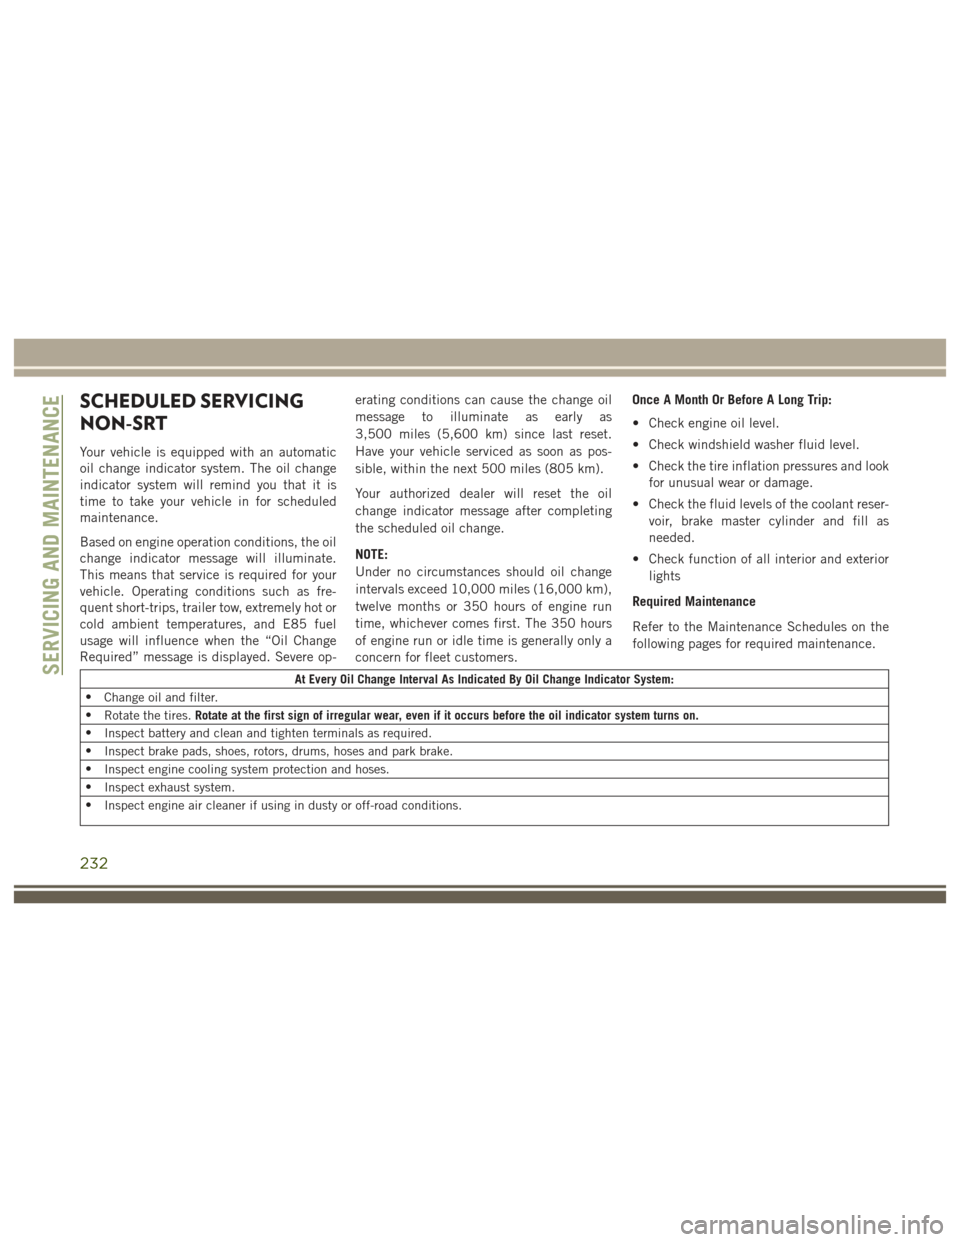
Required Maintenance
Refer to the Maintenance Schedules on the
following pages for required maintenance.
At Every Oil Change Interval As Indicated By Oil Change Indicator System:
• Change oil and filter.
• Rotate the tires. Rotate at the first sign of irregular wear, even if it occurs before the oil indicator system turns on.
• Inspect battery and clean and tighten terminals as required.
• Inspect brake pads, shoes, rotors, drums, hoses and park brake.
• Inspect engine cooling system protection and hoses.
• Inspect exhaust system.
• Inspect engine air cleaner if using in dusty or off-road conditions.SERVICING AND MAINTENANCE
232
Page 237 of 372
SCHEDULED SERVICING –
SRT
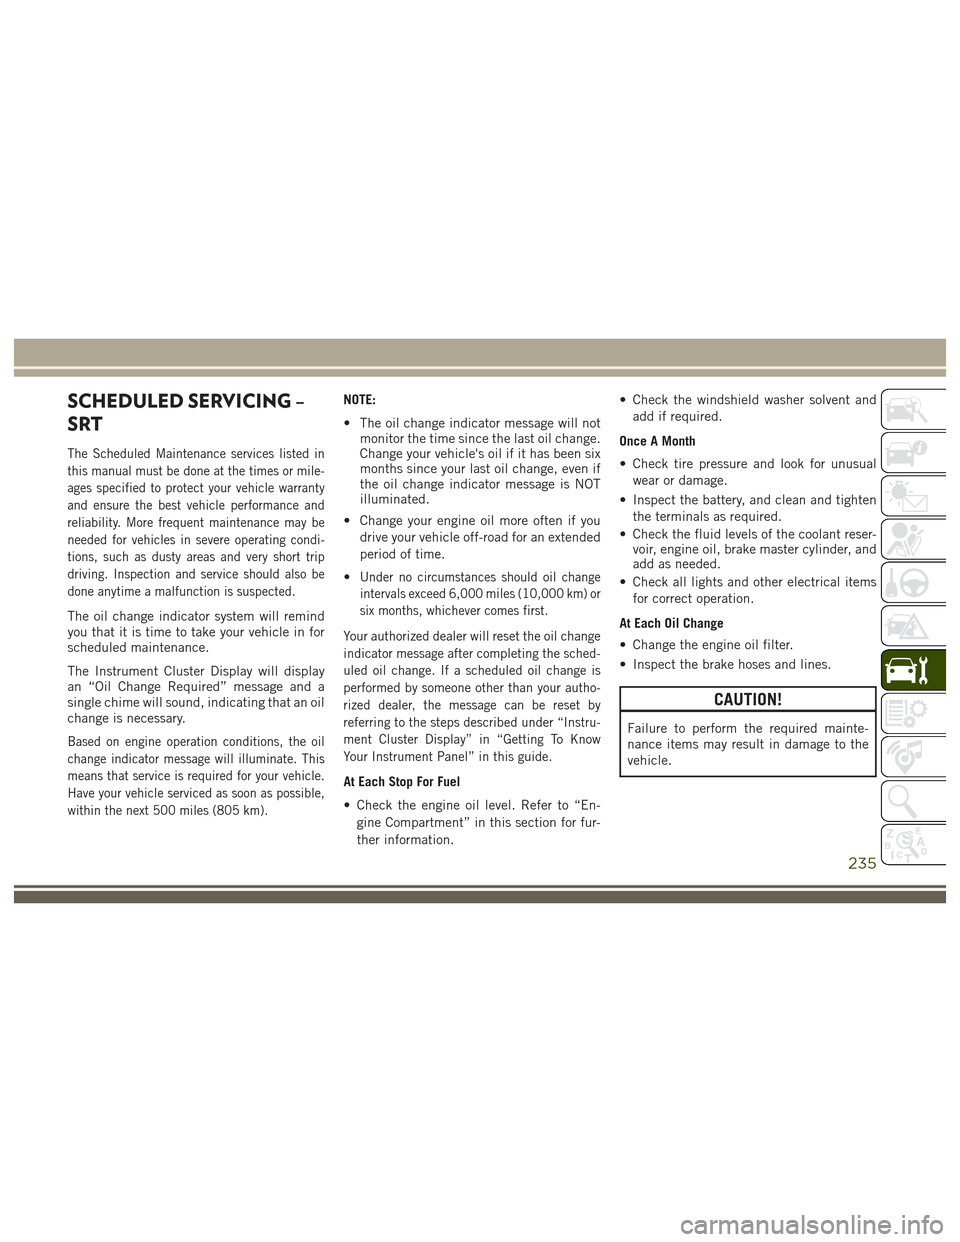
The Scheduled Maintenance services listed in
this manual must be done at the times or mile-
ages specified to protect your vehicle warranty
and ensure the best vehicle performance and
reliability. More frequent maintenance may be
needed for vehicles in severe operating condi-
tions, such as dusty areas and very short trip
driving. Inspection and service should also be
done anytime a malfunction is suspected.
The oil change indicator system will remind
you that it is time to take your vehicle in for
scheduled maintenance.
The Instrument Cluster Display will display
an “Oil Change Required” message and a
single chime will sound, indicating that an oil
change is necessary.
Based on engine operation conditions, the oil
change indicator message will illuminate. This
means that service is required for your vehicle.
Have your vehicle serviced as soon as possible,
within the next 500 miles (805 km).
NOTE:
• The oil change indicator message will notmonitor the time since the last oil change.
Change your vehicle's oil if it has been six
months since your last oil change, even if
the oil change indicator message is NOT
illuminated.
• Change your engine oil more often if you drive your vehicle off-road for an extended
period of time.
•
Under no circumstances should oil change
intervals exceed 6,000 miles (10,000 km) or
six months, whichever comes first.
Your authorized dealer will reset the oil change
indicator message after completing the sched-
uled oil change. If a scheduled oil change is
performed by someone other than your autho-
rized dealer, the message can be reset by
referring to the steps described under “Instru-
ment Cluster Display” in “Getting To Know
Your Instrument Panel” in this guide.
At Each Stop For Fuel
• Check the engine oil level. Refer to “En- gine Compartment” in this section for fur-
ther information. • Check the windshield washer solvent and
add if required.
Once A Month
• Check tire pressure and look for unusual wear or damage.
• Inspect the battery, and clean and tighten the terminals as required.
• Check the fluid levels of the coolant reser- voir, engine oil, brake master cylinder, and
add as needed.
• Check all lights and other electrical items for correct operation.
At Each Oil Change
• Change the engine oil filter.
• Inspect the brake hoses and lines.
CAUTION!
Failure to perform the required mainte-
nance items may result in damage to the
vehicle.
235
Page 242 of 372
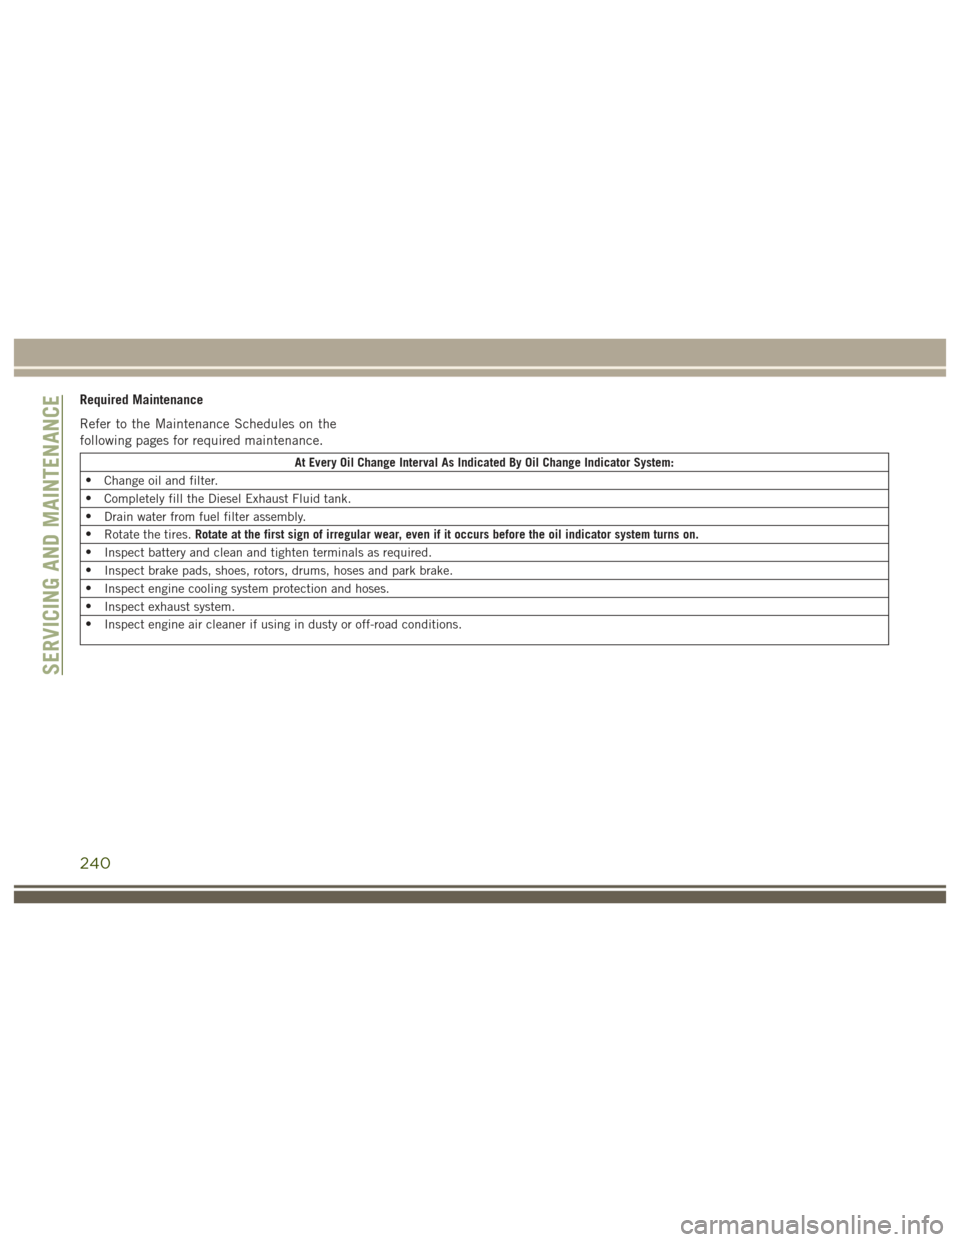
Required Maintenance
Refer to the Maintenance Schedules on the
following pages for required maintenance.
At Every Oil Change Interval As Indicated By Oil Change Indicator System:
• Change oil and filter.
• Completely fill the Diesel Exhaust Fluid tank.
• Drain water from fuel filter assembly.
• Rotate the tires. Rotate at the first sign of irregular wear, even if it occurs before the oil indicator system turns on.
• Inspect battery and clean and tighten terminals as required.
• Inspect brake pads, shoes, rotors, drums, hoses and park brake.
• Inspect engine cooling system protection and hoses.
• Inspect exhaust system.
• Inspect engine air cleaner if using in dusty or off-road conditions.
SERVICING AND MAINTENANCE
240
Page 252 of 372
WARNING!
catch fire. Brake fluid can also damage
painted and vinyl surfaces, care should
be taken to avoid its contact with these
surfaces.
• Do not allow petroleum based fluid to
contaminate the brake fluid. Brake seal
components could be damaged, causing
partial or complete brake failure. This
could result in a collision.
Automatic Transmission
Fluid Level Check
The fluid level is preset at the factory and
does not require adjustment under normal
operating conditions. Routine fluid level
checks are not required, therefore the trans-
mission has no dipstick. Your authorized
dealer can check your transmission fluid
level using special service tools. If you notice
fluid leakage or transmission malfunction,
visit your authorized dealer immediately to
have the transmission fluid level checked.
Operating the vehicle with an improper fluid
level can cause severe transmission damage.
CAUTION!
If a transmission fluid leak occurs, visit
your authorized dealer immediately. Se-
vere transmission damage may occur. Your
authorized dealer has the proper tools to
adjust the fluid level accurately.
Maintenance-Free Battery
Your vehicle is equipped with a maintenance-
free battery. You will never have to add water,
nor is periodic maintenance required.
WARNING!
• Battery fluid is a corrosive acid solutionand can burn or even blind you. Do not
allow battery fluid to contact your eyes,
skin, or clothing. Do not lean over a
battery when attaching clamps. If acid
splashes in eyes or on skin, flush the
area immediately with large amounts of
water. Refer to “Jump-Starting” in “In
Case Of Emergency” for further informa-
tion.
WARNING!
• Battery gas is flammable and explosive.Keep flame or sparks away from the
battery. Do not use a booster battery or
any other booster source with an output
greater than 12 Volts. Do not allow cable
clamps to touch each other.
• Battery posts, terminals, and related ac-
cessories contain lead and lead com-
pounds. Wash hands after handling.
CAUTION!
• It is essential when replacing the cableson the battery that the positive cable is
attached to the positive post and the
negative cable is attached to the nega-
tive post. Battery posts are marked posi-
tive (+) and negative (-) and are identi-
fied on the battery case. Cable clamps
should be tight on the terminal posts
and free of corrosion.
• If a “fast charger” is used while the
battery is in the vehicle, disconnect both
vehicle battery cables before connecting
the charger to the battery. Do not use a
SERVICING AND MAINTENANCE
250
Page 269 of 372
WARNING!
The traction grade assigned to this tire is
based on straight-ahead braking traction
tests, and does not include acceleration,
cornering, hydroplaning, or peak traction
characteristics.
Temperature Grades
The temperature grades are A (the highest),
B, and C, representing the tire's resistance to
the generation of heat and its ability to dissi-
pate heat, when tested under controlled con-
ditions on a specified indoor laboratory test
wheel.
Sustained high temperature can cause the
material of the tire to degenerate and reduce
tire life, and excessive temperature can lead
to sudden tire failure. The grade C corre-
sponds to a level of performance, which all
passenger vehicle tires must meet under the
Federal Motor Vehicle Safety Standard No.
109. Grades B and A represent higher levels
of performance on the laboratory test wheel,
than the minimum required by law.
WARNING!
The temperature grade for this tire is es-
tablished for a tire that is properly inflated
and not overloaded. Excessive speed,
under-inflation, or excessive loading, ei-
ther separately or in combination, can
cause heat buildup and possible tire fail-
ure.
STORING THE VEHICLE
If the vehicle should remain stationary for
more than a month, observe the following
precautions:
• Park your vehicle in a covered, dry andpossibly airy location the windows open
slightly.
• Check that the Electric Park Brake is not engaged.
• Disconnect the negative (-) terminal from the battery post and be sure that the
battery is fully charged. During storage
check battery charge quarterly. • If you do not disconnect the battery from
the electrical system, check the battery
charge every thirty days.
• Clean and protect the painted parts by applying protective waxes.
• Clean and protect polished metal parts by applying protective waxes.
• Apply talcum powder to the front and rear wiper blades and leave raised from the
glass.
• Cover the vehicle with an appropriate cover taking care not to damage the
painted surface by dragging across dirty
surfaces. Do not use plastic sheeting
which will not allow the evaporation of
moisture present on the surface of the
vehicle.
• Inflate the tires at a pressure of +7.25 psi (+0.5 bar) higher than recommended on
the tire placard and check it periodically.
• Do not drain the engine cooling system.
• Whenever you leave the vehicle is station- ary for two weeks or more, run idle the
engine for approximately five minutes,
with the air conditioning system on and
high fan speed. This will ensure a proper
267
Page 270 of 372
lubrication of the system, thus minimizing
the possibility of damage to the compres-
sor when the vehicle is put back into
operation.
NOTE:
When the vehicle has not been started or
driven for at least 30 days, an Extended Park
Start Procedure is required to start the ve-
hicle. Refer to “Starting Procedures” in
“Starting And Operating” for further
information.
CAUTION!
Before removal of the positive and nega-
tive terminals to the battery, wait at least a
minute with ignition switch in the OFF
position and close the drivers door. When
reconnecting the positive and negative ter-
minals to the battery be sure the ignition
switch is in the OFF position and the
drivers door is closed.
BODYWORK
Body And Underbody Maintenance
Cleaning Headlights
Your vehicle is equipped with plastic head-
lights and fog lights that are lighter and less
susceptible to stone breakage than glass
headlights.
Plastic is not as scratch resistant as glass and
therefore different lens cleaning procedures
must be followed.
To minimize the possibility of scratching the
lenses and reducing light output, avoid wip-
ing with a dry cloth. To remove road dirt, wash
with a mild soap solution followed by rinsing.
Do not use abrasive cleaning components,
solvents, steel wool or other aggressive mate-
rial to clean the lenses.
Preserving The Bodywork
Washing
• Wash your vehicle regularly. Always wash your vehicle in the shade using MOPAR Car
Wash, or a mild car wash soap, and rinse
the panels completely with clear water.
• If insects, tar, or other similar deposits have accumulated on your vehicle, use
MOPAR Super Kleen Bug and Tar Remover
to remove.
• Use a high quality cleaner wax, such as MOPAR Cleaner Wax to remove road film,
stains and to protect your paint finish. Take
care never to scratch the paint.
• Avoid using abrasive compounds and power buffing that may diminish the gloss
or thin out the paint finish.
SERVICING AND MAINTENANCE
268
Page 291 of 372
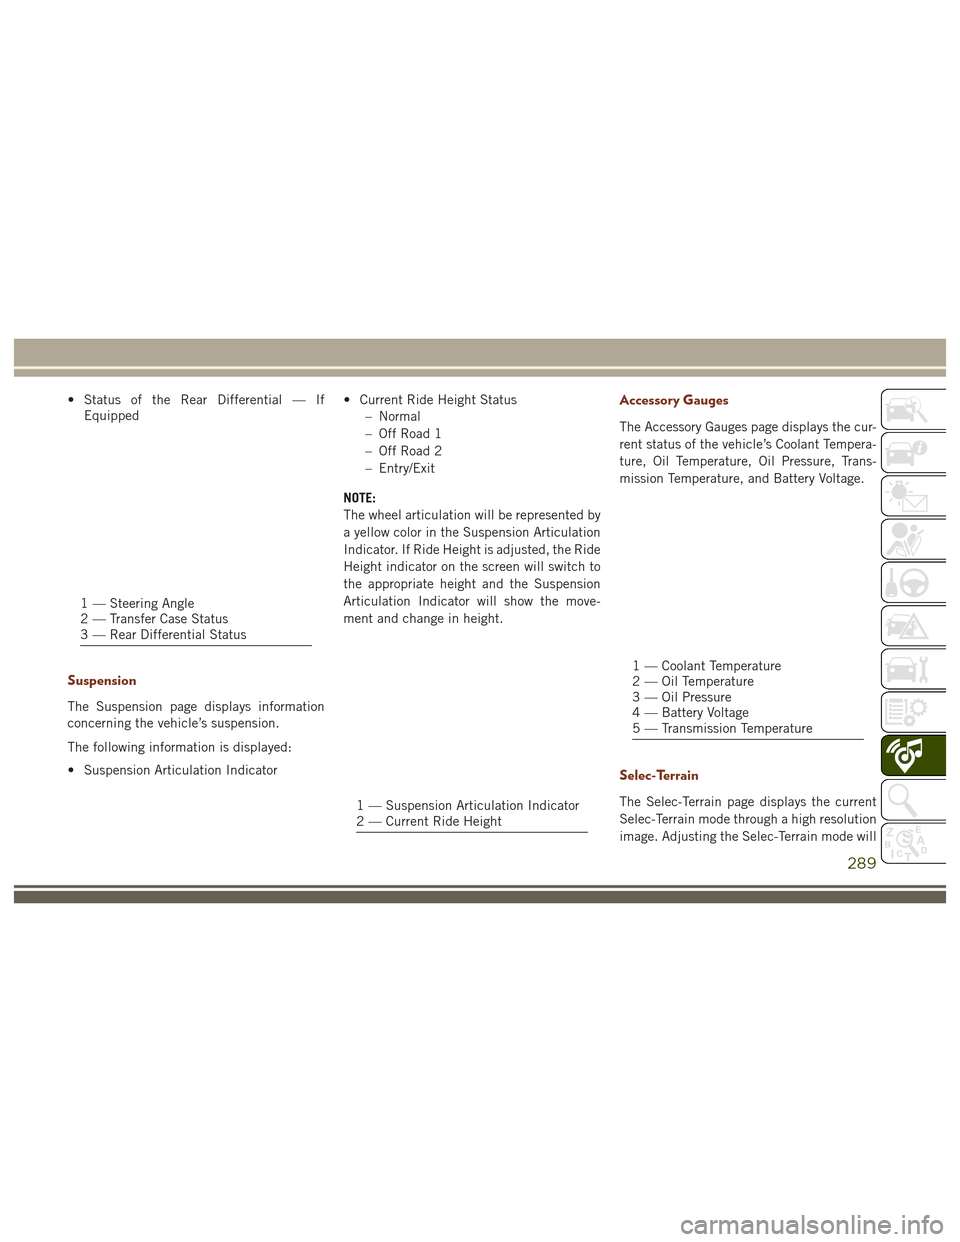
• Status of the Rear Differential — IfEquipped
Suspension
The Suspension page displays information
concerning the vehicle’s suspension.
The following information is displayed:
• Suspension Articulation Indicator • Current Ride Height Status
– Normal
– Off Road 1
– Off Road 2
– Entry/Exit
NOTE:
The wheel articulation will be represented by
a yellow color in the Suspension Articulation
Indicator. If Ride Height is adjusted, the Ride
Height indicator on the screen will switch to
the appropriate height and the Suspension
Articulation Indicator will show the move-
ment and change in height.
Accessory Gauges
The Accessory Gauges page displays the cur-
rent status of the vehicle’s Coolant Tempera-
ture, Oil Temperature, Oil Pressure, Trans-
mission Temperature, and Battery Voltage.
Selec-Terrain
The Selec-Terrain page displays the current
Selec-Terrain mode through a high resolution
image. Adjusting the Selec-Terrain mode will
1 — Steering Angle
2 — Transfer Case Status
3 — Rear Differential Status
1 — Suspension Articulation Indicator
2 — Current Ride Height
1 — Coolant Temperature
2 — Oil Temperature
3 — Oil Pressure
4 — Battery Voltage
5 — Transmission Temperature
289
Page 300 of 372
Maintaining Your Uconnect Access
Account
Selling Your Vehicle
When you sell your vehicle, we recommend
that you remove your Uconnect Access Ac-
count information from the vehicle. You can
do this on the Mopar Owner Connect website
moparownerconnect.com. Removing your ac-
count information cancels your subscription
and makes your vehicle factory-ready for a
new owner/subscriber.
For additional information on Uconnect, visit
DriveUconnect.com or call 1-877-855-8400
Built-In Features
WARNING!
ALWAYS drive safely with your hands on
the wheel. You have full responsibility and
assume all risks related to the use of the
Uconnect features and applications in this
vehicle. Only use Uconnect when it is safe
to do so. Failure to do so may result in an
accident involving serious injury or death.
WARNING!
• ALWAYS obey traffic laws and pay atten-tion to the road. Some Uconnect Access
services, including 9-1-1 and Assist,
will NOT work without an operable 1X
(voice/data) or 3G (data) network con-
nection.
• Ignoring the rearview mirror light could
mean you may not have 9-1-1 Call ser-
vice if needed. If the rearview mirror
light is illuminated, have an authorized
dealer service the 9-1-1 Call system
immediately.
• The Occupant Restraint Controller
(ORC) turns on the Air Bag Warning
Light on the instrument panel if a mal-
function is detected in any part of the
airbag system. If the Air Bag Warning
Light is illuminated, the air bag system
may not be working properly and the
9-1-1 system may not send a signal to a
9-1-1 operator if an air bag is deployed.
If the Air Bag Warning Light is illumi-
nated, have an authorized dealer service
your vehicle immediately.
WARNING!
• If anyone in the vehicle could be indanger (e.g., fire or smoke is visible,
dangerous road conditions or location),
do not wait for voice contact from a
9-1-1 operator. All occupants should
exit the vehicle immediately and move
to a safe location.
• The 9-1-1 Call system is embedded into
the vehicle’s electrical system. Do not
add aftermarket electrical equipment to
the vehicle’s electrical system. This may
prevent your vehicle from sending a sig-
nal to initiate an emergency call. To
avoid interference that can cause the
9-1-1 Call system to fail, never add
aftermarket equipment (e.g., two-way
mobile radio, CB radio, data recorder,
etc.) to your vehicle’s electrical system
or modify the antennas on your vehicle.
• IF YOUR VEHICLE LOSES BATTERY
POWER FOR ANY REASON (INCLUD-
ING DURING OR AFTER AN ACCI-
DENT), the Uconnect features, apps and
services, among others, will not operate.
MULTIMEDIA
298
Page 325 of 372
Audio Jack (AUX)
• The AUX allows a device to be plugged intothe radio and utilize the vehicle’s sound
system, using a 3.5 mm audio cable, to
amplify the source and play through the
vehicle speakers.
• Pressing the “AUX” button on the touch- screen will change the mode to auxiliary
device if the audio jack is connected,
allowing the music from your device to be
heard through the vehicle's speakers. To
activate the AUX, plug in the audio jack.
• The functions of the device are controlled using the device buttons. The volume may
be controlled using the radio or device.
• To route the audio cable out of the center console, use the access cut out in the front
of the console.
USB Port
• Connect your compatible device using aUSB cable into the USB Port. USB
Memory sticks with audio files can also be
used. Audio from the device can be played
on the vehicles sound system while provid-
ing metadata (artist, track title, album,
etc.) information on the radio display. • When connected, the compatible USB de-
vice can be controlled using the radio or
Steering Wheel Audio Controls to play,
skip to the next or previous track, browse,
and list the contents.
• The battery charges when plugged into the USB port (if supported by the specific
device).
• To route the USB cable out of the center console, use the access cut out.
NOTE:
When connecting your device for the first
time, the system may take several minutes to
read your music, depending on the number of
files. For example, the system will take ap-
proximately five minutes for every
1,000 songs loaded on the device. Also dur-
ing the reading process, the Shuffle and
Browse functions will be disabled. This pro-
cess is needed to ensure the full use of your
features and only happens the first time it is
connected. After the first time, the reading
process of your device will take considerably
less time unless changes are made or new
songs are added to the playlist.
SD Card
• Play songs stored on an SD card inserted into the SD card slot.
• Song playback can be controlled using the radio or Steering Wheel Audio Controls to
play, skip to the next or previous track,
browse, and list the contents.
Bluetooth Streaming Audio
If using a Bluetooth equipped device you may
also be able to stream music to your vehicle's
sound system. Your connected device must
be Bluetooth compatible and paired with your
system (see Uconnect Phone for pairing in-
structions). You can access the music from
your connected Bluetooth device by pressing
the Bluetooth button on the touchscreen
while in Media mode.
323