engine JEEP GRAND CHEROKEE 2017 WK2 / 4.G User Guide
[x] Cancel search | Manufacturer: JEEP, Model Year: 2017, Model line: GRAND CHEROKEE, Model: JEEP GRAND CHEROKEE 2017 WK2 / 4.GPages: 372
Page 16 of 372
WARNING!
• Always remove the key fobs from thevehicle and lock all doors when leaving
the vehicle unattended.
• For vehicles equipped with Keyless
Enter-N-Go — Ignition, always remem-
ber to place the ignition in the OFF
mode.
Duplication of key fobs may be performed at
an authorized dealer. This procedure consists
of programming a blank key fob to the vehicle
electronics. A blank key fob is one that has
never been programmed.
NOTE:
When having the Sentry Key Immobilizer Sys-
tem serviced, bring all vehicle keys with you
to an authorized dealer.
IGNITION SWITCH
Models With Keyless Enter-N-Go —
Passive Entry
This feature allows the driver to operate the
ignition switch with the push of a button as
long as the key fob is in the passenger com-
partment.
The push button ignition has three operating
positions. The three positions are OFF, RUN,
and START.
NOTE:
If the ignition switch does not change with
the push of a button, the key fob may have a
low or dead battery. In this situation, a back
up method can be used to operate the igni-
tion switch. Put the nose side (side opposite
of the emergency key) of the key fob against
the ENGINE START/STOP button and push to
operate the ignition switch. The push button ignition can be placed in the
following positions:
OFF
• The engine is stopped.
• Some electrical devices (e.g. Central lock-
ing, alarm, etc.) are still available.
START/STOP Ignition Button
GETTING TO KNOW YOUR VEHICLE
14
Page 17 of 372
RUN
• Driving position.
• All the electrical devices are available.
START
• Start the engine.
WARNING!
• When leaving the vehicle, always re-move the key fob from the vehicle and
lock your vehicle.
• Never leave children alone in a vehicle,
or with access to an unlocked vehicle.
• Allowing children to be in a vehicle
unattended is dangerous for a number
of reasons. A child or others could be
seriously or fatally injured. Children
should be warned not to touch the
parking brake, brake pedal or the gear
selector.
• Do not leave the key fob in or near the
vehicle, or in a location accessible to
children, and do not leave the ignition
of a vehicle equipped with Keyless
Enter-N-Go in the MAR/RUN mode. A
WARNING!
child could operate power windows,
other controls, or move the vehicle.
• Do not leave children or animals inside
parked vehicles in hot weather. Interior
heat build-up may cause serious injury
or death.
CAUTION!
An unlocked vehicle is an invitation for
thieves. Always remove key fob from the
vehicle and lock all doors when leaving the
vehicle unattended.
NOTE:
For further information, refer to "Starting Pro-
cedures," in "Starting And Operating."
Vehicle On Message
When opening the driver's door when the
ignition is in RUN (engine not running), a
chime will sound to remind you to place the
ignition in the OFF position. In addition to the
chime, the message will display “Ignition Or
Accessory On” in the cluster. NOTE:
The power window switches and power sun-
roof (if equipped) will remain active up to ten
minutes after the ignition is cycled to the OFF
position. Opening either front door will can-
cel this feature. The time for this feature is
programmable.
WARNING!
• Before exiting a vehicle, always shift the
automatic transmission into PARK, ap-
ply the parking brake, place the engine
in the OFF position, remove the key fob
from the vehicle and lock your vehicle. If
equipped with Keyless Enter-N-Go, al-
ways make sure the keyless ignition is in
“OFF” position, remove the key fob from
the vehicle and lock the vehicle.
• Never leave children alone in a vehicle,
or with access to an unlocked vehicle.
• Allowing children to be in a vehicle un-
attended is dangerous for a number of
reasons. A child or others could be seri-
ously or fatally injured. Children should
be warned not to touch the parking
brake, brake pedal or the gear selector.
15
Page 18 of 372
WARNING!
• Do not leave the key fob in or near thevehicle, or in a location accessible to
children, and do not leave the ignition of
a vehicle equipped with Keyless Enter-
N-Go in the ON/RUN mode. A child
could operate power windows, other con-
trols, or move the vehicle.
• Do not leave children or animals inside
parked vehicles in hot weather. Interior
heat build-up may cause serious injury
or death.
CAUTION!
An unlocked vehicle is an invitation for
thieves. Always remove key fob from the
vehicle and lock all doors when leaving the
vehicle unattended.
REMOTE STARTING
SYSTEM — IF EQUIPPED
• Push the remote start button on the key
fob twice within five seconds. Pushing the
remote start button a third time shuts the
engine off.
• To drive the vehicle, push unlock button, insert the key in the ignition and turn to
the ON/RUN position.
• With remote start, the engine will only run for 15 minutes (timeout) unless the igni-
tion key is placed in the ON/RUN position.
• The vehicle must be started with the key after two consecutive timeouts.
WARNING!
• Do not start or run an engine in a closed
garage or confined area. Exhaust gas
contains Carbon Monoxide (CO) which is
odorless and colorless. Carbon Monox-
ide is poisonous and can cause you or
others to be severely injured or killed
when inhaled.
WARNING!
• Keep key fobs away from children. Op-eration of the Remote Start System, win-
dows, door locks or other controls could
cause you and others to be severely
injured or killed.
General Information
The following regulatory statement applies to
all Radio Frequency (RF) devices equipped in
this vehicle:
This device complies with Part 15 of the FCC
Rules and with Industry Canada licence-
exempt RSS standard(s). Operation is sub-
ject to the following two conditions:
1. This device may not cause harmful inter-
ference, and
2. This device must accept any interference received, including interference that may
cause undesired operation.
GETTING TO KNOW YOUR VEHICLE
16
Page 19 of 372
NOTE:
Changes or modifications not expressly ap-
proved by the party responsible for compli-
ance could void the user’s authority to oper-
ate the equipment.
SENTRY KEY
The Sentry Key Immobilizer system prevents
unauthorized vehicle operation by disabling
the engine. The system does not need to be
armed or activated. Operation is automatic,
regardless of whether the vehicle is locked or
unlocked.
All of the key fobs provided with your new
vehicle have been programmed to the vehicle
electronics.
Irregular Operation
The system uses a key fob, an Ignition Node
Module, Keyless Push Button Ignition and a
RF receiver to prevent unauthorized vehicle
operation. Therefore, only key fobs that are
programmed to the vehicle can be used tostart and operate the vehicle. The system will
not allow the engine to crank if an invalid key
fob is used to start and operate the vehicle.
The system will shut the engine off in two
seconds if an invalid key fob is used to start
the engine.
NOTE:
A key fob that has not been programmed is
also considered an invalid key.
During normal operation, after placing the
keyless ignition in the ON/RUN position, the
Vehicle Security Light will turn on for three
seconds for a bulb check. If the light remains
on after the bulb check, it indicates that
there is a problem with the electronics. In
addition, if the light begins to flash after the
bulb check, it indicates that someone used
an invalid key fob to try to start the engine.
Either of these conditions will result in the
engine being shut off after two seconds.
If the Vehicle Security Light turns on during
normal vehicle operation (vehicle running for
longer than 10 seconds), it indicates thatthere is a fault in the electronics. Should this
occur, have the vehicle serviced as soon as
possible by an authorized dealer.
VEHICLE SECURITY ALARM
— IF EQUIPPED
The Vehicle Security Alarm monitors the ve-
hicle doors, hood, liftgate, and the Keyless
Enter-N-Go — Ignition for unauthorized op-
eration. While the Vehicle Security Alarm is
armed, interior switches for door locks and
liftgate release are disabled. If something
triggers the alarm, the Vehicle Security Alarm
will provide the following audible and visible
signals:
• The horn will pulse
• The park lamps and/or turn signals will
flash
• The Vehicle Security Light in the instru- ment cluster will flash
17
Page 29 of 372
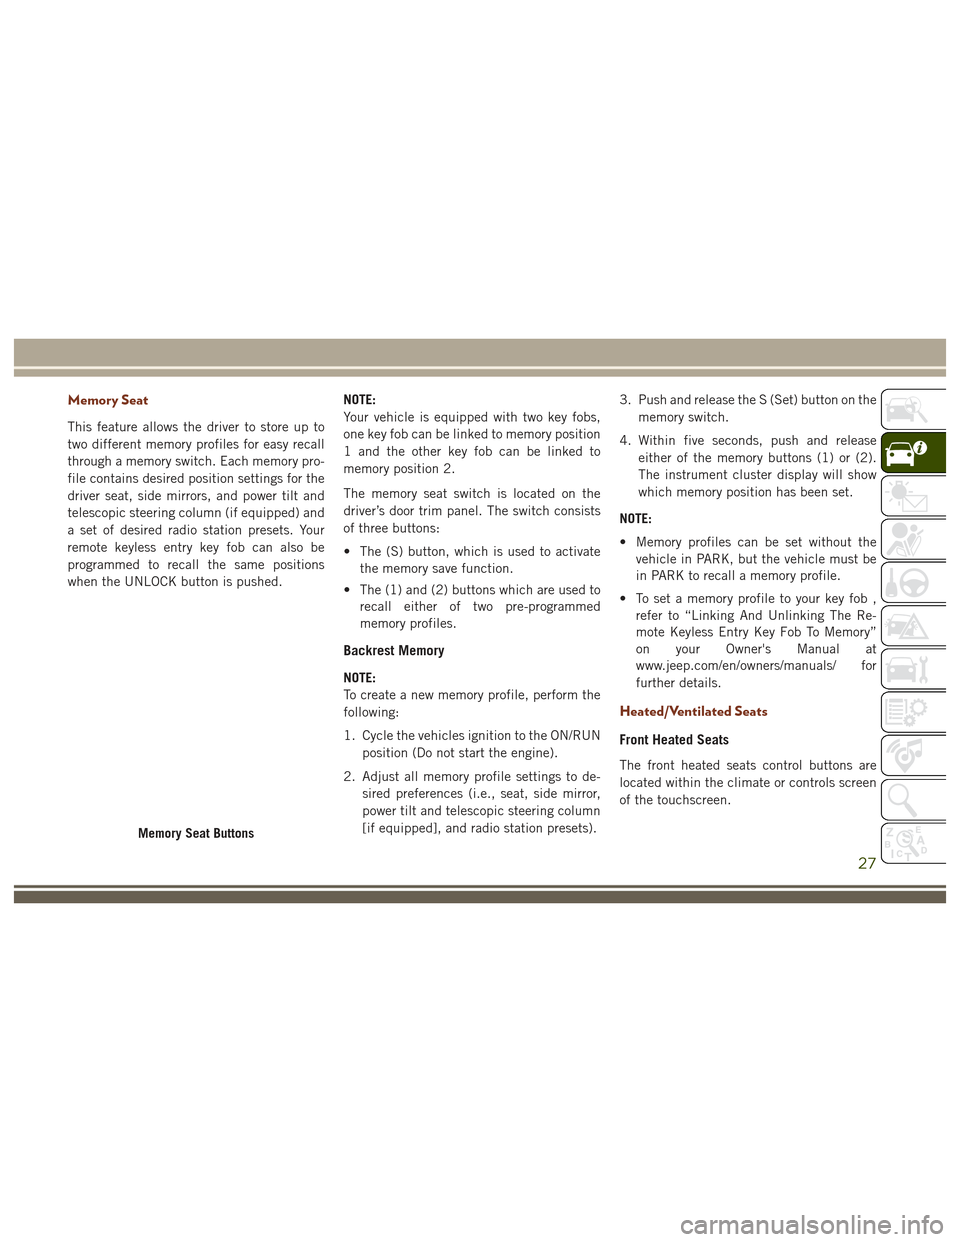
Memory Seat
This feature allows the driver to store up to
two different memory profiles for easy recall
through a memory switch. Each memory pro-
file contains desired position settings for the
driver seat, side mirrors, and power tilt and
telescopic steering column (if equipped) and
a set of desired radio station presets. Your
remote keyless entry key fob can also be
programmed to recall the same positions
when the UNLOCK button is pushed.NOTE:
Your vehicle is equipped with two key fobs,
one key fob can be linked to memory position
1 and the other key fob can be linked to
memory position 2.
The memory seat switch is located on the
driver’s door trim panel. The switch consists
of three buttons:
• The (S) button, which is used to activate
the memory save function.
• The (1) and (2) buttons which are used to recall either of two pre-programmed
memory profiles.
Backrest Memory
NOTE:
To create a new memory profile, perform the
following:
1. Cycle the vehicles ignition to the ON/RUN
position (Do not start the engine).
2. Adjust all memory profile settings to de- sired preferences (i.e., seat, side mirror,
power tilt and telescopic steering column
[if equipped], and radio station presets). 3. Push and release the S (Set) button on the
memory switch.
4. Within five seconds, push and release either of the memory buttons (1) or (2).
The instrument cluster display will show
which memory position has been set.
NOTE:
• Memory profiles can be set without the vehicle in PARK, but the vehicle must be
in PARK to recall a memory profile.
• To set a memory profile to your key fob , refer to “Linking And Unlinking The Re-
mote Keyless Entry Key Fob To Memory”
on your Owner's Manual at
www.jeep.com/en/owners/manuals/ for
further details.
Heated/Ventilated Seats
Front Heated Seats
The front heated seats control buttons are
located within the climate or controls screen
of the touchscreen.
Memory Seat Buttons
27
Page 30 of 372
You can choose from HI, LO or OFF heat
settings. The indicator arrows in touchscreen
buttons indicate the level of heat in use. Two
indicator arrows will illuminate for HI, one for
LO and none for OFF.
• Press the heated seat button
once to
turn the HI setting ON.
• Press the heated seat button
a second
time to turn the LO setting ON.
• Press the heated seat button
a third
time to turn the heating elements OFF.
If the HI-level setting is selected, the system
will automatically switch to LO-level after
approximately 60 minutes of continuous op-
eration. At that time, the display will change
from HI to LO, indicating the change. The
LO-level setting will turn OFF automatically
after approximately 45 minutes.
NOTE:
• Once a heat setting is selected, heat will be felt within two to five minutes.
• The engine must be running for the heated seats to operate. Vehicles Equipped With Remote Start
On models that are equipped with remote
start, the heated seats can be programmed to
come on during a remote start.
This feature can be programmed through the
Uconnect system. Refer to your Owner's
Manual
at
www.jeep.com/en/owners/manuals/ for fur-
ther details.
WARNING!
• Persons who are unable to feel pain to the skin because of advanced age,
chronic illness, diabetes, spinal cord in-
jury, medication, alcohol use, exhaus-
tion or other physical condition must
exercise care when using the seat
heater. It may cause burns even at low
temperatures, especially if used for long
periods of time.
• Do not place anything on the seat or
seatback that insulates against heat,
such as a blanket or cushion. This may
cause the seat heater to overheat. Sit-
ting in a seat that has been overheated
WARNING!
could cause serious burns due to the
increased surface temperature of the
seat.
Rear Heated Seats
On some models, the two outboard seats are
equipped with heated seats. The heated seat
switches for these seats are located on the
rear of the center console. There are two
heated seat switches
that allow the rear
passengers to operate the seats indepen-
dently.
You can choose from HI, LO or OFF heat
settings. The indicator lights in each switch
indicate the level of heat in use. Two indica-
tor lights will illuminate for HI, one for LO
and none for OFF.
• Push the heated seat button
once to
select HI-level heating.
• Push the heated seat button
a second
time to select LO-level heating.
• Push the heated seat button
a third
time to turn the heating elements OFF.
GETTING TO KNOW YOUR VEHICLE
28
Page 31 of 372
NOTE:
• Once a heat setting is selected, heat willbe felt within two to five minutes.
• The engine must be running for the heated seats to operate.
If the HI-level setting is selected, the system
will automatically switch to LO-level after
approximately 60 minutes of continuous op-
eration. At that time, the number of illumi-
nated LEDs changes from two to one, indicat-
ing the change. The LO-level setting will turn
OFF automatically after approximately
45 minutes.
Front Ventilated Seats
If your vehicle is equipped with ventilated
seats, the seat cushion and seat back will
have fans that draw the air from the passen-
ger compartment and move air through fine
perforations in the seat cover to help keep the
driver and front passenger cooler in higher
ambient temperatures. The fans operate at
two speeds, HI and LO. The front ventilated seats control buttons are
located within the Uconnect system. You can
gain access to the control buttons through
the climate screen or the controls screen.
• Press the ventilated seat button
once
to choose HI.
• Press the ventilated seat button
a
second time to choose LO.
• Press the ventilated seat button
a
third time to turn the ventilated seat OFF.
NOTE:
The engine must be running for the ventilated
seats to operate.
Vehicles Equipped With Remote Start
On models that are equipped with remote
start, the ventilated seats can be pro-
grammed to come on during a remote start.
This feature can be programmed through the
Uconnect system. Refer to your Owner's
Manual at
www.jeep.com/en/owners/manuals/ for fur-
ther details.
HEAD RESTRAINTS
Head restraints are designed to reduce the
risk of injury by restricting head movement in
the event of a rear impact. Head restraints
should be adjusted so that the top of the head
restraint is located above the top of your ear.
WARNING!
• All occupants, including the driver, should not operate a vehicle or sit in a
vehicle’s seat until the head restraints
are placed in their proper positions in
order to minimize the risk of neck injury
in the event of a crash.
• Head restraints should never be ad-
justed while the vehicle is in motion.
Driving a vehicle with the head restraints
improperly adjusted or removed could
cause serious injury or death in the event
of a collision.
29
Page 36 of 372
based on environmental temperatures. The
heated steering wheel can shut off early or
may not turn on when the steering wheel is
already warm.
The heated steering wheel control button is
located within the Uconnect system. You can
gain access to the control button through the
climate screen or the controls screen.
• Press the heated steering wheel button
once to turn the heating element ON.
• Press the heated steering wheel button
a second time to turn the heating
element OFF.
NOTE:
The engine must be running for the heated
steering wheel to operate.
Vehicles Equipped With Remote Start
On models that are equipped with remote
start, the heated steering wheel can be pro-
grammed to come on during a remote start
through the Uconnect system. Refer to
“Uconnect Settings” in “Multimedia” in the
Owner’s Manualat
www.jeep.com/en/owners/manuals/ for fur-
ther information.
WARNING!
• Persons who are unable to feel pain to the skin because of advanced age,
chronic illness, diabetes, spinal cord in-
jury, medication, alcohol use, exhaus-
tion, or other physical conditions must
exercise care when using the steering
wheel heater. It may cause burns even at
low temperatures, especially if used for
long periods.
• Do not place anything on the steering
wheel that insulates against heat, such
as a blanket or steering wheel covers of
any type and material. This may cause
the steering wheel heater to overheat.
MIRRORS
Interior Mirror
Manual Mirror
The mirror head can be adjusted up, down,
left, and right for various drivers. The mirror
should be adjusted to center on the view
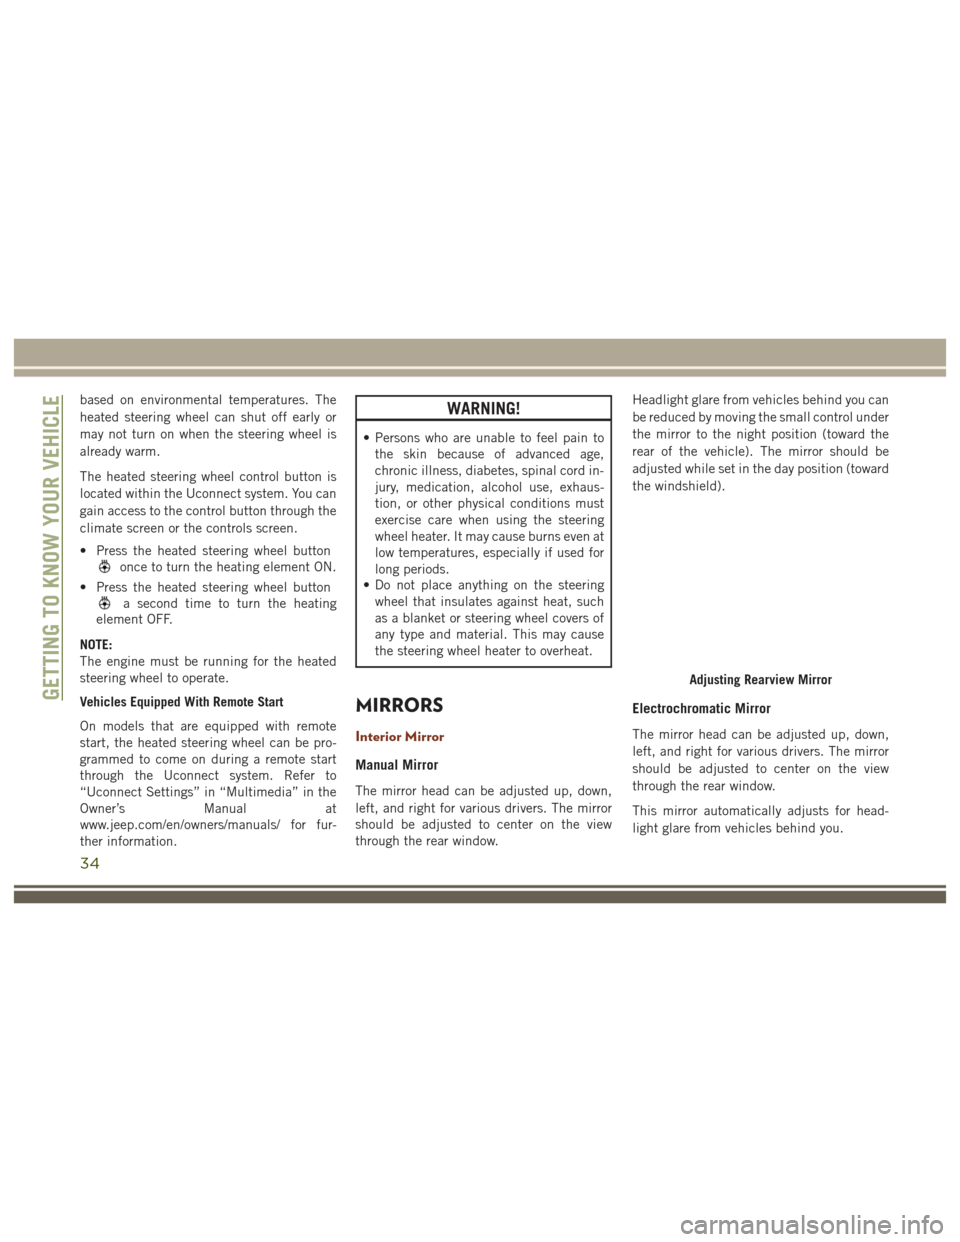
through the rear window. Headlight glare from vehicles behind you can
be reduced by moving the small control under
the mirror to the night position (toward the
rear of the vehicle). The mirror should be
adjusted while set in the day position (toward
the windshield).
Electrochromatic Mirror
The mirror head can be adjusted up, down,
left, and right for various drivers. The mirror
should be adjusted to center on the view
through the rear window.
This mirror automatically adjusts for head-
light glare from vehicles behind you.
Adjusting Rearview Mirror
GETTING TO KNOW YOUR VEHICLE
34
Page 40 of 372
Daytime Running Lights
The Daytime Running Lights (low intensity)
come on whenever the engine is running, and
the transmission is not in the PARK position.
The lights will remain on until the ignition is
switched to the OFF or ACC position or the
parking brake is engaged.
The Daytime Running Lights (bright inten-
sity) come on whenever the engine is run-
ning, and the transmission is not in the PARK
position. The lights will remain on until the
ignition is switched to the OFF or ACC posi-
tion or the parking brake is engaged.
NOTE:
• If a turn signal is activated, the DRL lampon the same side of the vehicle will turn off
for the duration of the turn signal activa-
tion. Once the turn signal is no longer
active, the DRL lamp will illuminate.
• The DRL function may be disabled through the Uconnect system. Refer to
“Uconnect Settings” in “Multimedia” for
further information.
The headlight switch must be used for normal
nighttime driving.
High Beams
Push the multifunction lever toward the in-
strument panel to switch the headlights to
high beams. Pulling the multifunction back
toward the steering wheel will turn the low
beams back on, or shut the high beams off.
Flash-To-Pass
You can signal another vehicle with your
headlights by partially pulling the multifunc-
tion lever toward the steering wheel. This will
cause the high beam headlights to turn on
until the lever is released.
Automatic Lighting
The Automatic High Beam Headlamp Control
system provides increased forward lighting at
night by automating high beam control
through the use of a digital camera mounted
on the inside rearview mirror. This camera
detects vehicle specific light and automati-
cally switches from high beams to low beams
until the approaching vehicle is out of view. NOTE:
• The Automatic High Beam Headlamp Con-
trol can be turned on or off using the
Uconnect System. Refer to “Uconnect
Settings” in “Multimedia” in the Owner’s
Manual at
www.jeep.com/en/owners/manuals/ for
further information.
• Broken, muddy, or obstructed headlights and taillights of vehicles in the field of
view will cause headlights to remain on
longer (closer to the vehicle). Also, dirt,
film, and other obstructions on the wind-
shield or camera lens will cause the sys-
tem to function improperly.
• To opt out of the Advanced Auto High- Beam Sensitivity Control (default) and en-
ter Reduced High-Beam Sensitivity Con-
trol (not recommended), toggle highbeam
lever 6 full on/off cycles within 10 sec-
onds of ignition ON. System will return to
default setting upon ignition off.GETTING TO KNOW YOUR VEHICLE
38
Page 52 of 372
MAX A/C
MAX A/C sets the control for maximum cool-
ing performance.
Press and release to toggle between MAX A/C
and the prior settings. The button illuminates
when MAX A/C is on.
In MAX A/C, the blower level and mode posi-
tion can be adjusted to desired user settings.
Pressing other settings will cause the MAX
A/C operation to switch to the selected set-
ting and MAX A/C to exit.
Recirculation
When outside air contains smoke, odors, or
high humidity, or if rapid cooling is desired,
you may wish to recirculate interior air by
pressing the Recirculation control button.
The recirculation indicator will illuminate
when this button is selected. Press the but-
ton a second time to turn off the Recircula-
tion mode and allow outside air into the
vehicle.NOTE:
In cold weather, use of recirculation mode
may lead to excessive window fogging. The
recirculation feature may be unavailable
(button on the touchscreen greyed out) if
conditions exist that could create fogging on
the inside of the windshield. On systems with
Manual Climate Controls, the Recirculation
mode is not allowed in Defrost mode to im-
prove window clearing operation. Recircula-
tion will be disabled automatically if this
mode is selected. Attempting to use Recircu-
lation while in this mode will cause the LED
in the control button to blink and then turn
off.
Automatic Temperature Control (ATC) —
If Equipped
Automatic Operation
1. Push the AUTO button on the faceplate,
or the AUTO button on the touchscreen on
the Automatic Temperature Control (ATC)
Panel.
2. Next, adjust the temperature you would like the system to maintain by adjusting
the driver and passenger temperature control buttons. Once the desired tem-
perature is displayed, the system will
achieve and automatically maintain that
comfort level.
3. When the system is set up for your comfort level, it is not necessary to change the
settings. You will experience the greatest
efficiency by simply allowing the system
to function automatically.
NOTE:
• It is not necessary to move the tempera- ture settings for cold or hot vehicles. The
system automatically adjusts the tempera-
ture, mode, and blower speed to provide
comfort as quickly as possible.
• The temperature can be displayed in U.S. or Metric units by selecting the US/Metric
customer-programmable feature. Refer to
the “Customer Programmable Features —
Uconnect System Settings” in “Multime-
dia” in your Owner’s Manual on
jeep.com/en/owners/manuals for further
information.
To provide you with maximum comfort in the
Automatic mode during cold start-ups, the
blower fan will remain on low until the engine
GETTING TO KNOW YOUR VEHICLE
50