ESP JEEP GRAND CHEROKEE 2017 WK2 / 4.G User Guide
[x] Cancel search | Manufacturer: JEEP, Model Year: 2017, Model line: GRAND CHEROKEE, Model: JEEP GRAND CHEROKEE 2017 WK2 / 4.GPages: 372
Page 2 of 372

If you are the first registered retail
owner of your vehicle, you may
obtain a complimentary printed copy
of the Owner’s Manual, Navigation/
Uconnect Manuals or Warranty
Booklets by calling 1-877-426-5337
(U.S.) or 1-800-387-1143 (Canada)
or by contacting your dealer.
The driver’s primary
responsibility is the safe
operation of the vehicle. Driving
while distracted can result in loss
of vehicle control, resulting in a
collision and personal injury. FCA
US LLC strongly recommends
that the driver use extreme
caution when using any device
or feature that may take their
attention off the road.
Use of any electrical devices,
such as cellular telephones,
computers, portable radios,
vehicle navigation or other
devices, by the driver while the vehicle is moving is
dangerous and could lead to a
serious collision. Texting while
driving is also dangerous and
should never be done while the
vehicle is moving.
If you find yourself unable to
devote your full attention to
vehicle operation, pull off the
road to a safe location and stop
your vehicle. Some states or
provinces prohibit the use of
cellular telephones or texting
while driving. It is always the
driver’s responsibility to
comply with all local laws.Important:
This User Guide is intended to familiarize you with the
important features of your vehicle. Your Owner’s Manual,
Navigation/Uconnect Manuals and Warranty Booklets can be
found on your DVD (if applicable) or by visiting the website
on the back cover of your User Guide. We hope you find
it useful. U.S. residents can purchase replacement kits by
visiting www.techauthority.com and Canadian residents
can purchase replacement kits by calling 1 800 387-1143.
This guide has been prepared to help you
get quickly acquainted with your new Jeep
brand vehicle and to provide a convenient
reference source for common questions.
However, it is not a substitute for your
Owner’s Manual.
For complete operational instructions,
maintenance procedures and important
safety messages, please consult your
Owner’s Manual, Navigation/Uconnect
Manuals and other Warning Labels in
your vehicle.
Not all features shown in this guide
may apply to your vehicle. For additional
information on accessories to help
personalize your vehicle, visit
www.mopar.com (U. S .), www.mopar.ca
(Canada) or your local Jeep brand dealer.Driving and Alcohol:
Drunken driving is one of the most frequent causes of collisions. Your
driving ability can be seriously impaired with blood alcohol levels far below
the legal minimum. If you are drinking, don’t drive. Ride with a designated
non-drinking driver, call a cab, a friend, or use public transportation.
WARNING!
Driving after drinking can lead to a collision. Your perceptions are less
sharp, your reflexes are slower, and your judgment is impaired when you
have been drinking. Never drink and then drive.
Page 4 of 372
HOW TO USE THIS MANUAL
Essential Information
Each time direction instructions (left/right or
forwards/backwards) about the vehicle are
given, these must be intended as regarding
an occupant in the driver's seat. Special
cases not complying with this rule will be
properly specified in the text.
The figures in the Owner Handbook are pro-
vided by way of example only: this might
imply that some details of the image do not
correspond to the actual arrangement of your
vehicle.
In addition, the Handbook has been con-
ceived considering vehicles with steering
wheel on the left side; it is therefore possible
that on vehicles with steering wheel on the
right side, the position or construction of
some controls is not exactly mirror-like with
respect to the figure.To identify the chapter with the information
needed you can consult the index at the end
of this Owner Handbook.
Chapters can be rapidly identified with dedi-
cated graphic tabs, at the side of each odd
page. A few pages further there is a key for
getting to know the chapter order and the
relevant symbols in the tabs. There is anyway
a textual indication of the current chapter at
the side of each even page.
Symbols
Some vehicle components have colored la-
bels whose symbols indicate precautions to
be observed when using this component.
ROLLOVER WARNING
Utility vehicles have a significantly higher
rollover rate than other types of vehicles. This
vehicle has a higher ground clearance and a
higher center of gravity than many passenger
vehicles. It is capable of performing better in
a wide variety of off-road applications. Driven
in an unsafe manner, all vehicles can go out
of control. Because of the higher center of
gravity, if this vehicle is out of control it may
roll over while some other vehicles may not.
Do not attempt sharp turns, abrupt maneu-
vers, or other unsafe driving actions that can
cause loss of vehicle control. Failure to oper-
ate this vehicle safely may result in a colli-
sion, rollover of the vehicle, and severe or
fatal injury. Drive carefully.
HOW TO USE THIS MANUAL
2
Page 5 of 372
Failure to use the driver and passenger seat
belts provided is a major cause of severe or
fatal injury. In fact, the U.S. government
notes that the universal use of existing seat
belts could cut the highway death toll by
10,000 or more each year and could reduce
disabling injuries by two million annually. Ina rollover crash, an unbelted person is signifi-
cantly more likely to die than a person wear-
ing a seat belt. Always buckle up.
WARNINGS AND CAUTIONS
While reading this Owner Handbook you will
find a series of WARNINGS to prevent proce-
dures that could damage your vehicle.
There are also CAUTIONS that must be care-
fully followed to prevent incorrect use of the
components of the vehicle, which could
cause accidents or injuries.
Therefore all WARNINGS and CAUTIONS
must always be carefully followed. WARN-
INGS and CAUTIONS are recalled in the text
with the following symbols:NOTE:
These symbols, when necessary, are indi-
cated besides the title or at the end of the line
and are followed by a number. That number
recalls the corresponding warning at the end
of the relevant section.
VEHICLE CHANGES/
ALTERATIONS
IMPORTANT: Any change or alteration of the
vehicle might seriously affect its safety and
road holding, thus causing accidents, in
which the occupants could even be fatally
injured.
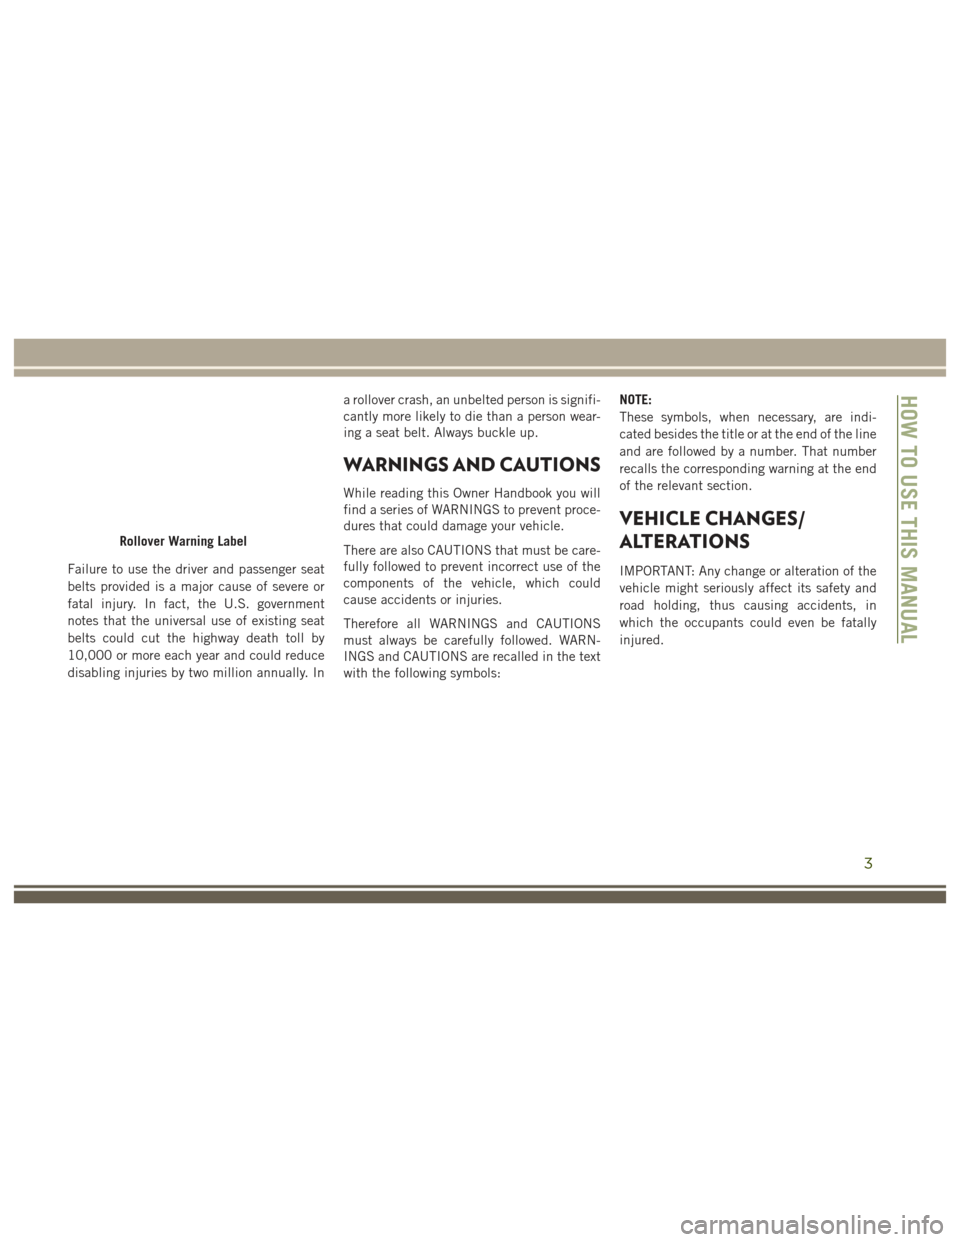
Rollover Warning Label
HOW TO USE THIS MANUAL
3
Page 19 of 372
NOTE:
Changes or modifications not expressly ap-
proved by the party responsible for compli-
ance could void the user’s authority to oper-
ate the equipment.
SENTRY KEY
The Sentry Key Immobilizer system prevents
unauthorized vehicle operation by disabling
the engine. The system does not need to be
armed or activated. Operation is automatic,
regardless of whether the vehicle is locked or
unlocked.
All of the key fobs provided with your new
vehicle have been programmed to the vehicle
electronics.
Irregular Operation
The system uses a key fob, an Ignition Node
Module, Keyless Push Button Ignition and a
RF receiver to prevent unauthorized vehicle
operation. Therefore, only key fobs that are
programmed to the vehicle can be used tostart and operate the vehicle. The system will
not allow the engine to crank if an invalid key
fob is used to start and operate the vehicle.
The system will shut the engine off in two
seconds if an invalid key fob is used to start
the engine.
NOTE:
A key fob that has not been programmed is
also considered an invalid key.
During normal operation, after placing the
keyless ignition in the ON/RUN position, the
Vehicle Security Light will turn on for three
seconds for a bulb check. If the light remains
on after the bulb check, it indicates that
there is a problem with the electronics. In
addition, if the light begins to flash after the
bulb check, it indicates that someone used
an invalid key fob to try to start the engine.
Either of these conditions will result in the
engine being shut off after two seconds.
If the Vehicle Security Light turns on during
normal vehicle operation (vehicle running for
longer than 10 seconds), it indicates thatthere is a fault in the electronics. Should this
occur, have the vehicle serviced as soon as
possible by an authorized dealer.
VEHICLE SECURITY ALARM
— IF EQUIPPED
The Vehicle Security Alarm monitors the ve-
hicle doors, hood, liftgate, and the Keyless
Enter-N-Go — Ignition for unauthorized op-
eration. While the Vehicle Security Alarm is
armed, interior switches for door locks and
liftgate release are disabled. If something
triggers the alarm, the Vehicle Security Alarm
will provide the following audible and visible
signals:
• The horn will pulse
• The park lamps and/or turn signals will
flash
• The Vehicle Security Light in the instru- ment cluster will flash
17
Page 22 of 372
Power Door Locks
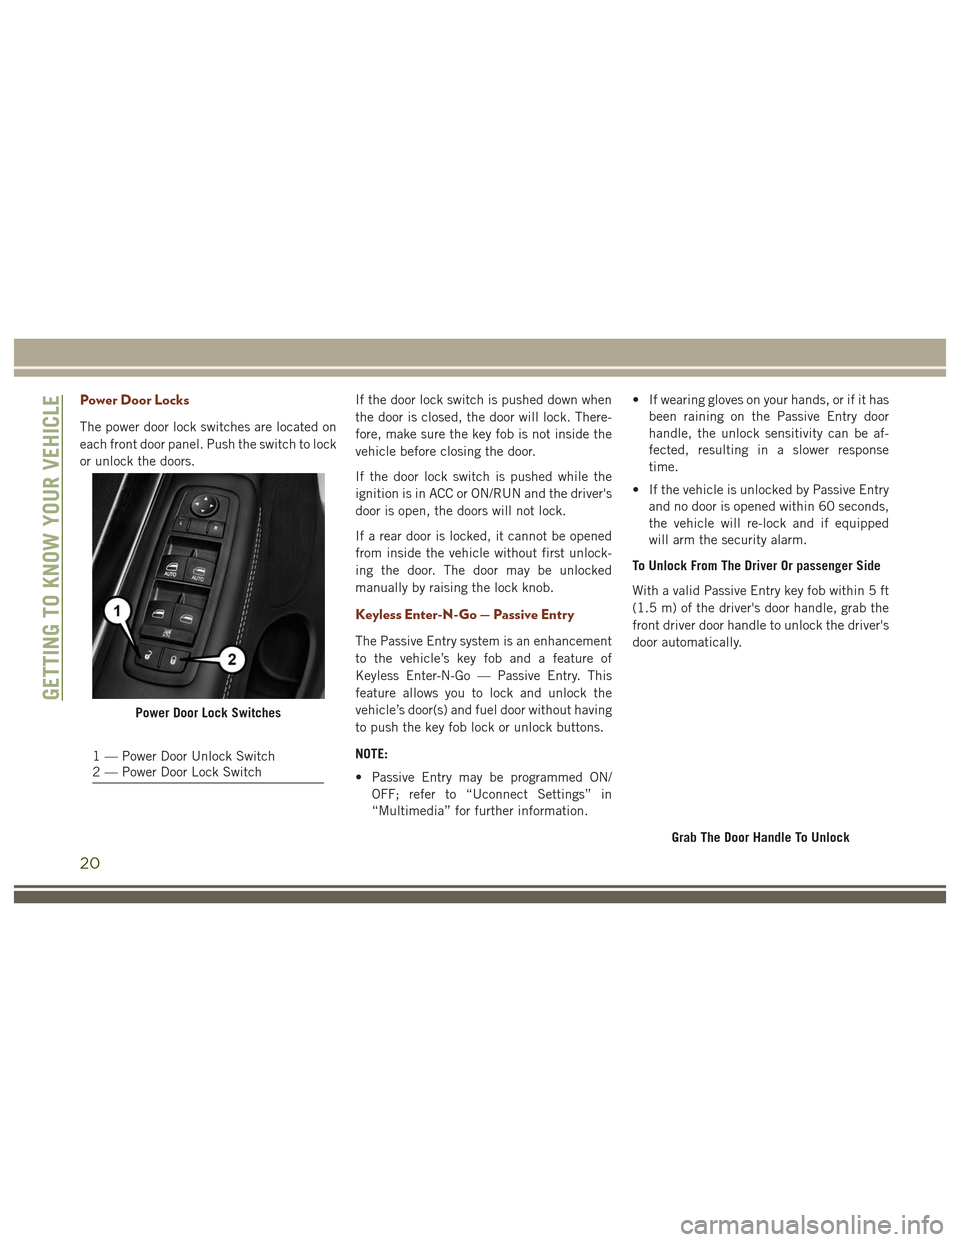
The power door lock switches are located on
each front door panel. Push the switch to lock
or unlock the doors.If the door lock switch is pushed down when
the door is closed, the door will lock. There-
fore, make sure the key fob is not inside the
vehicle before closing the door.
If the door lock switch is pushed while the
ignition is in ACC or ON/RUN and the driver's
door is open, the doors will not lock.
If a rear door is locked, it cannot be opened
from inside the vehicle without first unlock-
ing the door. The door may be unlocked
manually by raising the lock knob.
Keyless Enter-N-Go — Passive Entry
The Passive Entry system is an enhancement
to the vehicle’s key fob and a feature of
Keyless Enter-N-Go — Passive Entry. This
feature allows you to lock and unlock the
vehicle’s door(s) and fuel door without having
to push the key fob lock or unlock buttons.
NOTE:
• Passive Entry may be programmed ON/
OFF; refer to “Uconnect Settings” in
“Multimedia” for further information. • If wearing gloves on your hands, or if it has
been raining on the Passive Entry door
handle, the unlock sensitivity can be af-
fected, resulting in a slower response
time.
• If the vehicle is unlocked by Passive Entry and no door is opened within 60 seconds,
the vehicle will re-lock and if equipped
will arm the security alarm.
To Unlock From The Driver Or passenger Side
With a valid Passive Entry key fob within 5 ft
(1.5 m) of the driver's door handle, grab the
front driver door handle to unlock the driver's
door automatically.
Power Door Lock Switches
1 — Power Door Unlock Switch
2 — Power Door Lock Switch
Grab The Door Handle To Unlock
GETTING TO KNOW YOUR VEHICLE
20
Page 30 of 372
You can choose from HI, LO or OFF heat
settings. The indicator arrows in touchscreen
buttons indicate the level of heat in use. Two
indicator arrows will illuminate for HI, one for
LO and none for OFF.
• Press the heated seat button
once to
turn the HI setting ON.
• Press the heated seat button
a second
time to turn the LO setting ON.
• Press the heated seat button
a third
time to turn the heating elements OFF.
If the HI-level setting is selected, the system
will automatically switch to LO-level after
approximately 60 minutes of continuous op-
eration. At that time, the display will change
from HI to LO, indicating the change. The
LO-level setting will turn OFF automatically
after approximately 45 minutes.
NOTE:
• Once a heat setting is selected, heat will be felt within two to five minutes.
• The engine must be running for the heated seats to operate. Vehicles Equipped With Remote Start
On models that are equipped with remote
start, the heated seats can be programmed to
come on during a remote start.
This feature can be programmed through the
Uconnect system. Refer to your Owner's
Manual
at
www.jeep.com/en/owners/manuals/ for fur-
ther details.
WARNING!
• Persons who are unable to feel pain to the skin because of advanced age,
chronic illness, diabetes, spinal cord in-
jury, medication, alcohol use, exhaus-
tion or other physical condition must
exercise care when using the seat
heater. It may cause burns even at low
temperatures, especially if used for long
periods of time.
• Do not place anything on the seat or
seatback that insulates against heat,
such as a blanket or cushion. This may
cause the seat heater to overheat. Sit-
ting in a seat that has been overheated
WARNING!
could cause serious burns due to the
increased surface temperature of the
seat.
Rear Heated Seats
On some models, the two outboard seats are
equipped with heated seats. The heated seat
switches for these seats are located on the
rear of the center console. There are two
heated seat switches
that allow the rear
passengers to operate the seats indepen-
dently.
You can choose from HI, LO or OFF heat
settings. The indicator lights in each switch
indicate the level of heat in use. Two indica-
tor lights will illuminate for HI, one for LO
and none for OFF.
• Push the heated seat button
once to
select HI-level heating.
• Push the heated seat button
a second
time to select LO-level heating.
• Push the heated seat button
a third
time to turn the heating elements OFF.
GETTING TO KNOW YOUR VEHICLE
28
Page 36 of 372
based on environmental temperatures. The
heated steering wheel can shut off early or
may not turn on when the steering wheel is
already warm.
The heated steering wheel control button is
located within the Uconnect system. You can
gain access to the control button through the
climate screen or the controls screen.
• Press the heated steering wheel button
once to turn the heating element ON.
• Press the heated steering wheel button
a second time to turn the heating
element OFF.
NOTE:
The engine must be running for the heated
steering wheel to operate.
Vehicles Equipped With Remote Start
On models that are equipped with remote
start, the heated steering wheel can be pro-
grammed to come on during a remote start
through the Uconnect system. Refer to
“Uconnect Settings” in “Multimedia” in the
Owner’s Manualat
www.jeep.com/en/owners/manuals/ for fur-
ther information.
WARNING!
• Persons who are unable to feel pain to the skin because of advanced age,
chronic illness, diabetes, spinal cord in-
jury, medication, alcohol use, exhaus-
tion, or other physical conditions must
exercise care when using the steering
wheel heater. It may cause burns even at
low temperatures, especially if used for
long periods.
• Do not place anything on the steering
wheel that insulates against heat, such
as a blanket or steering wheel covers of
any type and material. This may cause
the steering wheel heater to overheat.
MIRRORS
Interior Mirror
Manual Mirror
The mirror head can be adjusted up, down,
left, and right for various drivers. The mirror
should be adjusted to center on the view
through the rear window. Headlight glare from vehicles behind you can
be reduced by moving the small control under
the mirror to the night position (toward the
rear of the vehicle). The mirror should be
adjusted while set in the day position (toward
the windshield).
Electrochromatic Mirror
The mirror head can be adjusted up, down,
left, and right for various drivers. The mirror
should be adjusted to center on the view
through the rear window.
This mirror automatically adjusts for head-
light glare from vehicles behind you.
Adjusting Rearview Mirror
GETTING TO KNOW YOUR VEHICLE
34
Page 43 of 372
CAUTION!
Always remove any buildup of snow that
prevents the windshield wiper blades from
returning to the PARK position. If the
windshield wiper switch is turned off, and
the blades cannot return to the PARK
position, damage to the wiper motor may
occur.
Rain Sensor
This feature senses moisture on the wind-
shield and automatically activates the wipers
for the driver. The feature is especially useful
for road splash or overspray from the wind-
shield washers of the vehicle ahead. Rotate
the end of the multifunction lever to one of
four settings to activate this feature.
Automatic Wiping
The sensitivity of the system can be adjusted
with the multifunction lever. Wiper delay po-
sition one is the least sensitive, and wiper
delay position four is the most sensitive.
Setting three should be used for normal rain
conditions. Settings one and two can be used
if the driver desires less wiper sensitivity.Setting four can be used if the driver desires
more sensitivity. Place the wiper switch in the
OFF position when not using the system.
NOTE:
• The Rain Sensing feature will not operate
when the wiper switch is in the low or
high-speed position.
• The Rain Sensing feature may not function properly when ice, or dried salt water is
present on the windshield.
• Use of Rain-X or products containing wax or silicone may reduce Rain Sensing per-
formance.
• The Rain Sensing feature can be turned on and off using the Uconnect System, refer
to “Uconnect Settings” in “Multimedia”
in the Owners Manual at
www.jeep.com/en/owners/manuals/ for
further information.
The Rain Sensing system has protection fea-
tures for the wiper blades and arms, and will
not operate under the following conditions: •
Low Ambient Temperature — When the ig-
nition is first turned ON, the Rain Sensing
system will not operate until the wiper
switch is moved, vehicle speed is greater
than 0 mph (0 km/h), or the outside tem-
perature is greater than 32°F (0°C).
• Transmission In NEUTRAL Position — When
the ignition is ON, and the automatic
transmission is in the NEUTRAL position,
the Rain Sensing system will not operate
until the wiper switch is moved, vehicle
speed is greater than 3 mph (5 km/h), or
the gear selector is moved out of the NEU-
TRAL position.
Remote Start Mode Inhibit — On vehicles
equipped with Remote Starting system, Rain
Sensing wipers are not operational when the
vehicle is in the remote start mode. Once the
operator is in the vehicle and has placed the
ignition switch in the RUN position, rain
sensing wiper operation can resume, if it has
been selected, and no other inhibit condi-
tions (mentioned previously) exist.
41
Page 85 of 372
NOTE:
• If the power steering assistance is no lon-ger operational, it is still possible to steer
the vehicle. Under these conditions there
will be a substantial increase in steering
effort, especially at low speeds and during
parking maneuvers.
• See your authorized dealer for service.
– Door Open Warning Light
This indicator will illuminate when a door is
ajar/open and not fully closed.
If the vehicle is moving, there will also be a
single chime.
– Liftgate Open Warning Light
This indicator will turn when the liftgate is
open.
If the vehicle is moving there will also be a
single chime.
– Transmission Temperature Warning
Light
This light indicates that there is excessive
transmission fluid temperature that might
occur with severe usage such as trailer tow- ing. If this light turns on, stop the vehicle and
run the engine at idle, with the transmission
in NEUTRAL, until the light turns off. Once
the light turns off, you may continue to drive
normally.
WARNING!
If you continue operating the vehicle when
the Transmission Temperature Warning
Light is illuminated you could cause the
fluid to boil over, come in contact with hot
engine or exhaust components and cause a
fire.
CAUTION!
Continuous driving with the Transmission
Temperature Warning Light illuminated
will eventually cause severe transmission
damage or transmission failure.
– Hood Open Warning Light
This indicator will illuminate when the hood
is left open and not fully closed.
Yellow Telltale Lights
– Engine Malfunction Warning Light
The Engine Check/Malfunction Indicator
Light (MIL) is a part of an Onboard Diagnostic
System called OBD II that monitors engine
and automatic transmission control systems.
The light will illuminate when the ignition is
in the ON position before engine start. If the
bulb does not come on when turning the key
from OFF to ON/RUN, have the condition
checked promptly.
Certain conditions, such as a loose or missing
gas cap, poor quality fuel, etc., may illumi-
nate the light after engine start. The vehicle
should be serviced if the light stays on
through several typical driving styles. In most
situations, the vehicle will drive normally and
will not require towing.
When the engine is running, the MIL may
flash to alert serious conditions that could
lead to immediate loss of power or severe
catalytic converter damage. The vehicle
should be serviced as soon as possible if this
occurs.
83
Page 86 of 372
WARNING!
A malfunctioning catalytic converter, as
referenced above, can reach higher tem-
peratures than in normal operating condi-
tions. This can cause a fire if you drive
slowly or park over flammable substances
such as dry plants, wood, cardboard, etc.
This could result in death or serious injury
to the driver, occupants or others.
CAUTION!
Prolonged driving with the Malfunction
Indicator Light (MIL) on could cause dam-
age to the engine control system. It also
could affect fuel economy and driveability.
If the MIL is flashing, severe catalytic
converter damage and power loss will soon
occur. Immediate service is required.
– Electronic Stability Control (ESC)
Warning Light
The “ESC Indicator Light” in the instrument
cluster will come on when the ignition switch
is turned to the ON/RUN position. It should
go out when the engine is running. If the “ESC Indicator Light” comes on continuously
with the engine running, a malfunction has
been detected in the ESC system. If this light
remains on after several ignition cycles, and
the vehicle has been driven several miles
(kilometers) at speeds greater than 30 mph
(48 km/h), see your authorized dealer as soon
as possible to have the problem diagnosed
and corrected.
• The “ESC Off Indicator Light” and the
“ESC Indicator Light” come on momen-
tarily each time the ignition switch is
turned to ON/RUN.
• Each time the ignition is turned to ON/ RUN, the ESC system will be ON, even if it
was turned off previously.
• The ESC system will make buzzing or clicking sounds when it is active. This is
normal; the sounds will stop when ESC
becomes inactive following the maneuver
that caused the ESC activation.
This telltale indicates that an ESC event is
active.
– Electronic Stability Control (ESC) OFF
Indicator Light — If Equipped
This light indicates the Electronic Stability
Control (ESC) is off.
– Tire Pressure Monitoring System
(TPMS) Warning Light
The warning light switches on and a message
is displayed to indicate that the tire pressure
is lower than the recommended value and/or
that slow pressure loss is occurring. In these
cases, optimal tire duration and fuel con-
sumption may not be guaranteed.
Should one or more tires be in the condition
mentioned above, the display will show the
indications corresponding to each tire in se-
quence.
IMPORTANT: Do not continue driving with one
or more flat tires as handling may be compro-
mised. Stop the vehicle, avoiding sharp brak-
ing and steering. Repair immediately using
the dedicated tire repair kit and contact your
authorized dealer as soon as possible.
GETTING TO KNOW YOUR INSTRUMENT PANEL
84