engine JEEP GRAND CHEROKEE 2018 Owner handbook (in English)
[x] Cancel search | Manufacturer: JEEP, Model Year: 2018, Model line: GRAND CHEROKEE, Model: JEEP GRAND CHEROKEE 2018Pages: 368, PDF Size: 5.72 MB
Page 247 of 368
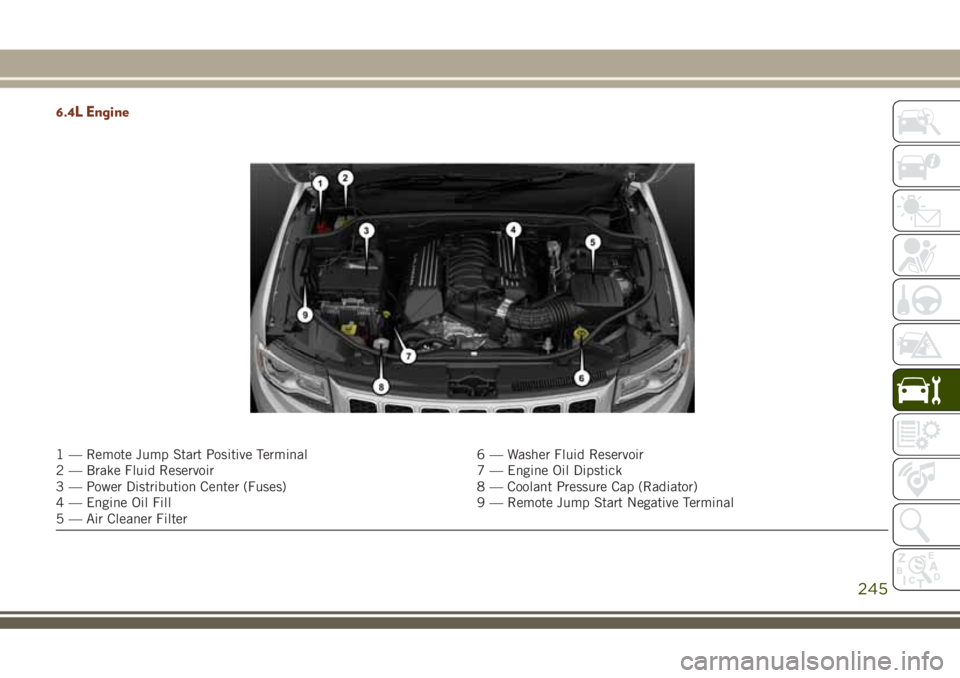
6.4L Engine
1 — Remote Jump Start Positive Terminal 6 — Washer Fluid Reservoir
2 — Brake Fluid Reservoir 7 — Engine Oil Dipstick
3 — Power Distribution Center (Fuses) 8 — Coolant Pressure Cap (Radiator)
4 — Engine Oil Fill 9 — Remote Jump Start Negative Terminal
5 — Air Cleaner Filter
245
Page 248 of 368
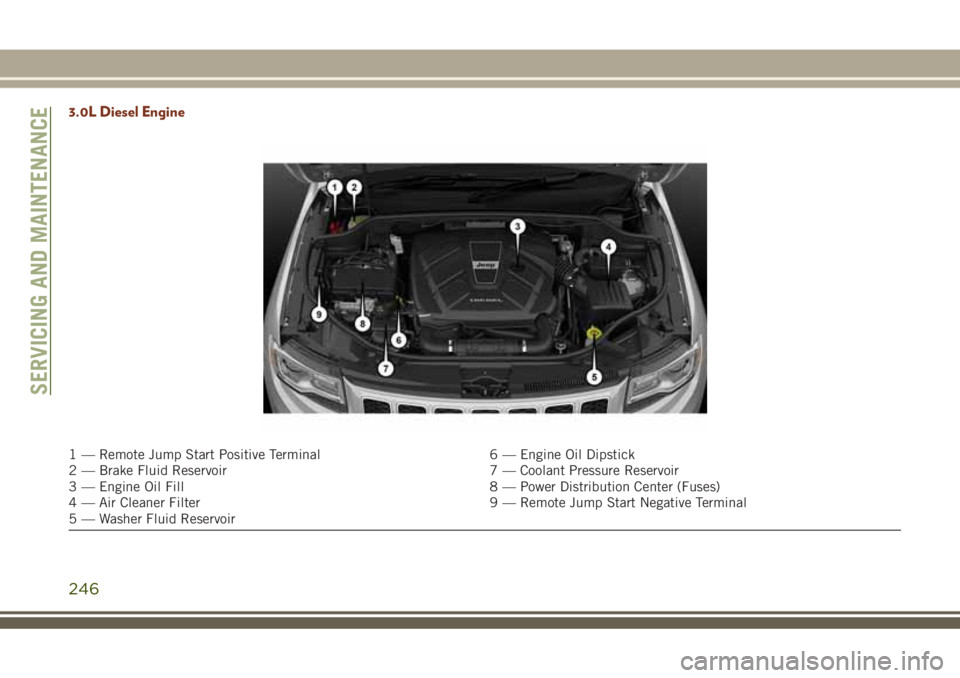
3.0L Diesel Engine
1 — Remote Jump Start Positive Terminal 6 — Engine Oil Dipstick
2 — Brake Fluid Reservoir 7 — Coolant Pressure Reservoir
3 — Engine Oil Fill 8 — Power Distribution Center (Fuses)
4 — Air Cleaner Filter 9 — Remote Jump Start Negative Terminal
5 — Washer Fluid Reservoir
SERVICING AND MAINTENANCE
246
Page 249 of 368
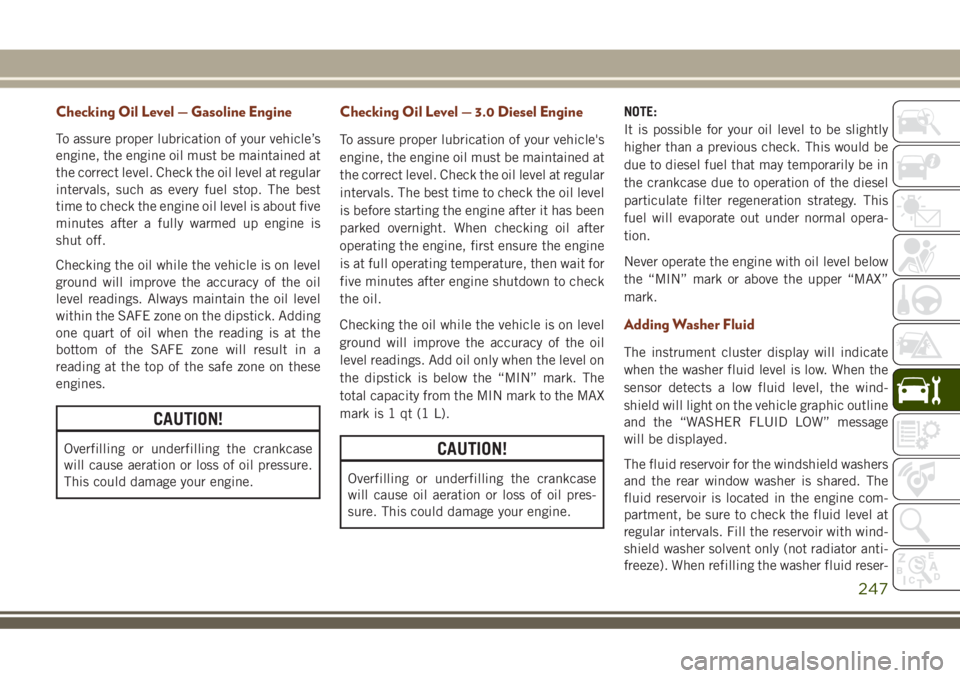
Checking Oil Level — Gasoline Engine
To assure proper lubrication of your vehicle’s
engine, the engine oil must be maintained at
the correct level. Check the oil level at regular
intervals, such as every fuel stop. The best
time to check the engine oil level is about five
minutes after a fully warmed up engine is
shut off.
Checking the oil while the vehicle is on level
ground will improve the accuracy of the oil
level readings. Always maintain the oil level
within the SAFE zone on the dipstick. Adding
one quart of oil when the reading is at the
bottom of the SAFE zone will result in a
reading at the top of the safe zone on these
engines.
CAUTION!
Overfilling or underfilling the crankcase
will cause aeration or loss of oil pressure.
This could damage your engine.
Checking Oil Level — 3.0 Diesel Engine
To assure proper lubrication of your vehicle's
engine, the engine oil must be maintained at
the correct level. Check the oil level at regular
intervals. The best time to check the oil level
is before starting the engine after it has been
parked overnight. When checking oil after
operating the engine, first ensure the engine
is at full operating temperature, then wait for
five minutes after engine shutdown to check
the oil.
Checking the oil while the vehicle is on level
ground will improve the accuracy of the oil
level readings. Add oil only when the level on
the dipstick is below the “MIN” mark. The
total capacity from the MIN mark to the MAX
mark is 1 qt (1 L).
CAUTION!
Overfilling or underfilling the crankcase
will cause oil aeration or loss of oil pres-
sure. This could damage your engine.NOTE:
It is possible for your oil level to be slightly
higher than a previous check. This would be
due to diesel fuel that may temporarily be in
the crankcase due to operation of the diesel
particulate filter regeneration strategy. This
fuel will evaporate out under normal opera-
tion.
Never operate the engine with oil level below
the “MIN” mark or above the upper “MAX”
mark.
Adding Washer Fluid
The instrument cluster display will indicate
when the washer fluid level is low. When the
sensor detects a low fluid level, the wind-
shield will light on the vehicle graphic outline
and the “WASHER FLUID LOW” message
will be displayed.
The fluid reservoir for the windshield washers
and the rear window washer is shared. The
fluid reservoir is located in the engine com-
partment, be sure to check the fluid level at
regular intervals. Fill the reservoir with wind-
shield washer solvent only (not radiator anti-
freeze). When refilling the washer fluid reser-
247
Page 253 of 368
CAUTION!
The cabin air filter is identified with an
arrow to indicate airflow direction through
the filter. Failure to properly install the
filter will result in the need to replace it
more often.
8. Reinstall the glove compartment door on
the door hinge and reattach the tension
tether by inserting the tether clip in the
glove compartment and sliding the clip
away from the face of the glove compart-
ment door.
9. Push the door to the near closed position
to reengage the glove compartment travel
stops.
NOTE:
Ensure the glove compartment door
hinges and glove compartment travel
stops are fully engaged.
Windshield Wiper Blades
Clean the rubber edges of the wiper blades
and the windshield periodically with a sponge
or soft cloth and a mild nonabrasive cleaner.
This will remove accumulations of salt or road
film.
Operation of the wipers on dry glass for long
periods may cause deterioration of the wiper
blades. Always use washer fluid when using
the wipers to remove salt or dirt from a dry
windshield.
Avoid using the wiper blades to remove frost
or ice from the windshield. Keep the blade
rubber out of contact with petroleum prod-
ucts such as engine oil, gasoline, etc.
NOTE:
Life expectancy of wiper blades varies de-
pending on geographical area and frequency
of use. Poor performance of blades may be
present with chattering, marks, water lines or
wet spots. If any of these conditions are
present, clean the wiper blades or replace as
necessary.The wiper blades and wiper arms should be
inspected periodically, not just when wiper
performance problems are experienced. This
inspection should include the following
points:
• Wear Or Uneven Edges
• Foreign Material
• Hardening Or Cracking
• Deformation Or Fatigue
If a wiper blade or wiper arm is damaged,
replace the affected wiper arm or blade with a
new unit. Do not attempt to repair a wiper
arm or blade that is damaged.
Front Wiper Blade Removal/Installation
CAUTION!
Do not allow the wiper arm to spring back
against the glass without the wiper blade
in place or the glass may be damaged.
251
Page 256 of 368
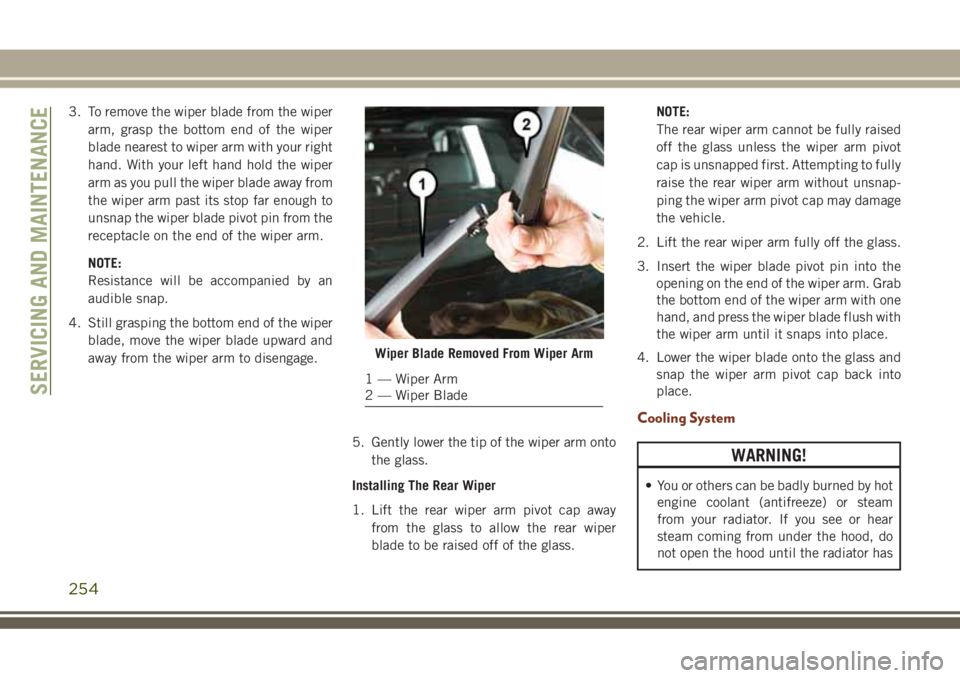
3. To remove the wiper blade from the wiper
arm, grasp the bottom end of the wiper
blade nearest to wiper arm with your right
hand. With your left hand hold the wiper
arm as you pull the wiper blade away from
the wiper arm past its stop far enough to
unsnap the wiper blade pivot pin from the
receptacle on the end of the wiper arm.
NOTE:
Resistance will be accompanied by an
audible snap.
4. Still grasping the bottom end of the wiper
blade, move the wiper blade upward and
away from the wiper arm to disengage.
5. Gently lower the tip of the wiper arm onto
the glass.
Installing The Rear Wiper
1. Lift the rear wiper arm pivot cap away
from the glass to allow the rear wiper
blade to be raised off of the glass.NOTE:
The rear wiper arm cannot be fully raised
off the glass unless the wiper arm pivot
cap is unsnapped first. Attempting to fully
raise the rear wiper arm without unsnap-
ping the wiper arm pivot cap may damage
the vehicle.
2. Lift the rear wiper arm fully off the glass.
3. Insert the wiper blade pivot pin into the
opening on the end of the wiper arm. Grab
the bottom end of the wiper arm with one
hand, and press the wiper blade flush with
the wiper arm until it snaps into place.
4. Lower the wiper blade onto the glass and
snap the wiper arm pivot cap back into
place.
Cooling System
WARNING!
• You or others can be badly burned by hot
engine coolant (antifreeze) or steam
from your radiator. If you see or hear
steam coming from under the hood, do
not open the hood until the radiator has
Wiper Blade Removed From Wiper Arm
1 — Wiper Arm
2 — Wiper BladeSERVICING AND MAINTENANCE
254
Page 257 of 368
WARNING!
had time to cool. Never open a cooling
system pressure cap when the radiator
or coolant bottle is hot.
• Keep hands, tools, clothing, and jewelry
away from the radiator cooling fan when
the hood is raised. The fan starts auto-
matically and may start at any time,
whether the engine is running or not.
• When working near the radiator cooling
fan, disconnect the fan motor lead or
turn the ignition to the OFF mode. The
fan is temperature controlled and can
start at any time the ignition is in the ON
mode.
Engine Coolant Checks
Check the engine coolant (antifreeze) protec-
tion every 12 months (before the onset of
freezing weather, where applicable). If the
engine coolant (antifreeze) is dirty, the sys-
tem should be drained, flushed, and refilled
with fresh OAT coolant (conforming to
MS.90032) by an authorized dealer. Check
the front of the A/C condenser for any accu-mulation of bugs, leaves, etc. If dirty, clean
by gently spraying water from a garden hose
vertically down the face of the condenser.
Check the engine cooling system hoses for
brittle rubber, cracking, tears, cuts, and
tightness of the connection at the coolant
recovery bottle and radiator. Inspect the en-
tire system for leaks. DO NOT REMOVE THE
COOLANT PRESSURE CAP WHEN THE
COOLING SYSTEM IS HOT.
RAISING THE VEHICLE
In the case where it is necessary to raise the
vehicle, go to an authorized dealer or service
station.
TIRES
Tires — General Information
Tire Pressure
Proper tire inflation pressure is essential to
the safe and satisfactory operation of your
vehicle. Four primary areas are affected by
improper tire pressure:
• Safety and Vehicle Stability• Economy
• Tread Wear
• Ride Comfort
Safety
WARNING!
• Improperly inflated tires are dangerous
and can cause collisions.
• Underinflation increases tire flexing and
can result in overheating and tire failure.
• Overinflation reduces a tire's ability to
cushion shock. Objects on the road and
chuckholes can cause damage that re-
sult in tire failure.
• Overinflated or underinflated tires can
affect vehicle handling and can fail sud-
denly, resulting in loss of vehicle control.
• Unequal tire pressures can cause steer-
ing problems. You could lose control of
your vehicle.
• Unequal tire pressures from one side of
the vehicle to the other can cause the
vehicle to drift to the right or left.
255
Page 267 of 368
These effects can be reduced by timely rota-
tion of tires. The benefits of rotation are
especially worthwhile with aggressive tread
designs such as those on On/Off-Road type
tires. Rotation will increase tread life, help to
maintain mud, snow, and wet traction levels,
and contribute to a smooth, quiet ride.
Refer to the “Maintenance Plan” for the
proper maintenance intervals. More frequent
rotation is permissible if desired. The reasons
for any rapid or unusual wear should be
corrected prior to rotation being performed.
NOTE:
The premium Tire Pressure Monitor System
will automatically locate the pressure values
displayed in the correct vehicle position fol-
lowing a tire rotation.
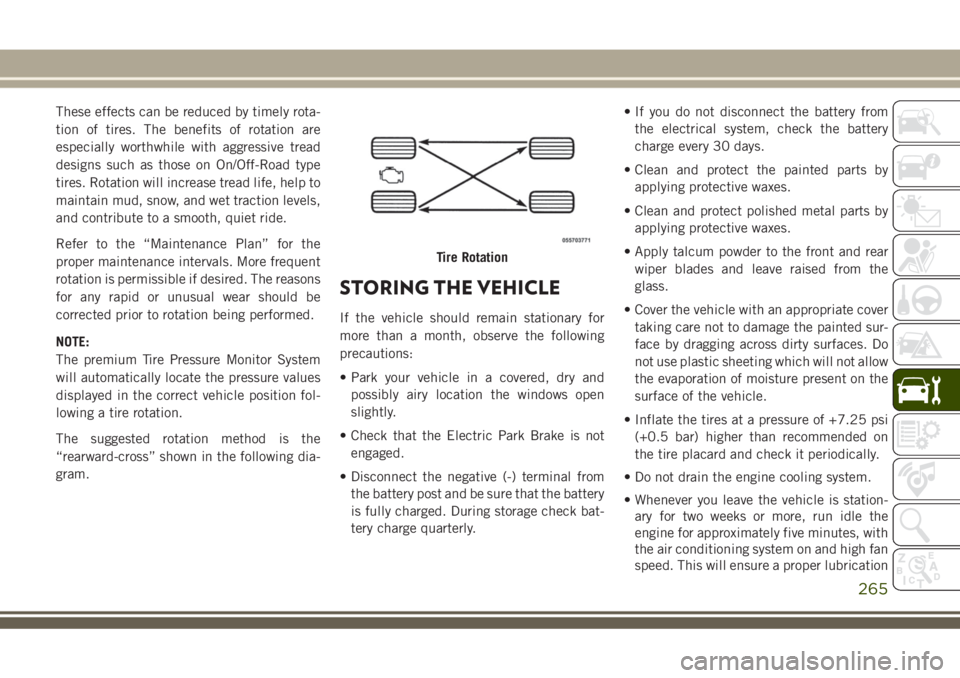
The suggested rotation method is the
“rearward-cross” shown in the following dia-
gram.
STORING THE VEHICLE
If the vehicle should remain stationary for
more than a month, observe the following
precautions:
• Park your vehicle in a covered, dry and
possibly airy location the windows open
slightly.
• Check that the Electric Park Brake is not
engaged.
• Disconnect the negative (-) terminal from
the battery post and be sure that the battery
is fully charged. During storage check bat-
tery charge quarterly.• If you do not disconnect the battery from
the electrical system, check the battery
charge every 30 days.
• Clean and protect the painted parts by
applying protective waxes.
• Clean and protect polished metal parts by
applying protective waxes.
• Apply talcum powder to the front and rear
wiper blades and leave raised from the
glass.
• Cover the vehicle with an appropriate cover
taking care not to damage the painted sur-
face by dragging across dirty surfaces. Do
not use plastic sheeting which will not allow
the evaporation of moisture present on the
surface of the vehicle.
• Inflate the tires at a pressure of +7.25 psi
(+0.5 bar) higher than recommended on
the tire placard and check it periodically.
• Do not drain the engine cooling system.
• Whenever you leave the vehicle is station-
ary for two weeks or more, run idle the
engine for approximately five minutes, with
the air conditioning system on and high fan
speed. This will ensure a proper lubrication
Tire Rotation
265
Page 268 of 368
of the system, thus minimizing the possi-
bility of damage to the compressor when
the vehicle is put back into operation.
NOTE:
When the vehicle has not been started or
driven for at least 30 days, an Extended Park
Start Procedure is required to start the ve-
hicle. Refer to “Starting The Engine” in
“Starting And Operating” for further
information.
CAUTION!
Before removal of the positive and nega-
tive terminals to the battery, wait at least a
minute with ignition switch in the OFF
position and close the driver’s door. When
reconnecting the positive and negative ter-
minals to the battery be sure the ignition
switch is in the OFF position and the
driver’s door is closed.
BODYWORK
Preserving The Bodywork
Washing
• Wash your vehicle regularly. Always wash
your vehicle in the shade using a mild car
wash soap, and rinse the panels completely
with clear water.
• Use a high quality cleaner wax to remove
road film, stains and to protect your paint
finish. Take care never to scratch the paint.
• Avoid using abrasive compounds and power
buffing that may diminish the gloss or thin
out the paint finish.
CAUTION!
• Do not use abrasive or strong cleaning
materials such as steel wool or scouring
powder that will scratch metal and
painted surfaces.
• Use of power washers exceeding
1,200 psi (8,274 kPa) can result in
damage or removal of paint and decals.
Special Care
• If you drive on salted or dusty roads or if you
drive near the ocean, hose off the undercar-
riage at least once a month.
• It is important that the drain holes in the
lower edges of the doors, rocker panels, and
trunk be kept clear and open.
• If you detect any stone chips or scratches in
the paint, touch them up immediately. The
cost of such repairs is considered the re-
sponsibility of the owner.
• If your vehicle is damaged due to a collision
or similar cause that destroys the paint and
protective coating, have your vehicle re-
paired as soon as possible. The cost of such
repairs is considered the responsibility of
the owner.
•
If you carry special cargo such as chemicals,
fertilizers, de-icer salt, etc., be sure that such
materials are well packaged and sealed.
•If a lot of driving is done on gravel roads,
consider mud or stone shields behind each
wheel.
• An authorized dealer has touch up paint to
match the color of your vehicle.
SERVICING AND MAINTENANCE
266
Page 271 of 368
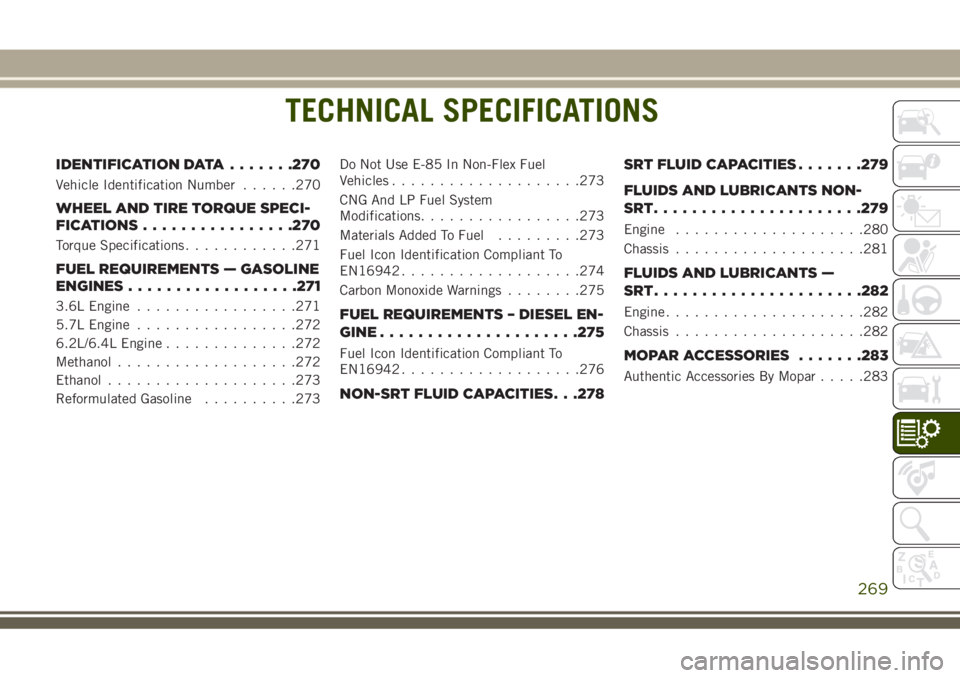
TECHNICAL SPECIFICATIONS
IDENTIFICATION DATA.......270
Vehicle Identification Number......270
WHEEL AND TIRE TORQUE SPECI-
FICATIONS................270
Torque Specifications............271
FUEL REQUIREMENTS — GASOLINE
ENGINES..................271
3.6L Engine.................271
5.7L Engine.................272
6.2L/6.4L Engine..............272
Methanol...................272
Ethanol....................273
Reformulated Gasoline..........273Do Not Use E-85 In Non-Flex Fuel
Vehicles....................273
CNG And LP Fuel System
Modifications.................273
Materials Added To Fuel.........273
Fuel Icon Identification Compliant To
EN16942...................274
Carbon Monoxide Warnings........275FUEL REQUIREMENTS – DIESEL EN-
GINE.....................275
Fuel Icon Identification Compliant To
EN16942...................276
NON-SRT FLUID CAPACITIES. . .278SRT FLUID CAPACITIES.......279
FLUIDS AND LUBRICANTS NON-
SRT......................279
Engine....................280
Chassis....................281
FLUIDS AND LUBRICANTS —
SRT......................282
Engine.....................282
Chassis....................282
MOPAR ACCESSORIES.......283
Authentic Accessories By Mopar.....283
TECHNICAL SPECIFICATIONS
269
Page 273 of 368
nuts/bolts should be torqued using a properly
calibrated torque wrench using a high quality
six sided (hex) deep wall socket.
Torque Specifications
Base Model Vehicle
Lug Nut/Bolt
Torque**Lug Nut/Bolt
SizeLug Nut/Bolt
Socket Size
130 Ft-Lbs
(176 N·m)M14 x 1.50 22 mm
SRT Model Vehicle
Lug Nut/Bolt
Torque**Lug Nut/Bolt
SizeLug Nut/Bolt
Socket Size
110 Ft-Lbs
(149 N·m)M14 x 1.50 22 mm
**Use only your authorized dealer recom-
mended lug nuts/bolts and clean or remove
any dirt or oil before tightening.
Inspect the wheel mounting surface prior to
mounting the tire and remove any corrosion
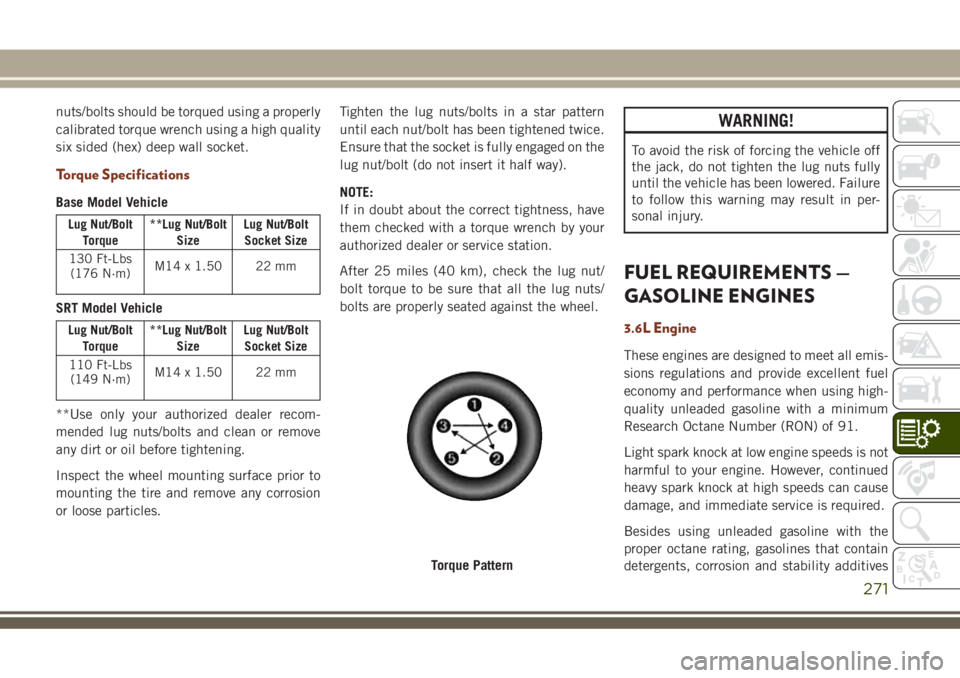
or loose particles.Tighten the lug nuts/bolts in a star pattern
until each nut/bolt has been tightened twice.
Ensure that the socket is fully engaged on the
lug nut/bolt (do not insert it half way).
NOTE:
If in doubt about the correct tightness, have
them checked with a torque wrench by your
authorized dealer or service station.
After 25 miles (40 km), check the lug nut/
bolt torque to be sure that all the lug nuts/
bolts are properly seated against the wheel.
WARNING!
To avoid the risk of forcing the vehicle off
the jack, do not tighten the lug nuts fully
until the vehicle has been lowered. Failure
to follow this warning may result in per-
sonal injury.
FUEL REQUIREMENTS —
GASOLINE ENGINES
3.6L Engine
These engines are designed to meet all emis-
sions regulations and provide excellent fuel
economy and performance when using high-
quality unleaded gasoline with a minimum
Research Octane Number (RON) of 91.
Light spark knock at low engine speeds is not
harmful to your engine. However, continued
heavy spark knock at high speeds can cause
damage, and immediate service is required.
Besides using unleaded gasoline with the
proper octane rating, gasolines that contain
detergents, corrosion and stability additives
Torque Pattern
271