service indicator JEEP GRAND CHEROKEE 2018 Owner handbook (in English)
[x] Cancel search | Manufacturer: JEEP, Model Year: 2018, Model line: GRAND CHEROKEE, Model: JEEP GRAND CHEROKEE 2018Pages: 368, PDF Size: 5.72 MB
Page 236 of 368
Severe Duty Conditions
†† Change the engine oil and engine oil filter
at every 4500 miles (7,500 km) or
12 months if using your vehicle under any of
the following severe duty conditions:
• Stop and go driving.
• Driving in dusty conditions.
• Short trips of less than 10 miles (16 km).
• Trailer towing.
• Taxi, police, or delivery service (commercial
service).
• Off-road or desert operation.
Scheduled Servicing — SRT
The scheduled services listed in this manual
must be done at the times or mileages speci-
fied to protect your vehicle warranty and
ensure the best vehicle performance and re-
liability. More frequent maintenance may be
needed for vehicles in severe operating con-
ditions, such as dusty areas and very short
trip driving. Inspection and service should
also be done anytime a malfunction is sus-
pected.The oil change indicator system will remind
you that it is time to take your vehicle in for
scheduled maintenance.
The Instrument Cluster Display will display
an “Oil Change Required” message and a
single chime will sound, indicating that an oil
change is necessary.
Based on engine operation conditions, the oil
change indicator message will illuminate.
This means that service is required for your
vehicle. Have your vehicle serviced as soon as
possible, within the next 500 miles
(805 km).
NOTE:
• The oil change indicator message will not
monitor the time since the last oil change.
Change your vehicle's oil if it has been six
months since your last oil change, even if
the oil change indicator message is NOT
illuminated.
• Change your engine oil more often if you
drive your vehicle off-road for an extended
period of time.• Under no circumstances should oil change
intervals exceed 6,000 miles (10,000 km)
or six months, whichever comes first.
Your authorized dealer will reset the oil
change indicator message after completing
the scheduled oil change. If a scheduled oil
change is performed by someone other than
your authorized dealer, the message can be
reset by referring to the steps described un-
der “Instrument Cluster Display” in “Getting
To Know Your Instrument Panel” in this
guide.
At Each Stop For Fuel
• Check the engine oil level. Refer to “Engine
Compartment” in this section for further
information.
• Check the windshield washer solvent and
add if required.
Once A Month
• Check tire pressure and look for unusual
wear or damage.
• Inspect the battery, and clean and tighten
the terminals as required.
SERVICING AND MAINTENANCE
234
Page 240 of 368
WARNING!
• You can be badly injured working on or
around a motor vehicle. Do only service
work for which you have the knowledge
and the right equipment. If you have any
doubt about your ability to perform a
service job, take your vehicle to a com-
petent mechanic.
• Failure to properly inspect and maintain
your vehicle could result in a component
malfunction and effect vehicle handling
and performance. This could cause an
accident.
Severe Duty Conditions
†† Change the engine oil and engine oil filter
at every 3,000 miles (5 000 km) or 3 months
if using your vehicle under any of the follow-
ing severe duty conditions:
• Stop and go driving.
• Driving in dusty conditions.
• Short trips of less than 10 miles (16 km).
• Trailer towing.• Taxi, police, or delivery service (commercial
service).
• Off-road or desert operation.
Scheduled Servicing — Diesel Engine
Your vehicle is equipped with an automatic
oil change indicator system. The oil change
indicator system will remind you that it is
time to take your vehicle in for scheduled
servicing.
Based on engine operation conditions, the oil
change indicator message will illuminate.
This means that service is required for your
vehicle. Operating conditions such as fre-
quent short-trips, trailer tow, extremely hot or
cold ambient temperatures will influence
when the “Oil Change Required” message is
displayed.
Your authorized dealer will reset the oil
change indicator message after completing
the scheduled oil change. If a scheduled oil
change is performed by someone other than
your authorized dealer, the message can bereset by referring to the steps described un-
der “Instrument Cluster Display” in “Getting
To Know Your Instrument Panel” for further
information.
Engine Oil Filter Replacement
Residual oil in the housing may spill from the
housing when the new filter is installed if the
residual oil is not either removed from the
housing or enough time has not elapsed to
allow the oil to drain back into the engine.
When servicing the oil filter on this engine,
carefully remove the filter and use a suction
gun to remove any residual oil left in the
housing or wait about 30 minutes for the oil
to drain back into the engine.
To help you have the best driving experience
possible, the manufacturer has identified the
specific vehicle maintenance service inter-
vals that are required to keep your vehicle
operating properly and safely.
The manufacturer recommends that these
maintenance intervals be performed at your
selling dealer. The technicians at your deal-
ership know your vehicle best, and have ac-
cess to factory trained information, genuine
Mopar parts, and specially designed elec-
SERVICING AND MAINTENANCE
238
Page 260 of 368
Tire Spinning
When stuck in mud, sand, snow, or ice con-
ditions, do not spin your vehicle's wheels
above 30 mph (48 km/h) or for longer than
30 seconds continuously without stopping.
Refer to “Freeing A Stuck Vehicle” in “In
Case Of Emergency” for further information.
WARNING!
Fast spinning tires can be dangerous.
Forces generated by excessive wheel
speeds may cause tire damage or failure. A
tire could explode and injure someone. Do
not spin your vehicle's wheels faster than
30 mph (48 km/h) for more than 30 sec-
onds continuously when you are stuck,
and do not let anyone near a spinning
wheel, no matter what the speed.
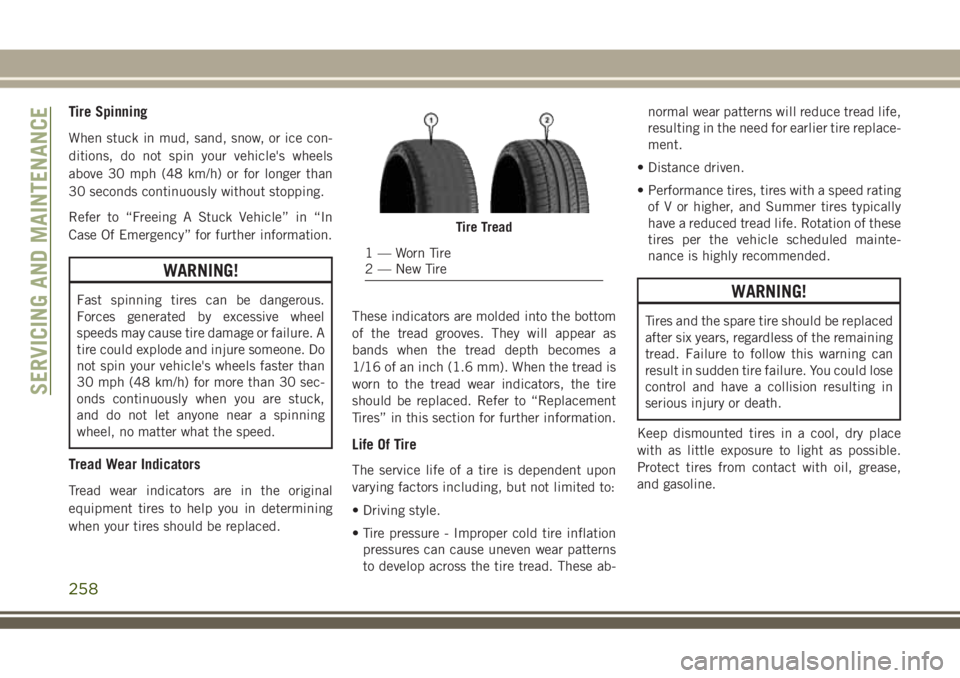
Tread Wear Indicators
Tread wear indicators are in the original
equipment tires to help you in determining
when your tires should be replaced.These indicators are molded into the bottom
of the tread grooves. They will appear as
bands when the tread depth becomes a
1/16 of an inch (1.6 mm). When the tread is
worn to the tread wear indicators, the tire
should be replaced. Refer to “Replacement
Tires” in this section for further information.
Life Of Tire
The service life of a tire is dependent upon
varying factors including, but not limited to:
• Driving style.
• Tire pressure - Improper cold tire inflation
pressures can cause uneven wear patterns
to develop across the tire tread. These ab-normal wear patterns will reduce tread life,
resulting in the need for earlier tire replace-
ment.
• Distance driven.
• Performance tires, tires with a speed rating
of V or higher, and Summer tires typically
have a reduced tread life. Rotation of these
tires per the vehicle scheduled mainte-
nance is highly recommended.
WARNING!
Tires and the spare tire should be replaced
after six years, regardless of the remaining
tread. Failure to follow this warning can
result in sudden tire failure. You could lose
control and have a collision resulting in
serious injury or death.
Keep dismounted tires in a cool, dry place
with as little exposure to light as possible.
Protect tires from contact with oil, grease,
and gasoline.
Tire Tread
1 — Worn Tire
2 — New Tire
SERVICING AND MAINTENANCE
258
Page 302 of 368
Balance/Fade
• Press the “Balance/Fade” button on the
touchscreen to Balance audio between the
front speakers or fade the audio between
the rear and front speakers.
• Pressing the “Front,” “Rear,” “Left,” or
“Right” buttons on the touchscreen or
press and drag the Speaker Icon to adjust
the Balance/Fade.
Equalizer
• Press the “Equalizer” button on the touch-
screen to activate the Equalizer screen.
• Press the “+” or “–” buttons on the touch-
screen, or press and drag over the level bar
for each of the equalizer bands. The level
value, which spans between plus or minus
nine, is displayed at the bottom of each of
the Bands.Speed Adjusted Volume
• Press the “Speed Adjusted Volume” button
on the touchscreen to activate the Speed
Adjusted Volume screen. The Speed Ad-
justed Volume is adjusted by pressing the
volume level indicator. This alters the auto-
matic adjustment of the audio volume with
variation to vehicle speed.
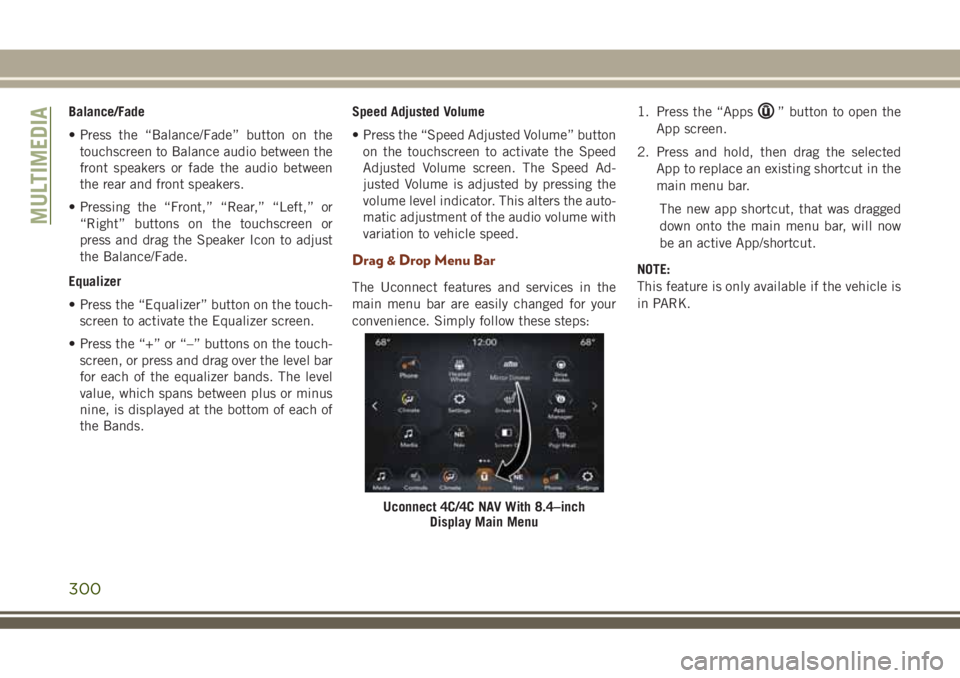
Drag & Drop Menu Bar
The Uconnect features and services in the
main menu bar are easily changed for your
convenience. Simply follow these steps:1. Press the “Apps
” button to open the
App screen.
2. Press and hold, then drag the selected
App to replace an existing shortcut in the
main menu bar.
The new app shortcut, that was dragged
down onto the main menu bar, will now
be an active App/shortcut.
NOTE:
This feature is only available if the vehicle is
in PARK.
Uconnect 4C/4C NAV With 8.4–inch
Display Main Menu
MULTIMEDIA
300
Page 362 of 368
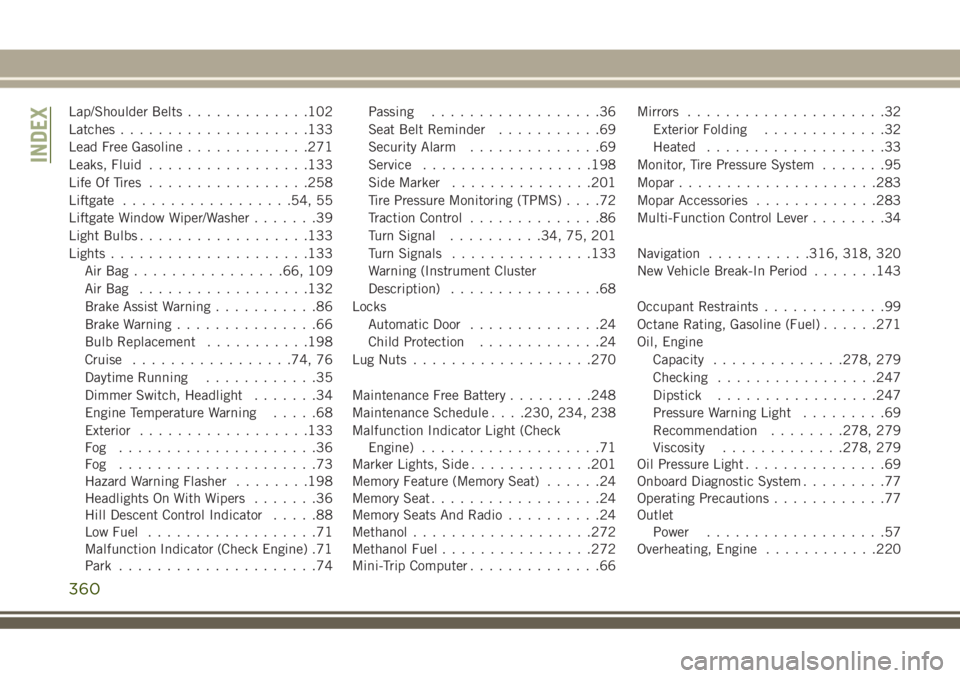
Lap/Shoulder Belts.............102
Latches....................133
Lead Free Gasoline.............271
Leaks, Fluid.................133
Life Of Tires.................258
Liftgate..................54, 55
Liftgate Window Wiper/Washer.......39
Light Bulbs..................133
Lights.....................133
AirBag................66, 109
AirBag ..................132
Brake Assist Warning...........86
Brake Warning...............66
Bulb Replacement...........198
Cruise.................74, 76
Daytime Running............35
Dimmer Switch, Headlight.......34
Engine Temperature Warning.....68
Exterior..................133
Fog .....................36
Fog .....................73
Hazard Warning Flasher........198
Headlights On With Wipers.......36
Hill Descent Control Indicator.....88
Low Fuel..................71
Malfunction Indicator (Check Engine) .71
Park.....................74Passing..................36
Seat Belt Reminder...........69
Security Alarm..............69
Service..................198
Side Marker...............201
Tire Pressure Monitoring (TPMS)....72
Traction Control..............86
Turn Signal..........34, 75, 201
Turn Signals...............133
Warning (Instrument Cluster
Description)................68
Locks
Automatic Door..............24
Child Protection.............24
Lug Nuts...................270
Maintenance Free Battery.........248
Maintenance Schedule. . . .230, 234, 238
Malfunction Indicator Light (Check
Engine)
...................71
Marker Lights, Side
.............201
Memory Feature (Memory Seat)......24
Memory Seat..................24
Memory Seats And Radio..........24
Methanol...................272
Methanol Fuel................272
Mini-Trip Computer..............66Mirrors.....................32
Exterior Folding.............32
Heated...................33
Monitor, Tire Pressure System.......95
Mopar.....................283
Mopar Accessories.............283
Multi-Function Control Lever........34
Navigation...........316, 318, 320
New Vehicle Break-In Period.......143
Occupant Restraints.............99
Octane Rating, Gasoline (Fuel)......271
Oil, Engine
Capacity..............278, 279
Checking.................247
Dipstick.................247
Pressure Warning Light.........69
Recommendation........278, 279
Viscosity.............278, 279
Oil Pressure Light...............69
Onboard Diagnostic System.........77
Operating Precautions............77
Outlet
Power...................57
Overheating, Engine............220
INDEX
360