torque JEEP GRAND CHEROKEE 2020 Owner handbook (in English)
[x] Cancel search | Manufacturer: JEEP, Model Year: 2020, Model line: GRAND CHEROKEE, Model: JEEP GRAND CHEROKEE 2020Pages: 378, PDF Size: 6.88 MB
Page 161 of 378
SPORT MODE — IF
EQUIPPED
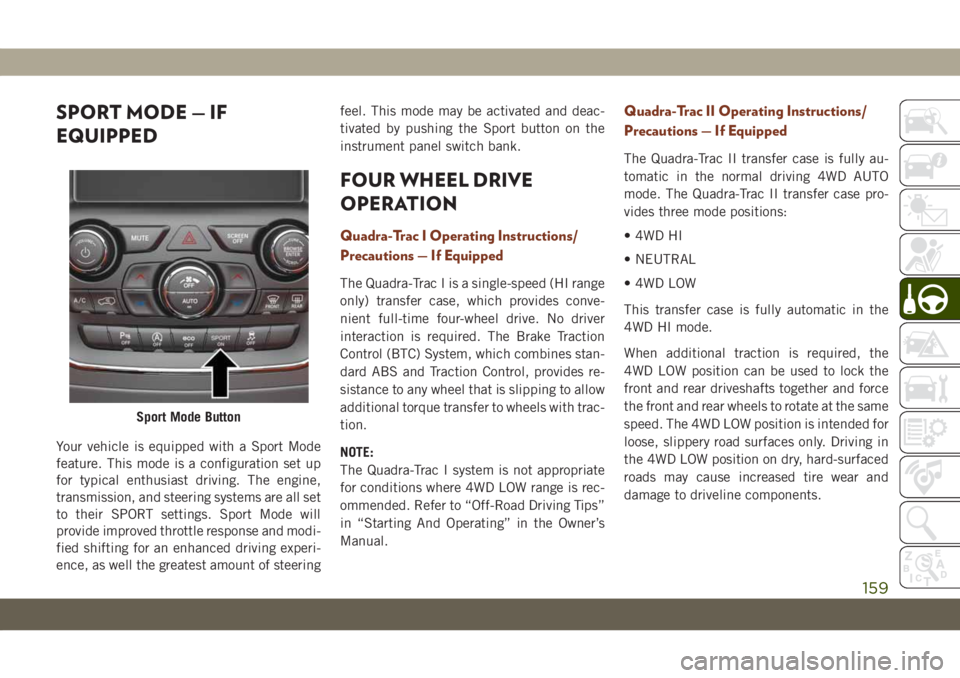
Your vehicle is equipped with a Sport Mode
feature. This mode is a configuration set up
for typical enthusiast driving. The engine,
transmission, and steering systems are all set
to their SPORT settings. Sport Mode will
provide improved throttle response and modi-
fied shifting for an enhanced driving experi-
ence, as well the greatest amount of steeringfeel. This mode may be activated and deac-
tivated by pushing the Sport button on the
instrument panel switch bank.
FOUR WHEEL DRIVE
OPERATION
Quadra-Trac I Operating Instructions/
Precautions — If Equipped
The Quadra-Trac I is a single-speed (HI range
only) transfer case, which provides conve-
nient full-time four-wheel drive. No driver
interaction is required. The Brake Traction
Control (BTC) System, which combines stan-
dard ABS and Traction Control, provides re-
sistance to any wheel that is slipping to allow
additional torque transfer to wheels with trac-
tion.
NOTE:
The Quadra-Trac I system is not appropriate
for conditions where 4WD LOW range is rec-
ommended. Refer to “Off-Road Driving Tips”
in “Starting And Operating” in the Owner’s
Manual.
Quadra-Trac II Operating Instructions/
Precautions — If Equipped
The Quadra-Trac II transfer case is fully au-
tomatic in the normal driving 4WD AUTO
mode. The Quadra-Trac II transfer case pro-
vides three mode positions:
• 4WD HI
• NEUTRAL
• 4WD LOW
This transfer case is fully automatic in the
4WD HI mode.
When additional traction is required, the
4WD LOW position can be used to lock the
front and rear driveshafts together and force
the front and rear wheels to rotate at the same
speed. The 4WD LOW position is intended for
loose, slippery road surfaces only. Driving in
the 4WD LOW position on dry, hard-surfaced
roads may cause increased tire wear and
damage to driveline components.
Sport Mode Button
159
Page 162 of 378
When operating your vehicle in 4WD LOW,
the engine speed is approximately three
times that of the 4WD HI position at a given
road speed. Take care not to overspeed the
engine and do not exceed 25 mph (40 km/h).
Proper operation of four-wheel drive vehicles
depends on tires of equal size, type, and
circumference on each wheel. Any difference
will adversely affect shifting and cause dam-
age to the transfer case.
Because four-wheel drive provides improved
traction, there is a tendency to exceed safe
turning and stopping speeds. Do not go faster
than road conditions permit.
WARNING!
You or others could be injured or killed if
you leave the vehicle unattended with the
transfer case in the NEUTRAL position
without first fully engaging the parking
brake. The transfer case NEUTRAL posi-
tion disengages both the front and rear
drive shafts from the powertrain and will
allow the vehicle to roll, even if the trans-
mission is in PARK. The parking brake
WARNING!
should always be applied when the driver
is not in the vehicle.
Shift Positions
For additional information on the appropriate
use of each 4WD system mode position, see
the information below:
4WD AUTO
This range is used on surfaces such as ice,
snow, gravel, sand, and dry hard pavement.
NOTE:
Refer to “Selec-Terrain — If Equipped” fur-
ther on in this section for further information
on the various positions and their intended
usages.
NEUTRAL
This range disengages the driveline from the
powertrain. It is to be used for flat towing
behind another vehicle. Refer to “Recre-
ational Towing” in “Starting And Operating”
for further information.
WARNING!
You or others could be injured or killed if
you leave the vehicle unattended with the
transfer case in the NEUTRAL position
without first fully engaging the parking
brake. The transfer case NEUTRAL posi-
tion disengages both the front and rear
drive shafts from the powertrain and will
allow the vehicle to roll, even if the trans-
mission is in PARK. The parking brake
should always be applied when the driver
is not in the vehicle.
4WD LOW
This range is for low speed four-wheel drive.
It provides an additional gear reduction
which allows for increased torque to be deliv-
ered to both the front and rear wheels while
providing maximum pulling power for loose,
slippery road surfaces only. Do not exceed
25 mph (40 km/h).
NOTE:
Refer to “Selec-Terrain — If Equipped” for
further information on the various positions
and their intended usages.
STARTING AND OPERATING
160
Page 165 of 378
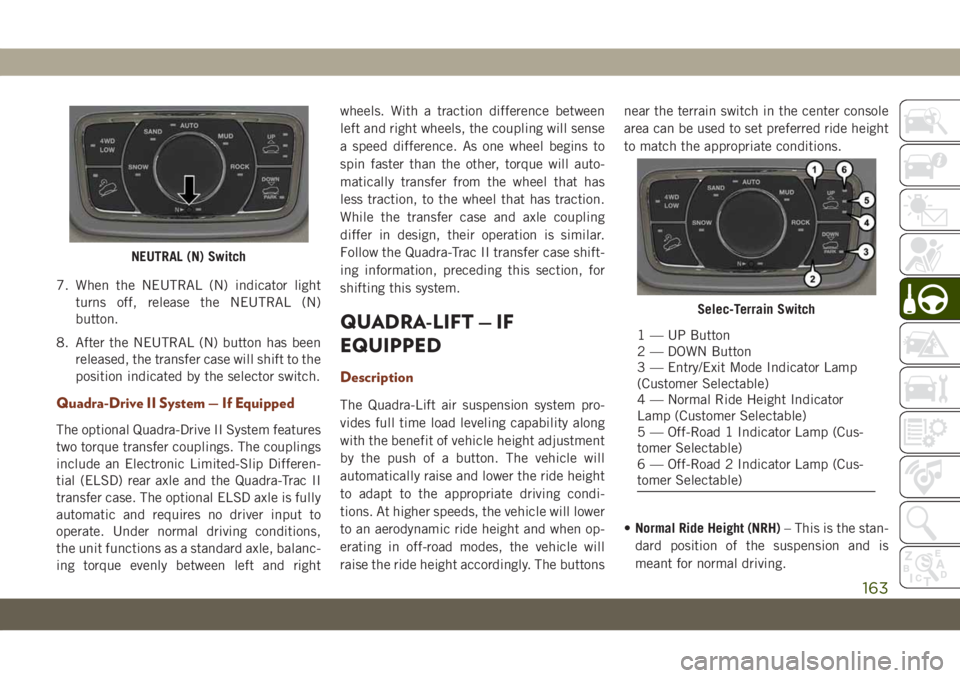
7. When the NEUTRAL (N) indicator light
turns off, release the NEUTRAL (N)
button.
8. After the NEUTRAL (N) button has been
released, the transfer case will shift to the
position indicated by the selector switch.
Quadra-Drive II System — If Equipped
The optional Quadra-Drive II System features
two torque transfer couplings. The couplings
include an Electronic Limited-Slip Differen-
tial (ELSD) rear axle and the Quadra-Trac II
transfer case. The optional ELSD axle is fully
automatic and requires no driver input to
operate. Under normal driving conditions,
the unit functions as a standard axle, balanc-
ing torque evenly between left and rightwheels. With a traction difference between
left and right wheels, the coupling will sense
a speed difference. As one wheel begins to
spin faster than the other, torque will auto-
matically transfer from the wheel that has
less traction, to the wheel that has traction.
While the transfer case and axle coupling
differ in design, their operation is similar.
Follow the Quadra-Trac II transfer case shift-
ing information, preceding this section, for
shifting this system.
QUADRA-LIFT — IF
EQUIPPED
Description
The Quadra-Lift air suspension system pro-
vides full time load leveling capability along
with the benefit of vehicle height adjustment
by the push of a button. The vehicle will
automatically raise and lower the ride height
to adapt to the appropriate driving condi-
tions. At higher speeds, the vehicle will lower
to an aerodynamic ride height and when op-
erating in off-road modes, the vehicle will
raise the ride height accordingly. The buttonsnear the terrain switch in the center console
area can be used to set preferred ride height
to match the appropriate conditions.
•Normal Ride Height (NRH)– This is the stan-
dard position of the suspension and is
meant for normal driving.
NEUTRAL (N) Switch
Selec-Terrain Switch
1 — UP Button
2 — DOWN Button
3 — Entry/Exit Mode Indicator Lamp
(Customer Selectable)
4 — Normal Ride Height Indicator
Lamp (Customer Selectable)
5 — Off-Road 1 Indicator Lamp (Cus-
tomer Selectable)
6 — Off-Road 2 Indicator Lamp (Cus-
tomer Selectable)
163
Page 184 of 378
When both lane markings are detected and
the driver unintentionally drifts out of the
lane (no turn signal applied), the LaneSense
system provides a haptic warning in the form
of torque applied to the steering wheel to
prompt the driver to remain within the lane
boundaries. If the driver continues to unin-
tentionally drift out of the lane, the Lane-
Sense system provides a visual warning
through the instrument cluster display to
prompt the driver to remain within the lane
boundaries.
The driver may manually override the haptic
warning by applying torque into the steering
wheel at any time.
When only a single lane marking is detected
and the driver unintentionally drifts across
the lane marking (no turn signal applied), the
LaneSense system provides visual warnings
through the instrument cluster display to
prompt the driver to remain within the lane.
When only a single lane marking is detected,
a haptic (torque) warning will not be
provided.NOTE:
When operating conditions have been met,
the LaneSense system will monitor if the
driver’s hands are on the steering wheel and
provides an audible warning to the driver
when the driver’s hands are not detected on
the steering wheel. The system will cancel if
the driver does not return their hands to the
wheel.
Turning LaneSense On Or Off
The default status of LaneSense is off. The
LED in LaneSense button will be illuminated
while the system is deactivated.
The LaneSense button is located
on the switch panel below the
Uconnect display.
To turn the LaneSense system
on, push the LaneSense button (LED turns
off). A “LaneSense On” message is shown in
the instrument cluster display.
To turn the LaneSense system off, push the
LaneSense button once (LED turns on).NOTE:
The LaneSense system will retain the last
system state on or off from the last ignition
cycle when the ignition is changed to the
ON/RUN position.
LaneSense Warning Message
The LaneSense system will indicate the cur-
rent lane drift condition through the instru-
ment cluster display.
Premium Instrument Cluster Display
When the LaneSense system is on; the lane
lines are gray when both of the lane bound-
aries have not been detected and the Lane-
Sense telltale
is solid white.
Left Lane Departure — Only Left Lane Detected
• When the LaneSense system is on, the
LaneSense telltale
is solid white when
only the left lane marking has been de-
tected and the system is ready to provide
visual warnings in the instrument cluster
display if an unintentional lane departure
occurs.
STARTING AND OPERATING
182
Page 185 of 378
• When the LaneSense system senses the
lane has been approached and is in a lane
departure situation, the left thick lane line
flashes yellow (on/off), the left thin line
remains solid yellow and the LaneSense
telltale
changes from solid white to
flashing yellow.
NOTE:
The LaneSense system operates with the
similar behavior for a right lane departure
when only the right lane marking has been
detected.
Left Lane Departure — Both Lanes Detected
• When the LaneSense system is on, the lane
lines turn from gray to white to indicate that
both of the lane markings have been de-
tected. The LaneSense telltale
is solid
green when both lane markings have been
detected and the system is on to provide
visual warnings in the instrument cluster
display and a torque warning in the steering
wheel if an unintentional lane departure
occurs.• When the LaneSense system senses a lane
drift situation, the left thick lane line and
left thin line turn solid yellow. The Lane-
Sense telltale
changes from solid green
to solid yellow. At this time torque is ap-
plied to the steering wheel in the opposite
direction of the lane boundary.
For example: If approaching the left side of
the lane the steering wheel will turn to the
right.
• When the LaneSense system senses the
lane has been approached and is in a lane
departure situation, the left thick lane line
flashes yellow (on/off) and the left thin line
remains solid yellow. The LaneSense tell-
tale
changes from solid yellow to flash-
ing yellow. At this time torque is applied to
the steering wheel in the opposite direction
of the lane boundary.
For example: If approaching the left side of
the lane the steering wheel will turn to the
right.
NOTE:
The LaneSense system operates with the
similar behavior for a right lane departure.
Changing LaneSense Status
The LaneSense system has settings to adjust
the intensity of the torque warning and the
warning zone sensitivity (early/late) that you
can configure through the Uconnect system
screen. Refer to “Uconnect Settings” in
“Multimedia” in your Owner’s Manual for
further information.
NOTE:
• When enabled the system operates above
37 mph (60 km/h) and below 112 mph
(180 km/h).
• Use of the turn signal suppresses the warn-
ings.
• The system will not apply torque to the
steering wheel whenever a safety system
engages (anti-lock brakes, traction control
system, electronic stability control, forward
collision warning, etc.).
183
Page 192 of 378
CAUTION!
For diesel engines, only use diesel fuel for
motor vehicles in accordance with EN 590
European specifications. The use of other
products or mixtures may damage the en-
gine beyond repair and consequently void
the warranty, due to the damage caused. If
you accidentally introduce other types of
fuel into the tank, do not start the engine.
Empty the tank. If the engine has been run
for even an extremely limited amount of
time, you must not only drain the fuel
tank, but the rest of the supply circuit as
well.
Avoid Using Contaminated Fuel
Fuel that is contaminated by water or dirt can
cause severe damage to the engine fuel sys-
tem. Proper maintenance of the engine fuel
filter and fuel tank is essential. Refer to
“Dealer Service” in “Servicing And Mainte-
nance” in your Owner’s Manual for further
information.
AdBlue® (UREA) — If Equipped
The vehicle is equipped with an UREA injec-
tion system and Selective Catalytic Reduc-
tion to meet emission standards. These two
systems ensure compliance with the diesel
emissions requirements; at the same, they
ensure fuel-efficiency, handling, torque and
power. For messages and system warnings,
refer to the "Warning Lights And Messages" in
the "Getting To Know Your Instrument Panel"
section. AdBlue
®is a very stable product
with a long shelf life. Stored at temperatures
LOWER than 90 °F (32 °C), it has a shelf life
of at least one year. For more information on
the AdBlue
®liquid type, see the “Fluids and
lubricants” in the “Technical specifications”
section. The vehicle is equipped with an
automatic AdBlue
®heating system when the
engine starts allowing the system to work
correctly at temperatures lower than 12 °F
(-11 °C).
NOTE:
• AdBlue
®freezes at temperatures lower
than 12 °F (-11 °C).• Your vehicle is equipped with a AdBlue
®
injection system. You may occasionally
hear an audible clicking noise from under
the vehicle at a stop. This is normal opera-
tion.
• The AdBlue
®pump will run for a period of
time after engine shutdown to purge the
AdBlue
®system. This is normal operation
and may be audible from the rear of the
vehicle.
AdBlue® Storage
AdBlue®is considered a very stable product
with a long shelf life. If AdBlue®is kept in
temperatures between 10° and 90°F
(-12° and 32°C), it will last a minimum of
one year.
AdBlue
®is subject to freezing at the lowest
temperatures. For example, AdBlue®may
freeze at temperatures at or below 12° F
(-11° C). The system has been designed to
operate in this environment.
STARTING AND OPERATING
190
Page 223 of 378
WARNING!
Raising the vehicle higher than necessary
can make the vehicle less stable. It could
slip off the jack and hurt someone near it.
Raise the vehicle only enough to remove
the tire.
7. Remove the lug nuts and wheel.
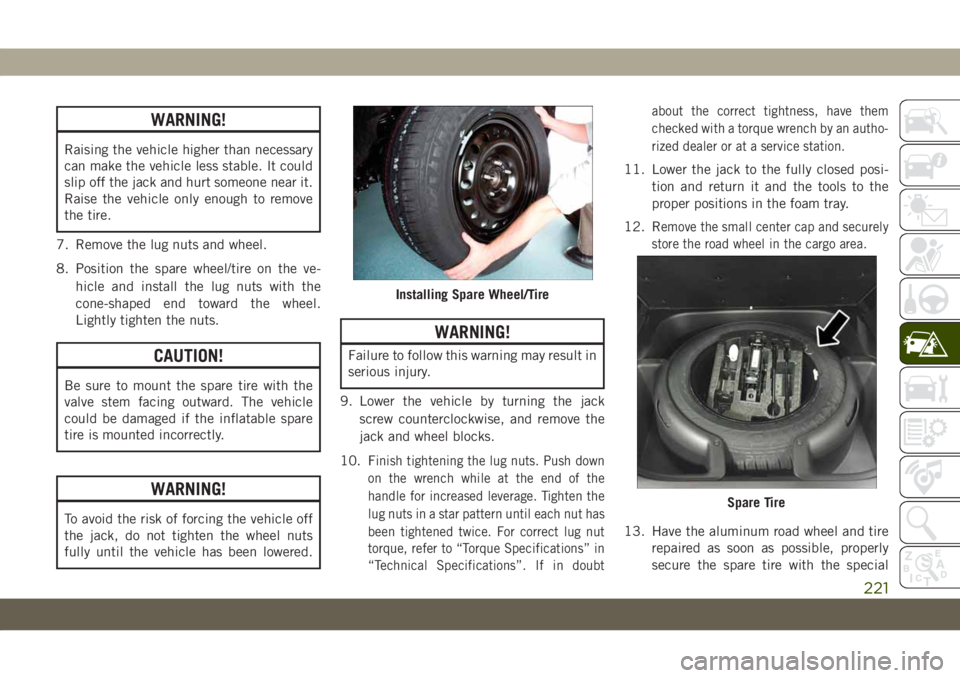
8. Position the spare wheel/tire on the ve-
hicle and install the lug nuts with the
cone-shaped end toward the wheel.
Lightly tighten the nuts.
CAUTION!
Be sure to mount the spare tire with the
valve stem facing outward. The vehicle
could be damaged if the inflatable spare
tire is mounted incorrectly.
WARNING!
To avoid the risk of forcing the vehicle off
the jack, do not tighten the wheel nuts
fully until the vehicle has been lowered.
WARNING!
Failure to follow this warning may result in
serious injury.
9. Lower the vehicle by turning the jack
screw counterclockwise, and remove the
jack and wheel blocks.
10. F
inish tightening the lug nuts. Push down
on the wrench while at the end of the
handle for increased leverage. Tighten the
lug nuts in a star pattern until each nut has
been tightened twice. For correct lug nut
torque, refer to “Torque Specifications” in
“Technical Specifications”. If in doubtabout the correct tightness, have them
checked with a torque wrench by an autho-
rized dealer or at a service station.
11. Lower the jack to the fully closed posi-
tion and return it and the tools to the
proper positions in the foam tray.
12. R
emove the small center cap and securely
store the road wheel in the cargo area.
13. Have the aluminum road wheel and tire
repaired as soon as possible, properly
secure the spare tire with the special
Installing Spare Wheel/Tire
Spare Tire
221
Page 224 of 378
wing nut torqued to 3.7 ft-lbs (5 N·m),
reinstall the jack and tool kit foam tray,
and latch the rear load floor cover.
NOTE:
Do not drive with the spare tire installed for
more than 50 miles (80 km) at a max speed
of 50 mph (80 km/h).
WARNING!
A loose tire or jack thrown forward in a
collision or hard stop could endanger the
occupants of the vehicle. Always stow the
jack parts and the spare tire in the places
provided. Have the deflated (flat) tire re-
paired or replaced immediately.
Road Tire Installation
1. Mount the road tire on the axle.
2. Install the remaining lug nuts with the
cone shaped end of the nut toward the
wheel. Lightly tighten the lug nuts.
WARNING!
To avoid the risk of forcing the vehicle off
the jack, do not tighten the wheel nuts
fully until the vehicle has been lowered.
Failure to follow this warning may result in
serious injury.
3. Lower the vehicle to the ground by turning
the jack handle counterclockwise.
4. Refer to “Torque Specifications” in
“Technical Specifications” for proper lug
nut torque.
5. After 25 miles (40 km), check the lug nut
torque with a torque wrench to ensure that
all lug nuts are properly seated against the
wheel.
Declaration Of Conformance
1. The undersigned, Tony Fabiano, repre-
senting the manufacturer, herewith de-
clares that the machinery described be-
low fulfills all relevant provisions of:
• The EC-directive 2006/42/EC on
Machinery
2. Description of machinery.
a) Generic Denomination: Vehicle Jack
b) Function: Lifting Vehicle
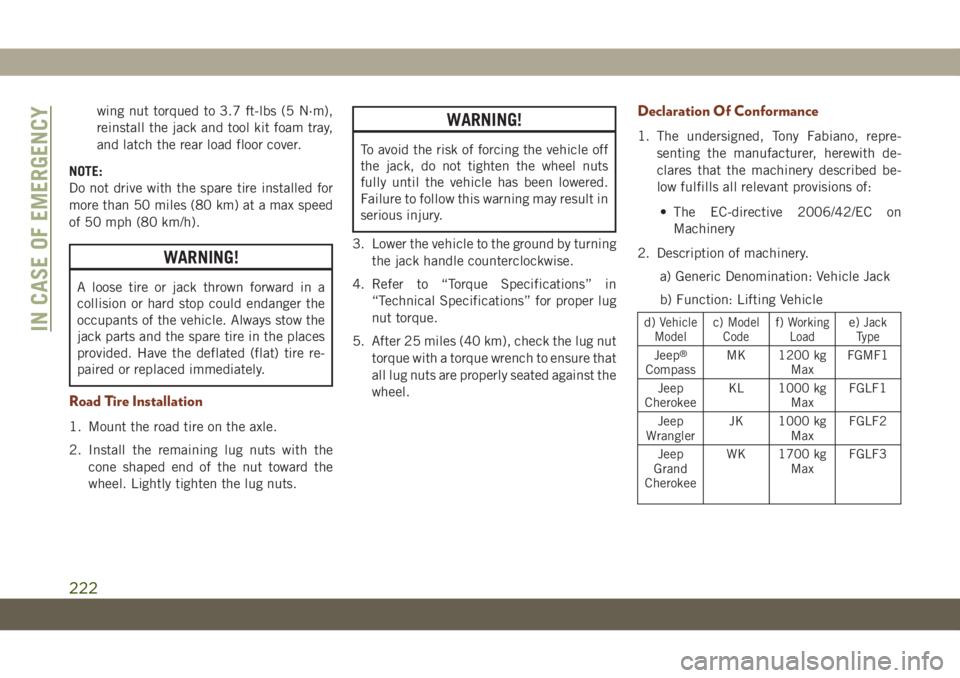
d)Vehicle
Modelc)Model
Codef)Working
Loade)Jack
Type
Jeep®
CompassMK 1200 kg
MaxFGMF1
Jeep
CherokeeKL 1000 kg
MaxFGLF1
Jeep
WranglerJK 1000 kg
MaxFGLF2
Jeep
Grand
CherokeeWK 1700 kg
MaxFGLF3
IN CASE OF EMERGENCY
222
Page 280 of 378
WHEEL AND TIRE TORQUE
SPECIFICATIONS
Proper lug nut/bolt torque is very important to
ensure that the wheel is properly mounted to
the vehicle. Any time a wheel has been re-
moved and reinstalled on the vehicle, the lug
nuts/bolts should be torqued using a properly
calibrated torque wrench using a high quality
six sided (hex) deep wall socket.
Torque Specifications
Base Model Vehicle
Lug Nut/Bolt
Torque**Lug Nut/Bolt
SizeLug Nut/Bolt
Socket Size
130 Ft-Lbs
(176 N·m)M14 x 1.50 22 mm
SRT Model Vehicle
Lug Nut/Bolt
Torque**Lug Nut/Bolt
SizeLug Nut/Bolt
Socket Size
110 Ft-Lbs
(149 N·m)M14 x 1.50 22 mm
**Use only your authorized dealer recom-
mended lug nuts/bolts and clean or remove
any dirt or oil before tightening.Inspect the wheel mounting surface prior to
mounting the tire and remove any corrosion
or loose particles.
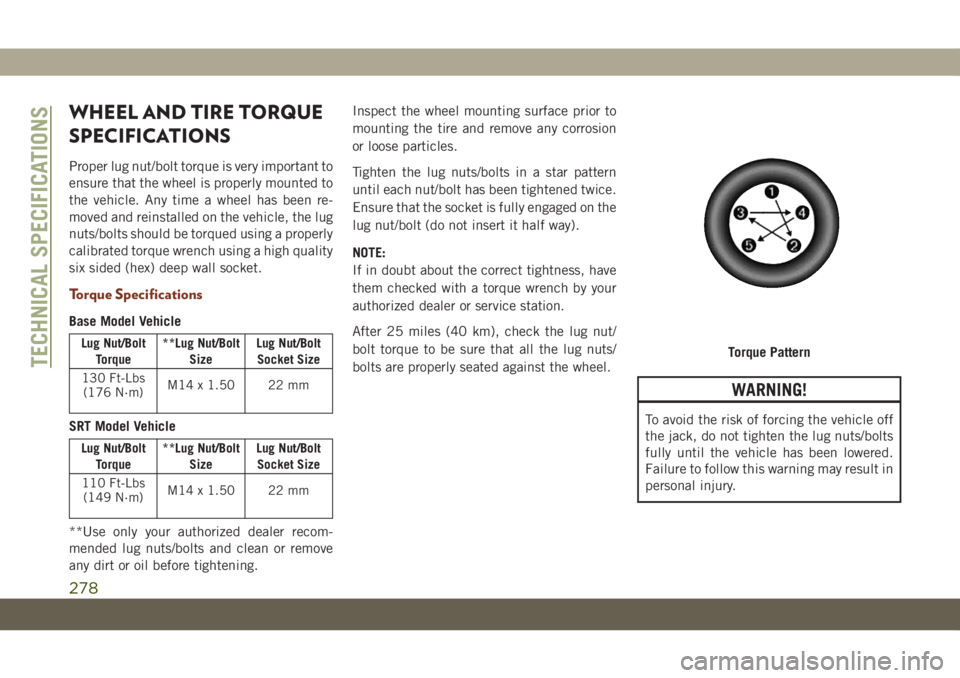
Tighten the lug nuts/bolts in a star pattern
until each nut/bolt has been tightened twice.
Ensure that the socket is fully engaged on the
lug nut/bolt (do not insert it half way).
NOTE:
If in doubt about the correct tightness, have
them checked with a torque wrench by your
authorized dealer or service station.
After 25 miles (40 km), check the lug nut/
bolt torque to be sure that all the lug nuts/
bolts are properly seated against the wheel.
WARNING!
To avoid the risk of forcing the vehicle off
the jack, do not tighten the lug nuts/bolts
fully until the vehicle has been lowered.
Failure to follow this warning may result in
personal injury.
Torque PatternTECHNICAL SPECIFICATIONS
278
Page 375 of 378
Tilt Steering Column...........33, 34
Tips ......................320
Tires...............143, 262, 268
Aging (Life Of Tires)..........266
Air Pressure...............262
Chains...............271, 272
Changing..........217, 222, 262
Compact Spare.............269
Flat Changing..............222
General Information.......262, 268
High Speed................264
Inflation Pressure............263
Jacking...............217, 262
Life Of Tires...............266
Load Capacity..............264
Pressure Monitoring System
(TPMS)................79, 103
Radial...................265
Replacement...........222, 266
Rotation..................272
Safety...................262
Snow Tires................268
Spare Tires.........217, 268, 270
Spinning.................265
Tread Wear Indicators.........266
Wheel Mounting.............222
Wheel Nut Torque............278To Open Hood.................59
Tow Hooks
Emergency................235
Towing.................192, 231
Disabled Vehicle.............231
Guide................192, 194
Recreational...............198
Weight...............192, 194
Towing Behind A Motorhome.......198
Towing Eyes.................234
T
raction Control................89
Trailer Sway Control (TSC)..........93
Trailer Towing................192
Trailer Towing Guide.........192, 194
Trailer Weight.............192, 194
Transfer Case
Fluid....................297
Transmission.................157
Automatic.............157, 256
Fluid....................297
Maintenance...............256
Shifting..................154
Transporting Pets..............140
Tread Wear Indicators............266
Trip Computer.................73
Turn Signals............40, 83, 207Uconnect 4C/4C Nav With 8.4-Inch
Display...................307
Uconnect 4 With 7-Inch Display.....301
Uconnect (Hands-Free Phone)......333
Making A Phone Call..........333
Receiving A Call.............333
Uconnect Phone...............333
Uconnect Settings
Customer Programmable Features . . .21
Passive Entry Programming.......21
Uconnect Voice Command.........341
Unleaded Gasoline.............282
Untwisting Procedure, Seat Belt.....112
USB......................321
USB Port...................321
Vehicle Identification Number (VIN) . . .277
Vehicle Loading...............264
Vehicle Storage................51
Voice Command...............339
Commands................338
Voice Recognition System
(VR)..............338, 339, 341
Warning Flashers, Hazard........
.203
Warning Lights (Instrument Cluster
Descriptions)................
77
373