change time JEEP GRAND CHEROKEE 2020 Owner handbook (in English)
[x] Cancel search | Manufacturer: JEEP, Model Year: 2020, Model line: GRAND CHEROKEE, Model: JEEP GRAND CHEROKEE 2020Pages: 378, PDF Size: 6.88 MB
Page 304 of 378
volume level indicator. This alters the auto-
matic adjustment of the audio volume with
variation to vehicle speed.
Loudness — If Equipped
• Press the “On” button on the touchscreen
to activate Loudness. Press “Off” to deac-
tivate this feature. When Loudness is On,
the sound quality at lower volumes
improves.
AUX Volume Offset
• Press the “AUX Volume Offset” button on
the touchscreen to activate the AUX Vol-
ume Offset screen. The AUX Volume Offset
is adjusted by pressing of the “+” and “–”
buttons. This alters the AUX input audio
volume. The level value, which spans be-
tween plus or minus three, is displayed
above the adjustment bar.
Auto Play — If Equipped
• Press the “Auto Play” button on the touch-
screen to activate the Auto Play screen. The
Auto Play feature has two settings “On”
and “Off.” With Auto Play on, music begins
playing from a connected device, immedi-
ately after it is connected to the radio.Auto On Radio — If Equipped
• The Radio automatically turns on when
vehicle is in run or will recall whether it was
on or off at last ignition off.
Radio Off With Door — If Equipped
• Press the “Radio Off With Door” button on
the touchscreen to activate the Radio Off
With Door screen. The Radio Off With Door
feature, when activated, keeps the radio on
until the driver or passenger door is opened,
or when the Radio Off Delay selected time
has expired.
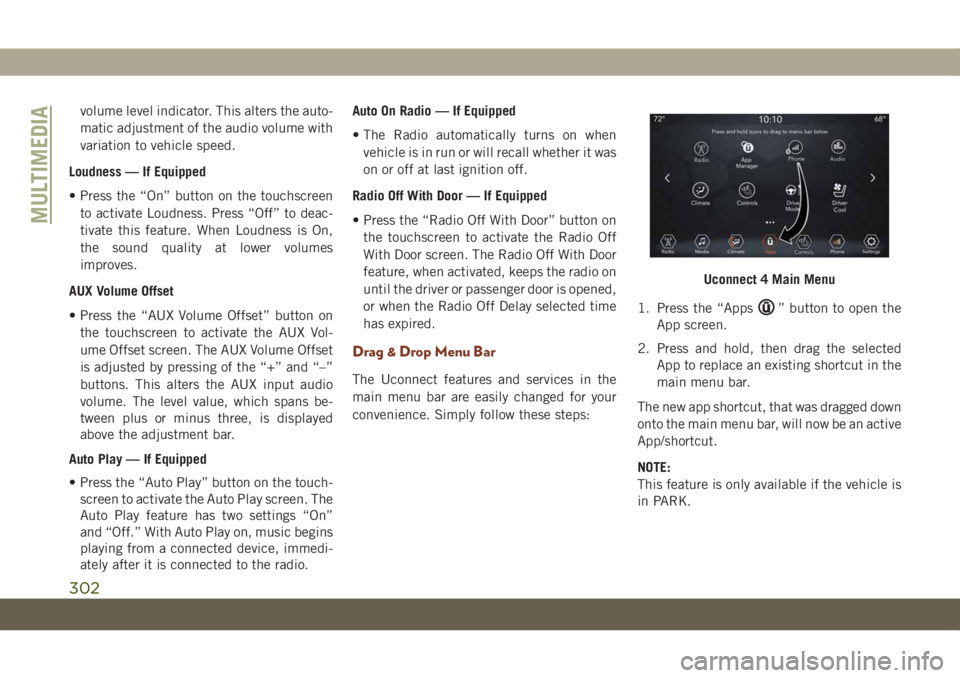
Drag & Drop Menu Bar
The Uconnect features and services in the
main menu bar are easily changed for your
convenience. Simply follow these steps:1. Press the “Apps
” button to open the
App screen.
2. Press and hold, then drag the selected
App to replace an existing shortcut in the
main menu bar.
The new app shortcut, that was dragged down
onto the main menu bar, will now be an active
App/shortcut.
NOTE:
This feature is only available if the vehicle is
in PARK.
Uconnect 4 Main Menu
MULTIMEDIA
302
Page 310 of 378
Background Themes
• Screen background themes are selectable
from a pre-loaded list of themes. If you’d
like to set a theme, follow the instructions
below.
• Press the “Settings” button on the touch-
screen and select the display menu.
• Then press the “Set Theme” button on the
touchscreen and select a theme.
Audio Settings
• Press the “Audio” button on the touch-
screen to activate the Audio settings screen
to adjust Balance\Fade, Equalizer, and
Speed Adjusted Volume.
• You can return to the Radio screen by
pressing the “X” located at the top right.
Balance/Fade
• Press the “Balance/Fade” button on the
touchscreen to Balance audio between the
front speakers or fade the audio between
the rear and front speakers.• Pressing the “Front,” “Rear,” “Left,” or
“Right” buttons on the touchscreen or
press and drag the Speaker Icon to adjust
the Balance/Fade.
Equalizer
• Press the “Equalizer” button on the touch-
screen to activate the Equalizer screen.
• Press the “+” or “–” buttons on the touch-
screen, or press and drag over the level bar
for each of the equalizer bands. The level
value, which spans between plus or minus
nine, is displayed at the bottom of each of
the Bands.
Speed Adjusted Volume
• Press the “Speed Adjusted Volume” button
on the touchscreen to activate the Speed
Adjusted Volume screen. The Speed Ad-
justed Volume is adjusted by pressing the
volume level indicator. This alters the auto-
matic adjustment of the audio volume with
variation to vehicle speed.
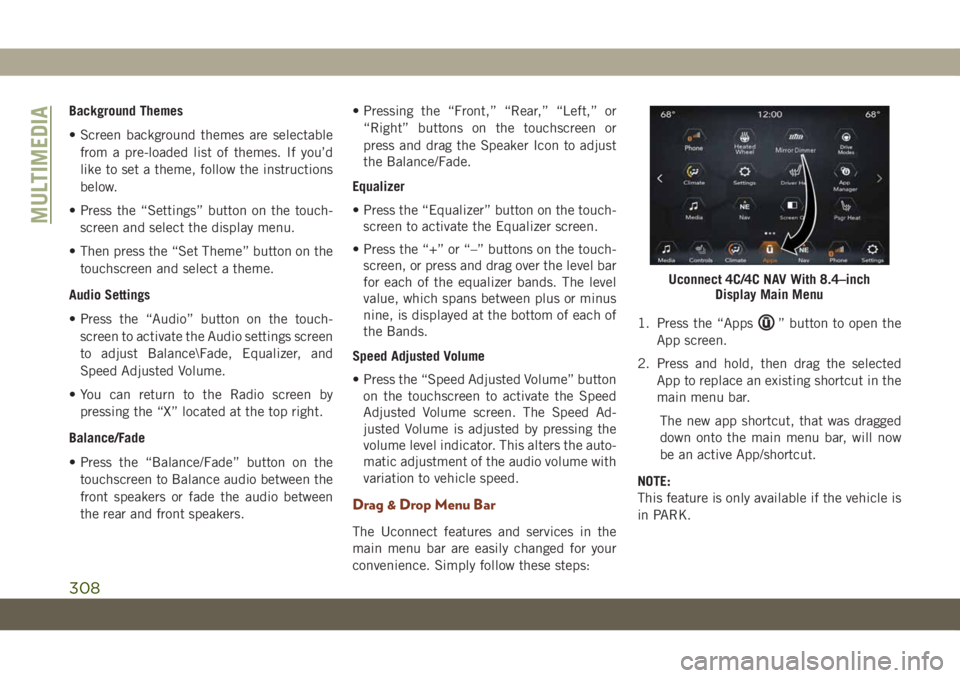
Drag & Drop Menu Bar
The Uconnect features and services in the
main menu bar are easily changed for your
convenience. Simply follow these steps:1. Press the “Apps
” button to open the
App screen.
2. Press and hold, then drag the selected
App to replace an existing shortcut in the
main menu bar.
The new app shortcut, that was dragged
down onto the main menu bar, will now
be an active App/shortcut.
NOTE:
This feature is only available if the vehicle is
in PARK.
Uconnect 4C/4C NAV With 8.4–inch
Display Main Menu
MULTIMEDIA
308
Page 314 of 378
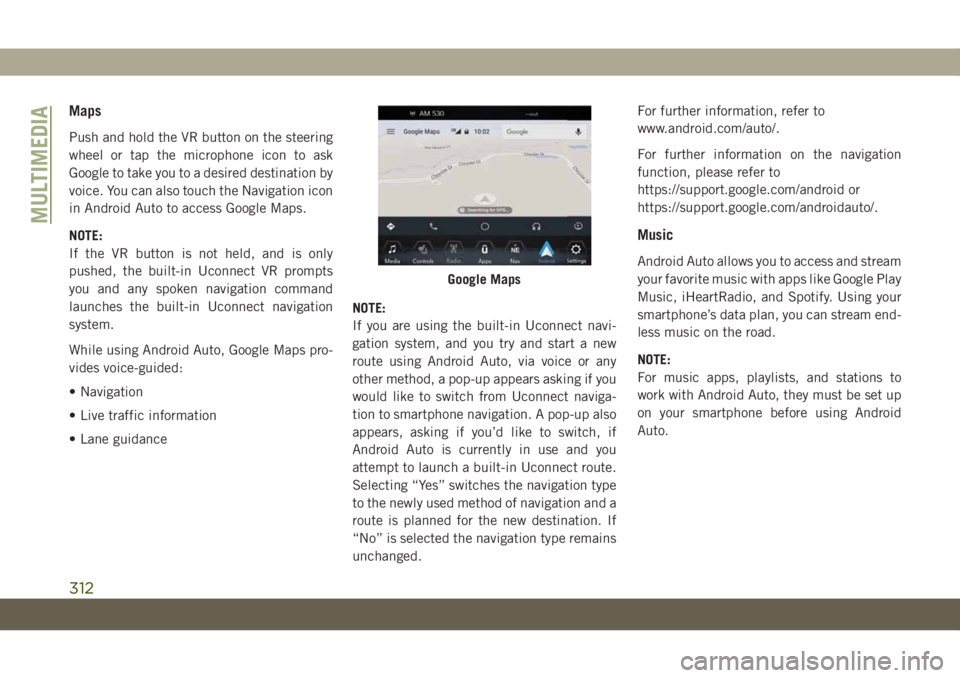
Maps
Push and hold the VR button on the steering
wheel or tap the microphone icon to ask
Google to take you to a desired destination by
voice. You can also touch the Navigation icon
in Android Auto to access Google Maps.
NOTE:
If the VR button is not held, and is only
pushed, the built-in Uconnect VR prompts
you and any spoken navigation command
launches the built-in Uconnect navigation
system.
While using Android Auto, Google Maps pro-
vides voice-guided:
• Navigation
• Live traffic information
• Lane guidanceNOTE:
If you are using the built-in Uconnect navi-
gation system, and you try and start a new
route using Android Auto, via voice or any
other method, a pop-up appears asking if you
would like to switch from Uconnect naviga-
tion to smartphone navigation. A pop-up also
appears, asking if you’d like to switch, if
Android Auto is currently in use and you
attempt to launch a built-in Uconnect route.
Selecting “Yes” switches the navigation type
to the newly used method of navigation and a
route is planned for the new destination. If
“No” is selected the navigation type remains
unchanged.For further information, refer to
www.android.com/auto/.
For further information on the navigation
function, please refer to
https://support.google.com/android or
https://support.google.com/androidauto/.
Music
Android Auto allows you to access and stream
your favorite music with apps like Google Play
Music, iHeartRadio, and Spotify. Using your
smartphone’s data plan, you can stream end-
less music on the road.
NOTE:
For music apps, playlists, and stations to
work with Android Auto, they must be set up
on your smartphone before using Android
Auto.
Google Maps
MULTIMEDIA
312
Page 318 of 378
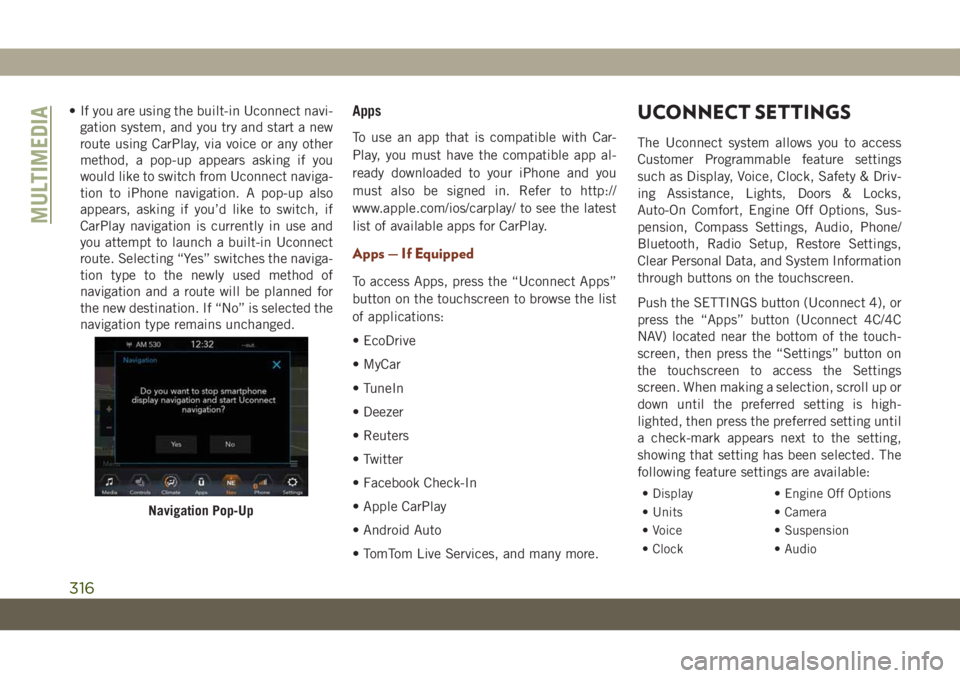
• If you are using the built-in Uconnect navi-
gation system, and you try and start a new
route using CarPlay, via voice or any other
method, a pop-up appears asking if you
would like to switch from Uconnect naviga-
tion to iPhone navigation. A pop-up also
appears, asking if you’d like to switch, if
CarPlay navigation is currently in use and
you attempt to launch a built-in Uconnect
route. Selecting “Yes” switches the naviga-
tion type to the newly used method of
navigation and a route will be planned for
the new destination. If “No” is selected the
navigation type remains unchanged.Apps
To use an app that is compatible with Car-
Play, you must have the compatible app al-
ready downloaded to your iPhone and you
must also be signed in. Refer to http://
www.apple.com/ios/carplay/ to see the latest
list of available apps for CarPlay.
Apps — If Equipped
To access Apps, press the “Uconnect Apps”
button on the touchscreen to browse the list
of applications:
• EcoDrive
• MyCar
• TuneIn
• Deezer
• Reuters
• Twitter
• Facebook Check-In
• Apple CarPlay
• Android Auto
• TomTom Live Services, and many more.
UCONNECT SETTINGS
The Uconnect system allows you to access
Customer Programmable feature settings
such as Display, Voice, Clock, Safety & Driv-
ing Assistance, Lights, Doors & Locks,
Auto-On Comfort, Engine Off Options, Sus-
pension, Compass Settings, Audio, Phone/
Bluetooth, Radio Setup, Restore Settings,
Clear Personal Data, and System Information
through buttons on the touchscreen.
Push the SETTINGS button (Uconnect 4), or
press the “Apps” button (Uconnect 4C/4C
NAV) located near the bottom of the touch-
screen, then press the “Settings” button on
the touchscreen to access the Settings
screen. When making a selection, scroll up or
down until the preferred setting is high-
lighted, then press the preferred setting until
a check-mark appears next to the setting,
showing that setting has been selected. The
following feature settings are available:
• Display • Engine Off Options
• Units • Camera
• Voice • Suspension
• Clock • Audio
Navigation Pop-Up
MULTIMEDIA
316
Page 320 of 378
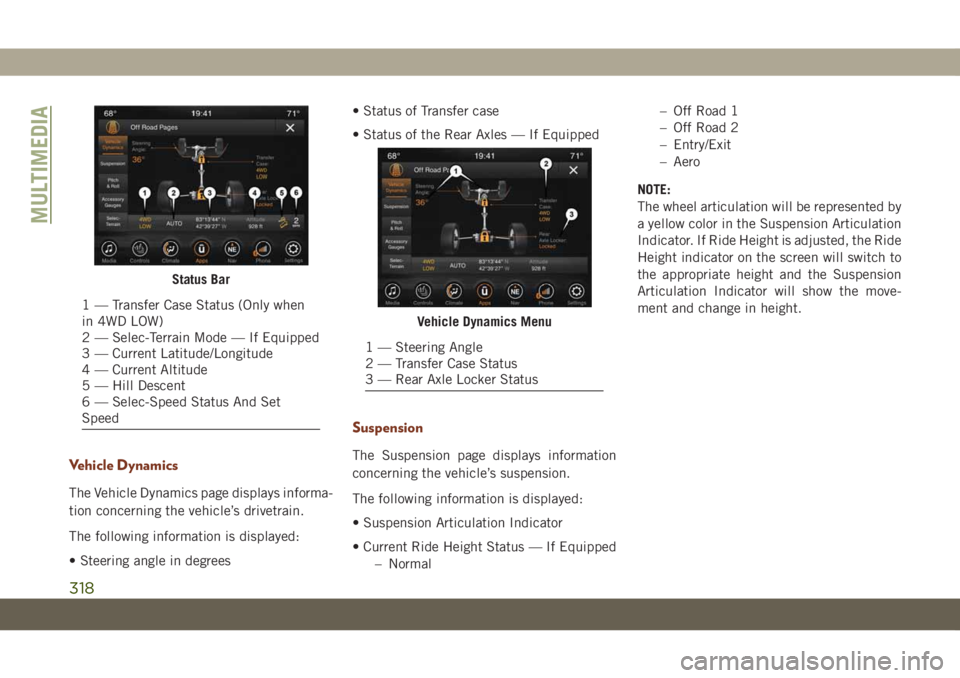
Vehicle Dynamics
The Vehicle Dynamics page displays informa-
tion concerning the vehicle’s drivetrain.
The following information is displayed:
• Steering angle in degrees• Status of Transfer case
• Status of the Rear Axles — If Equipped
Suspension
The Suspension page displays information
concerning the vehicle’s suspension.
The following information is displayed:
• Suspension Articulation Indicator
• Current Ride Height Status — If Equipped
– Normal– Off Road 1
– Off Road 2
– Entry/Exit
– Aero
NOTE:
The wheel articulation will be represented by
a yellow color in the Suspension Articulation
Indicator. If Ride Height is adjusted, the Ride
Height indicator on the screen will switch to
the appropriate height and the Suspension
Articulation Indicator will show the move-
ment and change in height.
Status Bar
1 — Transfer Case Status (Only when
in 4WD LOW)
2 — Selec-Terrain Mode — If Equipped
3 — Current Latitude/Longitude
4 — Current Altitude
5 — Hill Descent
6 — Selec-Speed Status And Set
Speed
Vehicle Dynamics Menu
1 — Steering Angle
2 — Transfer Case Status
3 — Rear Axle Locker Status
MULTIMEDIA
318
Page 322 of 378
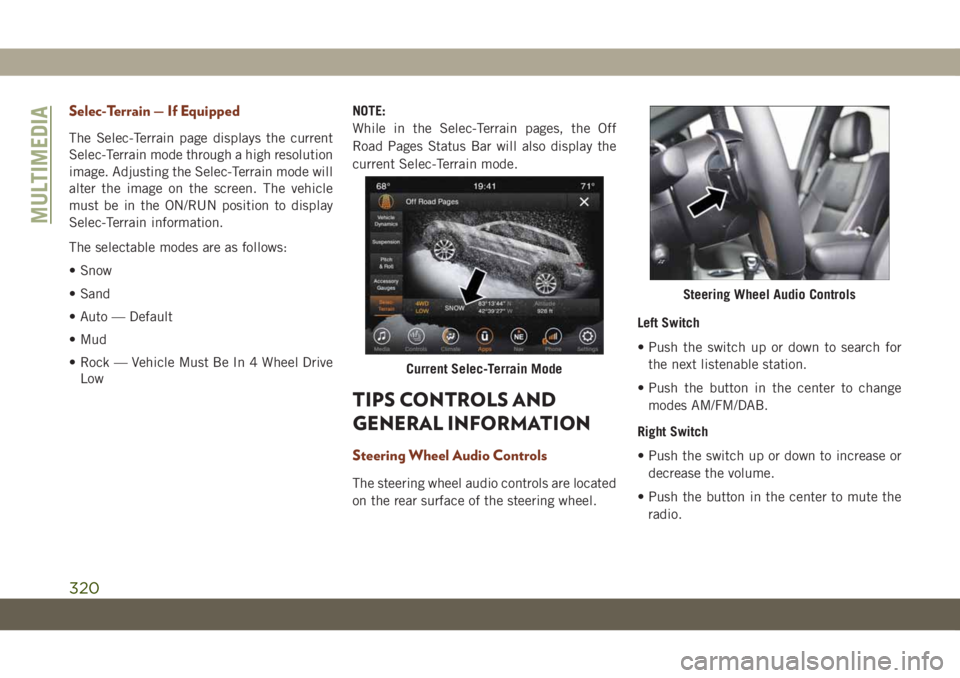
Selec-Terrain — If Equipped
The Selec-Terrain page displays the current
Selec-Terrain mode through a high resolution
image. Adjusting the Selec-Terrain mode will
alter the image on the screen. The vehicle
must be in the ON/RUN position to display
Selec-Terrain information.
The selectable modes are as follows:
• Snow
• Sand
• Auto — Default
• Mud
• Rock — Vehicle Must Be In 4 Wheel Drive
LowNOTE:
While in the Selec-Terrain pages, the Off
Road Pages Status Bar will also display the
current Selec-Terrain mode.
TIPS CONTROLS AND
GENERAL INFORMATION
Steering Wheel Audio Controls
The steering wheel audio controls are located
on the rear surface of the steering wheel.Left Switch
• Push the switch up or down to search for
the next listenable station.
• Push the button in the center to change
modes AM/FM/DAB.
Right Switch
• Push the switch up or down to increase or
decrease the volume.
• Push the button in the center to mute the
radio.
Current Selec-Terrain Mode
Steering Wheel Audio Controls
MULTIMEDIA
320
Page 324 of 378
Audio Jack (AUX)
• The AUX allows a device to be plugged into
the radio and utilize the vehicle’s sound
system, using a 3.5 mm audio cable, to
amplify the source and play through the
vehicle speakers.
• Pressing the “AUX” button on the touch-
screen will change the mode to auxiliary
device if the audio jack is connected, allow-
ing the music from your device to be heard
through the vehicle's speakers. To activate
the AUX, plug in the audio jack.
• The functions of the device are controlled
using the device buttons. The volume may
be controlled using the radio or device.
USB Port
• Connect your compatible device into the
USB Port using a USB cable. USB Memory
sticks with audio files can also be used.
Audio from the device can be played on the
vehicle’s sound system while providing
metadata (artist, track title, album, etc.)
information on the radio display.• When connected, the compatible USB de-
vice can be controlled using the radio or
Steering Wheel Audio Controls to play, skip
to the next or previous track, browse, and
list the contents.
• The battery charges when plugged into the
USB port (if supported by the specific de-
vice).
• To route the USB cable out of the center
console, use the access cut out.
NOTE:
When connecting your device for the first
time, the system may take several minutes to
read your music, depending on the number of
files. For example, the system will take ap-
proximately five minutes for every
1,000 songs loaded on the device. Also dur-
ing the reading process, the Shuffle and
Browse functions will be disabled. This pro-
cess is needed to ensure the full use of your
features and only happens the first time it is
connected. After the first time, the reading
process of your device will take considerably
less time unless changes are made or new
songs are added to the playlist.
Bluetooth Streaming Audio
If using a Bluetooth equipped device you may
also be able to stream music to your vehicle's
sound system. Your connected device must
be Bluetooth compatible and paired with
your system (see Uconnect Phone for pairing
instructions). You can access the music from
your connected Bluetooth device by pressing
the “Bluetooth” button on the touchscreen
while in Media mode.
UCONNECT REAR SEAT
ENTERTAINMENT (RSE)
SYSTEM — IF EQUIPPED
Your Rear Seat Entertainment System is de-
signed to give your family years of enjoyment.
You can play your favorite CDs, DVDs or
Blu-ray Discs, listen to audio over the wire-
less headphones, or plug and play a variety of
standard video games or audio devices.
Getting Started
•Screen(s) located in the rear of front seats:
Open the LCD screen cover by lifting up on
the cover.
MULTIMEDIA
322
Page 345 of 378
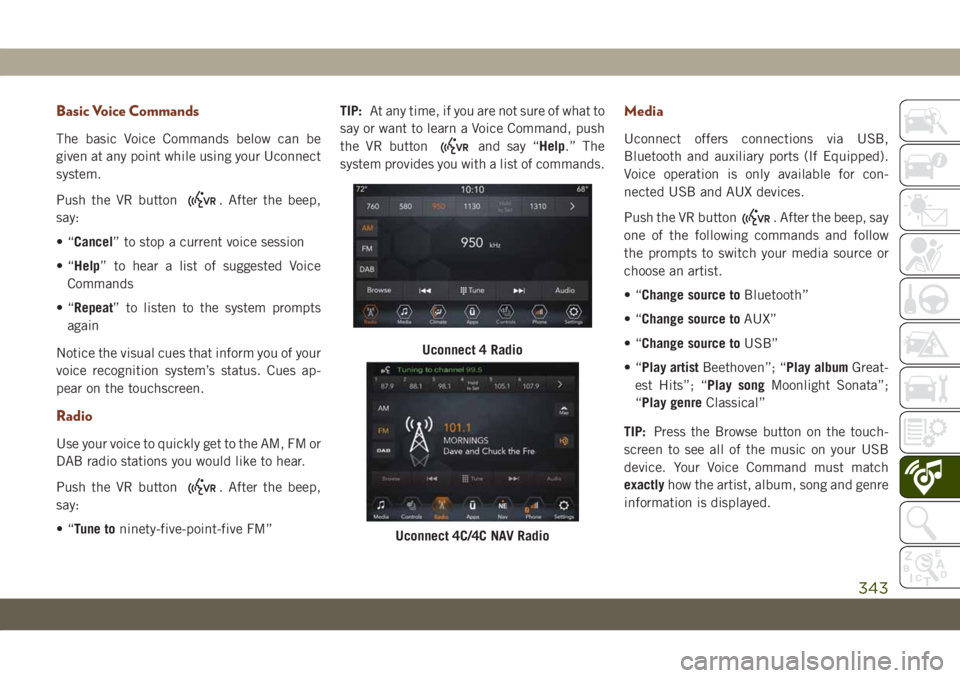
Basic Voice Commands
The basic Voice Commands below can be
given at any point while using your Uconnect
system.
Push the VR button
. After the beep,
say:
•“Cancel” to stop a current voice session
•“Help” to hear a list of suggested Voice
Commands
•“Repeat” to listen to the system prompts
again
Notice the visual cues that inform you of your
voice recognition system’s status. Cues ap-
pear on the touchscreen.
Radio
Use your voice to quickly get to the AM, FM or
DAB radio stations you would like to hear.
Push the VR button
. After the beep,
say:
•“Tune toninety-five-point-five FM”TIP:At any time, if you are not sure of what to
say or want to learn a Voice Command, push
the VR button
and say “Help.” The
system provides you with a list of commands.
Media
Uconnect offers connections via USB,
Bluetooth and auxiliary ports (If Equipped).
Voice operation is only available for con-
nected USB and AUX devices.
Push the VR button
. After the beep, say
one of the following commands and follow
the prompts to switch your media source or
choose an artist.
•“Change source toBluetooth”
•“Change source toAUX”
•“Change source toUSB”
•“Play artistBeethoven”; “Play albumGreat-
est Hits”; “Play songMoonlight Sonata”;
“Play genreClassical”
TIP:Press the Browse button on the touch-
screen to see all of the music on your USB
device. Your Voice Command must match
exactlyhow the artist, album, song and genre
information is displayed.
Uconnect 4 Radio
Uconnect 4C/4C NAV Radio
343
Page 370 of 378
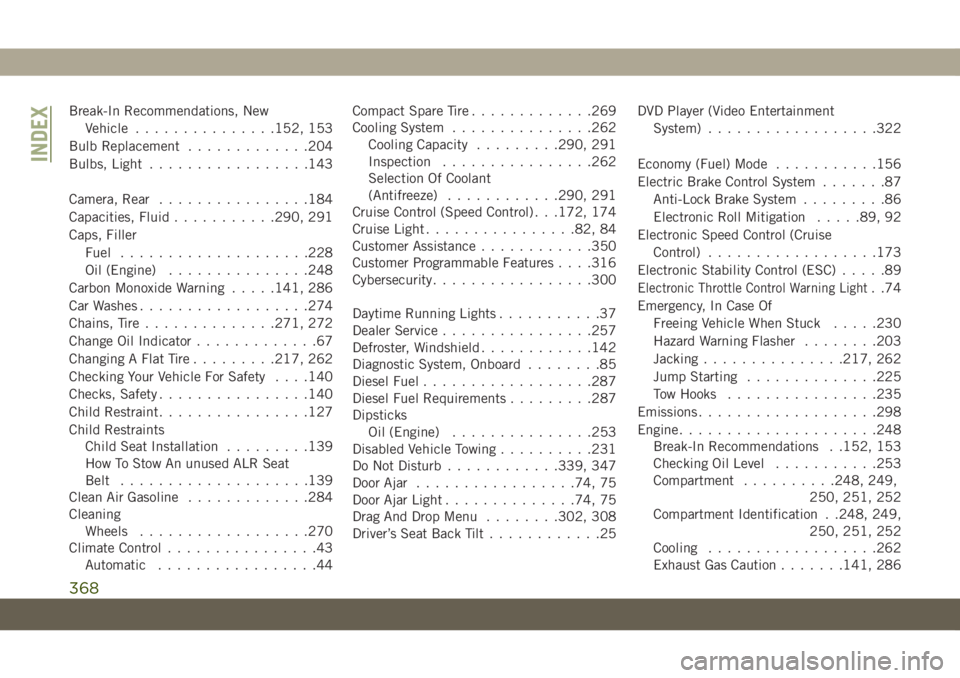
Break-In Recommendations, New
Vehicle...............152, 153
Bulb Replacement.............204
Bulbs, Light.................143
Camera, Rear................184
Capacities, Fluid...........290, 291
Caps, Filler
Fuel....................228
Oil (Engine)...............248
Carbon Monoxide Warning.....141, 286
Car Washes..................274
Chains, Tire..............271, 272
Change Oil Indicator.............67
Changing A Flat Tire.........217, 262
Checking Your Vehicle For Safety. . . .140
Checks, Safety................140
Child Restraint................127
Child Restraints
Child Seat Installation.........139
How To Stow An unused ALR Seat
Belt....................139
Clean Air Gasoline.............284
Cleaning
Wheels..................270
Climate Control................43
Automatic.................44Compact Spare Tire.............269
Cooling System...............262
Cooling Capacity.........290, 291
Inspection................262
Selection Of Coolant
(Antifreeze)............290, 291
Cruise Control (Speed Control) . . .172, 174
Cruise Light................82, 84
Customer Assistance............350
Customer Programmable Features. . . .316
Cybersecurity.................300
Daytime Running Lights...........37
Dealer Service................257
Defroster, Windshield............142
Diagnostic System, Onboard........85
Diesel Fuel
.................
.287
Diesel
Fuel Requirements.........287
Dipsticks
Oil (Engine)...............253
Disabled Vehicle Towing..........231
Do Not Disturb............339, 347
Door Ajar.................74, 75
Door Ajar Light..............74, 75
Drag And Drop Menu........302, 308
Driver’s Seat Back Tilt............25DVD Player (Video Entertainment
System)..................322
Economy (Fuel) Mode...........156
Electric Brake Control System.......87
Anti-Lock Brake System.........86
Electronic Roll Mitigation.....89, 92
Electronic Speed Control (Cruise
Control)..................173
Electronic Stability Control (ESC).....89
E
lectronic Throttle Control Warning Light. .74
Emergency, In Case Of
Freeing Vehicle When Stuck.....230
Hazard Warning Flasher........203
Jacking...............217, 262
Jump Starting..............225
Tow Hooks................235
Emissions...................298
Engine.....................248
Break-In Recommendations . .152, 153
Checking Oil Level...........253
Compartment..........248, 249,
250, 251, 252
Compartment Identification . .248, 249,
250, 251, 252
Cooling..................262
Exhaust Gas Caution.......141, 286
INDEX
368