key JEEP GRAND CHEROKEE 2020 Owner handbook (in English)
[x] Cancel search | Manufacturer: JEEP, Model Year: 2020, Model line: GRAND CHEROKEE, Model: JEEP GRAND CHEROKEE 2020Pages: 378, PDF Size: 6.88 MB
Page 4 of 378
HOW TO USE THIS MANUAL
Essential Information
Each time direction instructions (left/right or
forwards/backwards) about the vehicle are
given, these must be intended as regarding
an occupant in the driver's seat. Special
cases not complying with this rule will be
properly specified in the text.
The figures in this User Guide are provided by
way of example only: this might imply that
some details of the image do not correspond
to the actual arrangement of your vehicle.
In addition, the User Guide has been con-
ceived considering vehicles with the steering
wheel on the left side; it is therefore possible
that in vehicles with the steering wheel on the
right side, the position or construction of
some controls is not exactly mirror-like with
respect to the figure.
To identify the chapter with the information
needed you can consult the index at the end
of this User Guide.Chapters can be rapidly identified with dedi-
cated graphic tabs, at the side of each odd
page. A few pages further there is a key for
getting to know the chapter order and the
relevant symbols in the tabs. There is always
a textual indication of the current chapter at
the side of each even page.
Symbols
Some vehicle components have colored la-
bels whose symbols indicate precautions to
be observed when using this component.
Refer to “Warning Lights and Messages” in
“Getting To Know Your Instrument Panel” for
further information on the symbols used in
your vehicle.
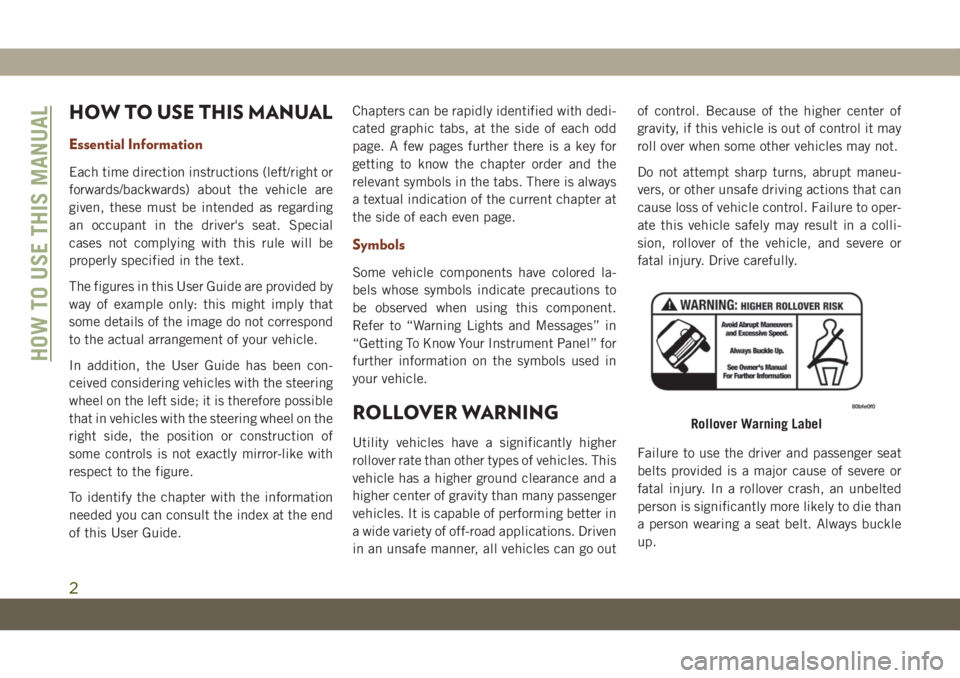
ROLLOVER WARNING
Utility vehicles have a significantly higher
rollover rate than other types of vehicles. This
vehicle has a higher ground clearance and a
higher center of gravity than many passenger
vehicles. It is capable of performing better in
a wide variety of off-road applications. Driven
in an unsafe manner, all vehicles can go outof control. Because of the higher center of
gravity, if this vehicle is out of control it may
roll over when some other vehicles may not.
Do not attempt sharp turns, abrupt maneu-
vers, or other unsafe driving actions that can
cause loss of vehicle control. Failure to oper-
ate this vehicle safely may result in a colli-
sion, rollover of the vehicle, and severe or
fatal injury. Drive carefully.
Failure to use the driver and passenger seat
belts provided is a major cause of severe or
fatal injury. In a rollover crash, an unbelted
person is significantly more likely to die than
a person wearing a seat belt. Always buckle
up.
Rollover Warning Label
HOW TO USE THIS MANUAL
2
Page 8 of 378
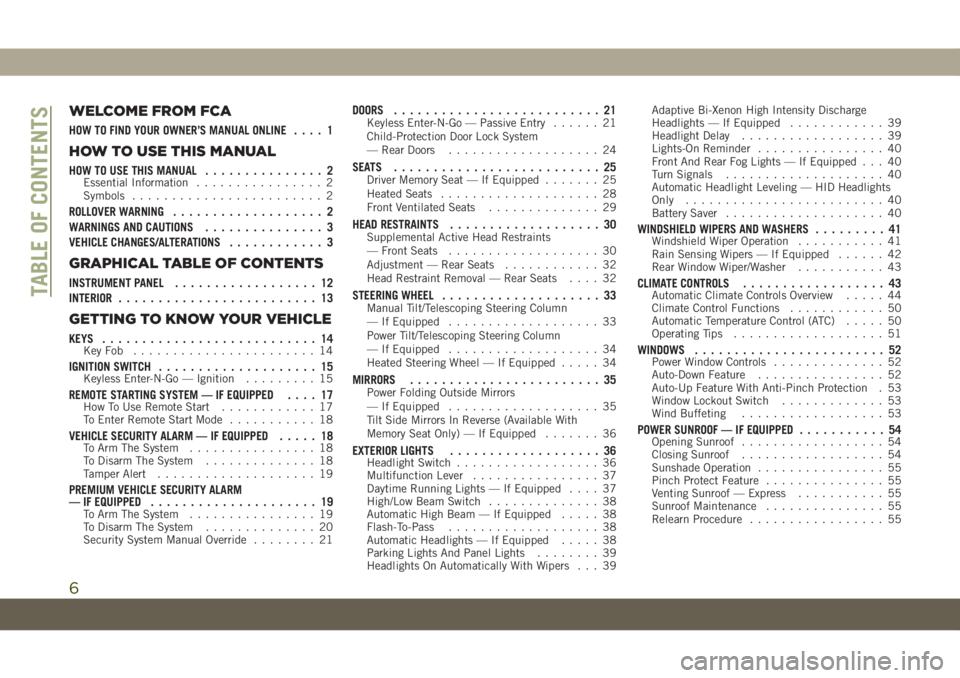
WELCOME FROM FCA
HOW TO FIND YOUR OWNER’S MANUAL ONLINE.... 1
HOW TO USE THIS MANUAL
HOW TO USE THIS MANUAL............... 2Essential Information................ 2
Symbols........................ 2
ROLLOVER WARNING................... 2
WARNINGS AND CAUTIONS............... 3
VEHICLE CHANGES/ALTERATIONS............ 3
GRAPHICAL TABLE OF CONTENTS
INSTRUMENT PANEL.................. 12
INTERIOR......................... 13
GETTING TO KNOW YOUR VEHICLE
KEYS........................... 14KeyFob ....................... 14
IGNITION SWITCH.................... 15Keyless Enter-N-Go — Ignition......... 15
REMOTE STARTING SYSTEM — IF EQUIPPED.... 17How To Use Remote Start............ 17
To Enter Remote Start Mode........... 18
VEHICLE SECURITY ALARM — IF EQUIPPED..... 18To Arm The System................ 18
To Disarm The System.............. 18
Tamper Alert.................... 19
PREMIUM VEHICLE SECURITY ALARM
— IF EQUIPPED..................... 19
To Arm The System................ 19
To Disarm The System.............. 20
Security System Manual Override........ 21
DOORS.......................... 21Keyless Enter-N-Go — Passive Entry...... 21
Child-Protection Door Lock System
— Rear Doors................... 24
SEATS .......................... 25Driver Memory Seat — If Equipped....... 25
Heated Seats.................... 28
Front Ventilated Seats.............. 29
HEAD RESTRAINTS................... 30Supplemental Active Head Restraints
— Front Seats................... 30
Adjustment — Rear Seats............ 32
Head Restraint Removal — Rear Seats.... 32
STEERING WHEEL.................... 33Manual Tilt/Telescoping Steering Column
— If Equipped................... 33
Power Tilt/Telescoping Steering Column
— If Equipped................... 34
Heated Steering Wheel — If Equipped..... 34
MIRRORS........................ 35Power Folding Outside Mirrors
— If Equipped................... 35
Tilt Side Mirrors In Reverse (Available With
Memory Seat Only) — If Equipped....... 36
EXTERIOR LIGHTS................... 36Headlight Switch.................. 36
Multifunction Lever................ 37
Daytime Running Lights — If Equipped.... 37
High/Low Beam Switch.............. 38
Automatic High Beam — If Equipped..... 38
Flash-To-Pass................... 38
Automatic Headlights — If Equipped..... 38
Parking Lights And Panel Lights........ 39
Headlights On Automatically With Wipers . . . 39Adaptive Bi-Xenon High Intensity Discharge
Headlights — If Equipped............ 39
Headlight Delay.................. 39
Lights-On Reminder................ 40
Front And Rear Fog Lights — If Equipped . . . 40
Turn Signals.................... 40
Automatic Headlight Leveling — HID Headlights
Only......................... 40
Battery Saver.................... 40
WINDSHIELD WIPERS AND WASHERS......... 41Windshield Wiper Operation........... 41
Rain Sensing Wipers — If Equipped...... 42
Rear Window Wiper/Washer........... 43
CLIMATE CONTROLS.................. 43Automatic Climate Controls Overview..... 44
Climate Control Functions............ 50
Automatic Temperature Control (ATC)..... 50
Operating Tips................... 51
WINDOWS........................ 52Power Window Controls.............. 52
Auto-Down Feature................ 52
Auto-Up Feature With Anti-Pinch Protection . 53
Window Lockout Switch............. 53
Wind Buffeting.................. 53
POWER SUNROOF — IF EQUIPPED........... 54Opening Sunroof.................. 54
Closing Sunroof.................. 54
Sunshade Operation................ 55
Pinch Protect Feature............... 55
Venting Sunroof — Express........... 55
Sunroof Maintenance............... 55
Relearn Procedure................. 55
TABLE OF CONTENTS
6
Page 10 of 378
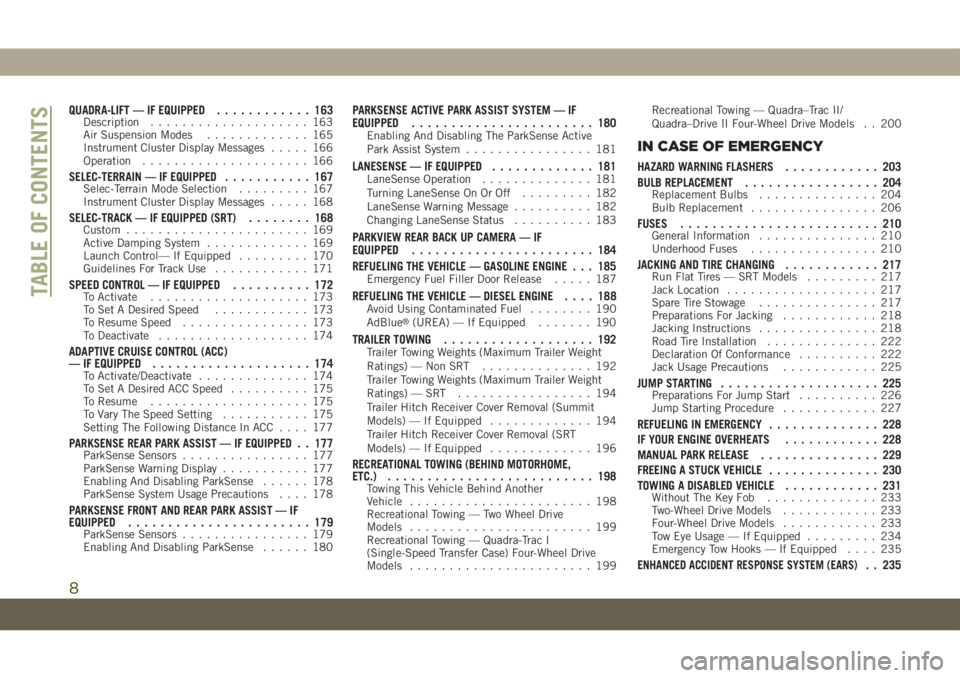
QUADRA-LIFT — IF EQUIPPED............ 163Description.................... 163
Air Suspension Modes............. 165
Instrument Cluster Display Messages..... 166
Operation..................... 166
SELEC-TERRAIN — IF EQUIPPED........... 167Selec-Terrain Mode Selection......... 167
Instrument Cluster Display Messages..... 168
SELEC-TRACK — IF EQUIPPED (SRT)........ 168Custom....................... 169
Active Damping System............. 169
Launch Control— If Equipped......... 170
Guidelines For Track Use............ 171
SPEED CONTROL — IF EQUIPPED.......... 172To Activate.................... 173
To Set A Desired Speed............ 173
To Resume Speed................ 173
To Deactivate................... 174
ADAPTIVE CRUISE CONTROL (ACC)
— IF EQUIPPED.................... 174
To Activate/Deactivate.............. 174
To Set A Desired ACC Speed.......... 175
To Resume.................... 175
To Vary The Speed Setting........... 175
Setting The Following Distance In ACC.... 177
PARKSENSE REAR PARK ASSIST — IF EQUIPPED . . 177ParkSense Sensors................ 177
ParkSense Warning Display........... 177
Enabling And Disabling ParkSense...... 178
ParkSense System Usage Precautions.... 178
PARKSENSE FRONT AND REAR PARK ASSIST — IF
EQUIPPED....................... 179
ParkSense Sensors................ 179
Enabling And Disabling ParkSense...... 180
PARKSENSE ACTIVE PARK ASSIST SYSTEM — IF
EQUIPPED....................... 180
Enabling And Disabling The ParkSense Active
Park Assist System................ 181
LANESENSE — IF EQUIPPED............. 181LaneSense Operation.............. 181
Turning LaneSense On Or Off......... 182
LaneSense Warning Message.......... 182
Changing LaneSense Status.......... 183
PARKVIEW REAR BACK UP CAMERA — IF
EQUIPPED....................... 184
REFUELING THE VEHICLE — GASOLINE ENGINE . . . 185
Emergency Fuel Filler Door Release..... 187
REFUELING THE VEHICLE — DIESEL ENGINE.... 188Avoid Using Contaminated Fuel........ 190
AdBlue®(UREA) — If Equipped....... 190
TRAILER TOWING................... 192Trailer Towing Weights (Maximum Trailer Weight
Ratings) — Non SRT.............. 192
Trailer Towing Weights (Maximum Trailer Weight
Ratings) — SRT................. 194
Trailer Hitch Receiver Cover Removal (Summit
Models) — If Equipped............. 194
Trailer Hitch Receiver Cover Removal (SRT
Models) — If Equipped............. 196
RECREATIONAL TOWING (BEHIND MOTORHOME,
ETC.).......................... 198
Towing This Vehicle Behind Another
Vehicle....................... 198
Recreational Towing — Two Wheel Drive
Models....................... 199
Recreational Towing — Quadra-Trac I
(Single-Speed Transfer Case) Four-Wheel Drive
Models....................... 199Recreational Towing — Quadra–Trac II/
Quadra–Drive II Four-Wheel Drive Models . . 200
IN CASE OF EMERGENCY
HAZARD WARNING FLASHERS............ 203
BULB REPLACEMENT................. 204
Replacement Bulbs............... 204
Bulb Replacement................ 206
FUSES......................... 210General Information............... 210
Underhood Fuses................ 210
JACKING AND TIRE CHANGING............ 217Run Flat Tires — SRT Models......... 217
Jack Location................... 217
Spare Tire Stowage............... 217
Preparations For Jacking............ 218
Jacking Instructions............... 218
Road Tire Installation.............. 222
Declaration Of Conformance.......... 222
Jack Usage Precautions............ 225
JUMP STARTING.................... 225Preparations For Jump Start.......... 226
Jump Starting Procedure............ 227
REFUELING IN EMERGENCY.............. 228
IF YOUR ENGINE OVERHEATS............ 228
MANUAL PARK RELEASE............... 229
FREEING A STUCK VEHICLE.............. 230
TOWING A DISABLED VEHICLE............ 231
Without The Key Fob.............. 233
Two-Wheel Drive Models............ 233
Four-Wheel Drive Models............ 233
Tow Eye Usage — If Equipped......... 234
Emergency Tow Hooks — If Equipped.... 235
ENHANCED ACCIDENT RESPONSE SYSTEM (EARS). . 235
TABLE OF CONTENTS
8
Page 13 of 378
SLOVENIA..................... 362
SOUTH AFRICA................. 362
SPAIN ....................... 362
SWEDEN..................... 363
SWITZERLAND.................. 363
TAIWAN ...................... 363
TURKEY...................... 363
UKRAINE..................... 364
UNITED KINGDOM............... 364
URUGUAY..................... 364
VENEZUELA................... 365
INDEX....................... 367
11
Page 16 of 378
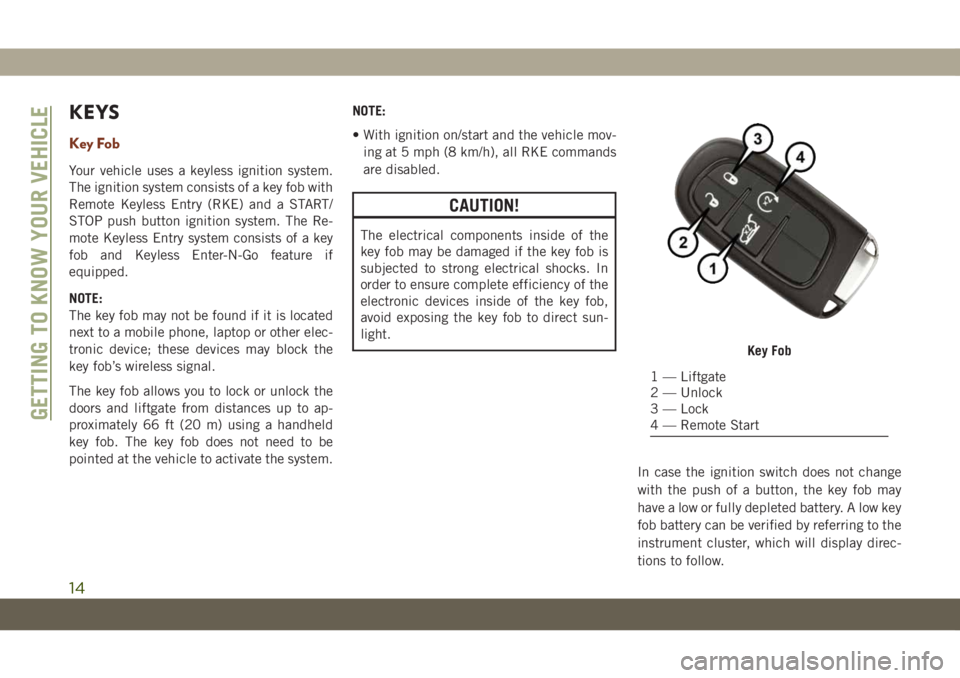
KEYS
Key Fob
Your vehicle uses a keyless ignition system.
The ignition system consists of a key fob with
Remote Keyless Entry (RKE) and a START/
STOP push button ignition system. The Re-
mote Keyless Entry system consists of a key
fob and Keyless Enter-N-Go feature if
equipped.
NOTE:
The key fob may not be found if it is located
next to a mobile phone, laptop or other elec-
tronic device; these devices may block the
key fob’s wireless signal.
The key fob allows you to lock or unlock the
doors and liftgate from distances up to ap-
proximately 66 ft (20 m) using a handheld
key fob. The key fob does not need to be
pointed at the vehicle to activate the system.NOTE:
• With ignition on/start and the vehicle mov-
ing at 5 mph (8 km/h), all RKE commands
are disabled.
CAUTION!
The electrical components inside of the
key fob may be damaged if the key fob is
subjected to strong electrical shocks. In
order to ensure complete efficiency of the
electronic devices inside of the key fob,
avoid exposing the key fob to direct sun-
light.
In case the ignition switch does not change
with the push of a button, the key fob may
have a low or fully depleted battery. A low key
fob battery can be verified by referring to the
instrument cluster, which will display direc-
tions to follow.
Key Fob
1 — Liftgate
2 — Unlock
3 — Lock
4 — Remote Start
GETTING TO KNOW YOUR VEHICLE
14
Page 17 of 378
To Unlock The Doors And Liftgate
Push and release the unlock button on the
key fob once to unlock the driver's door or
twice within five seconds to unlock all doors
and the liftgate.
All doors can be programmed to unlock on the
first push of the unlock button. Refer to
“Uconnect Settings” in “Multimedia” in the
Owner’s Manual for further information.
NOTE:
If the vehicle is unlocked by a key fob, and no
door is opened within 60 seconds, the vehicle
will re-lock and if equipped, the security
alarm will arm.
To Lock The Doors And Liftgate
Push and release the lock button on the key
fob to lock all doors and liftgate.
If one or more doors are open, or the liftgate is
open, the doors will lock. The doors will
unlock again automatically if the key is left
inside the passenger compartment, otherwise
the doors will stay locked.
Request For Additional Key Fobs
NOTE:
Only key fobs that are programmed to the
vehicle electronics can be used to start and
operate the vehicle. Once a key fob is pro-
grammed to a vehicle, it cannot be pro-
grammed to any other vehicle.
WARNING!
• Always remove the key fobs from the
vehicle and lock all doors when leaving
the vehicle unattended.
• Always remember to place the ignition in
the OFF mode.
Duplication of key fobs may be performed at
an authorized dealer. This procedure consists
of programming a blank key fob to the vehicle
electronics. A blank key fob is one that has
never been programmed.NOTE:
• When having the Sentry Key Immobilizer
System serviced, bring all vehicle keys with
you to an authorized dealer.
• Keys must be ordered to the correct key cut
to match the vehicle locks.
NOTE:
Black Keys (6.4L) must be replaced with
Black Keys and Red Keys (6.2L) must be
replaced with Red Keys.
IGNITION SWITCH
Keyless Enter-N-Go — Ignition
This feature allows the driver to operate the
ignition switch with the push of a button as
long as the key fob is in the passenger com-
partment.
The Keyless Push Button Ignition has several
operating modes that are labeled and will
illuminate when in position. These modes are
OFF, ACC, RUN, and START.
15
Page 18 of 378
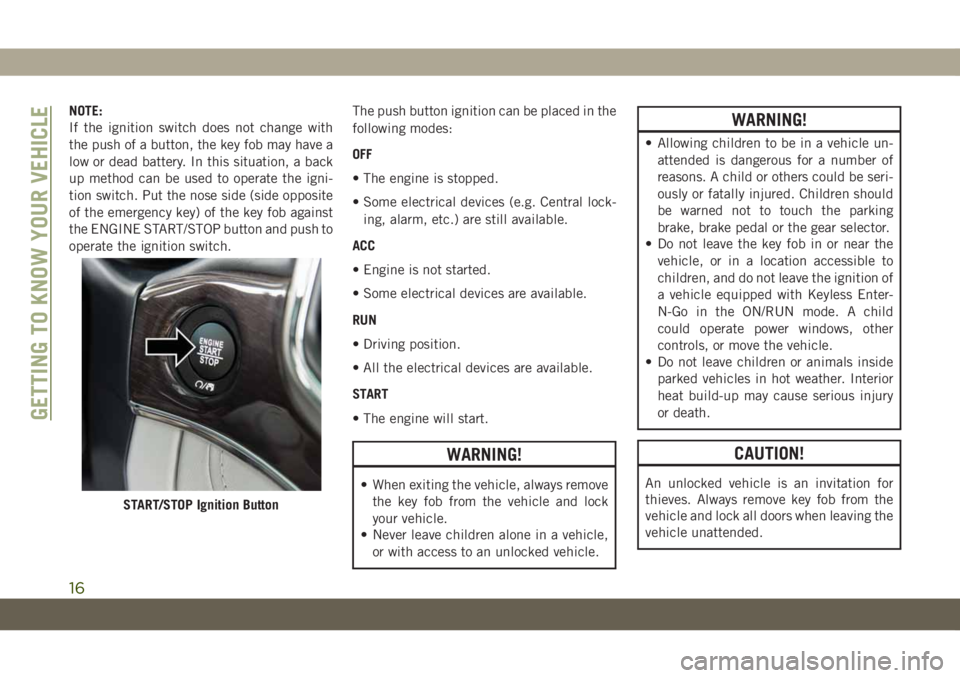
NOTE:
If the ignition switch does not change with
the push of a button, the key fob may have a
low or dead battery. In this situation, a back
up method can be used to operate the igni-
tion switch. Put the nose side (side opposite
of the emergency key) of the key fob against
the ENGINE START/STOP button and push to
operate the ignition switch.The push button ignition can be placed in the
following modes:
OFF
• The engine is stopped.
• Some electrical devices (e.g. Central lock-
ing, alarm, etc.) are still available.
ACC
• Engine is not started.
• Some electrical devices are available.
RUN
• Driving position.
• All the electrical devices are available.
START
• The engine will start.
WARNING!
• When exiting the vehicle, always remove
the key fob from the vehicle and lock
your vehicle.
• Never leave children alone in a vehicle,
or with access to an unlocked vehicle.
WARNING!
• Allowing children to be in a vehicle un-
attended is dangerous for a number of
reasons. A child or others could be seri-
ously or fatally injured. Children should
be warned not to touch the parking
brake, brake pedal or the gear selector.
• Do not leave the key fob in or near the
vehicle, or in a location accessible to
children, and do not leave the ignition of
a vehicle equipped with Keyless Enter-
N-Go in the ON/RUN mode. A child
could operate power windows, other
controls, or move the vehicle.
• Do not leave children or animals inside
parked vehicles in hot weather. Interior
heat build-up may cause serious injury
or death.
CAUTION!
An unlocked vehicle is an invitation for
thieves. Always remove key fob from the
vehicle and lock all doors when leaving the
vehicle unattended.
START/STOP Ignition Button
GETTING TO KNOW YOUR VEHICLE
16
Page 19 of 378
NOTE:
Refer to "Starting The Engine," in "Starting
And Operating" in the Owners Manual for
further information.
REMOTE STARTING
SYSTEM — IF EQUIPPED
• Push the remote start button on the key fob
twice within five seconds. Pushing the re-
mote start button a third time shuts the
engine off.
• With remote start, the engine will only run
for 15 minutes (time out) unless the igni-
tion is placed in the ON/RUN position.
• The vehicle must be manually started with
a push of the ignition START/STOP button
after two consecutive time outs.
WARNING!
• Do not start or run an engine in a closed
garage or confined area. Exhaust gas
contains Carbon Monoxide (CO) which
is odorless and colorless. Carbon Mon-
WARNING!
oxide is poisonous and can cause seri-
ous injury or death when inhaled.
• Keep key fobs away from children. Op-
eration of the Remote Start System,
windows, door locks or other controls
could cause serious injury or death.
How To Use Remote Start
• Push Remote Start button on the key fob
twice within five seconds. Pushing the Re-
mote Start button a third time shuts the
engine off.
• With remote start, the engine will only run
for 15 minutes (time out) unless the igni-
tion is placed in the ON/RUN position.
• The vehicle must be manually started with
a push of the ignition START/STOP button
after two consecutive time outs.
All of the following conditions must be met
before the engine will remote start:
• Gear Selector in PARK
• Doors closed
• Hood closed• Liftgate closed
• Hazard switch off
• Brake switch inactive (brake pedal not
pushed)
• Battery at an acceptable charge level
• System not disabled from previous remote
start event
• Vehicle alarm system indicator flashing
• Ignition in STOP/OFF position
• Fuel level meets minimum requirement
WARNING!
• Do not start or run an engine in a closed
garage or confined area. Exhaust gas
contains Carbon Monoxide (CO) which
is odorless and colorless. Carbon Mon-
oxide is poisonous and can cause seri-
ous injury or death when inhaled.
• Keep key fobs away from children. Op-
eration of the Remote Start System,
windows, door locks or other controls
could cause serious injury or death.
17
Page 20 of 378
To Enter Remote Start Mode
Push and release the Remote Start button on
the key fob twice within five seconds. The
vehicle doors will lock, the turn signals will
flash twice, and the horn will chirp twice.
Then the engine will start, and the vehicle
will remain in the Remote Start mode for a
15-minute cycle.
NOTE:
• If an engine fault is present or fuel level is
low, the vehicle will start and then shut
down in 10 seconds.
• The park lamps will turn on and remain on
during Remote Start mode.
• For security, power window operation is
disabled when the vehicle is in the Remote
Start mode.
• The engine can be started two consecutive
times (two 15-minute cycles) with the key
fob. However, the ignition must be placed
in the ON/RUN position before you can
repeat the start sequence for a third cycle.
VEHICLE SECURITY ALARM
— IF EQUIPPED
The vehicle security alarm monitors the ve-
hicle doors, hood, liftgate, and the Keyless
Enter-N-Go — Ignition for unauthorized op-
eration. While the vehicle security alarm is
armed, interior switches for door locks and
liftgate release are disabled. If something
triggers the alarm, the vehicle security alarm
will provide the following audible and visible
signals:
• The horn will pulse.
• The turn signals will flash.
• The vehicle security light in the instrument
cluster will flash.
To Arm The System
Follow these steps to arm the vehicle security
alarm:
1. Make sure the vehicle’s ignition is placed
in the “OFF” mode.
• For vehicles equipped with Keyless En-
try, make sure the vehicle’s keyless
ignition system is OFF.2. Perform one of the following methods to
lock the vehicle:
• Push the lock button on the interior
power door lock switch with the driver
and/or passenger door open.
• Push the lock button on the exterior
Passive Entry Door Handle with a valid
key fob available in the same exterior
zone. Refer to "Doors" in "Getting To
Know Your Vehicle" in your Owner’s
Manual for further information.
• Push the lock button on the key fob.
3. If any doors are open, close them.
To Disarm The System
The vehicle security alarm can be disarmed
using any of the following methods:
• Push the unlock button on the key fob.
• Grasp the passive entry door handle to
unlock the door, refer to "Doors" in "Getting
To Know Your Vehicle" in your Owner’s
Manual for further information.
• Cycle the ignition out of the off mode to
disarm the system.GETTING TO KNOW YOUR VEHICLE
18
Page 21 of 378
NOTE:
• The driver's door key cylinder and the lift-
gate button on the key fob cannot arm or
disarm the vehicle security alarm.
• The vehicle security alarm remains armed
during power liftgate entry. Pushing the
liftgate button will not disarm the vehicle
security alarm. If someone enters the ve-
hicle through the liftgate and opens any
door, the alarm will sound.
• When the vehicle security alarm is armed,
the interior power door lock switches will
not unlock the doors.
The vehicle security alarm is designed to
protect your vehicle. However, you can create
conditions where the system will give you a
false alarm. If one of the previously described
arming sequences has occurred, the vehicle
security alarm will arm, regardless of whether
you are in the vehicle or not. If you remain in
the vehicle and open a door, the alarm will
sound. If this occurs, disarm the vehicle
security alarm.If the vehicle security alarm is armed and the
battery becomes disconnected, the vehicle
security alarm will remain armed when the
battery is reconnected; the exterior lights will
flash, and the horn will sound. If this occurs,
disarm the vehicle security alarm.
Tamper Alert
If something has triggered the vehicle secu-
rity alarm in your absence, the horn will
sound three times and the exterior lights will
blink three times when you disarm the ve-
hicle security alarm. Check the vehicle for
tampering.
PREMIUM VEHICLE
SECURITY ALARM — IF
EQUIPPED
This premium vehicle security alarm moni-
tors the vehicle doors, hood, liftgate and
ignition for unauthorized operation. When the
alarm is armed, the interior switches for door
locks, and power liftgate are disabled. If
something triggers the alarm, the vehiclesecurity alarm will provide the following au-
dible and visible signals: the horn will pulse,
and the park lamps and/or turn signals will
flash.
To Arm The System
Follow these steps to arm the security alarm:
1. Remove the key from the ignition system
(refer to "Starting The Engine" in "Starting
And Operating" for further information).
• For vehicles equipped with Keyless
Enter-N-Go, make sure the vehicle igni-
tion system is "OFF."
• For vehicles not equipped with Keyless
Enter-N-Go, make sure the vehicle igni-
tion system is "OFF" and the key is physi-
cally removed from the ignition.
2. Perform one of the following methods to
lock the vehicle:
• Push lock on the interior power door
lock switch with the driver and/or passen-
ger door open.
• Push the lock button on the exterior
Passive Entry Door Handle with a valid
key fob available in the same exterior
19