center console JEEP GRAND CHEROKEE LIMITED 2019 Owners Manual
[x] Cancel search | Manufacturer: JEEP, Model Year: 2019, Model line: GRAND CHEROKEE LIMITED, Model: JEEP GRAND CHEROKEE LIMITED 2019Pages: 626, PDF Size: 3.77 MB
Page 58 of 626
WARNING!(Continued)
•Do not place anything on the seat or seatback that
insulates against heat, such as a blanket or cushion.
This may cause the seat heater to overheat. Sitting in
a seat that has been overheated could cause serious
burns due to the increased surface temperature of the
seat.
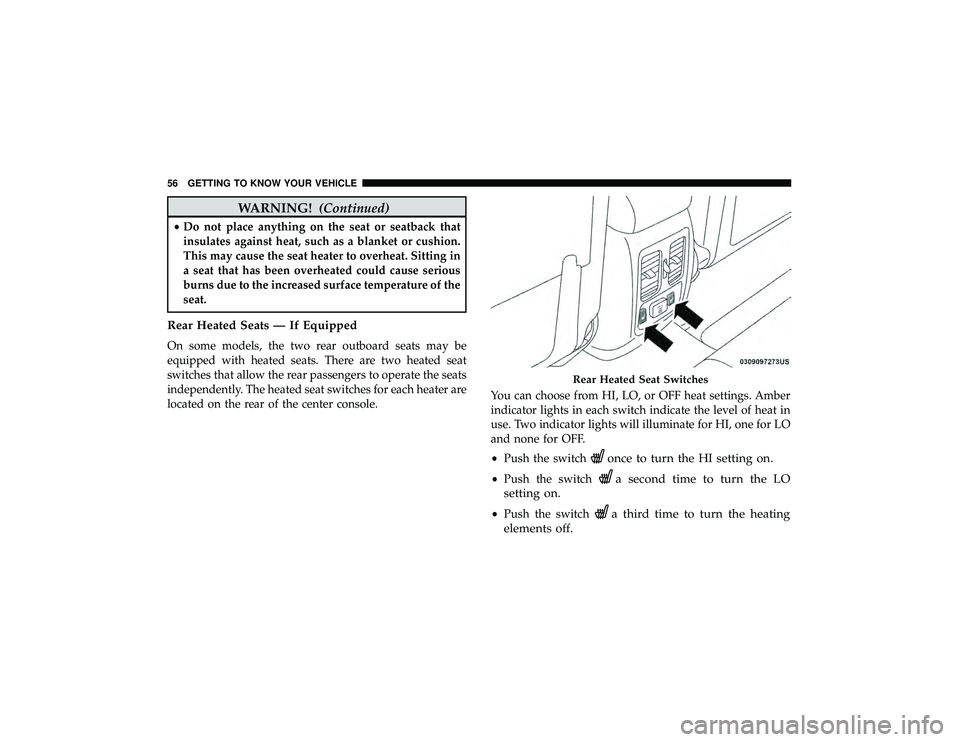
Rear Heated Seats — If Equipped
On some models, the two rear outboard seats may be
equipped with heated seats. There are two heated seat
switches that allow the rear passengers to operate the seats
independently. The heated seat switches for each heater are
located on the rear of the center console. You can choose from HI, LO, or OFF heat settings. Amber
indicator lights in each switch indicate the level of heat in
use. Two indicator lights will illuminate for HI, one for LO
and none for OFF.
•
Push the switch
once to turn the HI setting on.
•Push the switcha second time to turn the LO
setting on.
• Push the switcha third time to turn the heating
elements off.
Page 80 of 626
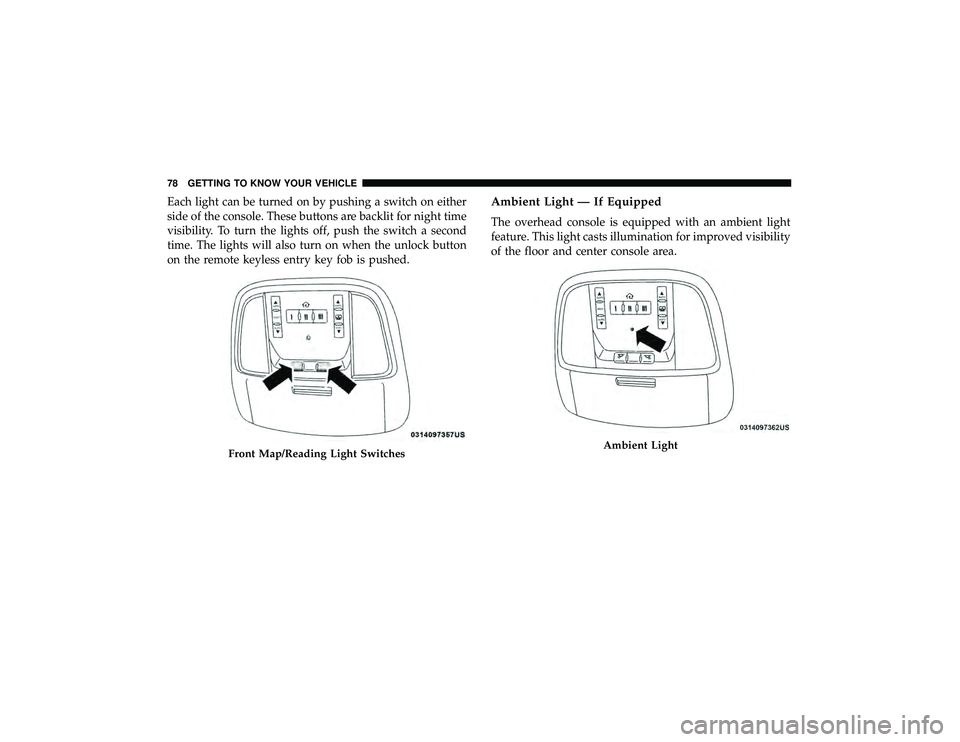
Each light can be turned on by pushing a switch on either
side of the console. These buttons are backlit for night time
visibility. To turn the lights off, push the switch a second
time. The lights will also turn on when the unlock button
on the remote keyless entry key fob is pushed.Ambient Light — If Equipped
The overhead console is equipped with an ambient light
feature. This light casts illumination for improved visibility
of the floor and center console area.
Ambient Light
78 GETTING TO KNOW YOUR VEHICLE
Page 116 of 626
WARNING!(Continued)
•Place as much cargo as possible in front of the rear
axle. Too much weight or improperly placed weight
over or behind the rear axle can cause the rear of the
vehicle to sway.
• Do not pile luggage or cargo higher than the top of
the seatback. This could impair visibility or become
a dangerous projectile in a sudden stop or accident.
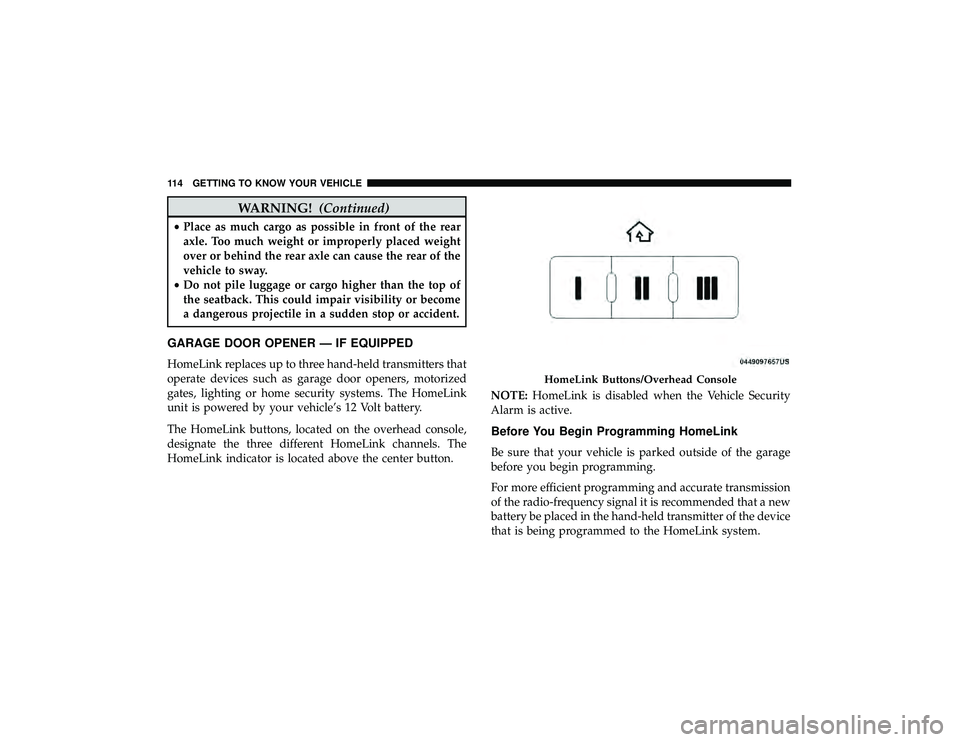
GARAGE DOOR OPENER — IF EQUIPPED
HomeLink replaces up to three hand-held transmitters that
operate devices such as garage door openers, motorized
gates, lighting or home security systems. The HomeLink
unit is powered by your vehicle’s 12 Volt battery.
The HomeLink buttons, located on the overhead console,
designate the three different HomeLink channels. The
HomeLink indicator is located above the center button. NOTE:
HomeLink is disabled when the Vehicle Security
Alarm is active.
Before You Begin Programming HomeLink
Be sure that your vehicle is parked outside of the garage
before you begin programming.
For more efficient programming and accurate transmission
of the radio-frequency signal it is recommended that a new
battery be placed in the hand-held transmitter of the device
that is being programmed to the HomeLink system.
Page 124 of 626
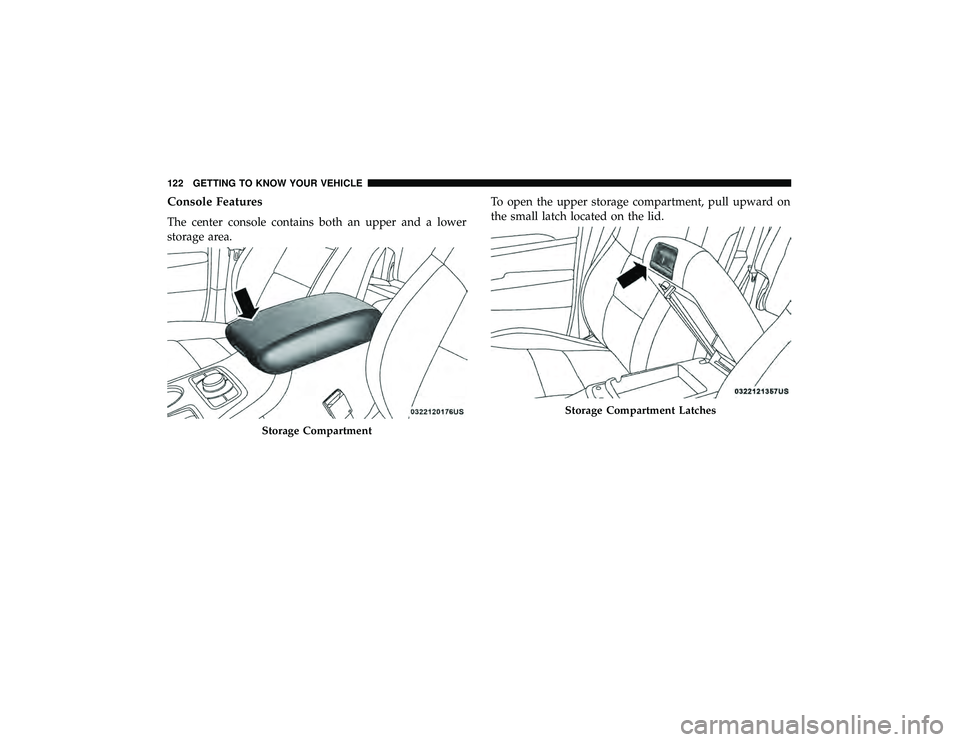
Console Features
The center console contains both an upper and a lower
storage area.To open the upper storage compartment, pull upward on
the small latch located on the lid.
Storage Compartment Latches
122 GETTING TO KNOW YOUR VEHICLE
Page 125 of 626
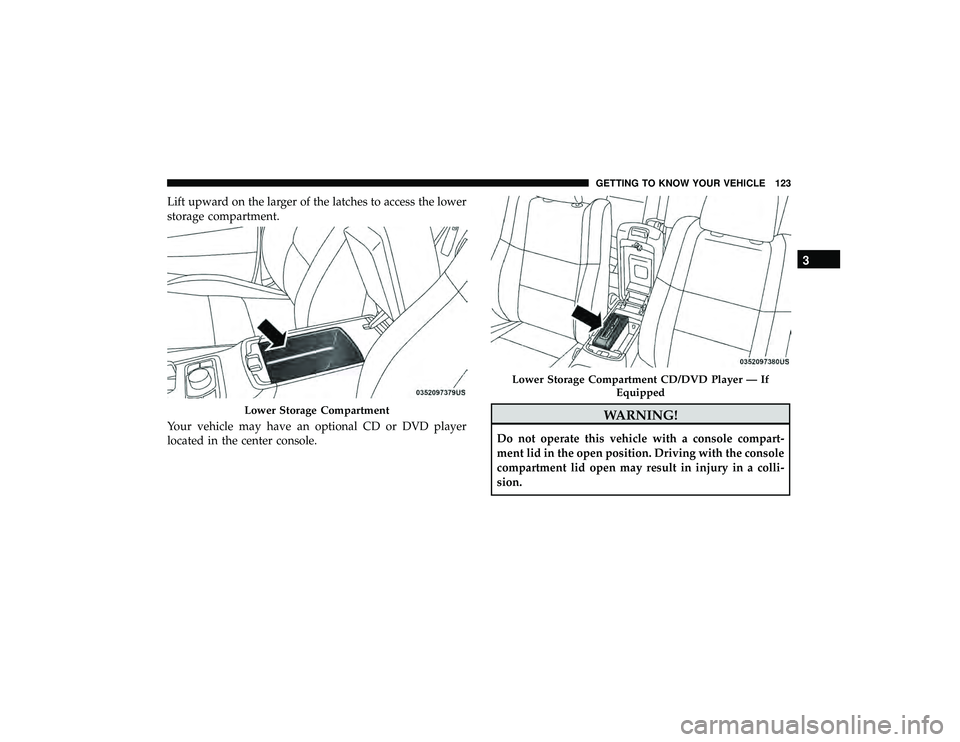
Lift upward on the larger of the latches to access the lower
storage compartment.
Your vehicle may have an optional CD or DVD player
located in the center console.
Lower Storage Compartment
Lower Storage Compartment CD/DVD Player — IfEquipped
3
GETTING TO KNOW YOUR VEHICLE 123
Page 126 of 626
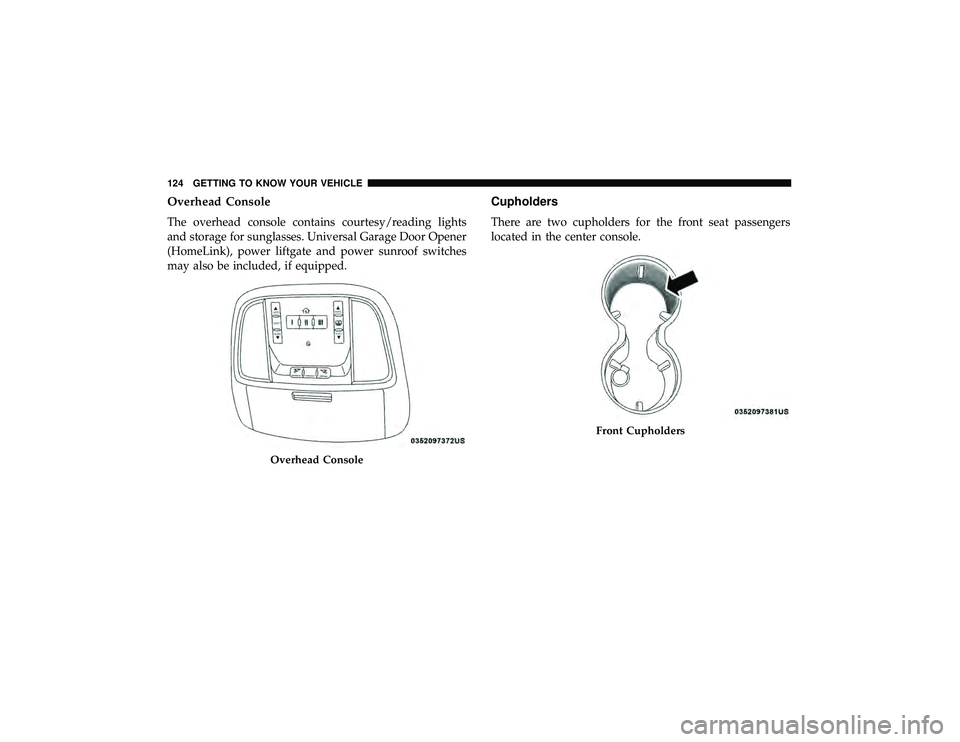
Overhead Console
The overhead console contains courtesy/reading lights
and storage for sunglasses. Universal Garage Door Opener
(HomeLink), power liftgate and power sunroof switches
may also be included, if equipped.
Cupholders
There are two cupholders for the front seat passengers
located in the center console.
Front Cupholders
124 GETTING TO KNOW YOUR VEHICLE
Page 129 of 626
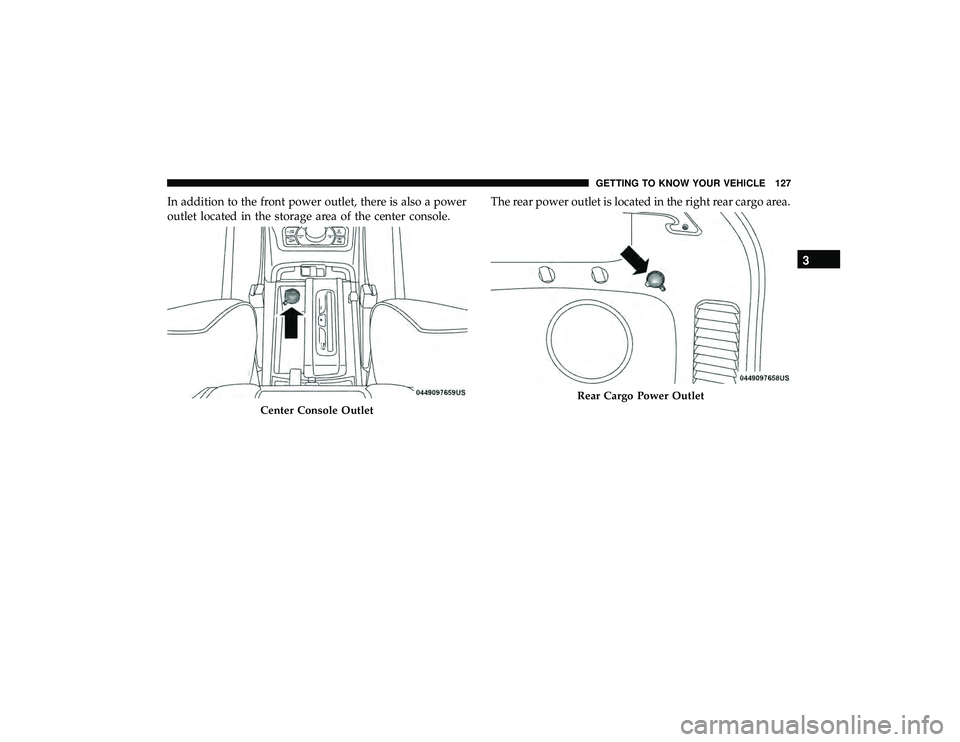
In addition to the front power outlet, there is also a power
outlet located in the storage area of the center console.The rear power outlet is located in the right rear cargo area.
Rear Cargo Power Outlet
3
GETTING TO KNOW YOUR VEHICLE 127
Page 131 of 626
WARNING!(Continued)
•Close the lid when not in use and while driving the
vehicle.
• If this outlet is mishandled, it may cause an electric
shock and failure.
CAUTION!
•Many accessories that can be plugged in draw power
from the vehicle’s battery, even when not in use (i.e.,
cellular phones, etc.). Eventually, if plugged in long
enough, the vehicle’s battery will discharge suffi-
ciently to degrade battery life and/or prevent the
engine from starting.
• Accessories that draw higher power (i.e., coolers,
vacuum cleaners, lights, etc.) will degrade the battery
even more quickly. Only use these intermittently and
with greater caution.
• After the use of high power draw accessories, or long
periods of the vehicle not being started (with acces-
sories still plugged in), the vehicle must be driven a
sufficient length of time to allow the generator to
recharge the vehicle’s battery.
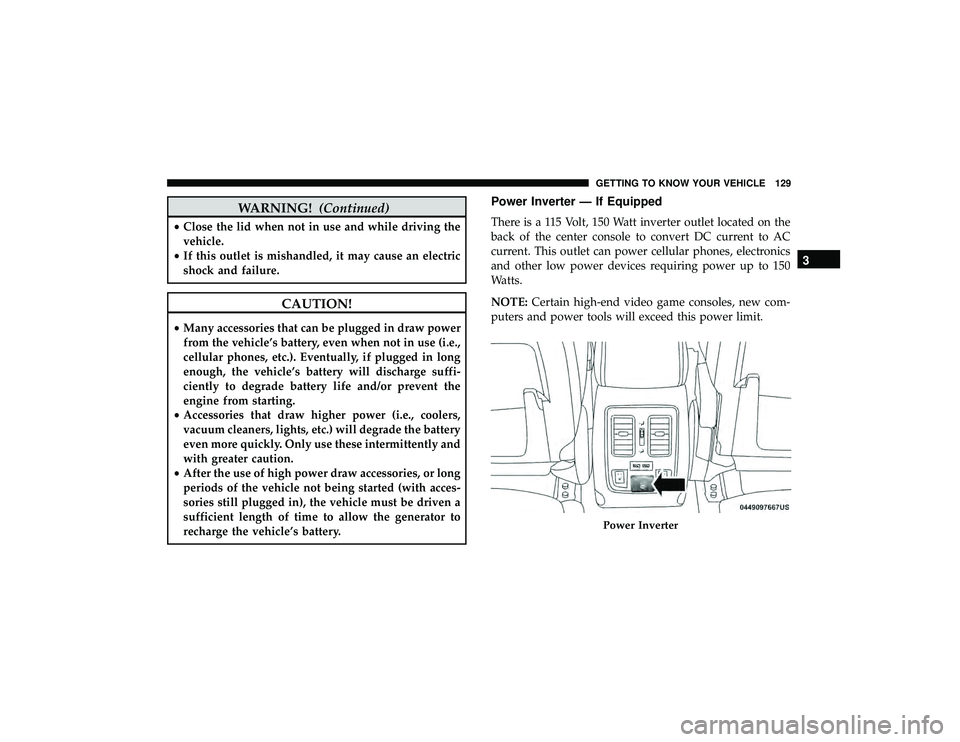
Power Inverter — If Equipped
There is a 115 Volt, 150 Watt inverter outlet located on the
back of the center console to convert DC current to AC
current. This outlet can power cellular phones, electronics
and other low power devices requiring power up to 150
Watts.
NOTE: Certain high-end video game consoles, new com-
puters and power tools will exceed this power limit.
Page 281 of 626
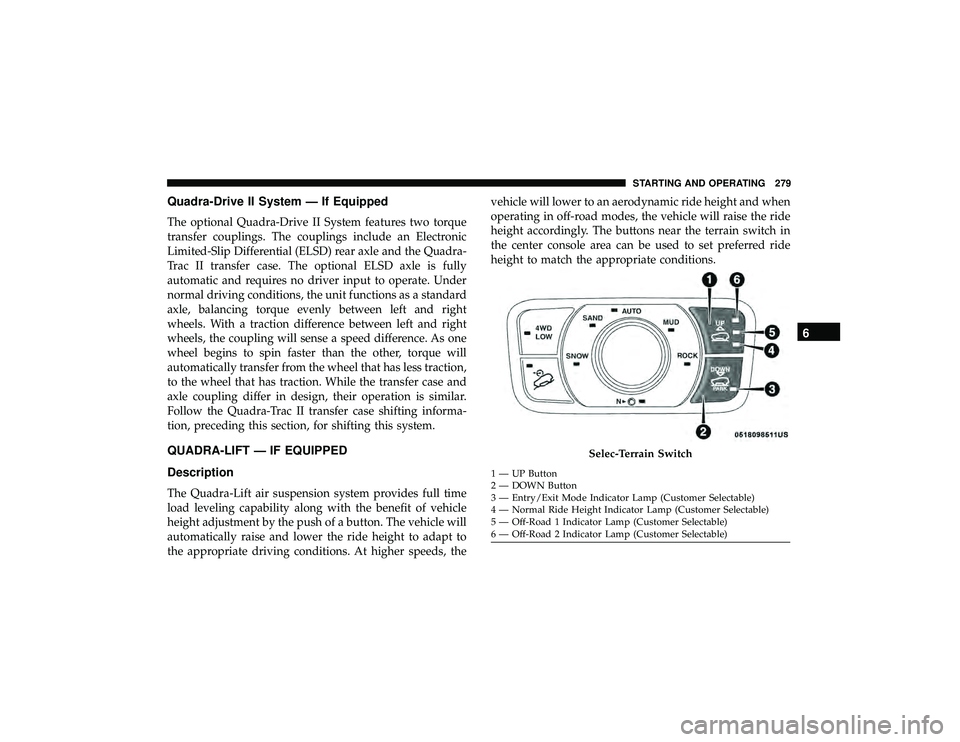
Quadra-Drive II System — If Equipped
The optional Quadra-Drive II System features two torque
transfer couplings. The couplings include an Electronic
Limited-Slip Differential (ELSD) rear axle and the Quadra-
Trac II transfer case. The optional ELSD axle is fully
automatic and requires no driver input to operate. Under
normal driving conditions, the unit functions as a standard
axle, balancing torque evenly between left and right
wheels. With a traction difference between left and right
wheels, the coupling will sense a speed difference. As one
wheel begins to spin faster than the other, torque will
automatically transfer from the wheel that has less traction,
to the wheel that has traction. While the transfer case and
axle coupling differ in design, their operation is similar.
Follow the Quadra-Trac II transfer case shifting informa-
tion, preceding this section, for shifting this system.
QUADRA-LIFT — IF EQUIPPED
Description
The Quadra-Lift air suspension system provides full time
load leveling capability along with the benefit of vehicle
height adjustment by the push of a button. The vehicle will
automatically raise and lower the ride height to adapt to
the appropriate driving conditions. At higher speeds, thevehicle will lower to an aerodynamic ride height and when
operating in off-road modes, the vehicle will raise the ride
height accordingly. The buttons near the terrain switch in
the center console area can be used to set preferred ride
height to match the appropriate conditions.
Page 414 of 626
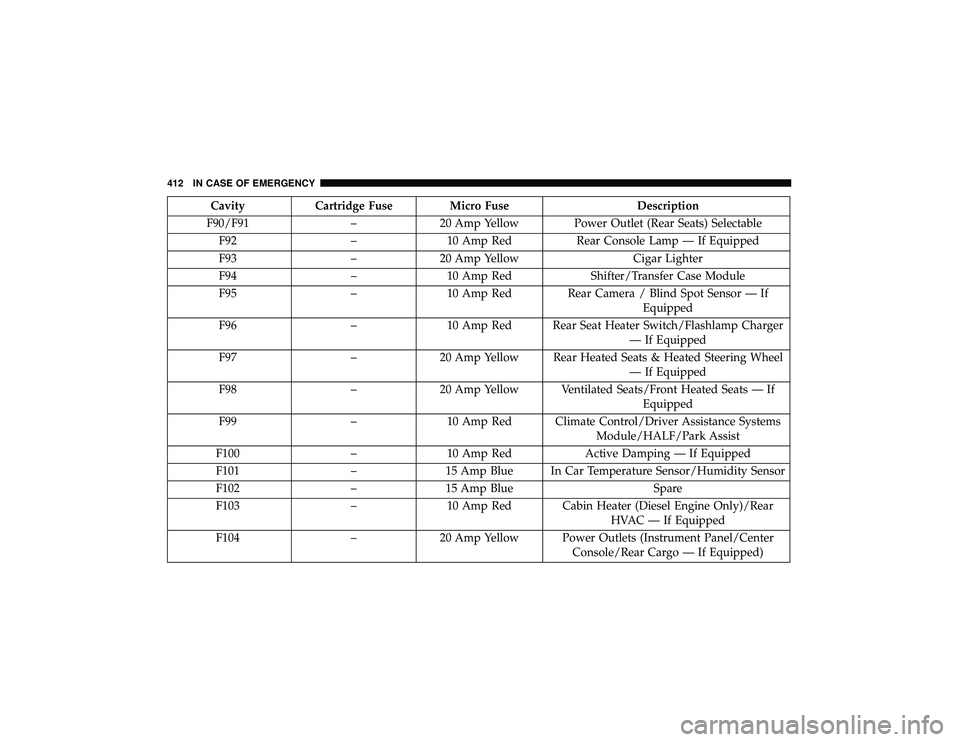
CavityCartridge Fuse Micro Fuse Description
F90/F91 –20 Amp Yellow Power Outlet (Rear Seats) Selectable
F92 –10 Amp Red Rear Console Lamp — If Equipped
F93 –20 Amp Yellow Cigar Lighter
F94 –10 Amp Red Shifter/Transfer Case Module
F95 –10 Amp Red Rear Camera / Blind Spot Sensor — If
Equipped
F96 –10 Amp Red Rear Seat Heater Switch/Flashlamp Charger
— If Equipped
F97 –20 Amp Yellow Rear Heated Seats & Heated Steering Wheel
— If Equipped
F98 –20 Amp Yellow Ventilated Seats/Front Heated Seats — If
Equipped
F99 –10 Amp Red Climate Control/Driver Assistance Systems
Module/HALF/Park Assist
F100 –10 Amp Red Active Damping — If Equipped
F101 –15 Amp Blue In Car Temperature Sensor/Humidity Sensor
F102 –15 Amp Blue Spare
F103 –10 Amp Red Cabin Heater (Diesel Engine Only)/Rear
HVAC — If Equipped
F104 –20 Amp Yellow Power Outlets (Instrument Panel/Center
Console/Rear Cargo — If Equipped)
412 IN CASE OF EMERGENCY