service JEEP PATRIOT 2007 1.G User Guide
[x] Cancel search | Manufacturer: JEEP, Model Year: 2007, Model line: PATRIOT, Model: JEEP PATRIOT 2007 1.GPages: 440, PDF Size: 7.26 MB
Page 97 of 440
When calling a number with your UConnectŸ system
that normally requires you to enter in a touch-tone
sequence on your cellular phone keypad, you can push
the 'Voice Recognition' button and say the sequence you
wish to enter followed by the word9Send.9For example,
if required to enter your pin number followed with a
pound3746#,youcanpressthe'Voice Recognition'
button and say93746#Send.9Saying a number, or
sequence of numbers, followed by9Send9is also to be
used to navigate through an automated customer service
center menu structure and to leave a number on a pager.
Barge In - Overriding Prompts
The 'Voice Recognition' button can be used when you
wish to skip part of a prompt and issue your voice
recognition command immediately. For example, if a
prompt is playing9Would you like to pair a phone, clear
a{,9you could press the 'Voice Recognition' button and
say9Pair a Phone9to select that option without having to
listen to the rest of the voice prompt.
Turning Confirmation Prompts On/Off
Turning confirmation prompts off will stop the system
from confirming your choices (e.g., the UConnectŸ
system will not repeat a phone number before you dial
it).
²Press the 'Phone' button to begin.
²After the9Ready9prompt and the following beep, say
9Setup Confirmations.9The UConnectŸ system will
play the current confirmation prompt status and you
will be given the choice to change it.
Phone and Network Status Indicators
If available on the radio and/or on a premium display
such as the instrument panel cluster, and supported by
your cell phone, the UConnectŸ system will provide
notification to inform you of your phone and network
status when you are attempting to make a phone call
using UConnectŸ. The status is given for roaming net-
work signal strength, phone battery strength, etc.
96 UNDERSTANDING THE FEATURES OF YOUR VEHICLE
Page 99 of 440
Information Service
When using AT&T Wireless Service, dialing to phone
number9#121,9you can access voice activated automated
system to receive news, weather, stocks, traffic, etc.
related information.
Advanced Phone Connectivity
Transfer Call to and from Cellular Phone
The UConnectŸ system allows on going calls to be
transferred from your cellular phone to the UConnectŸ
system without terminating the call. To transfer an ongo-
ing call from your UConnectŸ paired cellular phone to
the UConnectŸ system or vice-versa, press the 'Voice
Recognition' button and say9Transfer Call.9
Connect or Disconnect Link Between the
UConnectŸ System and Cellular Phone
Your cellular phone can be paired with many different
electronic devices, but can only be actively9connected9
with one electronic device at a time.If you would like to connect or disconnect the Blue-
toothŸ connection between a UConnectŸ paired cellular
phone and the UConnectŸ system, then follow the
instruction described in your cellular phone user's
manual.
List Paired Cellular Phone Names
²
Press the 'Phone' button to begin.
²After the ªReadyº prompt and the following beep, say
ªSetup Phone pairingº.
²When prompted, say9List Phones.9
²The UConnectŸ system will play the phone names of
all paired cellular phones in order from the highest to
the lowest priority. To ªselectº or ªdeleteº a paired
phone being announced, press the8Voice recognition'
button and say ªSelectº or ªDelete.º Also, see the next
two sections for an alternate way to ªselectº or ªde-
leteº a paired phone.
98 UNDERSTANDING THE FEATURES OF YOUR VEHICLE
Page 170 of 440
INSTRUMENT CLUSTER DESCRIPTIONS
1. Fuel Gauge/Fuel Door Location
When the ignition switch is in the ON position,
the pointer will show the level of fuel remain-
ing in the fuel tank. The fuel pump symbol
points to the side of the vehicle where the fuel
door is located
2. Charging System Light
9This light shows the status of the electrical charg-
ing system. The light should come on when the
ignition switch is first turned ON and remain on briefly
as a bulb check. If the light stays on or comes on while
driving, turn off some of the vehicle's non essential
electrical devices or increase engine speed (if at idle). If
the Charging System light remains on, it means that the
vehicle is experiencing a problem with the charging
system. Obtain SERVICE IMMEDIATELY. See your local
authorized dealer.93. Electronic Throttle Control Indicator Light
This light informs you of a problem with the
Electronic Throttle Control system. If a prob-
lem is detected, the light will come on while the
engine is running. If the light remains lit with
the engine running your vehicle will usually be drivable
and not need towing, however see your dealer for service
as soon as possible.
If the light is flashing when the engine is running you
may experience power loss, an elevated/rough idle, and
increased brake pedal effort, and your vehicle may
require towing. Immediate service is required.
The light will come on when the ignition switch is first
turned on and remain on briefly as a bulb check. This is
normal. If the light does not come on during starting,
have the system checked by an authorized dealer.
UNDERSTANDING YOUR INSTRUMENT PANEL 169
4
Page 172 of 440
10. Anti-Lock Warning Light (ABS) Ð If Equipped
This light monitors the Anti-Lock Brake System
(ABS) described elsewhere in this manual. This
light will come on when the ignition key is
turned to the ON position and may stay on for
as long as four seconds.
If the ABS light remains on or comes on during driving,
it indicates that the Anti-Lock portion of the brake system
is not functioning and that service is required, however,
the conventional brake system will continue to operate
normally provided that the BRAKE warning light is not
on.
If the ABS light is on, the brake system should be serviced
as soon as possible to restore the benefit of Anti-Lock
Brakes.
The warning light should be checked frequently to assure
that it is operating properly. Turn the ignition key to theon position, but do not start the vehicle. The light should
come on. If the light does not come on, have the system
checked by an authorized dealer.
11. Seat Belt Reminder Light
When the ignition switch is first turned ON, this
light will come on for about six seconds. A chime
will sound if you have not pulled the shoulder belt
out of the retractor. This is a reminder to ªbuckle upº. If
you do not buckle up, the light will remain on.
12. Tachometer
The white area of the scale shows the permissible engine
revolutions-per-minute (rpm x 1000) for each gear range.
Before reaching the red area, ease up on the accelerator to
prevent engine damage.
13. Engine Temperature Warning Light
This light warns of an overheated engine condi-
tion. If the engine is critically hot, a warning chime
UNDERSTANDING YOUR INSTRUMENT PANEL 171
4
Page 173 of 440
will sound 10 times. After the chime turns off, the engine
will still be critically hot until the light goes out.
14. Brake System Warning Light
This light monitors various brake functions, in-
cluding brake fluid level and parking brake appli-
cation. If the brake light turns on, it may indicate that the
parking brake is applied, there is a low brake fluid level
or there is a problem with the anti-lock brake system.
The dual brake system provides a reserve braking capac-
ity in the event of a failure to a portion of the hydraulic
system. Failure of either half of the dual brake system is
indicated by the Brake Warning Light which will turn on
when the brake fluid level in the master cylinder has
dropped below a specified level.
The light will remain on until the cause is corrected.NOTE:The light may flash momentarily during sharp
cornering maneuvers which change fluid level condi-
tions. The vehicle should have service performed, and
the brake fluid level checked.
If brake failure is indicated, immediate repair is neces-
sary.
WARNING!
Driving a vehicle with the brake light on is danger-
ous. Part of the brake system may have failed. It will
take longer to stop the vehicle. You could have an
accident. Have the vehicle checked immediately.
Vehicles equipped with Anti-Lock brakes (ABS), are also
equipped with Electronic Brake Force Distribution (EBD).
172 UNDERSTANDING YOUR INSTRUMENT PANEL
Page 175 of 440
the pointer drops back into the normal range. If the
pointer remains on theH(red) mark, turn the engine off
immediately and call for service.
There are steps that you can take to slow down an
impending overheat condition. If your air conditioning is
on, turn it off. The air conditioning system adds heat to
the engine cooling system and turning off the A/C
removes this heat. You can also turn the Temperature
control to maximum heat, the Mode control to Floor and
the Fan control to High. This allows the heater core to act
as a supplement to the radiator and aids in removing heat
from the engine cooling system.
18. Cruise Indicator Ð If Equipped
This indicator shows that the Speed Control
System is ON.
19. Speed ControlSETlight.
This indicator shows that the Speed Control System is
SET.20. Transmission Range Indicator
This display indicator shows the automatic transmission
gear selection.
21. Odometer/Trip Odometer Reset Button
Press this button to change the display from odometer to
either of the two trip odometer settings. Trip A or Trip B
will appear when in the trip odometer mode. Push in and
hold the button for two seconds to reset the trip odometer
to 0 miles or kilometers. The odometer must be in trip
mode to reset.
22. Tire Pressure Monitor Light
Each tire, including the spare (if provided),
should be checked monthly when cold and
inflated to the inflation pressure recommended
by the vehicle manufacturer on the vehicle
placard or tire inflation pressure label. (If your vehicle
has tires of a different size than the size indicated on the
174 UNDERSTANDING YOUR INSTRUMENT PANEL
Page 177 of 440
CAUTION!
The TPMS has been optimized for the original
equipment tires and wheels. TPMS pressures and
warning have been established for the tire size
equipped on your vehicle. Undesirable system opera-
tion or sensor damage may result when using re-
placement equipment that is not of the same size,
type, and/or style. Aftermarket wheels can cause
sensor damage. Do not use tire sealant from a can, or
balance beads if your vehicle is equipped with a
TPMS, as damage to the sensors may result.
23. Four-Wheel-Drive Light
This light indicates the vehicle is in 4WD locked mode.
24. Odometer/Trip Odometer
A vacuum fluorescent display indicates the total distance
the vehicle has been driven. Also, the cluster will display,replacing the odometer/trip odometer, vehicle warning
messages such as: door/gate ajar and loose gas cap.
Loose gas cap will be displayed from the Odometer/Trip
Odometer on all models.
NOTE:If vehicle is equipped with the optional Elec-
tronic Vehicle Information Center (EVIC) in the instru-
ment cluster, all warnings including ªdoorº, and ªgATEº
will only be displayed in the EVIC display. For additional
information, refer to ªElectronic Vehicle Information Cen-
ter Ð If Equippedº in Section 3.
U.S. federal regulations require that upon transfer of
vehicle ownership, the seller certify to the purchaser the
correct mileage that the vehicle has been driven. There-
fore, if the odometer reading is changed during repair or
replacement, be sure to keep a record of the reading
before and after the service so that the correct mileage can
be determined.
176 UNDERSTANDING YOUR INSTRUMENT PANEL
Page 178 of 440
25. OFF ROAD Light Ð If Equipped
The symbol illuminates (is armed) when the 4WD lock
switch is activated and the transmission range indicator
is in Low or Reverse position.
26. Malfunction Indicator Light
This light is part of an onboard diagnostic system
called OBD that monitors emissions, engine, and
automatic transmission control systems. The light
will illuminate when the key is in the ON/RUN position
before engine start. If the bulb does not come on when
turning the key from OFF to ON/RUN, have the condi-
tion checked promptly.
Certain conditions such as a loose or missing gas cap,
poor fuel quality, etc. may illuminate the light after
engine start. The vehicle should be serviced if the light
stays on through several of your typical driving cycles. In
most situations the vehicle will drive normally and will
not require towing.If the Malfunction Indicator Light flashes when the
engine is running, serious conditions may exist that
could lead to immediate loss of power or severe catalytic
converter damage. The vehicle should be serviced as
soon as possible if this occurs.
27. Hill Descent Control Light Ð If Equipped
The symbol illuminates (is armed) when the
4WD lock switch is activated and the transmis-
sion range indicator is in Low or Reverse
position (Off Road Mode).
28. Front Fog Light Indicator Ð If Equipped
This light shows when the front fog lights are ON.
UNDERSTANDING YOUR INSTRUMENT PANEL 177
4
Page 179 of 440
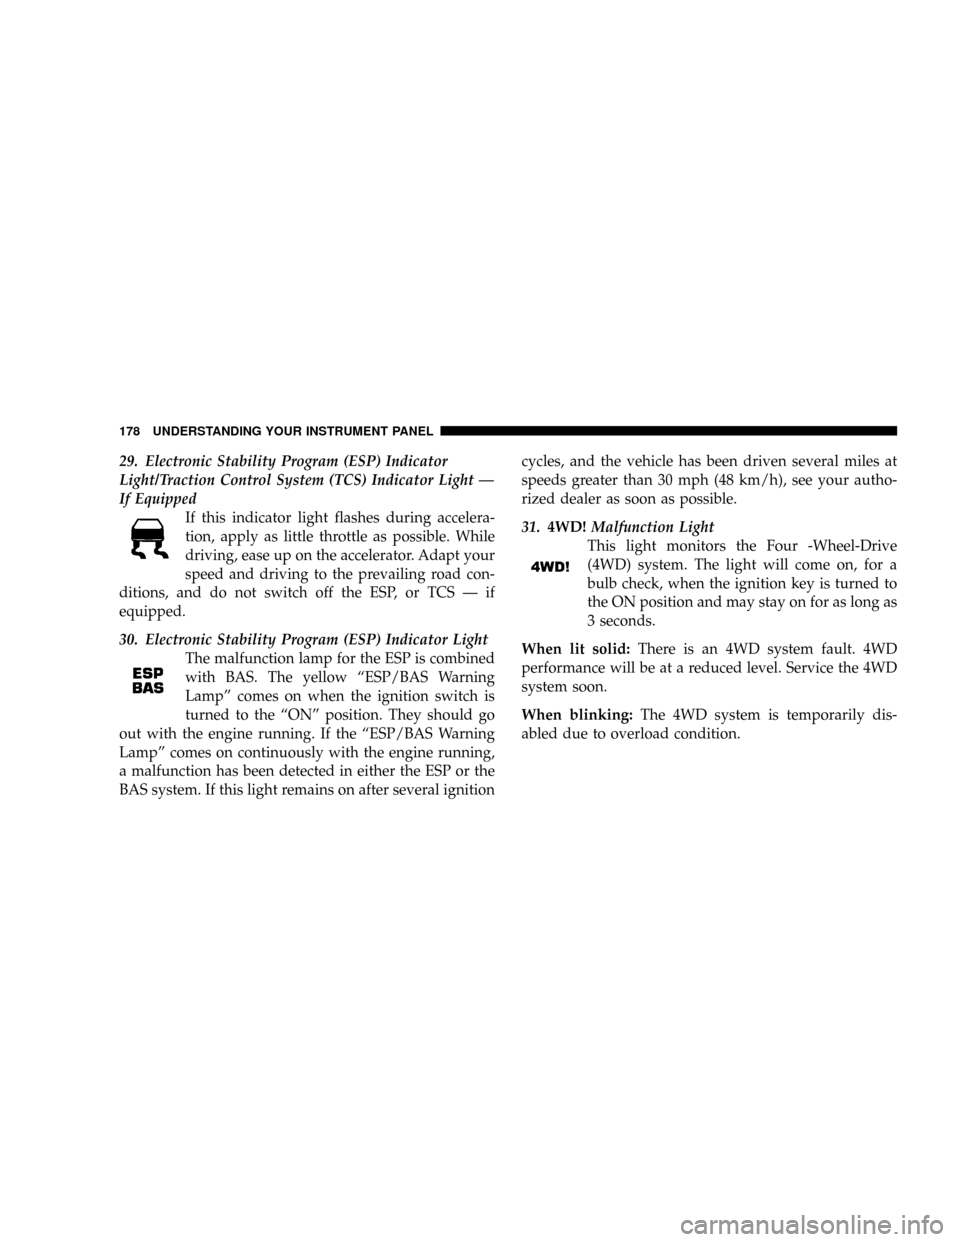
29. Electronic Stability Program (ESP) Indicator
Light/Traction Control System (TCS) Indicator Light Ð
If Equipped
If this indicator light flashes during accelera-
tion, apply as little throttle as possible. While
driving, ease up on the accelerator. Adapt your
speed and driving to the prevailing road con-
ditions, and do not switch off the ESP, or TCS Ð if
equipped.
30. Electronic Stability Program (ESP) Indicator Light
The malfunction lamp for the ESP is combined
with BAS. The yellow ªESP/BAS Warning
Lampº comes on when the ignition switch is
turned to the ªONº position. They should go
out with the engine running. If the ªESP/BAS Warning
Lampº comes on continuously with the engine running,
a malfunction has been detected in either the ESP or the
BAS system. If this light remains on after several ignitioncycles, and the vehicle has been driven several miles at
speeds greater than 30 mph (48 km/h), see your autho-
rized dealer as soon as possible.
31.4WD!Malfunction Light
This light monitors the Four -Wheel-Drive
(4WD) system. The light will come on, for a
bulb check, when the ignition key is turned to
the ON position and may stay on for as long as
3 seconds.
When lit solid:There is an 4WD system fault. 4WD
performance will be at a reduced level. Service the 4WD
system soon.
When blinking:The 4WD system is temporarily dis-
abled due to overload condition.
178 UNDERSTANDING YOUR INSTRUMENT PANEL
Page 218 of 440
SATELLITE RADIO Ð IF EQUIPPED
Satellite radio uses direct satellite to receiver broadcast-
ing technology to provide clear digital sound, coast to
coast. The subscription service provider is SiriusŸ Satel-
lite Radio. This service offers over 100 channels of music,
sports, news, entertainment, and programming for chil-
dren, directly from its satellites and broadcasting studios.
System Activation
To activate your Sirius Satellite Radio service, call the
toll-free number 888-539-7474, or visit the Sirius web site
at www.sirius.com. Please have the following informa-
tion available when activating your system:
1. The Electronic Serial Number/Sirius Identification
Number (ESN/SID).
2. Credit card information.
3. Your Vehicle Identification Number.
Electronic Serial Number/Sirius Identification
Number (ESN/SID)
The Electronic Serial Number/Sirius Identification Num-
ber is needed to activate your Sirius Satellite Radio
system. To access the ESN/SID, refer to the following
steps:
ESN/SID Access With REF Radios
With the ignition switch in the ACCESSORY position and
the radio OFF, press the CD Eject and Time buttons
simultaneously for 3 seconds. The first four digits of the
twelve-digit ESN/SID number will be displayed. Press
the SEEK UP button to display the next four digits.
Continue to press the SEEK UP button until all twelve
ESN/SID digits have been displayed. The SEEK DOWN
will page down until the first four digits are displayed.
The radio will exit the ESN/SID mode when any other
button is pushed, the ignition is turned OFF, or 5 minutes
has passed since any button was pushed.
UNDERSTANDING YOUR INSTRUMENT PANEL 217
4