weight JEEP PATRIOT 2007 1.G Owners Manual
[x] Cancel search | Manufacturer: JEEP, Model Year: 2007, Model line: PATRIOT, Model: JEEP PATRIOT 2007 1.GPages: 440, PDF Size: 7.26 MB
Page 62 of 440
WARNING!
In a collision, an unrestrained child, even a tiny baby,
can become a missile inside the vehicle. The force
required to hold even an infant on your lap could
become so great that you could not hold the child, no
matter how strong you are. The child and others could
be badly injured. Any child riding in your vehicle
should be in a proper restraint for the child's size.
Infants And Small Children
There are different sizes and types of restraints for
children from newborn size to the child almost large
enough for an adult safety belt. Always check the child
seat owner's manual to ensure you have the correct seat
for your child. Use the restraint that is correct for your
child:
²Safety experts recommend that children ride
rearward-facing in the vehicle until they are at least
one year old and weigh at least 20 lbs (9 kg). Two types
of child restraints can be used rearward-facing: infant
carriers and9convertible9child seats. Both types of
child restraints are held in the vehicle by the lap/
shoulder belt or the LATCH child restraint anchorage
system.
²The infant carrier is only used rearward-facing in the
vehicle. It is recommended for children who weigh up
to about 20 lbs (9 kg).9Convertible9child seats can be
used either rearward-facing or forward-facing in the
vehicle. Convertible child seats often have a higher
weight limit in the rearward-facing direction than
infant carriers do, so they can be used rearward-facing
by children who weigh more than 9 kg (20 lbs) but are
less than one year old.
THINGS TO KNOW BEFORE STARTING YOUR VEHICLE 61
2
Page 64 of 440
Here are some tips on getting the most out of your child
restraint:
²Before buying any restraint system, make sure that it
has a label certifying that it meets all applicable Safety
Standards. We also recommend that you make sure
that you can install the child restraint in the vehicle
where you will use it, before you buy it.
²The restraint must be appropriate for your child's
weight and height. Check the label on the restraint for
weight and height limits.
²Carefully follow the instructions that come with the
restraint. If you install the restraint improperly, it may
not work when you need it.
The passenger seat belts are equipped with either
cinching latch plates or seat belt retractors that can be
switched to an automatic locking mode, which are
designed to keep the lap portion tight around the childrestraint so that it is not necessary to use a locking clip.
If the seat belt has a cinching latch plate, pulling up on
the shoulder portion of the lap/shoulder belt will
tighten the belt. The cinching latch plate will keep the
belt tight, however, any seat belt system will loosen
with time, so check the belt occasionally and pull it
tight if necessary.
If the seat belt has a switchable retractor, it will have a
distinctive label. To operate the switchable retractor,
please refer to Automatic-Locking Retractor (ALR) in this
section.²In the rear seat, you may have trouble tightening the
lap/shoulder belt on the child restraint because the
buckle or latch plate is too close to the belt path
opening on the restraint. Disconnect the latch plate
from the buckle and twist the short buckle end of the
belt several times to shorten it. Insert the latch plate
into the buckle with the release button facing out.
THINGS TO KNOW BEFORE STARTING YOUR VEHICLE 63
2
Page 157 of 440
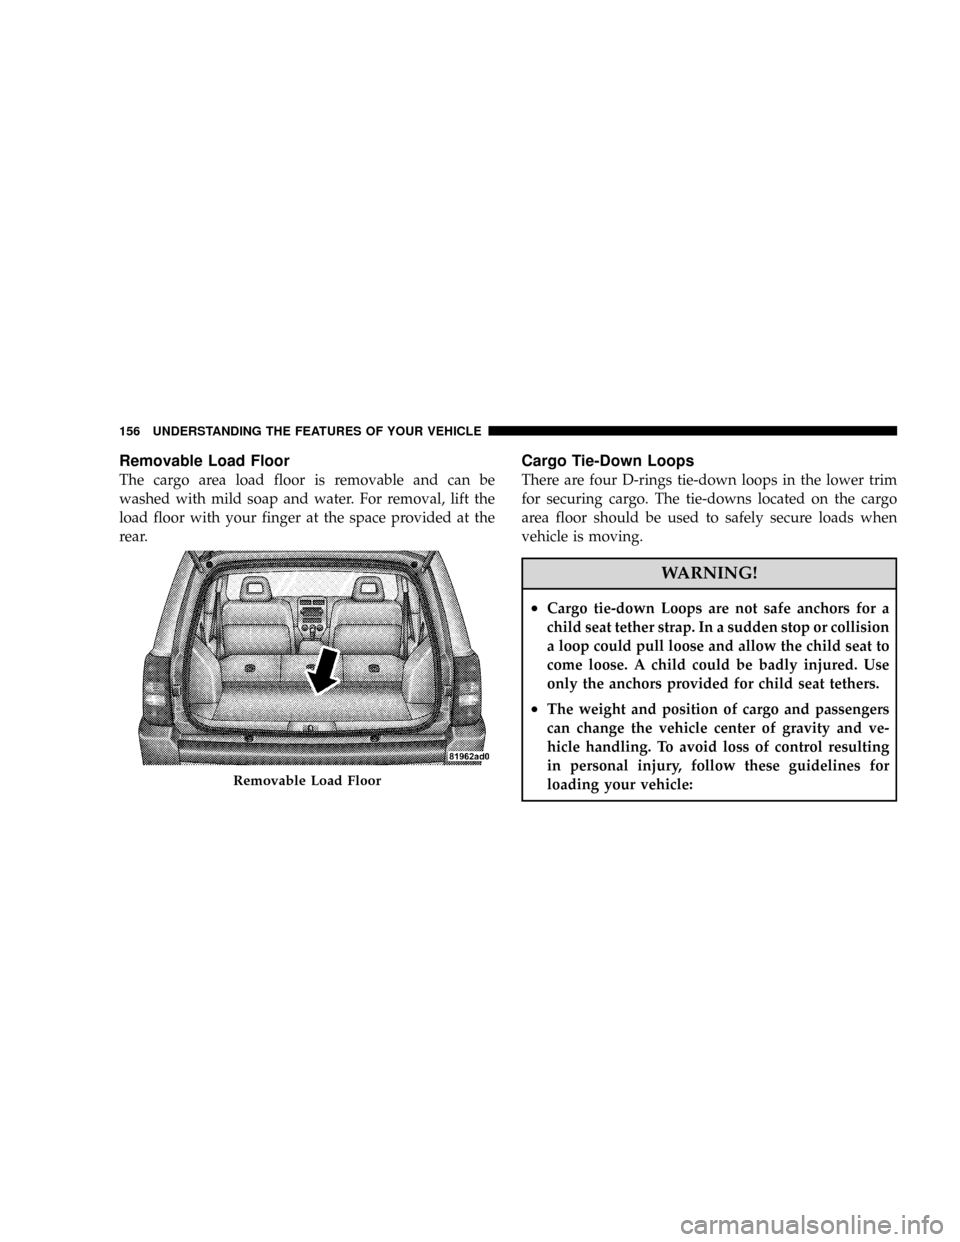
Removable Load Floor
The cargo area load floor is removable and can be
washed with mild soap and water. For removal, lift the
load floor with your finger at the space provided at the
rear.
Cargo Tie-Down Loops
There are four D-rings tie-down loops in the lower trim
for securing cargo. The tie-downs located on the cargo
area floor should be used to safely secure loads when
vehicle is moving.
WARNING!
²Cargo tie-down Loops are not safe anchors for a
child seat tether strap. In a sudden stop or collision
a loop could pull loose and allow the child seat to
come loose. A child could be badly injured. Use
only the anchors provided for child seat tethers.
²The weight and position of cargo and passengers
can change the vehicle center of gravity and ve-
hicle handling. To avoid loss of control resulting
in personal injury, follow these guidelines for
loading your vehicle:
Removable Load Floor
156 UNDERSTANDING THE FEATURES OF YOUR VEHICLE
Page 158 of 440
²Always place cargo evenly on the cargo floor. Put
heavier objects as low and as far forward as possible.
²Place as much cargo as possible in front of the rear
axle. Too much weight or improperly placed weight
over or behind the rear axle can cause the rear of the
vehicle to sway.
²Do not pile luggage or cargo higher than the top of the
seatback. This could impair visibility or become a
dangerous projectile in a sudden stop or collision.
WARNING!
To help protect against personal injury, passengers
should not be seated in the rear cargo area. The rear
cargo space is intended for load carrying purposes
only, not for passengers, who should sit in seats and
use seat belts.
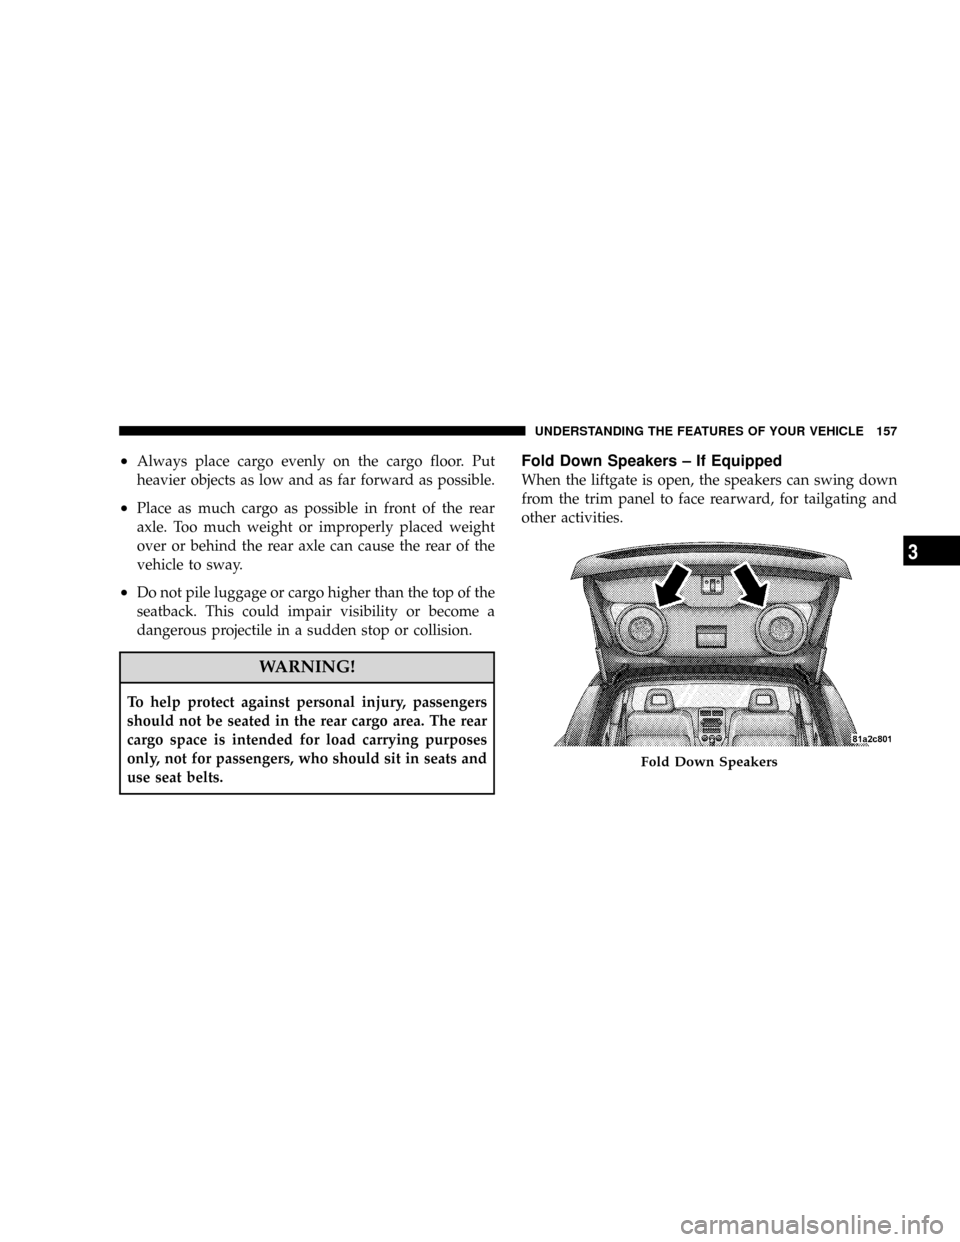
Fold Down Speakers ± If Equipped
When the liftgate is open, the speakers can swing down
from the trim panel to face rearward, for tailgating and
other activities.
Fold Down Speakers
UNDERSTANDING THE FEATURES OF YOUR VEHICLE 157
3
Page 184 of 440
Distance To Empty (DTE)
Shows the estimated distance that can be travelled with
the fuel remaining in the tank. This estimated distance is
determined by a weighted average of the instantaneous
and average fuel economy, according to the current fuel
tank level. This is not resettable.
NOTE:Significant changes in driving style or vehicle
loading will greatly affect the actual drivable distance of
the vehicle, regardless of the DTE displayed value.
When the DTE value is less than 30 miles estimated
driving distance, the DTE display will change to a text
display of9LOW FUEL9. This display will continue until
the vehicle runs out of fuel. Adding a significant amount
of fuel to the vehicle will turn off the9LOW FUEL9text
and a new DTE value will be displayed, based on the
current values in the DTE calculation and the current fuel
tank level.
Elapsed Time
Shows the total elapsed time of travel since the last reset
when the ignition switch is in the ACC position. Elapsed
time will increment when the ignition switch is in the ON
or START position.
Tire Pressure Monitor (TPM)
Refer to Section 5, ªTire Pressure Monitoring System
(TPMS) for system operation.
Personal Settings (Customer Programmable
Features)
This allows the driver to set and recall features when the
transmission is in PARK (automatic transmission) or the
vehicle is stopped (manual transmissions).
Press and release the EVIC button until Personal Settings
is displayed in the EVIC.
Use the EVIC button to display one of the following
choices:
UNDERSTANDING YOUR INSTRUMENT PANEL 183
4
Page 237 of 440
NFuel System Cautions..................305
NCarbon Monoxide Warnings..............306
mAdding Fuel..........................307
NFuel Filler Cap (Gas Cap)...............307
NLoose Fuel Filler Cap Message............308
mVehicle Loading........................309
NGross Vehicle Weight Rating (GVWR).......309
mTrailer Towing.........................309
NCommon Towing Definitions.............309NTrailer Hitch Classification...............312
NTrailer Towing Weights (Maximum Trailer Weight
Ratings)............................313
NTrailer And Tongue Weight..............314
NTowing Requirements..................315
NTowing Tips.........................320
mRecreational Towing (Behind Motorhome, Etc.) . . 322
NTowing This Vehicle Behind Another Vehicle
(Flat Towing With All Four Wheels On The
Ground)............................322
236 STARTING AND OPERATING
Page 260 of 440
dirt to fill the rut ahead of the turnout you just created.
You should now be able to drive out following the trench
you just created at a 45-degree angle.
WARNING!
There is an increased risk of roll over when crossing
an obstacle, at any angle, with steep sides.
Crossing Logs
To cross a log, approach it at a slight angle (approxi-
mately 10 to 15 degrees). This allows one front tire to be
on top of the log while the other just starts to climb the
log. While climbing the log, modulate your brake and
accelerator to avoid spinning the log out from under your
tires. Then ease the vehicle off the log using your brakes.
CAUTION!
Do not attempted to cross a log with a greater
diameter than the running ground clearance or the
vehicle will become high centered.
Getting High Centered
If you get hung up or high centered on an object, get out
of the vehicle and try to determine what the vehicle is
hung up on, where it is contacting the underbody and
what is the best direction to recover the vehicle. Depend-
ing on what you are in contact with, jack the vehicle up
and place a few rocks under the tires so the weight is off
of the high point when you let the vehicle down. You can
also try rocking the vehicle or winching the vehicle off
the object.
STARTING AND OPERATING 259
5
Page 262 of 440
a 1/4; turn quickly back and forth. This will provide a
fresh9bite9into the surface and will usually provide
enough traction to complete the climb. If you do not
make it to the top, place the vehicle in reverse and
back straight down the grade using engine resistance
along with the vehicle brakes.
WARNING!
Never attempt to climb a hill at an angle or turn
around on a steep grade. Driving across an incline
increases the risk of a roll over, which may result in
severe injury.
²Driving Down Hill± Before driving down a steep hill
you need to determine if it is too steep for a safe
descent. What is the surface traction? Is the grade too
steep to maintain a slow controlled descent? Are there
obstacles? Is it a straight descent? Is there plenty ofdistance at the base of the hill to regain control if the
vehicle descends to fast? If you feel confident in your
ability to proceed then make sure you are in low (L
Off-Road) with the 4WD Lock engaged and proceed
with caution. Allow engine and hill descent braking to
control the descent and apply your brakes if necessary,
but do not allow the tires to lock.
WARNING!
Do not descend a steep grade in neutral. Use vehicle
brakes in conjunction with engine braking. Descend-
ing a grade too fast could cause you to lose control
and be seriously injured.
²Driving Across An Incline± If at all possible avoid
driving across an incline. If it is necessary, know your
vehicle's abilities. Driving across an incline places
more weight on the down hill wheels, which increases
STARTING AND OPERATING 261
5
Page 282 of 440
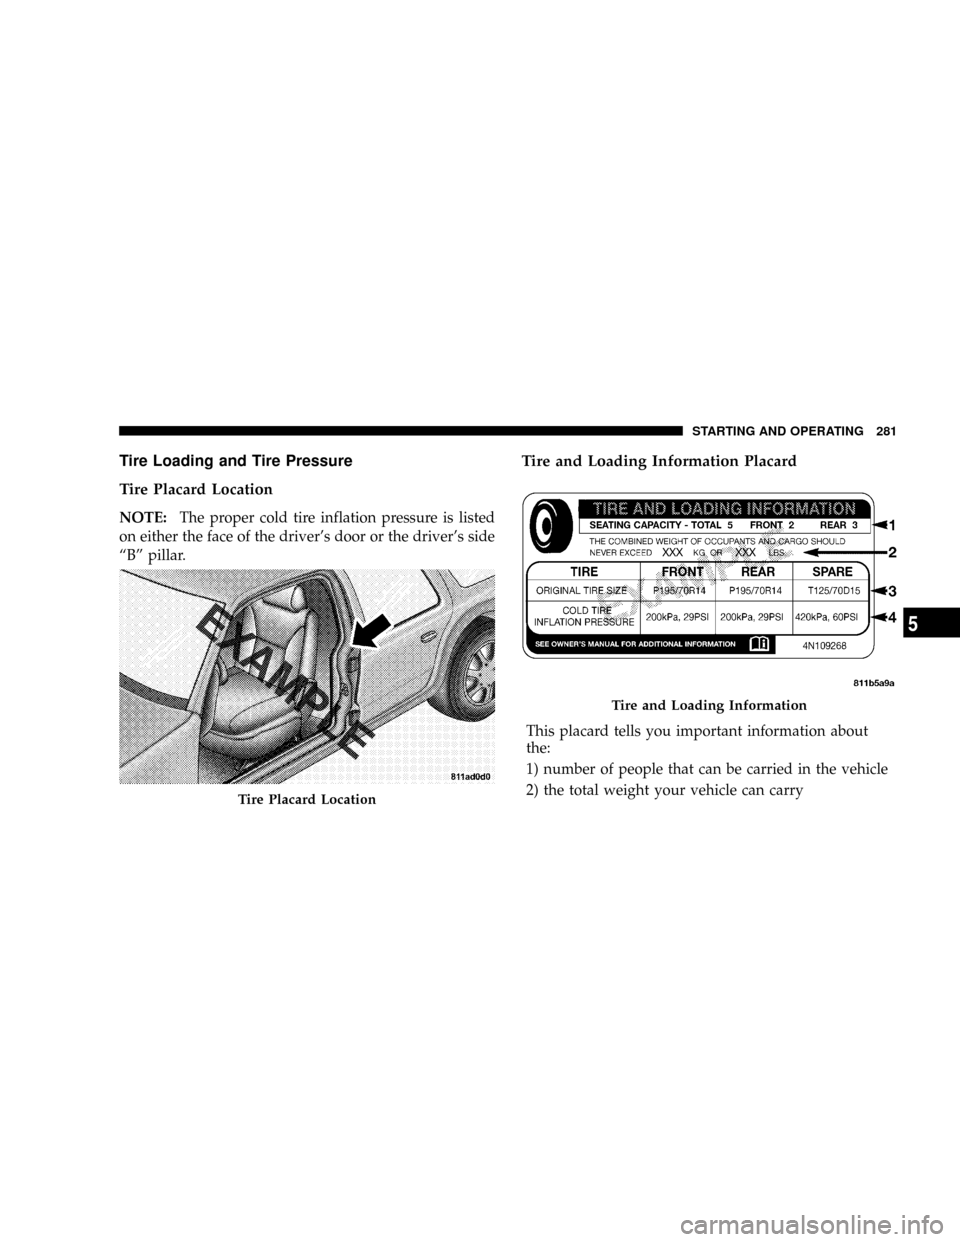
Tire Loading and Tire Pressure
Tire Placard Location
NOTE:The proper cold tire inflation pressure is listed
on either the face of the driver's door or the driver's side
ªBº pillar.
Tire and Loading Information Placard
This placard tells you important information about
the:
1) number of people that can be carried in the vehicle
2) the total weight your vehicle can carry
Tire Placard Location
Tire and Loading Information
STARTING AND OPERATING 281
5
Page 283 of 440
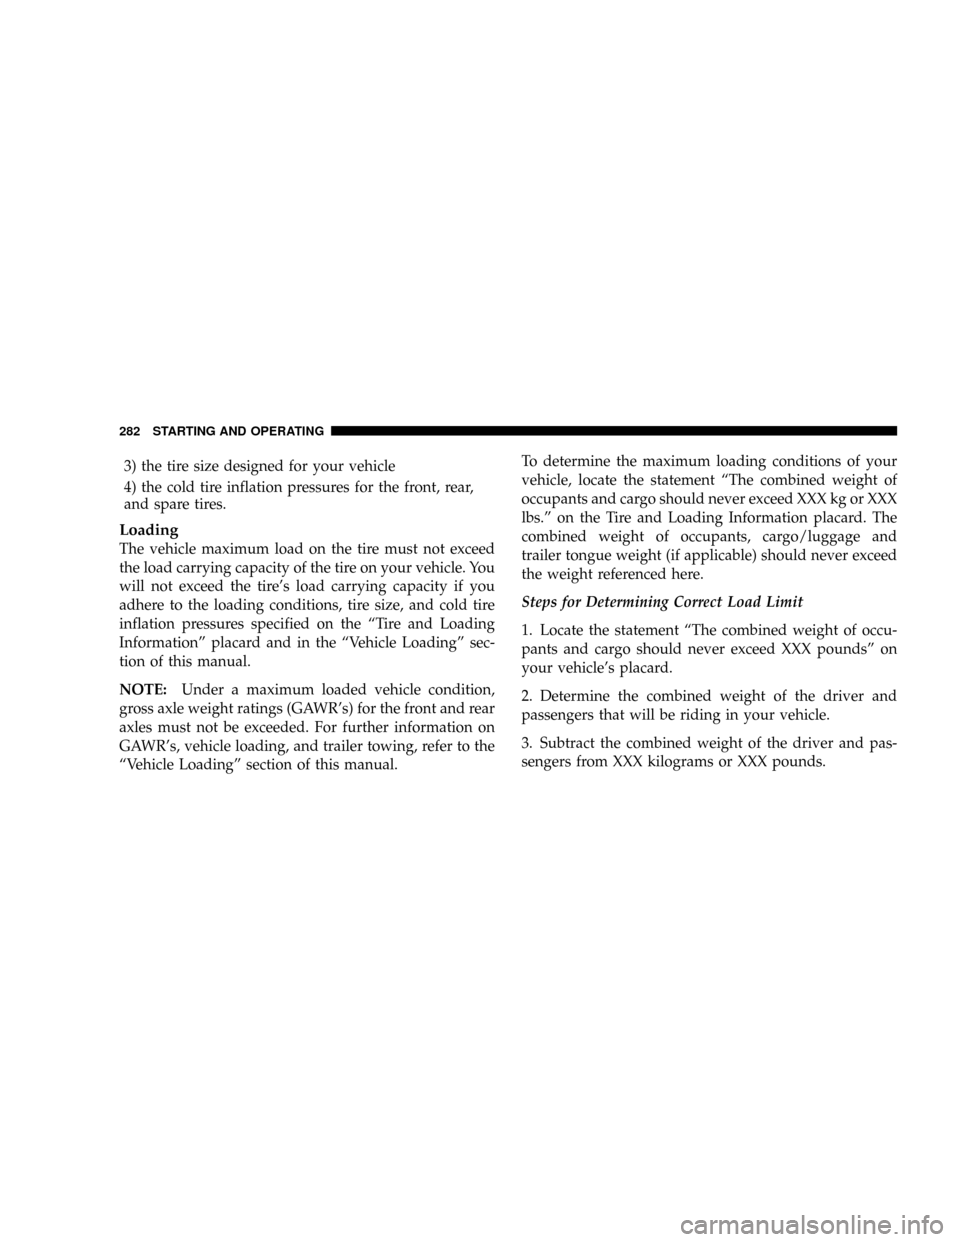
3) the tire size designed for your vehicle
4) the cold tire inflation pressures for the front, rear,
and spare tires.
Loading
The vehicle maximum load on the tire must not exceed
the load carrying capacity of the tire on your vehicle. You
will not exceed the tire's load carrying capacity if you
adhere to the loading conditions, tire size, and cold tire
inflation pressures specified on the ªTire and Loading
Informationº placard and in the ªVehicle Loadingº sec-
tion of this manual.
NOTE:Under a maximum loaded vehicle condition,
gross axle weight ratings (GAWR's) for the front and rear
axles must not be exceeded. For further information on
GAWR's, vehicle loading, and trailer towing, refer to the
ªVehicle Loadingº section of this manual.To determine the maximum loading conditions of your
vehicle, locate the statement ªThe combined weight of
occupants and cargo should never exceed XXX kg or XXX
lbs.º on the Tire and Loading Information placard. The
combined weight of occupants, cargo/luggage and
trailer tongue weight (if applicable) should never exceed
the weight referenced here.
Steps for Determining Correct Load Limit
1. Locate the statement ªThe combined weight of occu-
pants and cargo should never exceed XXX poundsº on
your vehicle's placard.
2. Determine the combined weight of the driver and
passengers that will be riding in your vehicle.
3. Subtract the combined weight of the driver and pas-
sengers from XXX kilograms or XXX pounds.
282 STARTING AND OPERATING