torque JEEP PATRIOT 2011 1.G Owners Manual
[x] Cancel search | Manufacturer: JEEP, Model Year: 2011, Model line: PATRIOT, Model: JEEP PATRIOT 2011 1.GPages: 490, PDF Size: 4.52 MB
Page 304 of 490

FOUR-WHEEL DRIVE OPERATION —
IF EQUIPPED
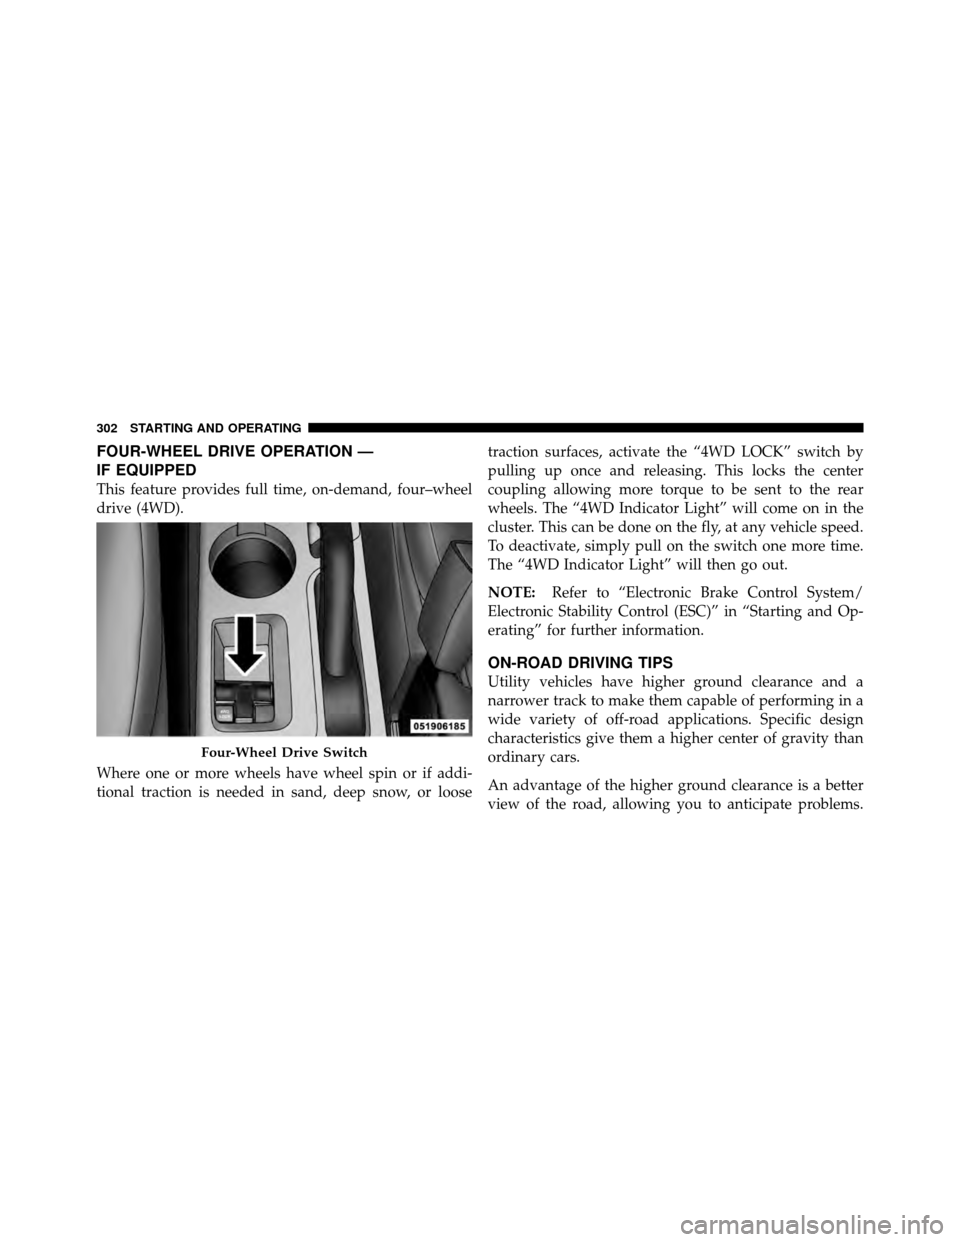
This feature provides full time, on-demand, four–wheel
drive (4WD).
Where one or more wheels have wheel spin or if addi-
tional traction is needed in sand, deep snow, or loosetraction surfaces, activate the “4WD LOCK” switch by
pulling up once and releasing. This locks the center
coupling allowing more torque to be sent to the rear
wheels. The “4WD Indicator Light” will come on in the
cluster. This can be done on the fly, at any vehicle speed.
To deactivate, simply pull on the switch one more time.
The “4WD Indicator Light” will then go out.
NOTE:
Refer to “Electronic Brake Control System/
Electronic Stability Control (ESC)” in “Starting and Op-
erating” for further information.
ON-ROAD DRIVING TIPS
Utility vehicles have higher ground clearance and a
narrower track to make them capable of performing in a
wide variety of off-road applications. Specific design
characteristics give them a higher center of gravity than
ordinary cars.
An advantage of the higher ground clearance is a better
view of the road, allowing you to anticipate problems.
Four-Wheel Drive Switch
302 STARTING AND OPERATING
Page 313 of 490

•Check threaded fasteners for looseness, particularly on
the chassis, drivetrain components, steering, and sus-
pension. Retighten them, if required, and torque to the
values specified in the Service Manual.
•Check for accumulations of plants or brush. These
things could be a fire hazard. They might hide damage
to fuel lines, brake hoses, axle pinion seals, and
propeller shafts.
•After extended operation in mud, sand, water, or
similar dirty conditions, have the radiator, fan, brake
rotors, wheels, brake linings, and axle yokes inspected
and cleaned as soon as possible.
WARNING!
Abrasive material in any part of the brakes may cause
excessive wear or unpredictable braking. You might
not have full braking power when you need it to
prevent a collision. If you have been operating your
vehicle in dirty conditions, get your brakes checked
and cleaned as necessary.
•If you experience unusual vibration after driving in
mud, slush or similar conditions, check the wheels for
impacted material. Impacted material can cause a
wheel imbalance and freeing the wheels of it will
correct the situation.
POWER STEERING
The standard power steering system will give you good
vehicle response and increased ease of maneuverability
in tight spaces. The system will provide mechanical
steering capability if power assist is lost.
5
STARTING AND OPERATING 311
Page 322 of 490

WARNING!
•The Brake Assist System (BAS) cannot prevent the
natural laws of physics from acting on the vehicle,
nor can it increase the traction afforded by prevail-
ing road conditions.
•The BAS cannot prevent collisions, including
those resulting from excessive speed in turns,
driving on very slippery surfaces, or hydroplan-
ing.
•The capabilities of a BAS-equipped vehicle must
never be exploited in a reckless or dangerous
manner which could jeopardize the user ’s safety
or the safety of others.
Traction Control System (TCS)
This system monitors the amount of wheel spin of each of
the driven wheels. If wheel spin is detected, brake
pressure is applied to the slipping wheel(s) and engine
power is reduced to provide enhanced acceleration and
stability. A feature of the TCS system functions similar to
a limited slip differential and controls the wheel spin
across a driven axle. If one wheel on a driven axle is
spinning faster than the other, the system will apply the
brake of the spinning wheel. This will allow more engine
torque to be applied to the wheel that is not spinning.
This feature remains active even if TCS and ESC are in
either the “Partial Off” or “Full Off” modes. Refer to
“Electronic Stability Control (ESC)” in this section of this
manual.
320 STARTING AND OPERATING
Page 389 of 490

4. Turn the jack screw to the left until the jack can be
placed under the jacking location. Once the jack is
positioned, turn the jack screw to the right until the jack
head is properly engaged with the lift area closest to the
wheel to be changed. Do not raise the vehicle until you
are sure the jack is securely engaged.
WARNING!
Raising the vehicle higher than necessary can make
the vehicle less stable. It could slip off the jack and
hurt someone near it. Raise the vehicle only enough
to remove the tire.
5. Raise the vehicle by turning the jack screw to the right,
using the swivel wrench. Raise the vehicle only until the
tire just clears the surface and enough clearance is
obtained to install the spare tire. Minimum tire lift
provides maximum stability. 6. Remove the wheel nuts and pull the wheel (and
bolt-on center cap if equipped) off the hub. Install the
spare wheel and wheel nuts with the cone shaped end of
the nuts toward the wheel. Lightly tighten the nuts.
WARNING!
To avoid the risk of forcing the vehicle off the jack,
do not fully tighten the wheel nuts until the vehicle
has been lowered. Failure to follow this warning may
result in personal injury.
7. Lower the vehicle by turning the jack screw to the left.
8. Finish tightening the nuts. Push down on the wrench
while tightening the wheel nuts. Alternate nuts until each
nut has been tightened twice. The correct wheel nut
torque is 100 ft lbs (135 N·m). If you doubt that you have
tightened the nuts correctly, have them checked with a
torque wrench by your authorized dealer or at a service
station.
6
WHAT TO DO IN EMERGENCIES 387