service JEEP PATRIOT 2017 1.G Owners Manual
[x] Cancel search | Manufacturer: JEEP, Model Year: 2017, Model line: PATRIOT, Model: JEEP PATRIOT 2017 1.GPages: 421, PDF Size: 3.4 MB
Page 6 of 421
INTRODUCTION
Congratulations on selecting your new FCA US LLC ve-
hicle. Be assured that it represents precision workmanship,
distinctive styling, and high quality.
This is a specialized utility vehicle. It can go places and
perform tasks that conventional passenger cars are not
intended. It handles and maneuvers differently from many
passenger cars both on-road and off-road, so take time to
become familiar with your vehicle.
The two-wheel drive version of this vehicle was designed
for on-road use only. It is not intended for off-road driving
or use in other severe conditions suited for a four-wheel
drive vehicle.
Before you start to drive this vehicle, read the Owner’s
Manual. Be sure you are familiar with all vehicle controls,
particularly those used for braking, steering, transmission,
and transfer case shifting. Learn how your vehicle handles
on different road surfaces. Your driving skills will improve
with experience. When driving off-road or working the
vehicle, don’t overload the vehicle or expect the vehicle to
overcome the natural laws of physics. Always observe
federal, state, provincial and local laws wherever you
drive.As with other vehicles of this type, failure to operate this
vehicle correctly may result in loss of control or a collision.
Refer to “Driving Tips” in “Starting And Operating” for
further information.
This Owner’s Manual has been prepared with the assis-
tance of service and engineering specialists to acquaint you
with the operation and maintenance of your vehicle. It is
supplemented by Warranty Information, and various
customer-oriented documents. Please take the time to read
these publications carefully. Following the instructions and
recommendations in this manual will help assure safe and
enjoyable operation of your vehicle.
NOTE: After reviewing the owner information, it should
be stored in the vehicle for convenient referencing and
remain with the vehicle when sold.
When it comes to service, remember that your authorized
dealer knows your Jeep® vehicle best, has factory-trained
technicians and genuine MOPAR® parts, and cares about
your satisfaction.
ROLLOVER WARNING
Utility vehicles have a significantly higher rollover rate
than other types of vehicles. This vehicle has a higher
ground clearance and a higher center of gravity than many
4 INTRODUCTION
Page 21 of 421
KEYS
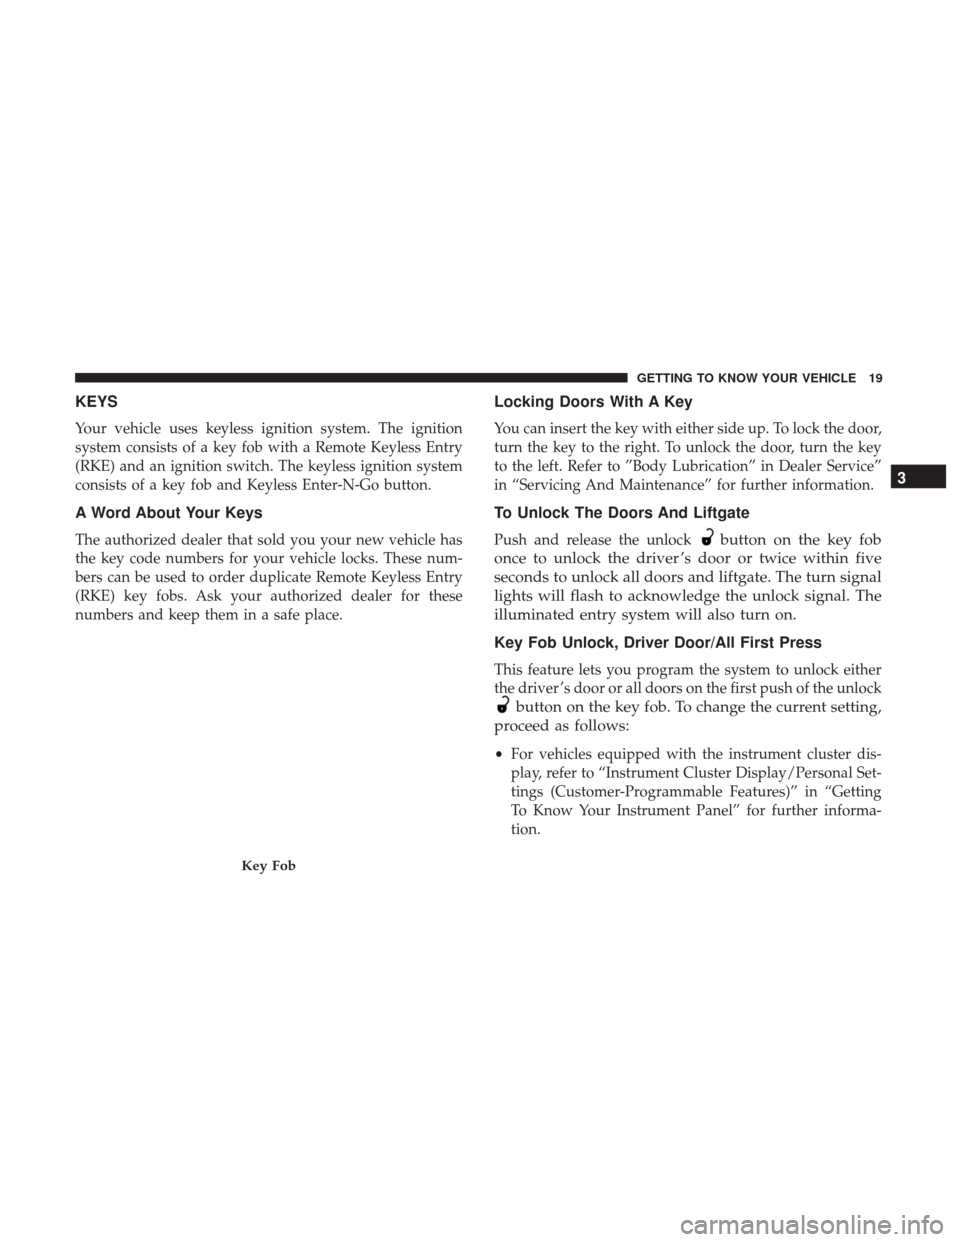
Your vehicle uses keyless ignition system. The ignition
system consists of a key fob with a Remote Keyless Entry
(RKE) and an ignition switch. The keyless ignition system
consists of a key fob and Keyless Enter-N-Go button.
A Word About Your Keys
The authorized dealer that sold you your new vehicle has
the key code numbers for your vehicle locks. These num-
bers can be used to order duplicate Remote Keyless Entry
(RKE) key fobs. Ask your authorized dealer for these
numbers and keep them in a safe place.
Locking Doors With A Key
You can insert the key with either side up. To lock the door,
turn the key to the right. To unlock the door, turn the key
to the left. Refer to ”Body Lubrication” in Dealer Service”
in “Servicing And Maintenance” for further information.
To Unlock The Doors And Liftgate
Push and release the unlockbutton on the key fob
once to unlock the driver ’s door or twice within five
seconds to unlock all doors and liftgate. The turn signal
lights will flash to acknowledge the unlock signal. The
illuminated entry system will also turn on.
Key Fob Unlock, Driver Door/All First Press
This feature lets you program the system to unlock either
the driver ’s door or all doors on the first push of the unlock
button on the key fob. To change the current setting,
proceed as follows:
• For vehicles equipped with the instrument cluster dis-
play, refer to “Instrument Cluster Display/Personal Set-
tings (Customer-Programmable Features)” in “Getting
To Know Your Instrument Panel” for further informa-
tion.
Key Fob
3
GETTING TO KNOW YOUR VEHICLE 19
Page 24 of 421
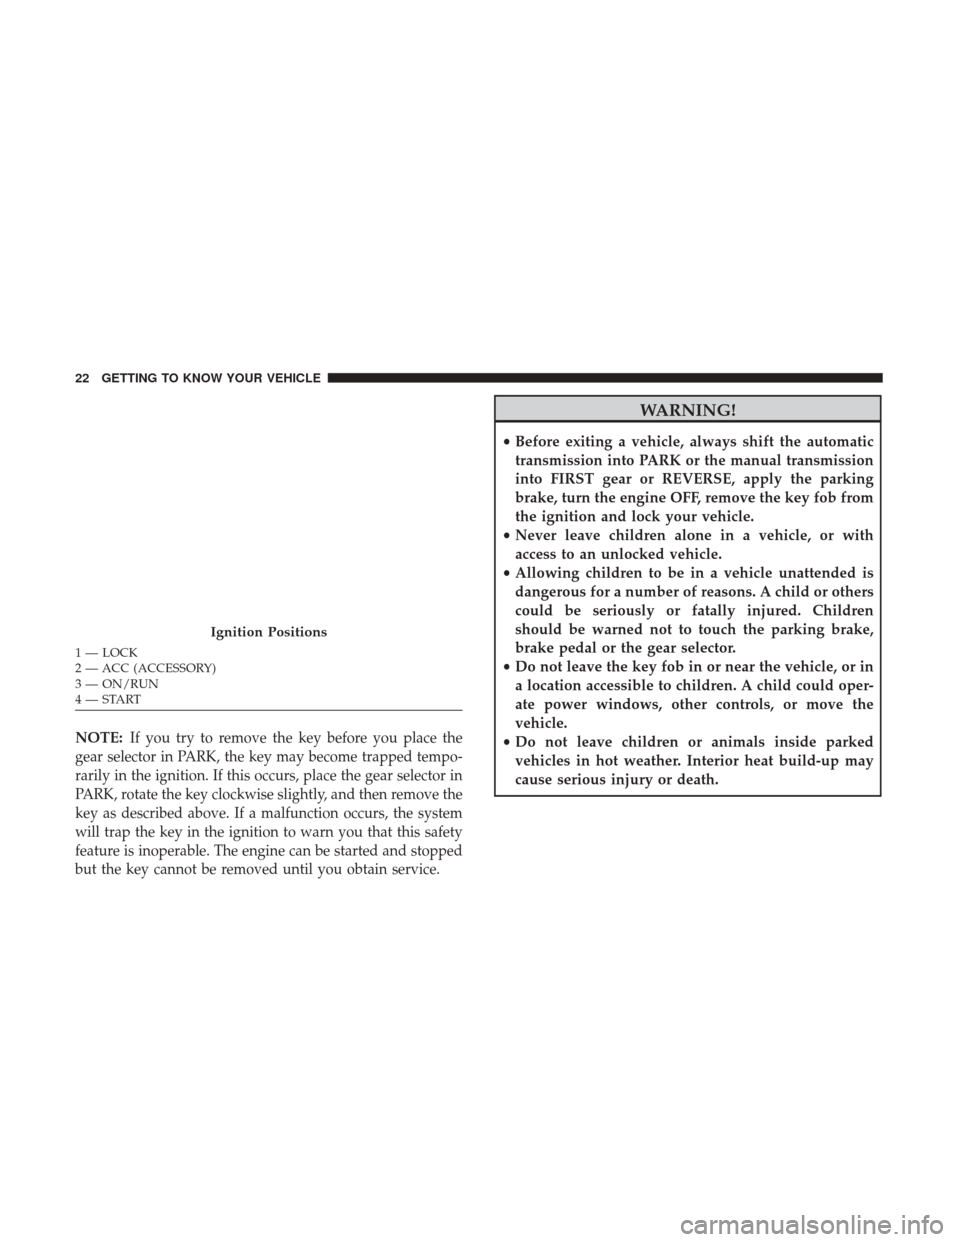
NOTE:If you try to remove the key before you place the
gear selector in PARK, the key may become trapped tempo-
rarily in the ignition. If this occurs, place the gear selector in
PARK, rotate the key clockwise slightly, and then remove the
key as described above. If a malfunction occurs, the system
will trap the key in the ignition to warn you that this safety
feature is inoperable. The engine can be started and stopped
but the key cannot be removed until you obtain service.
WARNING!
• Before exiting a vehicle, always shift the automatic
transmission into PARK or the manual transmission
into FIRST gear or REVERSE, apply the parking
brake, turn the engine OFF, remove the key fob from
the ignition and lock your vehicle.
• Never leave children alone in a vehicle, or with
access to an unlocked vehicle.
• Allowing children to be in a vehicle unattended is
dangerous for a number of reasons. A child or others
could be seriously or fatally injured. Children
should be warned not to touch the parking brake,
brake pedal or the gear selector.
• Do not leave the key fob in or near the vehicle, or in
a location accessible to children. A child could oper-
ate power windows, other controls, or move the
vehicle.
• Do not leave children or animals inside parked
vehicles in hot weather. Interior heat build-up may
cause serious injury or death.
Ignition Positions
1 — LOCK
2 — ACC (ACCESSORY)
3 — ON/RUN
4 — START 22 GETTING TO KNOW YOUR VEHICLE
Page 28 of 421
an invalid key to try to start the engine. Either of these
conditions will result in the engine being shut off after two
seconds.
If the Vehicle Security Light turns on during normal vehicle
operation (vehicle running for longer than 10 seconds), it
indicates that there is a fault in the electronics. Should this
occur, have the vehicle serviced as soon as possible by an
authorized dealer.
CAUTION!
The Sentry Key Immobilizer system is not compatible
with some aftermarket remote starting systems. Use of
these systems may result in vehicle starting problems
and loss of security protection.
All of the key fobs provided with your new vehicle have
been programmed to the vehicle electronics.
Replacement Key Fobs
NOTE: Only key fobs that are programmed to the vehicle
electronics can be used to start and operate the vehicle.
Once a key fob is programmed to a vehicle, it cannot be
programmed to any other vehicle.
CAUTION!
Always remove the Sentry Keys from the vehicle and
lock all doors when leaving the vehicle unattended.
Duplication of key fobs may be performed at an authorized
dealer or by following the customer key programming
procedure. This procedure consists of programming a
blank key fob to the vehicle electronics. A blank key fob is
one that has never been programmed.
NOTE: When having the Sentry Key Immobilizer System
serviced, bring all vehicle key fobs with you to an autho-
rized dealer.
Customer Key Programming
If you have two valid key fobs, you can program new key
fobs to the Sentry Key Immobilizer system by performing
the following procedure:
1. Cut the additional Key(s) to match the ignition and lock cylinder key code.
2. Insert the first valid key into the ignition. Place the ignition in the ON/RUN position for at least three
seconds, but no longer than 15 seconds. Then, place the
ignition in the LOCK position and remove the first key.
26 GETTING TO KNOW YOUR VEHICLE
Page 29 of 421
3. Insert the second valid key into the ignition. Place theignition in the ON/RUN position within 15 seconds.
After 10 seconds, a chime will sound. In addition, the
Vehicle Security Light will begin to flash. Place the
ignition in the LOCK position and remove the second
key.
4. Insert a blank key into the ignition. Place the ignition in the ON/RUN position within 60 seconds. After 10
seconds, a single chime will sound. In addition, the
Vehicle Security Light will stop flashing. To indicate that
programming is complete, the Vehicle Security Light
will turn on again for three seconds and then turn off.
The new key is programmed. The key fob will also be
programmed during this procedure.
Repeat this procedure to program up to eight keys. If you
do not have a programmed key fob, contact your autho-
rized dealer for details.
NOTE: If a programmed key fob is lost, see your autho-
rized dealer to have all remaining key fobs erased from the
system’s memory. This will prevent the lost key from
starting your vehicle. The remaining key fobs must then be
reprogrammed. All vehicle key fobs must be taken to an
authorized dealer at the time of service to be repro-
grammed.General Information
The following regulatory statement applies to all radio
frequency (RF) devices equipped in this vehicle:
This device complies with Part 15 of the FCC Rules and
with Industry Canada license-exempt RSS standard(s).
Operation is subject to the following two conditions:
1. This device may not cause harmful interference, and
2.
This device must accept any interference received, includ-
ing interference that may cause undesired operation.
NOTE: Changes or modifications not expressly approved
by the party responsible for compliance could void the
user ’s authority to operate the equipment.
VEHICLE SECURITY ALARM — IF EQUIPPED
This Vehicle Security Alarm monitors the doors, liftgate,
and ignition switch for unauthorized operation.
When the alarm is activated, the interior switches for door
locks are disabled. The Vehicle Security Alarm provides both
audio and visual signals, the horn will sound, the headlights,
park lamps and/or turn signals will flash repeatedly for
three minutes. If the disturbance is still present (driver’s
3
GETTING TO KNOW YOUR VEHICLE 27
Page 43 of 421
For comfort, the Active Head Restraints can be tilted
forward and backward. To tilt the head restraint closer to
the back of your head, pull forward on the bottom of the
head restraint. Push rearward on the bottom of the head
restraint to move the head restraint away from your head.NOTE:
•The head restraints should only be removed by qualified
technicians, for service purposes only. If either of the
head restraints require removal, see your authorized
dealer.
• In the event of deployment of an Active Head Restraint,
refer to “Occupant Restraints” in “Safety” for further
information.
Active Head Restraint (Normal Position)
Active Head Restraint (Tilted Position)
3
GETTING TO KNOW YOUR VEHICLE 41
Page 66 of 421
The operator can override the AUTO mode setting to
change airflow distribution by rotating the Mode Control
knob (on the right).
Operating Tips
NOTE:Refer to the chart at the end of this section for
suggested control settings for various weather conditions.
Summer Operation
The engine cooling system must be protected with a
high-quality antifreeze coolant to provide proper corrosion
protection and to protect against engine overheating. OAT
coolant (conforming to MS.90032) is recommended. Refer
to “Dealer Service” in “Servicing And Maintenance” for
proper coolant selection.
64 GETTING TO KNOW YOUR VEHICLE
Page 67 of 421
Winter Operation
To ensure the best possible heater and defroster perfor-
mance, make sure the engine cooling system is functioning
properly and the proper amount, type, and concentration
of coolant is used. Refer to “Dealer Service” in “Servicing
And Maintenance” for proper coolant selection. Use of the
air Recirculation mode during Winter months is not rec-
ommended because it may cause window fogging.
Vacation/Storage
Any time you store your vehicle or keep it out of service
(i.e., vacation) for two weeks or more, run the air condi-
tioning system at idle for about five minutes in fresh air
with the blower setting in high. This will ensure adequate
system lubrication to minimize the possibility of compres-
sor damage when the system is started again.
Window Fogging
Vehicle windows tend to fog on the inside of the glass in
mild, rainy and/or humid weather. Windows may frost on
the inside of the glass in very cold weather. To clear the
windows, select Defrost or Mix mode and increase the
front blower speed. Do not use the Recirculation mode
without A/C for long periods, as fogging may occur.NOTE:
Automatic Temperature Controls (ATC) will auto-
matically adjust the climate control settings to reduce or
eliminate window fogging on the front windshield. When
this occurs, recirculation will be unavailable.
Outside Air Intake
Make sure the air intake, located directly in front of the
windshield, is free of obstructions such as leaves. Leaves
collected in the air intake may reduce airflow, can cause
odor, and if they enter the plenum they could plug the
water drains. In Winter months make sure the air intake is
clear of ice, slush and snow.
A/C Air Filter
The climate control system filters outside air containing
dust, pollen and some odors. Strong odors cannot be totally
filtered out. Refer to “Dealer Service” in “Servicing And
Maintenance” for filter replacement instructions.
3
GETTING TO KNOW YOUR VEHICLE 65
Page 98 of 421
NOTE:U.S. Federal regulations require that upon transfer
of vehicle ownership, the seller certify to the purchaser the
correct mileage that the vehicle has been driven. If your
odometer needs to be repaired or serviced, the repair
technician should leave the odometer reading the same as
it was before the repair or service. If s/he cannot do so,
then the odometer must be set at zero, and a sticker must
be placed in the door jamb stating what the mileage was
before the repair or service. It is a good idea for you to
make a record of the odometer reading before the repair/
service, so that you can be sure that it is properly reset, or
that the door jamb sticker is accurate if the odometer must
be reset at zero.
2. Tachometer
•This gauge measures engine revolutions per minute
(RPM x 1000). Before the pointer reaches the red area,
ease up on the accelerator to prevent engine damage.
3. Temperature Gauge •The temperature gauge shows engine coolant tem-
perature. Any reading within the normal range indi-
cates that the engine cooling system is operating
satisfactorily. •
The gauge pointer will likely indicate a higher tem-
perature when driving in hot weather or up mountain
grades. It should not be allowed to exceed the upper
limits of the normal operating range.
CAUTION!
Driving with a hot engine cooling system could dam-
age your vehicle. If the temperature gauge reads “H”
pull over and stop the vehicle. Idle the vehicle with the
air conditioner turned off until the pointer drops back
into the normal range. If the pointer remains on the
“H”, turn the engine off immediately and call an
authorized dealer for service.
WARNING!
A hot engine cooling system is dangerous. You or
others could be badly burned by steam or boiling
coolant. You may want to call an authorized dealer for
service if your vehicle overheats. If you decide to look
under the hood yourself, see “Maintaining Your Ve-
hicle”. Follow the warnings under the Cooling System
Pressure Cap paragraph.
96 GETTING TO KNOW YOUR INSTRUMENT PANEL
Page 101 of 421
Red Telltale Lights
Seat Belt Reminder Warning Light
Red TelltaleLight What It Means
Seat Belt Reminder Warning Light
When the ignition switch is first turned to ON/RUN, this light will turn on for four to eight sec-
onds as a bulb check. During the bulb check, if the driver’s seat belt is unbuckled, a chime will
sound. After the bulb check or when driving, if the driver ’s seat belt remains unbuckled, the Seat
Belt Reminder Light will flash or remain on continuously and a chime will sound. Refer to “Oc-
cupant Restraint Systems” in “Safety” for further information.
Air Bag Warning Light
Red Telltale
Light What It Means
Air Bag Warning Light
This light will turn on for four to eight seconds as a bulb check when the ignition switch is first
turned to ON/RUN. If the light is either not on during startup, stays on, or turns on while driv-
ing, have the system inspected at an authorized dealer as soon as possible. This light will illumi-
nate with a single chime when a fault with the Air Bag Warning Light has been detected, it will
stay on until the fault is cleared. If the light comes on intermittently or remains on while driving,
have an authorized dealer service the vehicle immediately. Refer to “Occupant Restraint Systems”
in “Safety” for further information.
4
GETTING TO KNOW YOUR INSTRUMENT PANEL 99