high beam JEEP PATRIOT 2019 Owner handbook (in English)
[x] Cancel search | Manufacturer: JEEP, Model Year: 2019, Model line: PATRIOT, Model: JEEP PATRIOT 2019Pages: 332, PDF Size: 1.99 MB
Page 64 of 332
WARNING!(Continued)
•Always make sure that objects cannot fall
into the driver footwell while the vehicle is
moving. Objects can become trapped un-
der the brake pedal and accelerator pedal
causing a loss of vehicle control.
•If required, mounting posts must be prop-
erly installed, if not equipped from the
factory.
Failure to properly follow floor mat installa-
tion or mounting can cause interference with
the brake pedal and accelerator pedal opera-
tion causing loss of control of the vehicle.
Periodic Safety Checks You Should
Make Outside The Vehicle
Tires
Examine tires for excessive tread wear and
uneven wear patterns. Check for stones, nails,
glass, or other objects lodged in the tread or
sidewall. Inspect the tread for cuts and cracks.
Inspect sidewalls for cuts, cracks, and bulges.
Check the wheel nuts for tightness. Check the
tires (including spare) for proper cold inflation
pressure.
Lights
Have someone observe the operation of brake
lights and exterior lights while you work the
controls. Check turn signal and high beam
indicator lights on the instrument panel.Door Latches
Check for proper closing, latching, and locking.
Fluid Leaks
Check area under vehicle after overnight park-
ing for fuel, engine coolant, oil, or other fluid
leaks. Also, if gasoline fumes are detected or if
fuel, power steering fluid (if equipped), or brake
fluid leaks are suspected. The cause should be
located and corrected immediately.
60
Page 66 of 332
•Commands..................................86
•Voice Training.................................88
•SEATS ......................................88•Power Seats — If Equipped........................88
•Heated Seats — If Equipped........................89
•Manual Front Seat Adjustment.......................90
•Manual Seat Height Adjustment — If Equipped.............90
•Manual Lumbar — If Equipped......................91
•Driver’s Seatback Recline.........................91
•Fold-Flat Front Passenger Seat — If Equipped.............92
•Head Restraints...............................92
•Folding Rear Seat..............................94
•Reclining Rear Seat — If Equipped....................95
•TO OPEN AND CLOSE THE HOOD . ....................95
•LIGHTS......................................96
•Multifunction Lever.............................96
•Headlights And Parking Lights......................96
•Daytime Running Lights — If Equipped.................97
•Lights-On Reminder.............................97
•Front Fog Lights...............................97
•Rear Fog Lights................................97
•Turn Signals.................................97
•Lane Change Assist.............................98
•High/Low Beam Switch...........................98
•Flash-To-Pass................................98
•Instrument Panel Dimmer..........................98
•Headlight Leveling System — If Equipped................98
62
Page 101 of 332
Daytime Running Lights — If
Equipped
The high beam lights will come on as Daytime
Running Lights (lower intensity), whenever the
ignition is ON, the engine is running, the head-
light switch is off, the parking brake is off, the
turn signal is off, and the gear selector is in any
position except PARK.
Lights-On ReminderIf the headlights or parking lights are left on after
the ignition is turned OFF, a chime will sound to
alert the driver when the driver’s door is opened.
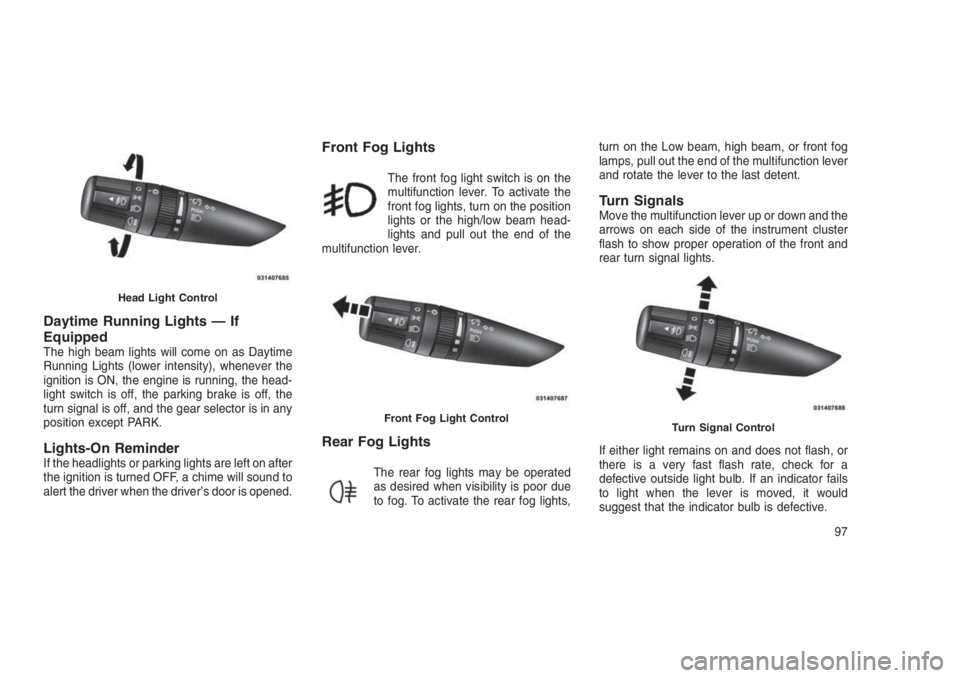
Front Fog Lights
The front fog light switch is on the
multifunction lever. To activate the
front fog lights, turn on the position
lights or the high/low beam head-
lights and pull out the end of the
multifunction lever.
Rear Fog Lights
The rear fog lights may be operated
as desired when visibility is poor due
to fog. To activate the rear fog lights,turn on the Low beam, high beam, or front fog
lamps, pull out the end of the multifunction lever
and rotate the lever to the last detent.
Turn SignalsMove the multifunction lever up or down and the
arrows on each side of the instrument cluster
flash to show proper operation of the front and
rear turn signal lights.
If either light remains on and does not flash, or
there is a very fast flash rate, check for a
defective outside light bulb. If an indicator fails
to light when the lever is moved, it would
suggest that the indicator bulb is defective.
Head Light Control
Front Fog Light ControlTurn Signal Control
97
Page 102 of 332
Lane Change AssistTap the lever up or down once, without moving
beyond the detent, and the turn signal (right or
left) will flash three times then automatically turn
off.
High/Low Beam SwitchPush the multifunction lever away from you to
switch the headlights to high beam. Pull the
multifunction lever toward you to switch the
headlights back to low beam.
Flash-To-PassYou can signal another vehicle with your head-
lights by lightly pulling the multifunction lever
toward you. This will turn on the high beam
headlights until the lever is released.
NOTE:
If the multifunction lever is held in the flash-
to-pass position for more than 15 seconds,
the high beams will shut off. If this occurs,
wait 30 seconds for the next flash-to-pass
operation.
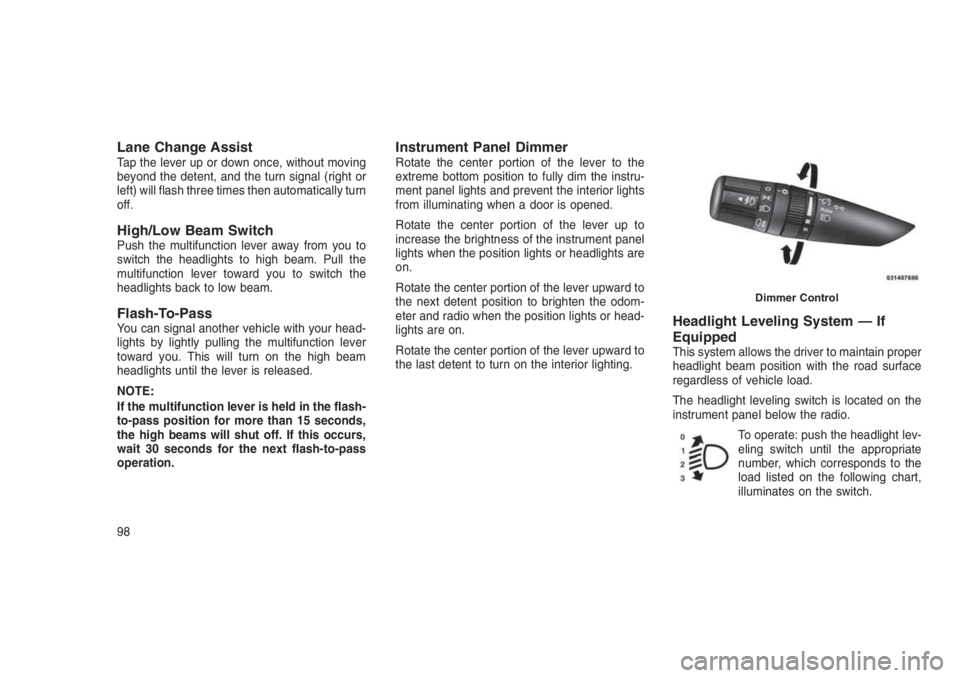
Instrument Panel DimmerRotate the center portion of the lever to the
extreme bottom position to fully dim the instru-
ment panel lights and prevent the interior lights
from illuminating when a door is opened.
Rotate the center portion of the lever up to
increase the brightness of the instrument panel
lights when the position lights or headlights are
on.
Rotate the center portion of the lever upward to
the next detent position to brighten the odom-
eter and radio when the position lights or head-
lights are on.
Rotate the center portion of the lever upward to
the last detent to turn on the interior lighting.
Headlight Leveling System — If
Equipped
This system allows the driver to maintain proper
headlight beam position with the road surface
regardless of vehicle load.
The headlight leveling switch is located on the
instrument panel below the radio.
To operate: push the headlight lev-
eling switch until the appropriate
number, which corresponds to the
load listed on the following chart,
illuminates on the switch.
Dimmer Control
98
Page 141 of 332
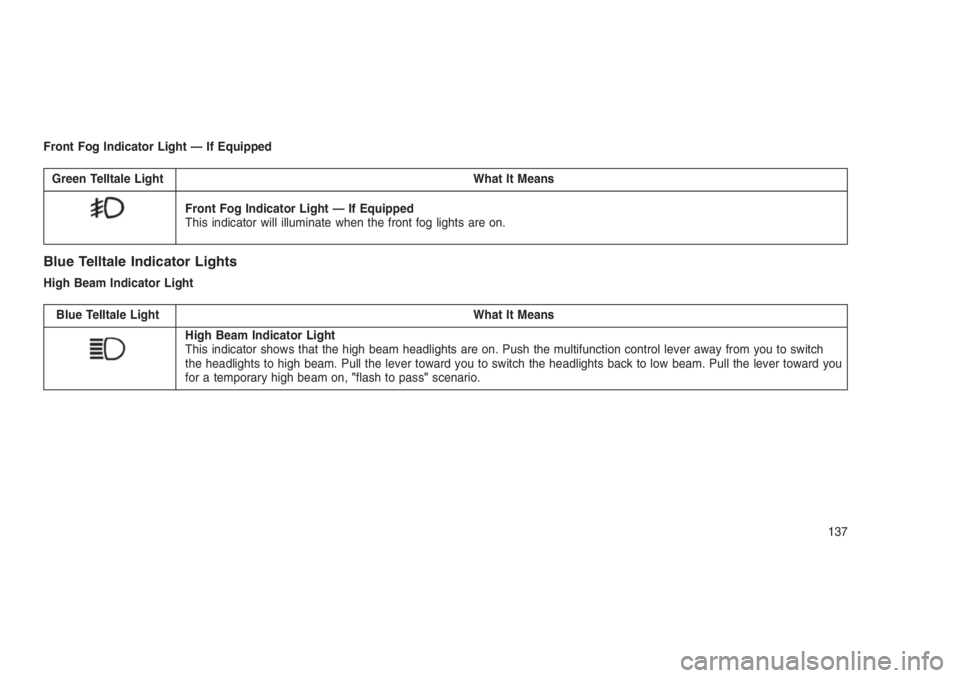
Front Fog Indicator Light — If Equipped
Green Telltale Light What It Means
Front Fog Indicator Light — If Equipped
This indicator will illuminate when the front fog lights are on.
Blue Telltale Indicator Lights
High Beam Indicator Light
Blue Telltale Light What It Means
High Beam Indicator Light
This indicator shows that the high beam headlights are on. Push the multifunction control lever away from you to switch
the headlights to high beam. Pull the lever toward you to switch the headlights back to low beam. Pull the lever toward you
for a temporary high beam on,"flash to pass"scenario.
137
Page 283 of 332
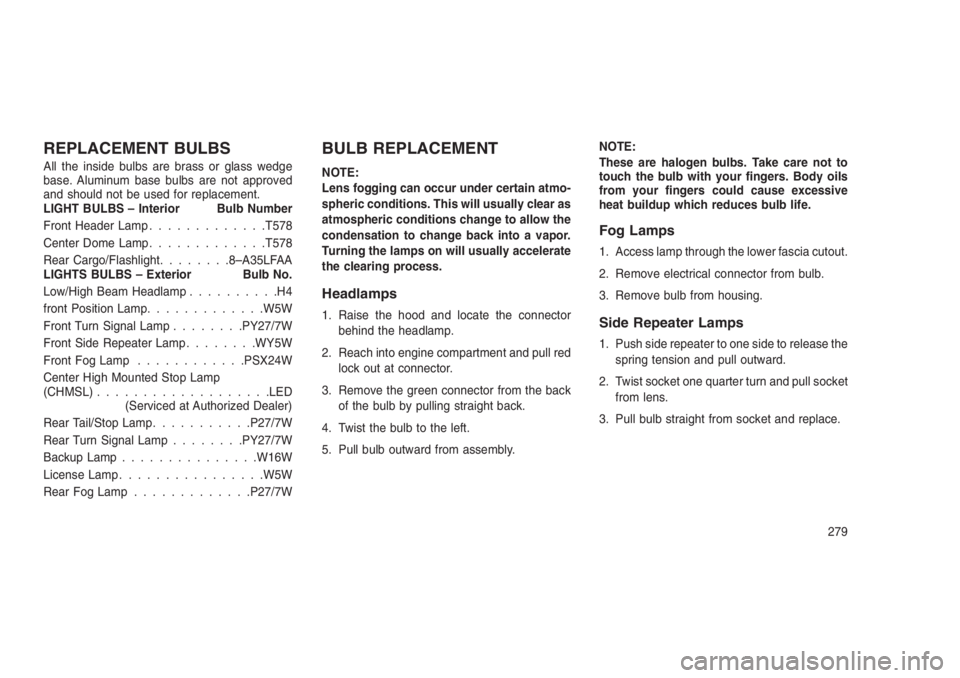
REPLACEMENT BULBS
All the inside bulbs are brass or glass wedge
base. Aluminum base bulbs are not approved
and should not be used for replacement.
LIGHT BULBS – Interior Bulb Number
Front Header Lamp.............T578
Center Dome Lamp.............T578
Rear Cargo/Flashlight........8–A35LFAA
LIGHTS BULBS – Exterior Bulb No.
Low/High Beam Headlamp..........H4
front Position Lamp.............W5W
Front Turn Signal Lamp........PY27/7W
Front Side Repeater Lamp........WY5W
Front Fog Lamp............PSX24W
Center High Mounted Stop Lamp
(CHMSL)...................LED
(Serviced at Authorized Dealer)
Rear Tail/Stop Lamp...........P27/7W
Rear Turn Signal Lamp........PY27/7W
Backup Lamp...............W16W
License Lamp................W5W
Rear Fog Lamp.............P27/7W
BULB REPLACEMENT
NOTE:
Lens fogging can occur under certain atmo-
spheric conditions. This will usually clear as
atmospheric conditions change to allow the
condensation to change back into a vapor.
Turning the lamps on will usually accelerate
the clearing process.
Headlamps
1. Raise the hood and locate the connector
behind the headlamp.
2. Reach into engine compartment and pull red
lock out at connector.
3. Remove the green connector from the back
of the bulb by pulling straight back.
4. Twist the bulb to the left.
5. Pull bulb outward from assembly.NOTE:
These are halogen bulbs. Take care not to
touch the bulb with your fingers. Body oils
from your fingers could cause excessive
heat buildup which reduces bulb life.
Fog Lamps
1. Access lamp through the lower fascia cutout.
2. Remove electrical connector from bulb.
3. Remove bulb from housing.
Side Repeater Lamps
1. Push side repeater to one side to release the
spring tension and pull outward.
2. Twist socket one quarter turn and pull socket
from lens.
3. Pull bulb straight from socket and replace.
279
Page 325 of 332
Gross Vehicle Weight Rating........213
Hands-Free Phone (Uconnect)........67
Hazard Warning Flasher...........227
Head Restraints................92
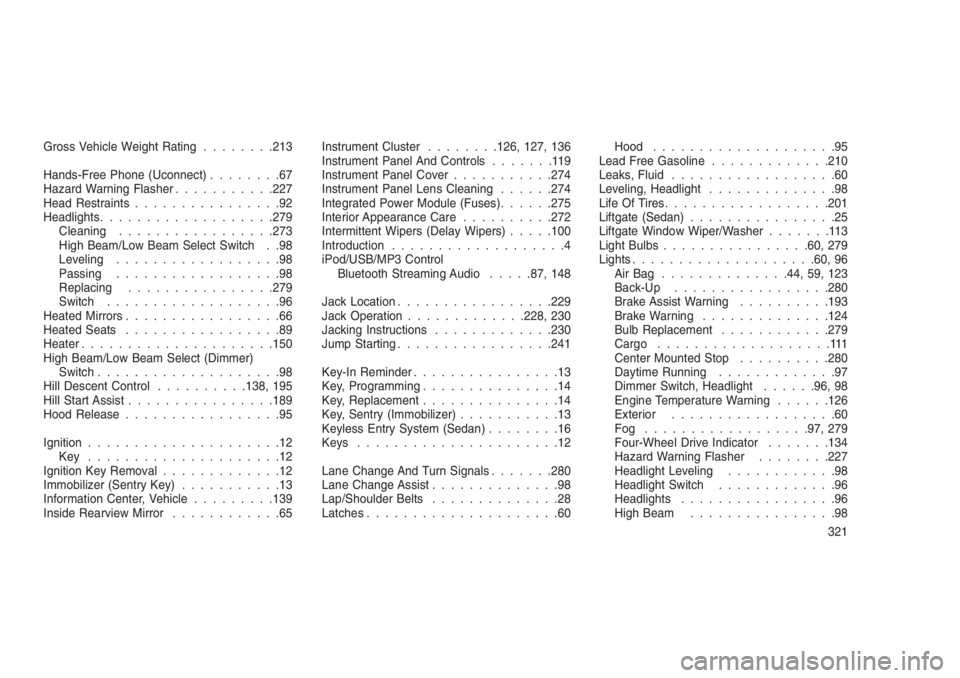
Headlights...................279
Cleaning.................273
High Beam/Low Beam Select Switch . .98
Leveling..................98
Passing..................98
Replacing................279
Switch...................96
Heated Mirrors.................66
Heated Seats.................89
Heater.....................150
High Beam/Low Beam Select (Dimmer)
Switch....................98
Hill Descent Control..........138, 195
Hill Start Assist................189
Hood Release.................95
Ignition.....................12
Key .....................12
Ignition Key Removal.............12
Immobilizer (Sentry Key)...........13
Information Center, Vehicle.........139
Inside Rearview Mirror............65Instrument Cluster........126, 127, 136
Instrument Panel And Controls.......119
Instrument Panel Cover...........274
Instrument Panel Lens Cleaning......274
Integrated Power Module (Fuses)......275
Interior Appearance Care..........272
Intermittent Wipers (Delay Wipers).....100
Introduction...................4
iPod/USB/MP3 Control
Bluetooth Streaming Audio.....87, 148
Jack Location.................229
Jack Operation.............228, 230
Jacking Instructions.............230
Jump Starting.................241
Key-In Reminder................13
Key, Programming...............14
Key, Replacement...............14
Key, Sentry (Immobilizer)
...........13
Keyless Entry System (Sedan)........16
Keys......................12
Lane Change And Turn Signals.......280
Lane Change Assist..............98
Lap/Shoulder Belts..............28
Latches.....................60Hood....................95
Lead Free Gasoline.............210
Leaks, Fluid..................60
Leveling, Headlight..............98
Life Of Tires..................201
Liftgate (Sedan)................25
Liftgate Window Wiper/Washer.......113
Light Bulbs................60, 279
Lights....................60, 96
AirBag ..............44, 59, 123
Back-Up.................280
Brake Assist Warning..........193
Brake Warning..............124
Bulb Replacement............279
Cargo...................111
Center Mounted Stop..........280
Daytime Running.............97
Dimmer Switch, Headlight......96, 98
Engine Temperature Warning......126
Exterior..................60
Fog ..................97, 279
Four-Wheel Drive Indicator.......134
Hazard Warning Flasher........227
Headlight Leveling............98
Headlight Switch.............96
Headlights.................96
High Beam................98
321
Page 326 of 332
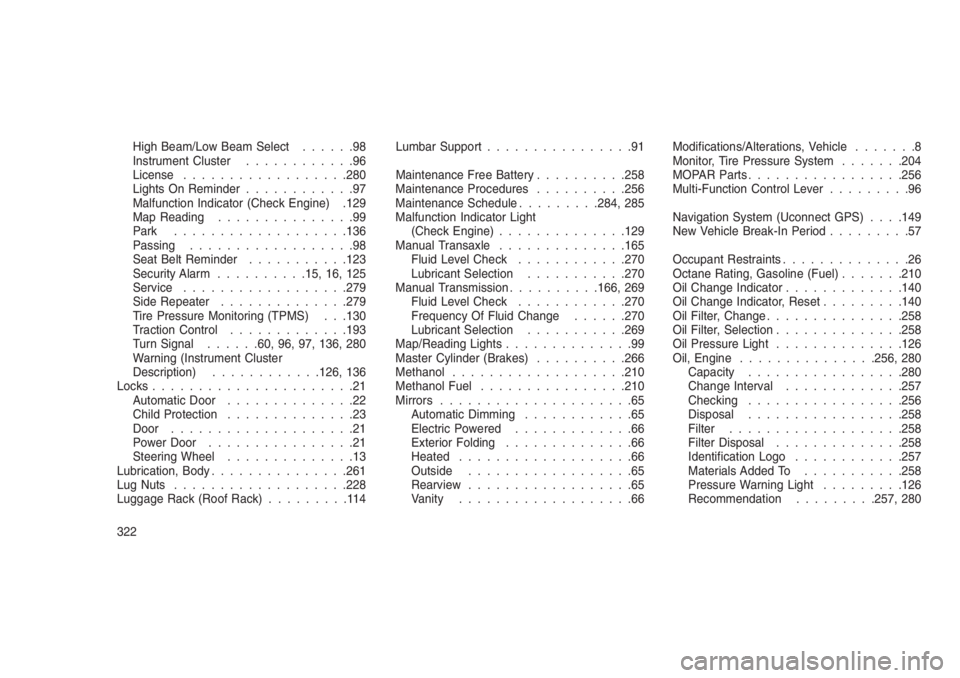
High Beam/Low Beam Select......98
Instrument Cluster............96
License..................280
Lights On Reminder............97
Malfunction Indicator (Check Engine) .129
Map Reading...............99
Park...................136
Passing..................98
Seat Belt Reminder...........123
Security Alarm..........15, 16, 125
Service..................279
Side Repeater..............279
Tire Pressure Monitoring (TPMS) . . .130
Traction Control.............193
Turn Signal......60, 96, 97, 136, 280
Warning (Instrument Cluster
Description)............126, 136
Locks......................21
Automatic Door..............22
Child Protection..............23
Door....................21
Power Door................21
Steering Wheel..............13
Lubrication, Body...............261
Lug Nuts...................228
Luggage Rack (Roof Rack).........114Lumbar Support................91
Maintenance Free Battery..........258
Maintenance Procedures..........256
Maintenance Schedule.........284, 285
Malfunction Indicator Light
(Check Engine)..............129
Manual Transaxle..............165
Fluid Level Check............270
Lubricant Selection...........270
Manual Transmission..........166, 269
Fluid Level Check............270
Frequency Of Fluid Change......270
Lubricant Selection...........269
Map/Reading Lights..............99
Master Cylinder (Brakes)..........266
Methanol..................
.210
Methanol Fuel................210
Mirrors.....................65
Automatic Dimming............65
Electric Powered.............66
Exterior Folding..............66
Heated...................66
Outside..................65
Rearview..................65
Vanity...................66Modifications/Alterations, Vehicle.......8
Monitor, Tire Pressure System.......204
MOPAR Parts.................256
Multi-Function Control Lever.........96
Navigation System (Uconnect GPS). . . .149
New Vehicle Break-In Period.........57
Occupant Restraints..............26
Octane Rating, Gasoline (Fuel).......210
Oil Change Indicator.............140
Oil Change Indicator, Reset.........140
Oil Filter, Change...............258
Oil Filter, Selection..............258
Oil Pressure Light..............126
Oil, Engine...............256, 280
Capacity.................280
Change Interval.............257
Checking.................256
Disposal.................258
Filter...................258
Filter Disposal..............258
Identification Logo............257
Materials Added To...........258
Pressure Warning Light.........126
Recommendation.........257, 280
322