tires JEEP PATRIOT 2019 Owner handbook (in English)
[x] Cancel search | Manufacturer: JEEP, Model Year: 2019, Model line: PATRIOT, Model: JEEP PATRIOT 2019Pages: 332, PDF Size: 1.99 MB
Page 64 of 332
WARNING!(Continued)
•Always make sure that objects cannot fall
into the driver footwell while the vehicle is
moving. Objects can become trapped un-
der the brake pedal and accelerator pedal
causing a loss of vehicle control.
•If required, mounting posts must be prop-
erly installed, if not equipped from the
factory.
Failure to properly follow floor mat installa-
tion or mounting can cause interference with
the brake pedal and accelerator pedal opera-
tion causing loss of control of the vehicle.
Periodic Safety Checks You Should
Make Outside The Vehicle
Tires
Examine tires for excessive tread wear and
uneven wear patterns. Check for stones, nails,
glass, or other objects lodged in the tread or
sidewall. Inspect the tread for cuts and cracks.
Inspect sidewalls for cuts, cracks, and bulges.
Check the wheel nuts for tightness. Check the
tires (including spare) for proper cold inflation
pressure.
Lights
Have someone observe the operation of brake
lights and exterior lights while you work the
controls. Check turn signal and high beam
indicator lights on the instrument panel.Door Latches
Check for proper closing, latching, and locking.
Fluid Leaks
Check area under vehicle after overnight park-
ing for fuel, engine coolant, oil, or other fluid
leaks. Also, if gasoline fumes are detected or if
fuel, power steering fluid (if equipped), or brake
fluid leaks are suspected. The cause should be
located and corrected immediately.
60
Page 134 of 332
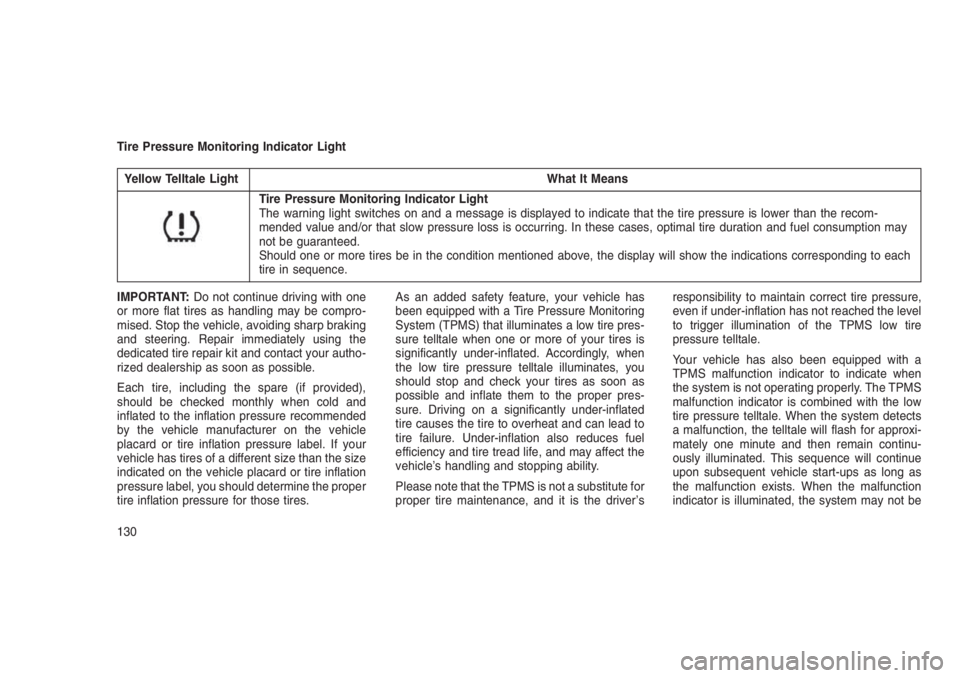
Tire Pressure Monitoring Indicator Light
Yellow Telltale Light What It Means
Tire Pressure Monitoring Indicator Light
The warning light switches on and a message is displayed to indicate that the tire pressure is lower than the recom-
mended value and/or that slow pressure loss is occurring. In these cases, optimal tire duration and fuel consumption may
not be guaranteed.
Should one or more tires be in the condition mentioned above, the display will show the indications corresponding to each
tire in sequence.
IMPORTANT:Do not continue driving with one
or more flat tires as handling may be compro-
mised. Stop the vehicle, avoiding sharp braking
and steering. Repair immediately using the
dedicated tire repair kit and contact your autho-
rized dealership as soon as possible.
Each tire, including the spare (if provided),
should be checked monthly when cold and
inflated to the inflation pressure recommended
by the vehicle manufacturer on the vehicle
placard or tire inflation pressure label. If your
vehicle has tires of a different size than the size
indicated on the vehicle placard or tire inflation
pressure label, you should determine the proper
tire inflation pressure for those tires.As an added safety feature, your vehicle has
been equipped with a Tire Pressure Monitoring
System (TPMS) that illuminates a low tire pres-
sure telltale when one or more of your tires is
significantly under-inflated. Accordingly, when
the low tire pressure telltale illuminates, you
should stop and check your tires as soon as
possible and inflate them to the proper pres-
sure. Driving on a significantly under-inflated
tire causes the tire to overheat and can lead to
tire failure. Under-inflation also reduces fuel
efficiency and tire tread life, and may affect the
vehicle’s handling and stopping ability.
Please note that the TPMS is not a substitute for
proper tire maintenance, and it is the driver’sresponsibility to maintain correct tire pressure,
even if under-inflation has not reached the level
to trigger illumination of the TPMS low tire
pressure telltale.
Your vehicle has also been equipped with a
TPMS malfunction indicator to indicate when
the system is not operating properly. The TPMS
malfunction indicator is combined with the low
tire pressure telltale. When the system detects
a malfunction, the telltale will flash for approxi-
mately one minute and then remain continu-
ously illuminated. This sequence will continue
upon subsequent vehicle start-ups as long as
the malfunction exists. When the malfunction
indicator is illuminated, the system may not be
130
Page 135 of 332
able to detect or signal low tire pressure as
intended. TPMS malfunctions may occur for a
variety of reasons, including the installation of
replacement or alternate tires or wheels on the
vehicle that prevent the TPMS from functioning
properly. Always check the TPMS malfunction
telltale after replacing one or more tires or
wheels on your vehicle, to ensure that the
replacement or alternate tires and wheels allow
the TPMS to continue to function properly.CAUTION!
The TPMS has been optimized for the origi-
nal equipment tires and wheels. TPMS pres-
sures and warning have been established for
the tire size equipped on your vehicle. Un-
desirable system operation or sensor dam-
age may result when using replacement
equipment that is not of the same size, type,
(Continued)
CAUTION!(Continued)
and/or style. Aftermarket wheels can cause
sensor damage. Using aftermarket tire seal-
ants may cause the Tire Pressure Monitoring
System (TPMS) sensor to become inoper-
able. After using an aftermarket tire sealant it
is recommended that you take your vehicle
to an authorized dealership to have your
sensor function checked.
Electronic Stability Control (ESC) OFF Indicator Light — If Equipped
Yellow Telltale Light What It Means
Electronic Stability Control (ESC) OFF Indicator Light — If Equipped
This light indicates the Electronic Stability Control (ESC) is off.
131
Page 166 of 332
•AutoStick (CVT) — If Equipped.....................177•FOUR-WHEEL DRIVE OPERATION — IF EQUIPPED . . . . . . . . . .178
•ON-ROAD DRIVING TIPS . . . . . . . . . . . . . . . . . .........179
•OFF-ROAD DRIVING TIPS..........................179
•When To Use Low (L Off-Road) With The 4WD Lock Lever Engaged —
If Equipped..................................179
•Driving In Snow, Mud And Sand.....................180
•Hill Climbing.................................181
•Driving Through Water...........................182
•After Driving Off-Road...........................183
•POWER STEERING . . . . . . . . . .....................184•Power Steering Fluid Check.......................184•PARKING BRAKE . ..............................185
•BRAKE SYSTEM . . . . . . . . . . . . . . . . . ..............186
•ELECTRONIC BRAKE CONTROL SYSTEM . . . . . . . . . ......187
•Electronic Brake Force Distribution (EBD)...............187
•Brake System Warning Light.......................187
•Anti-Lock Brake System (ABS)......................187
•Anti-Lock Brake Warning Light......................188
•Brake Assist System (BAS)........................189
•Hill Start Assist (HSA)...........................189
•Traction Control System (TCS)......................191
•Electronic Stability Control (ESC)....................191
•Electronic Roll Mitigation (ERM).....................194
•Hill Descent Control (HDC) — If Equipped...............195
•TIRES — GENERAL INFORMATION . . . . . . . . . . . . . . . . . . . .195•Tire Pressure................................195
162
Page 167 of 332
•Tire Inflation Pressures........................196
•Tire Pressures For High Speed Operation.............197
•Radial Ply Tires.............................197
•Tire Types................................198
•Run Flat Tires — If Equipped.....................199
•Spare Tires — If Equipped.......................199
•Tire Spinning..............................200
•Tread Wear Indicators.........................200
•Life Of Tire...............................201
•Replacement Tires...........................201
•TIRE CHAINS (TRACTION DEVICES) . . . . . . . . . . . . .. . . .202
•TIRE ROTATION RECOMMENDATIONS . . . . . . .. . . . . . . .203
•TIRE PRESSURE MONITORING SYSTEM (TPMS) . . . . .. . . .204
•Base System...............................205
•Premium System — If Equipped...................207
•TPMS Deactivation — If Equipped..................209
•FUEL REQUIREMENTS — GASOLINE ENGINE . . . . . . . . . . .210•Methanol.................................210
•Ethanol..................................210
•Clean Air Gasoline...........................211
•MMT In Gasoline............................211
•Materials Added To Fuel.......................211
•ADDING FUEL...............................212•Locking Fuel Filler Cap (Gas Cap).................212
•Loose Fuel Filler Cap Message...................212
•TRAILER TOWING . . ..........................213•Common Towing Definitions.....................213
163
Page 184 of 332
This will allow you to cross over obstacles and
descend hills, with improved control and less
effort.
NOTE:
For maximum off-road performance, pre-
mium fuel is recommended. While the ve-
hicle will operate on regular fuel when in L
Off-Road mode (if equipped), the engine has
been calibrated for maximum performance
using premium fuel.
Driving In Snow, Mud And SandThere is a drastic reduction in traction when
driving in snow, mud or sand. The vehicle will be
less responsive to steering, acceleration and
braking inputs. Therefore, you should acceler-
ate slowly, leave greater stopping distances and
avoid abrupt vehicle maneuvers. You want to
keep a slow constant steady pace. The key is to
maintain the vehicle’s momentum.
Snow
In heavy snow or for additional control and
traction at slower speeds, activate the 4WD
LOCK and shift the transaxle to low (L Off-Road
[if equipped] ) if necessary. Do not shift to a
lower gear than necessary to maintain head-way. Over-revving the engine can spin the
wheels and traction will be lost. If you start to
slow to a stop, try turning your steering wheel no
more than a 1/4 turn quickly back and forth,
while still applying throttle. This will allow the
tires to get a fresh"bite"and help maintain your
momentum.
CAUTION!
On icy or slippery roads, do not downshift at
high engine RPM’s or vehicle speeds be-
cause engine braking may cause skidding
and loss of control.
Mud
Deep mud creates a great deal of suction
around the tires and is very difficult to get
through. You should use low (L Off-Road [if
equipped] ) with the 4WD LOCK engaged and
maintain your momentum. If you start to slow to
a stop, try turning your steering wheel no more
than a 1/4 turn quickly back and forth for
additional traction. Mud holes pose an in-
creased threat of vehicle damage and getting
stuck. They are normally full of debris fromprevious vehicles getting stuck. As a good prac-
tice before entering any mud hole, get out and
determine how deep it is, if there are any hidden
obstacles and if the vehicle can be safely recov-
ered if stuck.
Sand
Soft sand is very difficult to travel through with
full tire pressure. When crossing soft sandy
spots in a trail maintain your vehicle’s momen-
tum and do not stop. The key to driving in soft
sand is using the appropriate tire pressure,
accelerating slowly, avoiding abrupt maneuvers
and maintaining the vehicle’s momentum. If you
are going to be driving on large soft sandy areas
or dunes, reduce your tire pressure to a mini-
mum of 15 psi (103 kPa) to allow for a greater
tire surface area. You should use low (L Off-
Road [if equipped] ) with the 4WD LOCK en-
gaged and ESC turned off. Reduced tire pres-
sure will drastically improve your traction and
handling, while driving on the soft sand, but you
must return the tires to normal air pressure
before driving on pavement or other hard sur-
faces. Be sure you have a way to reinflate the
tires prior to reducing the pressure.
180
Page 185 of 332
CAUTION!
Reduced tire pressures may cause tire un-
seating and total loss of air pressure. To
reduce the risk of tire unseating, while at a
reduced tire pressure, reduce your speed
and avoid sharp turns or abrupt maneuvers.
Hill ClimbingHill climbing requires good judgment and a
good understanding of your abilities and your
vehicle’s limitations. Hills can cause serious
problems. Some are just too steep to climb and
should not be attempted. You should always
feel confident with the vehicle and your abilities.
You should always climb hills straight up and
down. Never attempt to climb a hill on an angle.
Before Climbing A Steep Hill
As you approach a hill consider its grade or
steepness. Determine if it is too steep. Look to
see what the traction is on the hill side trail. Is
the trail straight up and down? What is on top
and the other side? Are there ruts, rocks,
branches or other obstacles on the path? Can
you safely recover the vehicle if something goeswrong? If everything looks good and you feel
confident, then you should use low (L Off-Road
[if equipped]) with the 4WD LOCK engaged and
proceed with caution maintaining your momen-
tum as you climb the hill.
Driving Up Hill
Once you have determined your ability to pro-
ceed and have shifted into the appropriate gear,
line your vehicle up for the straightest possible
run. Accelerate with an easy constant throttle
and apply more power as you start up the hill.
Do not race forward into a steep grade; the
abrupt change of grade could cause you to lose
control. If the front end begins to bounce, ease
off the throttle slightly to bring all four tires back
on the ground. As you approach the crest of the
hill, ease off the throttle and slowly proceed over
the top. If the wheels start to slip as you
approach the crest of a hill, ease off the accel-
erator and maintain headway by turning the
steering wheel no more than a 1/4 turn quickly
back and forth. This will provide a fresh"bite"
into the surface and will usually provide enough
traction to complete the climb. If you do not
make it to the top, place the vehicle in RE-VERSE and back straight down the grade using
engine resistance along with the vehicle brakes.
WARNING!
Never attempt to climb a hill at an angle or
turn around on a steep grade. Driving across
an incline increases the risk of a rollover,
which may result in severe injury.
Driving Down Hill
Before driving down a steep hill you need to
determine if it is too steep for a safe descent.
What is the surface traction? Is the grade too
steep to maintain a slow controlled descent?
Are there obstacles? Is it a straight descent? Is
there plenty of distance at the base of the hill to
regain control if the vehicle descends to fast? If
you feel confident in your ability to proceed then
make sure you are in low (L Off-Road [if
equipped] ) with the 4WD LOCK engaged and
proceed with caution. Allow engine and hill
descent braking to control the descent and
apply your brakes if necessary, but do not allow
the tires to lock.
181
Page 186 of 332
WARNING!
Do not descend a steep grade in NEUTRAL.
Use vehicle brakes in conjunction with en-
gine braking. Descending a grade too fast
could cause you to lose control and be
seriously injured or killed.
Driving Across An Incline
If at all possible avoid driving across an incline.
If it is necessary, know your vehicle’s abilities.
Driving across an incline places more weight on
the down-hill wheels, which increases the pos-
sibilities of a down-hill slide or rollover. Make
sure the surface has good traction with firm and
stable soils. If possible transverse the incline at
an angle heading slightly up or down.
WARNING!
Driving across an incline increases the risk of
a rollover, which may result in severe injury.
If You Stall Or Begin To Lose Headway
If you stall or begin to lose headway while
climbing a steep hill, allow your vehicle to cometo a stop and immediately apply the brake.
Restart the engine and shift to REVERSE. Back
slowly down the hill allowing engine and hill
descent braking to control the descent and
apply your brakes if necessary, but do not allow
the tires to lock.
WARNING!
If the engine stalls or you lose headway or
cannot make it to the top of a steep hill or
grade, never attempt to turn around. To do so
may result in tipping and rolling the vehicle,
which may result in severe injury. Always
back carefully straight down a hill in RE-
VERSE gear. Never back down a hill in
NEUTRAL using only the vehicle brakes.
Never drive diagonally across a hill, always
drive straight up or down.
Driving Through WaterExtreme care should be taken crossing any
type of water. Water crossings should be
avoided if possible, and only be attempted
when necessary in a safe responsible manner.You should only drive through areas which are
designated and approved. You should tread
lightly and avoid damage to the environment.
You should know your vehicles abilities and be
able to recover it if something goes wrong. You
should never stop or shut a vehicle off when
crossing deep water unless you ingested water
into the engine air intake. If the engine stalls, do
not attempt to restart it. Determine if it has
ingested water first. The key to any crossing is
low and slow. You want to use low (L Off-Road
[if equipped] ) with the 4WD LOCK engaged
and proceed very slowly with a constant slow
speed (3-5 mph [5–8 km/h] maximum) and light
throttle. Keep the vehicle moving; do not try to
accelerate through the crossing. After crossing
any water higher than the bottom of the axle
differentials, you should inspect all of the ve-
hicle fluids for signs of water ingestion.
CAUTION!
Water ingestion into the transaxle, transfer
case, engine or vehicle interior can occur if
you drive too fast or through too deep of
(Continued)
182
Page 187 of 332
CAUTION!(Continued)
water. Water can cause permanent damage
to engine, driveline or other vehicle compo-
nents and your brakes will be less effective
once wet and/or muddy.
Before You Cross Any Type Of Water
As you approach any type of water, you need to
determine if you can cross it safely and respon-
sibly. If necessary, get out and walk through the
water or probe it with a stick. You need to be
sure of its depth, approach angle, current and
bottom condition. Be careful of murky or muddy
waters; check for hidden obstacles. Make sure
you will not be intruding on any wildlife, and you
can recover the vehicle if necessary. The key to
a safe crossing is the water depth, current and
bottom conditions. On soft bottoms, the vehicle
will sink in, effectively increasing the water level
on the vehicle. Be sure to consider this when
determining the depth and the ability to safely
cross.Crossing Puddles, Pools, Flooded Areas
Or Other Standing Water
Puddles, pools, flooded or other standing water
areas normally contain murky or muddy waters.
These water types normally contain hidden
obstacles and make it difficult to determine an
accurate water depth, approach angle, and
bottom condition. Murky or muddy water holes
are where you want to hook up tow straps prior
to entering. This makes for a faster, cleaner and
easier vehicle recovery. If you are able to deter-
mine you can safely cross, than proceed using
the low and slow method.
CAUTION!
Muddy waters can reduce the cooling sys-
tem effectiveness by depositing debris onto
the radiator.
After Driving Off-RoadOff-road operation puts more stress on your
vehicle than does most on-road driving. After
going off-road, it is always a good idea to check
for damage. That way you can get any problemstaken care of right away and have your vehicle
ready when you need it.
•Completely inspect the underbody of your
vehicle. Check tires, body structure, steering,
suspension, and exhaust system for dam-
age.
•Inspect the radiator for mud and debris and
clean as required.
•Check threaded fasteners for looseness, par-
ticularly on the chassis, drivetrain compo-
nents, steering, and suspension. Retighten
them, if required, and torque to the values
specified in the Service Manual.
•Check for accumulations of plants or brush.
These things could be a fire hazard. They
might hide damage to fuel lines, brake hoses,
axle pinion seals, and propeller shafts.
•After extended operation in mud, sand, wa-
ter, or similar dirty conditions, have the radia-
tor, fan, brake rotors, wheels, brake linings,
and axle yokes inspected and cleaned as
soon as possible.
183
Page 192 of 332
•A slight drop of the brake pedal at the end of
the stop.
These are all normal characteristics of ABS.
WARNING!
•The ABS contains sophisticated electronic
equipment that may be susceptible to in-
terference caused by improperly installed
or high output radio transmitting equip-
ment. This interference can cause possible
loss of anti-lock braking capability. Instal-
lation of such equipment should be per-
formed by qualified professionals.
•Pumping of the Anti-Lock Brakes will di-
minish their effectiveness and may lead to
a collision. Pumping makes the stopping
distance longer. Just press firmly on your
brake pedal when you need to slow down
or stop.
(Continued)
WARNING!(Continued)
•The ABS cannot prevent the natural laws
of physics from acting on the vehicle, nor
can it increase braking or steering effi-
ciency beyond that afforded by the condi-
tion of the vehicle brakes and tires or the
traction afforded.
•The ABS cannot prevent collisions, includ-
ing those resulting from excessive speed
in turns, following another vehicle too
closely, or hydroplaning.
•The capabilities of an ABS equipped ve-
hicle must never be exploited in a reckless
or dangerous manner that could jeopar-
dize the user’s safety or the safety of
others.
ABS is designed to function with the OEM tires.
Modification may result in degraded ABS per-
formance.
Anti-Lock Brake Warning LightThe amber “Anti-Lock Brake Warning Light” will
turn on when the ignition switch is turned to the
ON position and may stay on for as long as four
seconds.
If the “Anti-Lock Brake Warning Light” remains
on or comes on while driving, it indicates that
the anti-lock portion of the brake system is not
functioning and that service is required. How-
ever, the conventional brake system will con-
tinue to operate normally if the “Brake System
Warning Light” is not on.
If the “Anti-Lock Brake Warning Light” is on, the
brake system should be serviced as soon as
possible to restore the benefits of anti-lock
brakes. If the “Anti-Lock Brake Warning Light”
does not come on when the ignition switch is
turned to the ON position, have the light re-
paired as soon as possible.
188