check engine JEEP PATRIOT 2020 Owner handbook (in English)
[x] Cancel search | Manufacturer: JEEP, Model Year: 2020, Model line: PATRIOT, Model: JEEP PATRIOT 2020Pages: 332, PDF Size: 1.99 MB
Page 133 of 332
Yellow Telltale Indicator Lights
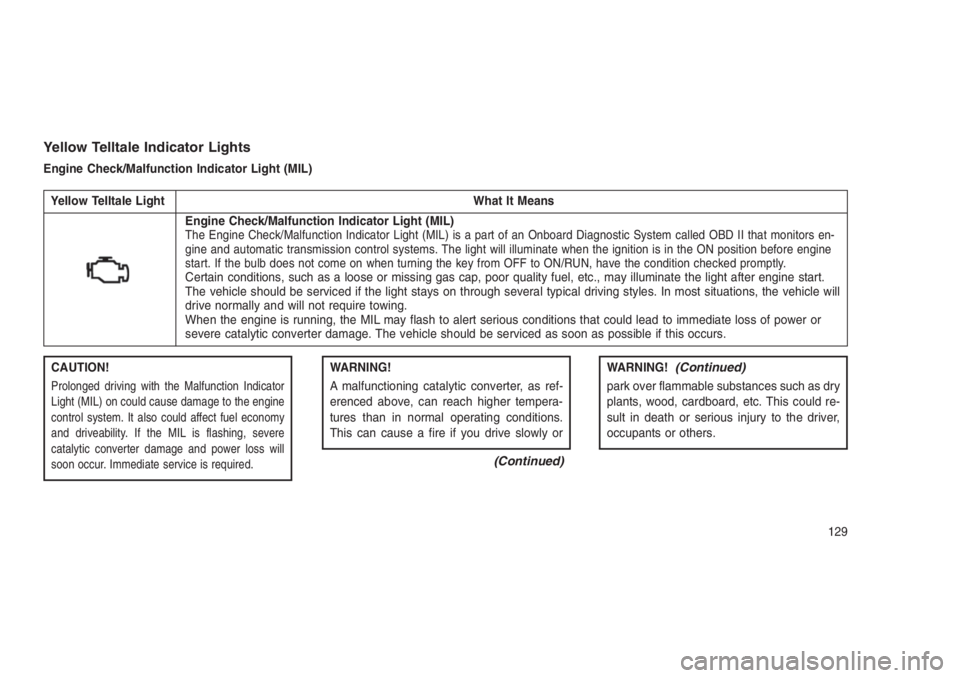
Engine Check/Malfunction Indicator Light (MIL)
Yellow Telltale Light What It Means
Engine Check/Malfunction Indicator Light (MIL)The Engine Check/Malfunction Indicator Light (MIL) is a part of an Onboard Diagnostic System called OBD II that monitors en-
gine and automatic transmission control systems. The light will illuminate when the ignition is in the ON position before engine
start. If the bulb does not come on when turning the key from OFF to ON/RUN, have the condition checked promptly.
Certain conditions, such as a loose or missing gas cap, poor quality fuel, etc., may illuminate the light after engine start.
The vehicle should be serviced if the light stays on through several typical driving styles. In most situations, the vehicle will
drive normally and will not require towing.
When the engine is running, the MIL may flash to alert serious conditions that could lead to immediate loss of power or
severe catalytic converter damage. The vehicle should be serviced as soon as possible if this occurs.
CAUTION!
Prolonged driving with the Malfunction Indicator
Light (MIL) on could cause damage to the engine
control system. It also could affect fuel economy
and driveability. If the MIL is flashing, severe
catalytic converter damage and power loss will
soon occur. Immediate service is required.
WARNING!
A malfunctioning catalytic converter, as ref-
erenced above, can reach higher tempera-
tures than in normal operating conditions.
This can cause a fire if you drive slowly or
(Continued)
WARNING!(Continued)
park over flammable substances such as dry
plants, wood, cardboard, etc. This could re-
sult in death or serious injury to the driver,
occupants or others.
129
Page 155 of 332
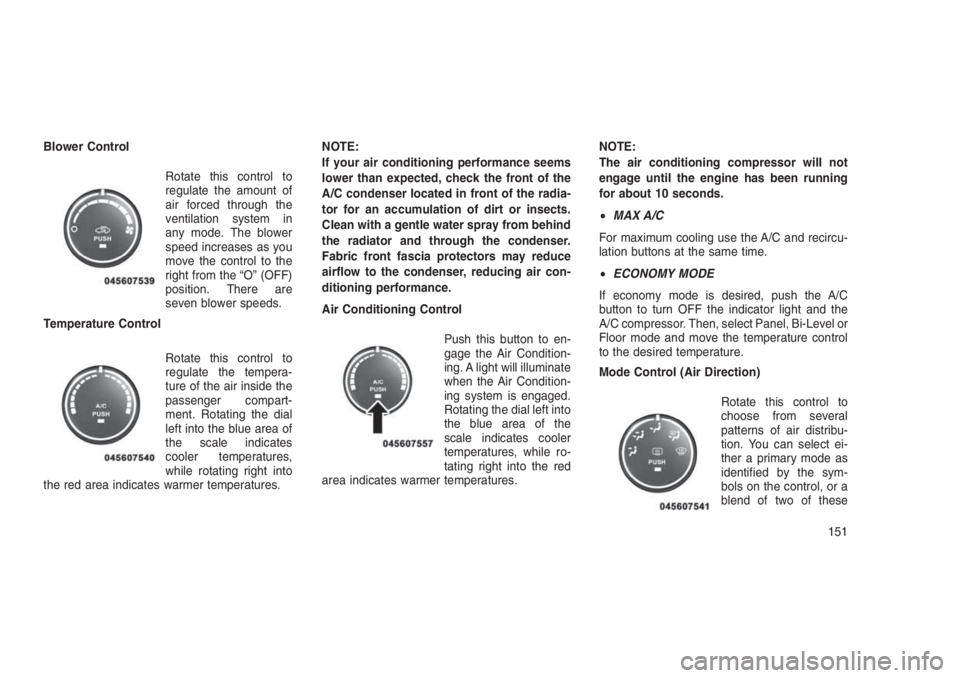
Blower Control
Rotate this control to
regulate the amount of
air forced through the
ventilation system in
any mode. The blower
speed increases as you
move the control to the
right from the “O” (OFF)
position. There are
seven blower speeds.
Temperature Control
Rotate this control to
regulate the tempera-
ture of the air inside the
passenger compart-
ment. Rotating the dial
left into the blue area of
the scale indicates
cooler temperatures,
while rotating right into
the red area indicates warmer temperatures.NOTE:
If your air conditioning performance seems
lower than expected, check the front of the
A/C condenser located in front of the radia-
tor for an accumulation of dirt or insects.
Clean with a gentle water spray from behind
the radiator and through the condenser.
Fabric front fascia protectors may reduce
airflow to the condenser, reducing air con-
ditioning performance.
Air Conditioning Control
Push this button to en-
gage the Air Condition-
ing. A light will illuminate
when the Air Condition-
ing system is engaged.
Rotating the dial left into
the blue area of the
scale indicates cooler
temperatures, while ro-
tating right into the red
area indicates warmer temperatures.NOTE:
The air conditioning compressor will not
engage until the engine has been running
for about 10 seconds.
•MAX A/C
For maximum cooling use the A/C and recircu-
lation buttons at the same time.
•ECONOMY MODE
If economy mode is desired, push the A/C
button to turn OFF the indicator light and the
A/C compressor. Then, select Panel, Bi-Level or
Floor mode and move the temperature control
to the desired temperature.
Mode Control (Air Direction)
Rotate this control to
choose from several
patterns of air distribu-
tion. You can select ei-
ther a primary mode as
identified by the sym-
bols on the control, or a
blend of two of these
151
Page 174 of 332
manually select the transmission gear, and will
display the current gear in the instrument clus-
ter as 1, 2, 3, etc.
Gear Ranges
DO NOT race the engine when shifting from
PARK or NEUTRAL into another gear range.
NOTE:
After selecting any gear range, wait a mo-
ment to allow the selected gear to engage
before accelerating. This is especially im-
portant when the engine is cold.
PARK (P)
This range supplements the parking brake by
locking the transmission. The engine can be
started in this range. Never attempt to use
PARK while the vehicle is in motion. Apply the
parking brake when leaving the vehicle in this
range.
When parking on a level surface, you may shift
the transmission into PARK first, and then apply
the parking brake.
When parking on a hill, apply the parking brake
before shifting the transmission to PARK, oth-
erwise the load on the transmission lockingmechanism may make it difficult to move the
gear selector out of PARK. As an added precau-
tion, turn the front wheels toward the curb on a
downhill grade and away from the curb on an
uphill grade.
WARNING!
•Never use the PARK position as a substi-
tute for the parking brake. Always apply
the parking brake fully when parked to
guard against vehicle movement and pos-
sible injury or damage.
•Your vehicle could move and injure you
and others if it is not in PARK. Check by
trying to move the gear selector out of
PARK with the brake pedal released. Make
sure the transmission is in PARK before
leaving the vehicle.
(Continued)
WARNING!(Continued)
•It is dangerous to shift out of PARK or
NEUTRAL if the engine speed is higher
than idle speed. If your foot is not firmly
pressing the brake pedal, the vehicle could
accelerate quickly forward or in reverse.
You could lose control of the vehicle and
hit someone or something. Only shift into
gear when the engine is idling normally
and your foot is firmly pressing the brake
pedal.
•Unintended movement of a vehicle could
injure those in or near the vehicle. As with
all vehicles, you should never exit a ve-
hicle while the engine is running. Before
exiting a vehicle, always shift the transmis-
sion into PARK, apply the parking brake,
turn the engine OFF, and remove the igni-
tion key. Once the key is removed, the
transmission is locked in PARK, securing
the vehicle against unwanted movement.
(Continued)
170
Page 178 of 332
Gear Ranges
DO NOT race the engine when shifting from
PARK or NEUTRAL into another gear range.
NOTE:
After selecting any gear range, wait a mo-
ment to allow the selected gear to engage
before accelerating. This is especially im-
portant when the engine is cold.
PARK (P)
This range supplements the parking brake by
locking the transmission. The engine can be
started in this range. Never attempt to use
PARK while the vehicle is in motion. Apply the
parking brake when leaving the vehicle in this
range.
When parking on a level surface, you may shift
the transmission into PARK first, and then apply
the parking brake.When parking on a hill, apply the parking brake
before shifting the transmission to PARK, oth-
erwise the load on the transmission locking
mechanism may make it difficult to move the
gear selector out of PARK. As an added precau-
tion, turn the front wheels toward the curb on a
downhill grade and away from the curb on an
uphill grade.
WARNING!
•Never use the PARK position as a substi-
tute for the parking brake. Always apply
the parking brake fully when parked to
guard against vehicle movement and pos-
sible injury or damage.
•Your vehicle could move and injure you
and others if it is not in PARK. Check by
trying to move the gear selector out of
PARK with the brake pedal released. Make
sure the transmission is in PARK before
leaving the vehicle.
(Continued)
WARNING!(Continued)
•It is dangerous to shift out of PARK or
NEUTRAL if the engine speed is higher
than idle speed. If your foot is not firmly
pressing the brake pedal, the vehicle could
accelerate quickly forward or in reverse.
You could lose control of the vehicle and
hit someone or something. Only shift into
gear when the engine is idling normally
and your foot is firmly pressing the brake
pedal.
•Unintended movement of a vehicle could
injure those in or near the vehicle. As with
all vehicles, you should never exit a ve-
hicle while the engine is running. Before
exiting a vehicle, always shift the transmis-
sion into PARK, apply the parking brake,
turn the engine OFF, and remove the igni-
tion key. Once the key is removed, the
transmission is locked in PARK, securing
the vehicle against unwanted movement.
(Continued)
174
Page 187 of 332
CAUTION!(Continued)
water. Water can cause permanent damage
to engine, driveline or other vehicle compo-
nents and your brakes will be less effective
once wet and/or muddy.
Before You Cross Any Type Of Water
As you approach any type of water, you need to
determine if you can cross it safely and respon-
sibly. If necessary, get out and walk through the
water or probe it with a stick. You need to be
sure of its depth, approach angle, current and
bottom condition. Be careful of murky or muddy
waters; check for hidden obstacles. Make sure
you will not be intruding on any wildlife, and you
can recover the vehicle if necessary. The key to
a safe crossing is the water depth, current and
bottom conditions. On soft bottoms, the vehicle
will sink in, effectively increasing the water level
on the vehicle. Be sure to consider this when
determining the depth and the ability to safely
cross.Crossing Puddles, Pools, Flooded Areas
Or Other Standing Water
Puddles, pools, flooded or other standing water
areas normally contain murky or muddy waters.
These water types normally contain hidden
obstacles and make it difficult to determine an
accurate water depth, approach angle, and
bottom condition. Murky or muddy water holes
are where you want to hook up tow straps prior
to entering. This makes for a faster, cleaner and
easier vehicle recovery. If you are able to deter-
mine you can safely cross, than proceed using
the low and slow method.
CAUTION!
Muddy waters can reduce the cooling sys-
tem effectiveness by depositing debris onto
the radiator.
After Driving Off-RoadOff-road operation puts more stress on your
vehicle than does most on-road driving. After
going off-road, it is always a good idea to check
for damage. That way you can get any problemstaken care of right away and have your vehicle
ready when you need it.
•Completely inspect the underbody of your
vehicle. Check tires, body structure, steering,
suspension, and exhaust system for dam-
age.
•Inspect the radiator for mud and debris and
clean as required.
•Check threaded fasteners for looseness, par-
ticularly on the chassis, drivetrain compo-
nents, steering, and suspension. Retighten
them, if required, and torque to the values
specified in the Service Manual.
•Check for accumulations of plants or brush.
These things could be a fire hazard. They
might hide damage to fuel lines, brake hoses,
axle pinion seals, and propeller shafts.
•After extended operation in mud, sand, wa-
ter, or similar dirty conditions, have the radia-
tor, fan, brake rotors, wheels, brake linings,
and axle yokes inspected and cleaned as
soon as possible.
183
Page 188 of 332
WARNING!
Abrasive material in any part of the brakes
may cause excessive wear or unpredictable
braking. You might not have full braking
power when you need it to prevent a colli-
sion. If you have been operating your vehicle
in dirty conditions, get your brakes checked
and cleaned as necessary.
•If you experience unusual vibration after driv-
ing in mud, slush or similar conditions, check
the wheels for impacted material. Impacted
material can cause a wheel imbalance and
freeing the wheels of it will correct the
situation.
POWER STEERING
The standard power steering system will give
you good vehicle response and increased ease
of maneuverability in tight spaces. The system
will provide mechanical steering capability if
power assist is lost.
If for some reason the power assist is inter-
rupted, it will still be possible to steer yourvehicle. Under these conditions, you will ob-
serve a substantial increase in steering effort,
especially at very low vehicle speeds and dur-
ing parking maneuvers.
NOTE:
•Increased noise levels at the end of the
steering wheel travel are considered nor-
mal and do not indicate that there is a
problem with the power steering system.
•Upon initial start-up in cold weather, the
power steering pump may make noise for
a short amount of time. This is due to the
cold, thick fluid in the steering system.
This noise should be considered normal,
and it does not in any way damage the
steering system.CAUTION!
Prolonged operation of the steering system
at the end of the steering wheel travel will
increase the steering fluid temperature and it
should be avoided when possible. Damage
to the power steering pump may occur.
Power Steering Fluid CheckChecking the power steering fluid level at a
defined service interval is not required. The fluid
should only be checked if a leak is suspected,
abnormal noises are apparent, and/or the sys-
tem is not functioning as anticipated. Coordi-
nate inspection efforts through an authorized
dealer.
CAUTION!
Do not use chemical flushes in your power
steering system as the chemicals can dam-
age your power steering components. Such
damage is not covered by the New Vehicle
Limited Warranty.
WARNING!
Fluid level should be checked on a level
surface and with the engine off to prevent
injury from moving parts and to ensure ac-
184
Page 221 of 332
WARNING!
Improper towing can lead to an injury acci-
dent. Follow these guidelines to make your
trailer towing as safe as possible:
•Make certain that the load is secured in the
trailer and that it will not shift during travel.
When trailering cargo that is not fully se-
cured, dynamic load shifts can occur that
may be difficult for the driver to control. You
could lose control of your vehicle and have
an accident.
•All trailer hitches should be professionally
installed on your vehicle.
•When hauling cargo or towing a trailer, do
not overload your vehicle or trailer. Over-
loading can cause a loss of control, poor
performance, or damage to brakes, axle,
engine, transmission, steering, suspen-
sion, chassis structure, or tires.
(Continued)
WARNING!(Continued)
•Safety chains must always be used be-
tween your vehicle and trailer. Always con-
nect the chains to the frame or hook re-
tainers of the vehicle hitch. Cross the
chains under the trailer tongue and allow
enough slack for turning corners.
•Vehicles with trailers should not be parked
on a grade. When parking, apply the park-
ing brake on the tow vehicle. Always, block
or"chock"the trailer wheels.
•GCWR must not be exceeded.
•Total weight must be distributed be-
tween the tow vehicle and the trailer
such that the following four ratings are
not exceeded:
1. GVWR
2. GTW
3. GAWR
4. Tongue weight rating for the trailer hitch
utilized.Towing Requirements — Tires
•Do not attempt to tow a trailer while using a
compact spare tire.
•Proper tire inflation pressures are essential
for the safe and satisfactory operation of your
vehicle. Refer to “Tires – General Informa-
tion” in “Starting and Operating” for proper
tire inflation procedures.
•Check the trailer tires for proper tire inflation
pressures before trailer usage.
•Check for signs of tire wear or visible tire
damage before towing a trailer. Refer to
“Tires – General Information” in “Starting and
Operating” for the proper inspection
procedure.
•When replacing tires, refer to “Tires – Gen-
eral Information” in “Starting and Operating”
for proper tire replacement procedures. Re-
placing tires with a higher load carrying ca-
pacity will not increase the vehicle’s GVWR
and GAWR limits.
217
Page 242 of 332
NOTE:
Do not remove foreign objects (e.g., screws
or nails) from the tire.
(C) Injecting Tire Service Kit Sealant Into
The Deflated Tire:
•Always start the engine before turning ON
the Tire Service Kit.
NOTE:
Manual transmission vehicles must have the
parking brake engaged and the gear selec-
tor in NEUTRAL.
•After pushing the Power Button (4), the seal-
ant (white fluid) will flow from the Sealant
Bottle (1) through the Sealant Hose (6) and
into the tire.
NOTE:
Sealant may leak out through the puncture
in the tire.
If the sealant (white fluid) does not flow
within0–10seconds through the Sealant
Hose (6):
1. Push the Power Button (4) to turn Off the Tire
Service Kit. Disconnect the Sealant Hose (6)from the valve stem. Make sure the valve
stem is free of debris. Reconnect the Seal-
ant Hose (6) to the valve stem. Check that
the Mode Select Knob (5) is in the Sealant
Mode position and not Air Mode. Push the
Power Button (4) to turn On the Tire Service
Kit.
2. Connect the Power Plug (8) to a different 12
Volt power outlet in your vehicle or another
vehicle, if available. Make sure the engine is
running before turning ON the Tire Service
Kit.
3. The Sealant Bottle (1) may be empty due to
previous use. Call for assistance.
NOTE:
If the Mode Select Knob (5) is on Air Mode
and the pump is operating, air will dispense
from the Air Pump Hose (7) only, not the
Sealant Hose (6).
If the sealant (white fluid) does flow through
the Sealant Hose (6):
1. Continue to operate the pump until sealant is
no longer flowing through hose (typicallytakes 30 - 70 seconds). As the sealant flows
through the Sealant Hose (6), the Pressure
Gauge (3) can read as high as 70 psi (4.8
Bar). The Pressure Gauge (3) will decrease
quickly from approximately 70 psi (4.8 Bar)
to the actual tire pressure when the Sealant
Bottle (1) is empty.
2. The pump will start to inject air into the tire
immediately after the Sealant Bottle (1) is
empty. Continue to operate the pump and
inflate the tire to the pressure indicated on
the tire pressure label on the driver-side
latch pillar (recommended pressure). Check
the tire pressure by looking at the Pressure
Gauge (3).
If the tire does not inflate to at least 26 psi
(1.8 Bar) pressure within 15 minutes:
•The tire is too badly damaged. Do not at-
tempt to drive the vehicle further. Call for
assistance.
238
Page 260 of 332
Loose Fuel Filler Cap MessageAfter fuel is added, the vehicle diagnostic sys-
tem can determine if the fuel filler cap is possi-
bly loose or improperly installed. A “gASCAP”
message will be displayed in the instrument
cluster. Tighten the gas cap until a “clicking”
sound is heard. This is an indication that the gas
cap is properly tightened. Push the trip odom-
eter RESET button to turn off the message. If
the problem persists, the message will appear
the next time the vehicle is started. This might
indicate a damaged cap. If the problem is
detected twice in a row, the system will turn on
the MIL. Resolving the problem will turn the MIL
light off.
REPLACEMENT PARTS
Use of genuine MOPAR parts for normal/
scheduled maintenance and repairs is highly
recommended to ensure the designed perfor-
mance. Damage or failures caused by the use
of non-MOPAR parts for maintenance and re-
pairs will not be covered by the New Vehicle
Limited Warranty.
MAINTENANCE PROCEDURES
The pages that follow contain therequired
maintenance services determined by the engi-
neers who designed your vehicle.
Besides those maintenance items specified in
the fixed “Maintenance Schedule”, there are
other components which may require servicing
or replacement in the future.
CAUTION!
•Failure to properly maintain your vehicle or
perform repairs and service when neces-
sary could result in more costly repairs,
damage to other components or negatively
impact vehicle performance. Immediately
have potential malfunctions examined by
an authorized dealer or qualified repair
center.
(Continued)
CAUTION!(Continued)
•Your vehicle has been built with improved
fluids that protect the performance and
durability of your vehicle and also allow
extended maintenance intervals. Do not
use chemical flushes in these components
as the chemicals can damage your engine,
transmission, or air conditioning. Such
damage is not covered by the New Vehicle
Limited Warranty. If a flush is needed
because of component malfunction, use
only the specified fluid for the flushing
procedure.
Engine Oil
Checking Oil Level
To assure proper engine lubrication, the engine
oil must be maintained at the correct level.
Check the oil level at regular intervals, such as
every fuel stop.
The best time to check the engine oil level is
about five minutes after a fully warmed engine is
shut off. Do not check oil level before starting
256
Page 261 of 332
the engine after it has sat overnight. Checking
engine oil level when the engine is cold will give
you an incorrect reading.
Checking the oil while the vehicle is on level
ground and only when the engine is hot, will
improve the accuracy of the oil level readings.
Maintain the oil level between the range mark-
ings on the dipstick. The range markings will
consist of a crosshatch zone that says SAFE or
a crosshatch zone that says MIN at the low end
of the range and MAX at the high end of the
range. Adding one quart of oil when the reading
is at the low end of the indicated range will result
in the oil level at the full end of the indicator
range.
CAUTION!
Do not overfill the engine. Overfilling the
engine will cause oil aeration, which can lead
to loss of oil pressure and an increase in oil
temperature. This could damage your en-
gine. Also, be sure the oil fill cap is replaced
and tightened after adding oil.Change Engine Oil – All Engines
Refer to the “Maintenance Schedule” for the
proper maintenance intervals.
Engine Oil Selection
For best performance and maximum protection
under all types of operating conditions, the manu-
facturer only recommends engine oils that are API
certified and meet the requirements of FCA Ma-
terial Standard MS-6395 or ACEA A1/B1.
American Petroleum Institute (API) Engine
Oil Identification Symbol
This symbol means that
the oil has been certified
by the American Petro-
leum Institute (API). The
manufacturer only rec-
ommends API Certified
engine oils.
This symbol certifies 0W-20, 5W-20, 0W-30,
5W-30 and 10W-30 engine oils.
CAUTION!
Do not use chemical flushes in your engine
oil as the chemicals can damage your en-
gine. Such damage is not covered by the
New Vehicle Limited Warranty.
Engine Oil Viscosity (SAE Grade)
MOPAR SAE 5W-20 engine oil is recom-
mended for all operating temperatures. This
engine oil improves low temperature starting
and vehicle fuel economy.
The engine oil filler cap also shows the recom-
mended engine oil viscosity for your engine. For
information on engine oil filler cap location, refer
to “Engine Compartment” in “Maintaining Your
Vehicle” for further information.
NOTE:
MOPAR SAE 5W-30 engine oil approved to
FCA MS-6395 or FCA Material Standard
9.55535-CR1 may be used when SAE 5W-20
engine oil meeting FCA MS-6395 or FCA
Material Standard 9.55535-CR1 is not avail-
able.
257