engine JEEP PATRIOT 2020 Owner handbook (in English)
[x] Cancel search | Manufacturer: JEEP, Model Year: 2020, Model line: PATRIOT, Model: JEEP PATRIOT 2020Pages: 332, PDF Size: 1.99 MB
Page 198 of 332
dealer as soon as possible to have the problem
diagnosed and corrected.
The “ESC Activation/Malfunction Indicator
Light” (located in the instrument cluster) starts
to flash as soon as the tires lose traction and the
ESC system becomes active. The “ESC
Activation/Malfunction Indicator Light” also
flashes when TCS is active. If the “ESC
Activation/Malfunction Indicator Light” begins to
flash during acceleration, ease up on the accel-
erator and apply as little throttle as possible. Be
sure to adapt your speed and driving to the
prevailing road conditions.
NOTE:
•The “ESC Off Indicator Light” and the
“ESC Activation/Malfunction Indicator
Light” come on momentarily each time
the ignition switch is placed in the ON/
RUN position.
•Each time the ignition is cycled to the
ON/RUN position, the ESC system will be
ON even if it was cycled off previously,
except for when the vehicle is started
while in 4L Range.•The ESC system will make buzzing or
clicking sounds when it is active. This is
normal; the sounds will stop when ESC
becomes inactive following the maneuver
that caused the ESC activation.
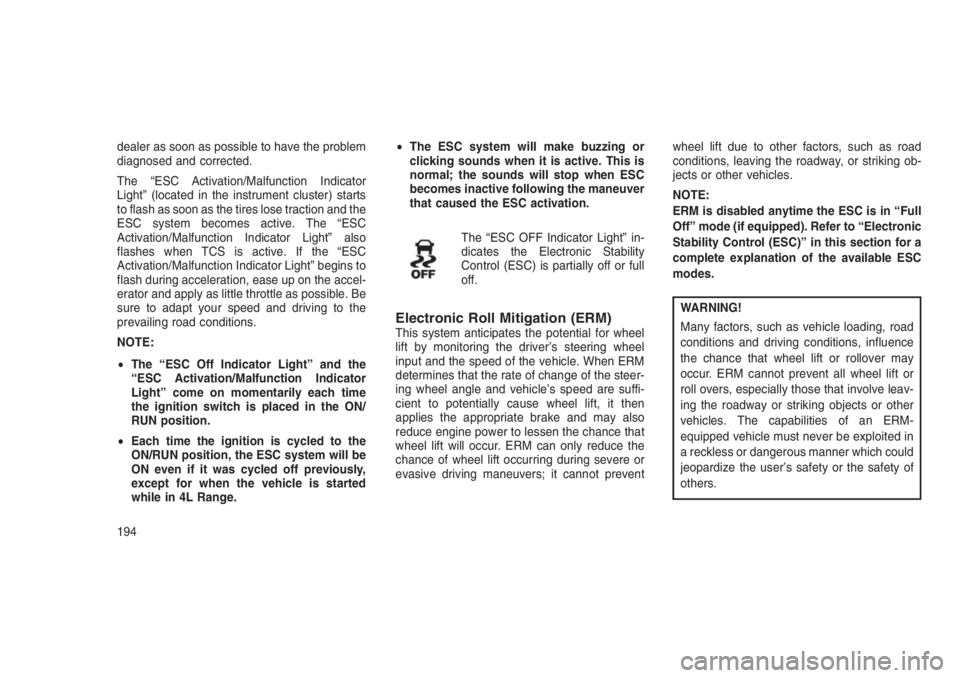
The “ESC OFF Indicator Light” in-
dicates the Electronic Stability
Control (ESC) is partially off or full
off.
Electronic Roll Mitigation (ERM)This system anticipates the potential for wheel
lift by monitoring the driver’s steering wheel
input and the speed of the vehicle. When ERM
determines that the rate of change of the steer-
ing wheel angle and vehicle’s speed are suffi-
cient to potentially cause wheel lift, it then
applies the appropriate brake and may also
reduce engine power to lessen the chance that
wheel lift will occur. ERM can only reduce the
chance of wheel lift occurring during severe or
evasive driving maneuvers; it cannot preventwheel lift due to other factors, such as road
conditions, leaving the roadway, or striking ob-
jects or other vehicles.
NOTE:
ERM is disabled anytime the ESC is in “Full
Off” mode (if equipped). Refer to “Electronic
Stability Control (ESC)” in this section for a
complete explanation of the available ESC
modes.
WARNING!
Many factors, such as vehicle loading, road
conditions and driving conditions, influence
the chance that wheel lift or rollover may
occur. ERM cannot prevent all wheel lift or
roll overs, especially those that involve leav-
ing the roadway or striking objects or other
vehicles. The capabilities of an ERM-
equipped vehicle must never be exploited in
a reckless or dangerous manner which could
jeopardize the user’s safety or the safety of
others.
194
Page 214 of 332
the “SERVICE TPM SYSTEM” message will no
longer be displayed as long as no system fault
exists.
To reactivate the TPMS, replace all four wheel
and tire assemblies (road tires) with tires
equipped with TPM sensors. Then, drive the
vehicle for up to 10 minutes above 15 mph
(24 km/h). The TPMS will chime, the “TPM
Telltale Light” will flash on and off for 75 sec-
onds and then turn off, and the Electronic
Vehicle Information Center (EVIC) will display
the “SERVICE TPM SYSTEM” message. The
EVIC will also display pressure values in place
of the dashes. On the next ignition switch cycle,
the “SERVICE TPM SYSTEM” message will no
longer be displayed as long as no system fault
exists.
FUEL REQUIREMENTS —
GASOLINE ENGINE
All gasoline engines are designed to meet all
emissions regulations and provide excellent
fuel economy and performance when using
high quality unleaded gasoline with a minimum
research octane rating (RON) of 91.Light spark knock at low engine speeds is not
harmful to your engine. However, continued
heavy spark knock at high speeds can cause
damage and immediate service is required.
Poor quality gasoline can cause problems such
as hard starting, stalling, and hesitations. If you
experience these symptoms, try another brand
of gasoline before considering service for the
vehicle.
Besides using unleaded gasoline with the
proper octane rating, gasolines that contain
detergents, corrosion and stability additives are
recommended. Using gasolines that have these
additives may help improve fuel economy, re-
duce emissions, and maintain vehicle perfor-
mance.
Poor quality gasoline can cause problems such
as hard starting, stalling and stumble. If you
experience these problems, try another brand
of gasoline before considering service for the
vehicle.
Methanol(Methyl) is used in a variety of concentrations
when blended with unleaded gasoline. You mayfind fuels containing 3% or more methanol
along with other alcohols called cosolvents.
Problems that result from using methanol/
gasoline blends are not the responsibility of the
manufacturer.
CAUTION!
Do not use gasolines containing Methanol.
Use of these blends may result in starting
and drivability problems and may damage
critical fuel system components.
EthanolThe manufacturer recommends that your ve-
hicle be operated on fuel containing no more
than 15% ethanol. Purchasing your fuel from a
reputable supplier may reduce the risk of ex-
ceeding this 15% limit and/or of receiving fuel
with abnormal properties. It should also be
noted that an increase in fuel consumption
should be expected when using ethanol-
blended fuels, due to the lower energy content
of ethanol. Problems that result from using
210
Page 215 of 332
methanol/gasoline or E-85 ethanol blends are
not the responsibility of the manufacturer.
CAUTION!
Use of fuel with Ethanol content higher than
15% may result in engine malfunction, start-
ing and operating difficulties, and materials
degradation. These adverse effects could
result in permanent damage to your vehicle.
Clean Air GasolineMany gasolines are now being blended that
contribute to cleaner air, especially in those
areas where air pollution levels are high. These
new blends provide a cleaner burning fuel and
some are referred to as “reformulated gasoline.”
The manufacturer supports these efforts toward
cleaner air. You can help by using these blends
as they become available.
MMT In GasolineMMT is a manganese containing metallic addi-
tive that is blended into some gasoline to in-
crease octane. Gasoline blended with MMTprovides no performance advantage beyond
gasoline of the same octane number without
MMT. Gasoline blended with MMT reduces
spark plug life and reduces emission system
performance in some vehicles. The manufac-
turer recommends that gasoline without MMT
be used in your vehicle. The MMT content of
gasoline may not be indicated on the gasoline
pump; therefore, you should ask your gasoline
retailer whether or not his/her gasoline contains
MMT.
Materials Added To FuelBesides using unleaded gasoline with the
proper octane rating, gasolines that contain
detergents, corrosion and stability additives are
recommended. Using gasolines that have these
additives will help improve fuel economy, re-
duce emissions, and maintain vehicle perfor-
mance.
Indiscriminate use of fuel system cleaning
agents should be avoided. Many of these ma-
terials intended for gum and varnish removal
may contain active solvents or similar ingredi-ents. These can harm fuel system gasket and
diaphragm materials.
WARNING!
Carbon monoxide (CO) in exhaust gases is
deadly. Follow the precautions below to pre-
vent carbon monoxide poisoning:
•Do not inhale exhaust gases. They contain
carbon monoxide, a colorless and odor-
less gas which can kill. Never run the
engine in a closed area, such as a garage,
and never sit in a parked vehicle with the
engine running for an extended period. If
the vehicle is stopped in an open area with
the engine running for more than a short
period, adjust the ventilation system to
force fresh, outside air into the vehicle.
(Continued)
211
Page 216 of 332
WARNING!(Continued)
•Guard against carbon monoxide with
proper maintenance. Have the exhaust
system inspected every time the vehicle is
raised. Have any abnormal conditions re-
paired promptly. Until repaired, drive with
all side windows fully open.
•Keep the liftgate closed when driving your
vehicle to prevent carbon monoxide and
other poisonous exhaust gases from en-
tering the vehicle.
ADDING FUEL
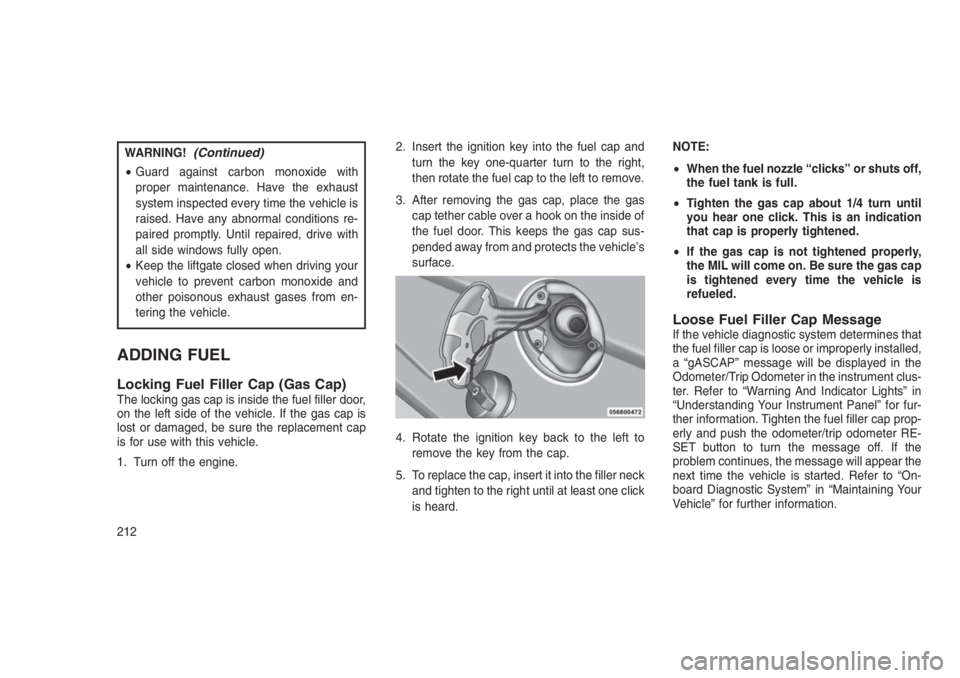
Locking Fuel Filler Cap (Gas Cap)The locking gas cap is inside the fuel filler door,
on the left side of the vehicle. If the gas cap is
lost or damaged, be sure the replacement cap
is for use with this vehicle.
1. Turn off the engine.2. Insert the ignition key into the fuel cap and
turn the key one-quarter turn to the right,
then rotate the fuel cap to the left to remove.
3. After removing the gas cap, place the gas
cap tether cable over a hook on the inside of
the fuel door. This keeps the gas cap sus-
pended away from and protects the vehicle’s
surface.
4. Rotate the ignition key back to the left to
remove the key from the cap.
5. To replace the cap, insert it into the filler neck
and tighten to the right until at least one click
is heard.NOTE:
•When the fuel nozzle “clicks” or shuts off,
the fuel tank is full.
•Tighten the gas cap about 1/4 turn until
you hear one click. This is an indication
that cap is properly tightened.
•If the gas cap is not tightened properly,
the MIL will come on. Be sure the gas cap
is tightened every time the vehicle is
refueled.
Loose Fuel Filler Cap MessageIf the vehicle diagnostic system determines that
the fuel filler cap is loose or improperly installed,
a “gASCAP” message will be displayed in the
Odometer/Trip Odometer in the instrument clus-
ter. Refer to “Warning And Indicator Lights” in
“Understanding Your Instrument Panel” for fur-
ther information. Tighten the fuel filler cap prop-
erly and push the odometer/trip odometer RE-
SET button to turn the message off. If the
problem continues, the message will appear the
next time the vehicle is started. Refer to “On-
board Diagnostic System” in “Maintaining Your
Vehicle” for further information.
212
Page 218 of 332
Trailer Sway ControlThe trailer sway control can be a mechanical
telescoping link that can be installed between the
hitch receiver and the trailer tongue that typically
provides adjustable friction associated with the
telescoping motion to dampen any unwanted
trailer swaying motions while traveling.
If equipped, the electronic Trailer Sway Control
(TSC) recognizes a swaying trailer and auto-
matically applies individual wheel brakes and/or
reduces engine power to attempt to eliminate
the trailer sway.
Weight-Carrying Hitch
A weight-carrying hitch supports the trailer
tongue weight, just as if it were luggage located
at a hitch ball or some other connecting point of
the vehicle. These kinds of hitches are the most
popular on the market today and they are
commonly used to tow small and medium sized
trailers.
Weight-Distributing Hitch
A weight-distributing system works by applying
leverage through spring (load) bars. They are
typically used for heavier loads to distribute
trailer tongue weight to the tow vehicle’s frontaxle and the trailer axle(s). When used in ac-
cordance with the manufacturer’s directions, it
provides for a more level ride, offering more
consistent steering and brake control thereby
enhancing towing safety. The addition of a
friction/hydraulic sway control also dampens
sway caused by traffic and crosswinds and
contributes positively to tow vehicle and trailer
stability. Trailer sway control and a weight dis-
tributing (load equalizing) hitch are recom-
mended for heavier Tongue Weights (TW) and
may be required depending on vehicle and
trailer configuration/loading to comply with
Gross Axle Weight Rating (GAWR) require-
ments.
WARNING!
•An improperly adjusted Weight Distributing
Hitch system may reduce handling, stabil-
ity, braking performance, and could result
in a collision.
(Continued)
WARNING!(Continued)
•Weight Distributing Systems may not be
compatible with Surge Brake Couplers.
Consult with your hitch and trailer manu-
facturer or a reputable Recreational Ve-
hicle dealer for additional information.
Breakaway Cable AttachmentEuropean braking regulations for braked trailers
up to 7,700 lbs (3,500 kg), require trailers to be
fitted with either a secondary coupling or break-
away cable.
The recommended location for attaching the
normal trailer’s breakaway cable is in the
stamped slot located on the sidewall of the hitch
receiver.
214
Page 220 of 332
Engine/Transmission Frontal Area Max. GTW (Gross Trailer Wt.) Max. Tongue Wt. (See Note 1)
2.0L Auto/Man 22 sq ft (2.04 sq m) 2,645 lbs (1,199 kg) 132 lbs (59 kg)
2.4L Auto/Man 22 sq ft (2.04 sq m) 3,307 lbs (1,500 kg) 165 lbs (74 kg)
When towing a trailer the technically permissible laden weight may be exceeded by not more than 10% or 220 lbs (99 kg), whichever is lower pro-
vided that the operating speed is restricted to 62 mph (100 km/h) or less.
Refer to local laws for maximum trailer towing speeds
Note 1 – The trailer tongue weight must be
considered as part of the combined weight of
occupants and cargo, and should never exceed
the weight referenced on the Tire and Loading
Information placard.
Trailer And Tongue WeightNever exceed the maximum tongue weight
stamped on your trailer hitch.
Consider the following items when computing
the weight on the rear axle of the vehicle:
•The tongue weight of the trailer.
•The weight of any other type of cargo or
equipment put in or on your vehicle.
•The weight of the driver and all passengers.NOTE:
Remember that everything put into or on the
trailer adds to the load on your vehicle. Also,
additional factory-installed options, or
dealer-installed options, must be consid-
ered as part of the total load on your vehicle.
Refer to the Tire and Loading Information
placard, located on the drivers door pillar,
for the maximum combined weight of occu-
pants and cargo for your vehicle.
Towing RequirementsTo promote proper break-in of your new vehicle
drivetrain components the following guidelines
are recommended:
CAUTION!
•Do not tow a trailer at all during the first
500 miles (805 km) the new vehicle is
driven. The engine, axle or other parts
could be damaged.
•Then, during the first 500 miles (805 km)
that a trailer is towed, do not drive over
50 mph (80 km/h) and do not make starts
at full throttle. This helps the engine and
other parts of the vehicle wear in at the
heavier loads.
216
Page 221 of 332
WARNING!
Improper towing can lead to an injury acci-
dent. Follow these guidelines to make your
trailer towing as safe as possible:
•Make certain that the load is secured in the
trailer and that it will not shift during travel.
When trailering cargo that is not fully se-
cured, dynamic load shifts can occur that
may be difficult for the driver to control. You
could lose control of your vehicle and have
an accident.
•All trailer hitches should be professionally
installed on your vehicle.
•When hauling cargo or towing a trailer, do
not overload your vehicle or trailer. Over-
loading can cause a loss of control, poor
performance, or damage to brakes, axle,
engine, transmission, steering, suspen-
sion, chassis structure, or tires.
(Continued)
WARNING!(Continued)
•Safety chains must always be used be-
tween your vehicle and trailer. Always con-
nect the chains to the frame or hook re-
tainers of the vehicle hitch. Cross the
chains under the trailer tongue and allow
enough slack for turning corners.
•Vehicles with trailers should not be parked
on a grade. When parking, apply the park-
ing brake on the tow vehicle. Always, block
or"chock"the trailer wheels.
•GCWR must not be exceeded.
•Total weight must be distributed be-
tween the tow vehicle and the trailer
such that the following four ratings are
not exceeded:
1. GVWR
2. GTW
3. GAWR
4. Tongue weight rating for the trailer hitch
utilized.Towing Requirements — Tires
•Do not attempt to tow a trailer while using a
compact spare tire.
•Proper tire inflation pressures are essential
for the safe and satisfactory operation of your
vehicle. Refer to “Tires – General Informa-
tion” in “Starting and Operating” for proper
tire inflation procedures.
•Check the trailer tires for proper tire inflation
pressures before trailer usage.
•Check for signs of tire wear or visible tire
damage before towing a trailer. Refer to
“Tires – General Information” in “Starting and
Operating” for the proper inspection
procedure.
•When replacing tires, refer to “Tires – Gen-
eral Information” in “Starting and Operating”
for proper tire replacement procedures. Re-
placing tires with a higher load carrying ca-
pacity will not increase the vehicle’s GVWR
and GAWR limits.
217
Page 226 of 332
Towing TipsBefore setting out on a trip, practice turning,
stopping and backing the trailer in an area away
from heavy traffic.
Manual Transmission — If Equipped
If using a manual transmission vehicle for trailer
towing, all starts must be in first gear to avoid
excessive clutch slippage.
Automatic Transmission — If Equipped
The DRIVE range can be selected when towing.
However, if frequent shifting or changes in
engine speed occur while in DRIVE, use the
AutoStick shift control to manually select a
lower gear ratio.
NOTE:
Using a lower gear ratio while operating the
vehicle under heavy loading conditions, will
improve performance and extend transmis-
sion life by reducing excessive shifting and
heat buildup. This action will also provide
better engine braking.
If you REGULARLY tow a trailer for more than
45 minutes of continuous operation, then
change the transmission fluid and filter asspecified for"police, taxi, fleet, or frequent
trailer towing."Refer to the “Maintenance
Schedule” for the proper maintenance intervals.
AutoStick
•When using the AutoStick shift control, select
the highest gear that allows for adequate
performance and avoids frequent downshifts.
For example, choose"4"if the desired speed
can be maintained. Choose"3"or"2"if
needed to maintain the desired speed.
•To prevent excess heat generation, avoid
continuous driving at high RPM. Reduce
vehicle speed as necessary to avoid ex-
tended driving at high RPM. Return to a
higher gear or vehicle speed when grade and
road conditions allow.
Electronic Speed Control — If Equipped
•Do not use in hilly terrain or with heavy loads.
•When using the speed control, if you experi-
ence speed drops greater than 10 mph
(16 km/h), disengage until you can get back
to cruising speed.•Use speed control in flat terrain and with light
loads to maximize fuel efficiency.
Cooling System
To reduce potential for engine and transmission
overheating, take the following actions:
City Driving
When stopped for short periods of time, shift the
transmission into NEUTRAL and increase en-
gine idle speed.
Highway Driving
Reduce speed.
Air Conditioning
Turn off temporarily.
222
Page 229 of 332
6
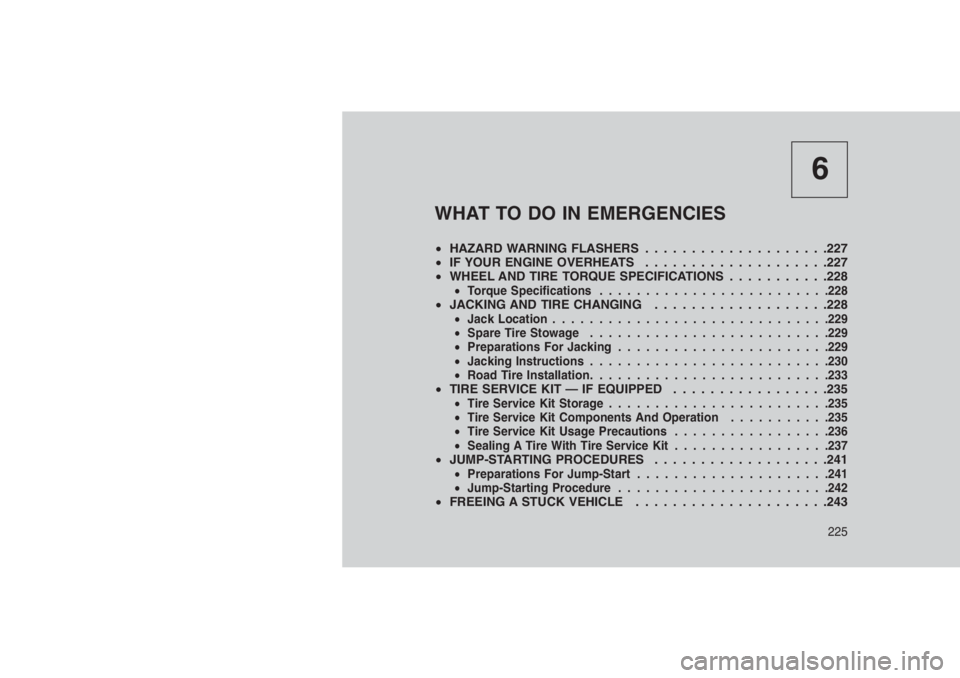
WHAT TO DO IN EMERGENCIES
•HAZARD WARNING FLASHERS . . . . . . . . ............227
•IF YOUR ENGINE OVERHEATS . . . . . . . . . . . . . . . . . . . .227
•WHEEL AND TIRE TORQUE SPECIFICATIONS . . . . . . . . . . .228
•Torque Specifications.........................228•JACKING AND TIRE CHANGING . . . . . . . . . . .........228•Jack Location..............................229
•Spare Tire Stowage..........................229
•Preparations For Jacking.......................229
•Jacking Instructions..........................230
•Road Tire Installation..........................233
•TIRE SERVICE KIT — IF EQUIPPED . . . . . . .. . . . . . . . . .235•Tire Service Kit Storage........................235
•Tire Service Kit Components And Operation...........235
•Tire Service Kit Usage Precautions.................236
•Sealing A Tire With Tire Service Kit.................237
•JUMP-STARTING PROCEDURES . . . . . . .. . . . . . . . . . . .241•Preparations For Jump-Start.....................241
•Jump-Starting Procedure.......................242
•FREEING A STUCK VEHICLE . . . . . . . ..............243
225
Page 231 of 332
HAZARD WARNING FLASHERS
The Hazard Warning flasher switch is located
on the instrument panel below the climate
controls.
Push the switch to turn on the Hazard
Warning flasher. When the switch is
activated, all directional turn signals
will flash on and off to warn oncoming traffic of
an emergency. Push the switch a second time
to turn off the Hazard Warning flashers.
This is an emergency warning system and it
should not be used when the vehicle is in
motion. Use it when your vehicle is disabled and
it is creating a safety hazard for other motorists.
When you must leave the vehicle to seek assis-
tance, the Hazard Warning flashers will con-
tinue to operate even though the ignition is
placed in the OFF position.
NOTE:
With extended use the Hazard Warning
flashers may wear down your battery.
IF YOUR ENGINE OVERHEATS
In any of the following situations, you can
reduce the potential for overheating by taking
the appropriate action.
•On the highways — slow down.
•In city traffic — while stopped, place the
transmission in NEUTRAL, but do not in-
crease engine idle speed.
NOTE:
There are steps that you can take to slow
down an impending overheat condition:
•If your air conditioner (A/C) is on, turn it
off. The A/C system adds heat to the
engine cooling system and turning the
A/C off can help remove this heat.
•You can also turn the temperature control
to maximum heat, the mode control to
floor and the blower control to high. This
allows the heater core to act as a supple-
ment to the radiator and aids in removing
heat from the engine cooling system.CAUTION!
Driving with a hot cooling system could dam-
age your vehicle. If the pointer rises to the
H(red) mark, the instrument cluster will
sound a chime. When safe, pull over and
stop the vehicle with the engine at idle. Turn
off the air conditioning and wait until the
pointer drops back into the normal range. If
the pointer remains on theH(red) mark for
more than a minute, turn the engine off
immediately and call for service.
WARNING!
You or others can be badly burned by hot
engine coolant (antifreeze) or steam from
your radiator. If you see or hear steam com-
ing from under the hood, do not open the
hood until the radiator has had time to cool.
Never try to open a cooling system pressure
cap when the radiator or coolant bottle is hot.
227